
We can generate IDEA project files with the IDEA plugin in our build file. IntelliJ IDEA has a Gradle plugin to import a Gradle project without first creating the project files. In this section, we will discuss how to use the Gradle plugin with IntelliJ IDEA 15 Community Edition or Ultimate.
We use the same project that was used with the Eclipse Gradle plugin to import the project into IntelliJ IDEA.
The Gradle plugin can be installed through the IntelliJ IDEA plugin manager. We need to go to IDE Settings in the Settings window, as shown in the following screenshot:

Selecting the Gradle plugin from the list of available plugins
We will select the Gradle plugin to install it in the IDE. Once we have installed the plugin, we can then import a project. By default, it is already installed.
To import an existing Gradle project, perform the following steps:
- We will start the Import Project wizard from the startup screen. Alternatively, we will select the Project from existing sources... option from the File menu. IntelliJ IDEA shows a dialog window in which we can choose the source of the new project, as shown in the following screenshot:

Selecting Gradle build file to import into IDEA
- We will click on the OK button. IntelliJ IDEA shows a new dialog window where we can fill in some extra details:

Overview of options for importing a Gradle project
- Here we can set some extra options before we import the Gradle project into IntelliJ IDEA. The Use auto-import option will automatically add new modules to our project for a multi-module project or the build file is executed again when we make a change and the IDEA project is updated automatically.
- With the Create directories for empty content roots automatically option, IntelliJ IDEA will create directories based on source sets in our Gradle build. For example, when we apply the java plugin, the
src/main/java,src/main/resources,src/test/java, andsrc/test/resourcesdirectories are created. - We can also specify the Gradle version that need to be used. We can choose a wrapper configured for the project, if it is available with the Use default gradle wrapper option. However, if the wrapper is not in our project, we can create one with the Use customizable gradle wrapper option.
- Finally, we can select a Gradle distribution that is already installed on our computer with Use local gradle distribution.
- If we need another Gradle home directory, we can set a value in the Gradle home field. We can also set the JDK used by Gradle with the Gradle JVM option.
- We can use two formats for an IntelliJ IDEA project: directory-based or file-based. We select the option we want with the Project format.
- We can access extra options if we click on the arrow next to Global Gradle settings. We can also specify to work offline with the Offline work checkbox.
- To change the Gradle user home directory, we can set the value for the Service directory path. Any Gradle VM options that we want to be applied for all build task will be set in the Gradle VM options field.
- To create our project, we will click on the OK button.
- We can see the project and its dependencies, as shown in the following screenshot:
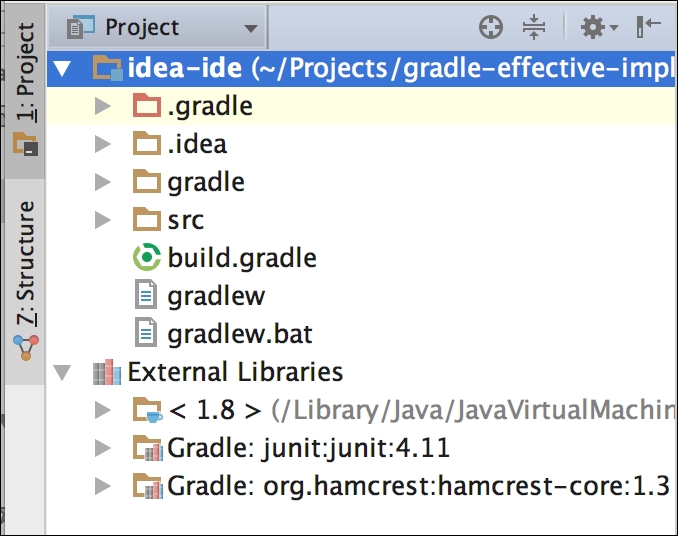
Gradle project is created in IntelliJ IDEA
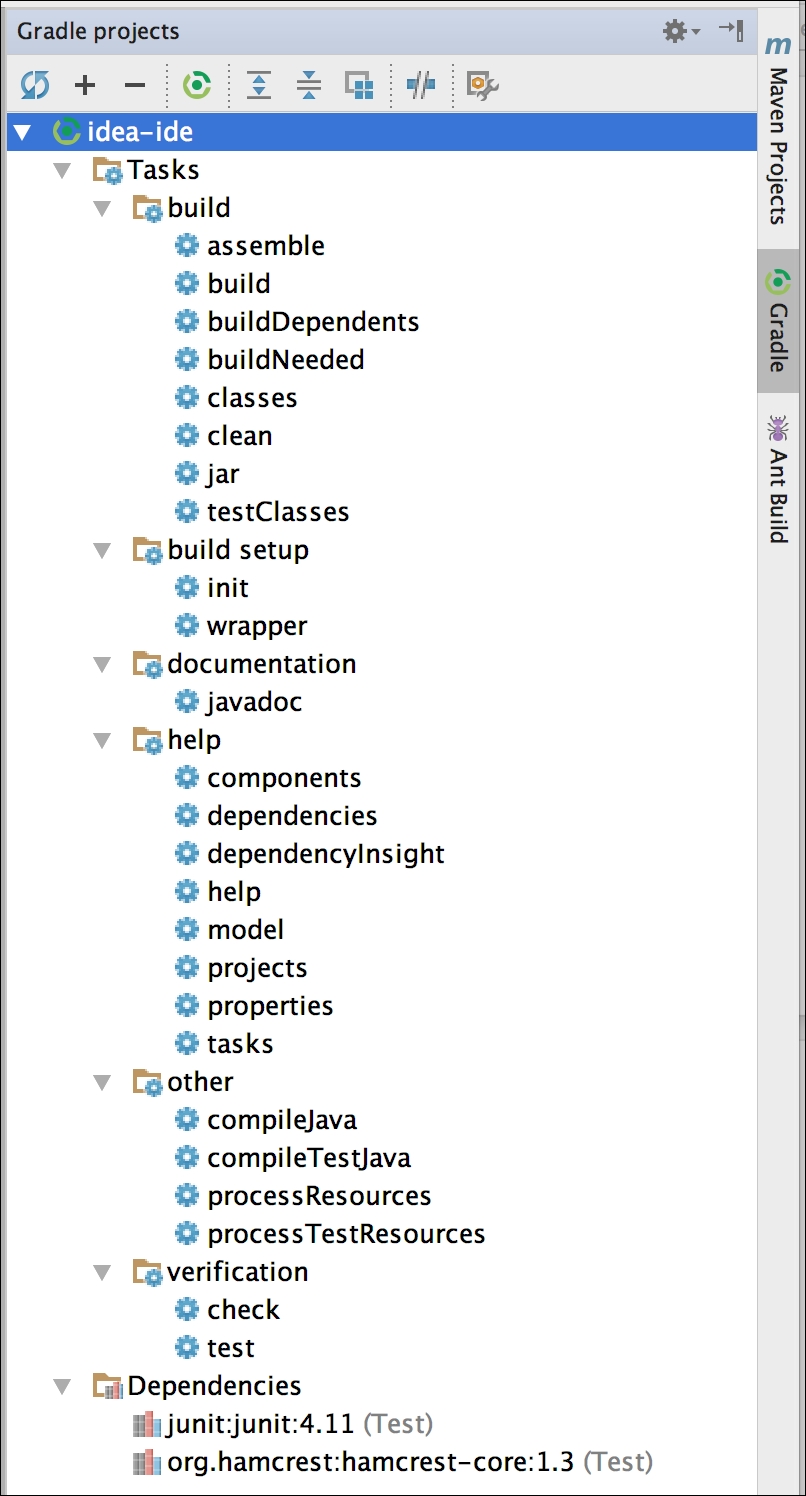
To see the Gradle project dependency structure, we can also open the Gradle window:
- Here we can see all tasks and dependencies defined in the build file. We must click on the Refresh button to use the latest changes in the
build.gradlefile. For example, if we add a neworg.slf4j:slf4j-api:1.7.18compile dependency, we must click on the refresh button to see the changes. - From the Gradle window, we can double-click on a task name to start it. The tasks are grouped by the task groups from the Gradle build file:
Overview of tasks
- For example, we can double-click on
buildto start thebuildtask. We can also click on the Run button. We get a new dialog window, where we can choose the task and project to run:
Options for running a Gradle task
- The output is the task, as shown in the Run window. Here we can see the execution of the task and the corresponding status and output:

Console output after running a Gradle task
- Another way to start a task is via Run Configurations of IntelliJ IDEA. First, we must create a new configuration. In the toolbar, we click on the configuration list box and select Edit configurations...â, as shown in the following screenshot:

Selecting Edit Configurations options
- In the dialog window, we can specify the options needed to run the build. We can type the task name in the Tasks field. If we click the OK button, we have a new configuration that we can run to execute the task:

Run configuration for a Gradle task