We can generate the Eclipse project files using the Eclipse plugin. We can also import a Gradle build file in Eclipse and then execute Gradle tasks from within Eclipse. In this section, we will see how to install the Gradle plugin in Eclipse and also how to use it to import a Gradle build file and execute tasks.
Gradle developed an Eclipse plugin, named Buildship. The plugin adds Gradle integration to the Eclipse IDE. The plugin has an import wizard to import existing Gradle builds. Multi-project builds are also supported by it.
The plugin keeps track of dependencies defined in the Gradle build file as project dependencies. This means that if we change a dependency in the build file, the Eclipse classpath will be updated with the change so that the compiler can use it.
To execute the tasks, the plugin adds an additional view to Eclipse. From the view, we can execute the tasks. The Eclipse launching framework is used to execute the tasks.
The following steps can be used to install the buildship plugin:
- To install the plugin, we will use the Eclipse marketplace. From the Help menu, we will select Eclipse Marketplace.... We will see then a new dialog window. In the Search field, we will type
buildshipand wait for the search result, as shown in the following screenshot:
Searching Buildship plugin in the Eclipse Marketplace
- We then click on the Install button to install the plugin in our Eclipse IDE. In the install dialog window, we will select the plugin features and click on the Confirm button:

Selecting the Buildship plugin features
- We have to accept the licenses, and Eclipse downloads the plugin components. Restart Eclipse after all the plugin components have been downloaded:

License for the Buildship plugin
After we have installed the plugin, we can use the import wizard to import a Gradle project. We will use a very simple Java project with the following build file:
apply plugin: 'java'

version = '1.0'
group = 'sample.gradle'

description = 'Sample Java project'

repositories {
    jcenter()
}

dependencies {
    testCompile 'junit:junit:4.11'
}
- In Eclipse, we select the Import option from the File menu.
- In the Import dialog window, we will select the
Gradle Projectoption before we click on the Next button, as shown in the following screenshot:
Importing a Gradle project
- In the next step of the import wizard, we must specify the root folder for our Gradle project. For a multi-project build, we should select the root folder. If we only have a single project, we can select the project folder then.
- We will click on the Next button to look at other options. However, we can also click on the Finish button to import the project into Eclipse:

Import Gradle Project overview
- In the Import Gradle Project dialog window, we can specify some extra options:
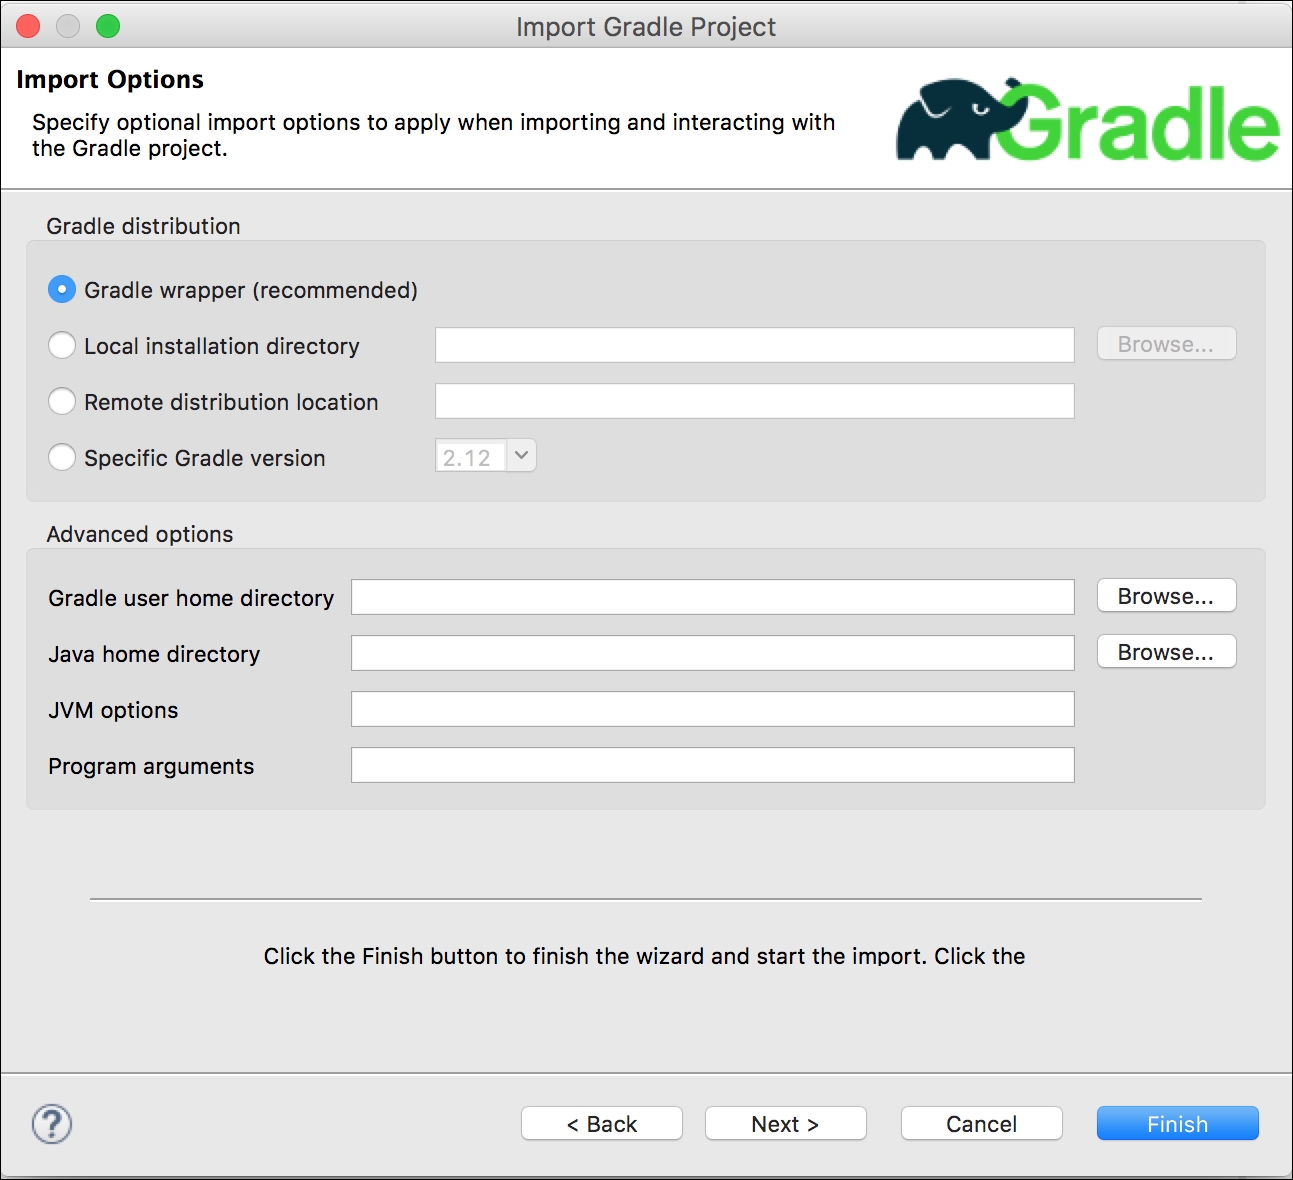
Configuration for importing Gradle project
- In the Gradle distribution section, we can specify the Gradle location and distribution that we want to use to build our project. We use the default Gradle wrapper (recommended) option to use the wrapper find in the project. We can also choose a Local installation directory to reference a Gradle installation on our computer. With the Remote distribution location option, we can set a download location for a Gradle distribution. This could, for example, also be corporate intranet site with a distribution.
- Finally, we can use Specific Gradle version to select a version. The version is downloaded to our computer if we don't have it already.
- In the Advanced options section, we can specify some more option for running Gradle. For example, to change the
GRADLE_USER_HOMEdirectory or extra command-line options. - We will click on the Next button and get an overview of all settings before the project is imported:

Preview of options for importing a Gradle project
- Next, we will click on the Finish button to import the project into Eclipse:

Imported Gradle project in Eclipse
To execute tasks, we will first open the Gradle Tasks view. Normally, it is already visible at the bottom of our workspace. If not, we can open it from the Window menu, we will select Show View and then Other.... We will type gradle in the search field to search for the Gradle Tasks view.
- In our workspace, we will now have the Gradle Tasks view. The tasks for this project are then displayed as shown in the following screenshot:

Overview of Gradle task in the Gradle Tasks view
- To execute a task, we will simply have to double-click on the task name. In the Gradle Executions view, we can see the tasks that are executed and the time each task took:

Results after running a Gradle task
- To see the output of the task, we will open the Console view. Here, we can see the console output of the executed task:

Console output after running a Gradle task
- We can also use the launch framework of Eclipse to run tasks. We must right-click on the project and select the Gradle Build or Gradle Build... option from the Run As option. The launch configuration is opened and here we can configure the tasks to be executed, as shown in following screenshot:

Configuring a Gradle task as run configuration
- Here we can type the name of the Gradle task that we want to execute.