
Chapter 5: Importing and Integrating Assets
In the previous chapter, we created the prototype of our level. Now, let's suppose that we have coded the game and tested it, validating the idea. With that, it's time to change the prototype art and use the real, finished art. We are going to code the game in Part 3, but for learning purposes, we'll skip that part for now. To use our final assets, we need to learn how to get them (images, 3D models, and so on), how to import them into Unity, and how to use them in our scene.
In this chapter, we will cover the following topics:
- Importing assets
- Integrating assets
- Configuring assets
Importing assets
We have different sources of assets that we can use in our project. We can simply get a file from our artist, download them from different free and paid assets sites, or we can use the Asset Store, Unity's official virtual asset store, where we can get free and paid assets ready to use within Unity. We will use a mix of downloading an asset from the internet and the Asset Store, just to get all the possible resources.
In this section, we will cover the following concepts related to importing assets:
- Importing assets from the internet
- Importing assets from the Asset Store
- Downloading and importing assets into our project from the internet
Let's get started!
Importing assets from the internet
In terms of getting art assets for our project, let's start with our terrain textures. Remember that we have our terrain painted with a grid pattern, so the idea is to replace that with grass, mud, rock, and other kinds of textures. To do that, we must get images. In this case, these kinds of images are usually top-down views of different terrain patterns, and they have the requirement of being "tileable." You can see an example of this in the following figure:

Figure 5.1 – Left – grass patch; right – the same grass patch separated to highlight the texture tiling
The grass on the left seems to be one single big image, but if you pay attention, you should be able to see some patterns repeating themselves. In this case, this grass is just a single image repeated four times in a grid, like the one on the right. This way, you can cover large areas by repeating a single small image, saving lots of RAM on your computer.
The idea is to get these kinds of images to paint our terrain. You can get them from several places, but the easiest way is to use Google Images or any image search engine. To do this, follow these steps:
- Open your browser (Chrome, Safari, Edge, and so on).
- Go to your preferred search engine. In this case, I will use Google.
- Use the PATTERN, tileable, and texture keywords, replacing PATTERN with the kind of terrain you are looking for, such as grass tileable texture or mud tileable texture. In this case, I am going to type grass tileable texture and then press Enter to search.
- Switch to the Images search mode:

Figure 5.2 – Google search for images
- Choose any texture you find suitable for the kind of grass you need and click it. Remember that the texture must be a top-down view of the grass and must repeat.
Important Note
Try to check the image's resolution before picking it. Try to select squared images that have a resolution less than 1,024 x 1,024 for now.
- Right-click on the opened image and select Save image as…:
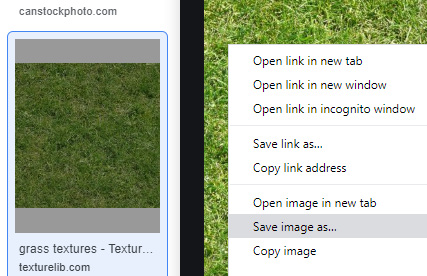
Figure 5.3 – Save image as… option
- Save the image in any folder you will remember.
Now that you have downloaded the image, you can add it to your project in several ways. The simplest way would be to do the following:
- Locate your image using File Explorer (Finder on Mac).
- Locate or create the Textures folder in the Project Window in Unity.
- Put both the File Explorer and Unity Project Window next to each other.
- Drag the file from File Explorer to the Textures folder in the Unity Project Window:
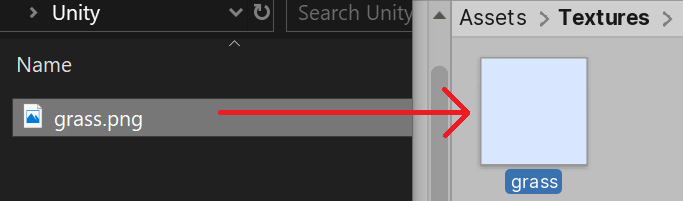
Figure 5.4 – Texture being dragged from Windows Explorer to Unity's Project Window
For simple textures like these, any search engine can be helpful, but if you want to replace the player's base geometry with detailed walls and doors or place enemies in your scene, you need to get 3D models. If you search for those in any search engine using keywords such as free, zombie, and 3D model, you will find endless free and paid 3D models sites such as TurboSquid and Mixamo. However, those sites can be problematic because those meshes are usually not prepared for being used in Unity, or even games. You will find models with very high polygons counts, incorrect sizes or orientations, unoptimized textures, and so on. To prevent those problems, we'll want to use a better source, and in this case, we will use Unity's Asset Store. So, let's explore it.
Importing assets from the Asset Store
The Asset Store is Unity's official asset marketplace where you can find lots of models, textures, sounds, and even entire Unity plugins to extend the capabilities of the engine. In this case, we will limit ourselves to downloading 3D models to replace the player's base prototype. You will want to get 3D models with a modular design, meaning that you will get several pieces, such as walls, floors, corners, and so on. You can connect them to create any kind of scenario.
To do that, you must follow these steps:
- Click on Window | Asset Store in Unity, which will open a new window saying that the Asset Store has moved. In previous versions of Unity, you could see the Asset Store directly inside the editor, but now, it is recommended to open it in a regular web browser, so just click the Search online button, which will open https://assetstore.unity.com/ in your preferred browser.

Figure 5.5 – The Asset Store has moved message
- In the top menu, click on the Assets | 3D category to browse 3D assets:

Figure 5.6 – 3D Assets menu
- On the recently opened page, click the arrow to the right of the 3D category in the All Categories panel on the right. Then, open Environments and check the Sci-Fi mark:

Figure 5.7 – 3D Assets menu
Important Note
As you can see, there are several categories for finding different types of assets, and you can pick another one if you want to. In Environments, you will find 3D models that can be used to generate the scenery for your game.
- If you need to, you can pay for an asset, but let's hide the paid ones for now. You can do that by searching through the Pricing section on the sidebar, opening it using the plus (+) symbol on its right, and then checking the Free Assets checkbox:
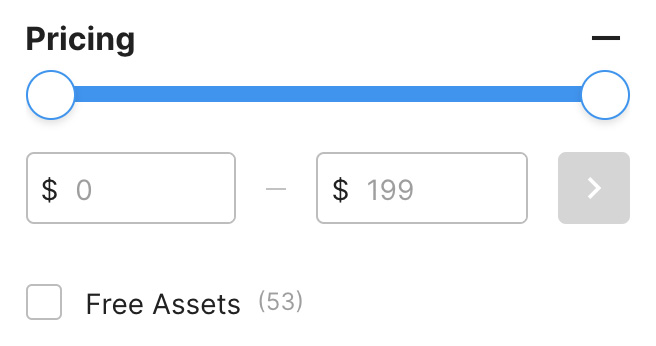
Figure 5.8 – Free Assets option
- In the search area, find any asset that seems to have the aesthetic you are looking for and click it. Remember to look out for outdoor assets, because most environment packs are usually interiors only. In my case, I have picked one called Sci-Fi Styled Modular Pack that serves both interiors and exteriors. Take into account that this package might not exist by the time you are reading this, so you might need to choose another one. If you don't find a suitable package, you can download the asset files we have provided in this book's GitHub repository:
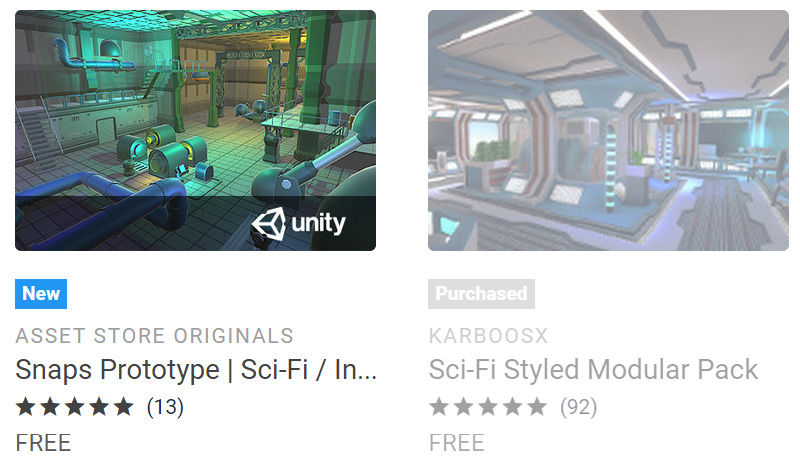
Figure 5.9 – Preview of Asset Store searched packages
Important Note
Unity offers the "Snaps" packages, which are a set of official Unity 3D models that can be used for modularly designing different kinds of environments. Some of them must be paid for, while others are free – I recommend that you try them out.
- Now, you will see the package details in the Asset Store window. Here, you can find information regarding the package's description, videos/images, the package's contents, and the most important part, the reviews, where you can check if the package is worth buying if it's a paid one:

Figure 5.10 – Asset Store package details
- If you are okay with this package, click the Add To My Assets button, log into Unity if requested, and click the Open In Unity button. You might be asked whether you meant to switch apps to open Unity; click Yes:

Figure 5.11 – Switching apps
- This will open Package Manager again, but this time, in My Assets, showing a list of all the assets you have ever downloaded from the Asset Store, as well as the one you just selected, highlighted in the list:
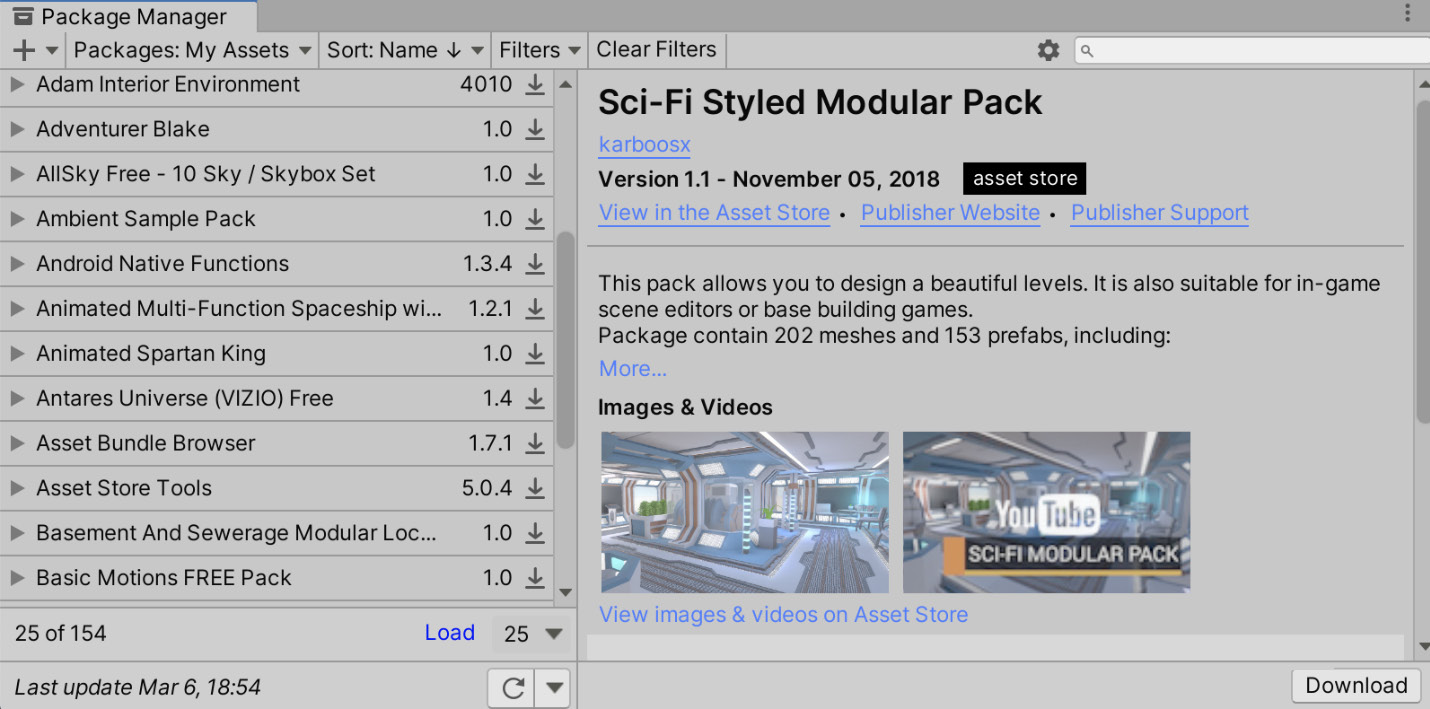
Figure 5.12 – Package Manager showing assets
- Click on Download at the bottom-right corner of the window and wait for it to end. Then, hit Import.
- After a while, the Package Contents window will appear, where you can select exactly which assets of the package you want in your project. For now, leave it as is and click Import:

Figure 5.13 – Selecting assets to import
- After a while, you will see all the package files in your Project window.
Take into account that importing lots of full packages will increase your project's size considerably, and that, later, you will probably want to remove the assets that you didn't use. Also, if you import assets that generate errors that prevent you from playing the scene, just delete all the .cs files that come with the package. They are usually in a folder called Scripts. These are code files that might not be compatible with your version of Unity:
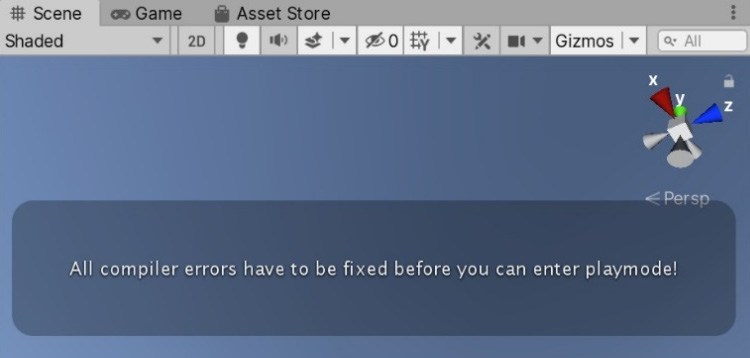
Figure 5.14 – Code error warning when hitting the play button
Important Note
The Asset Store is prone to changes, even if you are using the same Unity version I am using, so the previous steps may be changed by Unity without notice. Also, its contents change often, and you may not find the same packages that have been used in this book. If that happens, you can find another similar package, or take the files I used in the book's GitHub repository (links and instructions in the Preface).
Before you continue with this chapter, try to download an enemy character using the Asset Store while following the previous steps. To solve this exercise, you must complete the same steps you did previously but look in the 3D | Characters | Humanoid category of the Asset Store.
Now that we have imported lots of art assets, let's learn how to use them in our scene.
Integrating assets
We have just imported lots of files that can be used in several ways, so the idea of this section is to see how Unity integrates those assets with the GameObjects and components that need them.
In this section, we will cover the following concepts related to importing assets:
- Integrating terrain textures
- Integrating meshes
- Integrating materials
Let's start by using the tileable textures to cover the terrain.
Integrating terrain textures
To apply textures to our terrain, do the following:
- Select the Terrain object.
- In the Inspector window, click the brush icon of the Terrain component (second button).
- From the drop-down menu, select Paint Texture:
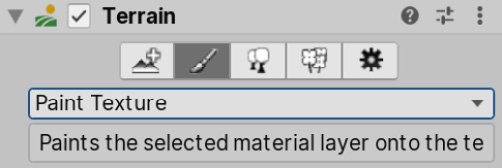
Figure 5.15 – Terrain Paint Texture option
- Click the Edit Terrain Layers… | Create Layer option.
- Find and double-click the terrain texture you downloaded previously in the texture picker window that appears:
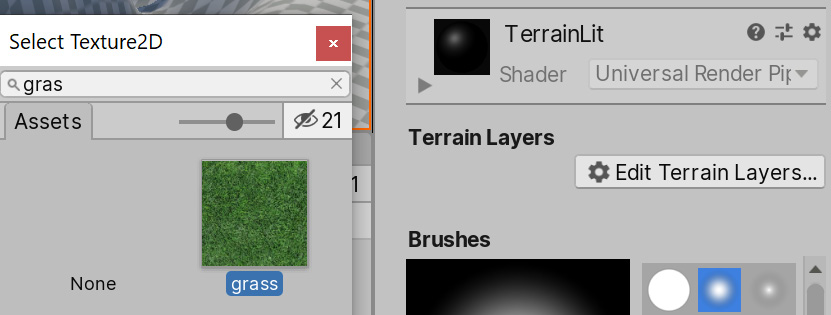
Figure 5.16 – Texture to paint picker
- You will see that the texture is immediately applied to the whole terrain.
- Repeat steps 4 and 5 to add another texture. This time, you will see that that texture is not immediately applied.
- In the Terrain Layers section, select the new texture you have created to start painting with that. I used a mud texture.
- Just like when you edited the terrain, in the Brushes section, you can select and configure a brush to paint the terrain.
- In the Scene view, paint the areas you want to have that texture applied to.
- If your texture patterns are too obvious, open the New Layer N section at the top of the Brushes section, where N is a number that depends on the layer you have created.
Important Note
Each time you add a texture to the terrain, you will see that a new asset called New Layer N is created in the Project view. It holds data about the terrain layer you have created, and you can use it in other terrains if you need to. You can also rename that asset and give it a meaningful name. Finally, you can reorganize those assets in their own folder.
- Open the section using the triangle to its left and increase the Size property in the Tiling Settings section until you find a suitable size, where the pattern is not that obvious:
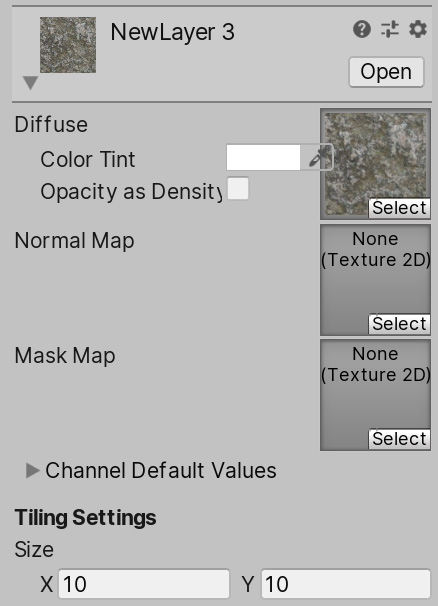
Figure 5.17 – Painting texture options
- Repeat steps 4 to 12 until you have applied all the textures you wanted to add to your terrain. In my case, I applied the mud texture to the river basin and used a rock texture for the hills. For the texture of the rocks, I reduced the Opacity property of the brush to blend it better with the grass in the mountains. You can also try to add a layer of snow at the top, just for fun:
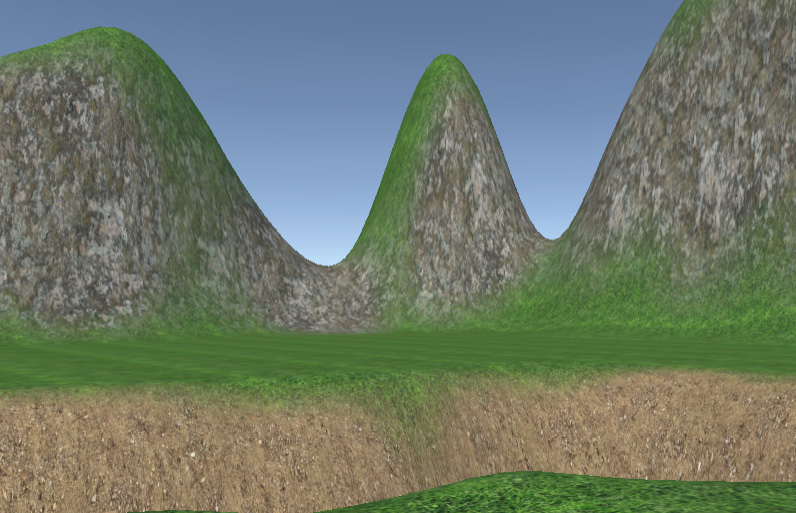
Figure 5.18 – Results of painting our terrain with three different textures
Of course, we can improve this a lot using lots of the advanced tools provided by the system, but just let's keep things simple for now. Now, let's learn how to integrate the 3D models.
Integrating meshes
If you select one of the 3D assets we have configured previously and click the arrow to its right, one or more sub-assets will appear in the Project window. This means that FBX is not a 3D model, but a container of assets that defines the 3D model:

Figure 5.19 – Mesh picker
Some of those sub-assets are meshes, which are collections of triangles that define the geometry of your model. You can find at least one of those inside the file, but you can also find several, and that can happen if your model is composed of lots of pieces. For example, a car can be a single rigid mesh, but that won't allow you to rotate its wheels or open its doors; it will be just a static car, and that can be enough if the car is just a prop in the scene. However, if the player will be able to control it, you will probably need to modify it. The idea is that all the pieces of your car are different GameObjects parented to the others, in such a way that you move one and all of them will move, but you can still rotate its pieces independently.
When you drag the 3D model file to the scene, Unity will automatically create all the objects for each piece and its proper parenting based on how the artist created them. You can select the object in the Hierarchy window and explore all its children to see this:
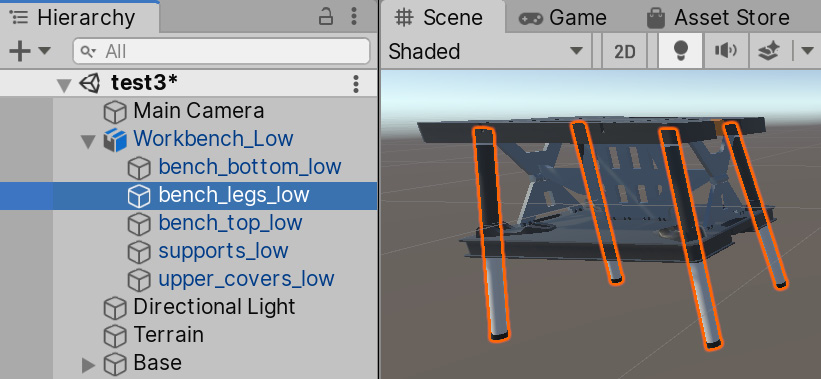
Figure 5.20 – Subobject selection
Also, you will find that each of those objects will have its own MeshFilter and MeshRenderer components, each one rendering just that piece of the car. Remember that the mesh filter is a component that provides a reference to the mesh asset to render, so the mesh filter is the one using those mesh sub-assets we talked about previously:
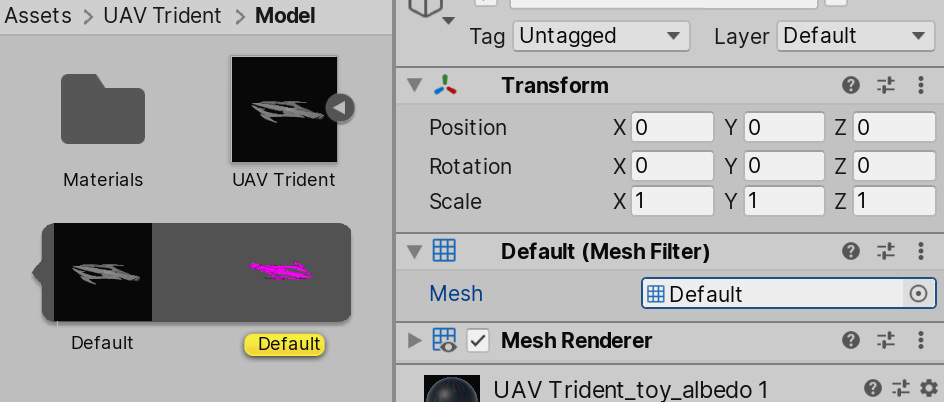
Figure 5.21 – Mesh filter – current mesh selection
Now, if you drag the 3D model file into the scene, you will get a similar result as if the model were a prefab and you were instancing it. But 3D model files are more limited than prefabs, because you can't apply changes to the model. If you've dragged the object onto the scene and edited it to have the behavior you want, I suggest that you create a prefab to get all the benefits we discussed in Chapter 3, Working with Scenes and Game Objects, such as applying changes to all the instances of the prefab and so on. Never create lots of instances of a model from its model file – always create them from the prefab you created based on that file.
That's the basic usage of 3D meshes. Now, let's explore the texture integration process, which will make our 3D models have more detail.
Integrating textures
Maybe your model already has the texture applied, but has a magenta color applied to all of it. In the latter case, this means the asset wasn't prepared to work with the URP template you selected when creating the project. Some assets in the Asset Store are meant to be used in older versions of Unity:
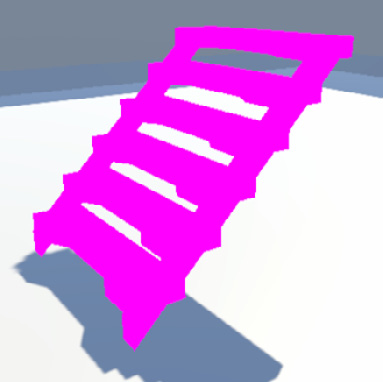
Figure 5.22 – Mesh being rendered with erroneous or no material at all
One way to fix this is by using the option in Edit | Render Pipeline | Universal Render Pipeline | Upgrade Project Materials to UniveralRP Materials. This will try to upgrade all your materials to the current version of Unity:

Figure 5.23 – Upgrade Project Materials to UniversalRP Materials option
The con of this method is that, sometimes, it won't upgrade the material properly. Luckily, we can fix this by reapplying the textures of the objects in this new way. Even if your assets work just fine, I suggest that you reapply your textures anyway, just to learn more about the concept of materials.
A texture is not applied directly to an object. This is because the texture is just one single configuration of all the ones that control the aspects of your model. To change the appearance of a model, you must create a material. Materials are separate assets that contain lots of settings about how Unity should render your object. You can apply such an asset to several objects that share the same graphics settings, and if you change the settings of that material, it will affect all the objects that are using it. It works like a graphics profile.
To create a material to apply the textures of your object, you need to follow these steps:
- In the Project window, click the plus (+) button at the top-left part of the window.
- Look at the Material option in that menu and click it.
- Name your material. This is usually the name of the asset you are creating (for example, Car, Ship, Character, and so on).
- Drag the material asset you created to the model instance on your scene. At the moment, if you move the mouse with the dragged asset over the object, you will be able to see a preview of how it will look with that material. You can confirm this by releasing the mouse.
- Maybe your object has several parts. In that case, you will need to drag the material to each part of the object.
Important Note
Dragging the material will just change the materials property of the MeshRenderer component of the object you have dragged.
- Select the material and click the circle to the left of the Base Map property (see Figure 5.23).
- In the Texture Selector window, click on the texture of your model. It can be complicated to locate the texture just by looking at it. Usually, the name of the texture will match the model's name. If not, you will need to try different textures until you see one that fits your object. Also, you may find several textures with the same name as your model. Just pick the one that seems to have the proper colors instead of the ones that look black and white or light blue; we will use those later:

Figure 5.24 – Base Map property of the URP materials
With this, you have successfully applied the texture to the object using a material. For each object that uses the same texture, just drag the same material. Now that we have a basic understanding of how to apply the model textures, let's learn how to configure the import settings before spreading models all over the scene.
Configuring assets
As we mentioned earlier, artists are used to creating art assets outside Unity, and that can cause differences between how the asset is seen from that tool and how Unity will import it. As an example, 3D Studio can work in centimeters, inches, and so on, while Unity works in meters. We have just downloaded and used lots of assets, but we have skipped the configuration steps for solving those discrepancies, so let's take a look at this now.
In this section, we will cover the following concepts related to importing assets:
- Configuring meshes
- Configuring textures
Let's start by discussing how to configure 3D meshes.
Configuring meshes
To change the model's import settings, you need to locate the model file you have downloaded. Several file extensions contain 3D models, with the most common one being the .fbx file, but you can encounter others such as .obj,.3ds, .blender, .mb, and so on. You can identify whether the file is a 3D mesh via its extension:

Figure 5.25 – Selected asset path extension
Also, you can click Asset, go to the Inspector window, and check the tabs, as shown in the following screenshot:

Figure 5.26– Mesh materials settings
Now that you have located the 3D mesh files, you can configure them properly. Right now, the only thing we should take into account is the proper scale of the model. Artists are used to working with different software with different setups; maybe one artist created the model using meters as its metric unit, while the other artists used inches, feet, and so on. When importing assets that have been created in different units, they will probably be unproportioned, which means we will get results such as humans being bigger than buildings.
The best solution is to just ask the artist to fix that. If all the assets were authored in your company, or if you used an external asset, you could ask the artist to fix it so that it works the way your company works, but right now, you are probably a single developer learning Unity by yourself. Luckily, Unity has a setting that allows you to rescale the original asset before using it in Unity. To change the scale factor of an object, you must do the following:
- Locate the 3D mesh in your Project window.
- Drag it onto the scene. You will see that an object will appear in your scene.
- Create a capsule using the GameObject | 3D Object | Capsule option.
- Put the capsule next to the model you dragged into the editor. See if the scale has sense. The idea is that the capsule is representing a human being (2 meters tall) so that you have a reference of its scale:
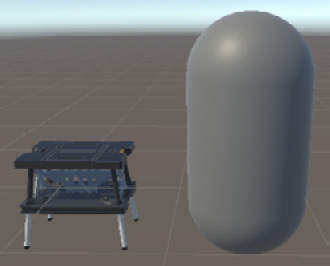
Figure 5.28 – Unproportioned asset
- If the model is bigger or smaller than expected, select the mesh again in the Project window (not the GameObject instance you dragged to the editor). You will see some import settings in the Inspector window.
- Look for the Scale Factor property and modify it, increasing it if your model is smaller than expected or reducing it in the opposite case:
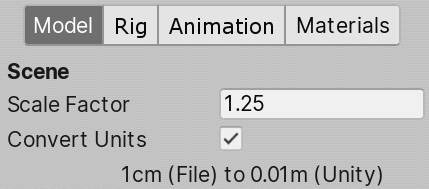
Figure 5.29 – Model mesh options
- Click the Apply button at the bottom part of the Inspector window.
- Repeat steps 6 and 7 until you get the desired result.
There are plenty of other options to configure, but let's stop here for now. Now, let's discuss how to properly configure the textures of our models.
Configuring textures
Again, there are several settings to configure here, but let's focus on the texture size for now. The idea is to use the size that best fits the usage of that texture, and that depends on lots of factors. The first factor to take into account is the distance from which the object will be seen. If you are creating a first-person game, you will probably see lots of objects near enough to justify a big texture, but maybe you have lots of distant objects such as billboards at the top of buildings, which you will never be near enough to see the details of, so you can use smaller textures for that. Another thing to take into account is the importance of the object. If you are creating a racing game, you will probably have lots of 3D models that will be on the screen for a few seconds and the player will never focus on them; they will be paying attention to the road and other cars. In this case, an object such as a trash can on the street can have a smaller texture and a low polygon model and the user will never notice (unless they stop to appreciate the scenery, but that's acceptable). Finally, you can have a game with a top-down view that will never zoom in on the scene, so the same object that has a big texture in first-person games will have a less detailed texture here. In the following images, you can see that the smaller ship can use a smaller texture:

Figure 5.30 – The same model at different distances
The ideal size of the texture is relative. The usual way to find this is by changing its size, until you find the smallest possible size with a decent quality when the object is seen from the nearest position possible in the game. This is a trial-and-error method. To do this, you can do the following:
- Locate the 3D model and put it into the scene.
- Put the Scene view camera in a position that shows the object at its biggest possible in-game size. As an example, in an FPS game, it would be almost right next to the object, while in a top-down game, it would be a few meters above the object. Again, that depends on your game.
- Find and select the texture that the object is using in the folders that were imported with the package or from the material you created previously. They usually have the .png, .jpg, or .tif extensions.
- In the Inspector window, look at the Max Size property and reduce it, trying the next smaller value. For example, if the texture is at 2,048, try 1,024.
- Click Apply and check the Scene view to see if the quality has decreased dramatically or if the change isn't noticeable. You will be surprised.
- Repeat steps 4 to 5 until you get a bad-quality result. In that case, just increase the previous resolution until you get acceptable quality. Of course, if you are targeting PC games, you can expect higher resolutions than mobile games.
Now that you have imported, integrated, and configured your objects, let's just create our player's base with those assets.
Assembling the scene
Let's start by replacing our prototype base using the environment pack we have downloaded. To do that, you must do the following:
- In the Environment pack we imported previously, locate the folder that contains all the models for the different pieces of the scene and try to find a corner. You can use the search bar in the Project window to search for the corner keyword:
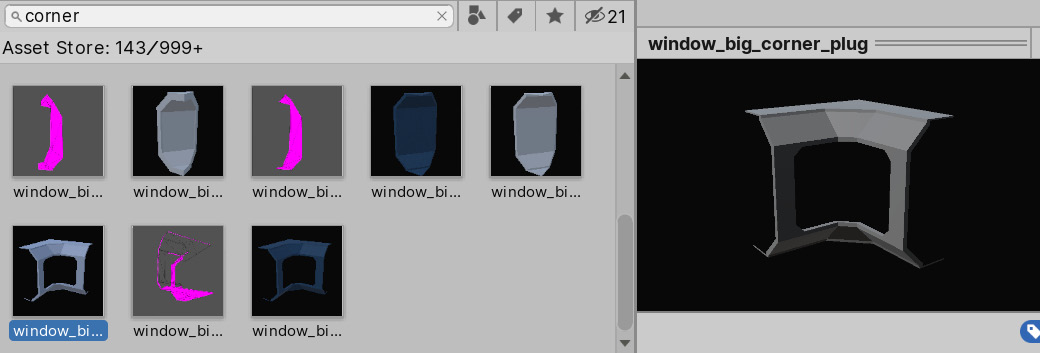
Figure 5.31 – Mesh picker
- In my case, I have the outer and inner sides of the corner as separate models, so I need to put them together.
- Put it in the same position as you would any corner of your prototype base:
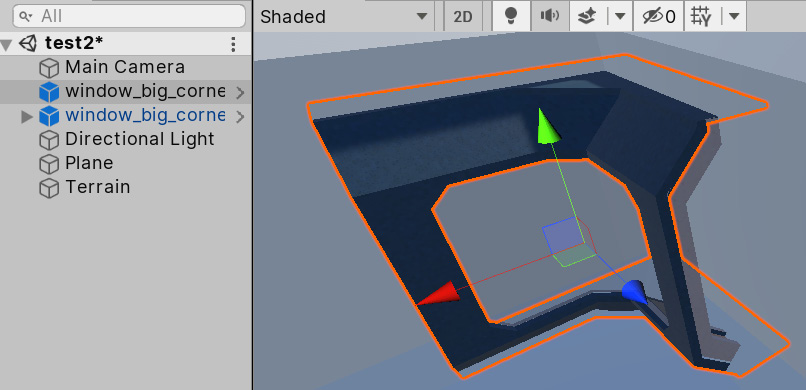
Figure 5.32– Positioning the mesh on a placeholder for replacement
- Find the proper model that will connect with that corner to create walls. Again, you can try searching for the wall keyword in the Project window.
- Instance it and position it so that it's connected to the corner. Don't worry if it doesn't fit perfectly; you will go over the scene when necessary later:
Important Note
Press the V key to select a vertex of the selected object so that you can drag it to the vertex of another object. This is called vertex snapping. It allows you to connect two pieces of the scene, exactly as intended:
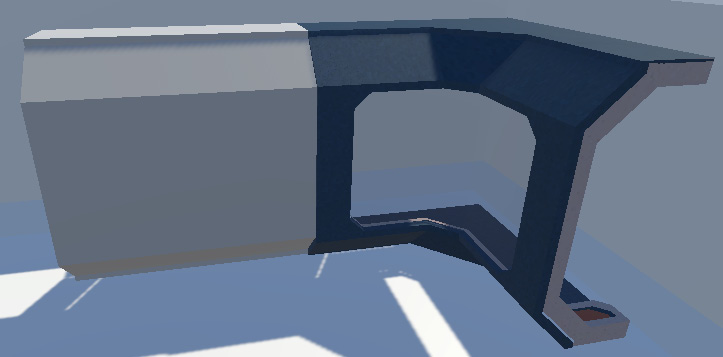
Figure 5.33 – Connecting two modules
- Repeat the walls until you reach the other end of the player base and position another corner. You might get a wall that's a little bit larger or smaller than the original prototype, but that's fine:

Figure 5.34 – Chain of connected modules
Important Note
Remember that you can move an object while pressing the Ctrl key (Control on Mac) to snap the object's position so that the clones of the wall can be easily located, right next to the others.
- Complete the rest of the walls and destroy the prototype. Remember that this process is slow, so you will need to be patient.
- Add floors by looking for floor tiles and repeating them all over the surface:
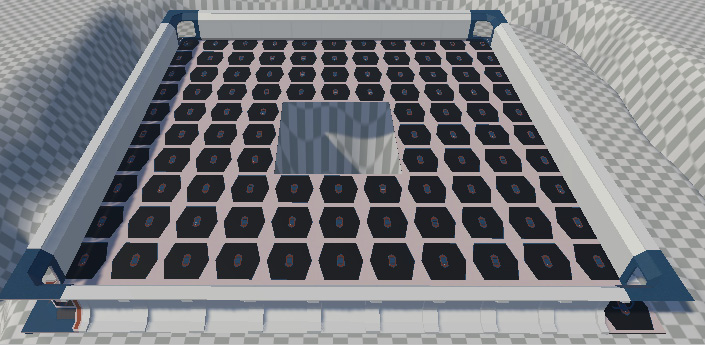
Figure 5.35 – Floor modules with a hole for the pit
- Add whatever details you want to add with other modular pieces in the package.
- Put all those pieces in a container object called Base. Remember to create an empty object and drag the base pieces into it:

Figure 5.36 – Mesh sub-assets
After a lot of practice doing this, you will slowly gain experience with the common pitfalls and good practices of modular scene design. All the packages have different modular designs in mind, so you will need to adapt to them.
Summary
In this chapter, we learned how to import models and textures and integrate them into our scene. We discussed how to apply textures to the terrain, how to replace our prototype mesh with modular models, how to apply textures to those, and how to configure the assets, all while taking several criteria into account according to the usage of the object.
With this, we have finished Part 1 of this book and discussed several basic Unity concepts. In Part 2, we will start to deep dive into several Unity systems that allow us to improve the graphics and sound quality of our game. We will start by learning how to create custom material types so that we can create interesting visual effects and animations.