
Documents are the primary way of saving data for apps. You can share the document with various apps and users so that the data is available to all users, but there are other ways to store and manage data in an app. Documents are the workhorses because you can control how much data is saved and how it is saved and shared.
Since the beginning of the iOS and macOS systems (and their predecessors) there has been another set of tools that let you store data. These tools are commonly used for user defaults, settings, and preferences. The data that they store and use is typically limited in size and scope. Even the terminology of these tools (user defaults, settings, and preferences) suggests the small size of the data involved. This remains true, but it is important to consider the fact that with the advances in technology, including data storage, user defaults, settings, and preferences, can in fact be a more central part of your app’s data strategy.
Note
Strictly speaking, a preference is the value of a setting such as the color to be used for drawing a new line where the value is blue for the lineColor preference. Once the value of a setting is set, it persists and is used each time the app runs until it is changed. In this case, the preference may be referred to as a default. In iOS, the built-in Settings app lets users control preferences and settings.
Preferences in Cocoa are stored in the Cocoa preferences system (also known as user defaults). If you want to make a strict distinction among these terms, in iOS the built-in Settings app controls these values for users. In Cocoa and Cocoa Touch, the user defaults system manages a database with the values. Some people distinguish between settings (part of the user interface) and user defaults (part of the Cocoa frameworks).
This chapter explores the possibilities you can use today for these data tools.
Looking at the Data Structures
String
Date
Integer number
Float number
Boolean
A property list (extension .plist) is designed for efficient serialization. The PropertyListSerialization class handles this for you. Property lists are used throughout Cocoa; over the years, this code has been refined and tested so that it can be relied on for many tasks.
In addition, a NSData type can be stored in a property list. If you do this, you must handle the serialization and deserialization of that data to or from an object that you want to deal with. A very common case is converting a NSData type to some binary format, which can then be interpreted as an image or other complex data structure.
Property lists can also include arrays and dictionaries. This means that you can use a property list, which itself is an array containing a dictionary that also declares another array as well as numbers and other simple objects.
The other constraint to bear in mind when considering user defaults, settings, and preferences is that the guidance from Apple is that these tools should be used only for limited purposes and relatively small amounts of data.
When thinking about storing data in this way, don’t worry too much about how much data can be stored as user defaults, settings, or preferences because that’s not really the limiting factor. If you use up almost all of a device’s storage in this way, you will degrade performance long before you run out of space.
Property lists are stored as instances of the PropertyListSerialization class. As instances of this class, property lists are read and written in full when they are read or written. This can mean that in order to access a single Boolean value, you may need to read or write an entire property list with dozens, hundreds, or even thousands of items. You can focus your reading or writing by storing property list values in an array or dictionary, but this doesn’t really help you much. You will need to read the entire property list in order to get to the array or dictionary and only then will you be able to hone in on the value you want.
The data that is stored as defaults, preferences, and settings can be anything that you want to store (provided that it is a property list and doesn’t take up too much space). There is a difference between these terms and this is a good place to start to understand them.
Exploring User Defaults, Preferences, and Settings
All of these data structures can be stored in property lists, but understanding how they are used can help you use them most efficiently. Remember that these structures are always stored in property lists, which means they are stored in key-value structures. For that reason, each user default, preference, and setting has a name (the key under which it is stored). There may be other data stored under that key—perhaps a lot of it—but each has a key.
Tip
When you are thinking about using these tools to store your own data, remember that the Settings app and user defaults system manage the data. If you want total control over the data, how it is stored, and the user interface for it, you may want to use a database or document where you control these features.
Understanding User Defaults
A user default value is a starting value (default) for some aspect of your app. For example, an app that lets you store the names of students in a class may start by identifying students as Student 1, Student 2, and so forth. A new student that a user adds might be called New Student.
“Student” is the name of each item in the app and new items are labelled “New Student.”
You could change the default value for items to be “Item” so that you would have “Chair” and “New Chair” as the app runs.
A slightly more complex default might let a user choose between “New” and a number to identify a new item, as in New Chair or Chair 3.
Defaults like this are often exposed to the user so that they can choose.
Tip
In a case like this, an empty string may be the default.
Exploring Settings
There is a user defaults database that stores settings like this for each app. The settings values persist from one use of the app to the next. Furthermore, users can change settings directly using the built-in tool, as shown later in this chapter.
Using Preferences
Although there is no hard-and-fast rule, many people consider preferences to be settable from outside the app, possibly even at the time the app is installed. In addition, some preferences such as the user’s location or language preference are set using the operating system itself.
Preferences and Settings: A Case Study
This section uses a simple example of a setting for the name of an item in an app (“Chair” or “Student”). It shows how this can be implemented with Settings or the user defaults system rather than with a database or document.
Start from a built-in Xcode project template (Single View App in this case).
Add a Settings bundle to manage the settings (“Chair” or “Student” in this example).
Build an interface to your app for the settings.
Add an interface to show the app’s settings and version. (This is useful for debugging any app. I use it automatically when I build any app.)
Creating the PreferencesApp
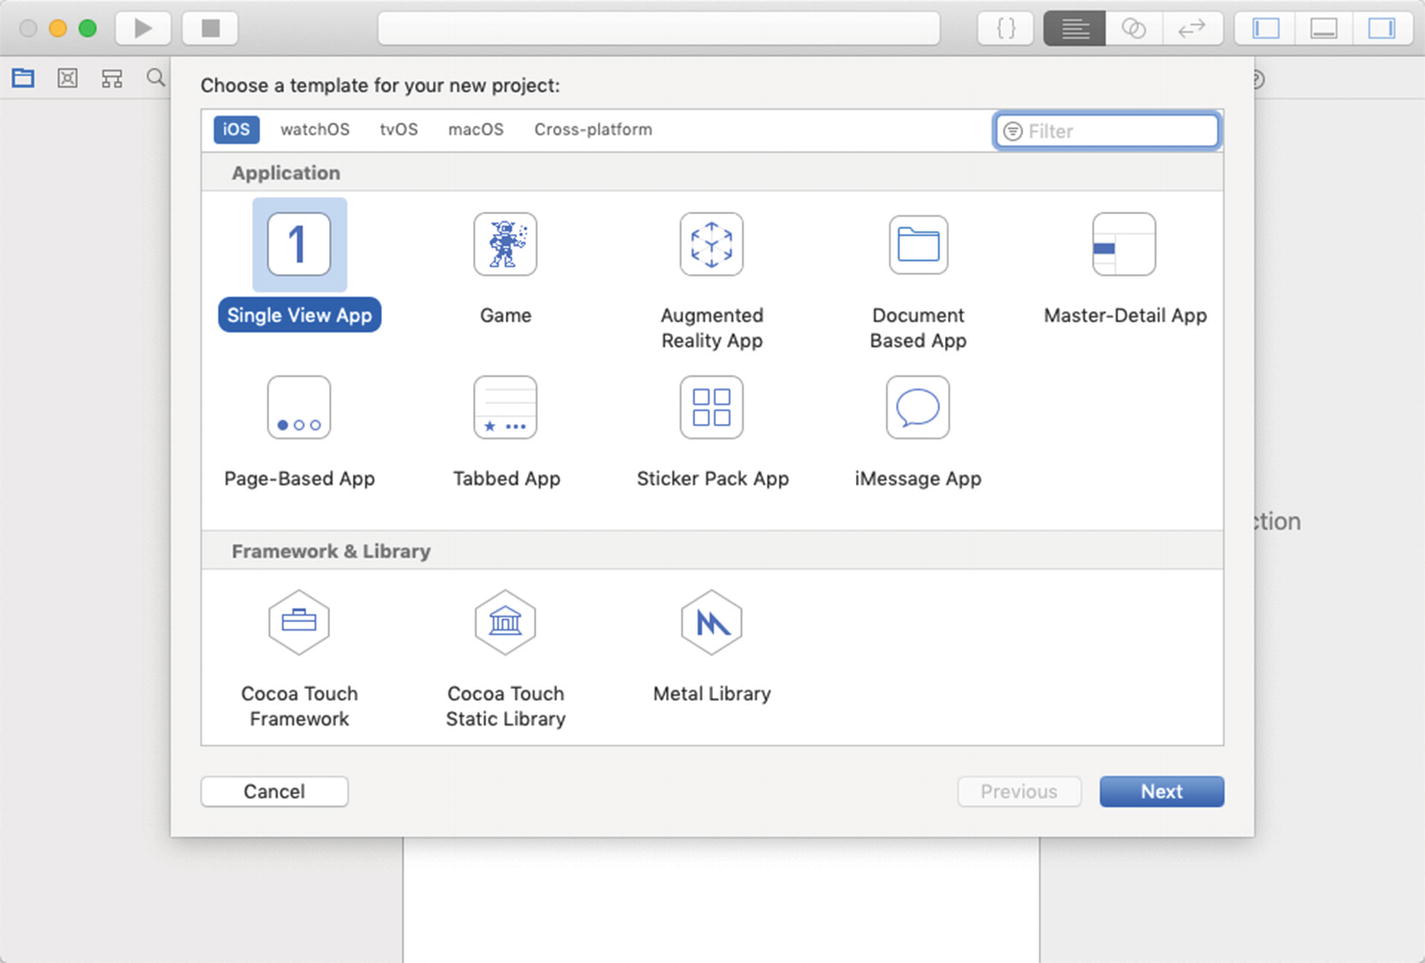
Starting from the Single View App project template
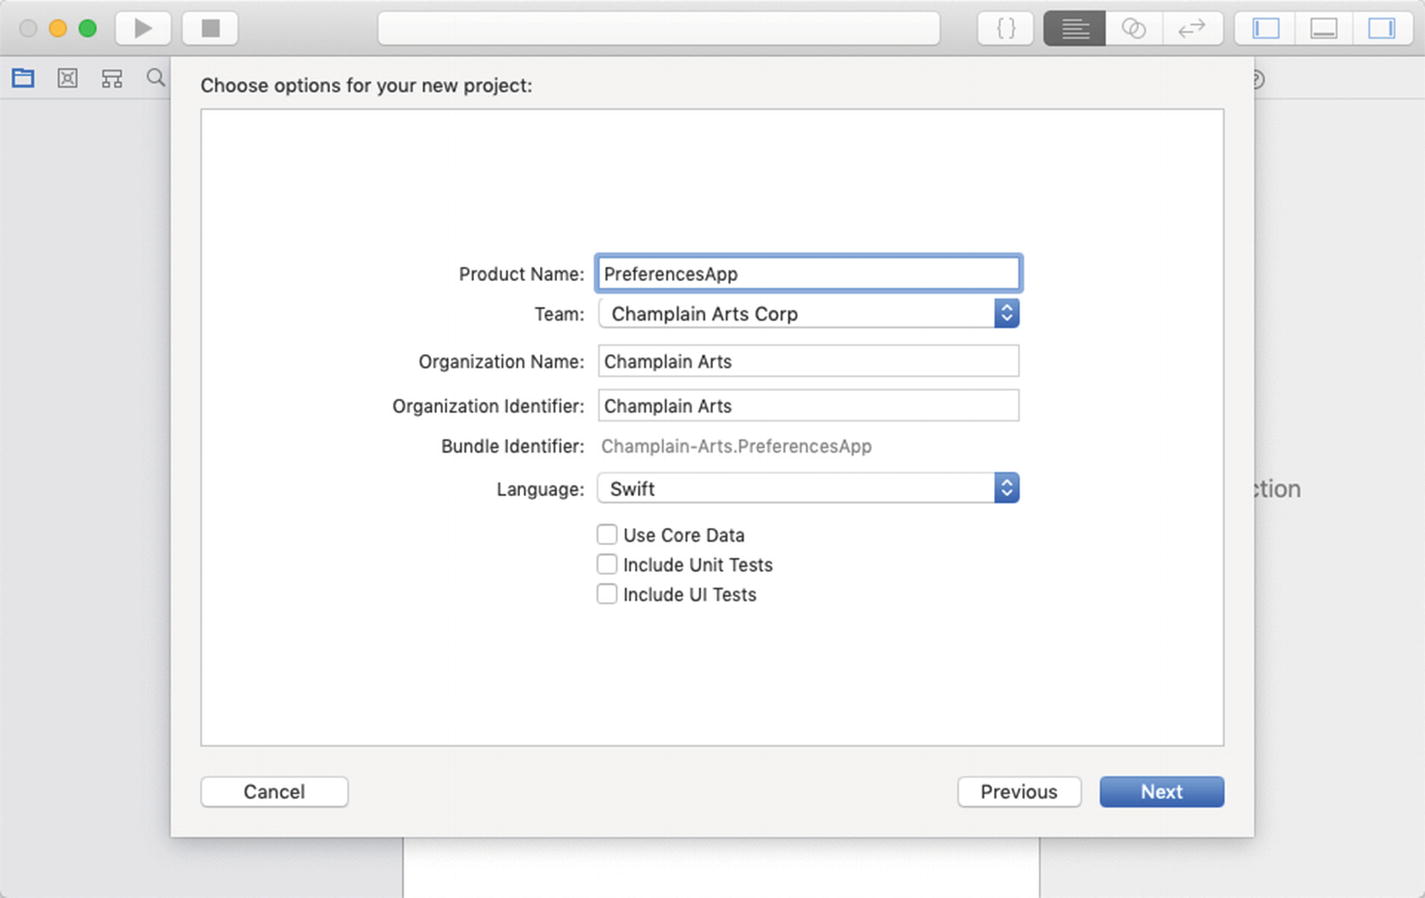
Setting the options for PreferencesApp
You don’t need special options to use Settings
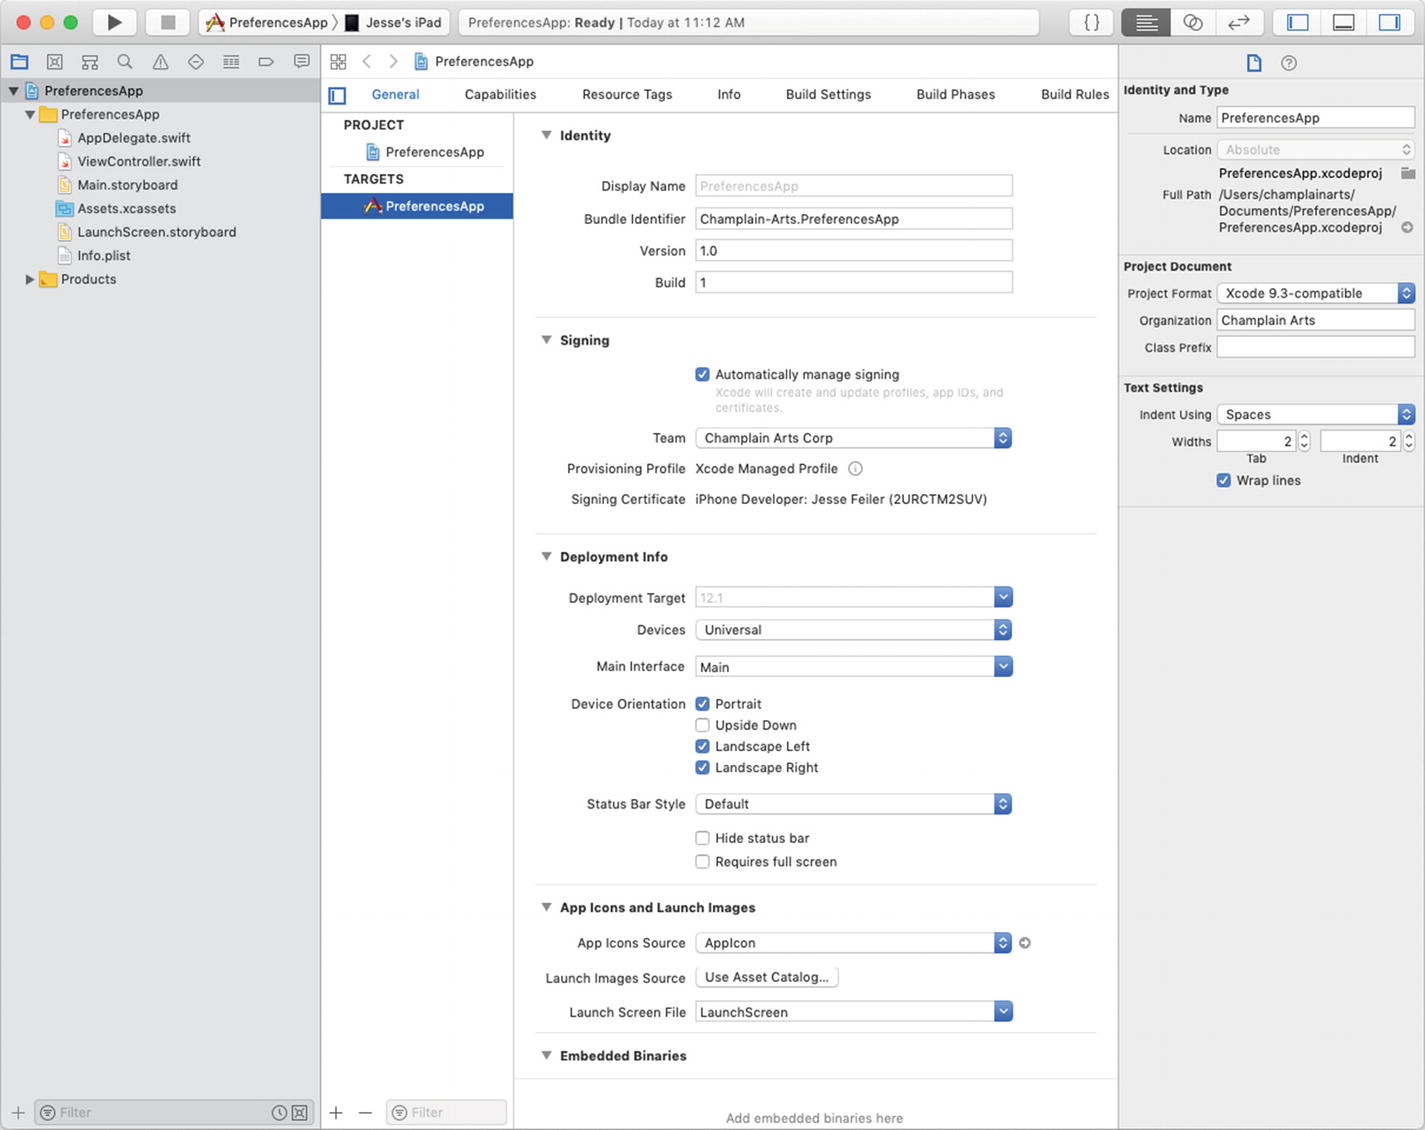
Adding a Settings Bundle

Adding a settings bundle to your app
Tip
When adding a settings bundle to your app, be careful to select the correct file. There are other settings bundles such as WatchKit Settings Bundle and, in the future, there are likely to be other settings bundles.

Placing the new settings bundle in the right target
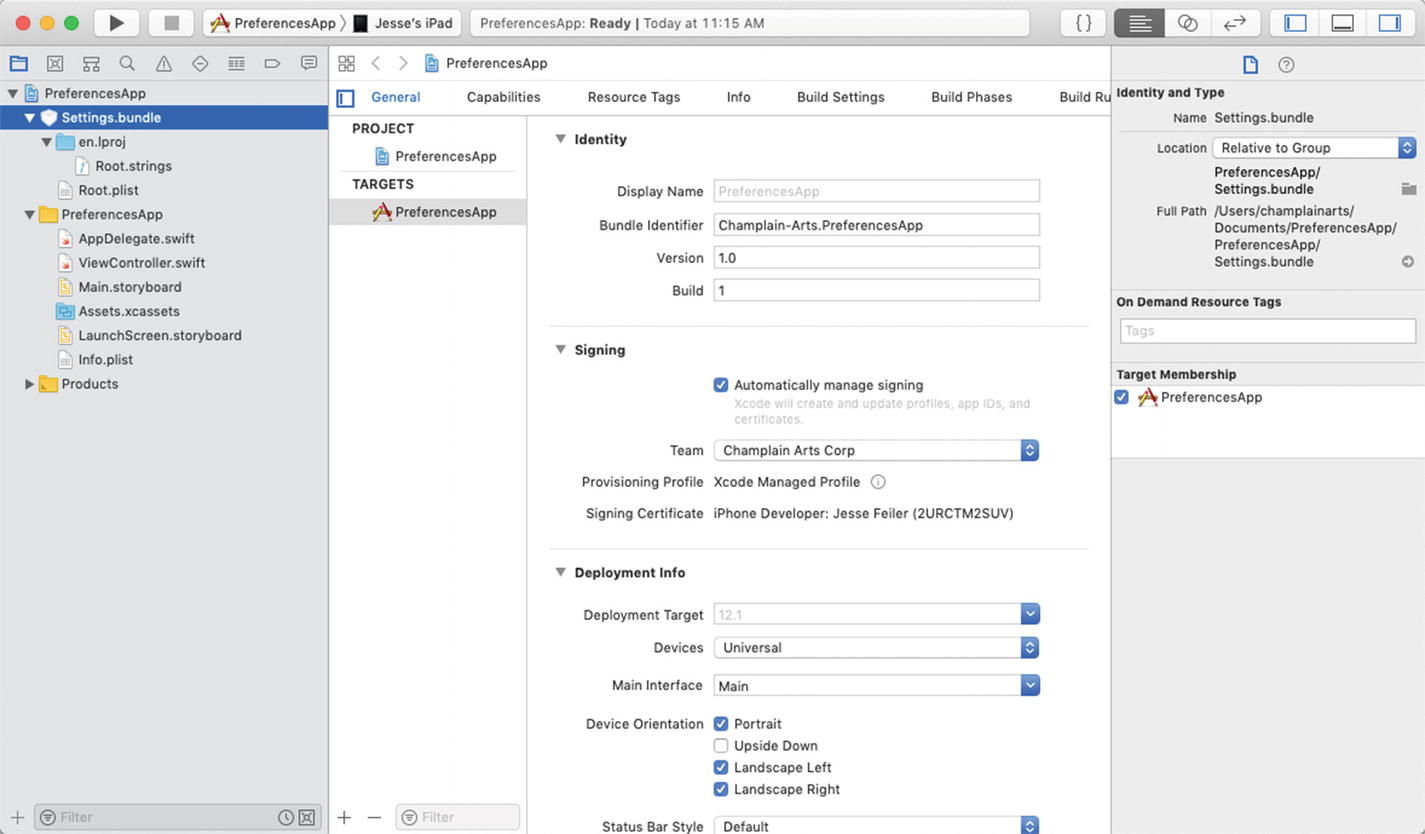
Confirming that the settings bundle has been added to the project navigator
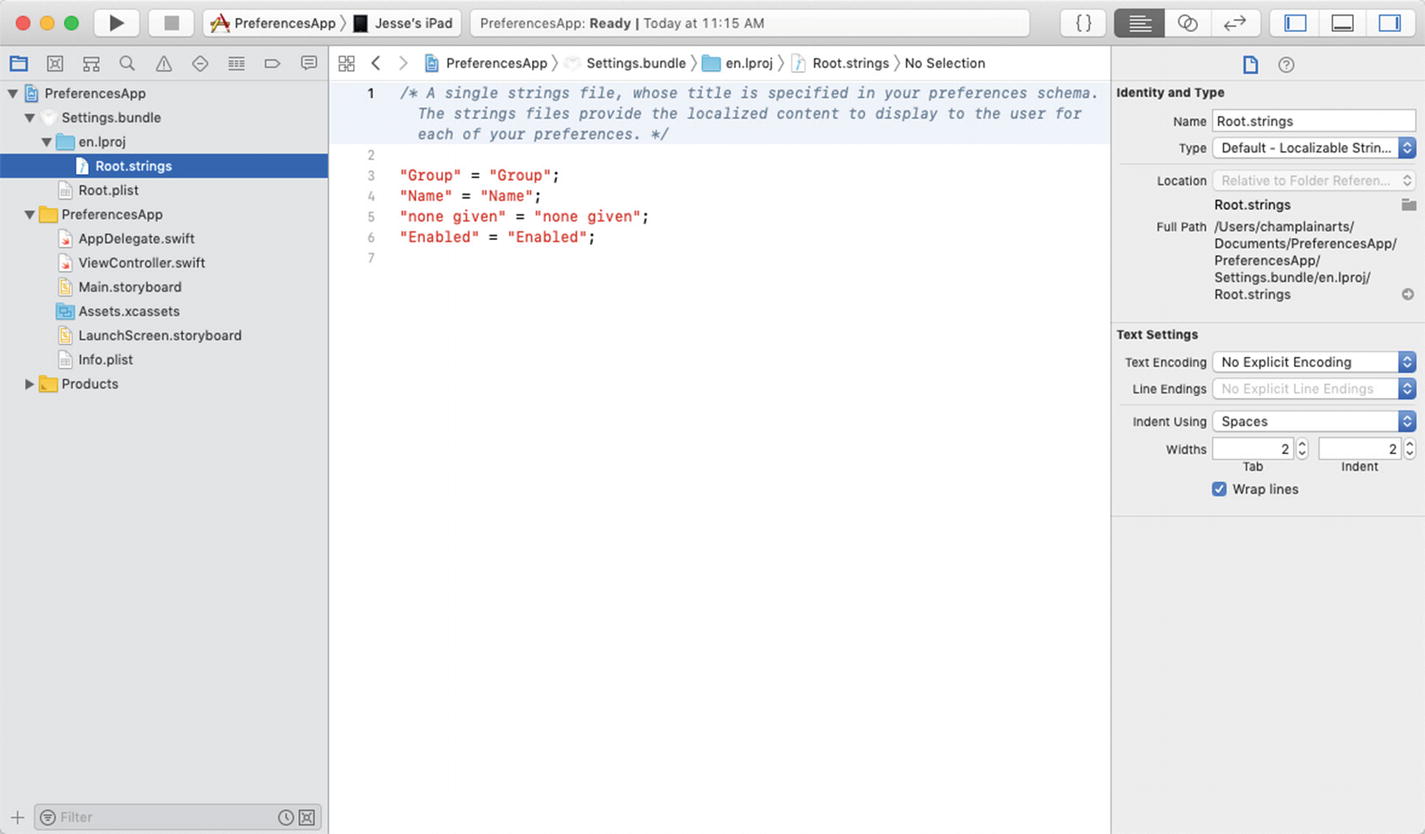
You can use the default settings strings as-is

Using Settings in iOS
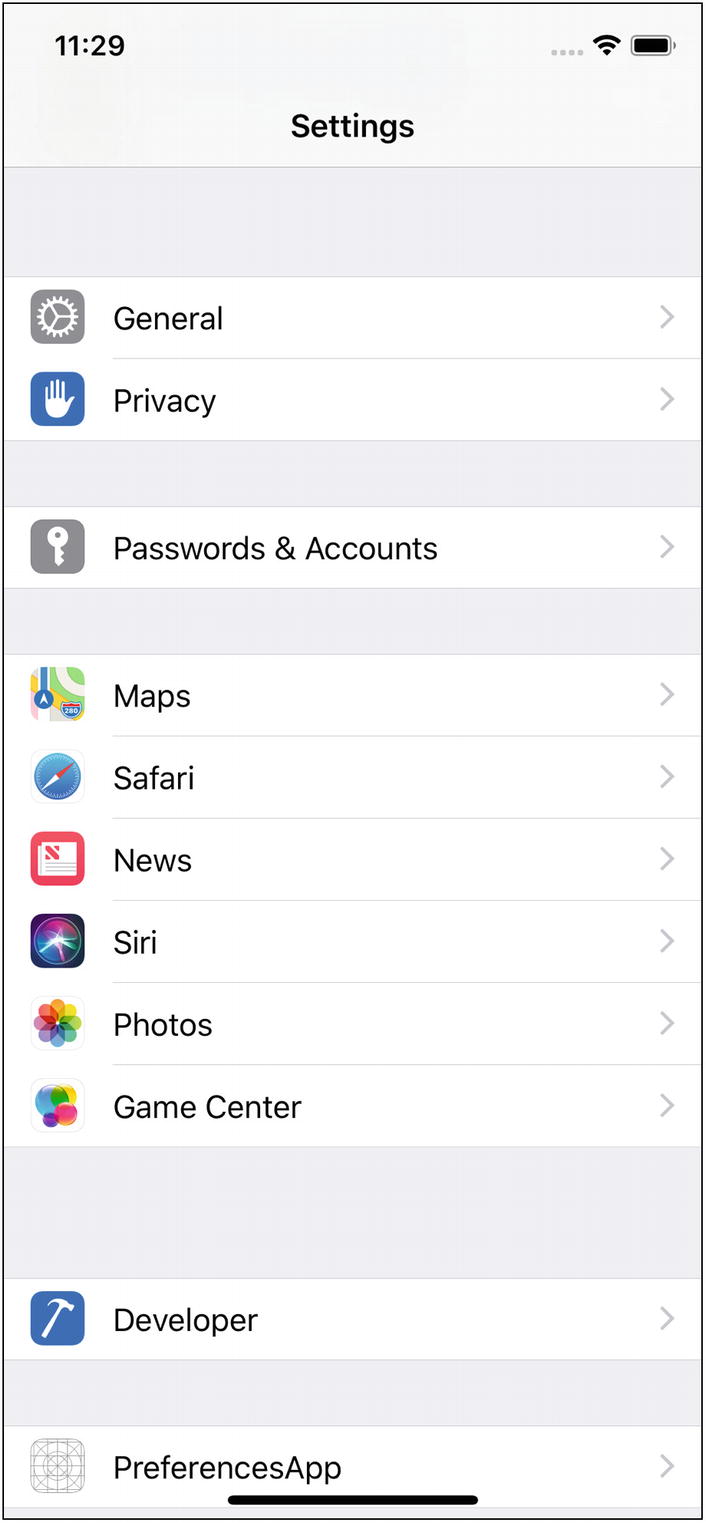
Tapping PreferencesApp in Settings
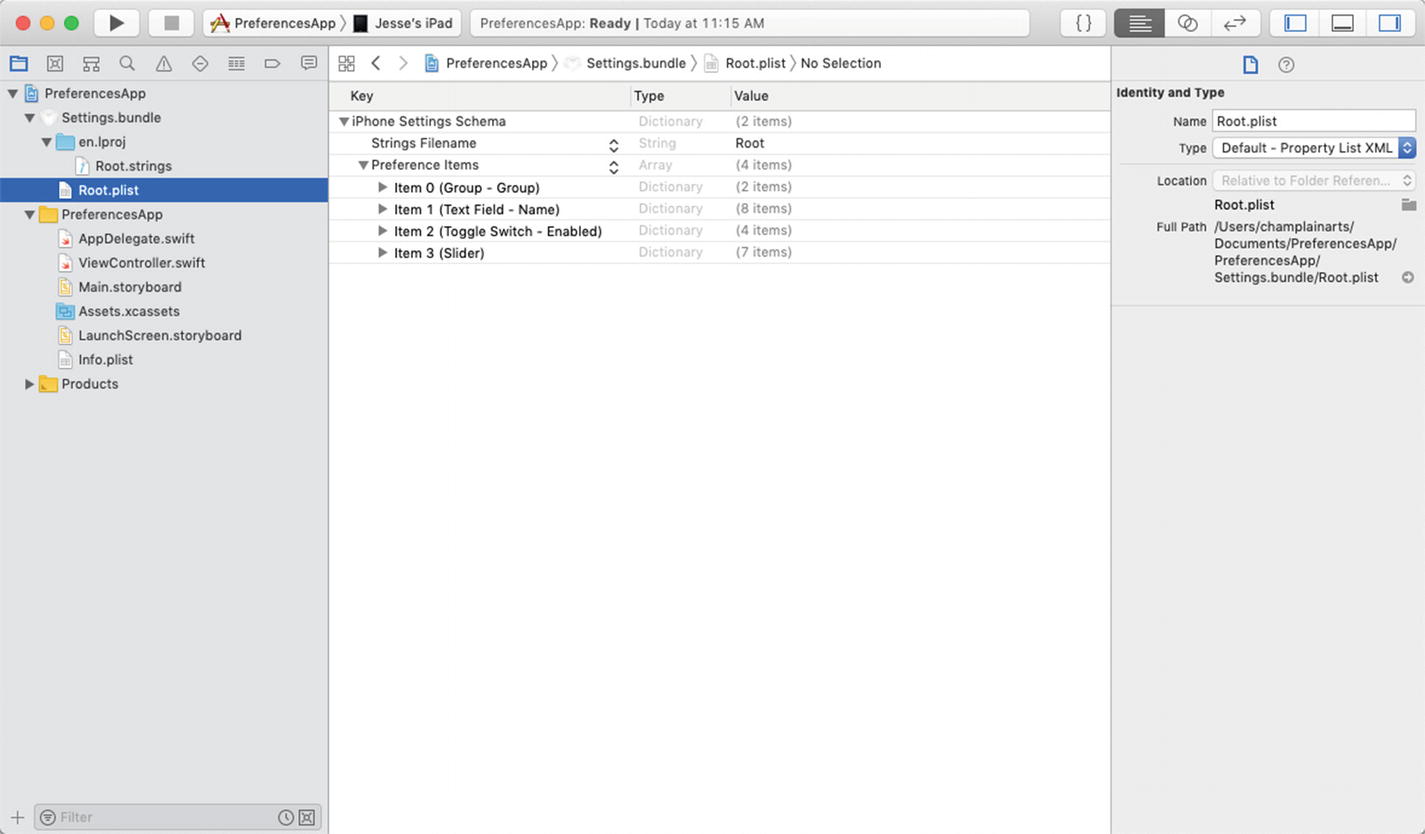
Initial settings
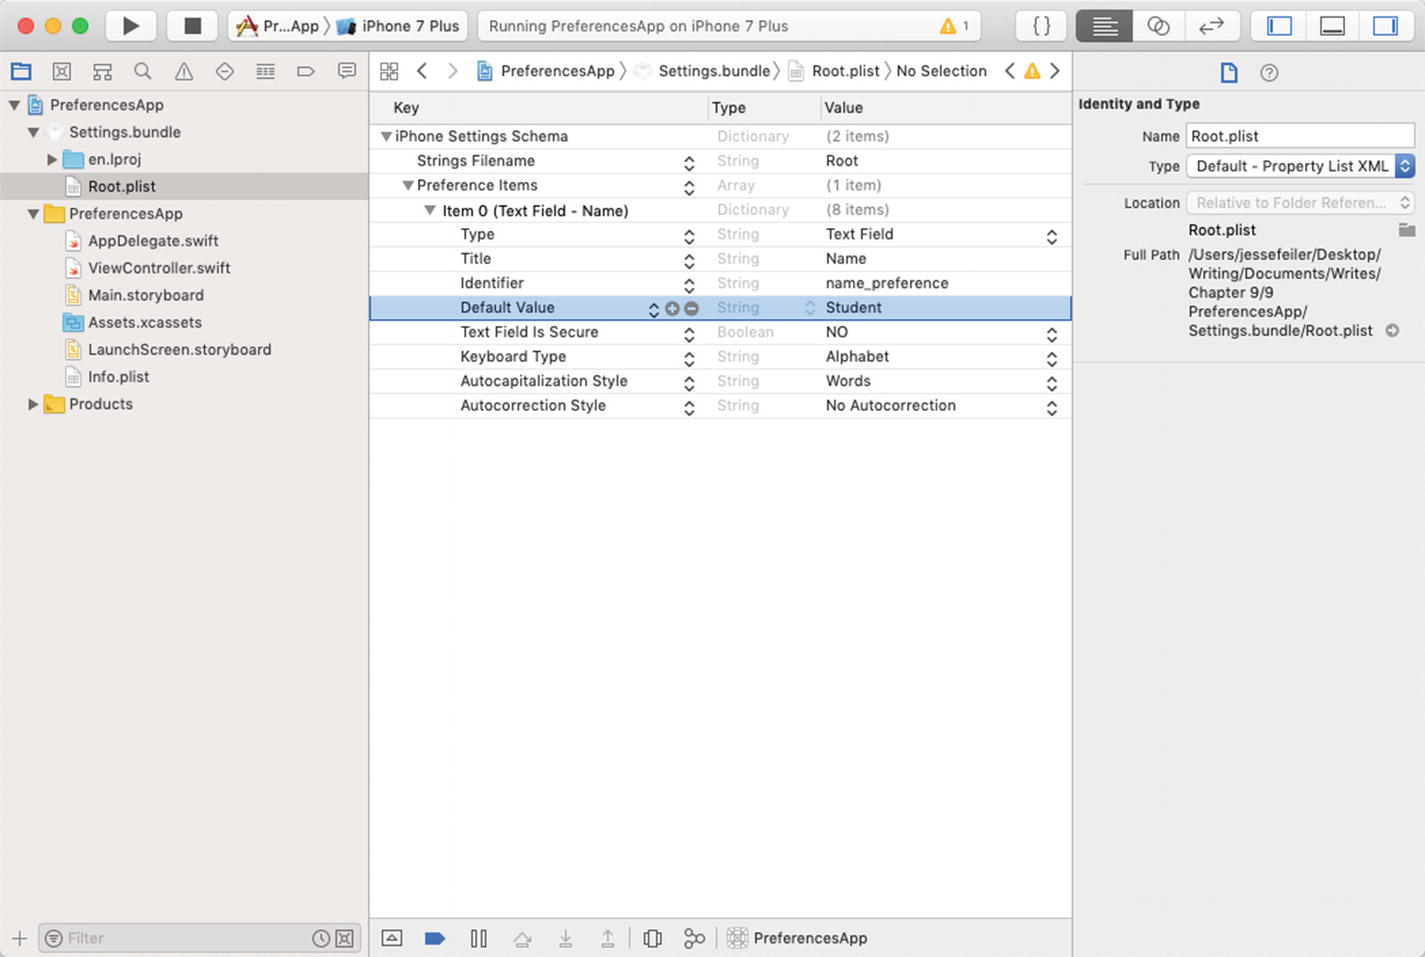
Changing the Default Value to Student
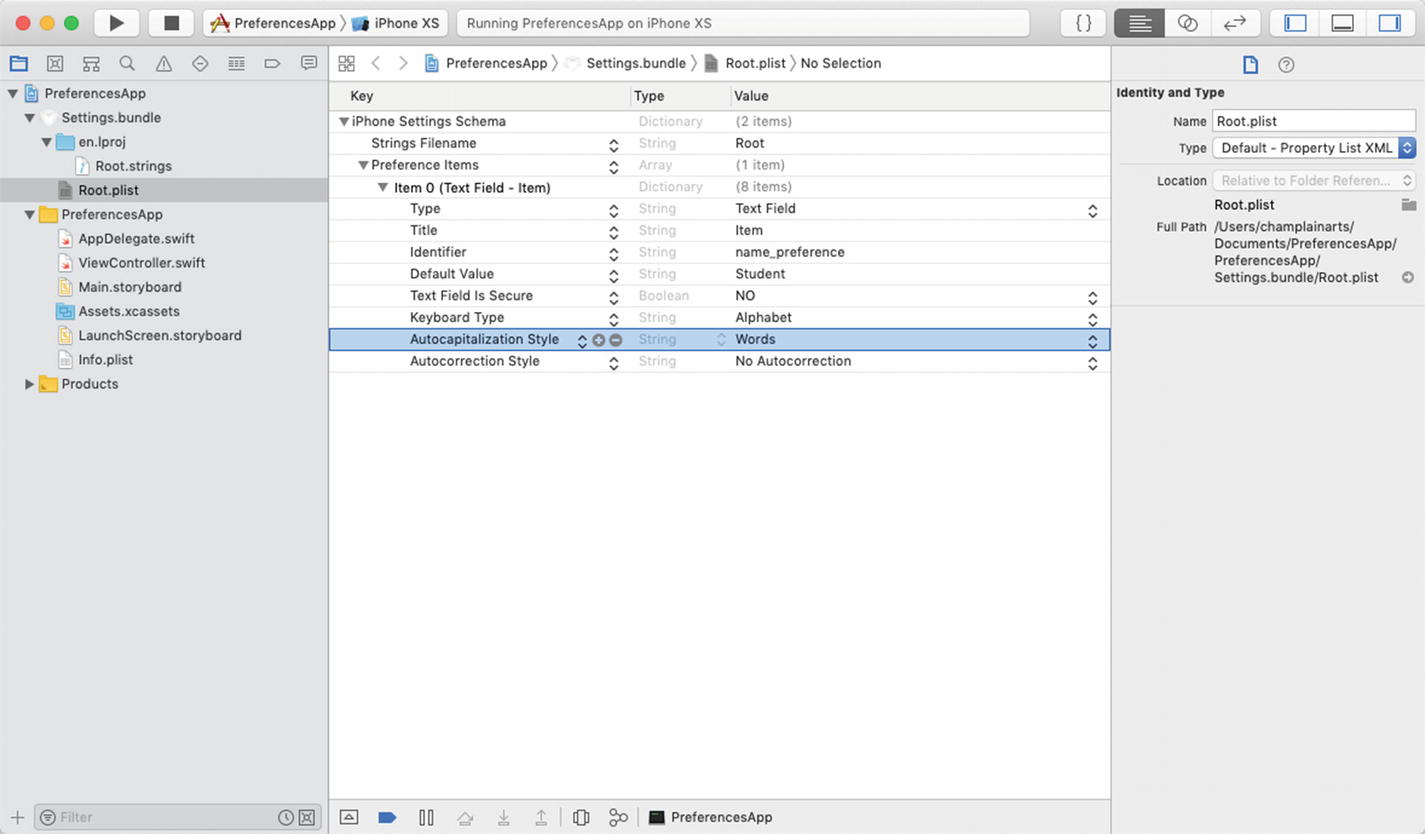
Adjusting the settings for your app
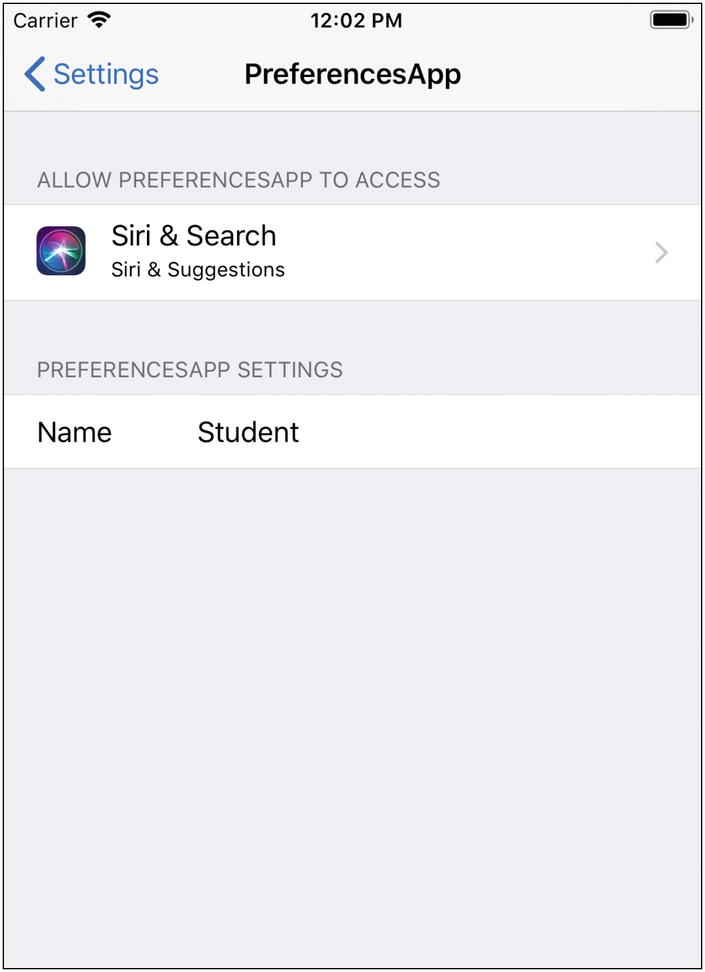
Finally, test Settings in the simulator, as shown in Figure 9-13. (You’ll notice that some items in Settings for an app are automatically added by iOS. The Siri & Search settings are an example of this.)
Accessing the Settings Bundle from Your Code
Test settings

Using the identifier key to access a user default property
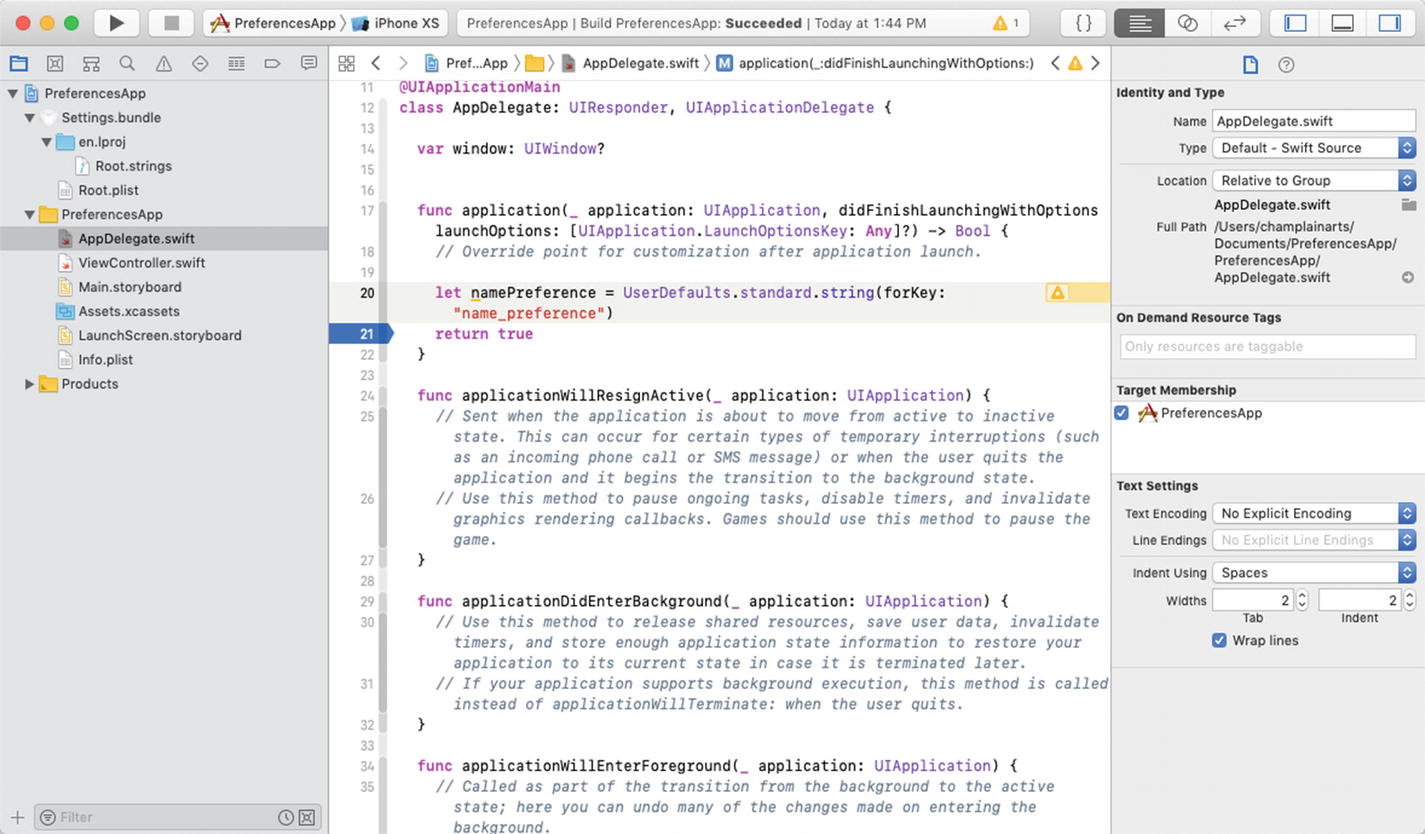
Accessing a property in the user default Settings app
Adding a Settings Interface

Adding a button to the view controller

Connecting the button to an action
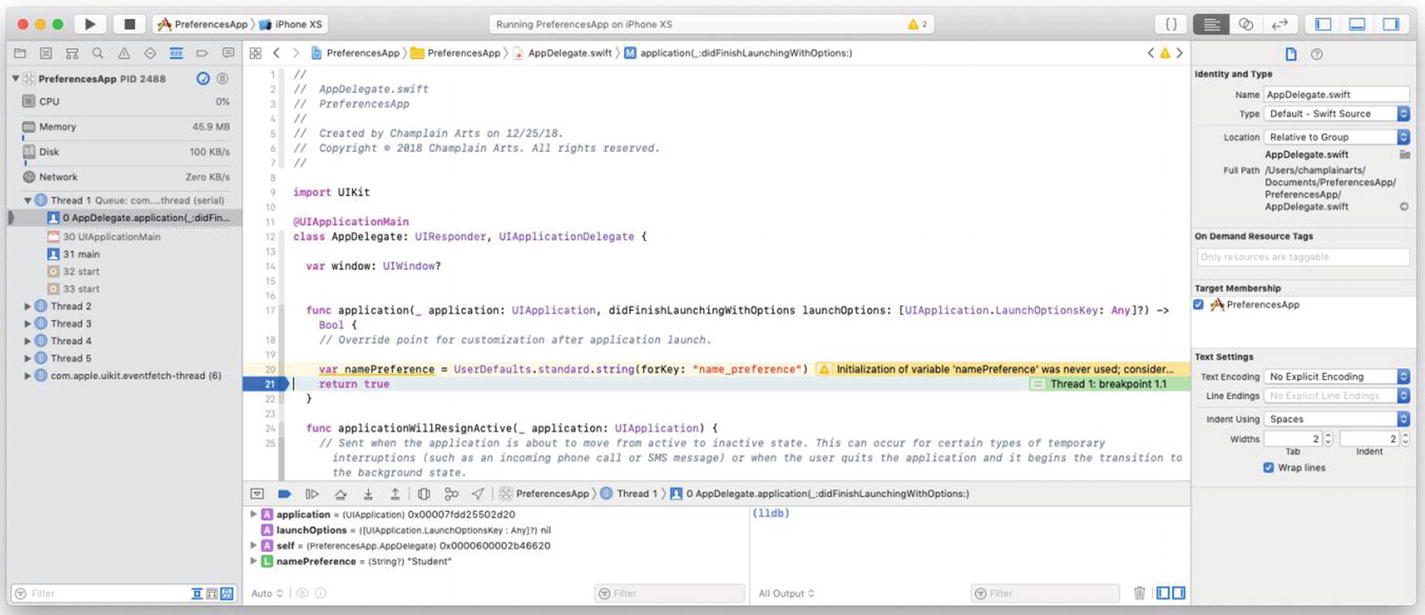
Using a breakpoint to check the value
Summary
This chapter showed how to use the built-in user defaults preferences and/or Settings app to store values for your app. These values must be able to be stored in a property list and they should now be large data objects, but you can use them for many purposes other than building a large-scale data manager.