Documents are critical components of many apps and have been so from the beginning of the personal computer era. Many people still think of documents as paper-based objects, but the documents that people work with today on iOS and macOS are much more sophisticated than their paper predecessors. This chapter introduces today’s documents and their structures. It then explains how to use UIDocumentBrowserViewController to manage documents.
Creating a Document-Based App
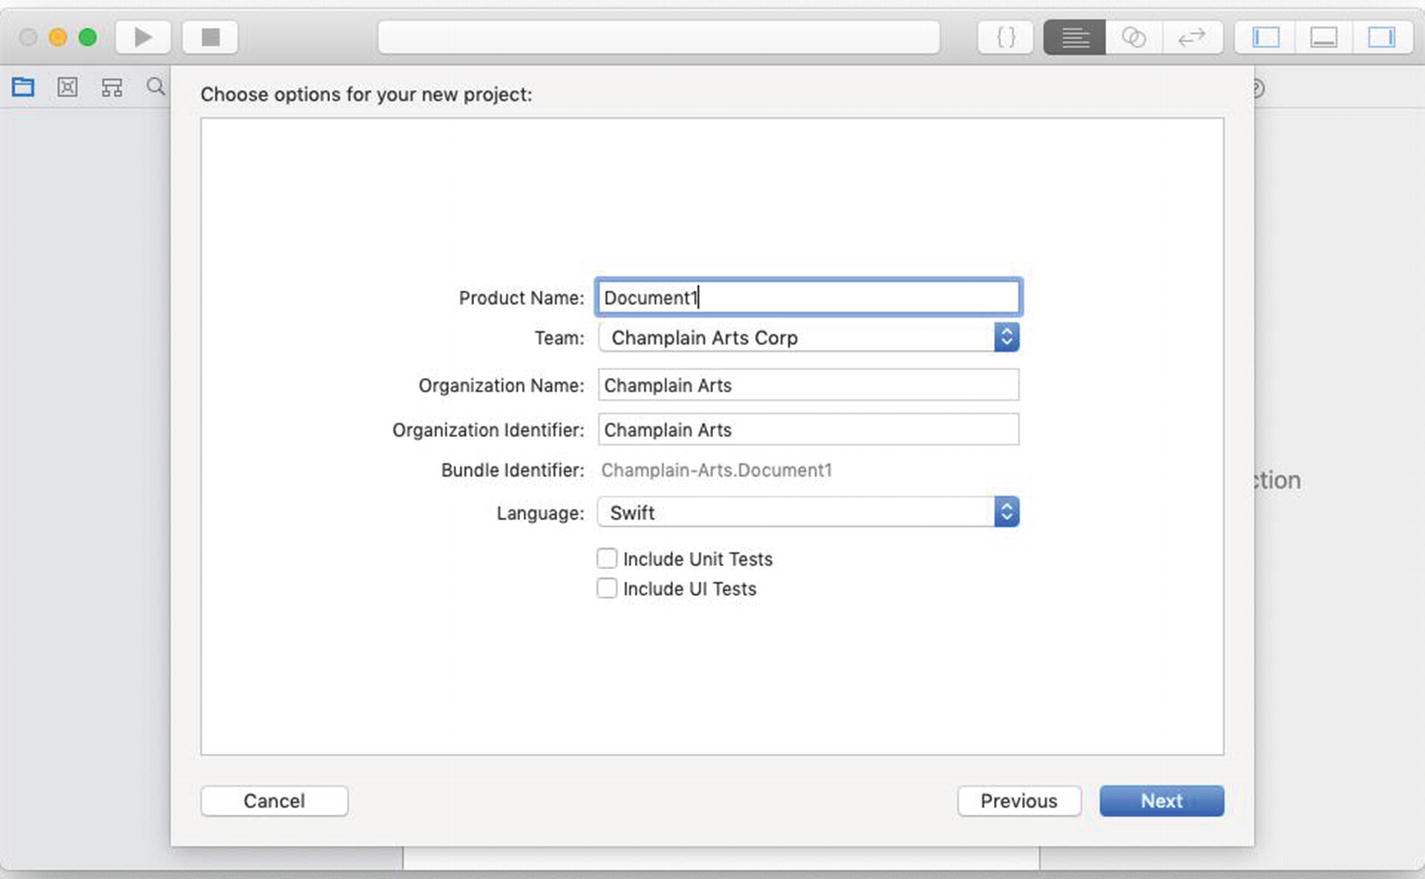
As is often the case with the basic building blocks of the frameworks in Xcode, the simplest way to get started with documents for iOS is to use the Document Based App project template that’s built into Xcode. Begin by creating a new iOS project, as shown in Figure 7-1.
Figure 7-1.
Picking the Document Based App template in Xcode
Go through the standard options shown in Figure 7-2 to set up the template.
Figure 7-2.
Setting the options for the new project
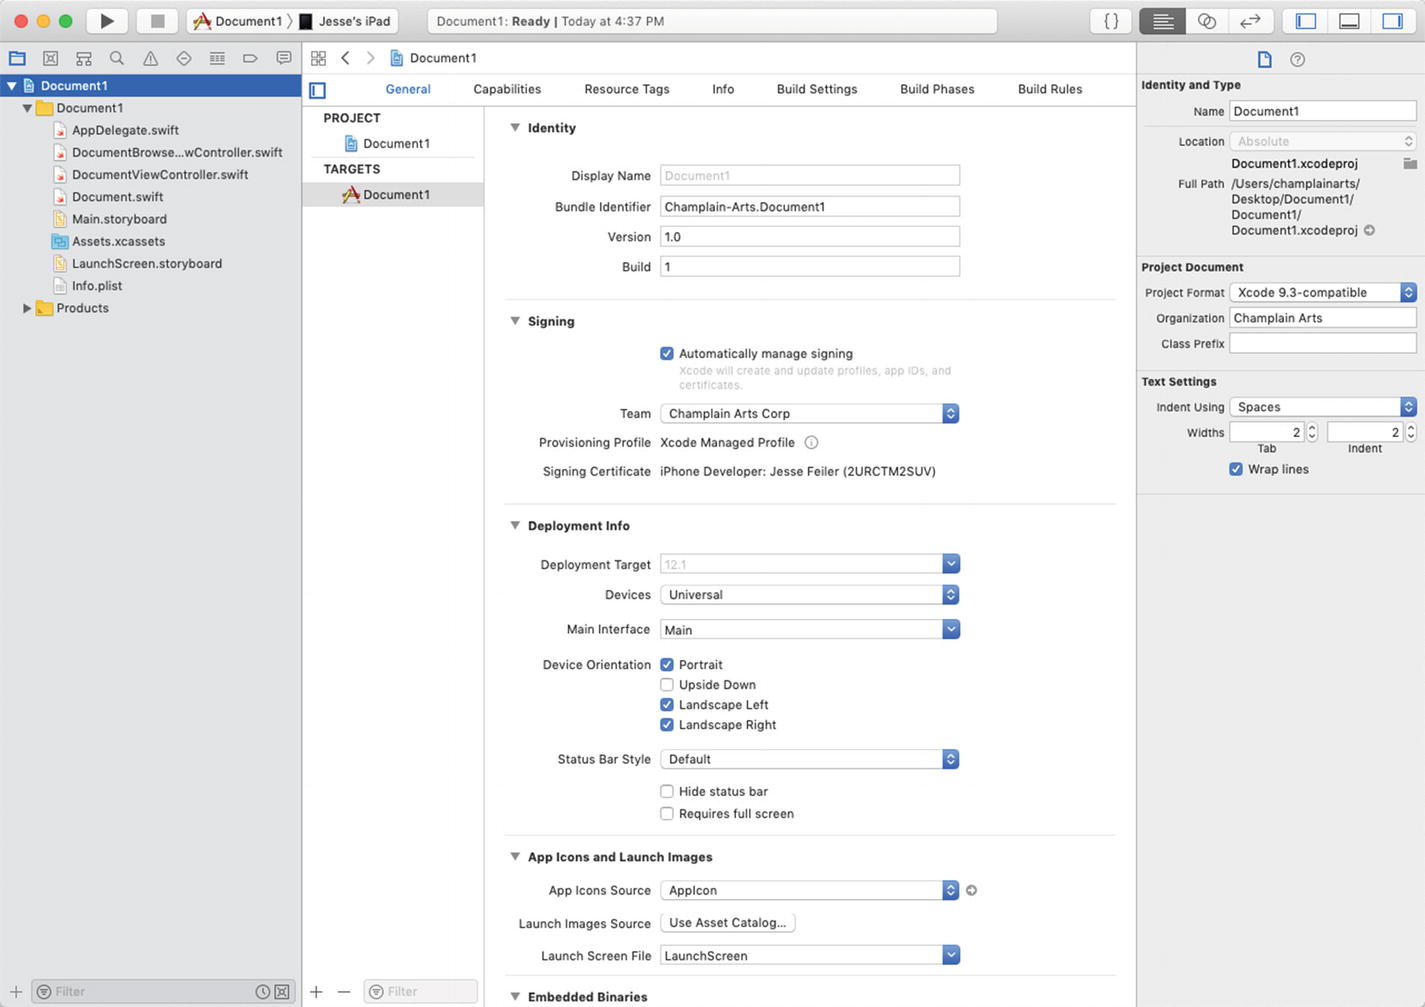
Continue with the options until you have the project template complete as shown in Figure 7-3.
Figure 7-3.
Reviewing the new project
When you’re finished, run the app. (This is a step you should always take when you create a new project from a template. Except for issues such as network availability, your new project template should run.)
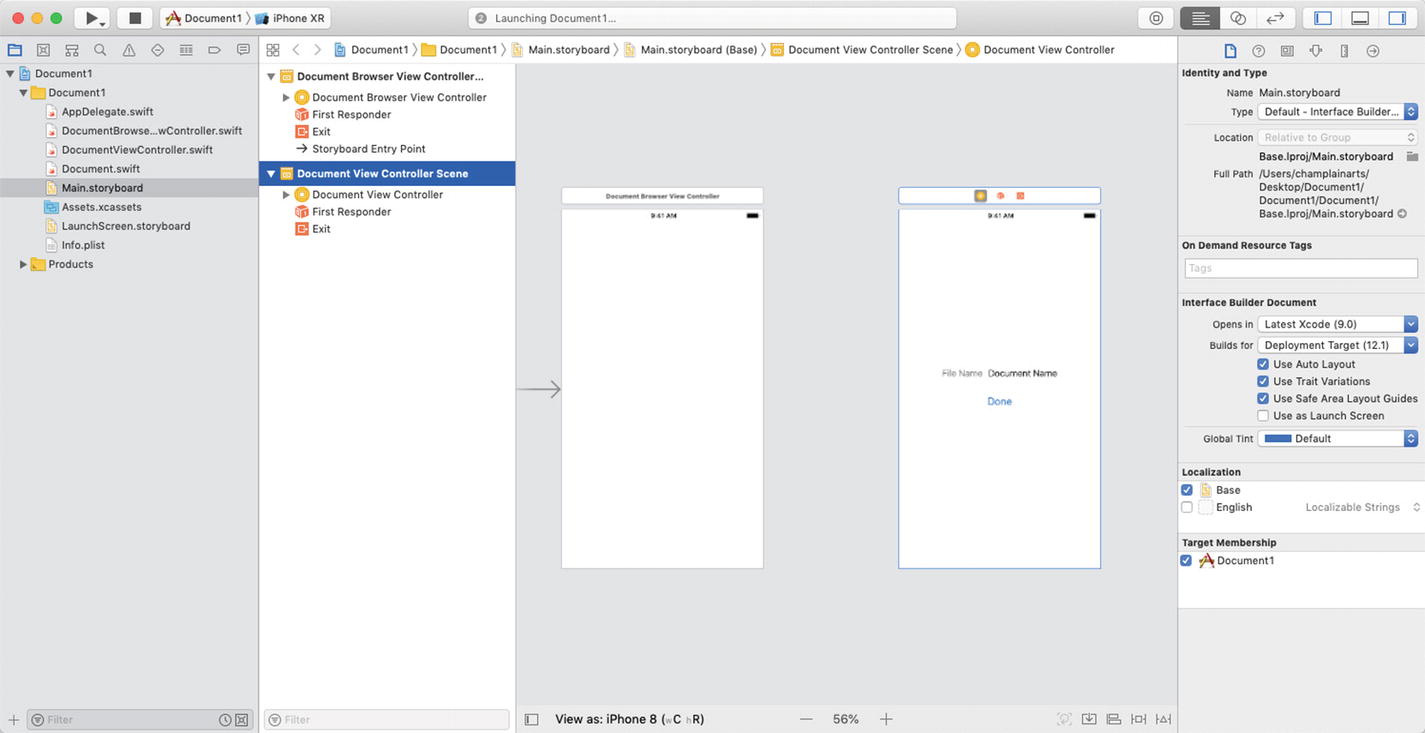
As you can see in Figure 7-4, you can open the project and see the storyboard with two view controllers.
Figure 7-4.
Looking at the storyboard
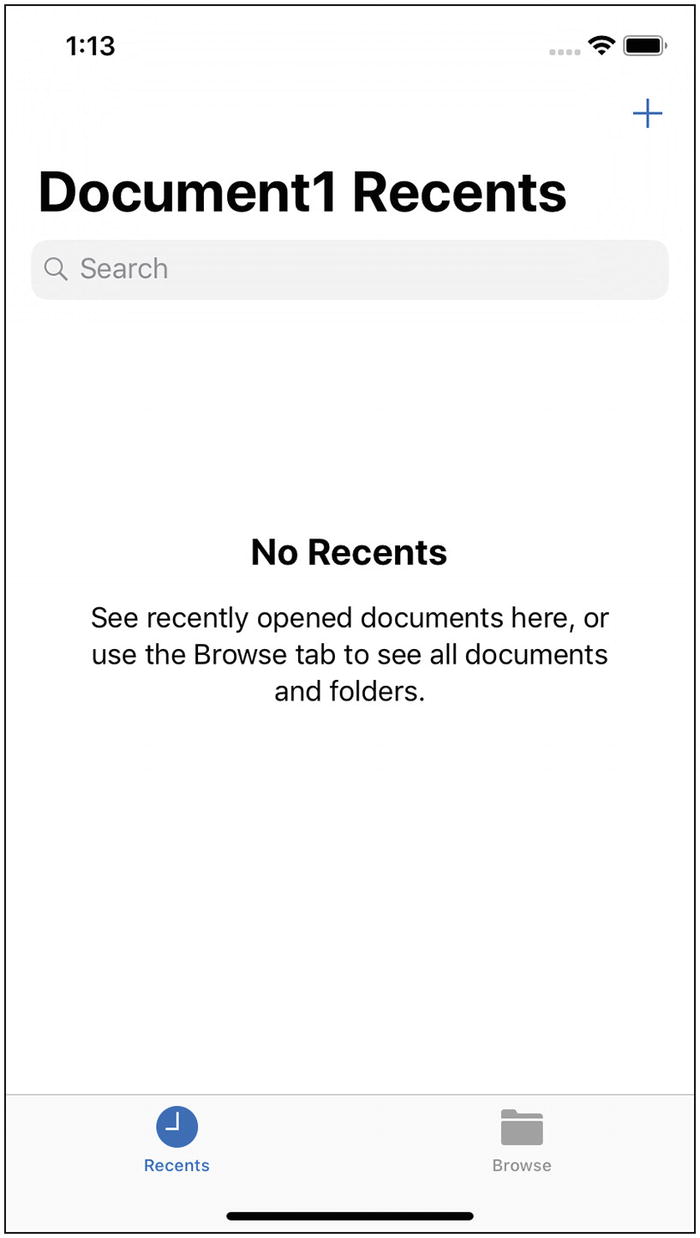
Run the project. You should see the Simulator, as shown in Figure 7-5.
Figure 7-5.
Running the app
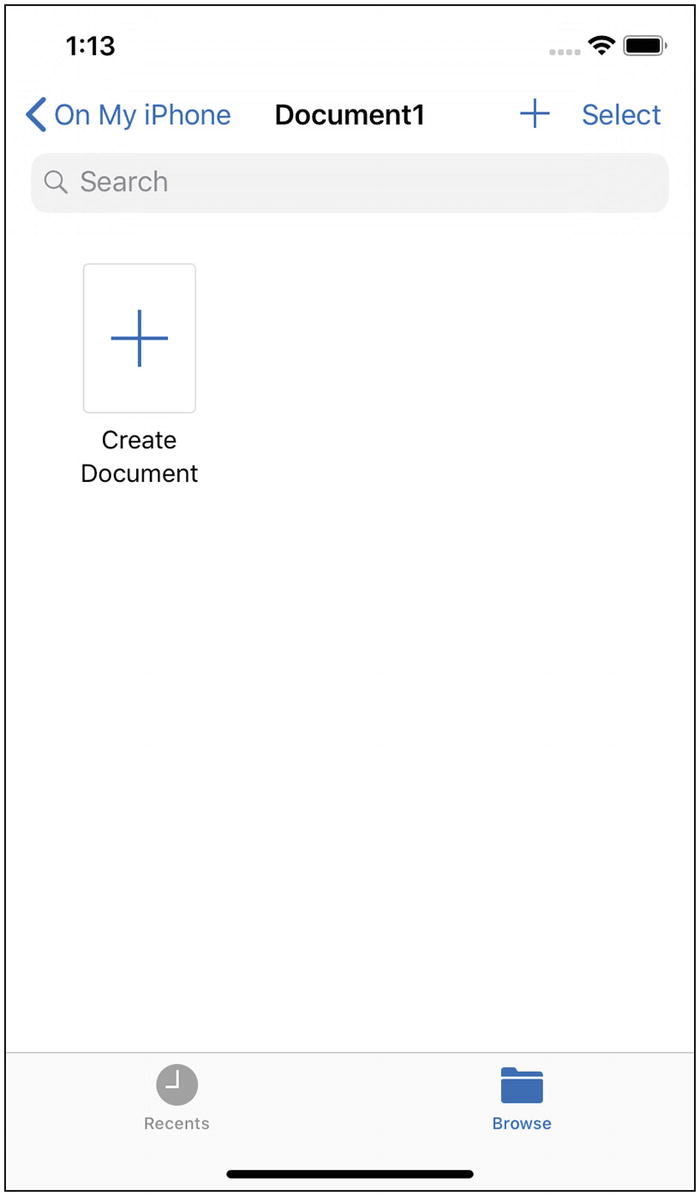
Continue exploring your new app. Use the Browse tab to browse files in your app’s sandbox, as shown in Figure 7-6.
Figure 7-6.
Exploring the Browse tab in your app
There are no files there now, but there is a Create Document button. Try it out!
Nothing happens.
It’s time to move to the next section of this chapter, which looks at UIDocument. Among other tasks, you’ll see how to implement the Create Document button.
Introducing UIDocument
The basic document class in iOS is UIDocument. UIDocument provides the basic functionality of a document in these ways:
fileURL: UIDocument identifies a document using a file URL so that your app can locate it for reading and writing.
UIDocument managesasynchronous reading and writingof data on a background queue with minimal effort on your part.
UIDocument also coordinates reading and writing of document files usingcloud servicessuch as iCloud.
UIDocument also managesconflicts and changes to versionsof your document.
These are the basic components of UIDocument. In order to start working with documents, you can use the basic code that is available in the Document Based App template. The basic code in the project template provides functionality for fileURL (document identification) as well as the critical reading and writing features along with cloud services and management of conflicts and changes.
Working with UIDocument
The key components for working with UIDocument are UIDocument, which handles reading, writing, and creating UIDocuments, and UIDocumentBrowserViewController, which handles the browsing and the user interface part of reading, writing, and creating UIDocument. Completing the basic functionality of UIDocument is an implementation of UIDocumentViewController.
UIDocument takes care of a lot of document management for you including many critical functions such as saving documents and managing changes. You can study the documentation to see all of the features, but you can use the stripped-down functions for UIDocument that are part of the Document Based App template used in this chapter. In fact, the basic code from the template (shown in Figure 7-7 and Listing 7-1) is an excellent place to start and, for many basic apps, it may be all you need along with a line or two of app-specific code.
Figure 7-7.
Basic UIDocument functionality
//
// Document.swift
// Document1
//
//
import UIKit
class Document: UIDocument {
override func contents(forType typeName: String) throws -> Any {
// Encode your document with an instance of NSData or NSFileWrapper
The function you need to implement first is contents(forType:). When you have decided the format for the data in your document, you specify its type, and that type is used to read and write the document’s data. Often, the type of a document file is a basic Swift or Objective-C type such as NSData. If you use NSData, it is your responsibility to convert your document’s data to NSData or whatever type you are using.
The companion function is load(fromContents: ofType:). Both of these functions let you read or write a general-purpose format and then convert it into data that your app manages.
If you explore the code for UIDocument, you’ll see that it handles asynchronous reading and writing, working with cloud data, and managing changes all within the basic structure of the two functions: contents(forType:)and load(fromContents: ofType:)
Working with UIDocumentViewController
Once you have your document in place, you need to add a view controller so that you can see and manipulate content. In the Document Based App project template, the document controller is created as shown in Figure 7-8.
// Make sure to handle the failed import appropriately,
// e.g., by presenting an error message to the user.
}
})
}
@IBAction func dismissDocumentViewController() {
dismiss(animated: true) {
self.document?.close(completionHandler: nil)
}
}
}
Listing 7-2
Document View Controller Code
There are two functions in the DocumentViewController class: viewWillAppear((_:) and dismissDocumentViewController(). The first opens the document and the second closes it.
Opening the Document
Opening the document is a great example of the Swift asynchronous programming style using a completion handler. The code is
document?.open(completionHandler: { (success) in
if success {
// Display the content of the document, e.g.:
self.documentNameLabel.text
self.document?.fileURL.lastPathComponent
} else {
// Make sure to handle the failed import appropriately,
// e.g., by presenting an error message to the user.
}
})
open is called on the document (note that it is an optional and is unwrapped with ?). The completion handler is declared in the open function, and it is called upon completion of open. There is one parameter passed into the completion handler. As is common but not required, it is often called success; it is a Boolean that indicates if open has succeeded or not.
The completion handler then executes this code:
if success {
// Display the content of the document, e.g.:
self.documentNameLabel.text
self.document?.fileURL.lastPathComponent
} else {
// Make sure to handle the failed import appropriately, e.g., by
// presenting an error message to the user.
}
For a successful opening of the document, a label in the storyboard is filled with lastPathComponent of the file URL. (You can see this at the right in Figure 7-4.) For most apps, you would actually display some content from the document in the interface.
Note
The completion handler for opening the document is a significant way of improving app performance. When you are dealing with documents and files that may be in the cloud, the delay in executing the completion handler (whether successful or not) can be significant. Remember this when you are testing your app.
Closing the Document
Closing the document uses a similar structure with dismissDocumentViewController. However, note that the completion handler in the app is nil. If you don’t need to process data that has changed, you don’t have to do anything except close the document.
Working with UIDocumentBrowserViewController
UIDocumentBrowserViewController is the heart of the document-based app. This section provides an overview of what happens. There are two basic paths to follow: creating a document or opening an existing document. (You might want to refer back to Figures 7-5 and 7-6.)
Loading the UIDocumentBrowserViewController
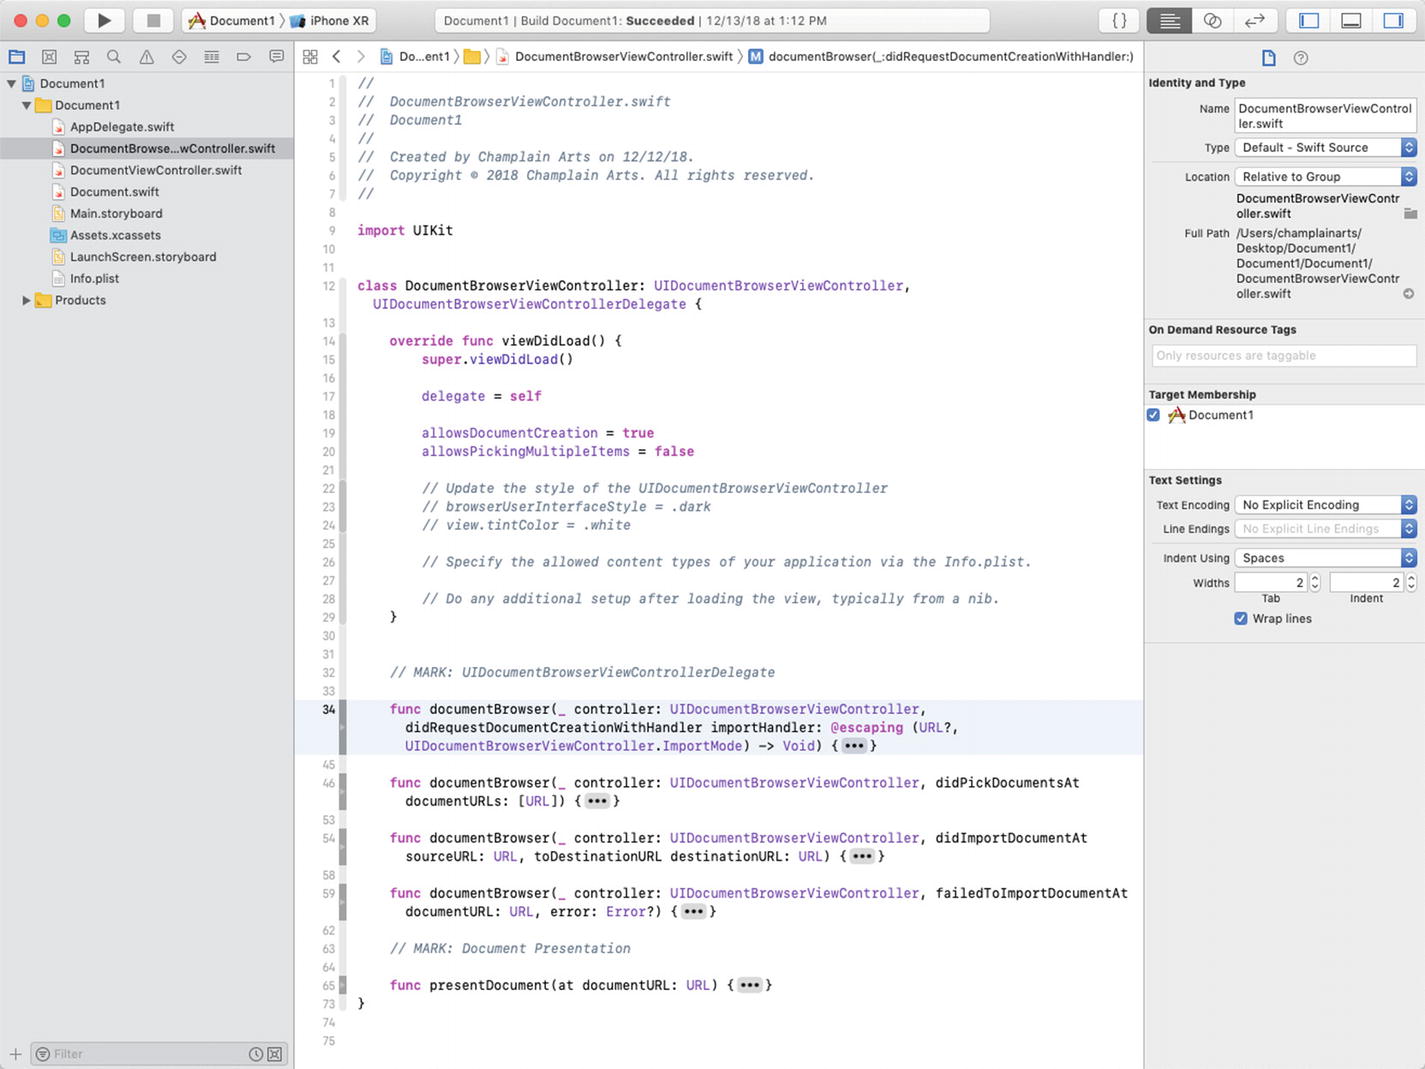
The first step in working with a UIDocumentBrowserViewController is to load it, as shown in Figure 7-9.
Figure 7-9.
Loading UIDocumentBrowserViewController
Note that your UIDocumentBrowserViewController subclass should also conform to the UIDocumentBrowserViewControllerDelegate protocol. You can see this in line 12 of Figure 7-9. For additional reference, here is the code:
delegate = self
You have choices for the visual style of the browser that you can set at this point so that they coordinate with your user interface. Other initializations can be handled in your info.plist.
Note that viewDidLoad lets you choose whether documents can be created with line 19:
allowsDocumentCreation = // true or false
After you have loaded the UIDocumentBrowserViewController, you typically implement four functions, which are shown as stubs in Figure 7-9, The functions are
(documentBrowser(_:didRequestDocumentCreationWithHandler:) for creating a new document
(documentBrowser(_:didPickDocumentAt:) for opening an existing document
(documentBrowser(_:didImportDocumentAt:toDestinationURL:) for, after opening a document, presenting it with its content
(documentBrowser(_:failedToImportDocumentAt:error) to handle an error
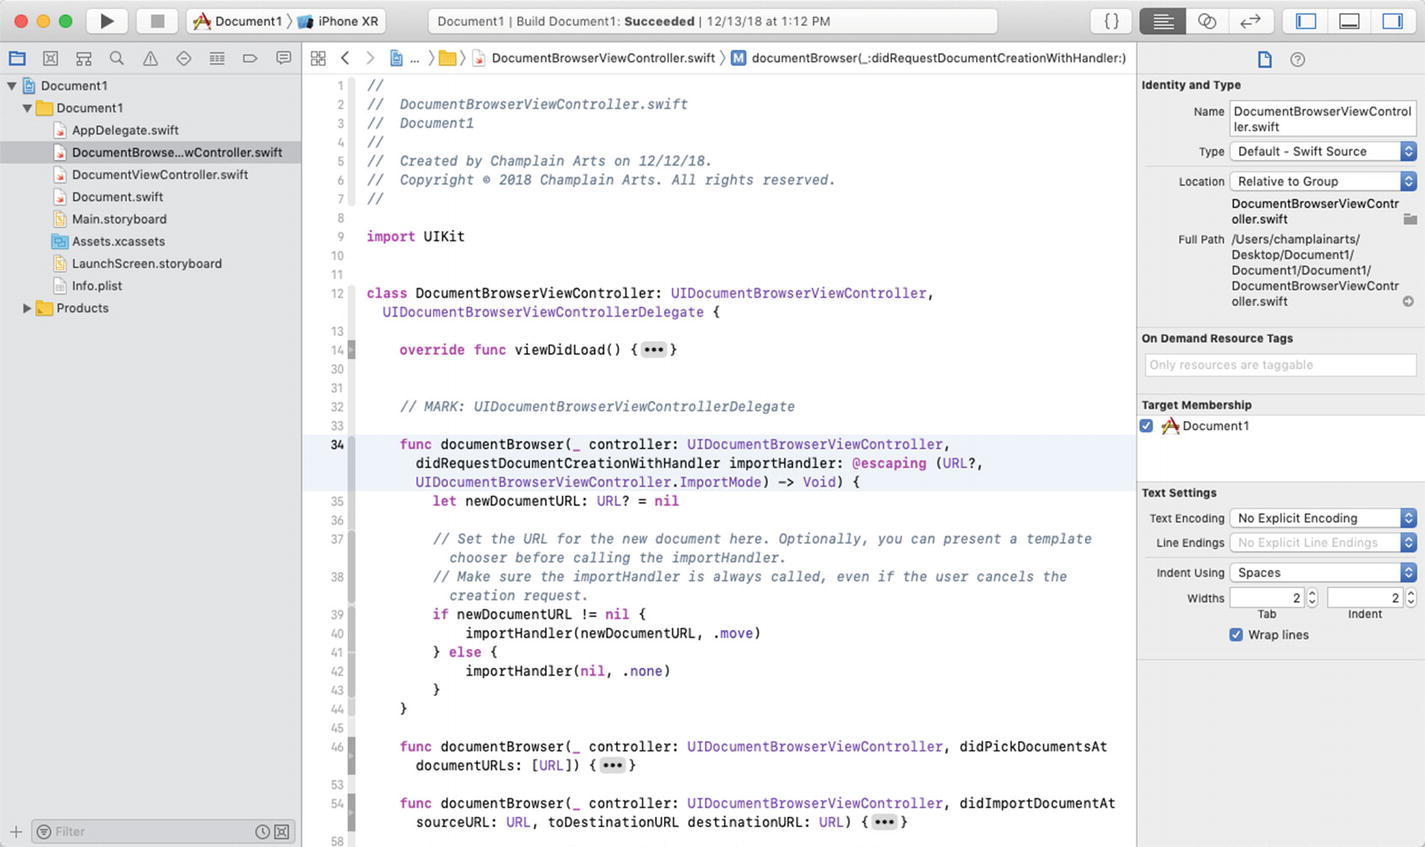
Creating a Document
You can use the template to create a new document. As the documentation indicates, you can allow users to choose which of several basic documents you will use as a template. See Figure 7-10.
Figure 7-10.
Creating a document
In many older design patterns, you would choose to create an empty document and then possibly modify it with data. The design pattern that is most often used in iOS is not to create a document but instead to copy an existing template document from your bundle and put the copy in the appropriate place for your app. This is a different work flow, but it becomes more efficient as you create and modify your app over time.
Listing 7-3 shows the code to let users choose a template from a list. The key line of code is
let newDocumentURL = Bundle.main.url(forResource: "Template",
This takes a file called Template with your document extension from your bundle and copies it to a new location. If you don’t need to let users choose from among several templates, just use this code without the alert that lets people choose.
let title = NSLocalizedString("Choose File Template", comment: "")
let cancelButtonTitle = NSLocalizedString("Cancel", comment: "")
let defaultButtonTitle = NSLocalizedString("Basic (Default) ",
comment: "Default")
let generalButtonTitle = NSLocalizedString("Demo)", comment: "")
let alertController = UIAlertController(title: title, message: message, preferredStyle: .alert)
let newDocumentURL = Bundle.main.url(forResource: "Template",
Figure 7-11 shows the code for opening an existing document.
Figure 7-11.
Opening an existing document
The key line of code here lets you select from several existing files; you attempt to open the first in the list as specified here:
guard let sourceURL = documentURLs.first else { return }
As you can see in Figure 7-9, you can specify if multiple files can be selected with this line of code in viewDidLoad for DocumentBrowserViewController:
allowsPicking Multiple Items = // true or false
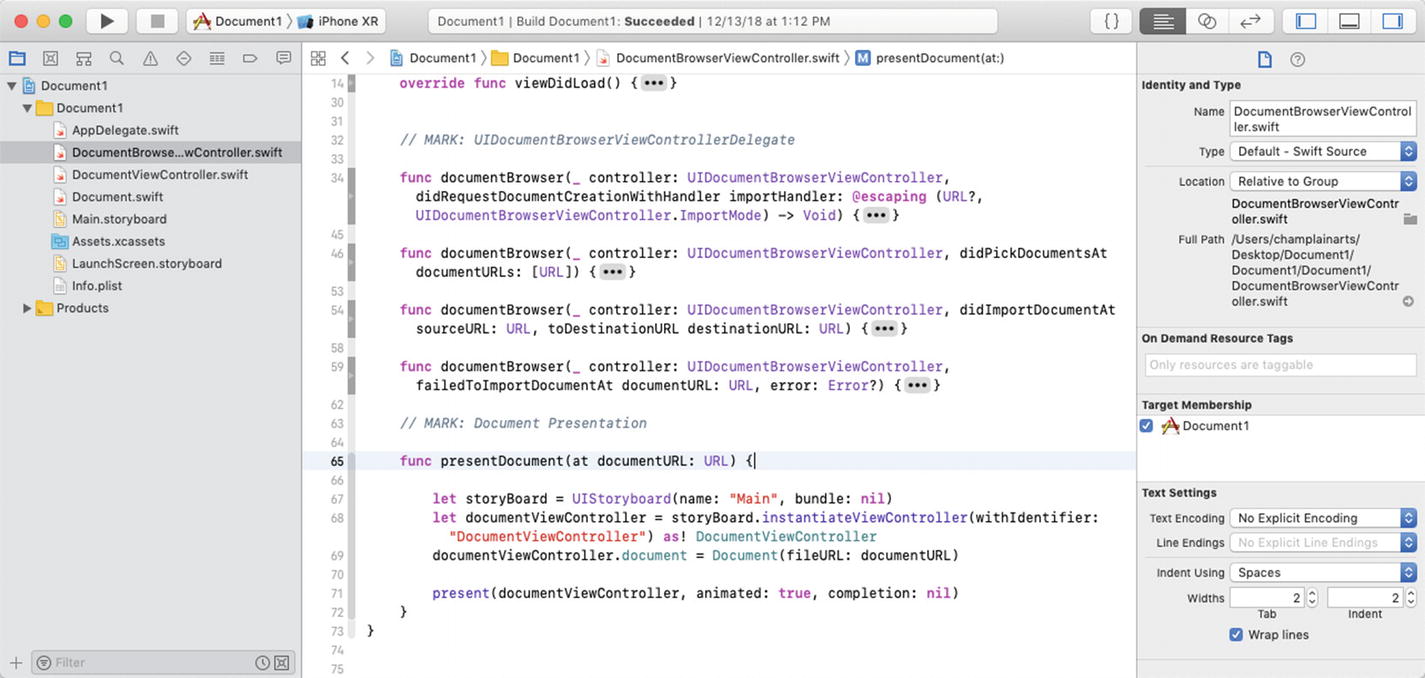
Once you have picked a document, you ask the DocumentBrowserViewController to present it, as shown in Figure 7-12.
Note that this code brings together a document view controller, a storyboard, and a document. All of these components must match (this is a common cause of debugging issues).
The last part of handling document browser view controllers is to make certain that you handle errors properly; see Figure 7-14.
Figure 7-14.
Handling errors properly
Summary
This chapter shows the processes involved in opening or creating a document. The most important take-away is that instead of creating documents from scratch, the best practice is to put a template document into your bundle so that opening and creating a document can both use the same basic code.