
Building local containers is a nice thing to do, but what about its wide distribution? We can use the Docker Hub service to store and distribute our containers (or its alternative Quay.io); however, uploading each and every container and version manually will soon be a problem. Consider you need to rebuild dozens of containers in an emergency, because of the existence of another OpenSSL security bug; nobody would want to be the one to upload them one by one, especially with the bad uplink at work. And as we're working with our Docker code using branches and tags, it will be awesome to see the same behavior reflected automatically on the remote Docker registry. This includes two of the Docker Hub (or Quay.io) features: automatically build Docker images upon changes and serve them to the world. We'll do exactly this in this section: create an automated build and distribution pipeline from our code to GitHub to the Docker Hub.
To step through this recipe, you will need:
- A free GitHub account
- A free Docker Hub account
- A Docker project
Our objective is to get a fully working Docker build pipeline. To achieve this, we'll use two free, popular services: GitHub and the Docker Hub. Let's start with the code from the previous section that helped us build an NGINX container; we can alternatively use any other repository on GitHub containing at least a buildable Dockerfile. The code needs to actually be on GitHub not just versioned using Git locally. The repository should look like this:

This repository is ready to communicate with other build services.
The Docker Hub is one of the commercial services from the company that created Docker. It's both a public Docker registry service (with private or public containers, depending on your subscription) and a Docker image build service that can automatically create new images when changes occur in the code. Go to https://hub.docker.com and log in or create an account if you don't have any.
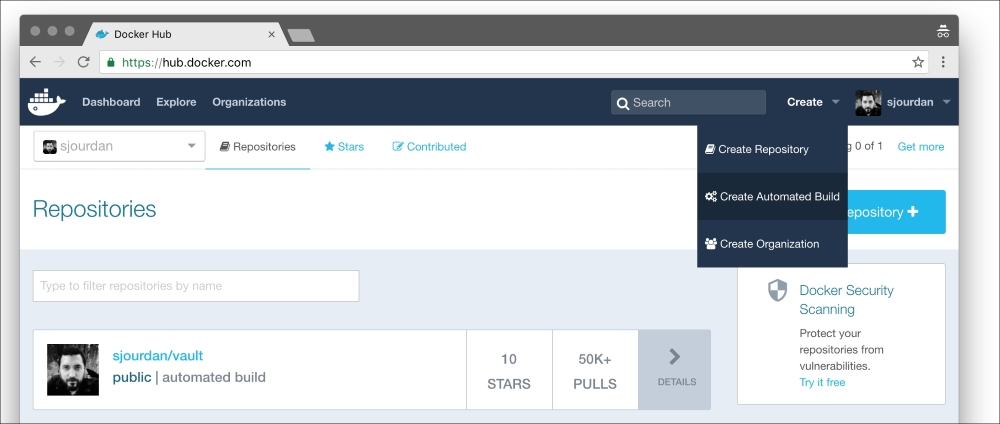
Click on Create Automated Build in the Create menu:
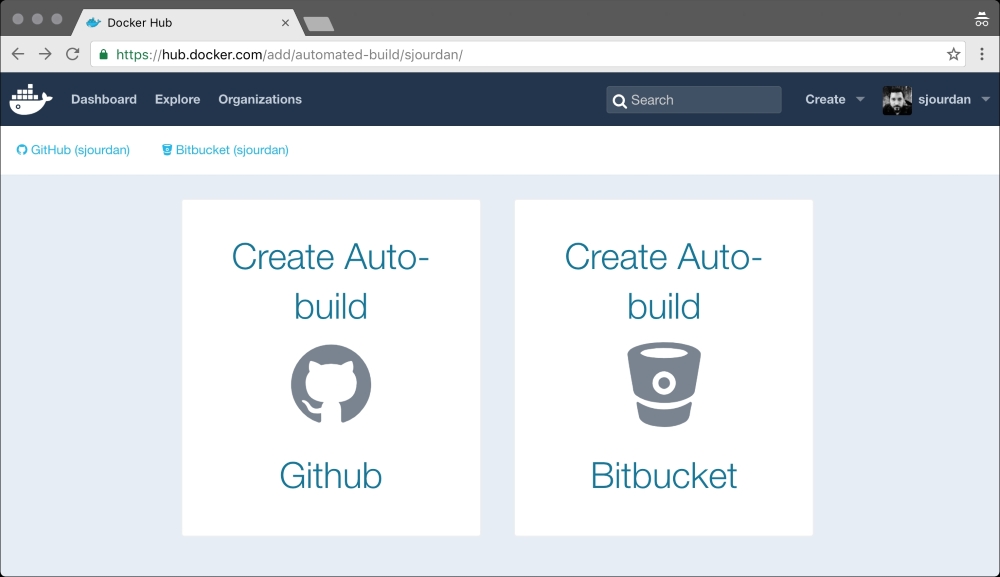
Choose the provider where the infrastructure code is hosted; in our case, it's GitHub:
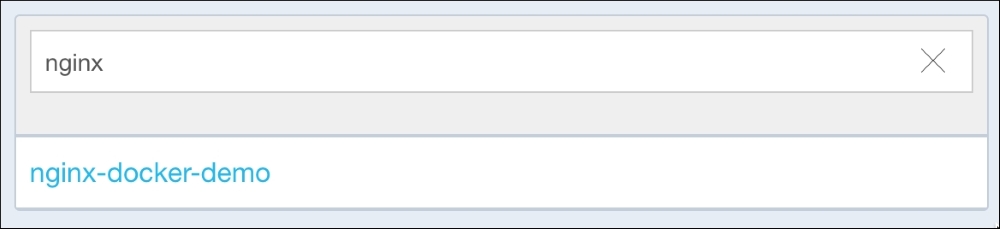
When the synchronization is done, choose the GitHub repository:
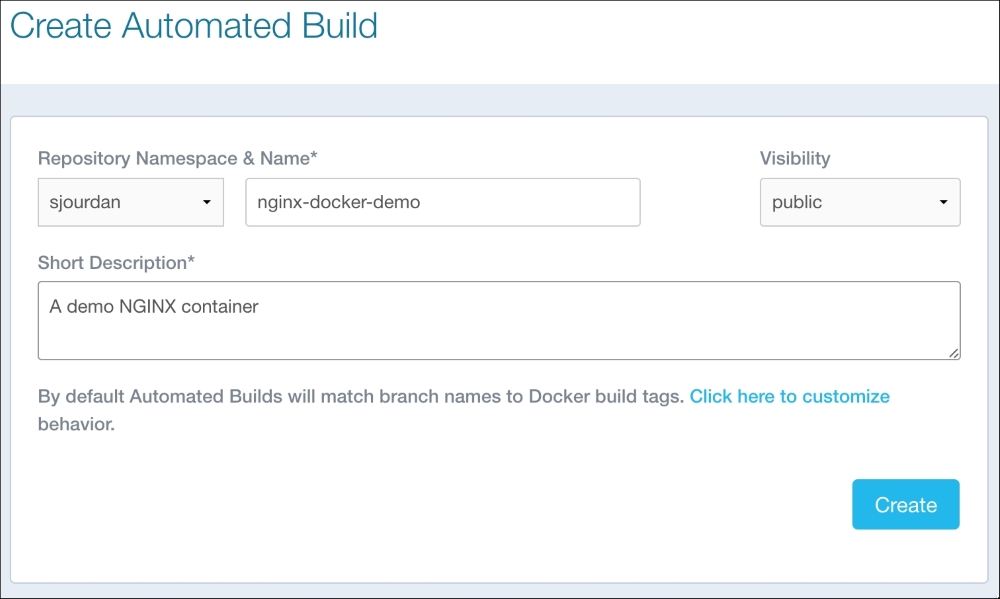
Finally, decide on a name for the image (it doesn't have to be the name of the GitHub repository) and the namespace. The namespace could either be your username or an organization if you have one. Write a short description and choose the visibility of the image: private stuff should remain private, while public can stay public. Let's be careful about what we ship:
Navigate to Build Settings of our Docker Hub's project to trigger an initial build:
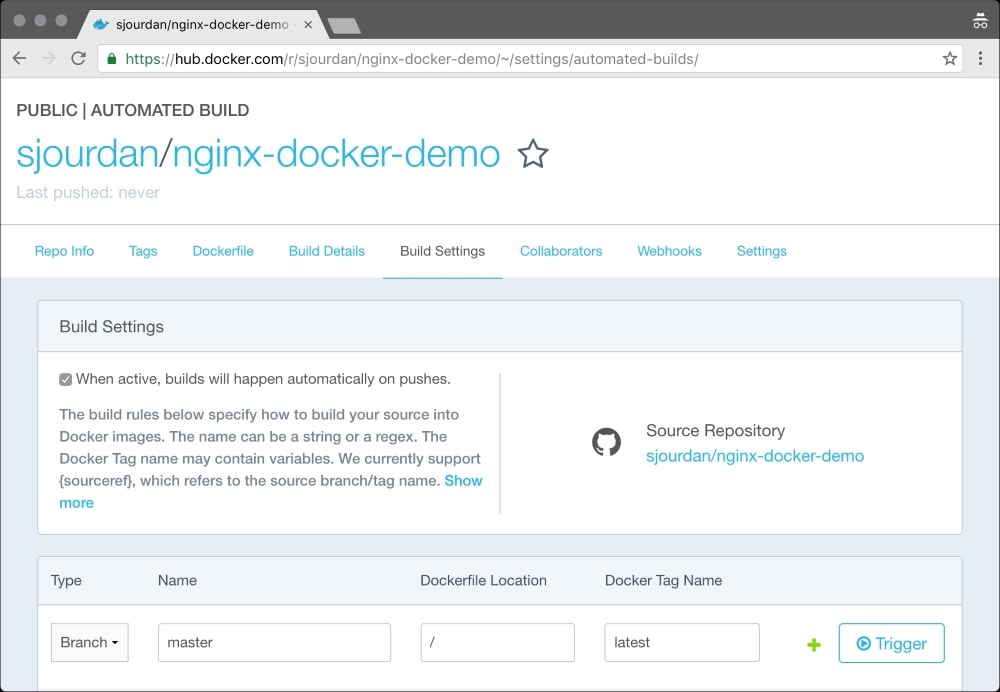
Clicking on the Trigger button will create a build. This is done by having master as the Branch type of our repository; tag the build with the latest tag. If, for some reason, the Dockerfile of our project wasn't at the root, we could specify it here. This build also allows us to manage different Dockerfile for different purposes, such as building the development and production containers differently, among other options.
Once the build is complete (should happen in minutes), navigating to the Tags tab will show the available tags (latest is the only one we have now) and the size of the image:

The Dockerfile tab shows the content of the Dockerfile from which the image has been built, while the Build Details tab will list all the builds and their details, including the build output. This is very useful for debugging when things go wrong.
Now let's make a modification to the Dockerfile, for example, adding a label for the image's name and version:
LABEL name="demo-nginx"
LABEL version=1.0
Commit and push this change to GitHub:
$ git add Dockerfile
$ git commit -m "added some missing labels"
[master f20017b] added some missing labels
 1 file changed, 2 insertions(+)
$ git push
What's happening on the Docker Hub? It automatically starts building a new image as soon as it becomes aware of the change on GitHub:

A few seconds later, our newest build is available for everyone to use:
$ docker pull sjourdan/nginx-docker-demo
As we're happy with this release, we'd like it to be available as a 1.0 tag on the Docker Hub. To do this, we'll need to complete two actions:
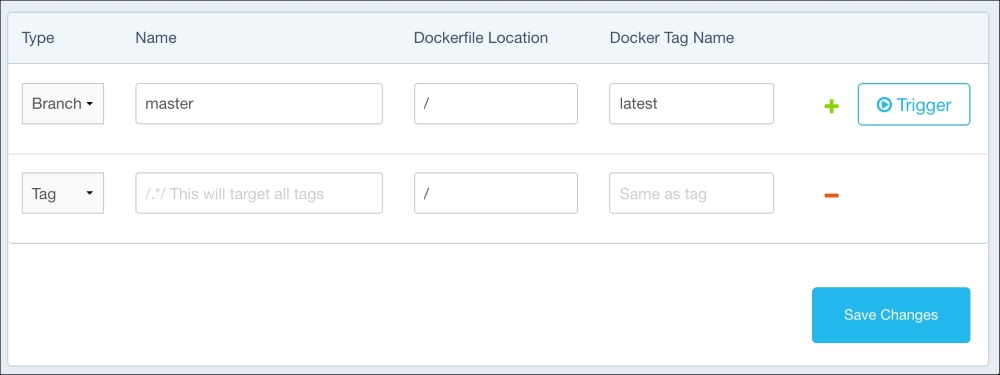
- Configure the Docker Hub to build and tag according to Git tags and not just branches
- Tag and push our release on Git
For the Docker Hub to build images with the same tags than the ones we set on Git, let's add a new type called Tag in the Build Settings tab. This will now make the Docker Hub follow the tags we set on Git. It will also build any other tag you may create in the future:
Let's tag our code as 1.0 on Git so we can refer to it later:
$ git tag 1.0
$ git push --tags
Total 0 (delta 0), reused 0 (delta 0)
To https://github.com/sjourdan/nginx-docker-demo.git
 * [new tag]         1.0 -> 1.0
This just triggered a new build on the Docker Hub, using the tag 1.0, as we asked to match:

Everyone can now refer to this stable build and use it without fearing a breaking change from the master branch; this branch will always be built with the latest tag:
$ docker pull sjourdan/nginx-docker-demo:1.0
Even better, from now on, our future Docker projects that need both this container and the stability can simply start with the following line on the Dockerfile:
FROM sjourdan/nginx-docker-demo:1.0
We now have a nice initial workflow for building master and tagged, stable releases of our containers.