We will learn various ways to post on social media platforms, using additional features and scheduling of tweets.
- Tweet/post on various social media profiles.
- Use location, privacy options, and link preview for Facebook.
This recipe will equip you for using social network selection and Compose message... options.
At the top of your HootSuite dashboard, you can see the ribbon as shown in the preceding screenshot that is used for composing a message, attaching files, selecting privacy settings, and many other options, which are very useful for marketers while posting on social networks. If you click anywhere on the blank area of this ribbon, it drops down and displays options, which we'll discuss now.
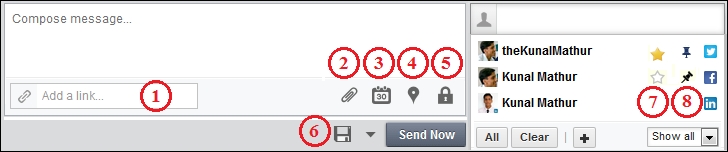
Let's learn about each numbered icon from the preceding screenshot:
- Using the Add a link... field, you can share any link from the web and post it through your social profiles. HootSuite allows you to shrink the URL using its own URL shorteners: ow.ly, owl.li, ht.ly, and htl.li ( the latter two commonly pronounced as Hoot-ly). You can choose one of these by clicking on the small wheel icon just to the left of the Shrink button, as shown in the following screenshot:
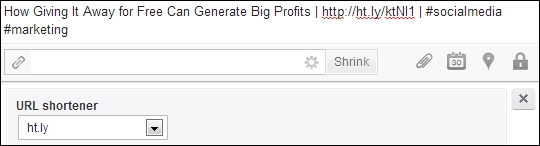
Use ht.ly when you want to use HootSuite's Social Bar at the top of your browser page, and use ow.ly when you want your links to appear without their Social Bar.

Anything posted via HootSuite using ht.ly will have a Social Bar, as shown in the previous screenshot, that lets you forward posts, articles, and so on via Twitter, Facebook, Digg, and several other options.
- Using the Attach image or file icon, you can share any video, audio, or document saved on your system from your social profiles. When you click on this icon, it further drops down, allowing you to either drop files directly from your desktop or by using the Select files to upload button to browse the desired file from your computer.
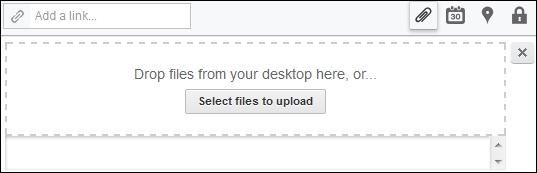
Once the file gets uploaded, it automatically creates a shortened URL of the image or file and you can add a caption or title of the file before actually posting it on your social profiles. HootSuite also allows you to hide a URL while posting it on Facebook or Google+ profiles.
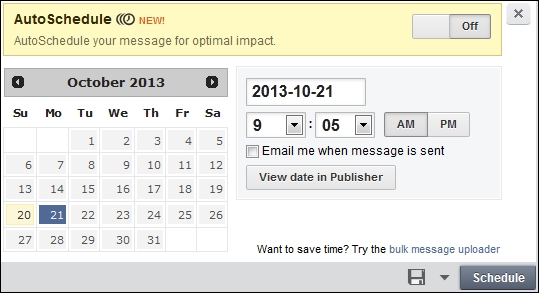
- After composing your message and selecting the desired social media profile, HootSuite allows you to schedule, autoschedule, or post the message right away on your social profiles. This is one of the most important and helpful tools for any marketer, as they can time their message to go out at a specified time and don't have to be present in front of their system at all times.
By clicking on the Scheduling icon, you can open a drop-down window wherein you can select the desired date and time for your message to be posted and then click on the Schedule button. In case you are not sure about the time zone that your HootSuite dashboard is following, then go to Settings | Accounts | Time Zone to identify and/or edit it.
All scheduled messages can be seen on a single page by going to Publisher | Scheduled as shown in the following screenshot. You can filter your scheduled messages by list, day, week, and month or by social media profile. Every message can be edited or deleted from this screen in addition to changing its time of publishing or social profiles. At the bottom-left corner of the screen, you can see the current time and time zone being followed by HootSuite.
You can also export your scheduled messages in CSV or Google CSV format.

If you are unaware of the optimal time of posting a message on your social profiles, you can also autoschedule your posts. After writing a message, select a desired social profile and click on the Scheduling icon; you can toggle the AutoSchedule switch to On and then click on the AutoSchedule button. The autoscheduling feature determines the best time to share messages from your social profiles on the basis of RT, replies, favorites, and the clicks your tweets receive from your followers at certain hours. This feature programs itself to send your tweets at the best time. Though it is not possible to accurately identify the best time to tweet, the autoschedule feature is still a useful tool.
You can view all such messages from the same location as scheduled messages; however, autoscheduled messages have a clock icon before its time of posting.

These messages are similar to scheduled messages and can be edited, rescheduled, or deleted at any time. After rescheduling, the clock icon disappears as an indicator that it has been manually scheduled.
- Adding a location to your messages allows your followers and friends to see where you are while messaging. This feature requires permission to access your location.

This feature is useful for businesses who want to drive customers to their shops by posting locations with their messages.
- HootSuite allows you to use privacy options for Facebook, Google+, and LinkedIn. This option can be activated by clicking on the padlock icon, which further opens a drop-down panel. This panel will show you the privacy options as per the social media profiles selected by you.
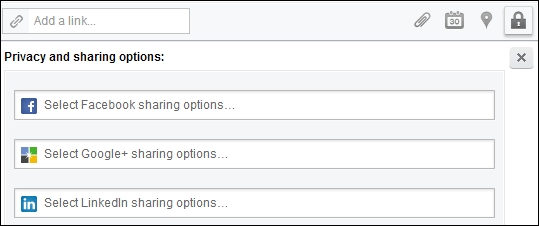
While posting on Facebook, you can either post with Public settings, that is, visible to all users, or make your post visible to a specific list created on Facebook. You can share updates with Connections only or Anyone when you are updating your LinkedIn status message. Similarly, HootSuite's privacy option for Google+ allows you to share your posts with public, specific circles, all of your circles, or extended circles. This helps you to viral your messages to the target group.
- If you have written a message but are not ready to send it right away, you can click on the floppy disk icon to save it as a draft. If you have selected a social profile on which you want to post this message, it will also get saved in drafts, allowing for faster sharing at a later point in time. You can save a message only if there is one social profile selected.
The arrowhead next to the floppy disk icon shows all your saved messages. You can click on any saved draft message and it will come up in the Compose message... box, wherein you can edit the content, select more social profiles, and post it by clicking the Send Now button. You can also delete any saved draft message by clicking the trash bin icon.
- The Pin feature allows you to set default social profiles that will always populate in the profile selector bar by clicking the Pin icon. It will change in shape when pinned and will start showing in the profile selection bar. You can also pin multiple social profiles that are linked with HootSuite. In case you do not want to share any message with a pinned profile, click on the profile selection bar before clicking on the Send Now button.
To unpin a social profile, you have to click on its icon to remove it from the profile selection bar. Then, click on the Pin icon to unpin it. All unpinned social profiles have to be manually selected before posting comments on them.
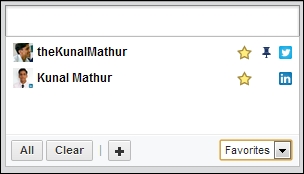
- If you are managing multiple social profiles, you can mark your favorite ones from the profile selection dropdown. This feature helps you to access the most commonly used profiles and saves you time in searching from the list. You can click on the star icon available to the left of the Pin icon. The blank star will convert to a yellow-colored star, which is an indication of the Favorite profile.
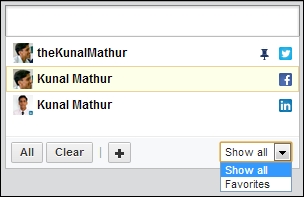
You can see only Favorites by clicking on the dropdown present at the bottom-right corner of the profile selection. Select Favorites in it. You can then click on the desired social profile to post comments on it.