This recipe will teach us how to create teams on HootSuite for managing outgoing messages and assigning tasks to them.
- Go to the user profile icon at the top-left corner.
- Create an organization and provide it with a name.
- Go to Manage and create a team by selecting Add Team.
- Add members to the team.
- Use the Assign to... option to directly assign tasks from the dashboard to the team members.
If the number of employees handling social media profiles of an organization increases, HootSuite helps in boosting team collaboration. You can create organizations, teams, and social networks or a selection of the three within HootSuite. The teams will have team members with different authority levels. It is important to understand a few terminologies and member roles before going forward.
- Default: This member can only view details about the team they are a part of and social networks they have access to within that organization.
- Admin: This member can invite and manage team members, all teams in the organization and social networks, in addition to all permissions of a default user.
- Super admin: This member has all admin permissions and can also manage other organization decisions such as vanity URLs, archives, enrolment in HootSuite University, and so on.
- Social Network: This member can belong to only one organization and when a team member is added to an organization, they automatically receive default permissions.
- Team: This is a group of users who work together on various social networks within an organization. A team can only be created by a marketer if he/she is a super admin, admin, or team admin. Each team member can be connected to multiple teams and social networks.
- Organization: This, in HootSuite, is the highest entity that has teams, team members, and social networks. Note that each HootSuite user can only create and become the super admin of their own organizations.
As per the structure of HootSuite organizations, if a team member is removed from one role in the organization, the member is not removed from the entire organization. If a team member belongs to a team and a social network and is only removed from the team, he can still access the network, depending on their permission level for the latter. Also, you only add premium members to the teams.
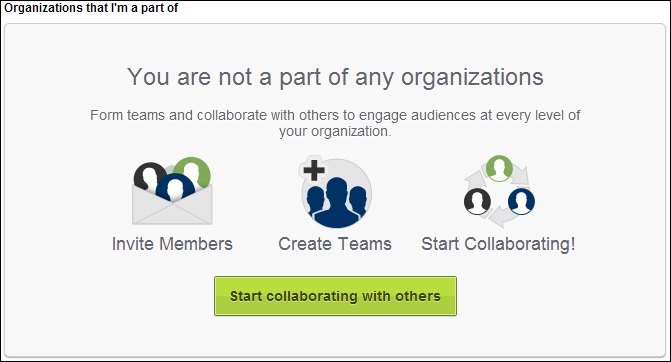
To create a new organization, click on the user profile icon from the top-left corner and then click on the Start Collaborating with others button.
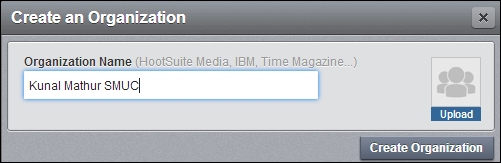
This will open a pop-up box where you can provide a name to your organization and upload an image. Click on the Create Organization button and you can check your organization name, member role and the number of premium seats used by the user.
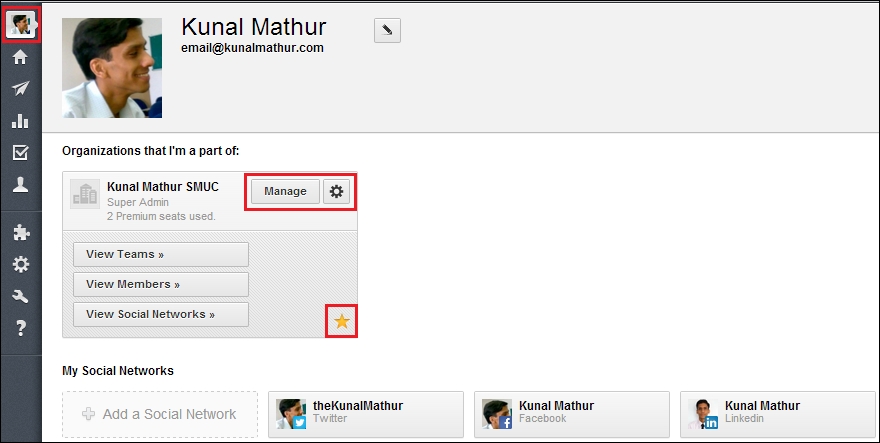
To overview the organizational setup, click on the user profile icon at the top-left corner of the dashboard and then click on Manage. While on this page, note the highlighted star; it depicts the paying member of the organization. An example of this setup can be seen in the following screenshot:
You will have to create a team by clicking on Add Team on the next page and then filling the pop-up box with the team name. You can also upload a team photo, however, it is not mandatory. Click to select one or more members by clicking on Invite Members, but note that only members who have been invited to your organization will populate in the list. After inviting members, click on Add Social Network to add a social network to this team; however, only those social networks that have been added to your organization will populate in the list.
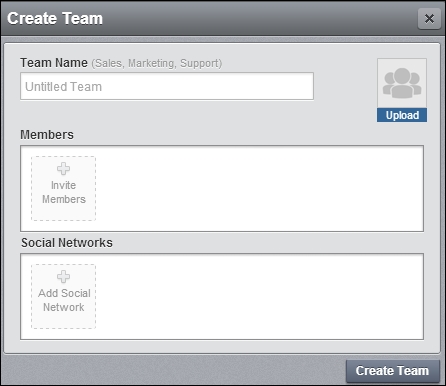
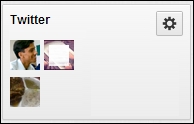
Clicking on Create Team will create a team that can be viewed by clicking on the Manage button. The first row will have the team members for that specified team and the bottom row will have the social network.
You can click on the gear icon to view team details, edit settings, or manage permissions of the team members. Once the team has been created and team members are assigned to social networks, marketers can now allocate posts for replies or follow-ups.
Click on the house icon from the left ribbon to go back to the streams.
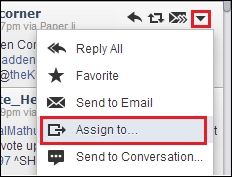
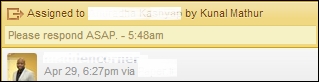
Now, when you find a message that needs to be assigned, click on the arrowhead and select Assign to.... This will open a pop-up box wherein you can select a team and then select the team member. You can also write an optional comment for the member who will reply as the lead.
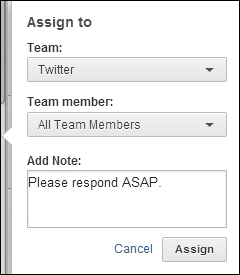
These notes can be seen by everyone in that team. Once the Assign button has been clicked, the tweet is highlighted and it starts showing the name of the contact to whom the lead has been assigned. It will also show the comment and time at which the lead was assigned to the team member.