


Service Assistant Tool
The Service Assistant (SA) Tool is used by IBM Support personnel to perform service functions as required on a specific IBM FlashSystem V9000 control node or enclosure canister as necessary. This chapter guides you through the various uses of Service Assistant Tool (if IBM Support guides you to use the tool) for IBM FlashSystem V9000.
Service Assistant Tool is used for troubleshooting or when an IBM Support engineer directs you to use it.
This chapter includes the following topics:
10.1 Accessing Service Assistant Tool
Use a web browser to access Service Assistant Tool. An example of getting access is to point your browser to the cluster management IP address and add the text /service to the end of the address, as in this example:
https://192.168.70.121/service
Each of the node’s service IP addresses can also be reached. Various options are available for accessing the Service Assistant (SA) Tool. The following example shows which IP addresses are configured and how they are accessed:
•Default Service IP address for Node 1 (configuration node):
192.168.70.121
Opens SA Tool for Node 1:
– https://192.168.70.121/service
– https://192.168.70.121
•Default Service IP address for Node 2:
192.168.70.122
Opens SA Tool for Node 2:
– https://192.168.70.122/service/
– https://192.168.70.122
•Example cluster IP address:
192.168.70.123
– Opens SA Tool for the configuration node:
https://192.168.70.123
– Opens the cluster management GUI:
https://192.168.70.123
|
Node names: Nodes are named Node 1 (as determined by the first AC2 node that was used to build the initial cluster) and Node 2 (the second AC2 that was added to the cluster). Extra building blocks can add more members to the configuration and more access points are possible.
|
10.2 Log in to Service Assistant Tool
The login window of FlashSystem V9000 Service Assistant Tool (Figure 10-1) allows only the superuser to log in; therefore, the user name cannot be changed. Enter the system’s superuser password to continue.
|
Attention: Incorrect use of the Service Assistant Tool (SA) can cause unscheduled downtime or even data loss. Use SA only when IBM Support asks you to use it.
|
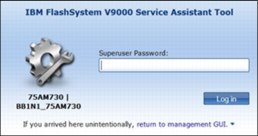
Figure 10-1 Service Assistant Tool login
10.3 Home page
After you type the password for the superuser, the Home page of the IBM FlashSystem V9000 Service Assistant Tool Home page opens (Figure 10-2 on page 402).
Figure 10-3 on page 402 and Figure 10-4 on page 403 shows the Service Assistant Tool Home page for the fully configured, scalable building block system.
The Home page shows all the members of the IBM FlashSystem V9000 system, including the expansion enclosures. Any one of these members can be selected for running specific tasks to perform service functions. Additionally, various options exist for examining installed hardware, identifying members, checking revision levels, performing maintenance functions, and for placing a selected member into the service state.
|
Note: On the fully configured scalable building block system, the node details of the member selected are shown further down the page, and are accessible by the scroll bars on the right side of the window.
|
.
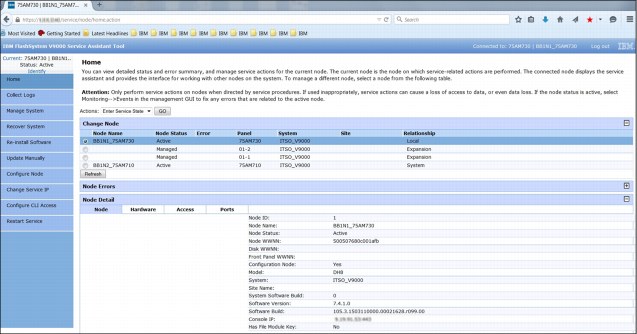
Figure 10-2 Home page - Single Building Block System

Figure 10-3 Home page - Fully Configured Scalable Building Block System (1 of 2)
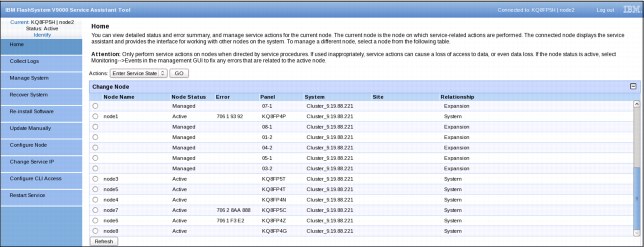
Figure 10-4 Home page - Fully Configured Scalable Building Block System (2 of 2)
10.4 Collect Logs page
The Collect Logs page (Figure 10-5) enables defined logs of the selected member to be collected for transfer to support for detailed analysis of a support request or debug of a fault. The support personnel inform you what level or which of the listed files to collect and how to send them to support for analysis. This page shows the files that can be selected for the selected member (in this example, a control node).
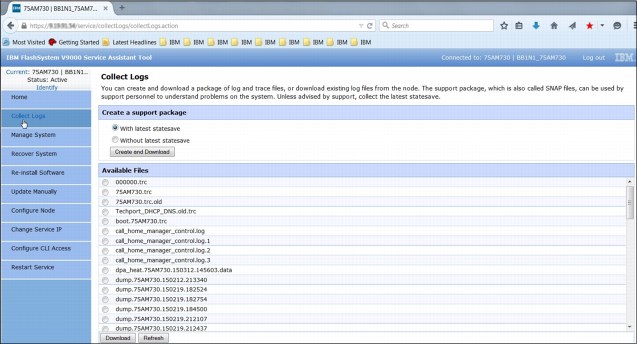
Figure 10-5 Collect Logs page
10.5 Manage System page
The Manage System page (Figure 10-6) shows the details of the clustered system that the members belong to.
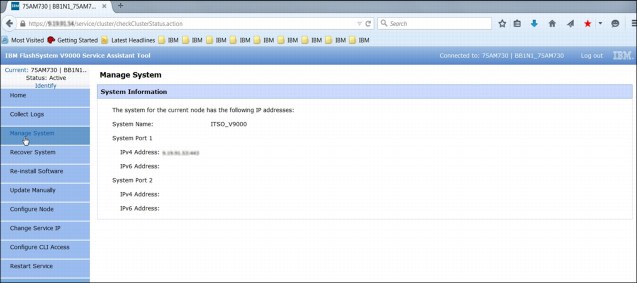
Figure 10-6 Manage System page
10.6 Recover System page
The Recover System page (Figure 10-7) can be used to perform emergency recovery of a clustered system that for technical reasons has its control members all in the Service state at the same time. This procedure is commonly known as the T3 Recovery. In this situation, there is no configuration node to manage the clustered system.
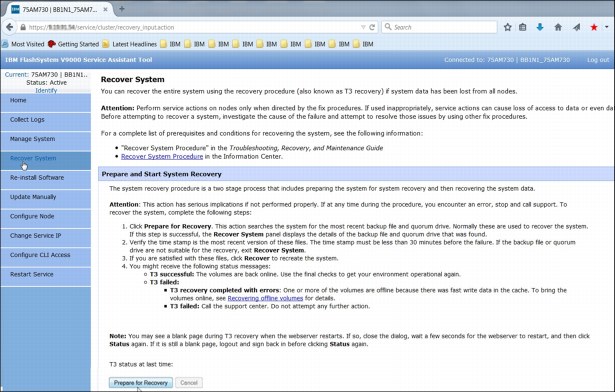
Figure 10-7 Recover System page
|
Important: Use extreme care when with this function; we suggest not attempting to run it without support guidance.
|
10.7 Reinstall Software page
The Re-install Software page (Figure 10-8) enables the firmware release that is currently loaded on the system to be reinstalled on a specific member without reloading to all members of the cluster as might be the case with update software on the Cluster Management GUI.
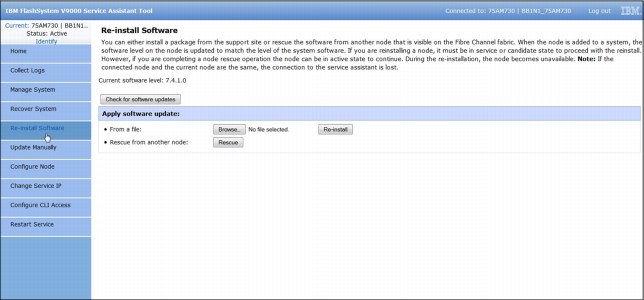
Figure 10-8 Re-install Software page
10.8 Update Manually page
From the Update Manually page (Figure 10-9), the system can be updated in a step-by-step process to ensure that each member is properly updated as needed when a normal update cannot be performed or fails for some reason.
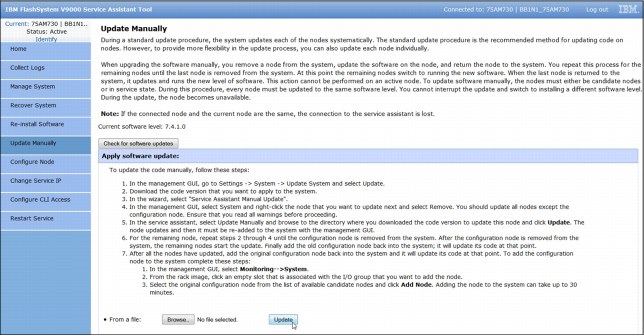
Figure 10-9 Update Manually page
|
Note: Using this feature should be guided by support personnel to ensure that all steps are properly completed.
|
10.9 Configure Node page
With the Configure Node page (Figure 10-10), the member nodes configuration settings can be changed as necessary to enable it to work in a specific environment.
|
Attention: These settings should not be modified without direction from support personnel, because changes can drastically affect the system’s functions and also risk data access and integrity.
|
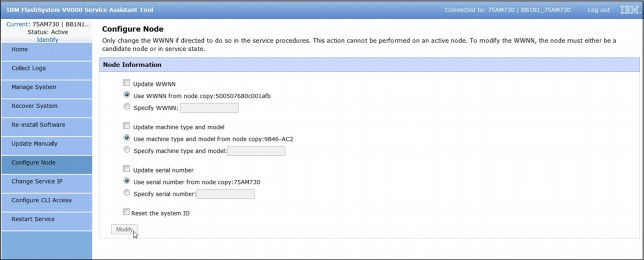
Figure 10-10 Configure Node page
Remember, make changes to this page only under the direction of IBM support personnel.
10.10 Change Service IP page
With the Change Service IP page (Figure 10-11), the selected AC2 node or AE2 canister can have its IP address changed as necessary to meet the IP environment needs so that IBM support can provide the necessary service.

Figure 10-11 Change Service IP page
10.11 Configure CLI Access page
The Configure CLI Access page (Figure 10-12) is used to select an SSH key file for an AC2 node that is in the Service state or is in candidate mode and does not have a valid SSH key for superuser access to be granted. You can select an SSH key file to enable CLI access.

Figure 10-12 Configure CLI Access page
10.12 Restart Service page
Sometimes, an unexpected interrupt can result in a service function being halted or exiting for no apparent reason. If this happens, use the Restart Service page (Figure 10-13) to restart the more commonly used service daemons and programs. IBM Support might direct you to use this page if necessary.

Figure 10-13 Restart Service page
..................Content has been hidden....................
You can't read the all page of ebook, please click here login for view all page.