
Chapter 10
Introduction to Java Applets
Java was born in 1995, shortly after the Internet became available to the public. The Netscape web browser enabled regular people to go online and download content from remote servers. This content was mainly some formatted text mixed with static images. But the Java programming language provided a way to incorporate downloadable applications into the web pages!
A programmer needed to write a Java application called an applet in a special way using GUI classes from the java.awt package (Swing was not invented yet). Applets were deployed on the web servers along with the HTML files that included references to the applets. Web browsers understand HTML, the markup that consists of special tags placed in text files so web browsers can properly format and lay out web pages. HTML has a special tag, <applet>, that tells the browser where to find and how to size and align a Java applet.
You can download a Java applet to your computer from the Internet as part of a web page, and web browsers use the JVM plug-in to run applets. The version of JVM included with a web browser is very important, because if you’re using, say, Java Swing classes, but the user’s web browser has a really old JVM, the browser won’t even know how to run the code that your applet uses.
In this lesson you’ll learn the basics of applet creation and the applet’s life cycle. In Lesson 11 you’ll build a tic-tac-toe game and will deploy it on the web server so other people can enjoy it.
An Unofficial History of Java Applets
Fifteen years ago Netscape’s market share was over 90 percent, but the situation changed when Microsoft introduced Internet Explorer. Back in 1998 there was an infamous lawsuit between Microsoft and Sun Microsystems — the former started quietly introducing its own class library to Java, breaking the write-once-run-anywhere principle of Sun. Sun won that lawsuit. But as the saying goes, it won the battle but lost the war.
Microsoft stopped including the current version of JVM with Internet Explorer. I’m not blaming them for this, but it hurt applets’ popularity — the end user couldn’t just open a web page to see an applet that required, say, JVM version 1.3. The user would need to first download the proper version of JVM, and then only the applets that were written for JVM 1.3 would work. The process of downloading the right JVM plug-in was a multi-step process.
Sun Microsystems showed a lack of competence on the client side, specifically in the area of integration of JVM into web browsers, and Adobe Flash Player, which is also a virtual machine) dominates in this area now.
High penetration of the required run-time environment and the ability to upgrade it easily are crucial for any web-based technology. Adobe Flash Player shines in this area. Flash Player is a virtual machine with a small memory footprint (1.5 Mb), and its installation takes less than 20 seconds after one button click. For years the JVM plug-in was about 16 Mb, and installation was complicated for a non-programmer — it’s a lot smaller now.
This situation changed after the release of Java 6 update 10, which includes the so-called next-generation Java plug-in. Now applets don’t run in the JVM packages with the web browser, but in a separate JVM launched by the Java plug-in. The applet still appears in the web browser’s window, but now it doesn’t depend on the willingness of the browser vendor to include the latest plug-in. You can read more about this next-generation Java plug-in at https://jdk6.dev.java.net/plugin2.
To control the settings of this plug-in in Microsoft Windows, use the Java Control Panel — select Start⇒ Control Panel⇒ Java. Under the Advanced tab find the item Java Plug-in where Enable the Next-generation Java Plug-in should be selected by default.
If you run Intel-based MAC OS X 10.6 or above, find out what Java plug-ins are installed by typing about:plugins into the address bar of your browser. To use the next-generation plug-in on Apple computers follow the instructions at http://blogs.sun.com/thejavatutorials/entry/enabling_the_next_generation_java.
The other major change introduced in the next-generation Java plug-in is the ability to launch Java applets directly from JNLP (Java Network Launch Protocol) files, which in the previous releases were used only in Java Web Start technology, which allowed local deployment of the applications over the network. As of Java 10.6.10 you can use the JNLP meta-descriptors to launch applets too. JNLP support is described in detail at www.oracle.com/technetwork/java/javase/index-142562.html.
What’s the next step in applets’ evolution? You’ll be creating a UI for web-based applications with a relatively new language called JavaFX, which will be demonstrated in Lesson 37.
People browse the Internet without knowing if web pages contain Java applets or not, but they want to be sure that the files located in their computers will not be harmed by some bad guys who have added a nasty applet to a page. Unsigned applets are the ones that haven’t gone through a special signing process to obtain a security certificate indicating that they come from a trusted source. Unsigned (aka untrusted) Java applets operate inside a so-called security sandbox and have the following main restrictions:
- They can’t access local files on your disk.
- They can connect only to the computer they were downloaded from.
- They can’t start any other programs located in your computer.
Applets can be signed by VeriSign or Thawte and operate outside the security sandbox and be unrestricted in their ability to access the user’s computer if the user accepts the applet’s security. A signed applet will run outside the security sandbox. If the user refuses to accept the certificate, the applet will run within the security sandbox as unsigned.
To run an applet you’ll need a Java class written in a special way, an HTML text file that contains the tag <applet> pointing to this class, and a web browser that supports Java. You can also test applets in Eclipse or using a special program called appletviewer. But before learning how to create applets, spend 15 minutes to get familiar with some HTML tags.
Imagine that you’ve already written and compiled the game applet class called TicTacToe. It has to be deployed on the web servers along with the HTML wrapper — the file that includes the proper references to TicTacToe.class. HTML stands for Hypertext Markup Language. It defines a set of tags placed in angle brackets that can be inserted in a text file with any plain text editor, such as Notepad, TextEdit, or the editor that comes with Eclipse (select File New File). In this section I’ll show you a bare minimum of HTML tags to get you going with applets, but you can find a complete HTML tutorial at www.w3schools.com/html/html_primary.asp.
Let’s start with creating the text file called TicTacToe.html. HTML files have names that end with .html or .htm. Inside they usually have two sections: header and body. HTML tags are placed inside angle brackets and most of them have the matching closing tags that start with a forward slash, for example <head> and </head>. The content of the very basic HTML file TicTacToe.html is shown in Listing 10-1.

Listing 10-1: The basic HTML file
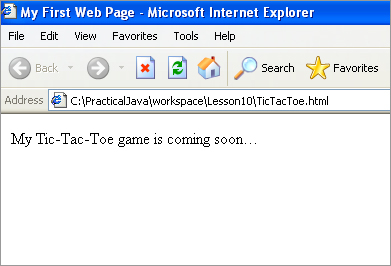
<html>
  <head>
   <title>My First Web Page</title>
  </head>
  <body>
     My Tic-Tac-Toe game is coming soon...
  </body>
</html>
You can place tags either in the same line, as we did with the tags <title> and </title>, or in separate lines. Open this file in your web browser using File Open. As shown in Figure 10-1, the title bar of the window will read “My First Web Page,” and inside the page you’ll see the words “My Tic-Tac-Toe game is coming soon…”
Earlier versions of the HTML standard included the tag <applet> to incorporate Java applets into an HTML page. But as of HTML 4.01 this tag has been deprecated and you should use the tag <object> for Internet Explorer or <embed> for other web browsers. But Oracle, the company behind Java, recommends using <applet> for web pages accessed through the Internet and <object> or <embed> for intranet-based websites. The main reason is that web browser vendors are infamous for being inconsistent in implementing HTML standards, and it’s safer to use the tried-and-true <applet> tag to give a predictable look and feel to the web pages that host Java applets. But an intranet is a more controlled environment. You can read about embedding applets with all of these tags at http://download.oracle.com/javase/6/docs/technotes/guides/plugin/developer_guide/using_tags.html, but in this tutorial I’ll stick to the <applet> tag.
The deployment options for applets have been extended as of the release of Java 6 update 10. To learn all the options for applet deployment in depth, refer to the Oracle document Java Rich Internet Applications Deployment Advice, available at http://download.oracle.com/javase/6/docs/technotes/guides/jweb/deployment_advice.html.
Let’s add the <applet> tag to the file TicTacToe.html, as shown in Listing 10-2. With some HTML tags you can specify additional attributes. The following are the main attributes of the <applet> tag:
- code: Contains the name of the applet Java class.
- width: Contains the width in pixels of the rectangular area on the screen that will be used by the applet.
- height: Contains the height of the area to be used by the applet.
- codebase: Specifies the root directory of your applet class relative to the location of the HTML file. For example, if the applet class is located in the sub-directory bin, specify "./bin" in the codebase attribute to avoid getting FileNotFoundException.
- archive: Use this attribute to specify the location of the jar file if your multi-class applet has been deployed as one archive file, which can be created with the help of the jar program located in the bin directory of your Java install.
The <applet> tag from Listing 10-2 means that a compiled version of the Java class TicTacToe is located in the same directory as TicTacToe.html, and it’ll occupy a screen area of 300 pixels by 250 pixels. Note that if an HTML tag doesn’t have nested tags, placing a forward slash in front of the closing angle bracket is a replacement for a closing </applet> tag.
But in general, the <applet> tag may have nested elements. In particular, if you need to pass parameters to an applet you can do it via the nested element <param>.
Listing 10-2: The basic HTML file
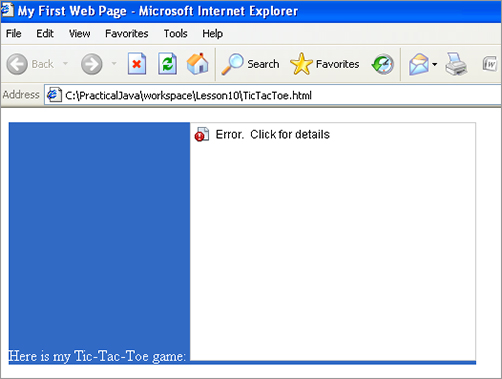
<html>
<body>
  Here is my Tic-Tac-Toe game:
  <applet code="TicTacToe.class" width=300 height=250 />
</body>
</html>
Now the screen looks different — instead of seeing the tic-tac-toe game you’ll get an error message, as in Figure 10-2. No wonder: The web browser could not find TicTacToe.class, so it just shows a rectangle of 300 pixels by 250 pixels. You’ll fix this error by creating the TicTacToe class a little later in this lesson.
Until the Swing library came into the picture, you could create Java applets only using UI components from the java.awt package. Even after Swing components were introduced, using them was somewhat problematic in applets downloadable over the Internet — what if the applet had to be run in an older browser that supported only Java 1.1 and didn’t know about Swing classes? But modern applets use the new plug-in and don’t depend on what JDK came with the web browser. In this book I’ll be writing my applets with Java Swing.
Swing applets have to be inherited from the class javax.swing.JApplet. For example
class TicTacToe extends javax.swing.JApplet {
}
Unlike Java applications, applets do not need a main() method because the web browser will download and run them as soon as it sees the <applet> tag in the web page. The Java plug-in will also notify the applet when some important life-cycle events happen — for example, when the applet is starting, repainting, and so on.
If your applet needs to react to these events, you should program one of the callback methods: init(), start(), paint(), stop(), and destroy(). The Java plug-in will call these methods in the following cases:
- init() is called when the applet is loaded by the Java plug-in. It’s called only once, playing a role similar to that of constructors in regular Java classes.
- start() is called right after init(). It is also called each time a user returns to the web page with the applet after visiting another page.
- paint() is called when the applet’s window needs to be displayed or refreshed after some activity on the screen, for example, when the applet is overlapping with some other window and the browser needs to repaint it. This method will get the Graphics object as an argument.
- stop() is called when the user leaves the web page containing the applet.
- destroy() is called when the browser destroys the applet. Write code in this method only if the applet uses some other resources — for example, if it holds a connection to the remote computer it was downloaded from.
Even though you do not have to program all these methods, each applet must have at least init() or paint(). For example, init() is the right place to get some external parameters that may be passed to the applet. Say that the HTML file has an <applet> tag that looks like this:
<applet>
      <param>name="backgroundColor" value="0xc0c0c0"</param>
</applet>
To get the value of the parameter backgroundColor just write one line in the init() method:
String backgroundColor = getParameter("backgroundColor");
Listing 10-3 shows the code of the applet that displays the words “Hello World.” This applet has only one method, paint(), that receives an instance of the Graphics object from the Java plug-in. The class java.awt.Graphics has several methods for painting. Our applet uses the method drawString() to draw the text “Hello World.”
Listing 10-3: Hello World applet
import javax.swing.JApplet;
import java.awt.Graphics;

public class HelloWorld extends JApplet {

      public void paint(Graphics g){
           g.drawString("Hello World", 50, 100);
      }
}
Create this class in Eclipse. Then run it as a Java Applet (Eclipse will use appletviewer to display it). The window appears as shown in Figure 10-3.
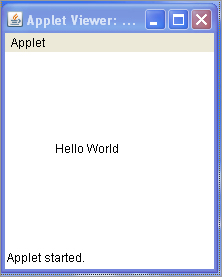
To test this applet in a web browser create the file Hello.html as you created the file in Listing 10-2. Start your web browser and open the file Hello.html using the browser’s File and Open menus. You’ll see the same output as in Figure 10-3.
Do you think that after this simple example you are ready to write a game program? You bet! You’ll do it in Lesson 11. For a more detailed tutorial on Java applets, please visit the following web page: http://download.oracle.com/javase/tutorial/deployment/applet/index.html.
Turn the calculator from Lessons 8 and 9 into an applet.
Lesson Requirements
You should have Java installed.
You can download the code and resources for this Try It from the book’s web page at www.wrox.com. You can find them in the Lesson10 folder in the download.
Step-by-Step
1. Create a new Eclipse project called Lesson10.
2. Take the Calculator class that you created in the Try It section of Lesson 8 and copy it into the project Lesson10. Give it an ancestor, JApplet.
3. Get rid of the main() method. Now the Calculator class will be instantiated for you by the Java plug-in inside the web browser.
4. Rename the Calculator’s constructor method into the applet’s init() method.
5. Do not control the size of the calculator by calling pack(). Now the size of your calculator is defined by the width and height attributes of the tag <applet>.
6. Do not instantiate JFrame.
7. Add the code to perform calculations that you completed at the end of Lesson 9.
8. Don’t try to control the life cycle of the calculator by processing events of the WindowListener, as was explained in Lesson 9. Now your window lives inside the web browser.
9. Create the file Calculator.html and open it in the web browser. You should see your calculator.
Please select Lesson 10 on the DVD with the print book, or watch online at www.wrox.com/go/fainjava to view the video that accompanies this lesson.