
Chapter 29
Developing Web Applications with JSF
In the previous lesson I mentioned that the JSP specification was created on top of servlets to simplify Web application development and as a step toward the separation of responsibilities between web designers and developers. I also said that you should minimize the use of Java code in a JSP page. But JSP doesn’t enforce this practice. JavaServer Faces (JSF) does, and using it is the best way of developing Java EE web applications with a thin client.
The current version, JSF 2.0, is based on the Facelets framework that was originally an open-source product. You’ll be creating JSF web pages in extensible HTML (.xhtml files), which means that the HTML has to be well-formed — every open tag should have a closing one, the values for the tags’ attributes must be placed in quotes, the elements tags must respect case-sensitivity, and the document must have a single root tag.
Like JSP, the JSF framework is tag-based. But JavaServer Faces has several important advantages over JSP:
- The JSF framework comes with a set of UI components, while JSP uses standard HTML components.
- JSF is event-driven.
- You can’t add Java to .xhtml files, which enforces clean code separation between Java and HTML.
- JSF offers easy navigation between web pages.
- JSF introduces configurable managed beans, which contain processing logic and navigation.
I’ll give you more details on each of these bullet points later in this lesson.
The JSF framework is a part of the presentation tier and it enforces the separation of presentation and processing logic. Reiterating the MVC paradigm, the library of JSF components is responsible for the UI, the servlet FacesServlet plays the role of a controller, and managed beans are the model. The processing logic can be placed in POJO classes, in EJB, or in third-party systems, as shown in Figure 29-1.
The managed beans can be linked to the UI JSF components so that when, for example, you fill out a form on a web page, the entered values are automatically assigned to the corresponding field in your Java bean. Sometimes beans that support UI components are called baking beans.
Without further ado, let’s start working on a two-page web application to enroll students into classes. The first page will enable users to enter student ID, name, and course, and the second page will confirm the enrollment. The UI will be supported by managed beans, which will serve as a data model, but the data won’t be saved (persisted) anywhere (you’ll learn about persistence in Lesson 33).
Managed JSF beans are similar to JavaBeans, introduced in Lesson 28, but the word managed means that they can be linked directly to JSF components. Besides storing data they may also contain information about page navigation. FacesServlet controls the managed beans.
Let’s start working on the student enrollment example by creating a managed bean called Student. But first create a new dynamic web project called Lesson29 in Eclipse IDE.
Then create the Java class Student in the folder com.practicaljava.Lesson29.beans and add the annotation @ManagedBean right above the class name. Eclipse will mark this line with a red x, complaining about the missing import statement. Right-click this x, select the option Quick Fix, and import this annotation class from the javax.faces.bean package. The annotation registers the class Student as a JSF resource. Add the @RequestScoped annotation to ensure that the container creates a new instance of this bean for each user’s request.
Declare three private variables: int studentId, String name, and long classId. Then select Source Generate Getter and Setters and the rest of the Student code will be auto-generated. It will look like Listing 29-1.

Listing 29-1: Managed bean Student
package com.practicaljava.lesson29.beans;

import java.io.Serializable;

import javax.faces.bean.ManagedBean;
import javax.faces.bean.RequestScoped;

@ManagedBean
@RequestScoped
public class Student implements Serializable{

      private long studentId;
      private String name;
       private int classId;

       public long getStudentId() {
            return studentId;
      }
      public void setStudentId(long studentId) {
            this.studentId = studentId;
      }
      public String getName() {
            return name;
      }
      public void setName(String name) {
            this.name = name;
      }
      public int getClassId() {
            return classId;
      }
      public void setClassId(int classId) {
            this.classId = classId;
      }
}
Configuration of the managed beans is done using annotations — no additional configuration files are required. But if you specify the file faces-config.xml in the WEB-INF directory, its setting will override the annotation values.
The content of the baking bean Student will have to be populated from the UI. With JSF you can either select the components that you want to put on each web page á la carte, or use a more structured and efficient approach called templating. I’ll explain the creation of JSF sites with templating.
Templating
The layout of most websites is similar: They have headers, footers, left and/or right sidebars, and content areas. This was taken into consideration by the designers of Facelets, who introduced templating. For example, you can define one template for a site that contains a header and a footer, and just change the views displayed in the content area based on the user’s actions. This is what templating is all about.
You start developing the website by creating an .xhtml file containing the main layout, and then add a number of views, or composition pages. Each of these composition pages will declare which template it has to use, define the required components for the content area, and either reuse the headers and footers from the template or override them. You’ll find the methodology of creating pages easy to understand when you create a sample template and composite page.
In Eclipse select File New XHTML page, and accept the default location, the WebContent directory. Enter StudentTemplate as the name of the file and click Next. Then select New Facelet Template in the pop-up window shown in Figure 29-2.

This will create a basic webpage template with three sections — header, content, and footer — as shown in Listing 29-2.
Listing 29-2: Facelet template StudentTemplate.xhtml
<!DOCTYPE html PUBLIC "-//W3C//DTD XHTML 1.0 Transitional//EN"
          "http://www.w3.org/TR/xhtml1/DTD/xhtml1-transitional.dtd">
<html xmlns="http://www.w3.org/1999/xhtml"
      xmlns:ui="http://java.sun.com/jsf/facelets">
<head>
  <title><ui:insert name="title">Default title</ui:insert></title>
</head>

<body>

<div id="header">
    <ui:insert name="header">
          Header area.  See comments below this line in the source.
          <!--  include your header file or uncomment the include below
                and create header.xhtml in this directory -->
          <!-- <ui:include src="header.xhtml"/> -->
    </ui:insert>
</div>

<div id="content">
  <ui:insert name="content">
          Content area.  See comments below this line in the source.
          <!--  include your content file or uncomment the include below
                 and create content.xhtml in this directory -->
<!-- <div> -->
          <!-- <ui:include src="content.xhtml"/> -->
          <!-- </div> -->
  </ui:insert>
</div>

<div id="footer">
  <ui:insert name="footer">
          Footer area.  See comments below this line in the source.
          <!--  include your header file or uncomment the include below and create footer.xhtml in this directory -->
      <!--<ui:include src="footer.xhtml"/>  -->
  </ui:insert>
</div>

</body>

</html>
The three sections enclosed in the HTML <div> tags suggest that the web pages that will be using this template might have a header, a content area, and the footer. If you don’t need this page layout just delete the appropriate <div>. If you need a sidebar create a <div> section with the ID sidebarleft or sidebarright. Notice the ui prefix inside the tags: It points at the namespace where all the Facelets components reside. The namespace concept (see xmlns in the code) comes from XML. You can use any prefix instead of ui, but it should uniquely identify the location of the components referred to by the prefix. Namespaces are defined in the top portion of the template in Listing 29-2. You can have more than one namespace defined in your JSF page. The h prefix is typically used for HTML JSF components, and f for the core ones:
xmlns:ui=http://java.sun.com/jsf/facelets
xmlns:h=http://java.sun.com/jsf/html
xmlns:f="http://java.sun.com/jsf/core"
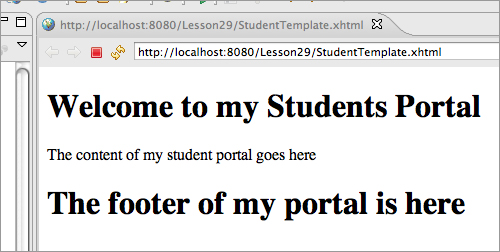
I’ll make a slight text edit to the code in order to have the header and the footer displayed in a large font — note the HTML tag <h1>:
<!DOCTYPE html PUBLIC "-//W3C//DTD XHTML 1.0 Transitional//EN"
          "http://www.w3.org/TR/xhtml1/DTD/xhtml1-transitional.dtd">
<html xmlns="http://www.w3.org/1999/xhtml"
      xmlns:ui="http://java.sun.com/jsf/facelets">
<head>
  <title><ui:insert name="title">Student Portal</ui:insert></title>
</head>

<body>

<div id="header">
    <ui:insert name="header">
          <h1>Welcome to my Students Portal</h1>
    </ui:insert>
</div>

<div id="content">
  <ui:insert name="content">
          The content of my student portal goes here  </ui:insert>
</div>

<div id="footer">
  <ui:insert name="footer">
          <h1>The footer of my portal is here</h1>
  </ui:insert>
</div>

</body>
</html>
You can run and test this template in Eclipse: Right-click StudentTemplate.xhtml and select Run as Run on Server. If the GlassFish server is not running, Eclipse will start it for you and deploy the Lesson29 web application. Figure 29-3 shows how the internal Eclipse web browser will show this page. You can also enter the URL http://localhost:8080/Lesson29/StudentTemplate.xhtml into a regular web browser — the output will be the same.

I want to keep this well-designed header and footer on each page of my student portal that has views with changing content in the middle. Let’s create a new file called EnrollStudent.xhtml, but this time select New Facelets Composition Page in the pop-up window shown in Figure 29-2. Eclipse will create the file shown in Listing 29-3.
Listing 29-3: Default composition page in Eclipse
<!DOCTYPE html PUBLIC "-//W3C//DTD XHTML 1.0 Transitional//EN"
    "http://www.w3.org/TR/xhtml1/DTD/xhtml1-transitional.dtd">

<html xmlns="http://www.w3.org/1999/xhtml"
      xmlns:ui="http://java.sun.com/jsf/facelets"
      xmlns:h="http://java.sun.com/jsf/html"
      xmlns:f="http://java.sun.com/jsf/core">

<ui:composition template="">
      <ui:define name="header">
          Add your header here or delete to use the default
      </ui:define>
      <ui:define name="content">
          Add your content here or delete to use the default
      </ui:define>
      <ui:define name="footer">
          Add your footer here or delete to use the default
      </ui:define>
</ui:composition>
</html>
Note that this Facelet also has three sections, like the template in Listing 29-2. To link this page to a template, add StudentTemplate.xhtml to the template attribute. To reuse the header and the footer from the template, just remove the Facelets tag <ui:define> for the header and footer, as in Listing 29-4. When the JSF implementation can’t find the definitions for these sections, it’ll use the ones from the template.
Listing 29-4: EnrollStudent.xhtml, first version
<!DOCTYPE html PUBLIC "-//W3C//DTD XHTML 1.0 Transitional//EN"
    "http://www.w3.org/TR/xhtml1/DTD/xhtml1-transitional.dtd">

<html xmlns="http://www.w3.org/1999/xhtml"
      xmlns:ui="http://java.sun.com/jsf/facelets"
      xmlns:h="http://java.sun.com/jsf/html"
      xmlns:f="http://java.sun.com/jsf/core">

<ui:composition template="StudentTemplate.xhtml">
      <ui:define name="content">
          Add your content here or delete to use the default
      </ui:define>
</ui:composition>
</html>
Now run this page in Eclipse or in your web browser, but add /faces to the URL, like this: http://localhost:8080/Lesson29/faces/EnrollStudent.xhtml. By default this will engage FacesServlet, which knows how to properly interpret all JFS tags. Figure 29-4 shows the first version of the Enroll Student page.
To complete the Enroll Student page, let’s add several JSF tags: form, inputText, outputText, and commandButton. Listing 29-5 shows the updated version of EnrollStudent.xhtml. Note that the value attribute of each inputText tag is bound to the corresponding field of the student bean. The first letter of the bean name starts with a lowercase letter (student, not Student). The <br/> tag is just an HTML tag indicating a line break.
Listing 29-5: EnrollStudent.xhtml, second version
<!DOCTYPE html PUBLIC "-//W3C//DTD XHTML 1.0 Transitional//EN"
    "http://www.w3.org/TR/xhtml1/DTD/xhtml1-transitional.dtd">

<html xmlns="http://www.w3.org/1999/xhtml"
      xmlns:ui="http://java.sun.com/jsf/facelets"
      xmlns:h="http://java.sun.com/jsf/html"
      xmlns:f="http://java.sun.com/jsf/core">

<ui:composition template="StudentTemplate.xhtml">
 <ui:define name="content">
  <h:form>

    <h:outputText value="Student Name:"/>
    <h:inputText  value="#{student.name}" title="name" id="name" /> <br/>

    <h:outputText value="Student ID:"/>
    <h:inputText value="#{student.studentId}" title="id" id="studentId"/> <br/>

    <h:outputText value="Class ID:"/>
    <h:inputText  value="#{student.Id}" title="classId" id="classId" /> <br/>
    <h:commandButton action="enrolled" value="submit" />

  </h:form>
 </ui:define>
</ui:composition>
</html>
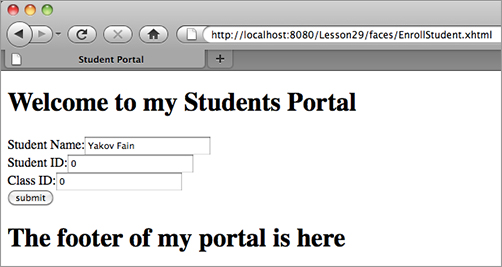
Run EnrollStudent.html and you’ll see the great-looking portal in Figure 29-5. Just to prove that the UI is really bound to the bean Student, I’ve hard-coded my name in this class. That’s why you see it in the form. The Student ID and Class ID fields show zeros — default values for numbers.
Page Navigation
The command button in Listing 29-5 has the attribute action="enrolled". This means that after this form is processed, the web application has to navigate to another JSP called Enrolled. Listing 29-6 shows this page.
Listing 29-6: Enrolled.xhtml
<!DOCTYPE html PUBLIC "-//W3C//DTD XHTML 1.0 Transitional//EN"
    "http://www.w3.org/TR/xhtml1/DTD/xhtml1-transitional.dtd">

<html xmlns="http://www.w3.org/1999/xhtml"
      xmlns:ui="http://java.sun.com/jsf/facelets"
      xmlns:h="http://java.sun.com/jsf/html"
      xmlns:f="http://java.sun.com/jsf/core">

<ui:composition template="StudentTemplate.xhtml">
  <ui:define name="content">

   <h:outputText value="#{student.name}"/>, thank you for enrolling in class
   <h:outputText value="#{student.classId}" />

  </ui:define>

</ui:composition>
</html>
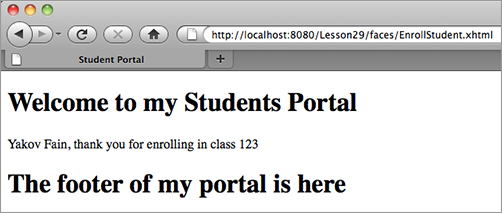
It’s a pretty simple way of arranging page navigation, isn’t it? I’ve enrolled myself into class 123 in EnrollStudent.xhtml. After pressing Submit, I got the confirmation shown in Figure 29-6.
The commandButton button can be used for a different purpose: to call a method on a bean. You can write a bean just to serve as a data model, but nothing prevents you from writing a method that performs some business logic or performs other actions, such as getting data from a web service or saving data using EJBs. In the next code snippet the click on the button will call the method doSomething() on the bean Student.
<h:commandButton value="Do Something" action="#{student.doSomething}" />
The method doSomething() can return a String containing the name of the next JSF page to be called, just like this:
class Student{
...
  public String doSomething(){
       // Do something and navigate to the next page
      return "TheNextPage.xhtml";
  }
}
To become familiar with other tags available in Facelets, refer to Chapter 5 of the Java EE 6 tutorial, available at http://download.oracle.com/javaee/6/tutorial/doc/giepx.html.
Managed beans can have converters and validators assigned to them. A Java class has strongly typed fields, but when the data arrives at the web page it has to be converted into Strings. JSF performs this conversion automatically for Java data types, but you can write your own converter and add some application-specific logic.
Validators enable you to put some constraints on the data in the managed beans. You can either use predefined annotations such as @NotNull, @Min, and @Max from javax.validation.constraints to specify the data validation constraints on the bean’s fields, or create your own custom annotations that implement constraints specific to your application. The standard validators on the fields of the Student bean may look like this:
@ManagedBean
@RequestScoped
public class Student implements Serializable{

      @NotNull(message="you must enter Student ID"
       @Size(min=8, max=10,
                 message="Student ID must include between 8 and 10 symbols")
       private long studentId;

       @Size(min=2, message="Name can have less than two characters")
       private String name;

       @NotNull(message="Please enter Class ID")
       private int classId;
       ...
}
The core JSF library has standard validators that can validate length, and ranges for long and double values. You encapsulate these validators right in the JSF file, like this:
<h:inputText  value="#{student.name}" title="name" id="name" >
   <f:validateLength minimum="2"/>
</h:inputText>
To create a custom validator (such as CreditCardValidator) you need to write a Java class that implements the javax.faces.validator.Validator interface and performs the validation in the method validate(). If the value is not valid, the method has to throw a ValidatorException. Custom validators must be registered in faces-config.xml.
    <validator>
        <validator-id>CreditCardValidator</validator-id>
        <validator-class>myvalidators.CreditCardValidator</validator-class>
    </validator>
Custom validators can be used in a JSF page with the <f: validator> tag, as in the following example:
<h:inputText  value="#{student.creditcad}" title="card" id="card" >
   <f:validator id="CreditCardValidator"/>
</h:inputText>
Rewrite the sample stock server application that you created in the “Try It” section of Lesson 28, but this time do it using JSF. The JSF client should have one text input field with a Submit button. The user will enter the stock symbol she wants to get a price quote for. Generate a random quote and return a web page with the quote. Reuse the code for StockServerImpl from Listing 25-2 to generate the price quotes. The web page should show the list of available stocks.
The managed bean will have a method called getQuotes() that should be called when the user clicks the Submit button.
Lesson Requirements
You should have Java installed.
You can download the code and resources for this Try It from the book’s web page at www.wrox.com. You can find them in the Lesson29 folder in the download.
Hints
NetBeans 7 IDE supports JSF better than Eclipse does. It has a number of wizards, and in particular you can easily define the navigation of your web pages in a graphical interface. (See http://netbeans.org/kb/docs/web/jsf20-support.html for details.) The other popular IDE, IntelliJ IDEA 9, also offers excellent support for JSF. (Refer to www.jetbrains.com/idea/features/javaserver_faces.html for details.)
Step-by-Step
1. Create a new StockServer bean, which will include the methods getQuote() and getNasdaqSymbols().
2. Define a JSF template.
3. Create two JSF pages: one for making a request for a price quote for a specific stock, and the other one for showing the result. The Submit button in the first web page should call the method getQuote() on the managed bean.
4. Run and test this JSF application.
Please select Lesson 29 on the DVD with the print book, or watch online at www.wrox.com/go/fainjava to view the video that accompanies this lesson.