
![]()
Enterprise JavaBeans
Enterprise JavaBeans were created in order to separate the view layers from the database access and business layers. EJBs are where all of the database (EntityManager) access and business logic should take place within a Java EE application, and they have become significantly easier to use over the past few releases. EJBs are used to coordinate database tasks with entities, and JSF managed beans are used to interact directly with the JSF web pages. Managed beans are used to provide a façade between the view layer and the business layer.
EJBs are deployed to an application server container, which manages the bean life cycle. The container also provides features such as transaction management and security for EJBs. EJBs are portable, meaning that they can be deployed to different application servers. This adds benefit for EJB developers because a single EJB can be utilized across multiple applications. EJBs also alleviate the issue of having to code applications to work with multiple databases because the EJB Query Language (covered in Chapter 10) rather than routine SQL is used to perform database operations. Therefore, if an application is developed on one database, it can be ported to another without the need to rewrite any SQL.
There are three types of EJBs that can be used: stateless, stateful, and message-driven. This chapter will cover the first two, and message-driven beans will be covered in Chapter 12 where the Java Messaging Service (JMS) is covered. Stateless session beans are used most often, because they are used for quick transactions and do not maintain any conversational state. Stateful beans, on the other hand, are to be used in situations where a conversational state across multiple client requests is required.
This chapter includes recipes to familiarize you with stateful and stateless session beans. You will learn how to access EJBs from a JSF managed bean client and display content within a JSF view that the EJB has queried from the database. There are also recipes covering useful tactics such as using bean Timers and creating Singleton session beans.
![]() Note To run the sources for this chapter, please set up the provided NetBeans project entitled JavaEERecipes, or compile and deploy the sources in your own environment. You can also simply deploy the JavaEERecipes.war file that is distributed with the book to a GlassFish v4 application server. Once you’ve deployed it, please visit the following URL to run the example application for Chapter 9: http://localhost:8080/JavaEERecipes/faces/chapter09/home.xhtml.
Note To run the sources for this chapter, please set up the provided NetBeans project entitled JavaEERecipes, or compile and deploy the sources in your own environment. You can also simply deploy the JavaEERecipes.war file that is distributed with the book to a GlassFish v4 application server. Once you’ve deployed it, please visit the following URL to run the example application for Chapter 9: http://localhost:8080/JavaEERecipes/faces/chapter09/home.xhtml.
9-1. Obtaining an Entity Manager
Problem
You have created a persistence unit for your database connection, and you want to use it to obtain a connection for working with the database.
Solution #1
Create an EntityManagerFactory object utilizing a local JDBC connection by calling the javax.persistence.Persistence createEntityManagerFactory method and passing the name of the RESOURCE_LOCAL persistence unit. Obtain an EntityManager object from the factory object that has been created, and then utilize the EntityManager object as needed to work with the database entities. The following lines of code demonstrate how to accomplish the creation of an EntityManager object using a local JDBC connection:
EntityManagerFactory emf = Persistence.createEntityManagerFactory("JavaEERecipesLOCAL");
 EntityManager em = emf.createEntityManager();
![]() Note For further reference regarding the creation of a persistence unit, please see Recipe 8-3.
Note For further reference regarding the creation of a persistence unit, please see Recipe 8-3.
Solution #2
Inject EntityManager into EJB when using a database connection within an environment utilizing Java Naming and Directory Interface (JNDI), such as an application server. To do so, declare a private field of the EntityManager type, and annotate it using @PersistenceContext. Pass the name of the relevant persistence unit to the @PersistenceContext annotation. The following lines of code demonstrate how this technique is performed. In an application, these lines of code would reside within an EJB for an entity class.
@PersistenceContext(unitName = "JavaEERecipesJTA")
 private EntityManager em;
![]() Note A PersistenceContext unitName can be composed of any valid string. The unitName that is used within the book sources may differ from that which is shown in the book.
Note A PersistenceContext unitName can be composed of any valid string. The unitName that is used within the book sources may differ from that which is shown in the book.
How It Works
Before an entity class can be used to persist an object or obtain query results, an entity manager must be created from the persistence unit database connection configuration. The way in which you achieve the creation of an entity manager will differ depending upon the type of database connection you are using. For instance, if you are creating an entity manager from a local JDBC connection, then there is a little more work to be done because an EntityManagerFactory must be used to obtain the EntityManager object. On the other hand, if you are creating a container-managed entity manager from a database connection that is registered with an application server via JNDI, then much of the work is done for you behind the scenes via metadata annotations.
In the first solution to this recipe, a persistence unit pertaining to a local JDBC connection is used to obtain an EntityManager object. As mentioned previously, within an EJB, an EntityManagerFactory object must first be obtained by calling the javax.persistence.Persistence class’s createEntityManagerFactory method and passing the string-based persistence unit name to the method. From there, an EntityManager object can be instantiated by invoking the EntityManagerFactory’s createEntityManager method.
In the second solution to this recipe, a container-managed EntityManager object instance is obtained. If an application is deployed to an enterprise application server container such as Oracle’s GlassFish, this is the preferred way to obtain an EntityManager. Utilizing container-managed entity managers makes JPA development easier, because a Java EE container manages the life cycle of container-managed entity managers. Moreover, container-managed entity managers are automatically propagated to all application components within a single Java Transaction API (JTA) transaction. To obtain a container-managed entity manger, declare an EntityManager field within an EJB and simply annotate it with @PersistenceUnit, passing the string-based name of the persistence unit to the annotation. Doing so injects the entity manager into the application component.
After performing either of these solutions, the newly obtained EntityManager object is ready to be utilized. The most often used EntityManager methods are createQuery, createNamedQuery, and persist. You will learn more about utilizing the EntityManager in the following recipes. However, a handful of recipes within Chapter 8 also make use of EntityManager objects.
9-2. Developing a Stateless Session Bean
Problem
You want to create a class that can be used to perform tasks for a client, but the application does not require the bean to retain any state between transactions. Additionally, you want to have the ability to interact with a database from within the class.
Solution #1
Create a stateless session bean for the entity class for which you’d like to perform tasks. Create an EntityManager object from a persistence unit, and initiate tasks against the database using the entity classes. In the following solution, a stateless session bean is created for working with the Book entity:
package org.javaeerecipes.chapter09.session;

import javax.ejb.Stateless;
import javax.persistence.EntityManager;
import javax.persistence.PersistenceContext;
import org.javaeerecipes.chapter09.entity.Book;

/**
 * Stateless Session Bean for the Book entity
 * @author juneau
 */
@Stateless
public class BookFacade {
    @PersistenceContext(unitName = "JavaEERecipesJTA")
    private EntityManager em;


    protected EntityManager getEntityManager() {
        return em;
    }

    public BookFacade() {

    }

    /**
     * Create a book object
     * @param book
     */
    public void create(Book book){
        em.persist(book);
    }

    /**
     * Update a book object
     * @param book
     */
    public void edit(Book book){
        em.merge(book);
    }

    /**
     * Remove a book object
     * @param book
     */
    public void remove(Book book){
        em.remove(book);
    }

    /**
     * Return a Book object based upon a given title.  This assumes that there
     * are no duplicate titles in the database.
     * @param title
     * @return
     */
    public Book findByTitle(String title){
        return (Book) em.createQuery("select object(o) from Book o " +
                              "where o.title = :title")
                              .setParameter("title", title.toUpperCase())
                              .getSingleResult();
    }

}
In the example session bean, the create, edit, and remove methods can be called via a client to perform CRUD operations with the database. The findByTitle method can be called via a client to obtain a Book object from the database.
Solution #2
Create a stateless session bean for the entity class for which you’d like to perform tasks, and extend an abstract class that encapsulates standard operations from the session bean. Create an EntityManager object from a persistence unit, and initiate tasks against the database using the entity classes. In the following solution, a stateless session bean is created for working with the Book entity. It extends a class named AbstractFacade, which contains implementations for most of the commonly used tasks within EJBs.
First, let’s take a look at the BookFacade class, the stateless session bean.
package org.javaeerecipes.chapter09.session;

import javax.ejb.Stateless;
import javax.persistence.EntityManager;
import javax.persistence.PersistenceContext;
import org.javaeerecipes.chapter09.entity.Book;

/**
 * Stateless Session Bean for the Book entity
 * @author juneau
 */
@Stateless
public class BookFacade extends AbstractFacade<Book> {
    @PersistenceContext(unitName = "JavaEERecipesJTA")
    private EntityManager em;

    @Override
    protected EntityManager getEntityManager() {
        return em;
    }

    public BookFacade() {
        super(Book.class);
    }

    /**
     * Return a Book object based upon a given title.  This assumes that there
     * are no duplicate titles in the database.
     * @param title
     * @return
     */
    public Book findByTitle(String title){
        return (Book) em.createQuery("select object(o) from Book o " +
                              "where o.title = :title")
                              .setParameter("title", title.toUpperCase())
                              .getSingleResult();
    }

}
As you can see, there is only a single method implemented within the EJB, which is the findByTitle method. However, other CRUD functionality such as create, edit, and remove for the Book entity can also be performed via the BookFacade session bean because it extends AbstractFacade. The AbstractFacade class is an abstract class that implements the most commonly used EJB methods. It accepts an entity class type specified as a generic, and its implementation is as follows.
![]() Note The following code was automatically generated via the 7.x IDE along with the BookFacade session bean after creating a stateless session bean for the Book entity class.
Note The following code was automatically generated via the 7.x IDE along with the BookFacade session bean after creating a stateless session bean for the Book entity class.
package org.javaeerecipes.chapter09.session;

import java.util.List;
import javax.persistence.EntityManager;

/**
 * Abstract Facade for Session Beans
 *
 * @author Netbeans 7.x
 */
public abstract class AbstractFacade<T> {
    private Class<T> entityClass;

    public AbstractFacade(Class<T> entityClass) {
        this.entityClass = entityClass;
    }

    protected abstract EntityManager getEntityManager();

    public void create(T entity) {
        getEntityManager().persist(entity);
    }

    public void edit(T entity) {
        getEntityManager().merge(entity);
    }

    public void remove(T entity) {
        getEntityManager().remove(getEntityManager().merge(entity));
    }

    public T find(Object id) {
        return getEntityManager().find(entityClass, id);
    }

    public List<T> findAll() {
        javax.persistence.criteria.CriteriaQuery cq = getEntityManager().getCriteriaBuilder().createQuery();
        cq.select(cq.from(entityClass));
        return getEntityManager().createQuery(cq).getResultList();
    }

    public List<T> findRange(int[] range) {
        javax.persistence.criteria.CriteriaQuery cq = getEntityManager().getCriteriaBuilder().createQuery();
        cq.select(cq.from(entityClass));
        javax.persistence.Query q = getEntityManager().createQuery(cq);
        q.setMaxResults(range[1] - range[0]);
        q.setFirstResult(range[0]);
        return q.getResultList();
    }

    public int count() {
        javax.persistence.criteria.CriteriaQuery cq = getEntityManager().getCriteriaBuilder().createQuery();
        javax.persistence.criteria.Root<T> rt = cq.from(entityClass);
        cq.select(getEntityManager().getCriteriaBuilder().count(rt));
        javax.persistence.Query q = getEntityManager().createQuery(cq);
        return ((Long) q.getSingleResult()).intValue();
    }

}
How It Works
A Java class that is used to encapsulate the business logic and data access for an application is also known as a session bean. More specifically, session beans typically correspond to entity classes, whereas there is usually one bean per entity, although this is not a requirement and there are instances in which such an implementation does not work well. Any database transactions for an application should be encapsulated within a session bean class that is responsible for business process implementations, and clients should then make calls to the session beans in order to invoke business processes. A stateless session bean does not retain any state, meaning that variables within the bean are not guaranteed to retain their values between invocations. An application server container maintains a pool of session beans for use by its clients, and when a client invokes a bean, then one is taken from the pool for use. Beans are returned to the pool immediately after the client is finished with the invoking task. Therefore, stateless session beans are thread-safe, and they work very well within a concurrent user environment.
Stateless session beans should contain a no-argument constructor, and they are instantiated by an application server container at application start-up. To signify that a session bean is stateless, the class should be annotated with @Stateless, optionally passing a name parameter that is a String-based name for the bean. If no name parameter is specified within the @Stateless annotation, then the name of the bean is used. A stateless session bean should not be final or abstract; therefore, all methods within the bean should contain an implementation. They can extend other session beans or POJOs in order to extend functionality. In pre–EJB 3.1 environments, session beans used to be required to implement business interfaces that contained method signatures for those methods that were to be made public for client use. However, it is no longer a requirement for a session bean to implement a business interface, and indeed the solutions to this recipe do not demonstrate the use of business interfaces (see Recipe 9-4 for a concrete example).
Zero or more variables can be declared within a stateless session bean, although the contents of those variables are not guaranteed for retention between client calls. It is typical for a stateless session bean to contain at least one EntityManager connection, although it is possible for a bean to contain zero or more connections. For instance, in some cases session beans do not have a need to persist data, and in such cases no database connection would be needed. In other instances, there may be a need for a session bean to have the ability to work with multiple databases, in which case multiple database connections would be necessary. In the example for this recipe, a single database connection is declared as an EntityManager object, corresponding to the JavaEERecipesJTA persistence unit. It is possible to make use of standard JDBC persistence units, as well as standard JDBC DataSource objects within a session bean. The use of a standard JDBC DataSource declaration may look like the following:
@Resource(name="jdbc/MyDataSource")
private DataSource dataSource;
As mentioned previously, stateless session beans can implement business interfaces, although it is not required. The business interfaces that can be implemented via a stateless session bean can be local, remote, or web service endpoints. A local business interface is designed for clients of stateless session beans that exist within the same container instance as the session bean itself. Designating a business interface with the @Local annotation specifies a local interface. Remote business interfaces are designed for use by clients that reside outside of the session bean’s container instance. A remote business interface is denoted by the @Remote annotation. Web service endpoint interfaces can be implemented by stateless session beans, and they can be used to expose SOAP-based web services that are implemented within the session bean. To designate a web service endpoint interface, annotate it with the @WebService annotation.
Stateless session beans contain “callback methods” that will be invoked by the container automatically when certain life-cycle events occur. Specifically, stateless session beans can make use of two callbacks: PostConstruct and PreDestroy. After the container constructs a stateless session bean and resources have been injected, any method within the bean that is denoted with a @PostConstruct annotation will be invoked. Similarly, when the container decides that a bean should be removed from the pool or destroyed, then any method denoted with a @PreDestroy annotation will be invoked before the bean is destroyed. Callback methods can be very useful for instantiating database connections and so forth.
LIFE CYCLE OF A STATELESS SESSION BEAN
Stateless session beans have the following life cycle:
- A container creates a stateless session bean using the default no-argument constructor.
- Resources are injected as necessary (i.e., database connections).
- A managed pool of beans is generated, and multiple instances of the session bean are placed into the pool.
- An idle bean is taken from the pool when the invocation request is received from a client. If all beans in pool are currently in use, more beans are instantiated.
- The business method invoked by the client is executed.
- The bean is returned to the pool after the business method process is complete.
- The bean is destroyed from the pool on an as-needed basis.
In the first solution to this recipe, a stateless session bean is listed that does not implement any interfaces or extend any other classes. Such a stateless session bean is very typical, and it is not uncommon to see such a stateless session bean in EJB 3.1+ applications. The bean in the solution declares an EntityManager object, and the application server container performs the creation of the EntityManager automatically and injects it into the bean since the @PersistenceUnit annotation is specified. The annotation must designate a persistence unit name to tell the container the type of EntityManager to inject. In the case where a bean needs access to multiple database connections, then more EntityManager objects can be declared, specifying different names for each persistence unit corresponding to the different connections that are required by the bean. A no-argument constructor is specified as per the guidelines for stateless session beans. The solution also contains one business method implementation, findByTitle, which accepts a String argument and queries the Book entity for the specified book title. If found, the matching Book object is returned to the caller. The findByTitle method demonstrates the typical usage of an EntityManager object for working with a database from within a session bean.
In the second solution to the recipe, the BookFacade stateless session bean extends a class named AbstractFacade. The AbstractFacade class contains a number of method implementations that are commonly used within session bean classes. For instance, the create method within AbstractClass can be used to persist an object (insert into the database), and the edit method can be used to update an object. Solution #2 demonstrates a good technique that can be used to encapsulate commonly used business logic into a separate class so that it can be extended to multiple different beans. Consider that the application may contain ten different stateless session beans that corresponded to ten different entity classes, and each of those beans would need to contain a create, edit, and remove method. It is much easier to simply extend a single class that contains this functionality, rather than rewriting in each separate session bean class.
Stateless session beans are highly performant objects that are used to encapsulate the business logic and data access corresponding to an application entity. While most times a single session bean is written for each entity class, this is not a mandatory rule. Stateless session beans should be considered first when deciding upon which type of bean to use for encapsulating the logic for a particular application process. If a conversational state between the client and the bean are not required (no state needs to be maintained), then stateless session beans are the best choice since they provide the most concurrency and best performance. If, however, state is required, then consider the use of stateful session beans.
9-3. Developing a Stateful Session Bean
Problem
You want to develop a session bean that has the capability of maintaining a conversational state with the client. For instance, you want the client to have the ability to perform a multistep process without the state of the session bean being lost.
Solution
Create a stateful session bean and implement the business logic pertaining to the entity class of your choice within it. Consider that a customer is browsing the pages of the Acme Bookstore application and wants to add a book to a shopping cart. The cart would need to be maintained within a stateful session bean since it would be required to maintain state until the customer decides to make a purchase, cancel an order, or close the browser.
The following class is that of OrderFacade, the stateful session bean that maintains a visitor’s shopping cart and purchases:
package org.javaeerecipes.jpa.session;

import java.util.concurrent.TimeUnit;
import javax.ejb.*;
import org.javaeerecipes.jpa.object.Cart;

@Stateful
@StatefulTimeout(unit = TimeUnit.MINUTES, value = 30)
public class OrderFacade {

    private Cart cart;

    @SuppressWarnings("unused")
    @PrePassivate
    private void prePassivate() {
        System.out.println("In PrePassivate method");
    }

    @SuppressWarnings("unused")
    @PostActivate
    private void postActivate() {
        System.out.println("In PostActivate method");
    }

    /**
     * @return the cart
     */
    public Cart getCart() {
        if(cart == null)
            cart = new Cart();
        return cart;
    }

    /**
     * @param cart the cart to set
     */
    public void setCart(Cart cart) {
        this.cart = cart;
    }

    public void completePurchase() {
        System.out.println("Not yet implemented..");
    }

    @Remove
    public void destroy() {
        System.out.println("Destroying OrderFacade...");
    }
}
A client can make calls to a stateful session bean in the same manner as with a stateless session bean (see Recipe 9-2). That is, a client can access the methods of the stateful session bean via a business interface or through the no-interface view, which is new in EJB 3.0. In this example, the CartController JSF managed bean will access the stateful session bean via the no-interface view. The following code for CartController demonstrates how to access the OrderFacade from a JSF managed bean. The main point of access to the EJB takes place within the getCart() method.
@ManagedBean(name = "cartController")                   // Specifies a managed bean
@SessionScoped                                          // Specifies a session scoped bean
public class CartController implements Serializable {

    private Item currentBook = null;

    @EJB                                                // Injects EJB
OrderFacade orderFacade;

    @ManagedProperty(value = "#{authorConroller}")   // Injects specified managed bean controller
    private AuthorController authorController;

    /**
     * Creates a new instance of CartController
     */
    public CartController() {
    }

    public String addToCart() {
        if (getCart().getBooks() == null) {
            getCart().addBook(getAuthorController().getCurrentBook(), 1);
        } else {
            getCart().addBook(getAuthorController().getCurrentBook(),
                    searchCart(getAuthorController().getCurrentBook().getTitle()) + 1);
        }
        FacesMessage facesMsg = new FacesMessage(FacesMessage.SEVERITY_INFO,
                "Succesfully Updated Cart", null);
        FacesContext.getCurrentInstance().addMessage(null, facesMsg);
        return null;
    }

    /**
     * Determines if a book is already in the shopping cart
     *
     * @param title
     * @return
     */
    public int searchCart(String title) {
        int count = 0;

        for (Item item : getCart().getBooks()) {
            if (item.getBook().getTitle().equals(title)) {
                count++;
            }
        }
        return count;
    }

    public String viewCart() {
        if (getCart() == null) {
            FacesMessage facesMsg = new FacesMessage(FacesMessage.SEVERITY_INFO,
                    "No books in cart...", null);
            FacesContext.getCurrentInstance().addMessage(null, facesMsg);
        }

        return "/chapter09/cart";
    }

    public String continueShopping() {
        return "/chapter09/book";
    }

    public String editItem(String title) {
        for (Item item : getCart().getBooks()) {
            if (item.getBook().getTitle().equals(title)) {
                currentBook = item;
            }
        }
        return "/chapter09/reviewItem";

    }

    public String updateCart(String title) {
        Item foundItem = null;
        if (currentBook.getQuantity() == 0) {
            for (Item item : getCart().getBooks()) {
                if (item.getBook().getTitle().equals(title)) {
                    foundItem = item;
                }
            }
        }
        getCart().getBooks().remove(foundItem);
        FacesMessage facesMsg = new FacesMessage(FacesMessage.SEVERITY_INFO,
                "Succesfully Updated Cart", null);
        FacesContext.getCurrentInstance().addMessage(null, facesMsg);
        return "/chapter09/cart";
    }

    /**
     * @return the cart
     */
    public Cart getCart() {
        return orderFacade.getCart();
    }


    /**
     * @return the currentBook
     */
    public Item getCurrentBook() {
        return currentBook;
    }

    /**
     * @param currentBook the currentBook to set
     */
    public void setCurrentBook(Item currentBook) {
        this.currentBook = currentBook;
    }

    public void isBookInCart(ComponentSystemEvent event) {
        UIOutput output = (UIOutput) event.getComponent();
        if (getCart() != null) {
            if (searchCart(getAuthorController().getCurrentBook().getTitle()) > 0) {
                output.setValue("This book is currently in your cart.");
            } else {
                output.setValue("This book is not in your cart.");
            }
        } else {
            output.setValue("This book is not in your cart.");
        }
    }

    public void updateRowData(RowEditEvent e) {
        System.out.println("Perform editing logic here...");
        currentBook = (Item)e.getObject();
        // Call the updateCart method, passing the title of the current book.
        updateCart(((Item)e.getObject()).getBook().getTitle());
    }

    /**
     * @return the authorController
     */
    public AuthorController getAuthorController() {
        return authorController;
    }

    /**
     * @param authorController the authorController to set
     */
    public void setAuthorController(AuthorController authorController) {
        this.authorController = authorController;
    }
}
How It Works
A stateful session bean is a Java class that is used to encapsulate business logic for an application. In most cases, a stateful bean has a one-to-one correspondence with an entity class, in that the bean handles all of the database calls regarding one particular entity. Programmatically, a stateful session bean is very similar to a stateful session bean in that regard. However, stateful session beans are guaranteed to maintain a conversational state with a client, whereas a stateless session bean is not. That said, the application server container handles stateful session beans differently, and they have a much different life cycle than stateless session beans. The application server container maintains a pool of the stateful session beans for client use, but there is a one-to-one mapping between a client and a bean in that when a client invokes a stateful bean, it will not release that bean back to the pool until it is still active. Therefore, stateful session beans can be less efficient than stateless, and they can take up a larger memory footprint than stateless session beans because if there are a large number of active sessions using a stateful bean, then there will be a large number of stateful beans retained in memory remaining active for those sessions.
To make a stateful session bean, the class must be designated as such by annotating it with @Stateful. The optional name parameter of the @Stateful annotation can be used to specify a string-based name for the bean. Similarly to stateless session beans, a stateful session bean can implement a business interface, but as of EJB 3.1, it is not mandatory. In the example to this recipe, no business interface is used; therefore, any method within the bean that has a public modifier will be available for use by a client. Any variables that are used to store conversational state must be Java primitive types or Serializable. When an instance variable is used to store data, it will be maintained throughout the life cycle of the conversation.
Every stateful session bean must also contain a method that will be called when the bean client removes it. The state of the bean will be maintained until the @Remove method is called. The container will invoke the method annotated with @Remove when this occurs, and the bean will be removed after the @Remove method completes.
LIFE CYCLE OF STATEFUL SESSION BEAN
Stateful session beans have the following life cycle:
- The container creates new bean instances utilizing the default constructor whenever a new client session is started.
- The resources are injected into the bean.
- The bean instance is stored in memory.
- The method invoked by the client is executed.
- The bean waits and executes any subsequent requests.
- The bean is passivated, or removed from active memory into temporary storage, if the client remains idle for a period of time.
- The client invocation of a passivated bean will bring it back into memory from temporary storage.
- Failure of client to invoke a passivated bean instance for a period of time will cause the bean to be destroyed.
- If a client requests the removal of a bean instance, then it is activated if necessary and then destroyed.
Stateful session beans are stored in memory for a period of time. If the client does not request a stateful bean for use again after a period of time, then the container passivates it. Passivation is the process of taking a stateful session bean out of active memory and storing it into a temporary location on disk. The container does this by serializing the entire bean instance and moving it into permanent storage on disk. A bean is then activated later if a client invokes it, and activation is the opposite of passivation.
Another way to passivate a stateful session bean on a timed basis is by annotating the class using @StatefulTimeout. This annotation allows the developer to choose how long to maintain the state of the bean. In the case of the example for this recipe, the state is maintained for 30 minutes before the bean is passivated.
@StatefulTimeout(unit = TimeUnit.MINUTES, value = 30)
Stateful session beans have more callback methods than stateless session beans. Callback methods can be used to perform operations at a certain point in the bean’s life cycle. Specifically, the following annotations can be placed before method signatures in order to mark then for execution when the given bean life-cycle event occurs: @PostConstruct, @PrePassivate, @PostActivate, and @PreDestroy. The @PostConstruct annotation denotes that the annotated method will be executed by the container as an instance is created. @PrePassivate denotes that the annotated method will be executed by the container before passivation occurs. @PostActivate denotes that the annotated method should be executed after activation or, in other words, once a bean becomes active again. Lastly, methods annotated with @PreDestroy will be executed by the container just before the bean is destroyed.
If your session bean needs the ability to retain state throughout a conversation, then you will need to make use of a stateful session bean. However, it is important to make use of stateful session beans sparingly since they are less efficient than stateless session beans and they require a larger memory footprint on the application server.
9-4. Utilizing Session Beans with JSF
Problem
You want to develop a web-based client for a session bean that resides within the same container as the session bean itself.
Solution #1
Implement a business interface for the session bean that you want to work with, and write a client Java class to utilize the methods exposed via the interface. In this case, we’ll write a JSF managed bean to interact with the publicly exposed methods that are declared within the business interface. The following code demonstrates a stateless session bean named AuthorWorkFacade, which implements a business interface named AuthorWorkType. The business interface exposes methods for local clients to utilize for interaction with the EJB.
package org.javaeerecipes.jpa.session;

import java.math.BigDecimal;
import java.math.BigInteger;
import java.util.List;
import javax.ejb.Stateless;
import javax.persistence.EntityManager;
import javax.persistence.PersistenceContext;
import javax.persistence.Query;
import org.javaeerecipes.jpa.entity.AuthorWork;
import org.javaeerecipes.jpa.local.AuthorWorkType;

@Stateless
public class AuthorWorkFacade extends AbstractFacade<AuthorWork> implements AuthorWorkType  {
    // The EntityManager is provided by the PersistanceContext
    @PersistenceContext(unitName = "JavaEERecipesJTA")
    private EntityManager em;

    @Override
    protected EntityManager getEntityManager() {
        return em;
    }

    public AuthorWorkFacade() {
        super(AuthorWork.class);
    }

    /**
     * Return list of AuthorWork objects given a specified book id
     * @param bookId
     * @return
     */
    public List<AuthorWork> performFind(BigDecimal bookId){
        Query qry = em.createQuery("select object(o) from AuthorWork o " +
                                    "where o.bookId = :bookId")
                      .setParameter("bookId", bookId);

        return qry.getResultList();

    }

    /**
     * Return list of AuthorWork objects given a specified author id
     * @param bookId
     * @return
     */
    public List<AuthorWork> performFindByAuthor(BigDecimal authorId){
        Query qry = em.createQuery("select object(o) from AuthorWork o " +
                                    "where o.authorId = :authorId")
                      .setParameter("authorId", authorId);

        return qry.getResultList();

    }
}
Let’s take a look at the AuthorWorkType business interface that is implemented by the AuthorWorkFacade session bean. Note that this interface is annotated using the @Local annotation, which signifies that it is a local business interface.
package org.javaeerecipes.jpa.local;

import java.math.BigDecimal;
import java.util.List;
import javax.ejb.Local;
import org.javaeerecipes.jpa.entity.AuthorWork;

/**
 * Local business interface for the AuthorWorkFacade stateless session bean
 * @author juneau
 */
// Comment this annotation to decorate the EJB itself with the annotation
@Local
public interface AuthorWorkType {
    public List<AuthorWork> performFind(BigDecimal bookId);

    public List<AuthorWork> performFindByAuthor(BigDecimal authorId);
}
Finally, the client itself is a JSF managed bean controller named AuthorWorkController. The controller interacts with the methods within the EJB by making calls against the business interface method’s declarations.
package org.javaeerecipes.jpa.jsf;

import java.io.Serializable;
import java.util.List;
import javax.ejb.EJB;
import javax.faces.bean.ManagedBean;
import javax.faces.bean.SessionScoped;
import org.javaeerecipes.jpa.entity.AuthorWork;
import org.javaeerecipes.jpa.entity.Book;
import org.javaeerecipes.jpa.local.AuthorWorkType;

/**
 * JSF Managed bean controller for the AuthorWorkFacade EJB
 * @author juneau
 */
@ManagedBean(name = "authorWorkConroller")
@SessionScoped
public class AuthorWorkController implements Serializable {
    // Inject the EJB
    @EJB
    AuthorWorkType authorWork;
    /**
     * Creates a new instance of AuthorWorkController
     */
    public AuthorWorkController() {
    }

    /**
     * Invokes the AuthorWorkFacade's performFind method utilizing the
     * business interface.
     * @param book
     * @return
     */
    public List<AuthorWork> findByBookId(Book book){
        return authorWork.performFind(book.getId());
    }


}
JSF views can interact directly with public properties and methods within JSF managed bean controllers. Therefore, a JSF view can display a list of all books written by a given author by making the call to the findBookById method that resides within the AuthorWorkController.
Solution #2
Write a JSF view client and work directly with the session bean of your choice using the no-interface view that was introduced with the release of EJB 3.1. The following code demonstrates a JSF managed bean controller that interacts directly with a stateless session bean. The JSF managed bean, named BookController, is the client class for the BookFacade EJB session bean. You will see from the code that the bean is able to interact directly with the EJB session bean public methods via the declaration of a property pertaining to the BookFacade class.
package org.javaeerecipes.jpa.jsf;

import javax.persistence.PersistenceContext;
import java.io.Serializable;
import java.math.BigDecimal;
import java.util.List;
import javax.faces.bean.ManagedBean;
import javax.faces.bean.ManagedProperty;
import javax.faces.bean.SessionScoped;
import javax.persistence.EntityManager;
import org.javaeerecipes.jpa.entity.Book;

@ManagedBean(name="bookController")
@SessionScoped
public class BookController implements java.io.Serializable {

    @EJB
    BookFacade ejbFacade;

    private List<Book> completeBookList = null;
    @ManagedProperty(value = "#{authorConroller}")
    private AuthorController authorController;

    public BookController(){

    }

    /**
     * @return the completeBookList
     */
    public List<Book> getCompleteBookList() {
        completeBookList = ejbFacade.findAll();
        return completeBookList;
    }

    /**
     * @param completeBookList the completeBookList to set
     */
    public void setCompleteBookList(List<Book> completeBookList) {
        this.completeBookList = completeBookList;
    }

    public String populateBookList(BigDecimal bookId){
       String returnValue = getAuthorController().populateAuthorList(bookId);
       return returnValue;
    }

    /**
     * @return the authorController
     */
    public AuthorController getAuthorController() {
        return authorController;
    }

    /**
     * @param authorController the authorController to set
     */
    public void setAuthorController(AuthorController authorController) {
        this.authorController = authorController;
    }

}
The no-interface view makes it possible for clients to work directly with the public methods of a session bean. As you can see from the example, it is also possible for one JSF managed bean client to work with another JSF managed bean client because the BookController class declares a variable for the AuthorController JSF managed bean. Making use of the no-interface view provides clients with the most direct access to session beans, and a JSF view can now interact directly with the methods within the managed bean, making it easy to form the complete cycle for a web view utilizing information from a database.
How It Works
An EJB is the class within an application that is used to work directly with database objects. JSF web views and desktop Java clients cannot work directly with EJB methods since they reside on the application server. For this reason, EJBs must provide a way for clients to work with their methods, whether that client resides within the same container as the EJB itself or in a remote location. Prior to the release of EJB 3.1, if an EJB was going to be exposed to a client within the same container, such as a JSF managed bean, the EJB would need to implement a business interface denoted as a local interface with the @Local annotation. On the other hand, if an EJB were to be made accessible to a client running within a remote environment under pre–EJB 3.1, then the EJB would need to implement a business interface denoted as a remote interface with the @Remote annotation. In the majority of Java EE applications that are developed today, a web framework such as JSF is used to work with the EJB in order to manipulate or read data from an RDBMS or other data source. Such clients are local to the container in which the EJB pools reside, and therefore they would access the EJB via a local business interface.
![]() Note At first, the concept of a local client may be difficult to understand, so I will try to explain in a bit more detail. A typical JSF application utilizes local clients, those being JSF managed beans, to work directly with the EJBs. Although the user of the web application is sitting in a remote location from the EJB server container, they are working with HTML pages that are generated by JSF views within a browser, and those views interact directly with the JSF managed bean controllers. It is almost as if the JSF views are bound directly to the JSF managed bean controllers, which usually reside within the same container as the EJB. Figure 9-1 shows how this relationship works.
Note At first, the concept of a local client may be difficult to understand, so I will try to explain in a bit more detail. A typical JSF application utilizes local clients, those being JSF managed beans, to work directly with the EJBs. Although the user of the web application is sitting in a remote location from the EJB server container, they are working with HTML pages that are generated by JSF views within a browser, and those views interact directly with the JSF managed bean controllers. It is almost as if the JSF views are bound directly to the JSF managed bean controllers, which usually reside within the same container as the EJB. Figure 9-1 shows how this relationship works.
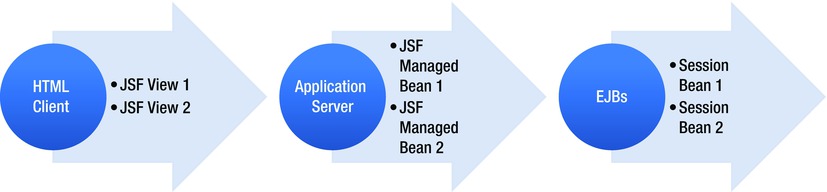
Figure 9-1 . HTML client (JSF view) to EJB relationship
In EJB 3.1+, it is possible for local clients to utilize “no-interface” business views for access to public EJB methods, thereby alleviating the need for the EJB to implement an interface. Using the no-interface view technique enables developers to be more productive because there is one less Java file to maintain (no interface needed), and the workflow becomes easier to understand since the local client can interact directly with the EJB, rather than via an interface. Solution #1 to this recipe demonstrates the use of a local business interface, while Solution #2 demonstrates the use of the no-interface view. Remote clients, such as Java classes running in a remote application server container, cannot use the no-interface view, and therefore a @Remote business interface is still needed in such situations.
Let’s start by discussing the use of the local business interface to work with the EJB because this may be the most commonly used technique today since EJB 3.1+ is still new at the time of this writing. EJB 3.0 made it much easier to develop an enterprise application because XML configuration was almost entirely eliminated via the use of annotations. Using the business interface technique, a JSF managed bean controller can interact with the methods that are declared within the interface by declaring a variable for the interface within the managed bean and denoting it as an EJB interface through dependency injection. Dependency injection works via the use of the javax.ejb.EJB annotation and specifying the enterprise bean’s local interface name within the JSF managed bean. The following code excerpt from the managed bean code in Solution #1 demonstrates the use of dependency injection using a local business interface:
@EJB
AuthorWorkType authorWork;
It is possible to obtain a reference to the local business interface using JNDI, rather than dependency injection. To do so, use the javax.naming.InitialContext interface’s lookup method as follows:
AuthorWorkType authorWork = (AuthorWorkType)
                            InitialContext.lookup("java:module/AuthorWorkType");
Using the business interface makes it easy for developers to work with EJBs in an indirect manner. Since the JSF managed bean is not working directly with the methods of the EJB, it allows the business logic of the EJB to change, without affecting the implementation of the managed bean controller. The no-interface view was introduced with the release of EJB 3.1, and it allows JSF managed beans to work directly with publicly exposed EJB methods without the need to work through a business interface. This still allows the business logic within the EJB to be changed without affecting the client unless the public method signatures change.
Solution #2 demonstrates the use of the no-interface view to allow JSF managed bean controllers to work with publicly declared EJB methods. To obtain a reference to the no-interface view of an EJB through dependency injection, use the javax.naming.EJB annotation, along with a declaration of the enterprise bean’s implementation class. The following code excerpt taken from the managed bean in Solution #2 demonstrates the dependency injection technique with a no-interface view:
@EJB
 BookFacade ejbFacade;
It is possible to use JNDI to perform a lookup on the EJB rather than using dependency injection. Use the javax.naming.InitialContext interface’s lookup method in order to perform the JNDI lookup as follows:
BookFacade ejbFacade = (BookFacade)
        InitialContext.lookup("java:module/BookFacade");
![]() Note Many people still have a bad taste in their mouth because of the complexity of EJBs prior to the release of EJB 3.0. Development of EJB 2.x required much XML configuration, which made EJBs difficult to understand and maintain, even though they were still robust and very viable for the development of enterprise applications. Moreover, the container manages the life cycle and resources for EJBs, which allows developers to focus on other application features rather than worry about life cycle and resource handling.
Note Many people still have a bad taste in their mouth because of the complexity of EJBs prior to the release of EJB 3.0. Development of EJB 2.x required much XML configuration, which made EJBs difficult to understand and maintain, even though they were still robust and very viable for the development of enterprise applications. Moreover, the container manages the life cycle and resources for EJBs, which allows developers to focus on other application features rather than worry about life cycle and resource handling.
Problem
You want to persist an object in your Java enterprise application. In other words, you want to create a new database record within one of the database tables used by your application.
Solution
Create an EntityManager object using one of the solutions provided in Recipe 9-1, and then call its persist method, passing the object you want to persist. The following lines of code demonstrate how to persist an object to the database using an EntityManager. In this case, a Book object is being persisted into the BOOK database table. This excerpt is taken from the BookFacade session bean.
...
@PersistenceContext(unitName = "JavaEERecipesJTA")
    private EntityManager em;
...
em.persist(book);
...
How It Works
The persistence of entity objects takes place within EJB classes. To persist an object to the underlying data store and make it managed, call the EntityManager object’s persist method. You must pass a valid entity object to the persist method, and the object should not yet exist in the database, meaning that it must have a unique primary key.
A few different exceptions may be thrown when working with the persist method that will help you determine what issue(s) are occurring. The EntityExistsException is self-explanatory, and it is thrown if the primary key for the entity that you are persisting already exists. However, in some cases a PersistenceException will be thrown instead at flush or commit time, so you should catch each of these exceptions when issuing a call to persist. If the object that you are trying to persist is not an entity, then the IllegalArgumentException will be thrown. Lastly, the TransactionRequiredException will be thrown if invoked on a container-managed entity manager of type PersistenceContextType.TRANSACTION, and there is no transaction made.
Problem
The contents of an entity object have been changed, and you want to persist the updates to the underlying data source.
Solution
Create an EntityManager object using one of the solutions provided in Recipe 9-1, and then call the EntityManager object’s merge method, passing a populated entity object that you want to update. The following lines of code demonstrate how to persist an object to the database using an EntityManager. In this case, a Book object is being updated in the BOOK database table. This excerpt is taken from the BookFacade session bean.
...
@PersistenceContext(unitName = "JavaEERecipesJTA")
    private EntityManager em;
...
em.merge(book);
...
![]() Note If the entity object (database record) being persisted does not already exist within the table, it will be stored as a newly persisted object rather than updated.
Note If the entity object (database record) being persisted does not already exist within the table, it will be stored as a newly persisted object rather than updated.
How It Works
The code implementation that is responsible for updating entity objects within the underlying data store resides within EJB classes. A valid EntityManager object must be available for use, and then the EntityManager’s merge method can be called, passing a valid entity object for update within the underlying data store. When this is done, the state of the entity object will be merged into the data store, and the underlying data will be updated accordingly.
Two possible exceptions may be thrown when attempting to merge data. An IllegalArgumentException may be thrown if the instance being merged is not an entity (the database table does not exist) or is a removed entity. A TransactionRequiredException may be thrown if the merge method is invoked on a container-managed entity manager of type PersistenceContextType.TRANSACTION and there is no transaction.
Solution #1
Return a List of entity objects for the underlying table containing the contents you want to display. Map a JSF dataTable component value to a managed bean controller property that contains a List of objects. In this case, the managed bean property would be the List of the entity objects corresponding to the database table. Within the managed bean controller, the List of entity objects can be obtained via an EJB call.
The following code excerpt is taken from the JSF managed bean controller named BookController. The managed bean property named completeBookList will be referenced from a dataTable component within a JSF view, displaying the data from the underlying table.
@ManagedBean(name="bookController")
@SessionScoped
public class BookController implements java.io.Serializable {

    @EJB
    BookFacade ejbFacade;

    private List<Book> completeBookList = null;


    @ManagedProperty(value = "#{authorConroller}")
    private AuthorController authorController;

    public BookController(){

    }

    /**
     * @return the completeBookList
     */
    public List<Book> getCompleteBookList() {
        completeBookList = ejbFacade.findAll();
        return completeBookList;
    }

    /**
     * @param completeBookList the completeBookList to set
     */
    public void setCompleteBookList(List<Book> completeBookList) {
        this.completeBookList = completeBookList;
    }

    public String populateBookList(BigDecimal bookId){
       String returnValue = getAuthorController().populateAuthorList(bookId);
       return returnValue;
    }

    /**
     * @return the authorController
     */
    public AuthorController getAuthorController() {
        return authorController;
    }

    /**
     * @param authorController the authorController to set
     */
    public void setAuthorController(AuthorController authorController) {
        this.authorController = authorController;
    }

}
Next, let’s take a look at an excerpt from the EJB named BookFacade. It is a stateless session bean that contains the method, which is invoked by the BookController in order to obtain the List of entity objects.
![]() Note The findAll() method that is called by BookController is inherited from the AbstractFacade class.
Note The findAll() method that is called by BookController is inherited from the AbstractFacade class.
...
@Stateless
public class BookFacade extends AbstractFacade<Book> {
    @PersistenceContext(unitName = "JavaEERecipesJTA")
    private EntityManager em;

    @Override
    protected EntityManager getEntityManager() {
        return em;
    }
...
    public Book findByTitle(String title){
        return (Book) em.createQuery("select object(o) from Book o " +
                              "where o.title = :title")
                              .setParameter("title", title.toUpperCase())
                              .getSingleResult();
    }
...
Solution #2
Return a List of Map objects containing the results of a native SQL query against the underlying table. The JSF managed bean controller can contain a property that is a List of Map objects, and it can be referenced from within a JSF dataTable component. In this case, EJB method that is invoked by the managed bean controller will make a native SQL query against the database, returning certain columns of data from the table and populating map objects with those column values.
In the following excerpt, the BookController.getCustomBookList() method populates a managed bean property named customBookList via a call to the EJB method named obtainCustomList. Excerpts including both of these methods are shown next.
Here’s the excerpt from org.javaeerecipes.jpa.BookController:
...
public List<Map> getCustomBookList(){
        customBookList = ejbFacade.obtainCustomList();
        return customBookList;
    }
...
Here are the excerpts from org.javaeerecipes.jpa.session.BookFacade:
...
    protected EntityManager getEntityManager() {
        return em;
    }
...
public List<Map> obtainCustomList(){

        List<Object[]> results = em.createNativeQuery(
                "select id, title, description " +
                "FROM BOOK " +
                " ORDER BY id").getResultList();

        List data = new ArrayList<HashMap>();

        if (!results.isEmpty()) {
            for (Object[] result : results) {
                HashMap resultMap = new HashMap();
                resultMap.put("id", result[0]);
                resultMap.put("title", result[1]);
                resultMap.put("description", result[2]);

                data.add(resultMap);
            }
        }
        return data;
    }
How It Works
One of the most often required tasks of a web application is to display content. What’s more, displaying database content is key to just about every enterprise application. Displaying content in table format provides the user with the ability to see the data because it is stored within the underlying table, in columnar format. The JSF dataTable component provides Java EE applications utilizing the JSF framework with an efficient and powerful way to display entity data in a table format.
The JSF dataTable component is capable of taking a List, DataModel, or Collection of objects and displaying them to the user. This recipe covers two different variations of retrieving data and storing it within a List for use in a dataTable component. The first solution is the most common situation. In both solutions, a managed bean property is used to store the List of entity objects. However, the first solution stores a List of entity objects themselves, whereas the second solution stores a List of Map objects. Let’s walk through each a little more closely.
In Solution #1 to this recipe, the completeBookList field within the BookController managed bean class is used to store the List of Book entities. The getCompleteBookList method populates the List by invoking the BookFacade session bean’s findAll() method to return all of the rows within the BOOK database table. Each database row is stored in a separate Book entity object, and in turn, each Book entity object is stored in the List. Finally, that list is returned to the BookController and assigned to the completeBookList field. In the end, the JSF dataTable component references the completeBookList to display the content.
![]() Note To learn more about working with JSF dataTable components, please refer to Recipe 3-12.
Note To learn more about working with JSF dataTable components, please refer to Recipe 3-12.
In Solution #2, the BookController field named customBookList is used to populate a JSF dataTable. The customBookList field is a List of Map objects. As far as the BookController method of population goes, the customBookList field is populated in much the same manner as the completeBookList in Solution #1. An EJB method is called, which returns the populated List of objects. In this case, the EJB named BookFacade returns a List of Map objects from a native SQL query. The BookFacade session bean class method obtainCustomList is responsible for creating the native SQL query and then storing the results within Map objects. In this case, the native query returns only a subset of the columns that are present within the BOOK database table in each row as a resultList and stores them into a List<Object[]>. A new ArrayList of HashMaps is then created and populated with the contents of the List from the database query. To populate the ArrayList, the List<Object[]> is traversed using a for loop. A HashMap object is created for each object that is returned from the database. The HashMap object is populated with name-value pairs, with the name of the column being the first part, and the value from the entity object being the second part in each element. Each column that was retrieved via the query is stored into the HashMap, and the HashMap itself is then added to a List. In the end, the List of HashMap objects is returned to the managed bean and stored into the customBookList field. In the JSF view, the names that were associated with each of the database columns in the HashMap are used to reference the values for display within the dataTable.
Both of the solutions showcased in this recipe offer valid options for displaying database data JPA within a JSF dataTable component, I recommend using the first solution where possible because there is more chance of error occurring with Solution #2. There is also native SQL hard-coded into the EJB for Solution #2, which is OK when necessary but never the best option. It is always much better when you can utilize an EJB method, such as the findAll method that is available in AbstractFacade (Recipe 9-2), because if the underlying database table changes, then there is no need to alter the application code.
9-8. Creating a Singleton Bean
Problem
You want to develop a session bean in which all application clients will use the same instance to update a current site visitor count. Only one instance of the bean should be allowed per application so that there is always a single counter for the number of visitors.
![]() Note In this recipe, the counter is not cumulative. That is, it is not persisted across application start-ups. To create a cumulative counter, the current count must be persisted to the database before the application or server is restarted.
Note In this recipe, the counter is not cumulative. That is, it is not persisted across application start-ups. To create a cumulative counter, the current count must be persisted to the database before the application or server is restarted.
Solution
Develop a singleton session bean that allows concurrent access by all application clients. The bean will keep track of the number of visitors who have been to the bookstore and display the number within the footer of the Acme Bookstore application. The following bean named BookstoreSessionCounter is a singleton session bean for the Acme Bookstore that is responsible for keeping track of an active session count:
package org.javaeerecipes.jpa.session;

import javax.ejb.Singleton;
import javax.ejb.ConcurrencyManagement;
import static javax.ejb.ConcurrencyManagementType.CONTAINER;

@Singleton
@ConcurrencyManagement(CONTAINER)
public class BookstoreSessionCounter {

    private int numberOfSessions;
   /**
     * Initialize the Bean
     */
     @PostConstruct
     public void init(){
         // Initialize bean here
         System.out.println("Initalizing bean...");
     }

    // Resets the counter on application startup
    public BookstoreSessionCounter(){
        numberOfSessions = 0;
    }

    /**
     * @return the numberOfSessions
     */
    public int getNumberOfSessions() {
        numberOfSessions++;
        return numberOfSessions;
    }

    /**
     *  @param numberOfSessions the numberOfSessions to set.  This could be set
   *  from the database if the current counter were persisted before the application
   *  was shutdown
     */
    public void setNumberOfSessions(int numberOfSessions) {
        this.numberOfSessions = numberOfSessions;
    }
}
Next, let’s look at the JSF managed bean controller that invokes the singleton session bean method for updating the site counter. The following excerpt is taken from a session-scoped managed bean named BookstoreSessionController, and the counter property is used to update the number of visitors within the EJB:
...
@ManagedBean(name="bookstoreSessionController")
@SessionScoped
public class BookstoreSessionController {

    @EJB
    BookstoreSessionCounter bookstoreSessionCounter;

    private int counter;
    private boolean flag = false;

    /**
     * @return the counter
     */
    public int getCounter() {
        if (!flag) {
            counter = bookstoreSessionCounter.getNumberOfSessions();
            flag = true;
        }
        return counter;
    }

    /**
     * @param counter the counter to set
     */
    public void setCounter(int counter) {
        this.counter = counter;
    }


}
Lastly, the counter is bound to a JSF EL expression within the Acme Bookstore Facelets template. The following line of code is excerpted from the template named custom_template_search.xhtml, which resides in the chapter09/layout directory of the book sources:
Number of Vistors: #{bookstoreSessionController.counter}
How It Works
A singleton is a class that is created once per application. There is only one instance of a singleton class at any given time, and all client sessions interact with that same instance. To generate a singleton session bean, denote a bean as such by specifying the javax.ejb.Singleton annotation. Programmatically, the annotation specification is one of the main differences between the coding of a standard stateless session bean and a singleton session bean. However, functionally, the bean is treated much different by the container than a standard stateless session bean.
Singleton session beans are instantiated by the container at an arbitrary point in time. To force the instantiation of a singleton instance at application start-up, the javax.ejb.Startup annotation can be specified. In the case of the example, there is no @Startup annotation specified, so the singleton instance will be instantiated by the container at any given point. However, a singleton will be started up before any of the application EJBs begin to receive requests. In the example, you can see that the @PostConstruct callback annotation is being used. This causes the method on which the annotation is specified to be executed directly after instantiation of the bean. Singletons share the same callback methodology as standard stateless session beans. To read more about callback methods, please refer to Recipe 9-2.
![]() Note If one or more singleton beans depend upon other singleton beans for initialization, the @DependsOn annotation can be specified for the bean to denote which bean it depends upon. A chain of dependencies can be set up using this annotation if needed.
Note If one or more singleton beans depend upon other singleton beans for initialization, the @DependsOn annotation can be specified for the bean to denote which bean it depends upon. A chain of dependencies can be set up using this annotation if needed.
By default, singletons are concurrent, meaning that multiple clients can access them at the same time (also known as thread-safe). There are two different ways in which to control concurrent access to singleton beans. The @ConcurrencyManagement annotation can be specified along with a given ConcurrentManagementType in order to tell the bean which type of concurrency to use. The two types of concurrency are CONTAINER, which is the default type if nothing is specified, and BEAN. In the example, the bean is annotated to specify container-managed concurrency. When container-managed concurrency is specified, the EJB container manages the concurrency. The @Lock annotation can be specified on methods of the singleton to tell the container how client access should be managed on the method. To use the @Lock annotation, specify a lock type of LockType.READ or LockType.WRITE (default) within the annotation to tell the container that many clients can access the annotated method concurrently or that the method should become locked to others when a client is accessing it, respectively. The entire class can also be annotated with @Lock, in which case the designated lock type will be used for each of the methods within the class unless they contain their own lock type designation. For example, the following lines specify a method within a singleton class that should be locked when accessed by a client so that only one client at a time has access:
@Lock(LockType.WRITE)
public void setCounter(int counter){
this.counter = counter;
}
Bean concurrency is different in that it allows full concurrent, thread-safe locking access to all clients on all methods within the class. The developer can use Java synchronization techniques such as synchronized and volatile to help manage the state of concurrency within those singletons designated with bean-managed concurrency.
9-9. Scheduling a Timer Service
Problem
You want to schedule a task that performs database transactions on a recurring interval.
Solution #1
Use the Timer service to schedule a task within a bean using an automatic timer. The timer will specify a required interval of time, and the method used to perform the task will be invoked each time the interval of time expires. The following session bean is set up to create an automatic timer, which will begin upon application deployment. The following code is contained within the Java file named org.javaeerecipes.jpa.timer.TimerBean:
import javax.ejb.Singleton;
import javax.ejb.Schedule;

/**
 * Recipe 9-9 : The EJB Timer Service
 * @author juneau
 */
@Singleton
public class TimerBean {

@Schedule(minute="*/5", hour="*")
    public void automaticTimer(){
        System.out.println("*** Automatic Timeout Occurred ***");
    }
}
The automatic timer will begin when the class is deployed to the application server. Every five minutes, the automaticTimer() method will be invoked as will any processes that are performed within that method.
Solution #2
Create a programmatic timer and specify it to start when it is deployed to the application server. Configure an initialization method within the timer bean that will create the timer automatically when the bean is initialized. The following example class is named org.javaeerecipes.jpa.timer.ProgrammaticTimerExample, and it will be automatically started when the application is deployed:
package org.javaeerecipes.jpa.timer;

import javax.annotation.PostConstruct;
import javax.annotation.Resource;
import javax.ejb.Singleton;
import javax.ejb.Timer;
import javax.ejb.Timeout;
import javax.ejb.TimerService;

@Singleton
@Startup
public class ProgrammaticTimerExample {

    @Resource
    TimerService timerService;

    @PostConstruct
    public void createTimer(){
        System.out.println("Creating Timer...");
        Timer timer = timerService.createTimer(100000, "Timer has been created...");
    }

    @Timeout
    public void timeout(Timer timer){
        System.out.println("Timeout of Programmatic Timer Example...");
    }

}
After deployment, you should see the a message in the server log indicating Creating Timer..., and then once the timer expires, the Timeout of Programmatic Timer Example... message will be displayed in the logs.
How It Works
In days past, enterprise application systems would be set up using various different technologies performing many different operations. For instance, an enterprise system of old may have a work ticket application that is built on Java EE, along with a mailing system that sends e-mail using an operating system process. That e-mail may be generated from a record that the application stored into a database table, and so forth. Enterprise systems such as these work fine when everything is running smoothly, but they can also go badly when one of the components fail. And an application outage can become extensive while time is spent determining what needs to be repaired, where it is located, and what technology was used to build it. Nowadays, it is easy to incorporate all the functionality just discussed under a single Java EE application…under one roof, so to speak. The EJB Timer service helps make such solutions possible, because it offers enterprise applications a method for scheduling tasks that will be performed by the application over a specified interval of time.
There are two different types of timers: programmatic and automatic. In Solution #1 to this recipe, an automatic timer is demonstrated. Although the solution does not perform any actual work, the method annotated with the @Schedule annotation is where the work takes place. An automatic timer is created when an EJB contains one or more methods that are annotated with @Schedule or @Schedules. The @Schedule takes a calendar-based timer expression to indicate when the annotated method should be executed.
![]() Note One or more @Schedule annotations can be grouped within @Scheduled{ ... }, separating each @Schedule with a comma.
Note One or more @Schedule annotations can be grouped within @Scheduled{ ... }, separating each @Schedule with a comma.
Calendar-based timer expressions can contain one or more calendar attributes paired with values to indicate a point in time for invocation of the method. Table 9-1 lists the different calendar-based timer expressions, along with a description of each.
Table 9-1. Calendar-Based Timer Expressions
| Attribute | Description |
|---|---|
| dayOfWeek | One or more days in a week: (0 – 7) or (Sun, Mon, Tue, Wed, Thu, Fri, Sat) |
| dayOfMonth | One or more days in a month: (1 – 31) or (Last) or (1st, 2nd, 3rd, 4th, 5th, Last) along with any of the dayOfWeek values |
| month | One or more months in a year: (1 – 12) or month abbreviation |
| year | Four-digit calendar year |
| hour | One or more hours within a day: (0 – 23) |
| minute | One or more minutes within an hour: (0 – 59) |
| second | One or more seconds within a minute: (0 – 59) |
When creating a calendar-based timer expression, the asterisk (*) can be specified as a wildcard. The forward slash (/) can be used to indicate an interval in time. An interval in time follows this pattern:
beginning time (larger unit) / frequency
Therefore, specifying /5 in the example ( minute="*/5" hour="*") indicates that you want the timer to be executed every five minutes within the hour because the wildcard indicates which hour to begin the timer and the 5 indicates how often. Timer expression attributes can contain more than one value, and a comma should separate each value. To indicate that you want to execute a timer at 3 a.m. and again at 6 a.m., you could write the following:
@Schedule(hour="3,6")
A range of values can also be specified for timer attributes. To indicate that you want to have the timer executed every hour between the hours of 4 and 7 a.m., you could specify the following:
@Schedule(hour"4-7")
Multiple timer expressions can be combined to tune the timer in a more fine-grained fashion. For instance, to specify a timer schedule that will execute at 1 a.m. every Sunday morning, you could write the following:
@Scheule(dayOfWeek="Sun", hour="1")
Programmatic timers are the second option that can be used when developing a timed-process, as demonstrated in Solution #2. A programmatic timer is different from an automatic timer because there is no schedule involved. Rather, a client can invoke a timer, or it can be initialized with the construction of a bean. A programmatic timer contains one method that is denoted using the @Timeout annotation. The @Timeout method will be executed when the timer expires. The timeout method must return void, and it can optionally accept a javax.ejb.Timer object. A timeout method must not throw an application exception.
To create a programmatic timer, invoke one of the create methods of the TimerService interface. Table 9-2 indicates the different create methods that can be used.
Table 9-2. Programmatic Timer Create Methods
| Method | Description |
|---|---|
| createTimer | Standard timer creation |
| createSingleActionTimer | Creates a timer that expires once |
| createIntervalTimer | Creates a timer that expires based upon a given time interval |
| createCalenarTimer | Creates a timer based upon a calendar |
In Solution #2 of this recipe, a standard timer is created, passing an interval of 100,000 milliseconds. This means that the method annotated with @Timeout will be executed once after 100,000 milliseconds has passed. The following is another syntax that could be used to create a timer that has the same schedule:
long duration = 100000;
Timer timer = timerService.createSingleActionTimer(duration, new TimerConfig());
Similarly, a date can be passed to the create method in order to specify a given date and time when the timer should expire. The following timer will expire 30 days from the date in which the application is deployed:
Calendar cal = Calendar.getInstance();
cal.add(Calendar.DATE, 30);
Timer timer = timerService.createSingleActionTimer(cal.getTime(), new TimerConfig());
To create a programmatic calendar-based timer, you must create a new schedule using the ScheduleExpression helper class. Doing so will allow you to utilize the calendar-based expressions that are listed in Table 9-1 to specify the timer expiration date. The following example demonstrates a timer that will expire every Sunday at 1 a.m.:
ScheduleExpression schedule = new ScheduleExpression();
schedule.dayOfWeek("Sun");
schedule.hour("1");
Timer timer = timerService.createCalendarTimer(schedule);
Timers do not need to be created in singleton session beans; they can be used in stateless session beans as well. However, they cannot be specified in stateful session beans. Timers are a topic that cannot be discussed within the boundaries of a single recipe. However, this brief introduction to timers should give you enough to get started using this technology within your applications. To learn more about timers, please refer to the online documentation at http://docs.oracle.com/javaee/6/tutorial/doc/bnboy.html.
![]() Note All timers are persistent by default, meaning that if the server is shut down for some reason, the timer will become active again when the server is restarted. In the event that a timer should expire while the server is down, the timer will expire (or the @Timeout method will be called) once the server is functioning normally again. To indicate that a timer should not be persistent, call TimerConfig.setPersistent(false), and pass it to a timer-creation method.
Note All timers are persistent by default, meaning that if the server is shut down for some reason, the timer will become active again when the server is restarted. In the event that a timer should expire while the server is down, the timer will expire (or the @Timeout method will be called) once the server is functioning normally again. To indicate that a timer should not be persistent, call TimerConfig.setPersistent(false), and pass it to a timer-creation method.
9-10. Performing Optional Transaction Life-Cycle Callbacks
Problem
You are interested in beginning a transaction when an enterprise bean is instantiated and ending the transaction when it is destroyed.
Solution
Choose to utilize the optional transaction life-cycle callbacks built into EJB. To begin a transaction during the @PostConstruct or @PreDestroy callbacks, annotate the methods accordingly with @TransactionAttribute, passing the TransactionAttributeType.REQUIRES_NEW attribute. In the following example, a transaction is started when the bean named AcmeFacade is created. Another transaction is started when the bean is being destroyed.
import javax.annotation.PostConstruct;
import javax.annotation.PreDestroy;
import javax.ejb.Stateful;
import javax.ejb.TransactionAttribute;
import javax.ejb.TransactionAttributeType;
import javax.persistence.EntityManager;
import javax.persistence.PersistenceContext;
import javax.persistence.PersistenceContextType;

@Stateful
public class AcmeFacade {

    @PersistenceContext(unitName = "JavaEERecipesPU", type = PersistenceContextType.EXTENDED)
    private EntityManager em;

    @TransactionAttribute(TransactionAttributeType.REQUIRES_NEW)
    @PostConstruct
    public void init() {
        System.out.println("The Acme Bean has been created");
    }

    @TransactionAttribute(TransactionAttributeType.REQUIRES_NEW)
    @PreDestroy
    public void destroy() {
        System.out.println("The Acme Bean is being destroyed...");
        em.flush();
    }
}
How It Works
Session beans have callback methods that are invoked when certain stages of a bean’s life cycle occur. For instance, a method can be registered within a session bean via annotation to invoke after the bean is constructed (@PostConstruct), before it is destroyed (@PreDestroy), and so on. Sometimes it makes sense to start a new transaction when one of these events occurs. It is possible to specify the transactional status of an annotated life-cycle callback method within a session bean when using container-managed transactions.
The annotation accepts a transaction type as per the values listed in Table 9-3.
Table 9-3. Container-Managed Transaction Demarcation
| Attribute | Description |
|---|---|
| MANDATORY | The container must invoke an enterprise bean method whose transaction is set to this attribute in the client’s transaction context. The client is required to call with a transaction context. |
| REQUIRED | The container must invoke an enterprise bean method whose transaction is set to this attribute value with an unspecified transaction context. |
| REQUIRES_NEW | The container must invoke an enterprise bean method whose transaction is set to this attribute value with a new transaction context. |
| SUPPORTS | If the client calls with a transaction context, then the container treats as REQUIRED. If the client calls without a transaction context, the container treats it as NOT_SUPPORTED. |
| NOT_SUPPORTED | The container invokes an enterprise bean method whose transaction attribute is set to this value with an unspecified transaction context. |
| NEVER | The container invokes an enterprise bean method whose transaction is set to this value without a transaction context defined by the EJB specification. |
By default, the life-cycle callback methods are not transactional in order to maintain backward compatibility. By annotating the callback method with the @TransactionAttribute and the preferred demarcation type, the callback method has opted in to be transactional.
9-11. Ensuring a Stateful Session Bean Is Not Passivated
Problem
Rather than have your inactive stateful session bean passivated, you want to keep it in memory.
Solution
Specify to the container that the bean is not to be passivated by indicating as such within the @Stateful annotation. To opt out of passivation, set the passivationCapable attribute of the @Stateful annotation to false, as demonstrated in the following excerpt:
@Stateful(passivationCapable=false)
public class AcmeFacade {
    ...
}
How It Works
When a stateful session bean has been inactive for a period of time, the container may choose to passivate the bean in an effort to conserve memory and resources. Typically, the EJB container will passivate stateful session beans using a least recently used algorithm. When passivation occurs, the bean is moved to secondary storage and removed from memory. Prior to the passivation of a stateful session bean, any methods annotated with @PrePassivate will be invoked. When a stateful session bean that has been passivated needs to be made active again, the EJB container activates the bean, then calls any methods annotated with @PostActivate, and finally moves the bean to the ready stage.
In EJB 3.2, stateful session beans can opt out of passivation so that they will remain in memory instead of being transferred to secondary storage if inactive. This may be helpful in situations where a bean needs to remain active for application processes or if the bean contains a nonserializable field, since these fields cannot be passivated and are made null upon passivation. To indicate that a bean is not to be passivated, set the passivationCapable attribute of the @Stateful annotation to false, as per the solution to this recipe.
9-12. Denoting Local and Remote Interfaces
Problem
You want to explicitly designate a local or remote interface for an EJB.
Solution
A business interface cannot be made both the local and remote business interfaces for a bean. Therefore, a new API has been developed to specify whether a business interface is intended as local or remote. The following rules pertain to business interfaces implemented by enterprise beans classes:
- The java.io.Serializable, java.io.Externalizable, and interfaces defined by the javax.ejb package are always excluded when determination of local or remote business interfaces are declared for a bean.
- If a bean class contains the @Remote annotation, then all implemented interfaces are assumed to be remote.
- If a bean class contains no annotation or if the @Local annotation is specified, then all implemented interfaces are assumed to be local.
- Any business interface that is explicitly defined for a bean that contains the no-interface view must be designated as @Local.
- Any business interface must be explicitly designated as local or remote if the bean class explicitly specifies the @Local or @Remote annotation with a nonempty value.
- Any business interface must be explicitly designated as local or remote if the deployment descriptor specifies as such.
How It Works
The release of EJB 3.0 greatly simplified development with EJBs because it introduced the no-interface view for making local business interfaces optional. The no-interface view automatically exposes all public methods of a bean to the caller. By default, a no-interface view is automatically exposed by any session bean that does not include an implements clause and has no local or remote client views defined. The EJB 3.2 release aims to provide further granularity for those situations where local and remote interfaces need to be explicitly specified.
Let’s break down the rules that were defined within the solution to this recipe. First, if an EJB exposes local interfaces, then there is no need to explicitly denote a bean as such. For instance, the following bean contains a local interface, although it is not explicitly denoted:
@Stateless
public class AcmeSession implements interfaceA {
        ...
}
public interfaceA { ... }
If a bean class is annotated with @Remote, then any interfaces that it implements are assumed to be remote. For instance, the following bean class implements two interfaces, and both are assumed to be remote, although they do not contain any annotation to indicate as such.
@Remote
@Stateless
public class AcmeSession implements interfaceA, interfaceB {
        ...
}
If a bean class contains the @Local annotation, then any interfaces that it implements are assumed to be local. For instance, the following bean class implements two interfaces, and both are assumed to be local although they do not contain any annotation to indicate as such:
@Local
@Stateless
public class AcmeSession implements interfaceA, interfaceB {
        ...
}
If a bean class contains the @Local or @Remote annotation and specifies an interface name within the annotation, then the specified interface is designated the same designation as the annotated bean. For instance, the following bean is annotated to include a local business interface, and the name of the interface is specified in the annotation, thereby making the interface local.
@Local(interfaceA.class)
@Stateless
public class AcmeSession implements interfaceA {
        ...
}
These new designation rules make it easier to designate and determine the type of business interface that is implemented by a bean.
9-13. Processing Messages Asynchronously from Enterprise Beans
Problem
You want to have the ability to process messages from session beans in an asynchronous manner.
Solution
Develop a message-driven bean to perform the message processing for your application. To develop a message bean, create an EJB that is annotated with @MessageDriven, passing the appropriate configuration options. In the bean, code a method named onMessage that will perform all of the message processing. The following example, org.javaeerecipes.chapter09.recipe09_13.AcmeMessageBean, demonstrates how to code a message-driven bean that processes messages from a javax.jms.Queue that has been configured within the application server container.
@MessageDriven(mappedName="jms/Queue", activationConfig = {
    @ActivationConfigProperty(propertyName = "destinationType",
                              propertyValue = "javax.jms.Queue")
})
public class AcmeMessageBean implements MessageListener {

    public AcmeMessageBean(){

    }

    @Override
    public void onMessage(Message msg) {
        if(msg != null){
            performExtraProcessing();
            System.out.println("Message has been received: " + msg);
        } else {
            System.out.println("No message received");
        }
    }

    public void performExtraProcessing(){
        System.out.println("This method could perform extra processing");
    }

}
How It Works
Message-driven beans (MDBs) are Enterprise JavaBeans that are utilized for processing messages in an asynchronous manner. Most often MDBs are JMS message listeners, receiving messages and processing accordingly. A message-driven bean is created by annotating a bean with the @MessageDriven annotation and optionally implementing the MessageListener interface. When a message is received in the container queue, the container invokes the bean’s onMessage method, which contains the business logic that is responsible for processing the message accordingly.
![]() Note Any session bean can be used for processing messages, but only message-driven beans can do so in an asynchronous manner.
Note Any session bean can be used for processing messages, but only message-driven beans can do so in an asynchronous manner.
MDBs must be made public, and not static or final. An MDB must contain a public, no-argument constructor, and it must contain a method named onMessage that accepts a javax.jms.Message argument. The onMessage method is responsible for performing all message processing, and it can utilize other methods within the bean to help out, where needed.
Bean providers may provide special configurations for MDBs to the deployers, such as information regarding message selectors, acknowledgment modes, and so on, by means of the activationConfig element of the @MessageDriven annotation. The EJB 3.2 release provides a standard list of activationConfig properties for JMS 2.0 alignment. Table 9-4 lists the new properties along with a description of what they do.
Table 9-4. JMS 2.0 Aligned activationConfig Properties
| Property | Description |
|---|---|
| destinationLookup | Provides advice to the deployer regarding whether the message-driven bean is intended to be associated with a Queue or Topic. Values for this property are javax.jms.Queue and javax.jms.Topic. |
| connectionFactoryLookup | Specifies the lookup name of an administratively defined ConnectionFactory object that will be used for a connection to the JMS provider from which a message-driven bean will send JMS messages. |
| clientId | Specifies the client identifier that will be used for a connection to the JMS provider from which a message-driven bean will send JMS messages. |
| subscriptionName | If the message-driven bean is intended to be used with a Topic, then the bean provider can specify the name of a durable subscription with this property and set the subscriptionDurability property to Durable. |
| shareSubscriptions | This property is only to be used when a message-driven bean is deployed to a clustered application server, and the value for this property can be either true or false. A value of true means that the same durable subscription name or nondurable subscription will be used for each instance in the cluster. A value of false means that a different durable subscription name or nondurable subscription will be used for each instance in the cluster. |