
JavaFX provides capabilities to interoperate with HTML5 content. The underlying web page rendering engine in JavaFX is the popular open source C++ API called WebKit. This API is used in Apple’s Safari browsers, Amazon’s Kindle devices, and was used in Google’s Chrome browser prior to version 27 (the WebKit fork is called Blink). HTML5 is the de facto standard markup language for rendering content in web browsers. HTML5 content consists of JavaScript, CSS, Scalable Vector Graphics (SVG), Canvas API, Media, XML, and new HTML element tags. In short, you can create JavaFX applications embedded with web browser-like functionality.
The relationship between JavaFX and HTML5 is an important combination because they complement one another by drawing from each of their individual strengths. For instance, JavaFX’s rich client APIs coupled with HTML5’s rich web content create a user experience resembling a web application with the characteristics of native desktop software. This new breed of application is called the Rich Internet Application (RIA) .
Before delving into the example applications, the chapter discusses the following core Java/JavaFX web-based APIs :
Java 9 Module javafx.web, Package namespace: javafx.scene.web
WebEngine
WebView
WebEvent
Java 9 Module: jdk.jsobject, Package namespace: netscape.javascript
JSObject
Java 9 Module: jdk.incubator.httpclient, Package namespace: jdk.incubator.http.
The module jdk.incubator.httpclient is currently experimental in Java 9. According to some reports, the module will be finalized in Java 10 and named java.httpclient.
HttpClient
HttpRequest
HttpResponse
In this chapter, you examine example applications that do the following:
Display HTML5 content into a WebView node (an SVG-based Analog Clock)
Communication between Java and JavaScript (WeatherWidget)
JavaFX Web and HTTP2 APIs
Before learning about JavaFX Web and HTTP2 APIs, I want to mention that the code examples in this chapter were developed as Java 9 modules (Jigsaw). Having said this, I thought it might be a good idea to show you a module definition with the three modules discussed throughout this chapter:
javafx.web - WebEngine and WebView
jdk.jsobject - JSObject
jdk.incubator.httpclient - HttpClient, HttpRequest, HttpResponse
Shown here is a typical application module that depends on these three modules:
module com.jfxbe.myapplicationmodule {requires javafx.web;requires jdk.jsobject;requires jdk.incubator.httpclient;exports com.jfxbe.myapplicationmodule;}
As a quick reference for the impatient reader, Table 10-1 contains the modules and their class descriptions. I also provide a short code snippet on how to use the various APIs relating to JavaFX Web and HTTP2 APIs in the description column. To see a more detailed discussion related to each class, you can skip Table 10-1.
Table 10-1. Description of Classes Contained Within the Java Modules
Module Name | Class Name | Description |
|---|---|---|
javafx.web | javafx.scene.web.WebEngine | A non-visible UI component capable of loading web content. WebEngine webEngine = new WebEngine(url); |
javafx.scene.web.WebView | A JavaFX node backed with a WebEngine instance capable of rendering HTML5 content to be displayed. WebView webView = new WebView();webView.getEngine().load( www.oracle.com "); | |
javafx.scene.web.WebEvent | Callbacks for common HTML browser-based web events. These web events are handled by the WebEngine instance. webView.getEngine() .setOnAlert((WebEvent<String> t) -> { showErrorDialog(t.getData()); }); | |
jdk.jsobject | netscape.javascript.JSObject | The JavaScript bridge object allows Java to talk to the JavaScript engine. When returned, you can set Java objects with the setMember() method to allow JavaScript code to invoke Java methods. JSObject jsobj = (JSObject) webView.getEngine() .executeScript("window");jsobj.setMember("WeatherWidget", this); |
jdk.incubator. httpclient | jdk.incubator.http.HttpClient | A new way to make HTTP requests. Additional features include WebSockets, Authenticators, Proxies, and SSL. String jsonText = HttpClient.newHttpClient() .send(HttpRequest.newBuilder( URI.create(urlQueryString)) .GET().build(), BodyHandler.asString()).body(); |
jdk.incubator.http.HttpRequest | The new API to make HTTP requests such as GET, POST, UPDATE, DELETE, and many other methods. import static jdk.incubator.http.HttpRequest.BodyProcessor.fromString; import static jdk.incubator.http.HttpClient.newHttpClient; HttpRequest req = HttpRequest.newBuilder( URI.create(" http://acme/create-account ")) .POST(fromString("param1=abc,param2=123")) .build(); newHttpClient().sendAsync(req, BodyHandler.discard(null)) .whenCompleteAsync( (resp, throwable) -> { System.out.println("Saving complete."); }); | |
jdk.incubator.http.HttpResponse | After an HTTP request has been made, an HTTP response object is returned. Response objects are populated with a status code, HTTP headers, and the payload or content body. Refer to the Javadoc documentation to see the many methods to convert body content to different data formats. HttpResponse.BodyProcessor |
Web Engine
JavaFX provides a non-GUI component capable of loading HTML5 content, called the WebEngine API (javafx.scene.web.WebEngine). This API is basically an object instance of the WebEngine class to be used to load a file containing HTML5 content. The HTML5 file to be loaded can be located on a local filesystem, a web server, or inside a JAR file. When you load a file using a web engine object, a background thread is used to load web content so that it does not block the JavaFX application thread. In this section, you learn about the following two WebEngine methods for loading HTML5 content:
load(String URL)
loadContent(String HTML)
WebEngine’s load() Method
The WebEngine API, like many APIs that use background threads, adheres to an event-based programming model. Being event-based usually means that method invocations are asynchronous (callbacks); for example, a web engine can load web content asynchronously from a remote web server and notify handler code when the content is finished loading.
After being notified, the handler code would then be run on the JavaFX application thread. Listing 10-1 loads HTML content from a remote web server in a background worker thread.
Listing 10-1. A WebEngine with a ChangeListener Lambda that Determines Whether the Background Loading Is Finished (Succeeded)
WebEngine webEngine = new WebEngine();webEngine.getLoadWorker().stateProperty().addListener( (obs, oldValue, newValue) -> {if (newValue == SUCCEEDED) {// finished loading...// process content...// Use webEngine.getDocument();}});webEngine.load("https://java.com");
To monitor or determine whether the worker thread has finished, a javafx.beans.value.ChangeListener (lambda expression) can be added to the state property. If you are unfamiliar with creating a lambda expression, refer to Chapter 4 on Lambda expressions to be able to use functional interfaces such as the ChangeListener or InvalidationListener objects.
In Listing 10-1, you’ll notice a ChangeListener as a lambda expression added to the state property via the addListener() method. The state property contains the status or lifecycle of the web engine’s background worker thread. The states are based on the State enum, which is owned by the javafx.concurrent.Worker interface.
After setting up the listener, the code begins the loading process by using the web engine’s load() method. Also notice that the string passed into the load() method is a valid URL string representing the location of the web content file or web server.
When a ChangeListener lambda expression is added to the state property, the parameters are as follows:
obs is of type ObservableValue<? extends Worker.State>, which references the state property on the web engine object.
oldValue is of type Worker.State enum and contains the previous value before the state property has changed.
newValue is of type Worker.State enum and contains the new state property.
The type specifiers for each parameter of the lambda expression (ChangeListener) were left off to allow the parameter signature to be more concise. After the state property changes, the newValue parameter can be checked for various thread states. In Listing 10-1, the newValue variable is used to check the state of the worker thread, which is an example of eager evaluation.
To be more thorough, I listed all the possible worker thread states:
READY, SCHEDULED, RUNNING, SUCCEEDED, CANCELLED, FAILEDAs you saw in Listing 10-1, the code determines whether the worker thread is finished loading the web content, by checking the worker thread’s state against the Worker.SUCCEEDED enum value.
WebEngine’s loadContent( ) Method
One additional way to load HTML5 content is by using the web engine’s loadContent(String htmlText) method and accepting a string. What’s nice about the loadContent() method is that HTML content represented as a string can be pre-generated without having to fetch web pages from a remote server. The following code snippet loads a string representing HTML content:
webEngine.loadContent("<html><body><b>JavaFX Rocks!</b></body></html>");Now that you know two strategies to load HTML content, you will see how to obtain and manipulate the raw content, along with common types of data formats that may be obtained from the web engine object after the web content is loaded.
HTML DOM Content
The web engine can load the current page’s document object model (DOM) as XML content following the W3C standards-based APIs for Java. Typically, developers who are familiar with an XML Document Object Model (DOM) can easily interrogate org.w3c.dom.Document objects. This section shows you how to obtain a W3C XML Document object and the raw XML as a String object.
Obtaining an org.w3c.dom.Document (DOM) Object
After a web engine instance successfully loads HTML content, an XML DOM can be obtained by invoking the WebEngine object’s getDocument() method.
The following code snippet obtains a document (org.w3c.dom.Document) instance, assuming the web engine is finished loading the HTML or XML content.
webEngine.getLoadWorker().stateProperty().addListener( (obs, oldValue, newValue) -> {if (newValue == SUCCEEDED) {org.w3c.dom.Document xmlDom = webEngine.getDocument();// Do something here with xmlDom}});webEngine.load("http://myserver.com/my_cool_xml:data.xml");
Using Raw XML Content as a String
Depending on the situation, sometimes it is necessary to obtain the raw XML data as a string of text. Developers often use libraries such as JDOM or dom4j to convert easily between the two data format types. Listing 10-2 shows how to convert from an org.w3c.dom.Document object to a String object without the need of using the previous mentioned XML parsing libraries.
Listing 10-2. Converting an XML DOM into a String
TransformerFactory transformerFactory = TransformerFactory.newInstance();Transformer transformer = transformerFactory.newTransformer();StringWriter stringWriter = new StringWriter();transformer.transform(new DOMSource(webEngine.getDocument()),new StreamResult(stringWriter));String xml = stringWriter.getBuffer().toString();System.out.println(xml);
The output of Listing 10-2 is shown here:
<?xml version="1.0"?><people><person eyes="green" hair="blonde"><firstname>Tracey</firstname><lastname>Dea</lastname></person><person eyes="brown" hair="black"><firstname>Carl</firstname><lastname>Dea</lastname></person></people>
The JavaScript Bridge
Early in this chapter, I discussed how the underlying web engine uses WebKit to load and interact with HTML5 content. What does it mean to interact with HTML5 content? JavaFX’s WebEngine API has a JavaScript bridge that allows Java code to invoke JavaScript functions or script code inside HTML5 content. So, another question would be how then does one obtain the raw HTML5 content as a string?
Some common use cases out in the field are the following: obtaining raw HTML content for web crawling (used in search engines), caching web pages, screen scraping, data mining, and data analysis. To obtain the raw HTML5, you will need to interact with the JavaScript engine in WebKit to access the web content’s DOM using the WebEngine’s executeScript() method. The following code statement accesses the HTML document (DOM) to obtain the raw content from the documentElement.outerHTML (the top-most element):
String html = (String) webEngine.executeScript("document.documentElement.outerHTML");Communicating from Java to JavaScript
Another example of using the method executeScript() is shown in Listing 10-3, where the code calls into a JavaScript function sayHello() to add text into an existing HTML DIV element with an id of my_message. The HTML file containing the function sayHello() is shown in Listing 10-4.
Listing 10-3. Java Calling a JavaScript Function
// From Java CodewebEngine.executeScript("sayHello('Hi there');");
The Java code in Listing 10-3 calls the JavaScript function sayHello() to update the DIV element with an id of my_message. Listing 10-4 shows the HTML file containing the sayHello() function and the DIV element. Notice the code will retrieve the DIV element using the DOM’s function document.getElementById(). To see more about JavaScript and how to manipulate the DOM, visit:
https://developer.mozilla.org/en-US/docs/Web/API/Document
Listing 10-4. An HTML File Containing the sayHello() Function
<script>function sayHello( msg ) {document.getElementById('my_message').innerHTML = msg;}</script>..<div id="my_message"></div>
Being able to call JavaScript is a powerful facility that allows Java code to use the WebEngine object’s JavaScript engine to manipulate the DOM. But what about JavaScript code talking back to Java code?
Communicating from JavaScript to Java
Java 8 allows JavaScript code to make calls into Java code. Allowing JavaScript to call Java code means that web developers can now take advantage of many Java APIs. In this section, we briefly discuss how to allow JavaScript code to communicate with Java code.
Enabling JavaScript to talk to Java is easy. The first step is obtaining the WebEngine object’s JSObject object via a call to the method executeScript("window"). The JSObject is a wrapper object to allow the bridge between the two languages.
After obtaining the JSObject, any object can be passed into the JavaScript engine’s context simply by invoking the setMember() method. To invoke the setMember() method, you pass in a string name and the corresponding object. Assuming the member object has public instance methods, the JavaScript code can access them. Listing 10-5 shows how to set up the JSObject for the JavaScript engine to talk to Java.
Listing 10-5. Allowing JavaScript Code to Make Upcalls to Java Code
// The web view's web enginewebView.getEngine().getLoadWorker().stateProperty().addListener( (obs, oldValue, newValue) -> {if (newValue == Worker.State.SUCCEEDED) {// Let JavaScript make upcalls to this (Java) classJSObject jsobj = (JSObject) webView.getEngine().executeScript("window");jsobj.setMember("ABCD", new HelloWorld() );} });
You can see in Listing 10-5 that the HelloWorld class instance is set as a member in the (JSObject) object. Listing 10-6 shows the simple HelloWorld class with a sayGoodbye() method.
Listing 10-6. Java Class with the Public Method sayGoodbye()
public class HelloWorld () {public String sayGoodbye(String name) {return "Hasta la vista " + name;}}
After you’ve set a HelloWorld instance as a JSObject member named ABCD, the JavaScript function sayGoodbye() shown in Listing 10-7 can now invoke the Java method ABCD.sayGoodbye().
Listing 10-7. JavaScript Code Calling Java Code
..<script>function sayGoodbye(name) {var message = ABCD.sayGoodbye(name);document.getElementById('my_message').innerHTML = message;}</script>..<div id="my_message"></div>
As a warning, be careful exposing methods that can allow client code to gain access and, thus, potentially harm or view private data.
Caution
Because JavaScript code has the capability to make calls into Java, it is very important to make sure you aren’t exposing APIs that could potentially harm systems or view private data.
As mentioned earlier in the chapter, the WebEngine object is a non-GUI component capable of loading web content, so you might be wondering if it is possible to make web service calls capable of retrieving serialized data that has different data formats such as the popular JSON format. To answer this question, you will want to know the WebEngine API’s responsibilities and limitations.
When using JavaFX’s WebEngine API to request web content such as HTML, JSON, and XML data, you will encounter some limitations; some of these involve the ability to fetch (GET) data from or submit (POST) data to a web server asynchronously. These types of web requests are called RESTful services.
Of course, there are a handful of interesting ways (hacks) to get JSON data using the WebEngine object by calling into the HTML DOM to obtain text content. Listing 10-8 is an example of how to obtain the JSON text content inside of its HTML DOM.
Listing 10-8. Obtaining the JSON Text Inside the DOM
webEngine.load("http://myserver.org/current-weather?format=json");...// handler code to obtain JSON data.String json = (String) webEngine.getDocument().getElementsByTagName("body").item(0).getTextContent();
The handler code traverses the HTML’s DOM to obtain text content retrieved from the web engine object. Even though it looks easy to implement to get JSON data as a string, I do not recommend using this approach because it is rather fragile and nonstandard. From a code-maintenance standpoint, the code could be taken out of context and a potential bug could surface in the future. I’m sure you’ve heard the phrase “Just because you can do something doesn’t mean you should.”
You will quickly find that the WebEngine API’s responsibility is basically for loading HTML5 and interacting with its content (HTML/JavaScript). The WebEngine API is not responsible for making web service calls or serializing data with different transport protocols.
So, is there a better way to make web requests (RESTful)? Of course there is. While there are many libraries you could choose from that simplify web service calls, the next section shows you how to do things using Java 9’s new experimental module called jdk.incubator.httpclient.
Java 9 Module jdk.incubator.httpclient
In the prior edition of this book related to web requests, we used legacy APIs such as the HttpURLConnection class; however, in this chapter we replace it in favor of the new experimental Java 9 module HTTP2 (JSR 110). For many years, Java developers relied heavily on third-party libraries to make web requests in a convenient way. In the previous edition of this book, I provided a pure Java solution by using the legacy HttpURLConnection API; however, it had limitations. Here is a brief rundown of the limitations of the HttpURLConnection API:
It supported older protocols that are now obsolete such as gopher, ftp, etc. It does not support WebSockets.
The APIs are very difficult to use. The APIs don’t use a fluent interface API pattern or lambdas expressions for preparing requests and handling error conditions.
Request calls are in a blocking mode only. The APIs don’t use Java 8 new CompletableFuture APIs.
The experimental Java 9 module jdk.incubator.httpclient contains new APIs to allow users to make HTTP web requests that use Java 8’s lambdas and concurrency API CompletableFuture. The CompletableFuture APIs allow you to make an asynchronous call to later complete. Once the call is complete, the handler code can then be triggered to process the HttpResponse. Later in this chapter, we will use these new APIs with an example Weather Widget application capable of making RESTful calls returning JSON data.
In the beginning, the Java architects were going to add the new HTTP2 modules to Java 9; however, as deadlines got tighter for project Jigsaw, it was decided to be pushed out to Java 10. The good news about the new HTTP2 module is that the engineers created an incubator project under the module name jdk.incubator.httpclient within JDK 9. The incubator area is for experimentation and will eventually end up as official core APIs. To see the HTTP2 JDK enhancement proposal, visit http://openjdk.java.net/jeps/110 .
Although the new HTTP2 module in Java 9 is experimental, it is fully functional, as far as I know. The official HTTP2 module implementation in Java 10 will likely be named java.httpclient. In fact, once the module moves to Java 10 your code that relies on Java 9’s HTTP client module (jdk.incubator.httpclient) will likely break and need to point to the new module name. As a quick recap, if you remember from Chapter 2 on modularity, your module definition might look like the following:
module com.jfxbe.myclientmodule {requires jdk.incubator.httpclient;exports com.jfxbe.myclientmodule;}
Assuming you have your JAVA_HOME and PATH environment variables set, you may not need to add the jdk.incubator.httpclient module when executing your application module; however, the --add-modules switch is available for adding third-party or platform modules to your module path. To be on the safe side, be sure to add (--add-modules) the httpclient module when running code, as shown here:
$ java --add-modules jdk.incubator.httpclient --module-path mods com.jfxbe.myclientmoduleIf you aren’t familiar with Java 9 modules, refer to Chapter 2 about JavaFX and Jigsaw for more details. Assuming you know about the necessary items, let’s continue the discussion of the HTTP2 module.
The new HTTP2 module is mainly divided into two parts—the HttpClient and the HttpRequest APIs. The HttpClient APIs are all about the connections and the HttpRequest APIs are about web requests. Both use the builder pattern with a static method HttpClient.newBuilder() and HttpRequest.newBuilder(), respectively. When following the builder pattern, most methods related to properties allow you to specify values in an ad hoc way. Each method returns the initially created builder instance.
After an invocation of newBuilder() on HttpClient and HttpRequest an instance of a HttpClient.Builder and HttpRequest.Builder is returned. Once you have finished specifying values on property methods, you will invoke the build() method to return the actual instance of the object. In the case with an HttpClient.Builder instance and a call to the build() method, an HttpClient instance is returned to the caller.
HttpClient API
The Java 9 HTTP2 module’s HttpClient API provides numerous connection settings. According to the Javadoc documentation, an HttpClient.Builder supports the following connection settings shown in Table 10-2.
Table 10-2. Connection Settings When Using the HttpClient.Builder Class
Connection Property | Description |
|---|---|
authenticator(Authenticator a) | Sets an authenticator to use for HTTP authentication. |
cookieManager(CookieManager cookieManager) | Sets a cookie manager. |
executor(Executor executor) | Sets the ExecutorService to be used for sending and receiving asynchronous requests. |
followRedirects(HttpClient.Redirect policy) | Specifies whether requests will automatically follow redirects issued by the server. |
pipelining(boolean enable) | Enables pipelining mode for HTTP/1.1 requests sent through this client. |
priority(int priority) | Sets the default priority for any HTTP/2 requests sent from this client. |
proxy(ProxySelector selector) | Sets a ProxySelector for this client. |
sslContext(SSLContext sslContext) | Sets an SSLContext. |
sslParameters(SSLParameters sslParameters) | Sets an SSLParameters. |
version(HttpClient.Version version) | Requests a specific HTTP protocol version where possible. |
A typical web site that uses basic authentication will specify an instance of a java.net.Authenticator. Listing 10-9 shows an HttpClient created with a basic authentication.
Listing 10-9. Basic Authentication Specified on an HttpClient Instance
HttpClient client = HttpClient.newBuilder().authenticator(new Authenticator() {@Overrideprotected PasswordAuthentication getPasswordAuthentication() {return new PasswordAuthentication("username", "pa$$w0rd1".toCharArray());}}).build();
HttpRequest API
After building your HTTP client, you need to create an HTTP request using the HttpRequest.newBuilder() method to create an HttpRequest.Builder instance. This is where you specify properties to build up a web request. Remember how I mentioned the older HttpURLConnection APIs limitations? One of the limitations was that the API was difficult to use. To compare and contrast, let’s look at the legacy and improved ways to make a synchronous HTTP GET web request. Listing 10-10 shows the legacy way to make an HTTP GET web request.
Listing 10-10. The Legacy Way to Make an HTTP GET Web Request
URL url = new URL(urlQueryString);HttpURLConnection connection = (HttpURLConnection) url.openConnection(); connection.setDoOutput(true);connection.setInstanceFollowRedirects(false);connection.setRequestMethod("GET");connection.setRequestProperty("Content-Type", "application/json"); connection.setRequestProperty("charset", "utf-8");connection.connect();InputStream inStream = connection.getInputStream();output(inStream);
As you can see, the legacy code in Listing 10-10 is verbose. Also, it appears that the http client and request APIs are combined. To see the new and improved code using the new http2 module, look at Listing 10-11 (HttpRequest).
Listing 10-11. The Improved Way to Make an HTTP GET Web Request
HttpRequest request = HttpRequest.newBuilder(URI.create(queryStr)).GET().build();HttpResponse<String> response = HttpClient.newHttpClient().send(request,BodyHandler.asString());System.out.println(response.statusCode());System.out.println(response.body());
The output of Listing 10-11 should look something like the following:
200<html><body><div>hello world</div></body></html>
You will notice in Listing 10-11 that the HTTP GET is a method instead of a string specified on the legacy method setRequestMethod("GET"). The new HttpRequest.Builder API also allows you to specify a string method by using the method(String, BodyProcessor) method. The method() method is usually used on the less common HTTP methods such as OPTION or HEAD. Since the HTTP protocol is a standard, the HTTP request builder supports the other commonly used methods, such as PUT, POST, and DELETE.
In Listing 10-11 you’ll notice the method send() being used as an equivalent blocking behavior to Listing 10-10. In the second scenario, the send() method is also making a blocking call to a remote web server. Later, you will learn how to make non-blocking calls to the remote web server.
There are many ways to create HttpRequest instances by using an HttpRequest.Builder object. To begin, you first must call the HttpRequest.newBuilder() method. All the available property methods you can specify on an HttpRequest.Builder object are listed in Table 10-3. Remember when you are done specifying property methods on your HttpRequest.Builder instance, you will call the build() method to return an HttpRequest object.
Table 10-3. The HttpRequest.Builder Request Property Methods When Using the HttpRequest.Builder Class
Request Property | Description |
|---|---|
body(HttpRequest.BodyProcessor reqproc) | Sets a request body for this builder. |
copy() | Returns an exact duplicate copy of this builder based on current state. |
expectContinue(boolean enable) | Requests server to acknowledge request before sending request body. |
followRedirects(HttpClient.Redirect policy) | Specifies whether this request will automatically follow redirects issued by the server. |
GET() | Builds and returns a GET HttpRequest from this builder. |
header(String name, String value) | Adds the given name/value pair to the set of headers for this request. |
headers(String... headers) | Adds the given name/value pairs to the set of headers for this request |
method(String method) | Builds and returns an HttpRequest from this builder using the given method String. |
POST() | Builds and returns a POST HttpRequest from this builder. |
proxy(ProxySelector proxy) | Overrides the ProxySelector set on the request's client for this request. |
PUT() | Builds and returns a PUT HttpRequest from this builder. |
setHeader(String name, String value) | Sets the given name/value pair to the set of headers for this request. |
timeout(TimeUnit unit, long timeval) | Sets a timeout for this request. |
uri(URI uri) | Sets this HttpRequest’s request URI. |
version(HttpClient.Version version) | Overrides the HttpClient.version() setting for this request. |
Now that you’ve seen how easily you can make synchronous (blocking) web requests using send(), let’s see how to make RESTful requests asynchronously (non-blocking). Next you will see more examples of how to make RESTful requests using Java 9’s experimental module jdk.incubator.httpclient.
Making RESTful Requests
In the Enterprise Web development world, you will inevitably encounter the concept of RESTful web services. Based on the concept of representational state transfer (REST), RESTful web services are lightweight HTTP requests that typically involve XML or JSON-formatted data. To make RESTful calls, the web request will contain a request method that tells the web server the type of HTTP data flow transaction.
Like database transactions, RESTful conventions follow the concept of CRUD (Create, Read, Update, and Delete), where the create stage is a POST request, read is a GET, update is a PUT, and delete is a DELETE. While the actions GET and DELETE only involve a query string to make a request, POST and PUT often involve a payload of larger amounts of data as part of the request.
The HTTP GET Request
Because RESTful services are beyond the scope of this book, I will detail only the two common RESTful call requests—GET and POST. Listing 10-12 shows the familiar HTTP GET request that developers typically perform when retrieving JSON data. Keep in mind that in Listing 10-12, the method sendAsync() is used as an asynchronous call to the remote web server. This involves a background worker thread fetching the data and later being notified when it is complete.
Listing 10-12. A RESTful GET Request to Retrieve Weather Data
import static jdk.incubator.http.HttpClient.newHttpClient;import static jdk.incubator.http.HttpRequest.newBuilder;import static jdk.incubator.http.HttpResponse.BodyHandler;..// ========================================================================// The sendAsync() and whenCompleteAsync() method returns a// CompletableFuture<HttpResponse<String>> instance.// ========================================================================String queryStr = "http://myplace/current-weather?q=Pasadena%20MD,US&format=json";HttpClient.newHttpClient().sendAsync(newBuilder(URI.create(queryStr)).GET().build(),BodyHandler.asString()).whenCompleteAsync( (httpResp, throwable) -> {if (throwable != null){System.err.println(throwable.getMessage());return;}String json = httpResp.body();System.out.println(json);});
In Listing 10-12, the code begins by creating an HttpClient instance via the newHttpClient() method. The newHttpClient() method is statically imported at the top. This makes the code more concise and more readable by not having to type the owning class. You’ll also notice other statically imported methods and classes, such as newBuilder and BodyHandler.
After creating a new HttpClient object, the sendAsync() method is invoked with a GET request using the newBuilder() method. As a convenience, the newBuilder() method follows the builder pattern for a web request to be created. The second (last) parameter to be passed into the sendAsync() method is a BodyHandler type.
Next, you learn about the body handler type and the HttpResponse<T> response objects when the web request is completed.
Body Handlers
For typical web requests, the body handler is simply a String type, but there are other body types that can be retrieved. When the body handler is passed in as the second parameter of the send() or sendAsync() method, the body handler type with respect to the HttpResponse<T> returned the type T will be the same. For instance, the method whenCompleteAsync() will receive an HTTP response having a body handler of type String.
In Listing 10-12, the method whenCompleteAsync() is triggered upon completing the web request. After being triggered, the handler code will receive an HttpResponse<String> and a Java Throwable. Again, you will notice the handler code invoking the httpResp.body() returning a string. Because the data type from the BodyHandler.asString() passed in earlier is a string, the method body() returns a value of type String.
Do you want to know what other types of body handlers are available?
According to the Java 9 Javadoc documentation , here are some other body handler types that can be retrieved:
asByteArray(): Returns a BodyHandler<byte[]> that returns a BodyProcessor<byte[]> obtained from BodyProcessor.asByteArray().
asByteArrayConsumer(Consumer): Returns a BodyHandler<Void> that returns a BodyProcessor<Void> obtained from BodyProcessor.asByteArrayConsumer(Consumer).
asFileDownload(Path,OpenOption...): Returns a BodyHandler<Path> that returns a BodyProcessor<Path> where the download directory is specified, but the filename is obtained from the Content-Disposition response header. The Content-Disposition header must specify the attachment type and must also contain a filename parameter. If the filename specifies multiple path components, only the final component is used as the filename (with the given directory name). When the HttpResponse object is returned, the body has been completely written to the file and HttpResponse.body() returns a Path object for the file. The returned Path is the combination of the supplied directory name and the filename supplied by the server. If the destination directory does not exist or cannot be written to, then the response will fail with an IOException.
discard(Object): Returns a response body handler, which discards the response body and uses the given value as a replacement for it. Used during a POST request.
asString(Charset): Returns a BodyHandler<String> that returns a BodyProcessor<String> obtained from BodyProcessor.asString(Charset). If a charset is provided, the body is decoded using it. If charset is null, then the processor tries to determine the character set from the Content-encoding header. If that charset is not supported, UTF_8 is used.
In this example, an asynchronous call sendAsync() method takes a valid URI consisting of a query string. Once the URI is created, the newBuilder() method invokes the GET() method to specify the HTTP method and finally invokes the build() method to return a populated object of type HttpRequest. Next, you see the common POST request when the client is sending larger payloads, such as a form submission.
HTTP POST Request
The code to make a RESTful POST request looks like the GET request in the previous example, except that the data submitted will not be specified as an appended query string such as “?param1=1¶m2=555”. Instead, to send name/value pairs as a String payload, Listing 10-13 shows an example of a fictitious bank using an HTTP RESTful POST service that creates a new customer bank account.
Listing 10-13. A RESTful POST Request
HttpRequest request = HttpRequest.newBuilder(URI.create("https://acmebank/create-account")).POST(fromString("id=" + newSeqId + ",firstName=John,lastName=Doe")).build();HttpClient httpClient = newHttpClient();httpClient.sendAsync(request, BodyHandler.discard(null)).whenCompleteAsync( (httpResp, throwable) -> {if (throwable != null){System.err.println("Error Saving");return;}System.out.println("Saving complete.");});
In Listing 10-13 the code makes an asynchronous call to create a new customer bank account. In this scenario, the id was passed in the POST method using the variable newSeqId instead of being returned in the HTTP response. As a demonstration of the server not returning a created customer id or any string response, the BodyHandler.discard(null) method was specified to ignore body content from the server.
Again, regarding the second parameter of the sendAsync() method as it relates to the data returned from the server, if your server code returns an id generated after a record has been created, you’ll want to replace the second parameter of the sendAsync() method with BodyHandler.asString(). Once the asynchronous call is completed, you can call the httpResp.body() function to return the message sent from the server.
The new HTTP2 module not only can provide request/response behavior, but it can also offer full-duplex or WebSockets behavior. The next section covers WebSockets.
WebSockets
WebSockets is a protocol for a two-way (full-duplex) communication using a TCP connection. Java 9’s http2 module supports the creation of client-side WebSockets. Like the previously mentioned APIs, the WebSockets API also provides a WebSocket.Builder class for easy creation of WebSocket instances.
Server-Side Sockets
This section doesn’t show you example code for the server side relating to WebSockets. Since there are literally tons of server-side solutions out in the wild, I suggest you search on the web and pick one. I will basically present client-side code using Java 9’s http2 module to talk to a WebSocket that essentially is an echo server.
For a WebSocket-based server-side solution, here are some solutions that I found on the Internet:
Netty: https://netty.io
Vert.x: http://vertx.io
Spark: http://sparkjava.com
JEE 7 vendors:
To test my client-side code, I’ve used Spark Java the embedded web server at http://sparkjava.com . They have great examples to create REST APIs and server-side WebSockets. Their documentation shows you how to create a simple echo server that returns what the client sends. To see their implementation of an echo server, visit Spark Java’s topic on WebSockets at http://sparkjava.com/documentation - embedded-web-server.
To obtain the Spark library, here are the Maven and Gradle coordinates.
Maven coordinates for Spark Java:
<dependency><groupId>com.sparkjava</groupId><artifactId>spark-core</artifactId><version>2.6.0</version></dependency>
Gradle coordinate notation for Spark Java:
compile "com.sparkjava:spark-core:2.6.0"Client-Side Sockets
On the client side, you will be creating a WebSocket to connect to the server. To create a WebSocket from an HttpClient class, you can invoke the static newWebSocketBuilder() method. The method takes two parameters—a URI and a WebSocket.Listener object. Listing 10-14 creates a WebSocket connection to an echo server with a URL of ws://localhost:4567/echo. By default, Spark uses port 4567.
Listing 10-14. Creating a Client WebSocket to Send Text Over TCP/IP. The Server Will Return the Sent Message Back to the Client
HttpClient client = HttpClient.newHttpClient();WebSocket clientWebSocket = client.newWebSocketBuilder(URI.create("ws://localhost:4567/echo"),new ClientSocketListener()).buildAsync().join();// Send the server two messagesclientWebSocket.sendText("Hello World 1" + new Date());clientWebSocket.sendText(“Hello World 2" + new Date());
Listing 10-14 creates an HttpClient instance first and then calls the newWebSocketBuilder() to create a WebSocket.Builder instance. After passing in the URI the second parameter is a new ClientSocketListener instance. To finish the builder, a call to buildAsync() will return a CompletableFuture<WebSocket>. After calling buildAsync() a call to the join() method will cause it to block and wait to return the WebSocket instance. After creating the WebSocket, the sendText() method is invoked to send text to the server.
The ClientSocketListener class shown in Listing 10-15 is responsible for handler code when communicating to the server. The only one that is really implemented is the onText() method.
Listing 10-15. An Client Socket Listener Class to Respond to the Echo Server
class ClientSocketListener implements WebSocket.Listener {@Overridepublic void onOpen(WebSocket webSocket) {System.out.println("onOpen");}@Overridepublic CompletionStage<?> onBinary(WebSocket webSocket, ByteBuffer message, WebSocket.MessagePart part) {System.out.println("onBinary");return null;}@Overridepublic CompletionStage<?> onPing(WebSocket webSocket, ByteBuffer message) {System.out.println("onPing");return null;}@Overridepublic CompletionStage<?> onPong(WebSocket webSocket, ByteBuffer message) {System.out.println("onPong");return null;}@Overridepublic CompletionStage<?> onClose(WebSocket webSocket, int statusCode, String reason) {System.out.println("onClose");return null;}@Overridepublic void onError(WebSocket webSocket, Throwable error) {System.out.println("onError");}@Overridepublic CompletionStage<?> onText(WebSocket webSocket,CharSequence message,WebSocket.MessagePart part) {System.out.println("onText");// request for one messagewebSocket.request(1);// Receive message from server.return CompletableFuture.completedFuture(message).thenAccept(System.out::println);}}
In Listing 10-15, the methods are basically all the events and callbacks when messages are received from the server. You will notice that the onText() method will return an instance of:
CompletableFuture<CharSequence>Because the messages are asynchronous, the thenAccept() method is triggered when the message is complete. Once complete, the message of type CharSequence will be printed to the console.
Well there you have it, a brief code example on WebSockets. I’m sure you are excited about fetching and posting data; however, maintain that enthusiasm as you’ll now see how to display data using JavaFX!
Viewing HTML5 Content (WebView)
Now that you’ve seen various strategies for fetching web-based content, you will finally get a chance to display HTML5 web content using the powerful JavaFX WebView node.
JavaFX provides a GUI WebView (javafx.scene.web.WebView) node that can render HTML5 content onto the Scene graph. A WebView node is basically a mini-browser UI component that can respond to web events and allows a developer to interact with the HTML5 content. Because of the close relationship between loading web content and the ability to display web content, the WebView node object also contains a WebEngine instance.
To whet your appetite in this section, I’ve created an example that uses the WebView API to render HTML5 content. The example is a JavaFX application that displays an SVG-based analog clock. To obtain the full source code, visit the book’s web site and download the DisplayingHtml5Content project.
Example: An HTML5 Analog Clock
As an example of using HTML5 content to be rendered onto a WebView node, let’s look at an analog clock that was created using an SVG file, based on the W3C’s scalable vector graphics (SVG) markup language. Figure 10-1 depicts an SVG-based analog clock that was rendered in a JavaFX WebView node.
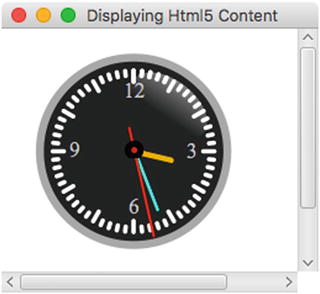
Figure 10-1. SVG-based analog clock (WebView node)
You can see that the analog clock face has hour, minute, and second hands. The clock hands will be initialized and positioned with the current time. Of course, as time goes by, the hands will move in a clockwise rotation.
To download the code, go to the book’s web site or to https://github.com/carldea/jfx9be for instructions on how to compile and run the code. Listing 10-16 shows statements on how to compile the code, copy resources, and run the displaying HTML5 content application on the DOS command prompt (terminal).
Listing 10-16. The Statements to Compile, Copy Resources, and Run the Displaying HTML5 Content Application Example
// Compile$ javac -d mods/com.jfxbe.html5content $(find src/com.jfxbe.html5content -name "*.java")// Copy resource$ cp src/com.jfxbe.html5content/com/jfxbe/html5content/clock.svgmods/com.jfxbe.html5content/com/jfxbe/html5content// Run Application$ java --module-path mods -mcom.jfxbe.html5content/com.jfxbe.html5content.DisplayingHtml5Content
The compile statement will place the compiled classes into the mods/com.jfxbe.html5content directory.
Once you have compiled the code, the next statement will copy the resources into the compiled area. Copying the resources will make files such as the clock.svg available during runtime. Usually, your favorite IDE will copy resources automatically. The last statement runs the application by using --module-path to point to the newly compiled module (com.jfxbe.html5content). Also note the -m switch. It tells the Java runtime which module to run and which class contains the application main() method.
After successfully running the application, Figure 10-1 shows the DisplayingHtml5Content application containing an SVG clock rendered in a WebView node. Next, let’s look at the source code to see how it was implemented (i.e., what makes it tick?).
Analog Clock Source Code
The source code begins with the module definition shown in Listing 10-17. If you aren’t familiar with Java 9’s module definitions, refer to Chapter 2 on JavaFX and Jigsaw. If you want to ignore modules and treat the code as Java 8 code, just skip the module definition and look at the main source code shown in Listing 10-18.
Listing 10-17. The Contents of the module-info.java Definition for the com.jfxbe.html5content Module
module com.jfxbe.html5content {requires javafx.web;requires jdk.jsobject;exports com.jfxbe.html5content;}
The module definition begins with a name such as com.jfxbe.html5content. This of course is just a convention and doesn’t have to be a namespace and dot separated. As of the writing of this book during compilation I received a warning because my module name has a numeral 5 in html5content. At this time, there have been e-mails circulating in regards to naming conventions, overall reduction in the amount of typing when specifyling what module names to include, and the simplification of running applications on the command line.
The main analog clock source code is shown in Listing 10-18. The analog clock is based on an SVG file loaded into a JavaFX application’s Scene graph. Listing 10-19 shows the SVG file containing the majority of the functional code that displays the clock face and the JavaScript code that animates the hour, minute, and second hands.
Listing 10-18. Analog Clock Source Code (DisplayingHtml5Content.java)
package com.jfxbe.html5content;import javafx.application.Application;import javafx.scene.Scene;import javafx.scene.paint.Color;import javafx.scene.web.WebView;import javafx.stage.Stage;import java.net.MalformedURLException;import java.net.URL;/*** An SVG analog clock rendered using the WebView node.* @author cdea*/public class DisplayingHtml5Content extends Application {@Overridepublic void start(Stage primaryStage) throws MalformedURLException {primaryStage.setTitle("Displaying Html5 Content");WebView browser = new WebView();Scene scene = new Scene(browser,320,250, Color.rgb(0, 0, 0, .80));primaryStage.setScene(scene);URL url = getClass().getResource("clock.svg");browser.getEngine().load(url.toExternalForm());primaryStage.show();}public static void main(String[] args) {launch(args);}}
Listing 10-19 shows the clock.svg SVG file that was created using the Inkscape tool. SVG specification is similar to HTML markup, where you can embed JavaScript code to interrogate element tags in the DOM.
Listing 10-19. The clock.svg File Containing an SVG Representation of an Analog Clock
<svgxmlns:dc="http://purl.org/dc/elements/1.1/"xmlns:cc="http://creativecommons.org/ns#"xmlns:rdf="http://www.w3.org/1999/02/22-rdf-syntax-ns#"xmlns:svg="http://www.w3.org/2000/svg"xmlns="http://www.w3.org/2000/svg"xmlns:xlink="http://www.w3.org/1999/xlink"xmlns:sodipodi="http://sodipodi.sourceforge.net/DTD/sodipodi-0.dtd"xmlns:inkscape="http://www.inkscape.org/namespaces/inkscape"width="300"height="250"id="svg4171"version="1.1"inkscape:version="0.48.1 "sodipodi:docname="clock.svg" onload="updateTime()"><script><![CDATA[var xmlns="http://www.w3.org/2000/svg"function updateTime(){var date = new Date();var hr = parseInt(date.getHours());if (hr > 12) {hr = hr - 12; }var min = parseInt(date.getMinutes());var sec = parseInt(date.getSeconds());var pi=180;var secondAngle = sec * 6 + pi;var minuteAngle = ( min + sec / 60 ) * 6 + pi;var hourAngle = (hr + min / 60 + sec /3600) * 30 + pi;moveHands(secondAngle, minuteAngle, hourAngle);}function moveHands(secondAngle, minuteAngle, hourAngle) {var secondHand = document.getElementById("secondHand"); var minuteHand = document.getElementById("minuteHand"); var hourHand = document.getElementById("hourHand");secondHand.setAttribute("transform","rotate("+ secondAngle + ")");minuteHand.setAttribute("transform","rotate("+ minuteAngle +")");hourHand.setAttribute("transform","rotate("+ hourAngle + ")");} ]]></script><defs id="defs4173">... // beginning of SVG code... // Main clock code<g id="hands" transform="translate(108,100)"> <g id="minuteHand"> <line stroke-width="3.59497285" y2="50" stroke-linecap="round" stroke="#00fff6" opacity=".9" /> <animateTransform attributeName="transform" type="rotate" repeatCount="indefinite" dur="60min" by="360" /> </g><g id="hourHand"> <line stroke-width="5" y2="30" stroke-linecap="round" stroke="#ffcb00" opacity=".9" /> <animateTransform attributeName="transform" type="rotate" repeatCount="indefinite" dur="12h"by="360" /> </g> <g id="secondHand"><line stroke-width="2" y1="-20" y2="70" stroke-linecap="round" stroke="red"/><animateTransform attributeName="transform" type="rotate" repeatCount="indefinite" dur="60s"by="360" /></g> </g>... // The rest of the Clock code: shiney glare, black button cover (center)</svg>
How It Works
HTML5 allows the use of scalable vector graphics (SVG) content to be shown in browsers. SVG is similar to JavaFX’s Scene graph (retained mode), in which nodes can be scaled at different sizes while preserving shape details without the effects of pixelation. In this example, the code in Listing 10-18 represents the Java source code, and Listing 10-19 represents the SVG content code that is loaded into a WebView node.
Before running the example code , make sure the clock.svg file is in the build path. In NetBeans, you may need to perform a clean and build before running the application, which will copy the resource clock.svg to the build path.
Let’s jump right into the code from Listing 10-18, beginning with the start() method. This method begins by setting the Stage window’s title bar. Then the code instantiates a WebView node as the root when creating the Scene object. After creation, the scene is set as the Stage window’s current scene.
Before loading the file, the code obtains a valid URL string of the location of the file based on the method getClass().getResources().
When loading a URL, you will notice the call to getEngine().load(), where the getEngine() method will return an instance of a javafx.scene.web.WebEngine object. This basically means that all instantiated WebView classes will implicitly create their own javafx.scene.web.WebEngine instances. The following code snippet is an excerpt from Listing 10-18, showing the JavaFX’s WebEngine object loading the clock.svg file:
WebView browser = new WebView();URL url = getClass().getResource("clock.svg");browser.getEngine().load(url.toExternalForm());
You are probably wondering why the Java source code is so small. It’s small because the WebView (javafx.scene.web.WebView) node is only responsible for rendering HTML5 content. The majority of the code is shown in Listing 10-19, and it contains the clock.svg file . This file not only contains SVG markup language, but also the JavaScript code. The SVG specification support animation is applied to elements. Next, let’s look at how the SVG content was created.
Inkscape and SVG
The analog clock was created using the popular open source SVG drawing program Inkscape. Because Inkscape is beyond the scope of this book, I will not be discussing the details of the tool. To learn more about Inkscape, visit http://www.inkscape.org/ for tutorials and demos. To learn more about SVG, visit https://www.w3schools.com/graphics/svg_intro.asp .
In brief, Inkscape allows designers to create shapes, text, and effects to generate illustrations. Because SVG files are considered HTML5 content, these files can also be displayed in an HTML5-capable browser such as the WebView node.
Running the example project called DisplayingHtml5Content, you have seen that the clock’s hands move or animate by rotating clockwise. You are probably wondering how the clock’s hands are rotated or positioned. Simply put, when manipulating SVG elements or any HTML5 elements, the JavaScript language will be employed. In fact, in this example the clock’s hour, minute, and second hand node elements are rotated by using JavaScript code that exists in Listing 10-19 between the <script> tag elements.
Between these <script> tags are the JavaScript code statements responsible for initializing and updating the clock’s hands. The main code uses the updateTime() function to calculate the position of each second, minute, and hour hand. Before the start of the animation of the clock hands, the code sets the clock’s initial position by calling the JavaScript updateTime() function via the onload attribute on the entire SVG document (located on the root svg element). Once the clock’s arms are set, the SVG code begins to animate the clock arms by using the animateTransform element. The following is SVG code that animates the second hand indefinitely:
<g id="secondHand"><line stroke-width="2" y1="-20" y2="70"stroke-linecap="round" stroke="red"/><animateTransform attributeName="transform"type="rotate" repeatCount="indefinite" dur="60s" by="360" /></g>
On a final note, if you want to create a clock like the one depicted in this example, visit http://screencasters.heathenx.org/blog to learn about all things Inkscape. Another impressive and beautiful display of custom controls that focuses on clocks, gauges, and dials is the Medusa, Steel Series, and the Enzo library by Gerrit Grunwald. To be totally amazed, visit his blog at http://harmoniccode.blogspot.com .
WebEvents
If you’ve read Chapter 9’s discussion of JavaFX Media and how the APIs are designed to be event-driven, you’ll be happy to know that the JavaFX Web APIs also adhere to an event-driven programming model. Web events mirror the way browsers raise client-side events such as alerts, errors, and statuses. In this section, you briefly learn about how to respond to web-based events.
If you are familiar with JavaScript client-side web development, you most likely know how to pop up an alert dialog box with a message. If you don’t know how to display an alert box, the following JavaScript code snippet will pop up an alert dialog box (assuming you are using a browser):
<script>alert('JavaFX is Awesome');</script>
Typically, old-school web developers will use alert boxes to debug web pages. However, modern web developers more likely use the JavaScript function console.log() to output information into a console provided by Firebug or the Chrome browser’s developer tools. So, what do you think would happen if an HTML web page that contained the alert() code just shown was loaded into a WebView node?
When the code is executed inside a JavaFX WebView node, a native dialog window will not pop up. But the OnAlert event does get raised as a javafx.scene.web.WebEvent object. To set up the handler, use the setOnAlert() method with an inbound parameter of type WebEvent.
The following code snippet will receive WebEvent<String> objects containing the string message to be output onto the console:
webView.getEngine().setOnAlert((WebEvent<String> wEvent) -> {System.out.println("Alert Event - Message: " + wEvent.getData());// ... show a JavaFX Alert dialog window});
Developers who want to create their own dialog windows upon an alert-triggered message can simply respond to WebEvents and use JavaFX Dialog APIs such as an Alert instance. Table 10-4 shows all the WebEngine’s web events.
Table 10-4. javafx.scene.web.WebEngine WebEvents and Properties
Set On Method | On Method Property | Description |
|---|---|---|
setOnAlert() | onAlertProperty() | JavaScript alert handler |
setOnError() | onErrorProperty() | WebEngine error handler |
setOnResized() | onResizedProperty() | JavaScript resize handler |
setOnStatusChanged() | onStatusChanged() | JavaScript status handler |
setOnVisibilityChanged() | onVisibilityChangedProperty() | JavaScript window visibility handler |
setConfirmHandler() | confirmHandlerProperty() | JavaScript Confirm window |
Now that you know how to retrieve data, manipulate HTML, and respond to browser-based web events, let’s look at an example that combines all the techniques that you’ve learned so far. This example is a Weather Widget application that fetches JSON data from a RESTful endpoint. You will also see bidirectional communication between Java and JavaScript using the JavaScript bridge object netscape.javascript.JSObject.
Weather Widget Example
The example demonstrated in this section is a Weather Widget that combines all the web-based concepts mentioned so far. The example is a JavaFX application that loads JSON weather information from the Open Weather Map API at http://openweathermap.org . Figure 10-2 shows the Weather Widget example with the current weather conditions in Columbus Ohio, USA.
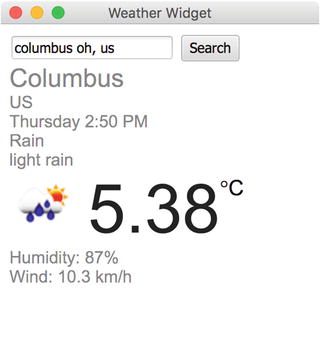
Figure 10-2. A Weather Widget displaying the current weather condition. Once you’ve entered the city, state code, and country code in the format of “CITY STATE,COUNTRY,” you click the Search button to fetch the JSON data.
To download the code, go to the book’s web site or to https://github.com/carldea/jfx9be for instructions on how to compile and run the code. Because the http2 module is part of the incubator area, I want to bring it to your attention when you include the module when compiling and running a warning. Listing 10-20 shows the statements for how to compile the code, copy resources and run the Weather Widget application on the DOS command prompt (terminal).
Listing 10-20. The Statements to Compile, Copy Resources, and Run the Weather Widget Application Example
// MacOSX and Linux// Compile$ javac -d mods/com.jfxbe.weatherwidget $(find src/com.jfxbe.weatherwidget -name "*.java")// Copy resource$ cp src/com.jfxbe.weatherwidget/com/jfxbe/weatherwidget/weather_template.htmlmods/com.jfxbe.weatherwidget/com/jfxbe/weatherwidget// Run Application$ java --add-modules jdk.incubator.httpclient --module-path mods -m com.jfxbe.weatherwidget/com.jfxbe.weatherwidget.WeatherWidget// Windows OS// Compilec:jfxbechap10> javac -d modscom.jfxbe.weatherwidget srccom.jfxbe.weatherwidgetmodule-info.java srccom.jfxbe.weatherwidgetcom.jfxbe.weatherwidgetWeatherWidget.java// Copy resourcec:jfxbechap10> copy srccom.jfxbe.weatherwidgetcomjfxbeweatherwidgetweather_template.htmlmodscom.jfxbe.weatherwidgetcomjfxbeweatherwidget// Run Applicationc:jfxbechap10> java --add-modules jdk.incubator.httpclient --module-path mods -m com.jfxbe.weatherwidget/com.jfxbe.weatherwidget.WeatherWidget
The compile statement will place the compiled classes into the mods/com.jfxbe.weatherwidget directory. When compiling, you should see the following warning on the console:
warning: using incubating module(s): jdk.incubator.httpclient1 warning
You can ignore the warning and proceed with the other steps. The warning basically indicates that it is considered experimental and not part of the core.
Once you have compiled the code, you need to copy resources into the compiled area. Copying the resources will make files available during runtime. Usually your favorite IDE will copy resources automatically. The last statement runs the application by adding the jdk.incubator.httpclient module via --add-modules and using the --module-path to point the newly compiled module to the mods directory. Note the -m switch, which tells the Java runtime which module to run and which class contains the main application. In this case, the module name and main class name are specified like so:
com.jfxbe.weatherwidget/com.jfxbe.weatherwidget.WeatherWidget.After successfully running the application , Figure 10-2 shows the Weather Widget application window.
Before I get too far ahead relating to the source code, I want to point out that for the Weather Widget application to successfully retrieve data, a valid API key must be obtained from the folks at Open Weather Map. To register and get an API key, go to http://openweathermap.org . If this is the first time you’ve run the application, you will be prompted with a dialog window asking you to enter in the API key, as shown in Figure 10-3.
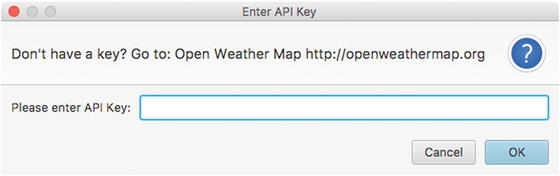
Figure 10-3. A dialog to enter the API key from the Open Weather Map
Once the API key is entered and accepted, it will be stored locally in a file named:
{user.home}/.openweathermap-api-keyWhere {user.home} is where you substitute your home directory. Once the file is saved, when you launch the application again, the API key file will be loaded instead of prompting the user for the API key.
In Java’s system properties, user.home is the user’s home directory depending on the operating system. See the Javadoc documentation and tutorial at the following:
https://docs.oracle.com/javase/tutorial/essential/environment/sysprop.htmlNote
The web service in this example is powered by the people of Open Weather Map ( http://openweathermap.org ). I encourage you to support them as they continue to provide a valuable service with maps and weather data around the world for application and mobile developers.
One-Liner: Reading an Input Stream into a String
As a really nice trick for how the Weather Widget example loads the API key file, I created a simple static utility method streamToString(). This handy utility method allows you to read a file’s content or a connection’s input stream and convert it into a string.
When you look at the Weather Widget example’s source code, the method will attempt to read a local file as a string containing an API key issued from the web site http://openweathermap.org .
Listing 10-21 shows how to convert an input stream into a String object.
Listing 10-21. A Static Method that Reads a Text File Returned as a String Object to the Caller
private static String streamToString(InputStream inputStream) {String text = new Scanner(inputStream, "UTF-8").useDelimiter("\Z").next();return text;}
You will quickly notice the strange one-line statement that “magically” converts an input stream into a String object. The streamToString() method uses the convenient Scanner API. This API is excellent for reading text files that have delimited text lines, such as comma-separated values (CSV). Scanner objects default their delimiter as an end-of-line character ( ).
By setting the end-of-file (EOF) marker (\Z) as the delimiter, the next() method will return the text stream before the end, creating the entire text as one field. Of course, there are other ways to retrieve text data, and probably more efficient ways, too; however, you can see that using this strategy can handle common situations with small- to medium-sized data requests (up to ∼3MB). The size can be an issue because the data is converted to a String object and, depending on the number of requests without garbage collection, memory resources can be easily consumed—possibly overwhelming the application. Since it is only an API key consisting of a hash, it should be perfectly fine.
The Weather Widget allows users to enter a city or region into the search field to determine the weather condition. After fetching the JSON weather data, the screen will display the following information: City, Country, Day of Week, Time (Last update), Weather Condition, Weather Description, Icon, Temperature, Humidity, and Wind Speed. The code will execute the JavaScript code to populate the display.
Okay, enough with the pre-requisites and description of the application—let’s now look at the Weather Widget’s source code.
Source Code
The Weather Widget project consists of three source files:
module-info.java: Module definition requires jdk.incubator.httpclient etc.
WeatherWidget.java: Main application code
weather_template.html: The HTML template used as the main display of weather info
In Listing 10-22, the module-info.java file contains the module definition. The Weather Widget module depends on the following modules: javafx.web, jdk.jsobject, and jdk.incubator.httpclient. The last statement is the exports of the Weather Widget module itself. Exporting a module is how to make the module and its APIs public to whoever uses it. For instance, if another module adds a requires com.jfxbe.weatherwidget, their code can safely import packages owned by com.jfxbe.weatherwidget. Remember that transitive dependencies don’t have to be included in the module definition if an existing module already references it, such as the module java.base.
Listing 10-22. The module-info.java for the com.jfxbe.weatherwidget Module
module com.jfxbe.weatherwidget {requires javafx.web;requires jdk.jsobject;requires jdk.incubator.httpclient;exports com.jfxbe.weatherwidget;}
Listing 10-23 is the main Weather Widget application code in the WeatherWidget.java file. In the source code, I’ve omitted some imports to save some space in this chapter, but I’ve included the static imports to help make code later more concise. It’s a good idea to read the main comments at the top of the class to better understand the data flow when the code communicates back and forth between Java and JavaScript.
Listing 10-23. Source Code of the Weather Widget (WeatherWidget.java)
package com.jfxbe.weatherwidget;// Other imports omitted...import static jdk.incubator.http.HttpClient.newHttpClient;import static jdk.incubator.http.HttpRequest.newBuilder;import static jdk.incubator.http.HttpResponse.BodyHandler;/*** The WeatherWidget application demonstrates the* use of the following interactions:* <pre>* 1) Communications from Java to JavaScript* 2) Communications from JavaScript to Java* 3) RESTful GET Web service end point* 4) Manipulate JSON Objects* 5) Handle HTML/JavaScript WebEvents* 6) Debugging using Firebug lite* </pre>** <pre>* The following are the steps to help* demonstrate the above interactions:** Step 1: The user enters a city state and country into the* search text field. (See weather_template.html)* Step 2: After search button is pressed the JavaScript function* findWeatherByLocation() is called. (See weather_template.html)* Step 3: An up call from JavaScript to Java is made to the method* WeatherWidget.queryWeatherByLocationAndUnit(). (See this class)* Step 4: After querying the weather data the JSON data is passed to* the Java method populateWeatherData(). This method will call* the JavaScript function populateWeatherData(). (See this class)* Step 5: Populates the HTML page with the JavaScript function* populateWeatherDate() (See weather_template.html)** </pre>** It is required to obtain a valid API key to query weather data.* To obtain an API key head over to Open Weather Map at* http://openweathermap.org** @author cdea*/public class WeatherWidget extends Application {/** The main URL of the current weather REST end point. */public static final String WEATHER_URL = "http://api.openweathermap.org/data/2.5/weather";/** A local file containing a valid API key. */public static final String API_KEY_FILE = ".openweathermap-api-key";/** The API key to access weather and map data. */private static String API_KEY = null;/** The Weather display HTML page */public static final String WEATHER_DISPLAY_TEMPLATE_FILE = "weather_template.html";/** A WebView node to display HTML5 content */private WebView webView;/** A singleton http client to make http requests */private static HttpClient HTTP_CLIENT;@Overridepublic void start(Stage stage) {stage.setTitle("Weather Widget");webView = new WebView();Scene scene = new Scene(webView, 300, 300);stage.setScene(scene);// obtain API keyloadAPIKey();// Turns on Firebug lite for debugging// html,css, javascript// enableFirebug(webView);// The web view's web enginewebView.getEngine().getLoadWorker().stateProperty().addListener( (obs, oldValue, newValue) -> {if (newValue == Worker.State.SUCCEEDED) {// Let JavaScript make up calls to this (Java) classJSObject jsobj = (JSObject)webView.getEngine().executeScript("window");jsobj.setMember("WeatherWidget", this);// default city's weather (a sunny place)queryWeatherByLocationAndUnit("Miami,FL", "c");}});// Display a JavaFX dialog window explaining the errorwebView.getEngine().setOnAlert((WebEvent<String> t) -> {System.out.println("Alert Event - Message: " + t.getData());showErrorDialog(t.getData());});// Load HTML template to display weatherwebView.getEngine().load(getClass().getResource(WEATHER_DISPLAY_TEMPLATE_FILE).toExternalForm());stage.show();}/*** If an API key file doesn't exist prompt the user to enter their key.* Once a valid key is saved into a file named .openweathermap-api-key* The application will use it to fetch weather data.*/private void loadAPIKey() {// Load API key from local fileFile keyFile = new File(System.getProperty("user.home") + "/" + API_KEY_FILE);// Check for file's existence and read/write privileges.if (keyFile.exists() && keyFile.canRead() && keyFile.canWrite()) {try (FileInputStream fis = new FileInputStream(keyFile)){Optional<String> apiKey = Optional.ofNullable(streamToString(fis));apiKey.ifPresent(apiKeyStr -> API_KEY = apiKeyStr);} catch (Exception e) {Platform.exit();return;}} else {// If the API key does not exist display dialog box.TextInputDialog dialog = new TextInputDialog("");dialog.setTitle("Enter API Key");dialog.setHeaderText("Don't have a key? Go to: Open Weather Map http://openweathermap.org");dialog.setContentText("Please enter API Key:");Optional<String> result = dialog.showAndWait();result.ifPresent(key -> {// write to disktry (FileOutputStream fos = new FileOutputStream(keyFile)) {String apiKey = result.get();fos.write(apiKey.getBytes());fos.flush();API_KEY = apiKey;} catch (Exception e) {e.printStackTrace();Platform.exit();return;}});}}/*** Display error dialog window.* @param errorMessage*/private void showErrorDialog(String errorMessage) {Alert dialog = new Alert(Alert.AlertType.ERROR, errorMessage);dialog.setTitle("Error Retrieving Weather Data");dialog.show();}@Overridepublic void stop() throws Exception {// clean up resources here...}/*** Quick one liner that delimits on the end of file character and* returning the whole input stream as a String.* @param inputStream byte input stream.* @return String A string from an input stream.*/public String streamToString(InputStream inputStream) {String text = new Scanner(inputStream, "UTF-8").useDelimiter("\Z").next();return text;}/*** Returns a string containing the URL with parameters.* @param cityRegion The city state and country. State and* country is separated by a comma.* @param unitType Specify c for celsius and f for fahrenheit.* @return String A query string representing the web request.*/private String generateQueryString(String cityRegion, String unitType) {String units = "f".equalsIgnoreCase(unitType) ? "imperial": "metric";String queryString = WEATHER_URL +"?q=" + cityRegion +"&" + "units=" + units +"&" + "mode=json" +"&" + "appid=" + API_KEY;return queryString;}/*** This method is called from the JavaScript function* findWeatherByLocation(). Refer to the weather_template.html* file.* <pre>* -- Step 3 --* </pre>** @param cityRegion The city, state and country.* @param unitType The temperature in celsius or fahrenheit.*/public void queryWeatherByLocationAndUnit(String cityRegion,String unitType) {// build a weather requestString queryStr = generateQueryString(cityRegion, unitType);System.out.println("Request (http2): " + queryStr);// Make a GET request to fetch weather data asynchronously// The sendAsync() method returns a CompletableFuture<HttpResponse<String>>HTTP_CLIENT.sendAsync( newBuilder(URI.create(queryStr)).GET().build(),BodyHandler.asString()).whenCompleteAsync( (httpResp, throwable) -> {if (throwable != null){showErrorDialog(throwable.getMessage());return;}String json = httpResp.body();populateWeatherData(json, unitType);System.out.println("Response (http2): " + json);});}/*** Invokes to the JavaScript function populateWeatherData() using the web engine.* <pre>* -- Step 4 --* From Java a call to invoke a JavaScript function is made by* calling populateWeatherData().* </pre>** @param json The JSON string to be evaluated (converted to a real JavaScript object).* @param unitType The symbol and unit for the temperature.*/private void populateWeatherData(String json, String unitType) {Platform.runLater(() -> {// On the JavaFX Application Thread....webView.getEngine().executeScript("populateWeatherData(eval(" + json + "), " +"'" + unitType + "' );");});}public static void main(String[] args){HTTP_CLIENT = newHttpClient();Application.launch(args);}}
Lastly, Listing 10-24 consists of the HTML and JavaScript code in a file resource weather_template.html. This file is loaded into the JavaFX WebView node.
Listing 10-24. An HTML Template File Populated with Weather Data
<!DOCTYPE html><html><head><title>Weather Widget</title><style type="text/css">body { background-color:#ffffff; }.tileTextDisplay {font-family: arial,sans-serif;font-weight: lighter !important;color: #878787 !important;}.largerFont {font-size: x-large !important;}.mediumFont {font-size: medium !important;}#weather-temp {font-family: 'Arial', sans-serif;font-size: 64px;color: #212121 !important;}#unitType {font-family: 'Arial', sans-serif;font-size: 20px;color: #000000 !important;}</style><script>var weekday=new Array(7);weekday[0]="Sunday";weekday[1]="Monday";weekday[2]="Tuesday";weekday[3]="Wednesday";weekday[4]="Thursday";weekday[5]="Friday";weekday[6]="Saturday";/* -- Step 2 --* Up call to Java invoking the* WeatherWidget.queryWeatherByLocationAndUnit() method.*/function findWeatherByLocation() {var cityInfo = encodeURIComponent(document.getElementById('search-field').value);setInnerText("error-msg", "");WeatherWidget.queryWeatherByLocationAndUnit(cityInfo, "c");}/* -- Step 5 --* Populate UI with weather data.* This function is called from Java code.*/function populateWeatherData(json, unitType) {var jsonWeather = json;if (jsonWeather.cod) {if (jsonWeather.cod != 200 ) {document.getElementById('error-msg').innerHTML = jsonWeather.message;alert(jsonWeather.message);return;}}setInnerText('city', jsonWeather.name);setInnerText('country', jsonWeather.sys.country);var weatherTime = new Date(jsonWeather.dt * 1000);var timeStr = timeFormat(jsonWeather.dt * 1000);setInnerText('weather-day-time', weekday[weatherTime.getDay()] + " " + timeStr) + " (Last Update)";setInnerText('weather-current', jsonWeather.weather[0].main);setInnerText('weather-current-desc', jsonWeather.weather[0].description);document.getElementById('weather-icon').src = "http://openweathermap.org/img/w/" + jsonWeather.weather[0].icon + ".png";setInnerText('weather-temp', jsonWeather.main.temp);setInnerText('weather-humidity', "Humidity: " + jsonWeather.main.humidity + "%");var windSpeed = (unitType === 'f') ? 'mph' : 'km/h';setInnerText('weather-wind-speed', "Wind: " + jsonWeather.wind.speed + " " +windSpeed);}function setInnerText(id, text) {document.getElementById(id).innerText = text;}function timeFormat( millis ) {var weatherTime = new Date(millis);var hours = weatherTime.getHours();var minutes = weatherTime.getMinutes();var meridian = hours >= 12 ? 'PM' : 'AM';hours = hours % 12;hours = hours ? hours : 12; // hour '0' means '12'minutes = minutes < 10 ? '0' + minutes : minutes;var timeStr = hours + ':' + minutes + ' ' + meridian;return timeStr;}function init() {// Apply listener to override enter key press.document.getElementById('search-field').addEventListener("keypress", function(event){// Overide default enter key to fetch and// populate weather info.if(event.keyCode==13) {event.preventDefault();findWeatherByLocation();return;}});}</script></head><body id="weather_background" onload="init();"><form><input id="search-field" placeholder="City State, Country Code" type="text" name="searchField"/><!-- Step 1 - The user enters a city state and country --><input id="search-button" type="button" onclick="findWeatherByLocation()" name="searchButton" value="Search"/></form><div id="error-msg"></div><div id="city" class="tileTextDisplay largerFont"></div><div id="country" class="tileTextDisplay mediumFont"></div><div id="weather-day-time" class="tileTextDisplay mediumFont"></div><div id="weather-current" class="tileTextDisplay mediumFont"></div><div id="weather-current-desc" class="tileTextDisplay mediumFont"></div><div><img id="weather-icon" style="float:left;height:64px;width:64px" src="" alt=""/><div id="weather-temp" style="padding-left:10px; float:left;"></div><div style="float:left; font-size:20px; margin-top:6px"><span style="display:inline">°<span id="unitType">C</span></span></div></div><div style="clear:both;"></div><div id="weather-humidity" class="tileTextDisplay mediumFont"></div><div id="weather-wind-speed" class="tileTextDisplay mediumFont"></div></body></html>
How It Works
The code is divided into two parts—the Java code shown in Listing 10-23 and HTML/JavaScript code shown in Listing 10-24. The purpose of this example is to demonstrate the bidirectional communication between Java and JavaScript while providing RESTful HTTP GET requests of JSON data. Because all of its aspects have already been discussed, from retrieving data to manipulating HTML, I will basically discuss the high-level steps of the start() method of the JavaFX WeatherWidget code from Listing 10-23.
The following code steps were taken within the start() method from the source code in Listing 20-23.
Set up the scene and stage window with a WebView as the root.
Read the API key file. If the API key doesn’t exist, show the prompt dialog window.
Create a WebView node to display HTML content.
Create handler code that responds when the WebView’s content is finished loading. The page weather_template.html is only loaded once as a single page application.
Once loaded, the code passes the application instance (this) into the web engine to allow up calls from JavaScript code. To allow JavaScript code to access Java objects, the code invokes the setMember() method by passing in the name and object, as shown:
// Let JavaScript make upcalls to this (Java) classJSObject jsobj = (JSObject) webView.getEngine().executeScript("window");jsobj.setMember("WeatherWidget", this);Default to the weather forecast of Miami, Florida, by fetching JSON weather data to be populated into the HTML page. The lowercase “c” is for the unit type, degrees Celsius. By calling the following Java method, it will fetch JSON data and call into JavaScript code to populate the HTML DOM with the weather data.
queryWeatherByLocationAndUnit("Miami%20FL,US", "c");
Create handler code for the OnAlert property on the WebView’s web engine. The handler code responds to HTML’s JavaScript alert() function for WebEvent. If there are errors returned from the web server, the web event data will be passed to my private showErrorDialog() method. This method will display a dialog window with the error message.
webView.getEngine().setOnAlert( (WebEvent<String> t) -> {System.out.println("Alert Event - Message: " + t.getData());showErrorDialog(t.getData());});Load the HTML file weather_template.html from the classpath to be displayed onto the WebView.
// Load HTML template to display weatherwebView.getEngine().load(getClass().getResource(WEATHER_DISPLAY_TEMPLATE_FILE).toExternalForm());
In Listing 10-23, you’ll notice the comment section regarding Steps 1 through 5; these show the application flow starting from the user searching for weather based on a city, state, and country, to displaying the data in the HTML page. The following are the steps from 1 to 5:
Step 1: The button click invokes the JavaScript function findWeatherByLocation():
<input id="search-button" type="button" onclick="findWeatherByLocation()"name="searchButton" value="Search"/>Step 2: The upcall to the actual Java code method queryWeatherByLocationAndUnit():
function findWeatherByLocation() {...}Step 3: The Java method that uses the new http2 module to make an asynchronous RESTful GET to fetch weather data:
public void queryWeatherByLocationAndUnit(String cityRegion, String unitType)Step 4: After the JSON data is fetched (on the Java side), a call to the executeScript() method passes the JSON object into the JavaScript function populateWeatherData():
private void populateWeatherData(String json, String unitType) {Platform.runLater(() -> {// On the JavaFX Application Thread....webView.getEngine().executeScript("populateWeatherData(eval(" + json + "), " +"'" + unitType + "' );");});}Step 5: The HTML page is populated with the JSON data representing the weather:
function populateWeatherData(json, unitType) {...}
Enhancements
As an exercise, you may want the Weather Widget application to fetch new weather data periodically. According to the Open Weather Map, their weather forecast updates are typically every three hours.
As a hint on how might you might call the setInterval() function, check out this code snippet:
// Every period query and populate the forecast using cached URLsetInterval(function(){WeatherWidget.queryWeatherByLocationAndUnit(null, "c");},(1000 * 60 * 60 * 3) // every 3 hours); // set interval
Summary
In this chapter, you learned about the WebEngine API for retrieving web HTML5 content. You began by learning two ways to load web content—using the WebEngine’s load() and loadContent() methods. After learning about how to load web content, you saw how to obtain raw content such as a DOM XML or XML. Next, you learned about the powerful JavaScript bridge that allows bidirectional communication between Java and JavaScript. Getting familiar with web development concepts, you also learned about some of the limitations to JavaFX’s WebEngine API ability to make web requests.
Within these limitations on making RESTful web service calls, you got a chance to learn about Java 9’s new experimental httpclient module. By using the httpclient module, you can make RESTful GET and POST requests with builder classes, thus simplifying the creation of web requests.
You also learned about the popular WebSockets protocol. Here, you got a chance to create client-side web sockets to talk to an echo server. After learning the many ways to retrieve data and manipulate HTML, you saw an example on how to render HTML5 content by running an animated SVG-based analog clock application.
Finally, you saw all the concepts combined into the last example of a Weather Widget application using JavaFX’s WebView node. The Weather Widget makes calls to retrieve JSON data from openweathermap.org to then be displayed on an HTML5 page in a WebView node. This example’s core focus was to learn how Java code can communicate with the WebEngine’s JavaScript bridge.
Now that you have a taste of JavaFX and the web, let’s move on to some advanced topics. In the next chapter, you explore the world of JavaFX 3D!