
Human beings are visual creatures. We can identify visual cues, no matter how subtle, and decipher their meaning. For example, the Windows operating system differentiates between active and inactive windows with visual cues––changing the color, the opacity, and other visual elements of the window. In Windows 7, inactive windows display themselves with more of a faded, transparent look than the color-rich, drop-shadow-encased active window. It's a subtle but effective means of telling users which window is currently active.
The ability to change how a particular user interface element looks is an extremely important feature of an application programming interface (API), and the DOM, combined with the styling power of CSS, gives you this ability.
In this lesson, you learn how you can leverage the power of the DOM and CSS to change the appearance elements in a web page. You can modify an element's style in two ways:
Change individual CSS properties using the
styleproperty.Change the value of the element's
classattribute.
The style property is an object that maps to an element's style attribute. It provides access to individual CSS properties, allowing you to change all CSS properties that the browser supports. You access the style property like this:
document.getElementById("someElement").style.color = "red";Here, an element with an id of someElement is retrieved, and its color property is set to red. Assuming this element is a <div/> element, this code essentially translates to the following HTML:
<div id="someElement" style="color: red"></div>
The relationship between the HTML style attribute and the JavaScript style property is usually overlooked by those new to JavaScript and the DOM. The style property is usually, and incorrectly, thought of as the doorway to all style information that affects an element — the belief being that an element's style, whether defined in an external style sheet or by means of the inline style attribute, can be retrieved with the style object. For example, assume the following style sheet:
<style type="text/css">
#someElement { color: red; }
</style>
It is not uncommon to see code that attempts to retrieve this information using the style object, like this:
var someEl = document.getElementById("someElement");
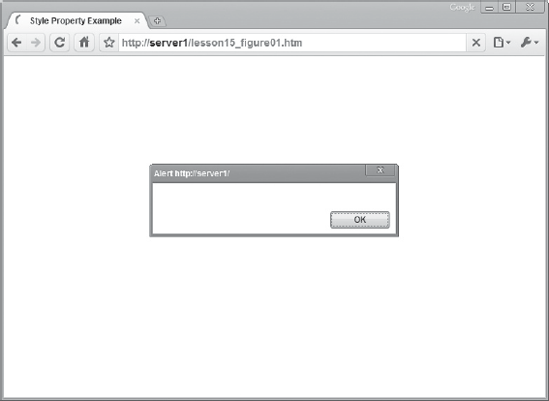
alert(someEl.style.color); // empty stringWhen this code is executed in a browser, an alert box displays an empty string (i.e., nothing) — it looks Figure 15-1.
This happens because the style object has no link to any style rules that affect the HTML element — only the CSS properties defined in the style attribute. The previous code looks at the style attribute, searches for the color property, finds none, and returns an empty string. But you can get this information once it is set by using either the style property or the style attribute, like this:
<div id="someElement" style="color: red;">Hello</div>
...
var someEl = document.getElementById("someElement");
alert(someEl.style.color); // red
someEl.style.color = "blue";
alert(someEl.style.color); // blue
Always remember that the style object links, and only links, to the HTML element's style attribute. Just remember that while the HTML attribute contains a string of CSS, the DOM style property is an object.
By comparing the actual CSS property — color in this case — with the JavaScript equivalent, you can see they are the same. Many CSS property names, accessed in JavaScript via the style property, are exactly the same as the CSS properties used in a style sheet. There are some, however, that are different and have to be changed in order to work in JavaScript.
For example, the CSS property to change an element's background color is background-color. This particular CSS property cannot be used in JavaScript as is because the hyphen (-) cannot be used in an identifier. So in order that an element's background color can be changed with JavaScript and the style object, the hyphen in background-color is dropped, and the first letter of color is capitalized, like this:
document.getElementById("someElement").style.backgroundColor = "blue";Many CSS properties use hyphens, and converting them to their JavaScript equivalents follows the same pattern: Drop the hyphen and camel-case the letter after the hyphen. The JavaScript equivalent of border-left-color, for example, is borderLeftColor.
There are a few exceptions to the camel-casing rule. Consider the CSS float property, for example. The word "float" is a reserved word in JavaScript, and as such, the code element.style.float will not change the float of the specified element. Instead, you must use the cssFloat and styleFloat (for IE8 and below) properties.
By using the style object, and the properties it allows you to modify, you can essentially replicate a style rule for a single HTML element, like this:
var someEl = document.getElementById("someElement");

someEl.style.color = "red";
someEl.style.backgroundColor = "gray";
someEl.style.border = "1px solid black";
Here, an element with an id of someElement is retrieved from document, its text color is changed to red, it is given a background color of gray, and a one-pixel black border is placed around it. Making many changes to an element's style in this manner, however, brings up a couple of issues you should be mindful of:
Each change to an element's style is an individual call to DOM properties — which, as you learned in the previous lesson, you want to limit as much as possible for performance reasons.
The philosophy behind CSS is to separate style from markup and behavior. This separation makes maintenance and modifications much easier because all the style information is grouped into style sheets — eliminating the need to search through HTML and JavaScript for style information.
For these reasons, editing an element's style one property at a time is considered the incorrect approach. There are situations in which you may want to, but for the most part the better solution is to manipulate an element's CSS class using the className property.
HTML elements have a class attribute that allows you to assign one or more CSS classes. This attribute is accessed through the DOM via the className property, and you use it like this:
someEl.className = "a-CSS-class";
Using the className property addresses the two previous issues rather nicely:
Modifying an element's CSS class, which can contain multiple CSS properties, changes an element's style with only one call to the DOM.
CSS data is kept separate from JavaScript; the only link between the CSS style sheet and the JavaScript code is the CSS class name. This makes maintenance much easier.
Another advantage to using the className property is that it requires less JavaScript code. The last example in the previous section used three lines of code to change an element's color, background color, and border. But place that style information in a CSS class, like this:
.a-CSS-class {
    color: red;
    background-color: gray;
    border: 1px solid black;
}
It takes only one line of JavaScript code:
someEl.className = "a-CSS-class";
You can also assign multiple CSS classes to the className property, just as you would with the class attribute. The following code demonstrates this:
someEl.className = "a-CSS-class b-CSS-class";
Just make sure to put a space between the class names.
In this lesson you learn how to manipulate an element's style by using the style and className properties.
For this lesson, you need a text editor; any plain text editor will do. For Microsoft Windows users, Notepad is available by default on your system or you can download Microsoft's free Visual Web Developer Express (www.microsoft.com/express/web/) or Web Matrix (www.asp.net/webmatrix/). Mac OS X users can use TextMate, which comes as part of OS X, or they can download a trial for Coda (www.panic.com/coda/). Linux users can use the built-in VIM.
You also need a modern web browser. Choose any of the following:
Internet Explorer 8+
Google Chrome
Firefox 3.5+
Apple Safari 4+
Opera 10+
Create a subfolder called Lesson15 in the JS24Hour folder you created in Lesson 1. Store the files you create in this lesson in the Lesson15 folder.
You will write a web page and dynamically change an element's style.
Open your text editor and type the following code:
<html>
<head>
    <title>Lesson 15: Example 1</title>
    <style type="text/css">
    .message-style1 {
        color: navy;
        font-weight: bold;
        background-color: gray;
    }
    </style>
</head>
<body>
    <div id="divMessage">
        Here is a message.
    </div>
    <input type="button" value="Toggle Style" />
    <script type="text/javascript">

    </script>
</body>
</html>
Now add the following bold code:
<html>
<head>
    <title>Lesson 15: Example 1</title>
    <style type="text/css">
    .message-style1 {
        color: navy;
font-weight: bold; background-color: gray; } </style> </head> <body> <div id="divMessage"> Here is a message. </div> <input type="button" value="Toggle Style" /> <script type="text/javascript">function toggleStyle() {var divMessage = document.getElementById("divMessage");if (divMessage.className === "message-style1") {divMessage.className = "";} else {divMessage.className = "message-style1";}}</script> </body> </html>The new code adds a function called
toggleStyle(). It retrieves the<div/>element with anidofdivMessage, and it sets the element'sclassNameproperty according to its current value. If the element has aclassNameofmessage-style1, thenclassNameis set to an empty string — effectively removing any styles applied to the element. If the element'sclassNamedoes not equalmessage-style1, thenclassNameis assigned that value.Now modify the following bold line:
<html> <head> <title>Lesson 15: Example 1</title> <style type="text/css"> .message-style1 { color: navy; font-weight: bold; background-color: gray; } </style> </head> <body> <div id="divMessage"> Here is a message. </div><input type="button" value="Toggle Style" onclick="toggleStyle()" /><script type="text/javascript"> function toggleStyle() { var divMessage = document.getElementById("divMessage"); if (divMessage.className === "message-style1") { divMessage.className = "";} else { divMessage.className = "message-style1"; } } </script> </body> </html>An event handler is added to the
<input/>element to execute thetoggleStyle()function when the button is clicked. Don't worry about events right now; you'll begin learning about them in the next lesson. For now, simply know thattoggleStyle()executes when you click the button.Save this HTML file as
lesson15_example01.htm. Open it in your browser, and click the button several times. You will see the<div/>element's style change with every click.
To get the sample code files you can download Lesson 15 from the book's website at www.wrox.com.
Note
Please select Lesson 15 on the DVD to view the video that accompanies this lesson.