
Chapter 7. User Accounts and Authentication
Picture yourself walking down a dark alley. You are on your way to join the “Secret Club for Super Cool People” (if you’re reading this, you are a well-deserving member). As you enter the hidden door to the club, you are greeted by a receptionist who hands you a form to complete. On the form, you must enter your name and a password, which will be known only by you and the receptionist.
Once you have completed the form, you hand it back to the receptionist, who goes to the back room of the club. In the back room, the receptionist uses a secret key to encrypt your password and then stores the encrypted password in a locked file vault. The receptionist then stamps a coin, on which is pressed your unique membership ID. Upon returning to the front room, the receptionist hands you the coin, which you tuck away in your pocket. Now each time you return to the club, you need only show your coin to gain entrance.
This interaction may sound like something out of a low-budget spy movie, but it’s nearly identical to the process that is followed each time we sign up for a web application. In this chapter, we’ll learn how to build GraphQL mutations that will allow a user to create an account and sign in to our application. We’ll also learn how to encrypt the user’s password and return a token to the user, which they can use to verify their identity when they interact with our application.
Application Authentication Flow
Before we get started, let’s step back and map out the flow users will follow when they sign up for an account and log in to an existing account. If you don’t yet understand all of the concepts covered here, don’t worry: we will approach them bit by bit. First, let’s review the account creation flow:
-
A user enters their intended email, username, and password into a field in a user interface (UI), such as the GraphQL Playground, a web application, or a mobile application.
-
The UI sends a GraphQL mutation to our server with the user’s information.
-
The server encrypts the password and stores the user’s information in the database.
-
The server returns a token to the UI, which contains the user’s ID.
-
The UI stores this token, for a specified period of time, and sends it with every request to the server to verify the user.
Now let’s look at the user sign-in flow:
-
A user enters their email or username and password into a field in a UI.
-
The UI sends a GraphQL mutation to our server with this information.
-
The server decrypts the password stored in the database and compares it with the one the user entered.
-
If the passwords match, the server returns a token to the UI, which contains the user’s ID.
-
The UI stores this token, for a specified period of time, and sends it with every request to the server.
As you can see, these flows are very similar to our “secret club” flow. In this chapter we’ll focus on implementing the API portions of these interactions.
Password Reset Flow
You’ll notice that our application does not allow users to change their password. We could allow users to reset their password with a single mutation resolver, but it is much more secure to verify the reset request via email first. For brevity’s sake we won’t be implementing password reset functionality in this book, but if you are interested in examples and resources for creating a password reset flow, please visit the JavaScript Everywhere Spectrum community.
Encryption and Tokens
In our exploration of the user authentication flow, I mentioned encryption and tokens. These sound like mythological dark arts, so let’s take a moment to look at each of these in more detail.
Encrypting Passwords
To effectively encrypt user passwords, we should use a combination of hashing and salting. Hashing is the act of obscuring a string of text by turning it into a seemingly random string. Hashing functions are “one way,” meaning that once the text is hashed it cannot be reverted to the original string. When a password is hashed, the plain text of the password is never stored in our database. Salting is the act of generating a random string of data that will be used in addition to the hashed password. This ensures that even if two user passwords are the same, the hashed and salted versions will be unique.
bcrypt is a popular hashing function based on the blowfish cipher and commonly used within a range of web frameworks. In Node.js development we can use the bcrypt module to both salt and hash our passwords.
In our application code we would require the bcrypt module and write a function to handle the salting and hashing.
Salting and Hashing Examples
The following example is for illustrative purposes. We will integrate password salting and hashing with bcrypt later in the chapter.
// require the moduleconstbcrypt=require('bcrypt');// the cost of processing the salting data, 10 is the defaultconstsaltRounds=10;// function for hashing and saltingconstpasswordEncrypt=asyncpassword=>{returnawaitbcrypt.hash(password,saltRounds)};
In this example, I could pass a password of PizzaP@rty99, which generates a salt of $2a$10$HF2rs.iYSvX1l5FPrX697O and the hashed and salted password of $2a$10$HF2rs.iYSvX1l5FPrX697O9dYF/O2kwHuKdQTdy.7oaMwVga54bWG (which is the salt plus an encrypted password string).
Now when checking a user’s password against the hashed and salted password, we will use the bcrypt’s compare method:
// password is a value provided by the user// hash is retrieved from our DBconstcheckPassword=async(plainTextPassword,hashedPassword)=>{// res is either true or falsereturnawaitbcrypt.compare(hashedPassword,plainTextPassword)};
With the user passwords encrypted, we are able to safely store them in a database.
JSON Web Tokens
As a user it would be extremely frustrating if we needed to enter our username and password each time we wanted to access a single protected page of a site or application. Instead, we can securely store a user’s ID on their device within a JSON Web Token. With each request the user makes from the client, they can send that token, which the server will use to identify the user.
A JSON Web Token (JWT) consists of three parts:
- Header
-
General information about the token and type of signing algorithm that is being used
- Payload
-
The information that we’ve intentionally stored within the token (such as the username or ID)
- Signature
If we were to look at the token, it would appear to be made up of random characters with each part separated by a period: xx-header-xx.yy-payload-yy.zz-signature-zz.
In our application code we can use the jsonwebtoken module to generate and validate our tokens. To do this we pass in the information we wish to store, along with a secret password, which would typically be stored within our .env file.
constjwt=require('jsonwebtoken');// generate a JWT that stores a user idconstgenerateJWT=awaituser=>{returnawaitjwt.sign({id:user._id},process.env.JWT_SECRET);}// validate the JWTconstvalidateJWT=awaittoken=>{returnawaitjwt.verify(token,process.env.JWT_SECRET);}
JWTs Versus Sessions
If you’ve worked with user authentication in web applications before, you’ve likely come across user sessions. Session information is stored locally, typically in a cookie, and verified against an in-memory data store (such as Redis, though traditional databases can be used as well). There is much debate about which is better, JWTs or sessions, but I’ve found that JWTs offer the most flexibility, particularly when integrating with nonweb environments such as native mobile applications. Though sessions work well with GraphQL, JWTs are also the recommended approach in the GraphQL Foundation and Apollo Server documentation.
By using JWTs, we can securely return and store a user’s ID with the client application.
Integrating Authentication into Our API
Now that you have a solid understanding of the components of user authentication, we’ll implement the ability for users to sign up and sign in to our application. To do this we’ll be updating both our GraphQL and Mongoose schemas, writing signUp and signIn mutation resolvers that generate a user token, and validating the token on each request to the server.
User Schemas
To begin we will update our GraphQL schema by adding a User type and updating the Note type’s author field to reference the User. To do so, update the src/schema.js file as follows:
typeNote{id:ID!content:String!author:User!createdAt:DateTime!updatedAt:DateTime!}typeUser{id:ID!username:String!:String!avatar:Stringnotes:[Note!]!}
When a user signs up for our application, they will submit a username, email address, and password. When a user signs in to our application, they will send a mutation containing their username or email address along with a password. If a sign-up or sign-in mutation is successful, the API will return a token as a string. To accomplish this in our schema, we will need to add two new mutations to our src/schema.js file, each of which will return a String, which will be our JWT:
typeMutation{...signUp(username:String!,:String!,password:String!):String!signIn(username:String,:String,password:String!):String!}
Now that our GraphQL schema has been updated, we also need to update our database models. To do this we’ll create a Mongoose schema file in src/models/user.js. This file will be set up similarly to our note model file, with fields for username, email, password, and avatar. We will also require the username and email fields to be unique in our database by setting index: { unique: true }.
To create the user database model, enter the following in your src/models/user.js file:
constmongoose=require('mongoose');constUserSchema=newmongoose.Schema({username:{type:String,required:true,index:{unique:true}},:{type:String,required:true,index:{unique:true}},password:{type:String,required:true},avatar:{type:String}},{// Assigns createdAt and updatedAt fields with a Date typetimestamps:true});constUser=mongoose.model('User',UserSchema);module.exports=User;
With our user model file in place, we now must update the src/models/index.js to export the model:
constNote=require('./note');constUser=require('./user');constmodels={Note,User};module.exports=models;
Authentication Resolvers
With our GraphQL and Mongoose schemas written, we can implement the resolvers that will allow a user to sign up and sign in to our application.
First, we need to add a value to the JWT_SECRET variable in our .env file. This value should be a string without spaces. It will be used to sign our JWT, which allows us to verify them when they are decoded.
JWT_SECRET=YourPassphrase
Once we have created this variable, we can import the required packages within our mutation.js file. We will utilize the third-party bcrypt, jsonwebtoken, mongoose, and dotenv packages as well as importing Apollo Server’s AuthenticationError and ForbiddenError utilities. Additionally, we’ll import the gravatar utility function, which I’ve included with the project. This will generate a Gravatar image URL from a user’s email address.
In src/resolvers/mutation.js, enter the following:
constbcrypt=require('bcrypt');constjwt=require('jsonwebtoken');const{AuthenticationError,ForbiddenError}=require('apollo-server-express');require('dotenv').config();constgravatar=require('../util/gravatar');
Now we can write our signUp mutation. This mutation will accept a username, email address, and password as parameters. We will normalize the email address and username by trimming any whitespace and converting it to all lowercase. Next, we will encrypt the user’s password using the bcrypt module. We will also generate a Gravatar image URL for user avatars by using our helper library. Once we have performed these actions, we will store the user in the database and return a token to the user. We can set this all up within a try/catch block, so that our resolver returns an intentionally vague error to the client if there are any issues with the sign-up process.
To accomplish all of this, write the signUp mutation as follows within the src/resolvers/mutation.js file:
signUp:async(parent,{username,,password},{models})=>{// normalize email address=.trim().toLowerCase();// hash the passwordconsthashed=awaitbcrypt.hash(password,10);// create the gravatar urlconstavatar=gravatar();try{constuser=awaitmodels.User.create({username,,avatar,password:hashed});// create and return the json web tokenreturnjwt.sign({id:user._id},process.env.JWT_SECRET);}catch(err){console.log(err);// if there's a problem creating the account, throw an errorthrownewError('Error creating account');}},
Now, if we switch over to the GraphQL Playground in our browser, we can try out our signUp mutation. To do so we’ll write a GraphQL mutation with username, email, and password values:
mutation{signUp(username:"BeeBoop",:"[email protected]",password:"NotARobot10010!")}
When we run the mutation, our server will return a token like this (Figure 7-1):
"data":{"signUp":"eyJhbGciOiJIUzI1NiIsInR5cCI6..."}}
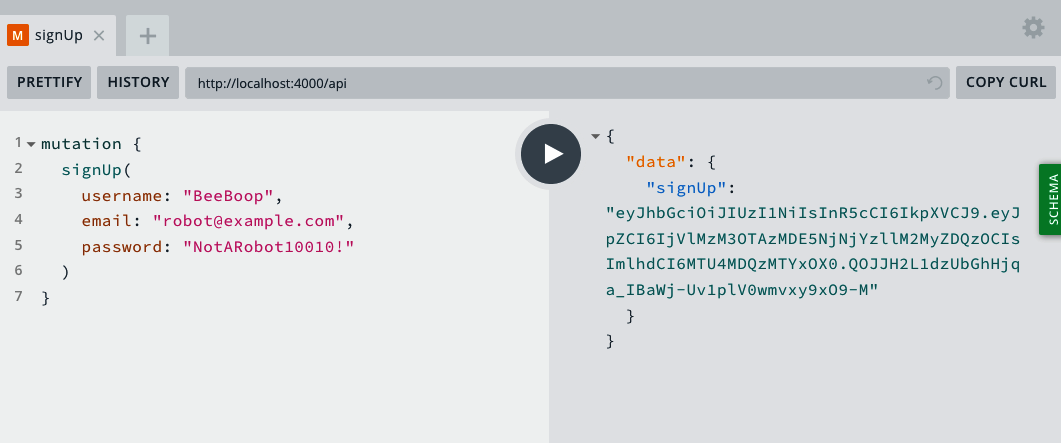
Figure 7-1. The signUp mutation in the GraphQL Playground
The next step will be to write our signIn mutation. This mutation will accept the user’s username, email, and password. It will then find the user in the database, based on the username or email address. Once the user is located, it will decrypt the password stored in the database and compare it with the one the user has entered. If the user and password match, our application will return a token to the user. If they don’t match, we’ll want to throw an error.
Write this mutation as follows in the src/resolvers/mutation.js file:
signIn:async(parent,{username,,password},{models})=>{if(){// normalize email address=.trim().toLowerCase();}constuser=awaitmodels.User.findOne({$or:[{},{username}]});// if no user is found, throw an authentication errorif(!user){thrownewAuthenticationError('Error signing in');}// if the passwords don't match, throw an authentication errorconstvalid=awaitbcrypt.compare(password,user.password);if(!valid){thrownewAuthenticationError('Error signing in');}// create and return the json web tokenreturnjwt.sign({id:user._id},process.env.JWT_SECRET);}
We can now visit the GraphQL Playground in our browser and try out the signIn mutation, using the account we created with our signUp mutation:
mutation{signIn(username:"BeeBoop",:"[email protected]",password:"NotARobot10010!")}
Again, if successful, our mutation should resolve with a JWT (Figure 7-2):
{"data":{"signIn":"<TOKEN VALUE>"}}
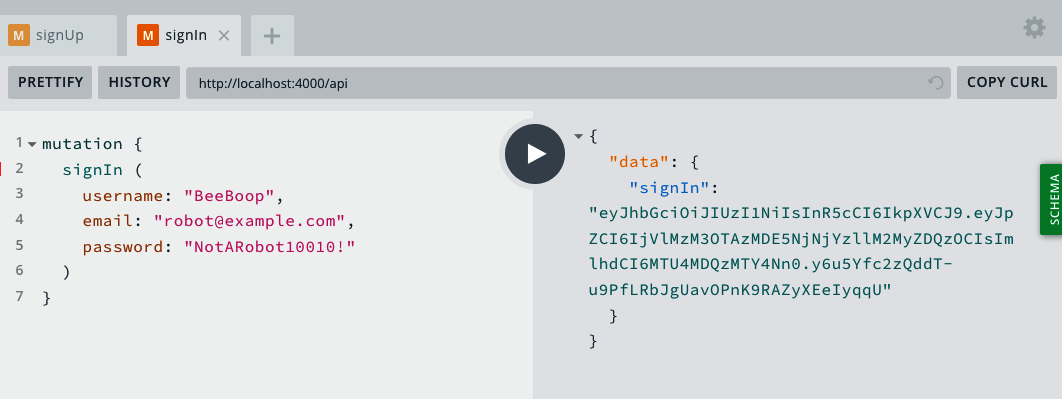
Figure 7-2. The signIn mutation in the GraphQL Playground
With these two resolvers in place, users will be able to both sign up for and sign in to our application using JWTs. To experiment with this, try adding more accounts and even intentionally entering incorrect information, such as passwords that do not match, to see what the GraphQL API returns.
Adding the User to the Resolver Context
Now that a user can use a GraphQL mutation to receive a unique token, we’ll need to verify that token on each request. Our expectation will be that our client, whether it be web, mobile, or desktop, will send the token with the request in an HTTP header named Authorization. We can then read the token from the HTTP header, decode it using our JWT_SECRET variable, and pass along the user’s information with the context to each GraphQL resolver. By doing this, we can determine if a signed-in user is making a request, and if so, which user it is.
First, import the jsonwebtoken module into the src/index.js file:
constjwt=require('jsonwebtoken');
With the module imported, we can add a function that will verify the validity of the token:
// get the user info from a JWTconstgetUser=token=>{if(token){try{// return the user information from the tokenreturnjwt.verify(token,process.env.JWT_SECRET);}catch(err){// if there's a problem with the token, throw an errorthrownewError('Session invalid');}}};
Now, within each GraphQL request we will grab the token from the header of the request, attempt to verify the validity of the token, and add the user’s information to the context. Once this is done, each GraphQL resolver will have access to the user ID we stored in the token.
// Apollo Server setupconstserver=newApolloServer({typeDefs,resolvers,context:({req})=>{// get the user token from the headersconsttoken=req.headers.authorization;// try to retrieve a user with the tokenconstuser=getUser(token);// for now, let's log the user to the console:console.log(user);// add the db models and the user to the contextreturn{models,user};}});
Though we’re not yet performing user interactions, we can test our user context within the GraphQL Playground. In the lower-left corner of the GraphQL Playground UI, there is a space labeled HTTP Headers. In that portion of the UI, we can add a header that contains a JWT that was returned in either our signUp or signIn mutation as follows (Figure 7-3):
{"Authorization":"<YOUR_JWT>"}
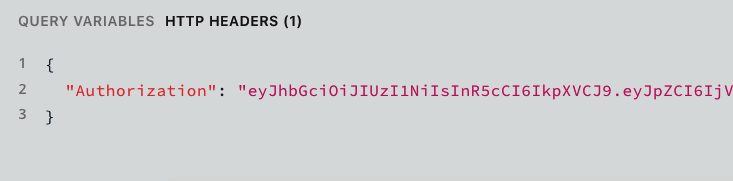
Figure 7-3. The authorization header in the GraphQL Playground
We can test this authorization header by passing it along with any query or mutation in the GraphQL Playground. To do this, we’ll write a simple notes query and include the Authorization header (Figure 7-4).
query{notes{id}}
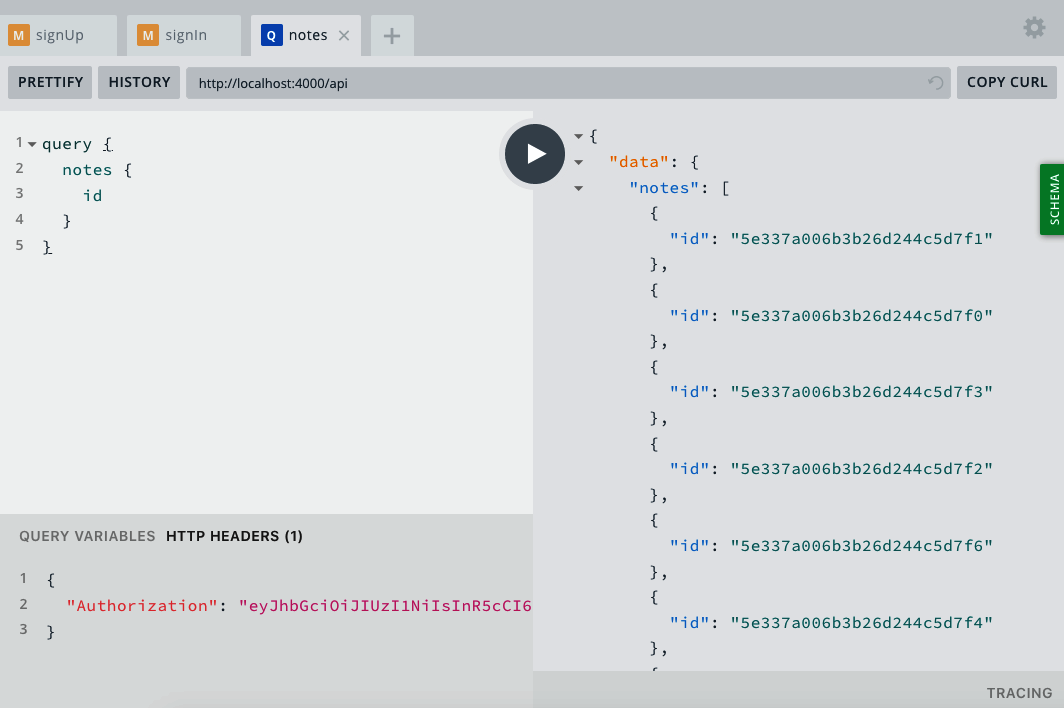
Figure 7-4. The authorization header and query in the GraphQL Playground
If our authentication is successful, we should see an object containing the user’s ID logged to our terminal application’s output, as shown in Figure 7-5.
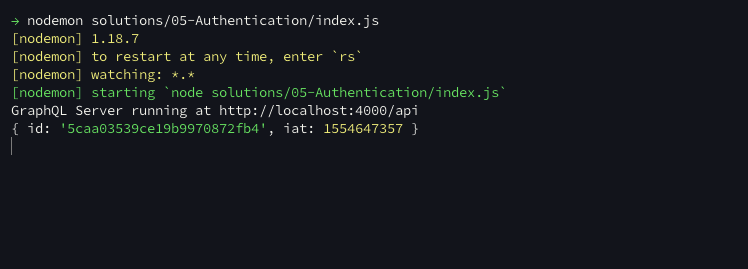
Figure 7-5. The user object in our terminal’s console.log output
With all of these pieces in place, we are now able to authenticate users in our API.
Conclusion
User account creation and sign-in flows can feel mysterious and overwhelming, but by taking it piece by piece, we can implement a stable and secure authentication flow in our API. In this chapter, we created both sign-up and sign-in user flows. These are a small fragment of the account management ecosystem, but will provide us with a stable foundation on which to build. In the next chapter we’ll implement user-specific interactions in our API, which will assign ownership to notes and activities within the application.