
The purpose of this chapter is to give you just enough knowledge about client side scripting so you are able to understand the technologies that are behind them and deploy JavaScript with HTML in real projects. In essence, the aim is to put you in a position to be able to:
Learn from scripts that you might see
Create your own scripts
Learn new scripting languages and techniques
The Web and associated technologies are moving so fast that new languages and techniques are appearing all the time. Understanding the basics behind client side scripting, and the purposes and mechanics, will prepare you for the future.
Most advanced techniques are based on the same underlying principles, and, in a sense, they are all based on one of two technologies—JavaScript and XML—sometimes working together (as in AJAX) to achieve the final result. JavaScript is the client side scripting language, and XML provides a communication layer between the page and the server.
So, this chapter teaches you the basics of JavaScript and also gives you a good reference section. This part of the chapter is very information dense, but feel free to use it whenever you need to look something up. Essentially you will first learn how to program, and then how to program with JavaScript, before finally applying it in an HTML and CSS context.
It is important to separate the reference section from the explanations that precede it. There is no (or very little) overlap in actual content—the reference is there to show you individual parts of the language, with examples, that you will only understand if you first understand the concepts behind the JavaScript language.
Generally speaking, when you include a client side script within the Web page (or as an external script), it is to perform one of the following functions:
Improve navigation
Provide special effects
Provide contextual highlighting
Validate forms or data
Provide dynamic content
Communicate within pages (inter-page communication)
Examples of improved navigation include drop-down menus that take the visitor straight to a given section without having to click through a hierarchical system of pages. These so-called jump boxes attach a small script to a drop-down selection box that is more commonly found as part of an HTML form, as in the last chapter.
Special effects include inline calendars or image selection (from thumbnail examples), which layer CSS (styles, such as div elements) on top of regular HTML. These are also manipulated using JavaScript, coupled with something called events, which are triggered by the browser underneath.
Contextual highlighting includes offering topic expansion or inline help. This can be in the form of cue cards hinting at the content behind, as well as floating sign-up boxes or splash screens. Again, these are previously invisible div elements (for example) that are brought to the front when a particular event is triggered.
Form and other data validation should be self-explanatory but allows the page to return data to the server that is pre-validated. This gives a better experience for the end users and reduces bandwidth usage in cases where the user has made a mistake. It also reduces the complexity (as you’ll see in the next chapter) of the server side scripts that process the results of the form.
Dynamic content includes the ability to switch between content without loading another page (that is, like a tab control), as well as retrieving and displaying information from the server based on data that the user is entering (as in the Google Suggest service). This last uses a technique called AJAX that combines JavaScript and XML, and is covered in Chapter 7.
Finally, inter-page communication includes the use of JavaScript as a shopping cart or questionnaire (survey) platform for multi-page questionnaires. This is a convenience more than anything else, but the Sun JavaScript documentation notes that the original intention of JavaScript was to provide just this functionality.
This chapter spends a lot of time on these topics because you will usually be creating more client side scripts than server side in order to reduce server load, and because server side scripting might not be available on the host you choose to use at first for your Web creations.
To do all of this, you first need to understand the role of client side scripts in the client/server model. Specifically, you need to be able to create small programs (scripts) in the special cross-browser language that is JavaScript (and which they understand).
Before you go on, there is an important distinction to make between something called the DOM (Document Object Model) as separate from the language, and the objects that it provides to manipulate the way that the browser displays the page. The DOM is provided by the browser and is specified by the W3C.
If you look into the specifications provided by the W3C, you will find that the Document Object Model is a set of objects and methods that define the way that a document and its contents can be manipulated. It is only a specification and not an implementation, and it is left up to the browser vendors to add libraries that support the DOM and its operations.
However, in the case of JavaScript, there is a substantial amount of something called mirroring that makes it look as if you are addressing the objects directly, when in fact you are manipulating the JavaScript mirror of those objects. If you bear this in mind, everything should be a lot easier to follow.
So, it is not the document itself that is being manipulated, but an abstraction of it. The changes are reflected thanks to the link between the JavaScript language and the browser. Different languages and environments have different abstractions, and the JavaScript choice is to use mirroring with built-in objects.
You should not rely on these objects being mirrored the same way in other environments; although the DOM might be present, it might be manipulated in a slightly different, but compatible, way.
Client side scripts are executed by the client (the browser) as if they are extensions to the HTML page that is being displayed. Logically, the browser must have support for the scripts that the Web page is asking it to display. There are a few of these scripting languages, and each one has separate support requirements.
Sometimes these scripting and content rendering languages are built in (like JavaScript, HTML, and, in some cases, XML). These are part of the browser, and as such, they can be activated or deactivated (in the case of JavaScript) and have a certain relationship with the underlying rendering model.
Then, there are add-ins (otherwise known as plug-ins) such as the Adobe Flash player for Flash movies, Microsoft Silverlight, VRML, and so on. These add-ins enable the browser to display special kinds of files that they download. In much the same way that your operating system must have a browser in order to display an HTML page, so your browser must have a special piece of software to display a Flash movie.
(These add-ins can also sometimes communicate with the Internet, and even the browser, using a variety of interfaces like XML.)
This book concentrates on the scripting and communications interfaces that are built in to most browsers—JavaScript, XML, and HTML—and not specific technologies that are added on to the browser by the users in order to do something specific.
However, you should not confuse these add-ins with things like applets and other drop-in elements that some Web 2.0 sites provide you with: these should be cross-browser too, even if they have been compiled into Java class files. These are out of scope for the book, but an interesting technology nonetheless.
Like CSS (style sheets—see Chapter 4), scripts can be included inline or as externally loaded, separate files. The Web server can serve scripts in the same way that it can serve image files and external style sheets—they are just another reference to be loaded as part of the page.
JavaScript can also be created by the server when it serves the pages, allowing for mixed-mode processing, which you’ll look at in the next chapter. In this kind of solution, the server side script delivers a Web page to the browser, with HTML, inline scripts, and references to external styles and scripts, and the browser then has to request the resources that it needs.
One thing to remember is that the whole page must load, and that includes the scripts, before anything can happen. This is because if an executing script references an HTML object in the page, that object must be loaded before this can happen. To avoid a chicken-and-egg situation, the browser generally tries to make sure that it has all the information it needs before executing scripts.
This does not extend to the resources such as embedded document objects (images are just loaded as placeholders, for example) might use, and so an image object might be accessible and loaded but it will not necessarily have an image in it. Instead, it might just have a reference to the place where it will appear. On the other hand, it means that you can do something called image preloading, which uses a client side script to load the images that a page needs before they are needed.
Scripts can be placed in the head section of the HTML document and will be accessible for all the HTML document. Anything that is defined here is visible to the rest of the page, as if it were style information.
<script>
// Code lines go here...
</script>
Typically the script section is a good place to put named blocks of code, called functions, which you’ll look at later in the chapter, and variables (temporary data storage boxes) that need to be used by the rest of the page. Usually, as you’ll see, the type of script should also be mentioned in the script tag, but most browsers will try to detect the scripting language being sued.
Also, inline scripts can be placed within the body of the page, by using the script tag. This is frowned upon by some Web programmers as it very much reduces the maintainability of the resulting page. If something needs to be changed, it is much more useful to have all the code in the same place.
Finally, scripts can be used as actions in, for example, form controls. This makes use of the events that are part of the HTML DOM and defined by the W3C. Any script language or action could feasibly be used in these event triggers. There are also a few cases where they can be used when other actions take place, such as the loading of a page or resource.
For example, onClick is an event that can be triggered by an HTML interactive object (such as a button or link). This can then be used with a piece of scripted code to perform a specific action when that object is clicked, called the event handler.
Scripts can also be linked to from the head of the document as an external resource, in much the same way that style sheets can be. This implies that the browser has to be able to request the resource from the server—which is either a fully qualified path or a relative path—in exactly the same way that other resources are referenced.
You do need to tell the browser what kind of script you are referring to, however, so that it knows what kind of interpreter to use. Again, if you don’t, most browsers will try to guess from the file extension or the content. It’s best not to rely on this, however.
The advantage of using external scripts is that they can be shared across multiple Web pages. In addition, there is a certain amount of hiding of the script that takes place because it is on a server and not directly in the page. The user cannot look at the script simply by selecting View Source from the menu, and downloading it might not enable them to see it either.
But make no mistake about this—scripts are never going to be safe from prying eyes unless you take additional steps to protect them by using a tool that makes them unreadable. This can also be a compiler that turns the script into an embeddable object (such as a Java applet), but this is beyond most, even intermediate, Web designers and Web programmers.
Most people won’t bother because they never put anything in the scripts that would give someone a competitive advantage. The kind of code that is scripted in is not usually proprietary; its inclusion is just a matter of convenience.
For example, simple code that preloads document images so that rollover menus work correctly or form validation scripts are things that are scripted in to make the whole interface hang together better. On the other hand, an on-the-fly encryption algorithm would be better off encoded as a separate object not directly viewable by the end users.
Most often the approach will be mixed, with functions (named blocks of code) defined in the head section and called from inside the HTML. These will be called from event handlers or directly from script blocks.
This approach will usually be interlaced with separate scripted modules outside that provide functions that are common to all Web pages in a set. These modules usually carry code that is abstracted across many pages—like generic form validation operations or interface code such as pop-up information boxes.
Then, functions which are only valid for the current page are kept in the head section; these might specialize the form validations or change the colors, text, or appearance of pop-up information boxes. These functions are called from the HTML page and they use the external modules that provide the actual functionality.
This keeps good organization because the objects and page that use the localized functions are kept separate from the code that provides the actual generic functionality. Sometimes this is referred to as object oriented programming.
The modular style makes the scripts easier to read, modify, and even share (or sell) than if the code was all in multi-line statements within the HTML objects. The advantages become more easily grasped the further you examine the role of JavaScript in Web programming and design.
It is not the aim of this book to give an in-depth guide to the JavaScript language; there are many books—offline and on—which detail the language. And it is just that—a language which can be used in browsers, compiled into applications, and used on the server.
In this book, the aim is to offer just enough information for you to get started and do useful things with JavaScript, by mixing it with HTML, XML, and other Web programming technologies. More than that, it’s treated as a client side (browser) scripting language only, which is arguably its strong point.
Much of the actual learning that you do will be online—through examples and probably other people’s scripts and tutorials—as well as using the official reference texts. The grounding that you receive here will make this process much easier and give you something useful to refer back to when you encounter something that you do not understand completely.
If you want to become a proficient JavaScript developer—to the extent that you can make a living doing it, for example—you will need to get a good in-depth guide to the language. This chapter is, however, an excellent start.
As mentioned, there are three ways to use scripts in Web pages, and there is no exception to this rule when using JavaScript:
Inline
External
Mixed
All the examples here are compliant with version 1.1 of the JavaScript standard, owned by Sun Microsystems, and as such ought also to be compliant with ECMA Script. There are variations between browser platforms such as Mozilla (Firefox) and Internet Explorer, but these should be few and far between.
The HTML DOM that is used by the browsers ought to be standard as it is defined by the W3C, but because the standardization is a relatively recent innovation, there may be some older browsers that still have issues in this respect. The reason for this is that the mirroring is not always correctly implemented and some specific objects might not be available under some browsers.
The samples have all been checked, however, and should work as is. As an aside, there are techniques for detecting which browser is running, but because these are changing as fast as new browsers are being released, there being no standard way to detect browser versions, you’ll have to do your own research.
An inline script must be contained within a matching pair of <script> tags, as in the following example, which also identifies the language and version:
<script language="JavaScript1.1">
// Code lines go here...
</script>
This is the same whether it is in the head section or within the HTML itself, except where it is provided as an event handler. In such cases, the script tag is not necessary, and the language and version identifier is omitted. For example:
<input type="submit" value="Submit" onClick="document.myForm.name.style =
           'background-color:red'">
However, if it is ever used as a target in a clickable entity (anchor, link, or suchlike), a special usage is generally applied. This is to identify the target of the link as JavaScript as opposed to something else such as a Web page (prefixed with http://) or other resource.
This inline usage then becomes:
<a href="Javascript:history.go(-1)">Back</a>
These are the three ways in which JavaScript can be identified and used inline. In all cases, multiple statements could theoretically be used, but, generally speaking, the JavaScript statements for event handlers and link targets tend to be single function calls or object references.
External JavaScript documents must have the extension .js and must be specified by the Web server as a type of document that it can serve. This can require special configuration on the part of the server administrator, and in some cases, special permission to host the .js files must be sought (especially on free Web host providers’ domains).
The reason that the configuration is required is so that it can pass the correct MIME type to the browser; without it, the browser might not know how to process the included file. Again, though, as with many client side functions, as long as the browser receives the resource, it will try to figure out how to process it for itself.
Tip
Including an external script is very similar to the method used to include an external style resource:
<script src="my_functions.js" type="application/x-javascript">
The type attribute is often omitted, because it is assumed that the server will supply the correct MIME type to the browser. However, because this is not guaranteed, I prefer to give the browser all the information that it might need in advance.
Sometimes it is necessary to do two things when using JavaScript, or any other scripting language, where support is optional, to prevent the browser becoming confused. The two possibilities are as follows:
Hide the script in HTML comments
Provide alternative rendering instructions
The first is used to mask the script from those browsers that do not process the <script> tag at all. Because rendering HTML requires (or at least encourages) that browsers ignore tags that they do not understand, the problem is not with the script tag itself. Rather it is with the JavaScript code that is contained within it.
A browser that does not process JavaScript (or the <script> tag) will not be able to do anything more than ignore the information that it does not understand. To this end, you just put those commands in HTML comments, thus:
<script language="JavaScript1.1">
<!- - Use HTML comments to hide the code
// JavaScript commands go here. . .
// . . . this line ends the hiding here - ->
</script>
This is the first of two possible options provided for those browsers that understand the <script> tag, but whose authors have chosen not to implement script processing. The second approach is to display some other content that does not rely on scripts to be displayed by the browser.
For example:
<noscript>
Your browser does not seem to support JavaScript!<br/>

(Perhaps you need to enable it?)
</noscript>
The browser is expected to render the content contained in the <noscript> tag as if it is regular HTML. This gives the author of the page the possibility to redirect the users to a download page for an updated browser that might support scripting. It also allows the users to enable the scripting engine if they have disabled it for security reasons.
Although it is becoming less and less necessary to do either of these options, it is still polite to attempt one or the other to make sure that all users have a consistent experience. They can even be used together, and there are no hard and fast rules about which is more appropriate. As a rule of thumb, if something viable and sensible can be displayed on platforms that have no script support, the <noscript> tag can be used. Otherwise, it is best to comment out the script commands and leave it at that.
Before you go on to the first part of the language discussion, there are a few basic things that you will need to remember. These form part of the underlying rules that govern the language and must be respected at all times.
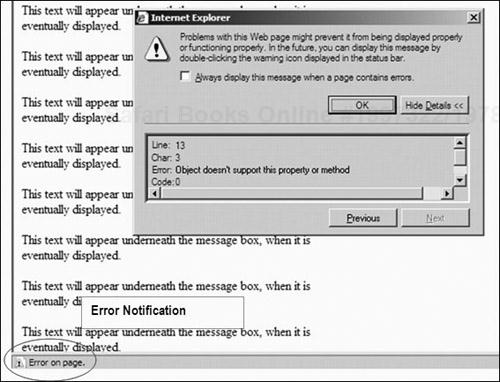
First, in your experiments, you will note that JavaScript rarely fails noisily. Often the only clue that you have that it is not correctly written is that it fails to do anything. At this point, you need to use the reporting function of your browser.
In Internet Explorer, this is indicated by a little error flag in the bottom left of the status bar. Double-clicking it will result in a dialog box containing the nature and location of the JavaScript error, as shown in Figure 5.1.
In Firefox, you need to access the error console via the menu. This is shown in Figure 5.2. The console can also be used to execute simple JavaScript statements and display the result.

Many of these errors will stem from the fact that JavaScript is case-sensitive—thismodule and ThisModule are not the same. This means that if you define something as thisModule and then try to access it as ThisModule, JavaScript will assume that you are trying to create a new item called ThisModule.
You can’t put quotes inside quotes. Sometimes, however, it is necessary. This usually happens when you’re trying to use a piece of JavaScript inside an event handler (such as onClick), where the code needs to refer to the name of something. In such cases, you need to use a single quote inside the double quotes. An example of this is as follows:
<input type="button" onClick="document.src = 'new_page.html';">
All statements must end with a semicolon (;). Sometimes, programmers leave them out in cases where the statement is an obvious end to a program, or in an event handler. This is not good practice for the novice, however, and is a bad programming habit to get into.
Comments are pieces of code that are not supposed to be executed by the browser, in the same way that HTML comments are not meant to be rendered. In JavaScript, comments are usually contained after // and inside /* */, which should be very familiar to C programmers. The following is a valid comment:
2 + 2; // This will not be evaluated
The /* */ usage is for multi-line comments:
/* Nor will this
   be at all */
Bear in mind that if something is inside a comment, it will be discarded. So, everything from the /* to the */ will be ignored, even if it is, itself, a comment. This means that it is not possible to use the // single comment token to end a multi-line comment that has been opened with /*.
Names of things in JavaScript cannot start with numbers or other special characters (although they can start with underscores, _, if you so wish). If you stick with a to z and A to Z or possibly an underscore, this is the correct approach. In addition, JavaScript names cannot contain spaces; an underscore is an acceptable substitute.
JavaScript is also not type-sensitive. As far as JavaScript is concerned, the number 42 and the string “42” are identical for numerical operations. JavaScript converts values by itself based on the target type or chooses the most appropriate type for a literal provided by the programmer.
This last point might be a little confusing right now, so it is a good time to discuss variables and types.
A variable is a place to put information—a named box, if you like. The information can be inserted, temporarily, and retrieved again. It is only in existence for as long as the script is in focus. As soon as the user moves away from the page, the variable is lost and any information that was in it is destroyed.
Each box contains information that has a given type. This means that it is treated by the script engine (the part of the browser that runs the script) in a certain way. A number is different from a string; a true or false value is different again.
But JavaScript is not type-sensitive and will freely convert—usually managing to get it right. In JavaScript, there are only four data types that you really need to be concerned with:
null,undefined—nothing, empty, and undefined (these are not the same)Numbers—Integers or floating point numbers
Boolean values—
trueorfalseCharacter strings—
"a"or"a string"
That really is it; there are no long integers or double-precision floating point numbers to worry about, and for the most part, you won’t need them. Most scripts will get by with processing very simple pieces of information, usually strings.
Before you can do much with these data types, you need to define a variable to put the data in. Only when a variable is defined can any data be stored in it. This is done either implicitly or explicitly, at the time that the data is needed, locally to a specific part of the script, or globally for the whole page and all the scripts within it.
An implicit declaration just requires that a variable be assigned a value, and the JavaScript engine will try to determine the data types from the values that it is passed. For example, you can write code such as:
myString = "a string";
However, because JavaScript is not strongly typed, it is also possible to write code like the following:
myString = "a string equals " + 42;
These values are called literals, and the built-in JavaScript type processing equates the two as best it can in the absence of any other reference point. The result of this is that myString now contains "a string equals 42", which is logical enough.
But what happens if you write the following:
myString = 42 + 42;
JavaScript will again try to match the type as closely as possible to the operation that is being performed. In this case, the result is that myString now contains 84 as a numeric value. Similarly, the following ought to have the same effect:
myNumber = 42 + "42";
Caution
A variable is usually assigned the data type of the first piece of data to be stored in it. Do not try to mix literals or variables and hope that JavaScript will make the right decision----it is better to ensure that your code does not assume anything.
A variable can also be declared explicitly with the var keyword:
var myString = ""; // an empty string
For the sake of clarity, in the examples in this book, I always declare variables explicitly. Note, however, that I do not assign a type to the variables at the time of declaration, unlike in other programming languages. It is also possible to declare a variable without putting any data in, as follows:
var myVariable;
In this case, the undefined value is automatically assigned to myVariable until such a time as some information is put into it. This value can be tested for, so the programmer can check to see if the variable has been initialized and take appropriate action.
Before you learn how to manipulate variables and test for the values that they contain, you need to look briefly at arrays, which are special kinds of variables.
A string is often viewed as an array of characters. Therefore, an array is a place where multiple pieces of data can be stored. You can think of it as a row of boxes that can contain individual pieces of data.
An array can contain any data type that can be defined in JavaScript, including the objects that make up an HTML page. They can also be mixed, meaning that different types of data can be stored next to each other in the array. There is a slight issue with this—as the programmer, you have to remember what order you put the data into the array so that when you take it out, it has the meaning that you expect.
Arrays that mirror the DOM are special objects in JavaScript because they follow the HTML model and give you access to parts of the HTML document. So, each element becomes a container (an array) for the elements that are logically stored inside it.
You’ll look at this in more detail later on, when you start to manipulate the Document Object Model (DOM). For now you just need to know that the paragraphs, headings, forms, and their various fields and buttons are all objects, and they can all be accessed using JavaScript arrays.
So, the document has an array of paragraphs, divisions, spans, layers, and other HTML elements inside it. A form contains an array of the controls that are used to provide the interactive content to the users.
Similarly, the document has an array of forms, and so on.
All of these objects can be referenced by their index in the page. The first form, for example, is contained at the first position of the forms array, which mirrors the DOM collection of forms inside the HTML document. This index is zero-based.
This means that an array of ten pieces of data is referenced by numbers 0 to 9. The type of the data will be assigned when the first value is stored at a referenced position inside the array. So, to access the first element in an array, you would use code such as:
myArray[0] = "element one";
An array can be declared by either filling it with values or reserving a certain number of items in advance. To set up an initially empty ten-element array, you would write:
var myArray = new Array (10);
You access an element in the array using the square bracket notation:
myArray[0] = "banana"; // This is the first element
Up until this line is executed, myArray[0] had the special value undefined as did the rest of the array. This special value can be tested for to see if an array has already been initialized. This is a technique that you’ll look at later on.
There is an easier way both to initialize and declare the array, at the same time filling it with an initial set of values. This uses the new keyword, along with the correct object type for an array, which happens to be Array. The code looks like:
var myFruits = new Array ("apple", "orange", "banana");There are other objects that can be created in this way, such as strings, and the JavaScript short reference (the Core Objects) covers a useful subset of the objects and the various operations that they support (also called methods).
There are many such operations that can be done on an array, such as adding and removing elements from it, sorting the array, and so on. These methods are all covered at the appropriate point in the short reference section.
Before leaving the topic of arrays for the time being, note that the previous examples are of one-dimensional arrays. Multidimensional arrays are also possible and used quite frequently in JavaScript programming. For example, if you want to store a table of integer values, you would first set it up using a declaration such as:
var myTable[10][10]; // 10 × 10 array
It is only when you begin to assign elements to the array that you begin to tell JavaScript what the elements are that should go into it. For example you could write code such as:
myTable[0][1] = 3;
myTable[1][1] = "three"; // [0][1] still contains 3
So far, you have looked at a lot of data storage and manipulation without looking at the operators in any detail. This would be a good time to do that, before you start putting the pieces together.
An operator performs some kind of operation on a set of values, be they variables or literals. An operator typically takes two arguments, although there is something called the conditional operator that takes three.
One thing to remember when using operators in JavaScript is that it will automatically translate a literal or a variable (that contains a literal) into an object before operating on it. This is part of the underlying mechanisms provided by JavaScript that make it flexible and easy to program with.
The simplest form of an operator is the assignment. You have already seen this in many of the small code examples. Formally stated, it takes a variable on the left side, and puts everything on the right side, once evaluated, into it as a literal value.
For example:
x = x; // Possible
x = "42"; // Put a string literal in x
"42" = x; // odd, doesn't do much
x=x+ 1; // add 1tox,put result in x
There is also something called the assignment operator, which allows you to perform the last operation with a single operator rather than the slightly clumsy long form. The generic format for the assignment operator is as follows:
operation=
where operation is any possible binary operator (+, -, /, and so on). The following is therefore equivalent to the x plus 1 example:
x+=1;
Other examples of the assignment operator are as follows:
x /= 2; // x = x / 2 (division)
x-=7;//x= x-7
The next operator you’ll look at is the comparison operator.
The purpose of the comparison operator is to test whether two values are the same or not, whether one is bigger than the other, and so on. You can compare two variables, a variable and a literal, or even two literals (although this might not make much sense). The == operator is used to compare two items. For example:
x = = y; // will be true if x equals y
If the two values are not of the same type, the JavaScript engine will attempt to convert one of them so that they are. So, the following should be valid:
var x = 3;
var y = "3";
x = = y; // will still be true
By a similar token, the != operator determines whether two values (or variables) are not exactly equal in value. Again, conversion will take place in an attempt to make sure that the types of the two arguments are correctly evaluated:
x != 1; // will be true if x is not equal to 1
x != true; // will be true if x is false
There are also two operators to test for whether one side is greater than or less than the other. These are the familiar mathematical symbols > and <. These can also be combined with the = operator to test for equality (that is, greater than or equal to and less than or equal to).
The following, for example, determines whether x is greater than y:
x > y; // true if x is greater than y
In addition, the following determines whether x is greater than or equal to y:
x >= y; // true when x is greater than or equal to y
The less than operator works in exactly the same way:
x < y; // true if x is less than y
x <= y; // true when x is less than or equal to y
The same rules hold as for the == and != operators when the values to be compared are not of the same type—that is, conversion. However, you should not rely on the automatic conversion and try specifically to convert values using the appropriate methods as discussed in the JavaScript short reference section.
The four mathematical operators are the familiar +, -, /, and *. These do exactly what you expect (add, subtract, divide, and multiply) and usually operate on numerical data except in certain cases (strings). For completeness:
var x = 42 + 1; // x = 43
var y = 100 - 1; // y = 99
var z=x/ y; // z= 0.43 or thereabouts
However, the logical operators are a little strange at first glace, especially for nonprogrammers. They operate on Boolean values, which can be either true or false. These two keywords represent the Boolean values as literals. The result of a comparison can also yield a true or false value.
The logical AND operator, &&, tests two arguments to see if they are both true at the same time. These arguments can be literal Boolean values, the result of a comparison or other operation, or a mixture of both. By way of example:
x = = y && a = = b; // statement is true if x is equal
                       // to y and a is equal to b
On the other hand, the logical OR operator, ||, determines whether one of the arguments is true, whereas the other one might not be. In other words, it determines whether A or B or both A and B are true. Therefore:
x = = y || a = = b; // true when x equals y or a equals b, or both
There is also a ! operator, called NOT, which returns true when the operand is false, or false when it is true. It effectively inverts the meaning. The following example might need to be read a couple of times before it is clear what it does:
!(x = = y) || !(a = = b); // true when x != y or a != b, or both
Finally, when used with strings, the + operator changes in meaning slightly. If both arguments are string literals, it converts them to string objects, concatenates the two strings, and then returns a single literal. This is easier to show than to explain:
"a " + "b"; // returns "a b"
The assignment operator works in exactly the same way:
var myString = "a ";
myString += "b"; // myString now contains "a b"
There are also some other useful operators that provide some additional functionality when dealing with various data types. Take a look at these next.
The new and delete operators are used to create and destroy objects, as you have already seen in the discussion of arrays. This book uses new and delete mainly in relation to arrays and other complex objects (such as Date or String objects). For example:
var myAddress = new String ("some text");
var myArrayOfNumbers = new Array (1, 2, 3, 4, 5);
The delete operator discards the object. You should be careful not to discard an object that you might need later, and always to test for the creation of objects that might not be instantiated at the time you try to access them (by testing against the special literal undefined). The delete operator is simple enough:
delete (myAddress);
After execution, the variable myAddress is no longer populated and cannot be used.
However, delete can also be used to delete a specific item from an array, rather than the whole array at once. For example:
delete myArrayOfNumbers[0];
This example would empty array element 0 (the first one) and set its value to undefined. If you delete an item in the middle of the array, it is set to undefined and the rest of the array is left untouched.
Next, the conditional operator, ?, is the only one to take three operands and is a shorthand evaluation of a condition that must evaluate to true or false. It allows you to perform code statements conditionally depending on the result of a condition. The generic form is as follows:
condition ? if_true : if_falseIn this generic form, if condition evaluates to true, the if_true expression is evaluated; otherwise, the if_false expression is evaluated. This allows you to create simple expressions that do something in a limited number of possible outcomes.
For clarity, the condition should be placed in brackets. For example:
(y == 3) ? x = 0 :x = 1;
This expression compares y with 3, and if it evaluates to true (that is, if the variable y contains 3), x is set to 0; otherwise, x is set to 1. There is another way to perform this operation, as you’ll see later, using the if statement.
The next operator you’ll look at, this, is special in that it returns the object that is currently being referenced. This will usually be in the context of an event handler coupled with an HTML object.
You’ll meet objects later when looking at the JavaScript interfaces to HTML and internal, core objects. For now you should just be aware that the whole environment that JavaScript operates under is called object oriented, comprised of individual objects.
The String is an object, the Number is an object, and Arrays are objects. They all have specific functions that can be called (called methods) to make them perform specific actions on their contents (otherwise known as their value). Notice that I have used a capital letter at the start of the object names to differentiate them from literals that have not been created with the new keyword and an object name.
In the definitions of those objects, there might be a call to manipulate one or more of their assigned values. This is most often used in conjunction with processing HTML objects, so an HTML form might have an action defined that validates its data:
<form action="submit.php" onClick="validate_form(this);" method="post">
In this snippet, the named function validate_form will receive the special object this, which will refer to the form created by the HTML statement (you’ll learn about named functions later on). You say that the object this is passed to the function validate_form. This enables validate_form to be written to validate any form, as you can reference the exact form to be validated as needed.
Finally, the special operator void is used when something must be evaluated, but no value is returned or processed. In the previous example, you could use the code:
<form action="submit.php" onClick="void(validate_form(this));" method="post">
In the previous line of HTML, the function validate_form would still be called, but its result would be discarded and the form never submitted. In reality, void is not used very often.
An expression is a collection of valid JavaScript literals (1, "a string", and so on), objects and their operators, or logical operators and valid values that all result in a single value. Any collection of the such objects that are combined in a single statement to be evaluated is known as an expression.
For example, all of the following are valid expressions:
x + 27; // assuming that x exists
y = x + 3; // result is assigned to y
myBoolean = (x > 42) ? true : false;
Where expressions become very important is for testing in conditions that allow the programmer to execute code conditionally (if a given expression is true, do this; otherwise do something else). You say that you are evaluating the expression.
Also, expressions are very useful in repetition statements (also called loops) where an action can be performed multiple times inside a code block. It is the evaluation of the expression that dictates when the loop can be terminated.
Functions can also be used as part of expressions, as long as they return a value that is of some use in the context of the expression being evaluated. You have not yet met functions, so now would be a good time to introduce them, as they are an integral part of client side JavaScript programming.
A function is a named piece of code that is executed by name. It can receive a list of arguments that it can operate on and possibly returns a value. Typically, when using JavaScript for client side scripting, all the functions that the HTML document needs are stored in one of two places:
In the head of the HTML document
In a separate .js file
The reason for this is simple—to be sure that all the functions are available when the HTML document objects are instantiated (loaded and rendered) by the browser. If they were stored in the HTML document, it would be harder to maintain and they might not be loaded at the time they were needed.
(Functions can be defined inline, at the point at which they are needed. However, in my opinion it is better style to keep the HTML and JavaScript as separate as possible, because it makes for much easier debugging and problem solving, as well as cleaner code.)
There is also a set of useful built-in functions, but the vast majority of work in JavaScript is done via the methods associated with built-in objects and not standalone functions.
So, all the functions that an HTML document uses are likely to be user-defined. They can be called from anywhere in the HTML document by using the script tag or by assigning them to event handlers.
A function is called by name, giving any arguments in the parameter list enclosed in parentheses. For example:
myFunction ("string", 1);The same naming conventions apply to function names as for other names in JavaScript. All the parameters are passed by value. This means that they cannot be changed, even if they are passed as variables. An example of passing variables (as opposed to the previous example, which passes two literals) is as follows:
myFunction (myString, myNumber); // myString and myNumber passed by value
The exception to this is when an object is passed (such as an array). In such cases, if the value contained in the object is modified, that modification stands even outside the function. This method of passing entities is called passing by reference instead of by value.
There are several built-in functions that can be used for a variety of tasks, which you’ll read about now.
You’ll read about these in more detail later on, because there are many different functions used for various tasks. Here is a brief summary of the most useful ones, which you need to understand in order to grasp some of the other examples in the book.
The first are the conversion functions—Number and String—which turn an expression that is not a string or number into a string or number. This is an alternative approach to allowing JavaScript to do the conversion for you.
This sounds reasonably straightforward, and it is. There is a particular example, where the String function can be used to render strange objects like a Date object into readable text. So, the following snippet can be written:
myDate = new Date (); // make a new date object, set to Today
myDateString = String (myDate); // convert to a string
Having evaluated this code, myDateString now contains:
"Sun Jan 27 2008 10:52:41 GMT+0100 (Romance Standard Time)"
Next, the eval function allows you to evaluate a string as if it were a piece of JavaScript code. The result of the eval function is, therefore, the result of the code that was executed. Clearly, this is very powerful for building expressions in a string with input from the user and then letting the JavaScript engine perform the relevant actions.
(Imagine, for example, entering a string of JavaScript into a text box in a form and having JavaScript evaluate it as if it were code.)
If the string to be evaluated contains statements or function names, eval will even call the functions and perform the statements. Some examples:
myNumber = "1 + 3"; // myNumber contains "1 + 3"
myNumber = eval (myNumber); // myNumber now contains 4
The last really useful pair of functions is escape and unescape. These are very useful in client side Web programming because they allow you to encode a URL by escaping the special characters. These characters are not allowed by the HTML standard; for example, you cannot pass characters in search strings to a search engine. For example:
mySearchString = escape("first second third");
     // mySearchString contains "first%20second%20third
You will meet these two again when you look at some client/server scripting for use in the Web environment.
The programmer can also define functions as long as they do not conflict with any functions that exist in the JavaScript namespace, and as long as they follow the aforementioned naming conventions.
It is good programming style to differentiate user-defined functions sufficiently that they do not become confused with pre-existing JavaScript functions. Although JavaScript will complain only if the functions are identical—name and parameter list—reading back the code is made much easier if there are no naming conflicts.
A user-defined function is declared as follows:
function myFunction (myParameter, myParameter) {
// My code statements
}
The code between the braces ({ and }) is executed when the function myFunction is used by name with the correct number of parameters in another code block. This is called calling the function.
You call the code between braces a code block, in this case a named code block. Other constructs for decision making and looping (repetitive statements) also use code blocks contained in between braces.
A function can also return a value, which can be used for ongoing processing. An example of a function that returns a value is as follows:
function myFunction (myParameter, myParameter) {
  // My code statements
  return myReturnValue;
}
The type of myReturnValue can be anything that JavaScript supports, even objects. It can be denoted as a variable, as in the previous example, or as a literal. So, an equally valid return statement might be:
return true;
Other functions that have been defined within the scope of the function being defined can also be called. As long as the function has been defined before it is called, it can be called from inside another function.
A function can also be defined as recursive; in other words, it can call itself. This is quite useful for processing lists (arrays) of objects in a similar fashion. If you use recursion, it is important to make sure that the exit condition is defined; otherwise, it will call itself forever.
Recursion is used in Web programming when the objects in a Web page must be traversed when looking for a specific item. The classic textbook example of a recursive function is the factorial function (for positive, non-zero numbers). It looks similar to this:
function my_fact ( n ) {
  if (n <= 1) return 1; // is n less than or equal to 1?
    else return (n * my_fact(n-1)); // if not call myself
}
The book covers conditional processing later on; for now, all that you need know is that the if clause evaluates the expression in brackets and performs a specific function—in this case, exiting the recursion—if it evaluates to true. You will probably recognize the alternative:
(n <= 1) ? return 1; return (n * my_fact(n-1));
A function can also be called with a variable number of arguments.
It is perfectly possible to define a function that does not have exactly one named parameter for each piece of information that it needs to process. Instead it has only one named parameter, and the rest are implied and can be accessed from the function code implicitly.
Parameters that are passed and not named can be accessed through the arguments property of the function. A function is, in this case, being treated as an object. The following example shows access to the parameter list, using the this object:
function myFunction (parameter_0) {
  return parameter_0 + this.arguments[1];
}
The this variable is special in JavaScript, and it refers to the current object. Inside a function, that object is the function itself. Outside functions, it can refer to the page, an HTML form, or an object inside the form (when called from a handler).
This example assumes that the function will be passed more than one argument, otherwise arguments[1] will be undefined. You can obtain the number of arguments by using the length property of the arguments collection (which is just an array of argument strings):
for (var arg = 0; arg < this.arguments.length; arg++) {
// process this.arguments[arg] here
}
This example uses a counted loop, which you’ll look at later on. Here, all that is necessary is to be aware that, inside the braces, the code is executed as many times as there are arguments, adding 1 to the arg counter each time. When the < expression evaluates to false, the loop stops.
The collection of values in the arguments array are accessed via a zero-based index, like all array processing.
There are two types of string in JavaScript programming. There are literals like "a string" and String objects. As noted previously, JavaScript will freely convert between real objects and variables that happen to contain string data.
So, the following examples are all equally valid:
var myString_1 = "My String";
var myString_2 = new String ("My String");
In order to determine the difference between the two programmatically, you can use the typeof function. When you use typeof to determine what kind of type these are, the difference becomes clear:
typeof myString_1; // returns string
typeof myString_2; // returns object
In reality, because JavaScript converts between a value and an object, there is no difference between the two when it comes to practical matters of their application.
JavaScript provides many powerful string-processing methods, which can be accessed either from an object or a literal. You’ll read about the basic string processing in the JavaScript short reference, which includes methods for splitting strings, determining length, extracting characters, and so on.
There are also some specific methods covered in the “The JavaScript Web Function Library” section of this chapter. These are methods that allow you to process strings with added HTML awareness—making automatic bold text, for example:
<script>
var outText = new String("Bold");

document.write(outText.bold());
</script>
The effect of this code is to make the text bold, before it is written into the document. This amounts to the same as the following HTML code:
<b>Bold</b>
Another way to use this feature is in conjunction with the eval string processing function which will execute a piece of JavaScript code. For example:
var evalString = "outText.italics()";
evalString = "document.write(" + evalString + ");";
eval (evalString);
The effect of this code is to put the text in italics. This would be useful in a design application, for example, where it would be possible to select the formatting from a drop-down list box in a form and apply the chosen formatting in a generated block of HTML.
Note also that the application of the bold or italics method does not change the content of the string (the string does not become “<b>Bold</b>”), but does change the way that it is rendered by the browser.
Assuming that the HTML exists in a named <div> block, and that outText has been set to something that is static, a function can be created that adjusts the formatting as required. This might look like this:
function applyFormatting (formatting_code, div_id, output_text){
  new_output_text = "<" + formatting_code + ">" + output_text;
  new_output_text = new_output_text + "</" + formatting_code + ">";
  document.div_id.innerHTML = new_output_text;
}
The other side of the equation is to have a list box that causes the formatting to be applied whenever the contents are changed. To create one that selects either bold or italics, the HTML would look something like this:
<select OnChange="applyFormatting(this.options [this.selectedIndex].value,
                  targetDiv, targetText); ">
<option value="i">Put in italics.
<option value="b">Make bold.
</select>
The OnChange handler calls the formatting function with the appropriate tag, which is then added to the text to affect the required change. It is assumed that the variables targetDiv and targetText exist and are appropriately populated.
JavaScript provides a number of features that can be used to execute blocks of code selectively, either based on a condition or in a repetitive fashion. These two mechanisms allow you to have precise control over how the code is executed, which is vital to being able to create code that serves a specific purpose.
JavaScript has two basic decision-making mechanisms, allowing for both binary decisions and testing for one of a set of values. These are similar to those provided by other programming languages:
if .. else—. If a condition is met, execute a code blockswitch—. Execute a code block depending on a discrete value
The first is for use when a condition needs to be evaluated that resolves to a binary condition—yes or no, true or false. The second is used when an expression could evaluate to one of a known discrete (finite) set of values.
The simple form of the if construct is as follows:
if (a == true) { // assuming a is Boolean
// execute this code
}
If the code to be executed consists of a single statement, the braces ({ and }) can be omitted. For example:
if (a == true)
   // do this
If there is an alternative piece of code to be executed when the condition evaluates to false, the following construct can be used:
if (a == true) {
   // do this if a is true

} else {
   // do this if a is false
}
Again, braces can be omitted in cases when there is only a single line of code (a single statement, in reality) to be executed. The expression in parentheses can be any expression that is valid in JavaScript and evaluates to a single true or false value. So, for example:
if (a = = "my string " + myNumberAsString) {
   // do this if a is true
} else {
   // do this if a is false
}
In cases where one of a known set is the result of the expression, the switch construct is used. This is often preferable to a whole slew of if statements, all testing for a specific value against a predefined set.
This mechanism has two parts: the switch with an expression, and a list of case statements that test a range of values. A simple example might be as follows:
switch (colorNumber){
  case 0 :
    colorString = "#ff0000";
  break;
  case 1 :
    colorString = "#0000ff";
  break;
  default:
    colorString = "#ffffff";
}
Again, the expression in parentheses can be any valid JavaScript expression. All it needs to do is evaluate to a value that can be tested in the case statements. Unlike other languages, it can be a string as well as a numeric value.
The break keyword is used to make sure that the evaluation stops when a case has been satisfied. However, multiple case statements can be grouped if they should have the same meaning attached to them. So, for example, to group values 1 and 2:
switch (colorNumber) {
  case 0 :
    colorString = "#ff0000";
  break;
  case 1 :
  case 2 : // do the same as for 1
    colorString = "#0000ff";
  break;
  default:
    colorString = "#ffffff";
}
The default keyword indicates what should happen if none of the case statements can be satisfied. It should be the last statement in the switch block, and does not need to be followed by a break statement, as no more processing will take place after it.
A loop is a construct that allows you to execute a set of statements in a code block a specific number of times. The loop can continue either until a condition is satisfied (uncounted loop) or a set number of times (counted loop). The difference between the two is that you use a counted loop when you know in advance how many iterations there should be.
The JavaScript language uses the for loop as a counted loop. A generic form is shown here:
for (var counter = 0; counter < total_iterations; counter++) {
   // statements to execute
}
The three parts of the statement in parentheses are the initial value that is assigned to the variable that is used in the loop (counter, in this case). The second part is the condition that must be satisfied for the loop to continue (in this case less than total_iterations). The final part is the operation that should be used to change the variable—simple addition in this case.
This last is the equivalent to:
for (var counter = 0; counter < total_iterations; counter = counter + 1) {The shorthand is known as the post-increment operator. Post-decrement is also possible, as is a loop that counts backwards. For completeness, the following is possible, but note the different condition based on the reversal of the meaning of counter:
for (var counter = total_iterations; counter > 0; counter- -) {Any complexity of expressions can be used in these three places, as long as they satisfy the criteria, but they should be kept as simple as possible. Once the condition in the middle is satisfied, the loop exits and execution continues on the line following the closing brace.
The do . . . while loop allows you to specify that a set of code statements is executed at least once, and continually until a condition is satisfied. So you can rewrite the previous for loop code as the following:
var counter = 0;
do {
   // statements to execute
   counter++;
} while (counter < total_iterations);
The first line just sets the value for counter to 0, just as the initial setting section of the for loop example did. Everything in the braces will be executed at least once including the counter increment, which, again, is shorthand for counter = counter + 1. Apart from the syntactic differences, this new loop does exactly the same thing.
The while clause gives the expression that is evaluated at the end of each loop—in this case, counter is tested against the variable total_iterations, which you can assume has been set elsewhere in the JavaScript program. Again, this is fairly self-explanatory.
One thing to note is that the counter should be updated at the end of the code that uses it; otherwise, the initial value that is used to do the work, inside the loop, will be 1 and not 0, which is perhaps not the intended behavior.
The next kind of loop that JavaScript supports is the while loop. This kind of loop is only different from the do . . . while loop in that the loop might not execute the first time because the evaluation is carried out at the start of each iteration and not the end. Like many JavaScript tasks, this is easier to understand than it is to explain.
Rewriting the previous example, you have the following example:
var counter = 0;

while (counter < total_iterations){
  // statements to execute
  counter++;
}
Aside from the small difference noted, it is identical in function to the for loop and do . . . while loop.
When using loops, the break and continue keywords let you test for conditions inside the loop and then perform special processing. They can be helpful if some of the work code inside the loop need only be executed under additional circumstances.
The break keyword that you met in the discussion of the switch decision-making construct has roughly the same meaning for a loop—it allows you to terminate the loop prematurely if a condition has been met. Execution will then continue after the closing brace. The following is an example:
var counter = 0;
while (counter < total_iterations){
  // statements to execute
  counter++;
  if (counter * 2 > target_value)
     break; // leave the loop
}
In this example, it is assumed that target_value has been declared elsewhere as a value at which to abort the loop. The break keyword causes the loop to be exited, as described in the preceding paragraph covering the break keyword.
On the other hand, the continue statement allows you to skip the processing between it and the end of the loop, with execution starting again at the top of the loop, rather than exiting the loop altogether. Be careful not to skip any statements accidentally that update variables that are used in the condition, though, or the loop might never end.
A simple use of the continue keyword is as follows:
for (var counter = 0; counter < total_iterations; counter++) {
  if (counter % 2 = = 0)
     continue; // Only execute the following on odd iterations
  // statements to execute
}
In this example, the modulo 2 of counter is taken and tested against zero. This has the effect of testing whether counter is even or odd. If it is even, the statements following the continue statement are not executed, and execution begins again with the next iteration following the rules of the for statement.
Both continue and break can be used with any of the loop constructs.
The reason for the introduction to JavaScript was to prepare you for how it is used to achieve Web programming tasks. JavaScript has interfaces to HTML objects and a collection of functions that are useful in Web programming based around the document container model that you are now familiar with from the last chapter.
The JavaScript interfaces to HTML documents are defined here on the basis of the events that can be trapped by the user and used to trigger JavaScript code. On the other hand, you’ll also look at the various objects within the hierarchy that can be manipulated. These are often mirrors of the objects contained within the DOM.
The following is a list of the principal events that are of use in JavaScript programming. Those specific events that have limited application have been omitted for the sake of clarity. These are all events that are attached to specific HTML objects; sometimes multiple events apply to multiple object types.
All of the separate events are listed by Sun in its JavaScript client side reference guide (see http://docs.sun.com/app/docs/coll/S1_Javascript_13), and I have extracted and annotated them with examples of where they should be used, to make it easier to reuse the information from this book.
Generally speaking, each event that can be attached with any HTML object (usually the body, img, a, and form tags) has the general form:
<tag onEvent="code">Where tag is the object for which the event is to occur, onEvent is the event that is being handled, and code is the JavaScript code. This code can be anything from a call to a function (recommended) to a single line of JavaScript. As mentioned, it is not recommended that you put anything more than a single command in here.
If more than a single command is required, they should be grouped in a user-defined function to be called from the handler. There are two ways to use the code section when creating event handlers:
<script>
function event_handler() {
  // function code here
}
</script>
<body onKeyPress="event_handler();">
This example will call the event handler directly, but will not have access to the event object parameters. To have access to any properties that are assigned to the event handler, you need to create an event handler and then reassign the event to it:
<body>
<script>
function event_handler(e) {
  // function has access to event properties
}
document.onKeyPress = event_handler(e);
</script>
</body>
Note that the event handler is different in each case. In the first, it is just a function, but in the second, it is an actual event handler. Both possibilities can be used with any event. However, an event handler is treated as an object with properties, so it is used only when it makes sense to pass more than just a set of values.
This book generally uses the first form, except in very specific circumstances.
This event occurs when the user interrupts the loading of a page. The OnAbort event should only be trapped once for the HTML document as a whole and is used with img tags. An example of trapping this event is as follows:
<img src="myimage.gif"
          onAbort="if (!confirm('Stop loading document?')) { history.go(0); }">
This snippet will ask if the users want to stop loading the document. If they click No on the confirm dialog box that appears, the document will be reloaded.
This event occurs when an element in a page or when the window containing a page loses focus—that is, the user moves away from it by using the Tab button. It only applies to interactive form elements and the window object.
This event occurs when the content of an interactive form element changes. This only applies to those elements that have selectable or user-entered values. For example, the Google Suggest service traps this event in order to populate the list of suggested search terms. This is used as follows:
<input type="text" name="keywords" onChange="updateKeyList(this.value);">
The snippet here assumes the existence of a functional user-defined function updateKeyList that takes the value of the named text entry field keywords as a parameter and performs some processing whenever it changes.
This event occurs when an object on a document is clicked—that is, a form button (including checkboxes and radio buttons) or a link. Because a click is a combination of a mouseDown and mouseUp event, clicks can be trapped separately with their own handlers.
An example of handling the onClick event might be:
<input type="submit" value="Does Nothing" onClick="return false;">
More usefully, this event can be used to turn an image into a clickable Submit button in a form with the following code:
<a onClick="this.myForm.submit();"> <img src="submit.gif" alt="Submit"></a>
This turns a clickable link into a Submit button, but it works equally well with plain text.
This event is the same as the onClick event, except that it is triggered when the user double-clicks a control.
This event is the opposite of onBlur, that is, it is triggered when the focus moves to a control on a from.
These three events are triggered in response to key presses, usually trapped by a document object. However, they are also listed for event handlers for links, images, and text area input controls.
They use a number of so-called event properties, the most useful of which are likely to be which and modifiers. The which property tells the event handler which key was pressed and is returned as an ASCII code for the key. Luckily, the String object provides a useful conversion method:
var keyName = String.fromCharCode (e.which);
This example assumes that the event handler has been assigned correctly, using a user-defined event handler rather than just a function. These properties are not available if a user-defined function is called rather than assigned to the event.
The modifiers property lists the modifier keys that have been held down at the same time—Shift, Control, Alt, and so on.
The onLoad event is triggered when a document has finished loading. It is usually handled in the body tag, thus:
<body onLoad="my_function();">
When using frames, it is best to place this event handler in the body tag of the document that is being loaded into the frame. Similarly, the onUnload event is triggered when the user navigates away from the document. It is handled in much the same way:
<body onLoad="my_function();" onUnload="my_cleanup_function();">
The combination of these two events causes an onMouseClick event to be triggered. The onMouseUp event can be trapped as well as the onMouseClick event for a given object. The onMouseDown event occurs when the mouse button is pressed and onMouseUp when it is released.
Handling these events is useful in allowing drag-and-drop style positioning of elements on a page.
This event is triggered when the mouse is moved over a browser window, but only when the mouse has been captured. Mouse capturing is achieved with the setCapture method.
The onMouseOut event is triggered when the mouse is moved off an image area (that is, a client side imagemap) or link, and an onMouseOver event is triggered when the mouse first enters the area or hovers over a link. This can produce interesting graphical effects such as:
<img src="out.bmp"
  onMouseOver="this.src='in.bmp';"
  onMouseOut="this.src='out.bmp';">
This example displays in.bmp when the mouse pointer enters the image, and resets it to out.bmp when the mouse leaves the image.
The onReset event is triggered when the user clicks the Reset button of a form, and the onSubmit event is triggered when the user clicks the Submit button. These events are handled in the form tag:
<form method="post" onSubmit="validate_form();" onReset="reset_form();">
These methods are revisited in the “Form Validation” section later in this chapter.
The following is not an exhaustive list, but contains the most useful of the top-level objects in the hierarchy supported by JavaScript that are browser-related. Again, they are mirrors of objects in the DOM specified by the W3C.
The document object has a number of methods, some of which you’ve already seen in a few examples in the previous code snippets. The most useful parts of the object are actually the properties, although there are three very handy methods that can be used for programmatic Web page creation.
A Web page can be entirely created using the following methods of the document object:
document.open();

document.write(HTML to write)

document.close();
The .open and .close methods are superfluous for cross-platform browser development because not all browsers react in the same way. For example, the following code, when used in some browsers, will clear the currently loaded document:
<script>document.close();
document.open();
document.write();</script>
However, in most cases calls to these methods are additive. So if the document has already been rendered, all that happens is the additional text is rendered underneath it. This is useful for conditionally writing text into the HTML as the document is rendered by the browser (inserting some of the document properties).
The document object has the following arrays:
forms. —An array of all the formsimages. —An array of all the imageslayers. —An array of all the CSS layers in the documentlinks. —An array of all the link locations in the document
In addition, it contains the following useful properties:
domain. —The domain hosting the documentcookie. —Any cookies associated with itwidthandheight. —The width and height, in pixelstitle. —The title, as displayed in the title barURL. —The full URL of the document
The arrays are zero-based like all arrays. In addition it is possible to identify forms by their name, provided that they have been defined with a name="myForm" attribute in the HTML document.
document.forms["MyForm"]
Generally, the properties should only be read and not modified unless you really know what you are doing. Individual objects can be altered, however. For example, to change an image source in reaction to a button press:
<input type="button" value="Change Image"
onClick="document.buttons[0].src='new.gif';">
An interesting point to note is that most objects in the document model also have a visible property. This can be used to great effect, for example, by making controls in a form available (or not) depending on the options already chosen.
You will see another use for the visible property later on, when you use it to make an entire <div> appear and disappear, like a message or pop-up box.
The window object has many properties and is the top-level object in hierarchy. This does not preclude that there may be many windows at the same level because they could just as well be frames inside a frameset.
The frames property gives you access to any frames that might be contained within the window. These are stored as an array, and each one can be treated as a window object in its own right. To know how many frames there are in that array, you can use the length property and traverse to the parent using the parent property.
The location property contains the address (URL) of the currently loaded document in the window (or frame). If this is changed, a new page can be loaded programmatically.
The status property contains a value that is displayed in the status bar (usually at the bottom of the screen) and this can be updated to change the message being displayed.
In the “Useful Top-Level Methods and Properties” section later in the chapter, I cover all the common methods that are accessed as if they were top-level methods and properties. However, there are a few specific ones that are relevant only when used with an actual window.
The back and forward methods load the previous and next URLs in the history list associated with the window. The close method can be used to close it, whereas the home method will load the URL that is specified in the user’s preferences.
For example, you might define three buttons:
<input type="button" value="Back" onClick="window.back();">
<input type="button" value="Home" onClick="window.home();">
<input type="button" value="Fwd" onClick="window.forward();">
The contents of the window can be printed using the print method, which will open the standard operating system’s Print dialog box. It is the equivalent of the users selecting File→Print from their Applications menu bar. (Most browsers place the Print option under this menu, although your own might differ from this standard.)
Finally, stop halts the current download, which is useful if something might take a long time to complete and you would like to allow the users to stop the process.
Using the String object, it is possible to convert a string literal to a piece of HTML code. The result will not appear as HTML in the document, but the browser will render it as if it had been generated using straight HTML code.
These are usually used with the document.write method to generate the inline HTML. Again, however, the actual HTML is not visible when the user selects View Source, only the JavaScript that has generated the HTML will be, as it is the browser that creates the rendered paged based on the script, and not based on HTML generated by the script.
Linking is achieved using the anchor and link methods, which both turn a piece of text into a piece of text that has a hypertext reference added to it. The first creates a named anchor and the second a hyperlink to another HTML document. For example:
var myString = "anchor text";
document.write(myString.anchor("anchor_name"));
This previous example is the equivalent of the following HTML code:
<a name="anchor_name">anchor text</a>
By the same token, the link method is used as follows:
var myString = "url text";

document.write(myString.link("url"));
This is rendered by the browser as if the HTML had been:
<a href="url">url text</a>
There are also three methods used to create text of different font sizes:
big—. Makes text that is bigger than normalsmall—. Makes text that is smaller than normalfontsize ( n )—. Makes text of a specific font size
The big and small methods cause rendering that is entirely arbitrary and the actual size will be relative to the default font size. These three methods could be used as follows:
document.write("Big Text".big());
document.write("Small Text".small());
document.write("Really Big Text".big(72));
Of course, string variables could have been used in these examples instead of literals. Also there are a some methods used to create fonts of different properties:
fixed. —Chooses a fixed font (like Courier)fontcolor ( color ). —Specifies the color of the font, wherecoloris either#rrggbborcolor name, following the Web standards
Then there are some general formatting methods that are rendered in the same way as the HTML equivalents:
Bold |
|
|
Italics |
|
|
Strike |
|
|
Sub |
|
|
Sup |
|
|
These can be used at any point in the HTML document, but note that it is not possible to change the font face (besides setting fixed font) or create headings using this method. However, by using styles, this is possible.
These are methods attached to top-level objects (such as the window object) that can be called as if they were functions. In such cases, the default current top-level item is taken as the owner. These methods can therefore be called without the window reference, as it is assumed.
This is not an exhaustive list, and the standard is changing on a reasonably regular basis, so it is better to check the actual lists online. Chapter 11, “Web References,” contains locations of the pertinent documentation.
Message boxes are a good way to communicate with your Website visitor, and JavaScript offers three possibilities—alert, confirm, and prompt.
First, the alert method displays a box alerting the user, with a custom string and a single OK button. For example:
alert("Alert! You pressed the alert button. . .");This code snippet yields the result in Figure 5.3.

The confirm method displays a confirmation box from which the users can select OK or Cancel. If they click OK, confirm returns true; otherwise, it returns false. For example:
theResult = confirm("Do you really want to do this?");This snippet yields the result in Figure 5.4.
The prompt method displays a box in which the users can type some text. If they then click OK, the text is returned; otherwise, null is returned. For example:
theResult = prompt("Please enter some text. . .");The result of this snippet is shown in Figure 5.5.
If more complex interaction is required, you can use the window.open method to open a new window containing a form from which information can be obtained. Or, a custom div can be displayed containing the relevant HTML. This is explored later in the JavaScript examples section.
JavaScript provides the possibility to execute a function after a certain length of time has elapsed in one of two ways:
Once every x milliseconds (interval)
After x milliseconds and never again (timeout)
The first of these models is activated by using the setInterval method and stopped using the clearInterval method. The setInterval method can be used in one of two ways—with an expression or with a function plus an argument list. For example, the following two usages are identical:
setInterval("my_function (1, 2, 3, 4);", 25)
setInterval(my_function, 25, 1, 2, 3, 4)
In both cases, my_function is being called with four arguments. The advantage is that with the second, it is possible to execute code such as the following:
var arg1 = 1;
setInterval(my_function, 25, arg1);
Without this, it would be necessary to build the string explicitly, as follows:
setInterval ("my_function(" + arg1 + ");", 25);The number represents the timeout value that is set in milliseconds. To have the function called every second, the value should be 1000. The call to setInterval returns a timer identifier that can be used to access it.
So, to cancel the interval timer, use the clearInterval method with the timer identifier:
clearInterval (timerID);
The timerID variable must be globally accessible, as there is no way to retrieve it once the timer has been set. A good way to do this is to make sure that it is specified in a section of the script in the head of the document.
If you want the function to be called only once rather than every so often, after a specific time has elapsed (for a timed test, for example), the setTimeout function can be used:
var myTimerID = setTimeout ("my_function ();", 1000);This will execute my_function after 1 second. If, however, you want to clear the timer before it expires, you can use the companion function, clearTimeout. Again, the setTimeout function returns the timer identifier. The clearTimeout function is called as follows:
clearTimeout (myTimerID);
You have seen some of these before, but there are a few things to note about the values that they return.
The window.location, for example, contains the URL of the document which is in focus when the method is called. If it is set by a piece of JavaScript code, it will cause the window to refresh. Remember, though, that the window might be a frame, so it is useful for refreshing part of the document set currently loaded.
By a similar token, the window.status property contains the current status text that is displayed at the bottom of the window. This can also be set using Java-Script, as in the following example that combines both methods:
<input type="button" value="Set Status"
 onClick="window.status='Current URL : ' + window.location;">
The location.reload method causes the current page to be refreshed, which is useful in conjunction with timers. This can also be attached to a button with code such as:
<input type="button" value="Reload" onClick="location.reload();">
Finally, the history object can be used to change the current page location based on the recent history.
For example, history.go(-1) has the same effect as when the user presses the back button, history.go(0) is the same as a reload using location.reload, and history.go(1) is the same as the user moving forward in the history. These can all be used with JavaScript handler, as in these examples:
<input type="button" value="<- Back" onClick="history.go(-1);">
<input type="button" value="<- Refresh ->" onClick="history.go(0);">
<input type="button" value="Next ->" onClick="history.go(1);">
Cookies are small pieces of information that are stored as name, value, expiration tuples. A tuple is just a collection of related values—in this case, the basket of values that control the cookie.
The expiration date is optional, and the exact format of the cookie data is up to the programmer to define. JavaScript provides access to the cookies through the document.cookie property.
They need to be encoded (using the escape and unescape functions) to render unsupported characters (such as spaces) as data using their hexadecimal equivalents. For example, a space is replaced by %20 with the call to escape. This is then replaced by a space value when given to the unescape function.
So, to set a cookie, it is necessary to build a cookie string (document.cookie) with three parts—the name (not encoded), the value (encoded), and the expiry date (not encoded and also optional). This cookie string can then be set in the document properties, but is stored by the browser.
The complete solution is as follows:
document.cookie = name + escape(value) + "; expiry=" + expiry_date; + ";"
To get the expiry date, you simply convert the Date object value to a GMT string using the .toGMTString() of the Date object. For example:
now = new Date();
expiry_date = now.toGMTString();
If expiry date not required, the cookie becomes a pair with just the name and encoded value.
Reading the cookie is slightly more complex as you need to examine each one in turn and see if it matches a specific name of the cookie you want to retrieve. Luckily, the .indexOf method of the String object provides the interface to get the location of the 'Name=' substring.
Because all cookies should end with the ; character, you can also extract the end location and use these two (start and end) to extract the named cookie data from the whole cookie string.
To get the start and end positions, you could use code such as:
startIndex = document.cookie.indexOf (name);
endIndex = document.cookie.indexOf (";");
Then, the value string can be extracted using the .substring method with the start and end indexes, as follows:
value = document.cookie.substring(startIndex, endIndex);
value = unescape(value); // decode the string
Of course, in cases where startIndex is –1, there are no cookies to extract (the indexOf function was not able to find a match), and if endIndex is –1, this means that there is no trailing semicolon.
Subsequently, where endIndex is –1, but where startIndex is valid, this is the only named cookie, and so the endIndex is effectively document.cookie.length. There can be multiple cookies assigned to a given domain (or document), so be sure to check that there are not already some assigned.
Finally, document.cookie.length returns the length of the string associated with the cookies that are part of the document data, as noted. If it is zero, no cookies have been stored.
Some URLs that are the result of a form submission contain data that has been submitted and that might be useful to extract from the URL. This is a good technique to use when making multipart forms.
The location.search property accesses the portion of the URL after the ? (question mark), which is otherwise known as the query string. The value returned includes the ?, so the first operation is to discard it. For example, from a client side imagemap click that is passed back to the page, you might have the following in the URL:
?x,y
The x is x position of the cursor in the area tag used for the imagemap, and y is the y position. Using the indexOf method of the string object, it is possible to extract the values for use in the JavaScript code.
This could also be true of a form that is passed back to the same document for processing, but the query string is likely to be more complex. For example, consider the following HTML code:
<form>
<input type="text" value="" name="textfield">
<input type="Submit" value="Submit!">
</form>
This submits the form back to the source page with the URL. If you had entered Banana in the text field, the URL would look something like this:
file:///test_html?textfield=Banana
This means that you can extract the query string, break it up, and use the value on the page by checking the index of the ?. Then, the value can be extracted relative to the = sign. The whole function might look something like this:
function check_form_input(queryString) {
  if (queryString.indexOf("?") != –1) {
    var myValue =
      queryString.substring(queryString.indexOf("=")+1,
                            queryString.length);
    document.write("<b>"+myValue+"</b><br/><br/>");
  }
}
This code could be placed in the onLoad handler of the document’s body tag. This would mean, however, that the rest of the document would not be visible. This is because the document.write statement closes the document. Care must be taken, therefore, to use the document.write method only when you know that the result will look coherent. Otherwise, the .innerHTML property can be set with most CSS tags (such as <div> tags) to change their HTML content.
This quick reference section covers all the core objects and the most useful methods that you’ll see in the JavaScript examples section that follows it. This reference is not designed to be exhaustive, but it does cover most of the pertinent core objects and their methods.
In addition there is a recap of the core language statements for conditions and loops, to act as a refresher whenever you encounter something that you do not understand in the working examples. Of course, if you need to relearn any of the language statements, you will need to refer back to the programming section of this chapter.
If you are just starting out in programming, this will be likely to be the case, because some of the more technical points take some practice to master!
The core JavaScript objects are a collection of primitives that all JavaScript implementations support, regardless of the platform. It just so happens that most of the examples in this chapter relate to client side Web programming tasks, because that is the focus of this book.
The Number object can contain any number and perform basic math operations on it. Advanced math functions, including trigonometric functions, are contained as methods of the Math object. However, there are two values associated with the Number object that might be of use:
Number.MAX_VALUE
Number.MIN_VALUE
The first is the largest number that the Number object can contain, the second is the smallest. Each value can only be accessed from the Number object; in other words, they are not properties of all numbers contained in variables in the JavaScript code that you create.
You should always use string literals in your JavaScript code, and never allocate a String object directly. The reason for this is that the String object sometimes works in a way that is not logical with respect to the code that you might want to write.
Specifically, when you use eval to evaluate a string expression, when it is a literal string, it is evaluated as if it were a real expression, but the String object is always evaluated as a string. This means that the following two examples do not yield the same result:
eval (" 1+1"); // returns 2
eval (new String(" 1+1"));
        // returns the string "1+1"
The JavaScript engine will substitute an object for the literal value or variable in order to perform the required operation on it. It is far more convenient to leave the variables as literals, both for understanding and manipulation.
There are several functions for extracting character sequences from strings, starting with a single character, which can be extracted by position using:
string.charAt ( n )
Next, you can extract a sequence of characters from the string using the slice method:
string.slice (start, end)
The start value indicates the character offset that the method starts at, and end indicates the last character not included in the resulting sequence. It is also possible to use a negative value for end, in which case the index is counted from the end of the string and not from the beginning.
To extract a substring using a start offset and a length of the resulting substring instead, use the substr method:
string.substr (start, length)
The length in this example is optional, in which case everything up to the end of the string (string.length) is extracted. The string can also be broken up into an array of strings using the split method:
string.split (separator, limit)
By way of demonstration, you can extract a query string in two simple steps:
var queryString = location.search.substr ( 1 );
            // everything except the ?
var queryArray = queryString.split ("&");
            // split by the & character
Then, the individual items from the resulting array can be split in a loop:
for (var arrayIndex = 0; arrayIndex < queryArray.length(); arrayIndex++)
{
  var queryPair = queryArray[arrayIndex].split ("=");
  // queryPair[0] is the item name, queryPair[1] is the value
}
To concatenate two or more strings to produce one string, use the concat method:
string.concat(string_1, string_2, . . . string_n)
So, to concatenate three strings:
var myString1 = "String1";
var myStringN = myString1.concat("2", "3");
The result of this would be "String123" in the myStringN variable.
As you saw previously, to get the index of a substring inside a string, you use the indexOf method. There is also a lastIndexOf method that can be called that searches the string from the other end. These two methods are illustrated here:
var firstThat = myString1.indexOf ("g1"); // returns 5
var lastThat = myString.lastIndexOf ("2"); // returns 7
If you want to replace a substring directly with another string inside that string, you can use the replace method. This takes a string to search for in the first parameter, and the string to replace it with in the second. The strings do not need to be the same length. For example:
var myString2 = myStringN.replace("123", "1234");Executing this code results in String1234 in the myString2 variable.
Finally, the case of the string can be changed with the two methods:
string.toUpperCase()
string.toLowerCase()
Neither of these affect the string that is being operated on, they just return the upper- or lowercase version of the string. The original data is preserved.
An array is very similar to a string in that some of the methods feel rather familiar, even if some of the names are different.
For example, the concat method takes two arrays and returns a new one that contains a copy of each concatenated together. Different types can be combined within the arrays, for example:
var myNumbers = new Array (42, 84, 12);
var myStrings = new Array ("forty-two", "eighty-four", "twelve");
var myNewArray = myNumbers.concat(myStrings);
This example results in myNewArray containing the following:
[ 42, 84, 12, "forty-two", "eighty-four", "twelve" ]
Next, the join method is the inverse of the split method from the String object. It turns an array into a string, separated with a user-defined or default separator. The default is a comma that can be changed to anything that the programmer wants. So, to add a space after the default comma, you would need to supply code such as:
var myString = myNewArray.join(", "); // default separator is commaThis snippet, operating on the existing myNewArray object from earlier on, yields a string containing:
"42, 84, 12, forty-two, eighty-four, twelve"
To extract data from the array, use the slice method. This takes two parameters: the (zero-based) start and end indexes for which the extraction should take place:
var newArray = myNewArray.slice (0, 3);
  // newArray contains [ 42, 84, 12, "forty-two" ]
Again, the slice method does not after the array on which it operates—it returns a new array object. On the other hand, the splice method acts directly on the array, removing some elements and adding new ones. Its generic form is as follows:
array.splice (startAt, toRemove, toAdd1, toAdd2, . . . toAddN)(The parameters in italics indicate values or variables that the programmer will supply in the actual call.)
In this definition, startAt gives the index at which to begin the splice. Similarly, toRemove gives the number of elements that should be removed. This can be 0 (indicating that no elements should be removed—they will only be added). Finally, the last parameter is the list of elements to add, in place of those that have been removed or inserted if there have been no elements deleted from the array.
Even the last parameter, giving the elements to add, is optional. This is, however, not the case if no elements are to be removed, in which case at least one to be added must be specified. This all sounds quite complex, but is easy to appreciate with some examples.
First, to simply remove the first three items, you could use the following code:
newArray.splice (0, 3);
Because this acts directly on the array, it is different from the slice example, which just returns a new, modified, array. To add three items at the beginning, you could use the following code:
var newArray = new Array ();
newArray.splice (0, 0, "1", "two", 3);
This has the effect of building the following array:
[ "1", "two", 3 ]
Next, you can combine the removal and addition operations, as follows:
newArray.splice (1, 2, "twelve", "four");
This example yields the following array:
[ "1", "twelve", "four" ]
The array is automatically resized and elements are reallocated as required.
The array elements can be reversed in order using the reverse method:
array.reverse()
This does exactly what you would expect, resulting in an array that has its elements back to front with respect to the original position. Again, it operates directly on the array.
The companion method, sort, is interesting in that the programmer can provide a compare function. This enables the default alphabetical sorting behavior of JavaScript to be overridden. If provided, the compare function must take two parameters and return one of the following values:
– | If the first parameter is less than the second |
| If the two parameters are equal |
| If the first parameter is greater than the second |
Allowing the programmer to specify the compare function allows JavaScript to sort arrays where the elements are not of the same type. JavaScript will deal quite happily with mixed arrays of numbers and strings, but the result might not be what the programmer actually wants.
The following is an easy numerical comparison function example:
function compare (a, b) {
  if (a < b) {
    return –1;
  }
  if (a > b) {
     return 1;
  }
  return 0;
}
The sort method can then be called using the compare function:
var myArray = new Array (1, 5, –3);
myArray.sort (compare);
The next set of functions deal with managing the array as if it were a list (or stack) of elements. In JavaScript, arrays are self-sizing, which means that you can do the following:
var myArray = new Array ();
myArray[0] = 1;
myArray[1] = 72;
myArray[3] = 27; // myArray[2] is undefined
In this code, the array will be four elements long, but the third element myArray[2] will be assigned the special value undefined. In addition to this useful feature of arrays, there are four other methods that are used to access the data contained in an array <space> and, crucially, which also change the contents of that array.
The syntax for looking at (and in this case copying to a variable) a single element in an array is as follows:
var myElement = myArray[1]; // extract the element at index 1
Given the previous code, the pop method performs a similar task, except that it returns the last element in the array and removes it from the array. So, taking myArray as an example, the following code extracts element [3] and removes it from the array:
var myElement = myArray.pop();
The inverse of the pop method is the push method, which places a value at the end of the array. Again, using myArray as an example, you can put the element back on the end with the following code:
myArray.push(myElement);
The new length of the array can then be retrieved using the following code:
var newLength = myArray.length();
This is much more reliable than testing the return value from the push method, which can return either the value that has been pushed or the new length of the array. Which one is returned depends on the version of JavaScript that the browser is using, and on the Web—you can never take anything for granted.
If you want to operate on the front of the array rather than the back, you can use the shift (pop from the front) and unshift (push to the front) methods. These work in exactly the same way as pop and push. For example:
var myArray = new Array();
myArray.unshift (3); // array contains [ 3 ]
myArray.unshift (5); // array contains [ 5, 3 ]
myArray.push (7); // array contains [ 5, 3, 7 ]
var myElement = myArray.shift(); // array contains [ 3, 7 ] , returns 5
These methods are very useful when processing data that has been submitted through forms or when building dynamic HTML pages based on user input.
The Date object allows you to manipulate date information. This section looks at the three main classes of methods that the Date object uses:
Date creation
Date extraction
Date string creation
First, you can create a date in three ways. You can create a Date object with today’s date in it:
var myDate = new Date (); // now, today
Or, you can create a specific date object for a specific date:
var myDate = new Date (month day, year hh:mm:ss);In the previous example, month must be replaced with the month name (such as January), the day with the day of the month, the year on four digits, and the time as shown, using the 24-hour clock. Finally, the previous example can be specified as numbers:
var myDate = new Date (year, month, day, hour, minutes, seconds);The methods cannot be mixed. As before, the values in italics need to be substituted for your own values; in this case, you need numerical equivalents.
Extracting date data is very easy:
| Returns the year (such as 1900) |
| Returns the month (zero-based, with 0 = January) |
| Returns the day of the week (zero-based, 0 = Sunday) |
| Returns the day of the month, between 1 and 31 |
| Returns the hours of the time, in 24-hour clock, 0 to 23 |
| Returns the minutes of the time, 0 to 59 |
| Returns the seconds of the time, 0 to 59 |
In addition, each of the GET methods also has a corresponding SET method that can be used to set the values for each of the Date object components.
The Math object is useful for performing advanced mathematical functions, including trigonometric operations. The built-in Number literal can be manipulated with all the familiar simple operators (+, -, /, *, % (modulo), and so on), but the more advanced functions have to be accessed through the Math object.
There are some properties which are useful, too, and these are accessed as follows:
| Equal to PI |
| Euler’s constant (used in calculating logarithms) |
| The square root of ½ |
| The square root of 2 |
There are more fixed properties, all accessed in the same way, but these are the most useful. The methods are similarly easy and self-explanatory:
| Returns the absolute of x |
| Returns the sine of x |
| Returns the cosine of x |
| Returns the tangent of x |
In addition, there are arc versions of sin, cos, and tan (asin, acos, and atan). All the trigonometric functions return their results in radians and not degrees.
Tip
To convert to degrees, it is necessary to remember that 360 degrees (a circle) contains 2pi radians.
Using the PI constant from the Math object, you can use the following code:
var myDegrees = (360 / (Math.PI * 2)) * radian_value;
Then, there are some basic comparison functions:
| Returns the smallest of x and y |
| Returns the largest of x and y |
Finally, there are some rounding and random number generation methods:
| Returns the smallest integer greater than or equal to x |
Math.round (x) | Rounds x up or down accordingly |
Math.random() | Returns a random number between 0 and 1 |
This section lists the most useful set of the Math methods, which have been fairly static since JavaScript was first devised.
For the sake of completeness, this section contains a quick recap of the three core areas of JavaScript programming used to control the flow of a program. If any of the concepts are still unfamiliar, you can check the exact usage, with examples, in the “Introduction to JavaScript” section earlier in the chapter.
JavaScript supports the if .. else statement for basic decision making:
if (a ==b) {
  // Do this
}
else {
  // Do that
}
The else clause is optional, and the expression to be tested as part of the if statement can be any supported JavaScript expression. This expression must evaluate to true or false.
For non-binary decision making, JavaScript offers the switch statement:
switch (myVariable) {
  case value :
    // do this
  break;
  default:
    // do this
  break;
}
The switch statement supports both numbers and strings. If no match is found, the default clause is executed. In addition, multiple case labels can refer to the same code to be executed.
Both counted and uncounted loops are supported in JavaScript. Counted loops are provided through the use of the for statement:
for (var myCounter = 0; myCounter < myTotal; myCounter++) {
  // processing
}
Uncounted loop support is provided through the do .. while and while statements. The difference between the two is that the do .. while loop is guaranteed to be executed at least once:
var myNumber = 9;
do {
  // This will executed at least once
  // do something to myNumber
} while (myNumber < 9);
Using a while loop, however, will mean that the code becomes unreachable:
var myNumber = 9;
while (myNumber < 9) {
  // This will never be executed
  // do something to myNumber
}
Using these three mechanisms, you can solve most programming problems requiring repetition. However, you can also use recursive functions.
Functions in JavaScript are named blocks of code, defined as follows:
function myFunction (parameters){
  return value; // optional
}
A function is called by name:
myValue = myFunction (parameters)or
myFunction (parameters)
Functions might not have parameters, in which case the parameters can be omitted. An example of a function that takes three parameters is as follows:
function myAdd (a, b, c) {
  return a + b + c;
}
In addition, functions might not have any formal parameters, but still have access to any parameters that might be passed to the function through the parameters array. To access this array, code such as the following can be used:
function myAdd ( ) {
  var myResult = 0;
  for ( var myCounter = 0; myCounter < arguments.length;
    myCounter++ ) {myResult += arguments[myCounter];
  }
  return myResult;
}
The myAdd function can be called with as many parameters as are required.
This is a cookbook of several applied JavaScript examples, which illustrate mixing JavaScript and HTML, at the DOM level and native JavaScript level. The same results can be achieved with other client side languages and, in certain circumstances, using server side programming.
However, there are some elements of interaction with the user, through the browser, that can only be achieved with client side scripting. In addition, these techniques are useful if you don’t have access to the server that supports scripting.
In these examples, you also meet a few new mirror objects available to JavaScript programmers, not to mention the very useful getElementById method, which allows you to retrieve the DOM mirror object relating to a specific HTML element in a page by name.
Image preloading is a great technique for reducing the wait time between when a mouse enters an image and when the image is changed. This effect is called image rollover, and the following HTML snippet provides a simple example of rollover, using the onMouse handlers:
<img src="out.bmp" onMouseOver= "this.src='in.bmp';"
          onMouseOut="this.src='out.bmp';">
There are two problems that you’ll want to solve here. The first is that, if there are many images on the page, or if the images to be used are large, the page will load very slowly. However, the second problem is that you might want the page to remain compatible with those users who do not have, or do not want to activate, JavaScript.
Image preloading is designed only to cache the images. In other words, the browser will download and store the images on the user’s hard drive and display them only when necessary. The image preload code goes in the head section of the HTML document.
It is very easy, and looks like this:
function preload_images () {
  var myImage = new Image();
  // Do the following for each image
  myImage.src = 'in.bmp';
  myImage.src = 'out.bmp';
}
Note from this example that I have introduced another JavaScript object, Image. Image has a collection of properties, of which the following are the most useful:
| The width of the image, in pixels |
| The height of the image, in pixels |
| The width of the border, or 0 for no border |
| The URL of the image’s source |
If you do not need to worry about the users not having JavaScript running, you can also preload the images into an array and set them directly using (for example) buttons. To do this, the initial script in the head section of the HTML document becomes:
var myImages = new Array();

function preload_images () {
  // Do the following for each image
  myImages[0] = new Image();
  myImages[0].src = 'in.bmp';

  myImages[1] = new Image();
  myImages[1].src = 'out.bmp';
}
Note that I have made the myImages array globally accessible by moving it outside of the preload_images function. Once the images have been loaded, it becomes a simple matter to change an image on the document via a button:
<input type="button" value="In"
  onClick="document.images[0].src=myImages[0].src;">
The array of Image objects in the document is stored in the document.images property. Although you cannot directly assign an Image object from one array to the other, you can access the .src property and use that to change the image being displayed. Because the image has been preloaded, there should be no delay between the button click and the image update.
One of the key uses for JavaScript in HTML is for pre-validating a form before sending it to the server for processing. This reduces the server load and the complexity of the server side script. You might also want to make a form dynamically update itself depending on the options already chosen by the user.
Validating the form requires trapping the onSubmit handler and returning true if the form should be submitted or false otherwise. In the following example, I have left out the action and method attributes so that the form submits itself to the same HTML page. You would need to put the required method (either GET or POST) and action (URL) as required by your server side script.
The HTML code might look something like the following:
<form onSubmit="return validate_form();" name="ContactDetailsForm">
  Name : <input type="text" value="" name="Name"><br/>
  Email : <input type="text" value="" name="Email"><br/>
  <input type="submit" Value="Submit">
</form>
There are a couple of caveats that you need to be aware of:
You want to show only one alert per error
You don’t want the form to submit before all errors are corrected
If the function called validate_form returns true, the form will be submitted. So, all the validation needs to do is return false if there is an error detected in the form data that is being checked.
A field to be checked is accessed through the named objects that are contained in the document’s form object. In basic JavaScript programming, there are three ways to do this:
document.forms[0].Name
document.forms["ContactDetailsForm"].Name
document.ContactDeatilsForm.Name
All three are identical in that they return the field that has the name="Name" attribute set in the HTML code. All that is needed afterwards is to access the value property and check it. In this case, you just need to check its length property. The following code shows this in action:
function validate_form () {
  if (document.ContactDetailsForm.Name.value.length = = 0) {
    // User has not filled out field correctly!
    return false;
  }
  // Everything is OK!
  return true;
}
However, this code is not very user friendly, as users do not know why their form has not been submitted. To let your users know there is a problem, you can put up an alert box, as follows:
if (document.ContactDetailsForm.Name.value.length = = 0) {
 alert("The Name field must be filled in!");
 return false;
}
It would also be nice to highlight the field that is in error. This is done using the DOM (Document Object Model) and then setting the style (as if it were a basic CSS element). The book has not yet discussed the DOM in detail, so this is a good time to introduce it.
It is important to remember, as stated in the introduction, that the DOM is separate from JavaScript and is also based on a W3C recommendation. This means that it is a standard model that all browser developers should follow, and that more details can be found at the W3C site (see http://www.w3.org/DOM/).
The particular method of interest here is called getElementById. The element ID in question is the same that would be allocated using the id="id" attribute of any CSS compliant HTML element. This includes div, span, table (and also tr and td tags), and form elements.
It is possible to access the fields in the form directly using this method, as long as their CSS ids are unique. The getElementById method is part of the document object in JavaScript and is accessed in the following way:
document.getElementById (fieldID)To continue building or validation code, you need to change the HTML for the form element to:
<input type="text" value="" name="Name" id="fieldName">
Now that the field can be referred to by its ID, you simply need to set its style to the correct value. Because you want to change the background color (to, for example, red), the following code is inserted in the validation section of the script:
document.getElementById("fieldName").style.backgroundColor="red";There are a few points to note. First, the getElementById method returns an object that can be accessed as if it were a CSS object. This means that it has properties that mirror the HTML, of which the following is the most useful subset:
CSS Style | JavaScript DOM Property |
|---|---|
|
|
|
|
|
|
|
|
|
|
Notice that a naming pattern emerges. All style attributes that can be defined in the style statement can be converted to DOM properties in the same way. So, you would expect that the style attribute left-border-style is mirrored in the DOM property (in JavaScript) leftBorderStyle.
Any time that the programmer needs to change the style of an object, it can be accessed via the style property of that object. This, in turn, gives access to the various attributes that can be set using a plain string that represents the new style information, following the regular CSS and HTML style principles from the last chapter.
(Seemingly, however, it is not possible to put all the attributes in a single string, and apply it to [for example] a general style parameter; they must be set separately.)
Finally it would be nice to reset the field back to white once the user starts to edit it. To do this, you could build a function to reset the color for a given field, as follows:
function reset_field_color (myField) {
  document.getElementById(myField.id).
           style.backgroundColor="white";
}
This function expects an object to be passed to it (myField), from which it creates a new object using the ID of the object passed in. This is a roundabout way, and is just used here to illustrate how the referencing principle works. By a similar token, the illustrative code that calls it uses the onFocus JavaScript event handler:
<input type="text" value="" name="Name" id="fieldName"
   onFocus="reset_field_color(this);">
If you want to validate on the basis of the user navigating the fields (rather than as the form is submitted), this technique can also be used. This means using the onChange event handler (rather than onFocus), with validation code very similar to that which you have constructed here.
A generic form of the previous form validation process itself might do the following:
Check that fields are not empty
Generate an alert based on each field name
Highlight all fields not correctly filled in
It is also possible to test a field based on its form and element index rather than using getElementById. This uses the standard JavaScript mirrored collections of objects, as follows:
function is_field_empty (form_index, field_index) {
  if (document.forms[form_index][field_index].
                      value.length = = 0) {
    return true;
  }
  return false;
}
The advantage in this method will be shown later on when you validate the whole form. The next thing to do is to be able to toggle highlighting based on whether an error was found in the field. The resulting function might look like this:
function highlight_field (field_id, on_off) {
  if (on_off = = 0) {
    document.getElementById(field_id).
             style.backgroundColor="white";
  }
  else {
    document.getElementById(field_id).
             style.backgroundColor="red";
  }
}
Finally, you need to go through the fields one by one and check that they all validate correctly. The following is for text fields only, but the same approach can be used for other kinds of fields like select controls:
function validate_form () {
var retValue = true;
for (var formIndex = 0; formIndex < document.forms.length;
     formIndex++) {
  for ( var fieldIndex = 0; fieldIndex < document.forms
        [formIndex].length;
            fieldIndex++ ) {
    if (is_field_empty (formIndex, fieldIndex)) {
      highlight_field (document.forms[formIndex]
                       [fieldIndex].id, 1);
      retValue = false;
    }
   }
  }

  if (retValue = = false) {
    alert("Please correct the fields marked in red.");
  }
  return retValue;
}
Now the utility of using the field and form indexes becomes clear—you can refer to them through the JavaScript arrays rather than needing to know the IDs. The code should be easy enough to understand. The only really complex bit is the double array that retrieves the form objects (controls).
The form itself might be defined in HTML like this:
<form onSubmit="return validate_form();" name="ContactDetailsForm"
   action="form_results.html" method="get">

Name : <input type="text" value="" name="Name" id="fieldName"
   onFocus="highlight_field(this.id, 0);"><br/>

Email : <input type="text" value="" name="Email" id="fieldEmail"
   onFocus="highlight_field(this.id, 0);"><br/>
<input type="submit" Value="Submit"><br/>
</form>
There are many extensions possible to the previous example, such as putting field names in the message box, adding an identifier to the name (such as _e for “can be empty”), improving validation, and also adding the box type to the name so that different actions can be carried out by the specific control type.
However, as it stands, it illustrates the key points of form validation and the use of styles to highlight specific items. One aspect where some customization might be desirable is in the way that the errors are relayed to the user—and for this you could program your own kind of message box.
First, I should note that this can be done by opening a new window, containing some HTML that defines the message that you would like to display. However, this has problems, such as pop-ups being blocked by the browser, the page opening in a new browser window or Tab, and so on.
Sometimes the basic JavaScript alert box is not enough, especially when you want to retrieve form data that is more complex than just a single line, for example. The solution is to make a piece of HTML that can be layered on top of the content and hidden or shown at will.
In the working example, the dialog box itself will be static, there being no easy way to set the title and text programmatically. This means that either the programmer must set the title and text in the HTML themselves or have it created using a server side script.
The following is a fairly straightforward example of such a message box, written in standard CSS compliant HTML statements:
<div id="msgBox"
style=" width:250px;height:150px;visibility:
hidden;left:150;top:150;">
<table style="background-color:#000080;"
width=100% height=100% cellpadding=5>
<tr height=15px>
<td style="color:#ffffff;">
<b>>Message Box Title</b>
</td>
</tr>
<tr>
<td style="background-color:#ffffff;"
align="center" valign="center">
<b>Message Box Text</b><br/>
<table>
<tr>
<td>
<input type="button" value=" OK "
onClick="close_dialog('OK'),">
</td>
<td> </td>
<td>
<input type="button" value="Cancel"
onClick="close_dialog('Cancel'),">
</td>
</tr>
</table>
</td>
</tr>
</table>
</div>The whole dialog box is contained inside a div tag, which is set to visibility: hidden so that it cannot be seen initially. The width, height, and placement values are more or less arbitrary in this code. The message box could, for example, be centered by making an outer div that takes whole screen and then centering the inner div on it with align property.
However, for the sake of clarity, I have kept it to a single div which is either shown or hidden. The close_dialog function, triggered by the onClick events of the two buttons, is just there to set the visibility back to hidden. It looks like this:
function close_dialog ( ) {
  document.getElementById("msgBox")
           style.visibility = "hidden";
}
In the same way, the open_dialog function is just there to set the visibility to visible:
function open_dialog ( ) {
  document.getElementById("msgBox")
           . style.visibility = "visible";
}
Next, in order to test the code, you need to place a button, with appropriate JavaScript code, to make the div visible. Obviously, you just use the open_dialog method, as follows:
<input type="button" onClick="return open_dialog();"
                              value="Show Dialog">
However, the function can be called from any script on the page, in response to a failed form validation or even the user leaving the page altogether.
There is an additional trick that you can use to highlight the appearance of the dialog box further and which illustrates another important set of style properties and manipulation techniques. This is to add an overlay that blanks out the original page when the pop-up message box is shown.
The overlay is defined as follows:
<div id="overlay"
  style="position:absolute; width:100%; height:100%;
         left:0; top:0; visibility:hidden;
         background-color:silver; filter:alpha(opacity=50);
         opacity:0.5"></div>
The important bit in this code is the filter:alpha(opacity=50), which sets the opacity to 50% in Internet Explorer. There is also an opacity:0.5 style attribute, which does same in other browsers. Without setting the opacity in this way, the whole page would be hidden behind a silver block. The 50% opacity level is a better solution as the page behind remains partially visible.
To use the overlay, the code just needs to set the visibility of the overlay div in exactly the same way as the msgBox div. The visibility should be toggled when the open_dialog and close_dialog functions are called.
The same div technique can be used for navigation bars that drop down. For these to work, the programmer needs to make use of the onMouseOut handler to detect when the mouse leaves the area, so the div can be rolled back up again.
A final use would be to create a tabbed control where clicking a link at the top of the control (the tab) causes other div elements to be shown that might contain different controls or information. This mimics the Windows and Mac style tabbed controls found in most standard applications.
Client side programming can be used for many tasks, depending on the purpose of the page. JavaScript is a fully implemented language that can complete very complex processing, and coupled with the rich multimedia capabilities of HTML and the standard document model, some very complex effects can be created.
These can be useful to improve navigation or present information in a way that is dynamic, allowing the users to swap between pieces of information on a page very quickly. For example, many online Web 2.0 editing interfaces (such as Squidoo, Hubpages, or any of the Google document tools) use JavaScript and dynamic HTML to provide a rich editing environment.
Scripted pages are also good for pre-validating form data so that only data that is known to be correct is passed to the server. This both makes the server side programming easier and improves the experience for the end users.
Coupled with other client and server side technologies, JavaScript is useful for creating dynamic data collection services such as questionnaires and shopping carts. Online marketing gurus have shown, for example, that pages that include a quick analysis of someone’s knowledge level increase the sign-up rate for special offers.
To do this, a modified version of the data validation script can be used for a simple approach or a tie-in with server side programming can be used for more complex setups where the server returns the result of the quick question and answer session.
JavaScript can be combined with other communication technologies such as XML to improve the flow around a Website—classic examples of this are the Google AdSense Keyword Research Tool and the Google Suggest service. They both leverage connections to an online database mixing JavaScript, XML, and server side scripting to create pages of “live” data.