2. Bringing Documents into Keynote
While you can create complete presentations using Keynote for iPad, you’re likely to want to import existing presentations that you created in Keynote ’09, or with Microsoft PowerPoint for either Mac or Windows.
Using documents created in the desktop versions of the presentation programs in Keynote for iPad is a three-step process. In this chapter, you’ll learn how to add compatible documents to iTunes, synchronize them to your iPad, and then finally import them into Keynote. I’ll also discuss some of the limitations of the iPad version’s importing process.
Moving Documents to the iPad
File management on the iPad is, to be charitable, clunky. The iPad doesn’t show up on your computer’s desktop like any other USB device, and you can’t get to any files or folders on the iPad directly. Instead, Apple has added a new section called File Sharing to the Apps tab of the increasingly-misnamed iTunes for Mac or Windows. In this section, each app on your iPad that supports File Sharing appears in a list. Clicking on the app in the list on the left shows you documents for that app in the list on the right ![]() . You can add files to the list, and they will be transferred to your iPad.
. You can add files to the list, and they will be transferred to your iPad.
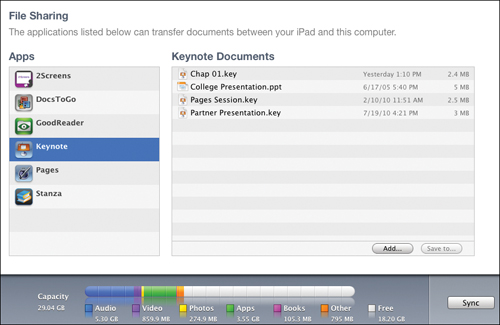
![]() You’ll transfer presentation files to the iPad using the File Sharing section in iTunes.
You’ll transfer presentation files to the iPad using the File Sharing section in iTunes.
You can also bring documents to the iPad via the iPad’s Mail app by receiving an email with a presentation file as an attachment. You can then open and import the attached file.
A third method to get files onto your iPad uses Apple’s iWork.com, an online service that helps you share your iWork documents with you or others. You’ll need to set up an account on iWork.com before you can work with it from your Mac and iPad.
To add documents to File Sharing in iTunes:
1. Connect your iPad to your computer with a Dock Connector to USB cable.
Your iPad will appear in iTunes’s sidebar, under Devices ![]() .
.
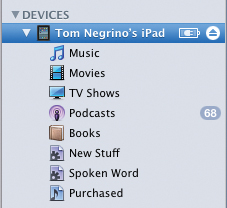
![]() Select your iPad in iTunes’s Devices section.
Select your iPad in iTunes’s Devices section.
2. Go to the Apps tab for your iPad. Scroll down to the File Sharing section at the bottom of the window ![]() .
.
3. In the left column of the File Sharing section, click Keynote.
4. Drag a file that you want to add from the Macintosh Finder or Windows Explorer into the Documents list.
or
At the bottom of the right column, click the Add button. iTunes displays a Choose a File dialog. Navigate to the file you want to add, select it, and click the Choose button.
After a brief wait, iTunes copies the files in the Documents list to your iPad. You don’t have to click the Sync button in iTunes for this to happen, and when File Sharing copies files, it doesn’t perform a complete synchronization. Now you’re ready to import the presentation into Keynote, as detailed in the next section.
Tip
Unfortunately, there’s no obvious way to tell the version of a Keynote file on your Mac. If you created a presentation in earlier versions of Keynote, I recommend that you first open the presentation in Keynote ’09 or later, then choose File > Save As and save a copy of the document. Keynote will automatically save the document in the latest format, which will be compatible with Keynote for iPad. Then use the newly saved copy for File Sharing to the iPad.
Tip
You can’t synchronize your iPad to iTunes wirelessly; you must use a USB cable.
Tip
You can also move files from the iPad to your computer using File Sharing; I’ll cover how to do that in Chapter 10.
Tip
If you like, you can add multiple documents to the Documents list at once, allowing you to transfer them all in one step.
Tip
It’s possible to add any kind of file to iTunes’s File Sharing Documents list, but only files compatible with Keynote on the iPad will appear in Keynote’s Import Presentation window, with one exception: a Keynote file created with any version of the program on the Mac will appear in the Import Presentation window. However, unless it is a Keynote ’09 file, it won’t import successfully.
To delete documents from the File Sharing list:
1. In the File Sharing section of the Apps tab of iTunes ![]() , click to select the app for which you want to delete files, then click to select the document to delete in the Documents list.
, click to select the app for which you want to delete files, then click to select the document to delete in the Documents list.
2. Press the Delete button on your keyboard.
iTunes displays an alert asking if you are sure you want to remove the item from your iPad.
3. Click Delete.
The file will be deleted immediately, and will no longer appear in Keynote’s Import Presentation window.
To import presentation documents using email:
1. On your computer, compose an email to an email address that is set up in the Mail app on your iPad. Attach a Keynote or PowerPoint file to the email and then send it.
2. On the iPad, launch the Mail app and select the received email message ![]() .
.
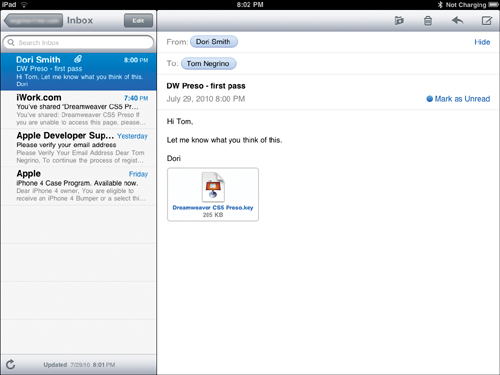
![]() In Mail on your iPad, display the email with the attached presentation file, then tap on the attachment.
In Mail on your iPad, display the email with the attached presentation file, then tap on the attachment.
The attachment appears at the bottom of the email’s message body.
3. Tap the attachment’s icon.
The presentation appears in a preview view ![]() ; this view is generated by the Mail app. The slides in the presentation will appear as pages; you can scroll through them. The preview has a toolbar at the top of the screen that disappears after a couple of seconds, allowing you to view the entire slide.
; this view is generated by the Mail app. The slides in the presentation will appear as pages; you can scroll through them. The preview has a toolbar at the top of the screen that disappears after a couple of seconds, allowing you to view the entire slide.

![]() Mail’s preview of the document has the toolbar that disappears after a few seconds; tap the screen to bring the toolbar back.
Mail’s preview of the document has the toolbar that disappears after a few seconds; tap the screen to bring the toolbar back.
4. To move the presentation into Keynote, tap anywhere on the screen to bring back the toolbar, then at the right side of the toolbar, tap the Open in button.
A popover appears showing the programs on your iPad that can read the presentation file ![]() .
.
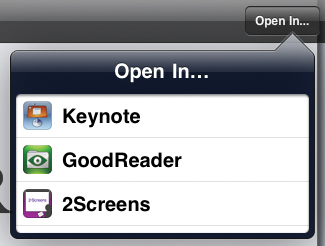
![]() In the popover, tap Keynote to import the attached file into Keynote.
In the popover, tap Keynote to import the attached file into Keynote.
5. Tap Keynote.
Keynote launches, imports the file, and displays it in the editing view ![]() .
.
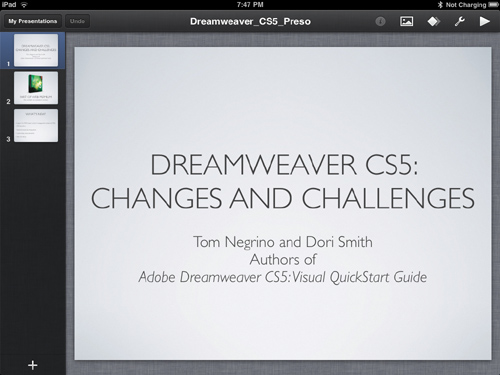
![]() After import, you can begin work on the presentation immediately.
After import, you can begin work on the presentation immediately.
Tip
Notice that the fonts are different between ![]() and
and ![]() . The correct fonts are in
. The correct fonts are in ![]() , corresponding to the fonts used in the original Keynote for Mac file. So don’t worry if the Mail preview shows you a distorted preview of the presentation; Keynote does a better job of rendering the presentation.
, corresponding to the fonts used in the original Keynote for Mac file. So don’t worry if the Mail preview shows you a distorted preview of the presentation; Keynote does a better job of rendering the presentation.
To import documents from iWork.com:
1. In Keynote ’09 on the Mac, choose Share > Share via iWork.com.
A dialog appears asking for information about who you want to share the file with, and allowing you to set sharing options ![]() .
.
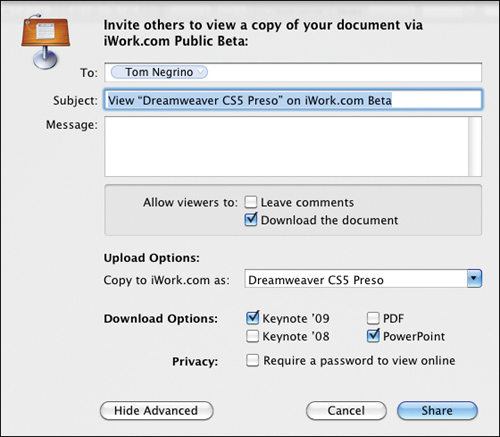
![]() In Keynote for Mac, you can invite people to share the presentation on iWork.com.
In Keynote for Mac, you can invite people to share the presentation on iWork.com.
2. Fill out the sharing dialog, with yourself in the To field. The dialog creates an email message that will be sent to your email address on your iPad.
3. Click Share.
You’ll receive an email notifying you that there is a shared document waiting ![]() .
.
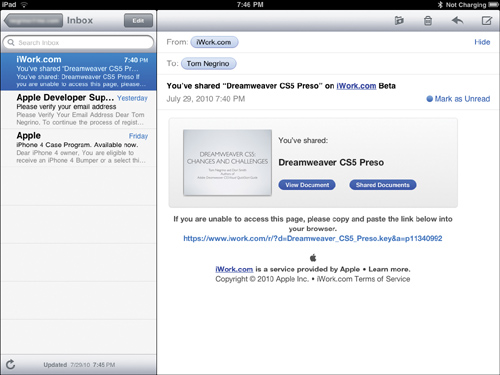
![]() In iPad’s Mail app, you get the invitation from iWork.com.
In iPad’s Mail app, you get the invitation from iWork.com.
4. In the email, tap Shared Documents.
If you haven’t previously done so, you’ll need to sign into your iWork.com account on your iPad ![]() . When you’ve done so, the Shared Documents view appears
. When you’ve done so, the Shared Documents view appears ![]() .
.
![]() If you haven’t been there before on your iPad, you must sign into iWork.com.
If you haven’t been there before on your iPad, you must sign into iWork.com.
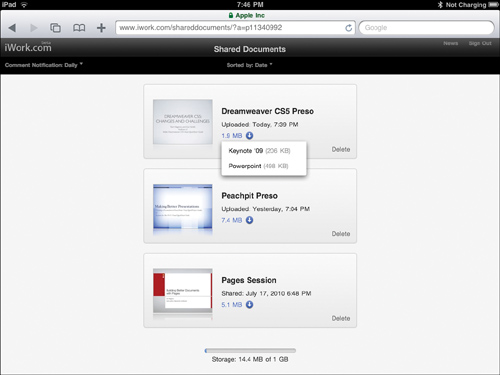
![]() In the Shared Documents view, you can choose from a variety of formats to download the presentation file.
In the Shared Documents view, you can choose from a variety of formats to download the presentation file.
5. For the presentation you want, tap the blue button with the downward pointing arrow. From the list of file formats, choose Keynote ’09.
A preview of the presentation appears ![]() .
.
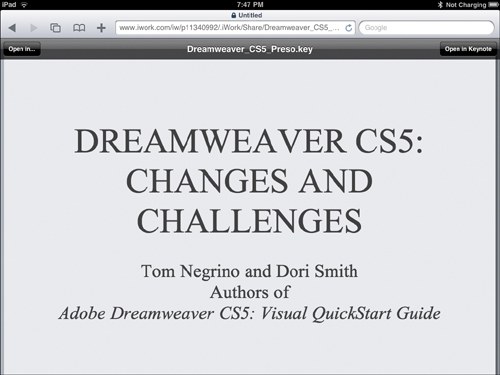
![]() Safari has its own preview. Tap the Open in Keynote button to import the file into Keynote.
Safari has its own preview. Tap the Open in Keynote button to import the file into Keynote.
6. Tap Open in Keynote.
Keynote launches, imports the file, and displays it in the editing view.
Importing Keynote and PowerPoint Documents
Once you have your files on the iPad, it’s time to actually import them into Keynote. The file formats Keynote for iPad can read are Keynote ’09, PowerPoint 2007 and later (.pptx and .ppsx), and PowerPoint 97-2004 (.ppt and .pps). Keynote presentations created with older versions of iWork won’t import successfully into Keynote for iPad. If you try, the program pops up an error window ![]() .
.
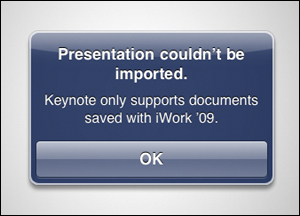
![]() If you try to import an older Keynote file, Keynote for iPad registers its objection.
If you try to import an older Keynote file, Keynote for iPad registers its objection.
Once on the iPad, the items in the Documents list in iTunes aren’t yet in Keynote, but they can be accessed from Keynote’s My Presentations view. In that view, tap the folder button at the right side of the toolbar ![]() and the Import Presentation window appears
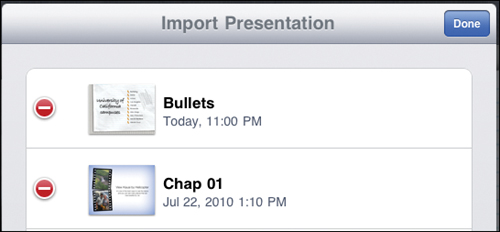
and the Import Presentation window appears ![]() . The files in this window correspond to the files in the iTunes Documents list.
. The files in this window correspond to the files in the iTunes Documents list.
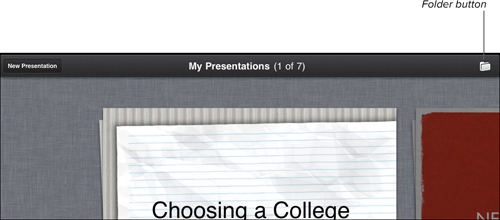
![]() Begin importing documents into Keynote by tapping the Folder button in the My Presentations view.
Begin importing documents into Keynote by tapping the Folder button in the My Presentations view.

![]() The files from iTunes appear in the Import Presentation window.
The files from iTunes appear in the Import Presentation window.
Once you are done importing a file into Keynote, the program makes an entirely separate new copy of the file, so you might want to delete the source file from the Import Presentation window. It’s important to understand that the files in My Presentations and in Import Presentation are completely independent. The files you can browse through in My Presentations are Keynote files that you have either created in Keynote on the iPad or files that you have previously imported into Keynote using the Import Presentation window. If you happen to have files with the same name in My Presentations and Import Presentation, changes you make in Keynote only affect the copy of the file available in My Presentations.
To import documents into Keynote:
1. Launch Keynote on the iPad.
2. If you’re not already there, tap the My Presentations button in Keynote’s toolbar to switch to the My Presentations view ![]() .
.
3. Tap the folder button at the right side of the toolbar, and the Import Presentation window appears ![]() .
.
4. Tap one of the presentations in the Import Presentation list. If necessary, you can scroll the list to show more choices.
Keynote displays a progress bar while it is importing your file, then opens the file, ready to be edited (or presented, if it needs no changes) ![]() .
.
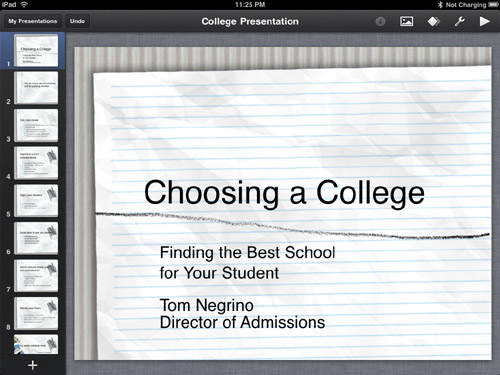
![]() After you import, Keynote prepares the file for any tweaking you might want to make.
After you import, Keynote prepares the file for any tweaking you might want to make.
In many cases, Keynote will display a window listing aspects of the original presentation that didn’t import correctly (see the “Importing Limitations” section later in this chapter for more information).
Tip
The PowerPoint file formats are interchangeable between the Windows and Macintosh versions of PowerPoint.
Tip
Despite what it says in ![]() , I am not a college director of admissions.
, I am not a college director of admissions.
To delete documents from the Import Presentation window:
1. In Keynote, switch to the My Presentations view.
2. Tap the folder button at the right side of the toolbar, and the Import Presentation window appears ![]() .
.
3. Tap the Edit button at the upper right corner of the window.
The list of documents in the window changes to display a red minus icon appearing next to each document’s name ![]() .
.
![]() To choose a file for deletion, tap its red minus icon.
To choose a file for deletion, tap its red minus icon.
4. Tap the red minus icon next to the document you want to delete.
A red Delete confirmation button appears to the right of the document’s name ![]() .
.

![]() Tap the red Delete confirmation button to erase the file from your iPad.
Tap the red Delete confirmation button to erase the file from your iPad.
5. Tap the Delete button.
Keynote removes the file.
6. Tap the Done button at the upper right corner of the window ![]() .
.
The Import Presentation window changes back to its usual appearance.
7. Tap the Close button ![]() to dismiss the window.
to dismiss the window.
Importing Limitations
Keynote for iPad is a capable presentation program, but compared to Keynote on the Mac, it has a much smaller feature set. In general, if a feature in Keynote ’09 isn’t available in Keynote for iPad, aspects of your presentation that rely on the desktop version’s features will be stripped out (and in some cases, completely discarded) when you import the presentation into Keynote for iPad. If you’ve been using Keynote for some time on the Mac, and have added fancy (or even some mundane) effects to your presentations, it can be disconcerting when you first import and open those presentations on the iPad.
Upon import of presentations with features that Keynote for iPad doesn’t support, the program puts up a window letting you know what problems it encountered ![]() . Unfortunately, this is often not a comprehensive list.
. Unfortunately, this is often not a comprehensive list.

![]() When you import a presentation, Keynote tries to alert you to potential problems.
When you import a presentation, Keynote tries to alert you to potential problems.
One of the biggest issues is simply that the iPad supports a limited selection of fonts (and you can’t add your own), so unsupported fonts in your presentation are replaced with a font that Keynote considers to be a close match. If it can’t find one, Keynote replaces the font with Helvetica.
You can find a list of iPad’s fonts, as well as many other potential import issues, in this Apple Support article, “Keynote for iPad: Frequently Asked Questions”: http://support.apple.com/kb/HT4066.
In tests, I discovered many aspects of Keynote and PowerPoint presentations that don’t translate to Keynote for iPad. This list is representative, not complete:
• If you used a presentation theme that isn’t built into Keynote for iPad (created by Apple or by third-party theme makers), any extra slide masters that theme contains will not be copied to the iPad; you’re limited to Keynote’s eight slide layouts. The unsupported theme’s slide backgrounds will be imported as an image laid over Keynote’s White theme.
• Grouped objects will become ungrouped. Sometimes, the objects in the group will be shifted.
• Presenter Notes and Comments are not imported.
• Some of the desktop version’s slide transitions and builds are not supported. Unsupported transitions or builds will become a simple dissolve.
• Motion paths will not be imported.
• Action Builds and Smart Builds will be removed. If you have multiple photos in a Smart Build, only the last one will be imported.
• Graphics that had their background removed with the Instant Alpha feature will import with the original background ![]() .
.
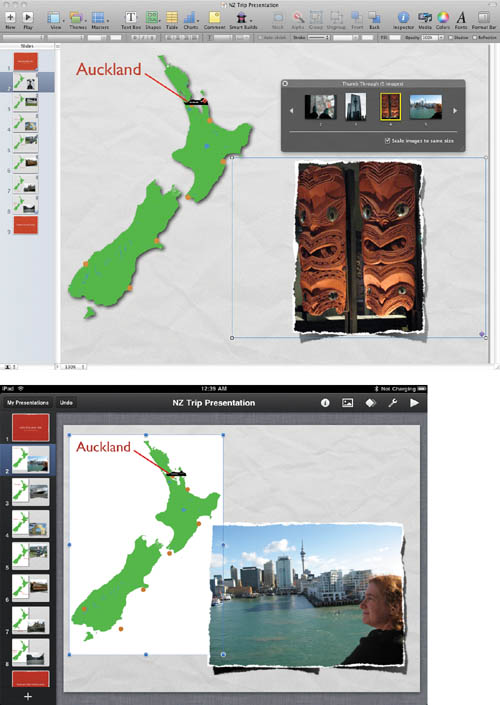
![]() Some aspects of a Keynote ’09 file won’t translate well when imported to the iPad. This is the identical slide on the Mac (above) and the iPad (below). The white background of the New Zealand map, which was knocked out using the Mac’s Instant Alpha feature, reappears on the iPad. The Mac slide also uses a Smart Build to display several photos in an automatic sequence; all but the last of the photos were thrown away on the iPad.
Some aspects of a Keynote ’09 file won’t translate well when imported to the iPad. This is the identical slide on the Mac (above) and the iPad (below). The white background of the New Zealand map, which was knocked out using the Mac’s Instant Alpha feature, reappears on the iPad. The Mac slide also uses a Smart Build to display several photos in an automatic sequence; all but the last of the photos were thrown away on the iPad.
• Movies are supported, but embedded or recorded audio aren’t imported.
• 3D charts are converted to 2D charts.
• You can’t use hyperlinks to change to different slides (or to a browser) during the presentation.
So with all these issues, should you just throw up your hands in horror? Well, probably not. But before you present, you should review existing presentations, and if need be, revise them to suit the iPad environment.
Apple has another Support document with some good advice, called “Keynote for iPad: Best practices for creating a presentation on a Mac for use on an iPad.” You can find it at http://support.apple.com/kb/HT4114. The article lists recommended themes for Keynote for Mac that will translate to the iPad, and makes suggestions for handling images.
Tip
If you import a Keynote file that used an unsupported feature (which will be stripped out during import), make changes, then export them back to your Mac, you’ll discover the original features will be gone. For example, Presenter Notes are eliminated altogether. Interestingly, PowerPoint files that are exported out of Keynote on the iPad retain at least some of their features, like motion paths, that don’t translate into Keynote for iPad.