Introduction
Welcome to Keynote for iPad: Visual QuickStart Guide. As the author of the first book about Keynote for Macintosh, I’m excited to also have the opportunity to write a book about the mobile version, Keynote for iPad.
I start the book with an overview of Keynote, move on to creating your first presentation, and then discuss how to add content and interactivity. Finally, I show you how to give the presentation effectively.
You’ll be able to use what you learn to build your own presentations, such as a talk for your annual sales meeting, a lecture for a class, or a slide show for your department detailing your latest work.
Using this book
I’ve organized the different elements of building presentations with Keynote for iPad (henceforth, just “Keynote”; when I discuss Keynote for Mac, I’ll refer to “Keynote ’09”) into chapters, and within each chapter are numbered, step-by-step directions that tell you exactly how to accomplish various tasks. You don’t have to work through the entire book in order, but it is structured so the more complex material builds on the earlier tasks.
Tip
Throughout the book I’ve included many tips that will help you get things done faster, better, or both.
Tip
Be sure to read the figure captions, too; sometimes you’ll find extra nuggets of information there.
Tip
When I’m showing Web and email addresses, I’ve used this code font.
Tip
You’ll also find sidebars (with colored backgrounds) that delve deeper into subjects.
Working with the iPad
The iPad’s multi-touch interface brings a whole new set of terminology, and you’ll find it easier to use this book once you understand the terms I’m using. Here are the terms I use in the book, with explanations of what they mean.
• Tapping means to point at an area on the screen and then lightly tap it with one finger. Similarly, double-tapping simply means to tap the same object on the screen twice in rapid succession.
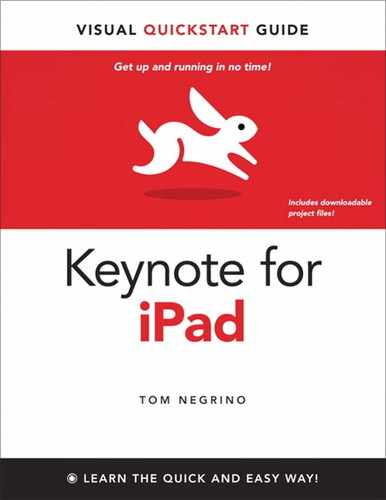
• A popover is iPad’s equivalent of a dialog in Mac or Windows. It’s a list of options that appears when you tap a button. For example, in Keynote, tapping the Media button on the toolbar brings up this pop-over ![]() (the Charts button in the popover has also been tapped).
(the Charts button in the popover has also been tapped).
![]() The Charts pane of the Media popover.
The Charts pane of the Media popover.
Tapping one of the chart types in the popover inserts a chart of that type onto your slide.
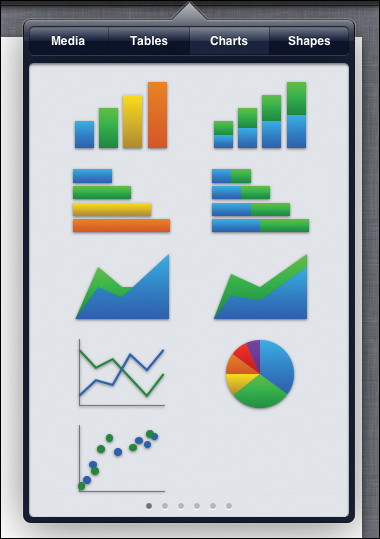
• Slow double-tapping is a term I invented for this book. It means that you tap an object, pause briefly, and then tap it again. In Keynote, this is often how you select objects and bring up popovers that allow you to edit them ![]() .
.
![]() A slow double-tap brings up this popover.
A slow double-tap brings up this popover.
• When you touch and hold, you’ll place your finger on an object on the screen, maintaining contact.
• To drag, touch and hold a point on the screen and then move your finger across. You can drag objects around on a Keynote slide, or you can drag inside a popover to scroll through a list of options.
• A flick is like a drag, but you do it more quickly. It’s usually used to scroll things faster. The iPad’s software notes the velocity of your finger and then matches the motion, until the scrolling object gradually slows and comes to a stop.
• A swipe is a movement in between a drag and a flick, and usually horizontal. In ![]() , for example, you can swipe right or left in the Charts popover to see different preset color choices for the charts. Notice the indicator at the bottom showing that there are six screens you can swipe through.
, for example, you can swipe right or left in the Charts popover to see different preset color choices for the charts. Notice the indicator at the bottom showing that there are six screens you can swipe through.
• A pinch gesture uses two fingers. You can zoom in or out on an item by touching two fingers to the screen and pinching them together (to zoom out) or spread them apart (to zoom in).
• Touch two fingers to the screen and turn your hand to rotate an object on a slide, such as a photo.
Tip
You can often use two hands to accomplish tasks in Keynote. For example, if you want to select more than one slide at a time, it’s easier to do it using both hands.
Using the iPad’s Onscreen Keyboard
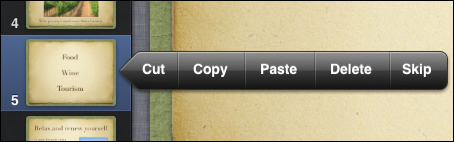
When you double-tap inside a text box in Keynote, the iPad’s software keyboard slides up from the bottom of the screen ![]() . You can type on this keyboard as you would a hardware keyboard, with a few caveats:
. You can type on this keyboard as you would a hardware keyboard, with a few caveats:
![]() The standard iPad onscreen keyboard.
The standard iPad onscreen keyboard.
• Some characters don’t appear where you expect them to, because the screen isn’t big enough to accommodate a standard keyboard layout. For example, you type an exclamation point by holding the Shift key ![]() and tapping the comma key.
and tapping the comma key.
![]() The onscreen keyboard includes the Shift and Symbol keys (top) and the Number key (bottom).
The onscreen keyboard includes the Shift and Symbol keys (top) and the Number key (bottom).
• To get numbers and some frequently-used symbols, tap the Number key ![]() , which changes the keyboard layout
, which changes the keyboard layout ![]() .
.
![]() Notice that this layout also includes an Undo key.
Notice that this layout also includes an Undo key.
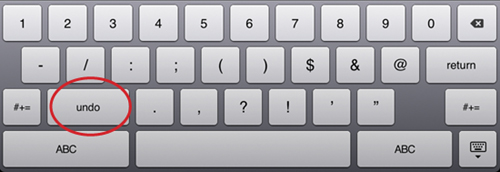
• You can access lesser-used characters by first tapping the Number key and then tapping the Symbol key ![]() , which displays yet another keyboard
, which displays yet another keyboard ![]() .
.
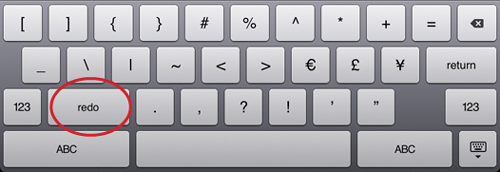
![]() This layout includes a Redo key.
This layout includes a Redo key.
• You can add a period by simply tapping two spaces after a word.
• To hide the keyboard, tap the Keyboard key ![]() .
.

![]() The Keyboard key and the Shift key (shown with Caps Lock activated).
The Keyboard key and the Shift key (shown with Caps Lock activated).
• Caps Lock is disabled by default, but you can change that by going to Settings > General > Keyboard and turning on Enable Caps Lock. To activate Caps Lock when you are typing, double-tap the Shift key. The face of the key turns blue ![]() to show that you are in Caps Lock mode.
to show that you are in Caps Lock mode.
Tip
The easiest way to quickly insert a number or symbol on the screen shown in ![]() is to touch and hold the Number key, slide your finger to the character you desire, and then lift your finger.
is to touch and hold the Number key, slide your finger to the character you desire, and then lift your finger.
Selecting Text or Objects
In Keynote, you generally tap an object on your slide to select it. That object could be a text box ![]() , a photo, a table, a chart, or a graphic object like a line or other geometric shape. A selected object on your slide will show selection handles.
, a photo, a table, a chart, or a graphic object like a line or other geometric shape. A selected object on your slide will show selection handles.
![]() A selected text box.
A selected text box.
Double-tapping a word inside a text box selects the word, highlighting it and causing selection handles to appear at the left and right edges of the word ![]() .
.
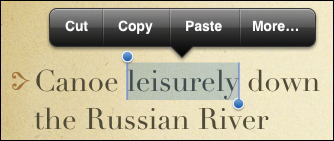
![]() A selected word.
A selected word.
You can drag either selection handle to expand or contract the selection. You can also tap one of the options in the Edit popover shown in ![]() to cut, copy, or paste.
to cut, copy, or paste.
There’s more online
To help you get up and running faster with Keynote, I’ve prepared some sample files with some of the content in this book that you can import and use for practice. You’ll find those files on the Peachpit Web site, at www.peachpit.com/vqs/KeynoteforiPad/.
Let’s get started
Every journey begins with a first step, and if you’ve read this far, your journey with Keynote has already begun. Thanks for joining me, don’t forget to have fun, and let’s get started building some presentations.
— Tom Negrino, September 2010