Knitting in the Round
One of the knitting world’s most handy tools is the circular needle, which is two short needles that are connected with a cable. You’ve already learned how to use a circular needle to knit a project that has too many stitches to fit on a single-pointed needle. In this section, you’ll learn how to use a circular needle to make a cylindrical item. In addition, you will find information for knitting with double-pointed needles to shape the crown of a hat and as a substitute for circular needles.
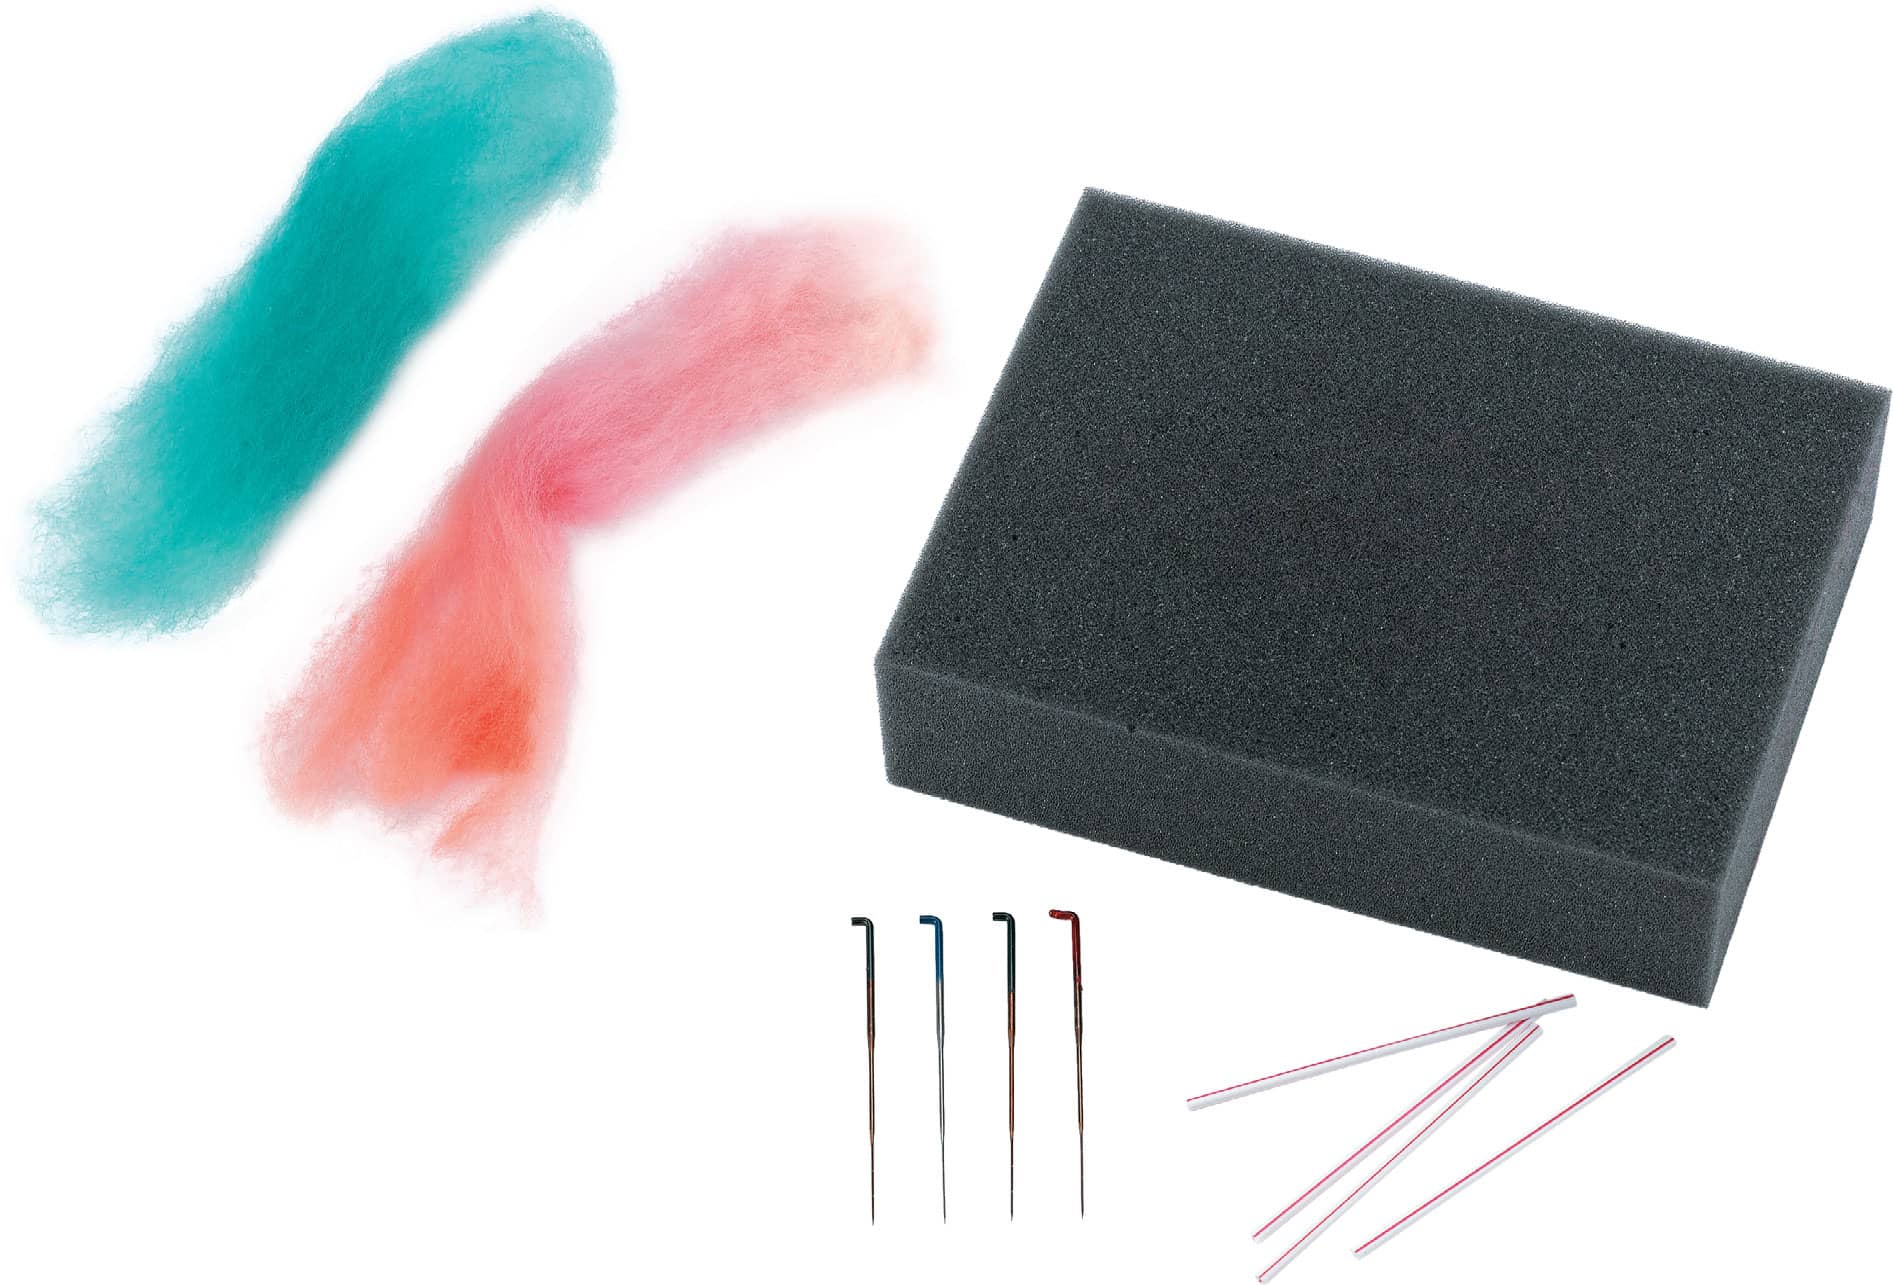
Felted Bag with Embellished Flap
A felted handbag is a great project for learning how to knit in the round. Part of the bag is worked in the round to form a cylinder followed by knitting back and forth on half of the stitches to make a flap. The bag is wet felted in your washer using agitation and hot water. This will transform the knit stitches into wool felt. When dry, the flap makes a perfect canvas for needle felting with wool roving. Look for roving assortments at your LYS. Bag instructions begin shown here.

Skills and Useful Information
CIRCULAR NEEDLES
Circular needles come in a variety of lengths (measured from needle tip to needle tip). When used for knitting in the round, the length of the needle when joined from tip to tip will equal the circumference of the circle. Circular needles are used for knitting in the round (making a cylinder) as well as for knitting back and forth on a flat item with many stitches.
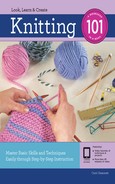
How to Knit in the Round on a Circular Needle
Using a circular needle to knit in the round is quite simple except that it is important that the stitches not be twisted when the circle is first made. Every pattern for knitting in the round will say something like “Join in the round being careful not to twist”. You will learn in the practice swatch below how to join in the round without twisting the stitches.
The common needle lengths for knitting in the round are shown in the chart to the left. You can find shorter and longer lengths not listed on the chart, but most patterns use lengths shown.
A circular needle can be used to make an item that is slightly larger than its circumference, but it cannot be used to make an item that is smaller than its circumference. More stitches can be squeezed together but there’s a limit to how far apart the stitches can be stretched.
Stockinette Stitch in the Round Compared to Working Back and Forth on a Flat Item
Recall for a moment the beginning chapters of this book when you learned to make a flat item in stockinette stitch by alternating knit rows with purl rows. Think of what you learned this way: when knitting a flat item, the right side, the public side, is worked in knit stitch and the wrong side, the private side, is work in purl stitch. Because you are knitting back and forth, half of the rows are made using the knit stitch on the outside (the public side) and half of the rows are made using the purl stitch on the inside (the private side). However, when knitting in the round, for instance on a hat, you are always working on the outside (the public side). To make stockinette stitch in the round, every round is worked in knit stitch. You will see this clearly while making the bag when you stop knitting in the round about half way through and switch to knitting back in forth.
One interesting fact to note is that when knitting in the round, garter stitch is the opposite of stockinette stitch. Instead of knitting every row when working back and forth on a flat item, knit rows must be alternated with purl rows to execute garter stitch in the round.
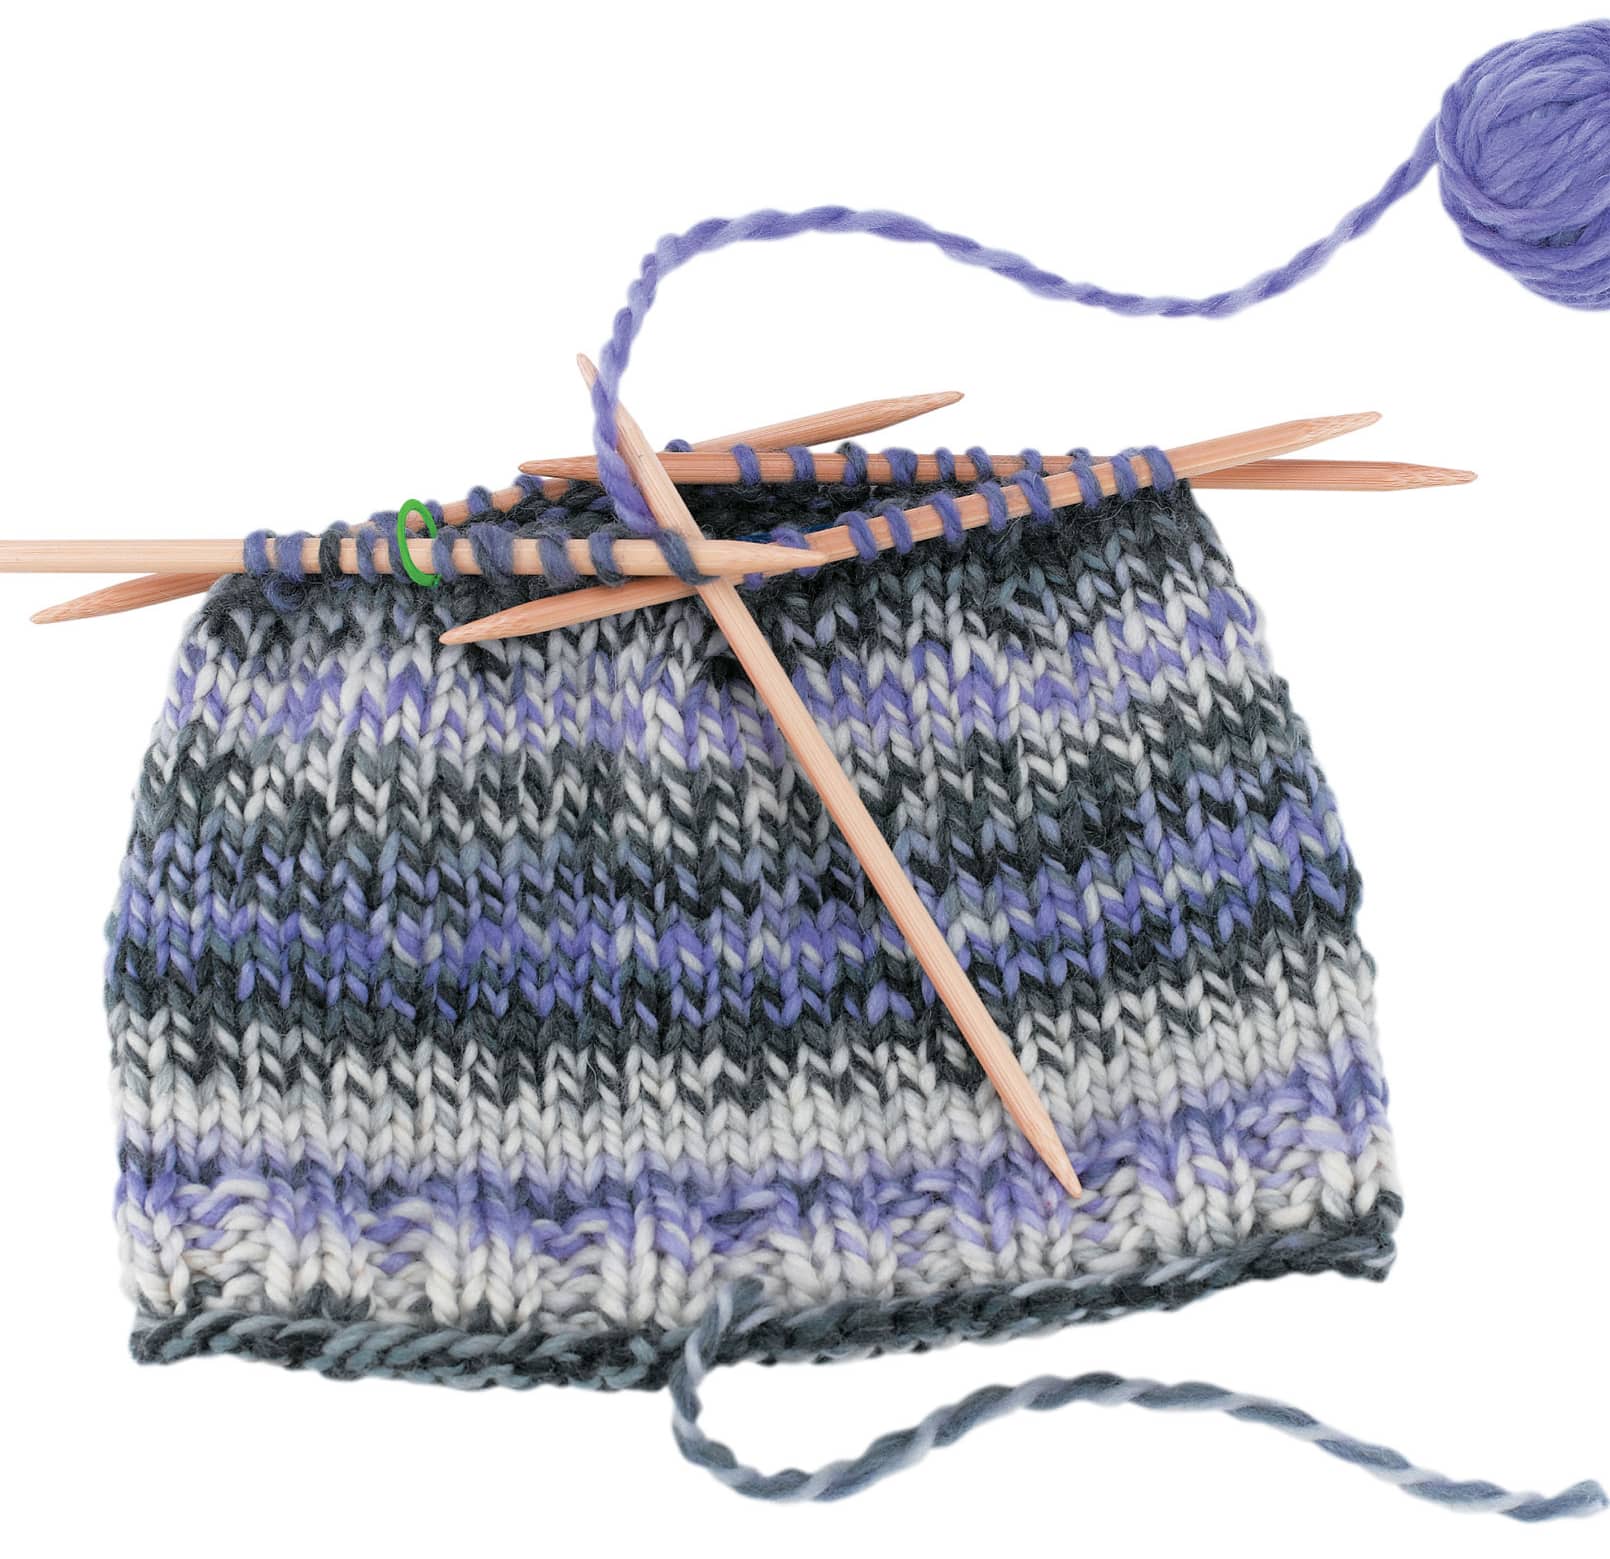
NEEDLE FELTING
Needle felting is the process that binds wool and sometimes other fibers together to make felt. Instead of using water, felting needles with small barbs on the end are jabbed repeatedly through multiple layers of fibers. The jabbing (or stabbing) of the barbed felting needle locks the fibers together. The more times the needle is jabbed through the fibers, the tighter the fibers will lock together and the firmer the fabric will become.
There are some very important guidelines to follow when you needle felt:
• The needles are very sharp! This is not a hobby for young children and the needles should be kept out of their reach at all times.
• Pay attention to the safety of your own fingers. Use a chop stick to keep the fibers in place instead of your fingers and keep your eyes on your work at all times.
• Protect your work surface. The needles will damage a hard work surface or be broken. The object being felted should be placed onto a needle felting mat, a piece of foam, or a dry sponge. The needle will stab through the felt and then slightly into the felting mat.
• The needles are breakable. Always move the needles straight up and down, not at an angle. When you finish using the needles, replace them in their covers. Don’t stab the needle any deeper than necessary through the felt and into the protective felting mat.
• Lift your work up from time to time. The process of needle felting makes the fibers stick into the mat a bit so occasionally lift up your work and reposition it.
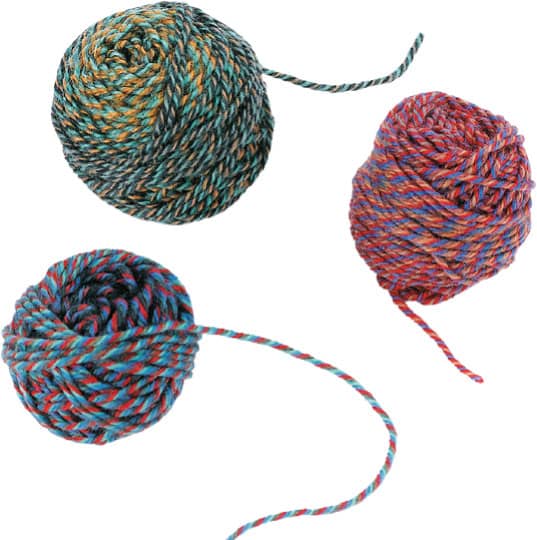
• Roving is simply unspun wool or other fibers. For use in needle felting roving is normally sold in short pieces of thick, ropey fluff that has been dyed. You can find both solid colored, commercially dyed roving and more artistic hand-dyed rovings with many colors or shades on the same piece. Just a few grams of roving, a quarter of an ounce or so, is a grapefruit size ball of fluff, which is more than enough of any one color for many projects. Look for color packs if you’re just starting as this is an economical way to build a supply of colors.
How to Knit the Bag
FINISHED DIMENSIONS |
• Before felting: 18" (46 cm) circumference by 12" (30 cm) depth • After felting: 14" (35.5 cm) circumference by 8" (20 cm) depth |
It is very important that your stitches be somewhat loose before the item is felted. The stitches need to move and agitate against each other in order to felt. If your stitches aren’t loose enough, then switch to a larger needle. The photos above will give you an idea of the difference in the bag before and after felting.
Before felting

After felting
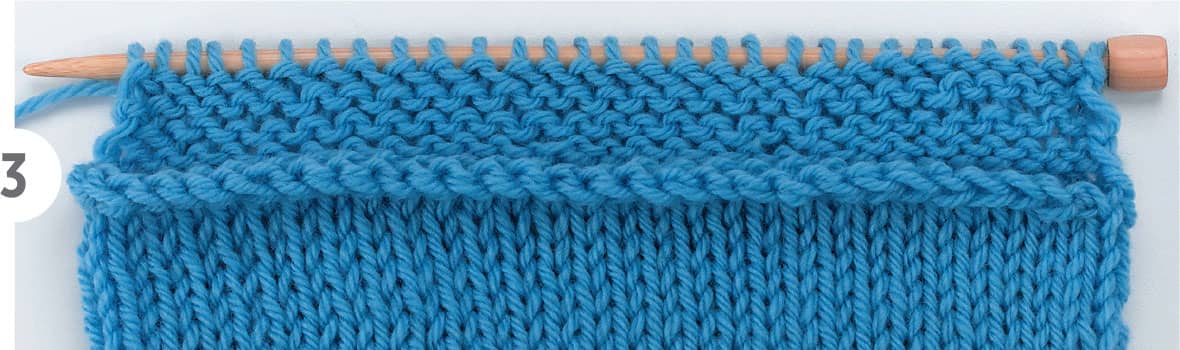
Begin at the Bag Bottom
Note: Charcoal grey provides a great contrast for the needle felted design but for clarity, blue yarn is used to show the steps in making the bag.
1 Cast on 60 stitches. Place BOR marker and join in the round, being careful not to twist (see here for more information).

2 Work in stockinette stitch (knit all stitches) until the length from the cast-on row is 12" (30 cm).
Make Bag Flap
3 Bind off 30 stitches, leaving 30 stitches on the needle. Either knit back and forth on the circular needle (see here for more information) or switch to single-pointed needles. Begin bag flap by knitting back and forth as follows:
Row 1: Knit.
Row 2: Purl.
Repeat rows 1 and 2 until the length of the flap (the portion that has been knit back and forth) is 11" (28 cm).
4 Bind off all stitches loosely and evenly.
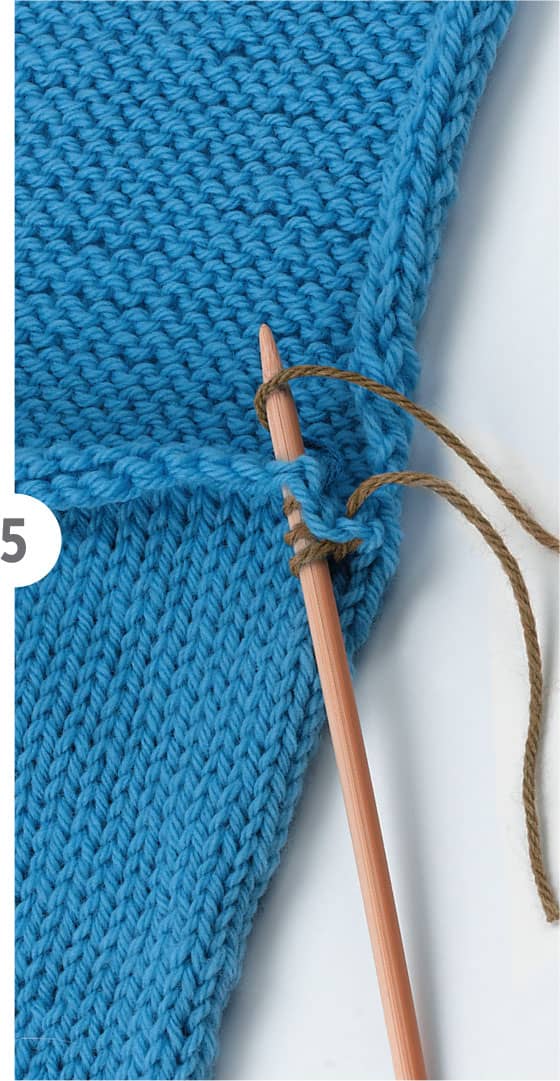
I-cord Strap
5 (Note that the yarn in the photo used for picking up stitches and the I-cord is a different color in order to show contrast. Your bag should be made using all the same color.) Four new stitches need to be added to the cast-off edge as the foundation for the straps. You will be working from the outside of the bag, using a separate ball of yarn (the leftover yarn from knitting the bag) and the double-pointed needles. Place the stitches as close to the corner formed by the cast-off edge and the bag flap as possible. Working from the right side, insert the needle from the front to the back going under two strands along the cast-off edge. Wrap the yarn around the needle as if you were knitting and pull a loop through and onto the needle. Continue in this manner until 4 stitches are on the needle. When starting the first stitch, be sure to leave a tail at least 8" (20 cm) long.
6 Using the stitches just added to the double-pointed needle, work I-cord for approximately 33" (84 cm). See directions for I-cord shown here. Bind off stitches and cut yarn leaving a tail at least 8" (20 cm) long. Repeat for second strap.

Seam the Bottom
7 Turn the bag inside out and pin the bottom opening closed with the right sides facing. The seam should be pinned parallel to the bound-off edge that was made before the flap was knit.

8 Cut a length of wool yarn (the same used to knit the bag) and thread it onto a yarn needle. (Note that the yarn in the photo used for seaming is a different color in order to show contrast. Your bag should be seamed using all the same color.) Start at the right edge, leaving a tail about 8" (20 cm) long. Insert the needle from the back to the front, going under the strands at the cast-on edge (not through the individual yarn strands). Move about 1/2" (1.5 cm) to the left and repeat the stitch. Continue as established across the seam.

Make a few stitches very close together at the left edge and then weave in the yarn end to secure. Thread the other tail in the needle, make an extra stitch or two at the very edge, and weave in the ends to secure. Weave in all loose ends.
FELTING THE BAG
It is essential that the bag be put into a zippered mesh laundry bag or pillow cover before felting. If not, the straps can wrap around the washer post and be permanently damaged. Follow the general directions for felting shown here. Be sure to check the bag frequently, pulling and tugging it into shape each time it is checked (this will encourage the final shape).
Once the bag is dried, the strap can be tied into a knot to make it the desired length. If desired, the strap can be trimmed to a shorter length. Once felted the knitting stitches won’t unravel.

How to Needle Felt the Design on the Flap
1 After the bag is completely dry it is ready to be needle felted. Open the flap of the bag and place it on top of the needle felting mat or foam. You can work without a plan or draw a mock-up of your design before you start. Needle felting is a highly creative process with very fluid results, so allow your creativity to flow.

2 Begin by teasing apart bits of roving about as thick as a pencil. Lay the roving on the bag flap to outline the shapes of the flower petals, adjusting the colors and outlines until you are pleased with the general design. Use the felting needle to stab here and there and tack the design into place. Once you are happy with the general look, then stab the felting needle over and over into the roving until it is held firmly in place.

3 Now begin to fill in the petals with more roving, shading the colors if desired until you are pleased with the thickness. Just add a little bit at a time; you can always add more density but it’s difficult to remove once it has been fully felted. Be sure to stab the surface of the petals completely and evenly to adhere all of the roving.

4 To make the center of the flower, pull off a pencil of a contrasting color of roving. Spit into the palm of your hands or sprinkle a few drops of water and then rub the roving quickly back and forth until it forms a dense, kinked cord. Coil the cord in the center of the flower, tacking it a bit at a time. Once in place, needle felt securely.

5 If desired, you can use bits of left over yarn from another project to outline the flower petals.
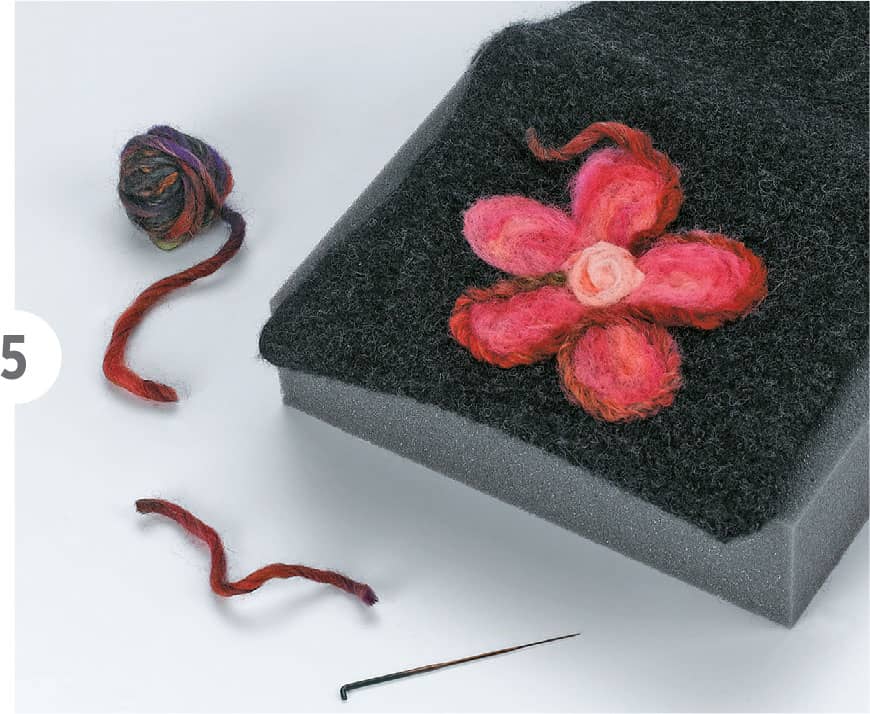
6 Using the same technique to make cords for the flower center, make flower stems and lay them in a curling fashion around the flower. Needle felt securely into place and embellish the stems with some extra yarn if desired.

7 Flower buds can be made by rolling a small ball of roving back and forth in your hand (with a little bit of spit) to create a tight kernel of roving. Needle felt it into place but just around the edges so it adds some surface interest.
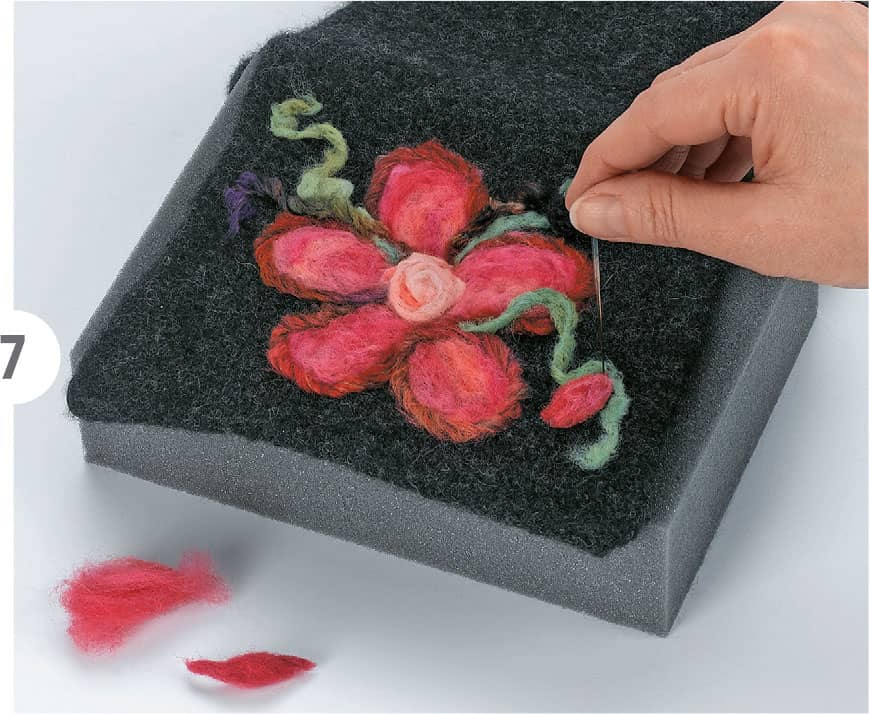
Once you are satisfied with your design, no further work is necessary. The needle felting process permanently attaches the fibers. Don’t forget to pick up the bag and reposition it from time to time as you work. As you wear the bag, if some of the embellishment starts to come loose just take a moment to reattach it with your felting needle.
Easy Knit Hat
Making a simple hat is a terrific way to expand on the basic technique for knitting in the round. Once you get your stitches joined in the round you’ll find this to be an easy, take-along project. Consider choosing an interesting yarn such as this self-striping yarn. Any small inconsistencies in your knitting will be disguised by the details in the yarn. The circumference of this hat is 20" (60 cm), which should fit most adults. Instructions begin shown here.

Skills and Useful Information
USING DOUBLE-POINTED NEEDLES TO SHAPE THE CROWN OF A HAT
A knit hat is started on circular needles using the same guidelines as shown here. The first section of knitting used to make a hat is simply a cylinder with a height of anywhere from 5" (13 cm) to 8" (20 cm) or more depending on the size of the hat. Once the cylinder is completed then the crown must be shaped, somewhat like the top of a dome.
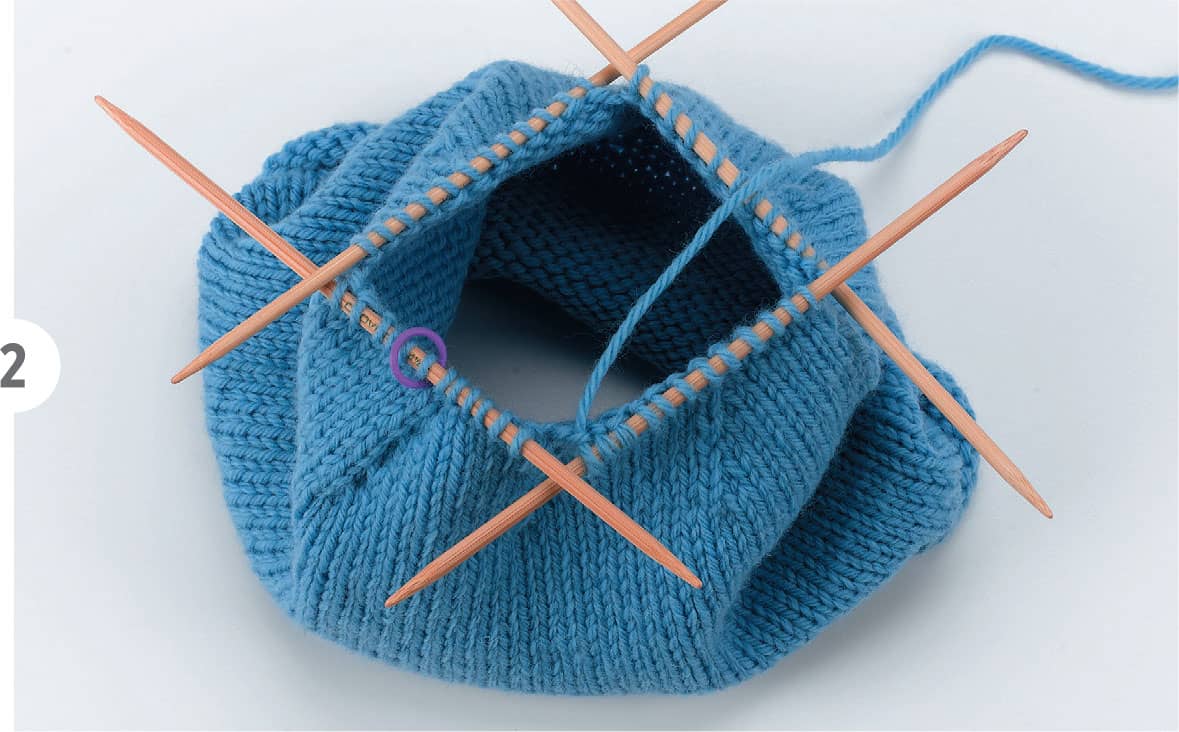
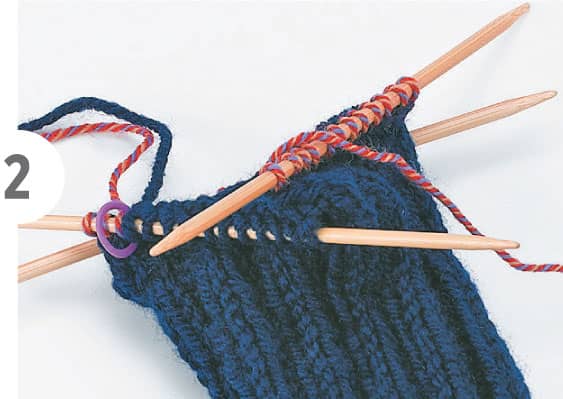
The shaping is accomplished by dividing the stitches into wedges that are gradually decreased to form a tapered top. As the stitches are decreased to form the tapered shape, the circumference of the cylinder will become smaller and no longer fit around the circular needle. At that point the stitches must be transferred to double-pointed needles to finish the remainder of the crown. Before you transfer the stitches to the double-pointed needles you will already have established the wedges marked by a line of decreases (k2tog).

1 Continuing in the same stitch pattern, knit the stitches off the circular needle and onto four double-pointed needles. Transfer the stitches on one of the plain knit rounds in between the decrease rounds.

2 The most effective arrangement of the stitches is to put two wedges onto each needle. Divide the stitches evenly into quarters with one of the k2tog decreases at the end of each needle. It’s best to place the beginning-of-round (BOR) marker in the middle of one of the needles, so start to transfer the stitches at the beginning of the last wedge before the BOR marker.
3 Once all the stitches have been transferred to the double-pointed needles, use the fifth needle for knitting the stitches one needle at a time. Knit all the stitches from the first needle onto the free needle. When that needle is empty it becomes the new free needle and is used to knit the stitches on the next needle and so on around the hat.
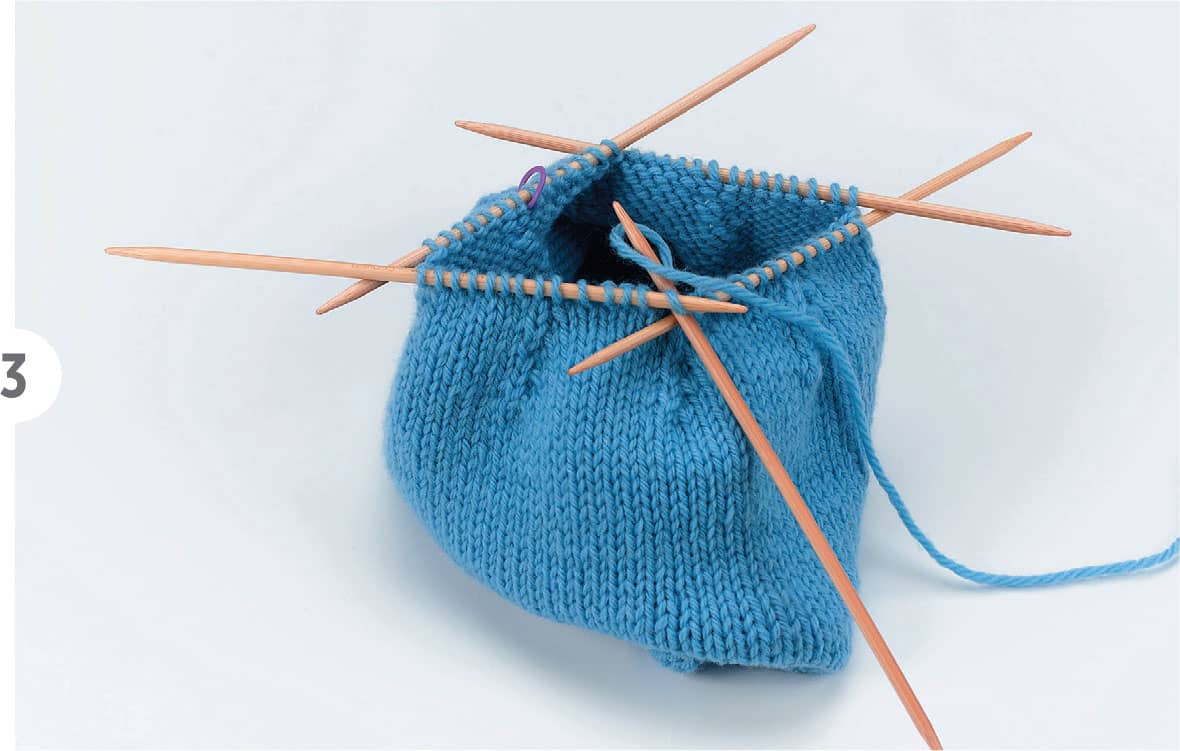
4 After working through the decreases you will reach the point where just 8 stitches are left, 2 on each needle. Cut the working yarn leaving a tail at least 8" (20 cm) long and thread it on a yarn needle. Working in same order as used with knitting, thread the tail through each of the stitch loops around the top of the hat.

5 Pass the needle through the hole on the top of the hat to the inside, and pull it firmly to close the hole in the top of the hat. Weave the ends into the stitches on the inside of the hat to secure the ends.

How to Knit the Hat
FINISHED DIMENSIONS |
• Sized to fit a medium adult head • 20" (51 cm) circumference by 8" (20 cm) height |
1 Cast on 60 stitches and join in the round being careful not to twist. Place marker to indicate the beginning of the round. Knit 2 rounds, slipping the marker as you come to it.
2 To stop the brim from rolling a few rounds of ribbing are added.
Round 1: *K2, p2*; repeat from * to * to end of round.
Repeat round 1 three more times for a total of 4 ribbing rounds.

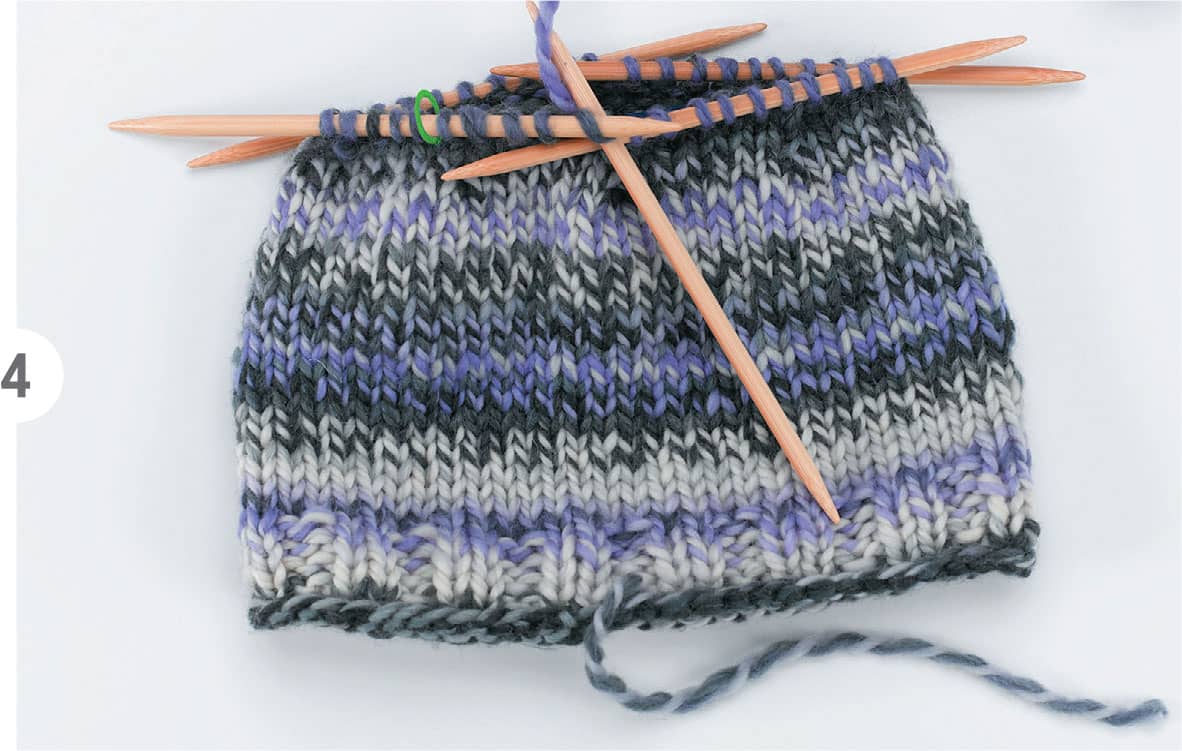
3 From this point on, knit all rounds. Continue knitting around and around until the length from the cast-on edge is approximately 51/2" (13 cm). The rolled brim below the ribbing will need to be unrolled to obtain an accurate measurement.
4 Shape top. The stitches now need to be decreased to shape the crown. Work through all of the rows shown below. Change to double-pointed needles when the stitches will no longer fit comfortably around the circular needle. Use four double-pointed needles to hold the stitches and the fifth needle as the free needle for knitting. Arrange the stitches as shown in the Skills section with 15 stitches on each needle to begin.
Round 2: *K13, k2tog*; repeat from * to * to end of round—56 sts remain.
Round 3: *K5, k2tog*; repeat from * to * to end of round—48 sts remain.
Round 4: Knit.
Round 5: *K4, k2tog*; repeat from * to * to end of round—40 sts remain.
Round 6: Knit.
Round 7: *K3, k2tog*; repeat from * to * to end of round—32 sts remain.
Round 8: Knit.
Round 9: *K2, k2tog*; repeat from * to * to end of round—24 sts remain.
Round 10: Knit.
Round 11: *K1, k2tog*; repeat from * to * to end of round—16 sts remain.
Round 13: Knit.
Round 14: *K2tog*; repeat from * to * to end of round—8 sts remain.
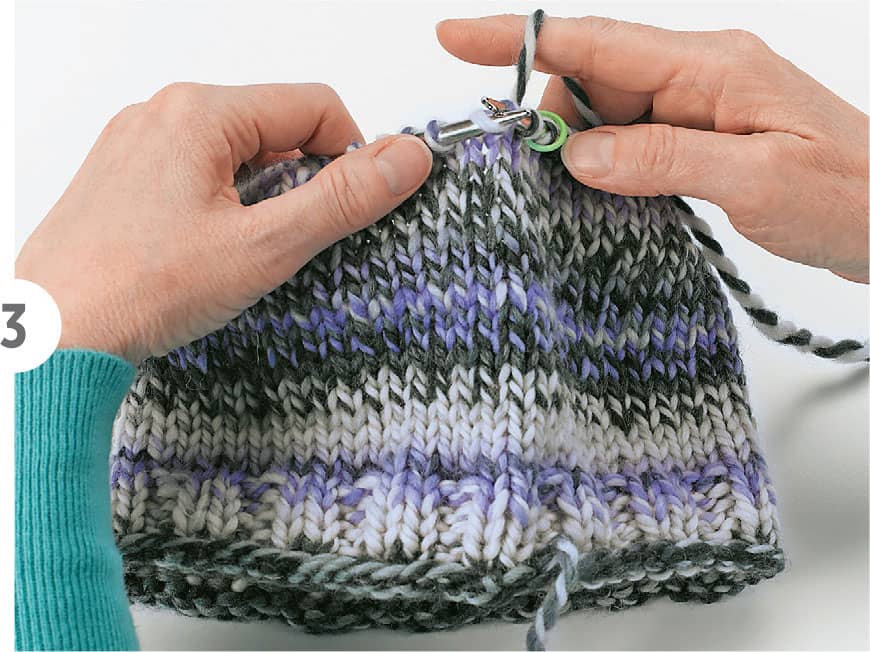
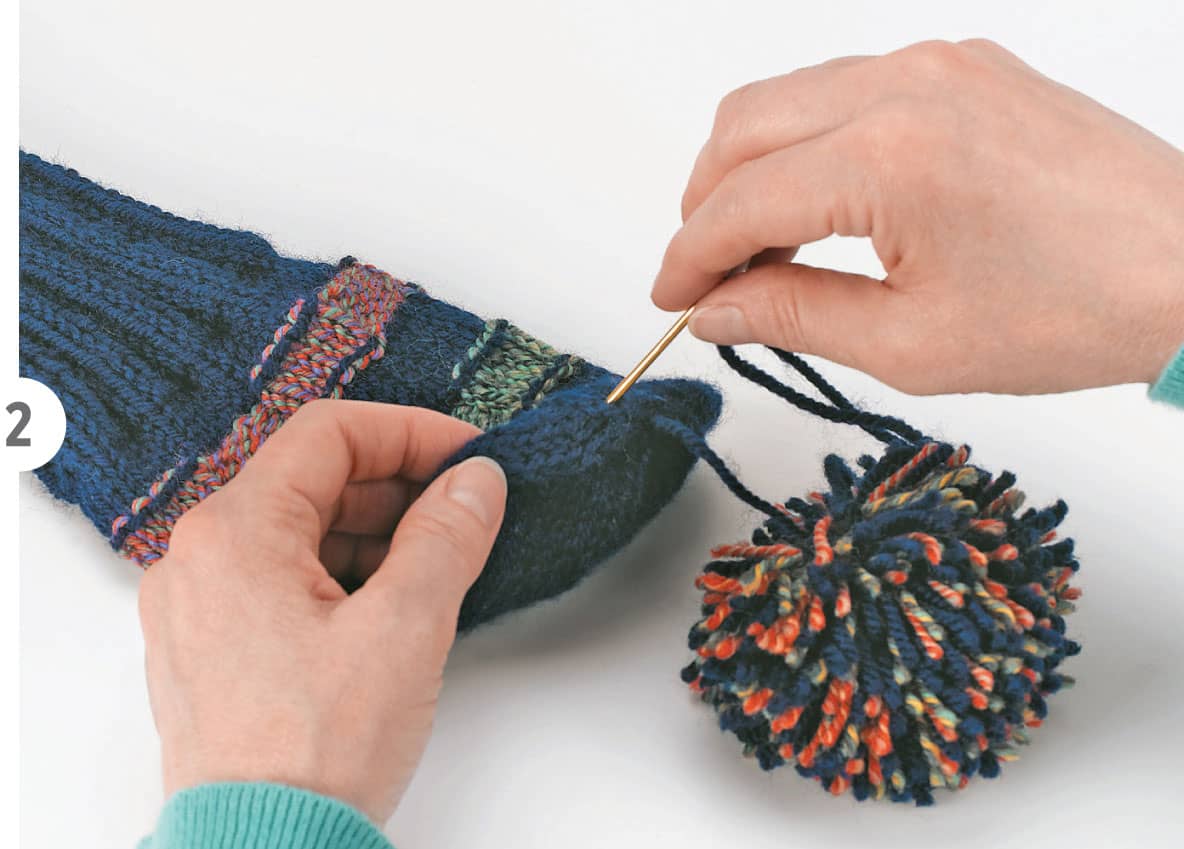
5 Finish the top. To finish the hat, cut the yarn, leaving a tail at least 8" (20 cm) long. Using a yarn needle, thread the tail through the remaining stitches and pass through the hole in the top of the hat to the inside. Pull the tail firmly to close the hole and weave the ends into the stitches in the inside of the hat to secure.
6 The last step is to add a decorative braid to the top. Begin by cutting three strands of yarn about 1 yd (0.9 m) long. Thread the strands on to the yarn needle and pass under a stitch on either side of the hole at the top of the hat. Pull the strands so that equal lengths are on either side of the center hole on top of the hat. There will now be six strands, three on either side of the hole.

7 Tie an overhand knot with all six of the strands. Divide the strands into two sections of three each and braid each section to the desired length. Tie an overhead knot at the end of the braid and trim the unused yarn.

8 Weave in all other ends and lightly steam block if desired.
Golf Club Covers
Making a set of golf club covers is a great way to reinforce your skills for knitting in the round. Instead of a circular needle this set is knit with double-pointed needles. Each cover has a different number of stripes that are made using different sections from a ball of self-striping yarn. Instructions begin shown here.

Skills and Useful Information
USING DOUBLE-POINTED NEEDLES
The circumference of the golf club cover is much smaller than the felted bag or hat. As was stated in the introduction to knitting in the round shown here circular needles have a limitation. You can knit an item that has a larger circumference than a particular circular needle, but you cannot make an item with a circumference that is smaller than a particular circular needle. Double-pointed needles can be used to knit a circumference as small as a few stitches, and they are also used for shaping the crown of a hat. As a new knitter, avoid metal double-pointed needles; they are much too slippery. Use bamboo or wood instead. Also, don’t use the very short double-pointed needles. Your needles should be at least 7" (18 cm).
MAKING A POMPOM
There are several different ways to make a pompom. You can purchase a pompom maker at your LYS or craft store or find lots of different directions online. Most of the methods you’ll find involve sandwiching a center cord between a pompom form (circular or rectangular). Once the desired number of wraps have been made around the form, they are cut and then tied with the center cord. This method can be a challenge; the ends can get loose and it can be difficult to tie the center cord tightly enough. The method shown in the directions below might take a little longer but it provides better control.
There are a few things to remember about making pompoms. The width of the rectangle or form being wrapped defines how big the pompom will be. If you want a pompom with a 3" (7.5 cm) diameter then make a form that is a little wider than 3" (7.5 cm) and at least 6" (15 cm) long. The number of wraps will determine how thick or lush the pompom will be. If you want a floppy, more casual pompom, then don’t make as many wraps. Also, the number of strands required is dependent on how thick the yarn is. The thicker the yarn the fewer number of wraps required.
1 Use a circular form such as a juice glass to draw a circle on cardboard and then cut it out with scissors. Measure the diameter and cut a piece of cardboard that is about 1/4" (6 mm) wider that the circle’s diameter and about 6" (15 cm) long. Cut a piece of yarn 30" (76 cm) long to be used as the pompom tie and set aside.

2 Wrap repeatedly around narrow width of the pompom form working from side to side as you wrap so that the yarn does not bunch up too thickly in any one spot. Don’t wrap the yarn too tightly; use a pencil or needle inserted under the wraps if necessary to make a bit of space.
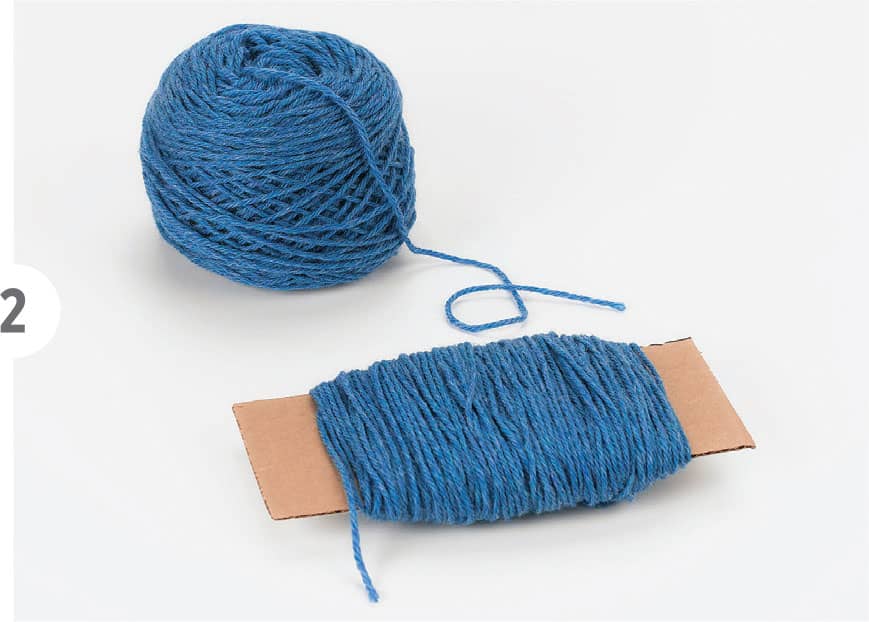
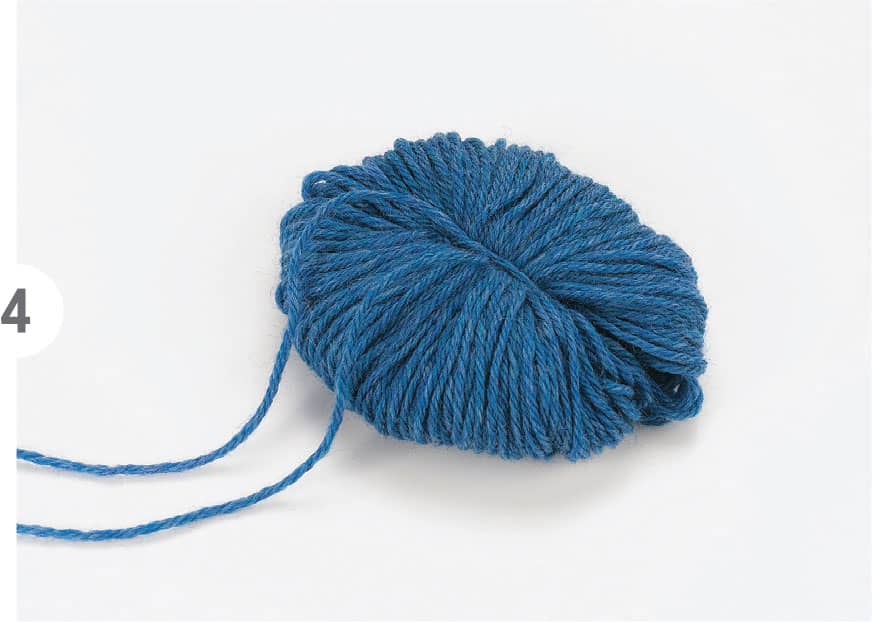
3 Wrap the yarn around the form about 200 times. Remove the wraps from the form (take the spacer out first) and lay the bundle on top of the pompom tie. The wraps should be perpendicular to the tie.

4 Pick up the opposite ends of the center cord. Tie a single overhand knot and begin to draw bundle of yarn together. Adjust the center cord as necessary so that it is in the middle of the yarn pieces. When the pieces have been drawn together enough so they can be picked up, hold the bunch together with one hand and with the other hand wrap one end of the center cord twice around the circumference of the sheaf. Tug firmly on the opposite ends of the center cord until it is drawn tightly around the sheaf and no more slack can be removed. Tie a double overhand knot to secure the pompom.
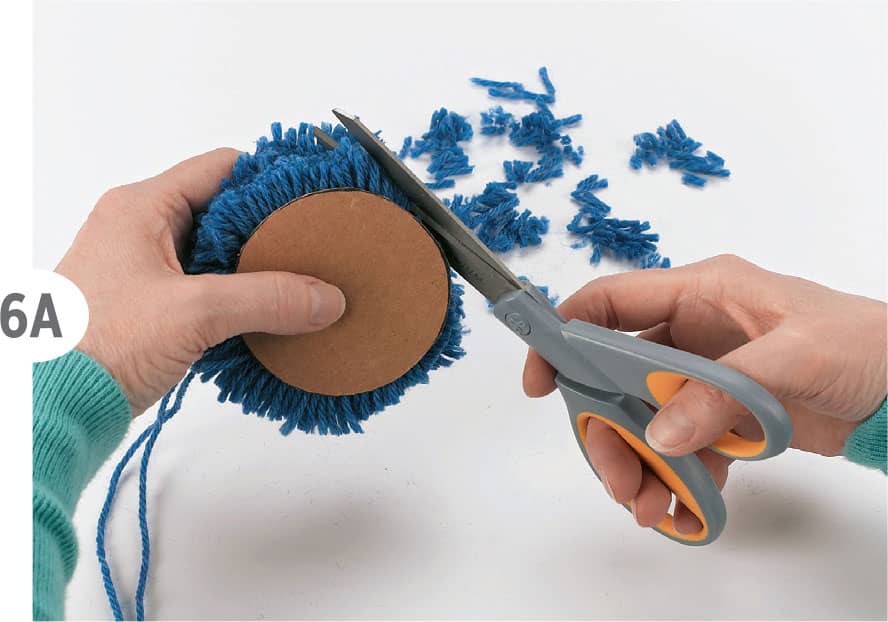
5 Insert scissors into the center of the loops on each side of the tie and cut the loops open. Be very careful not to cut the cord that was used to tie the pompom.

6 Keeping the center cords free (A), lay the cardboard circle over the pompom and trim the ends to a consistent length (B).

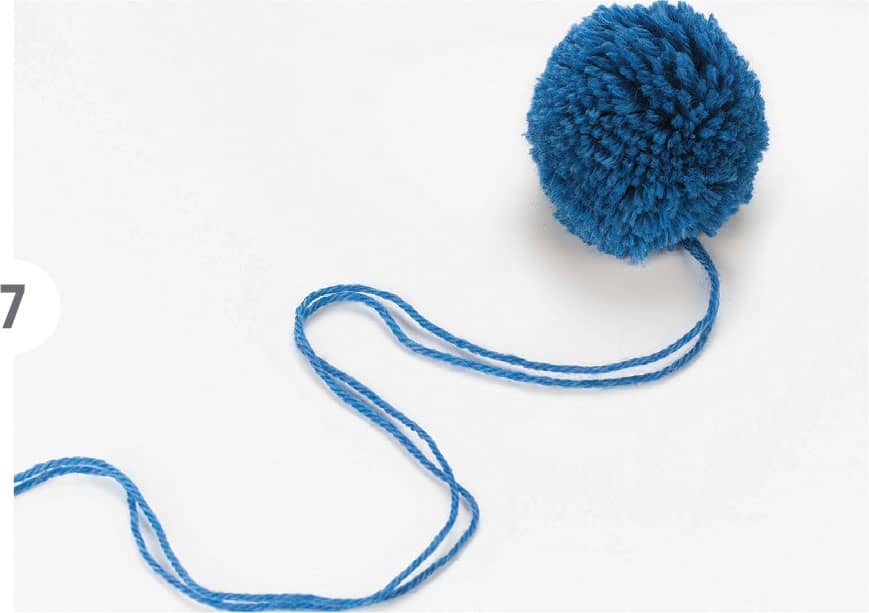
7 Fluff out the pompom by shaking vigorously. Continue trimming as needed.
How to Knit the Golf Club Covers
FINISHED DIMENSIONS |
• 10" (25.5 cm) circumference by 12" (30.5 cm) length |
PREPARING THE YARN
The self striping yarn (yarn B) that was used to make the contrasting stripes on the club covers varies in color from green to red. In order to be able to control the color of the stripe more exactly, wind the yarn into smaller balls so that each smaller ball starts with a different color.
MAKING THE CLUB COVER
1 Using smaller needle and yarn A, cast on 40 stitches and distribute the stitches on three needles with 14 stitches on needles 1 and 2 and 12 stitches on needle 3. Join in the round, being careful not to twist. Place marker to indicate the beginning of the round.
Round 1: Knit.
Round 2: *K2, p2*; repeat from * to * to end of round.
Repeat round 2, slipping BOR marker as you come to it until the length from the cast-on round is 6" (15 cm).

2 Change to larger needle and begin stripe pattern. Each club cover has a different number of stripes. If you are making the cover with three stripes, then follow all the rows of the pattern. For the one- and two-stripe versions, switch to stockinette stitch (knit every round) and yarn A after rounds 14 and 26, respectively. Shape all three covers the same, beginning with round 38.
Rounds 3 to 8: Knit to end of round. After completing round 6, cut yarn A, leaving a tail at least 8" (20 cm) long.
Round 9: Change to yarn B, *k5, p5*; repeat from * to * to end of round.
Rounds 10 to 13: *P5, k5*; repeat from * to * to end of round. After completing round 10, cut yarn B leaving a tail at least 8" (20 cm) long.
Round 14: Change to yarn A, *k5, p5*; repeat from * to * to end of round.
Rounds 15 to 19: Knit to end of round. After completing round 19, cut yarn A, leaving a tail at least 8" (20 cm) long. If you are making the club cover with one stripe, do not cut yarn A, and continue repeating round 15 until the length from the cast-on edge is approximately 101/2" (27 cm).
Round 20: Change to yarn B, *p5, k5*; repeat from * to * to end of round.
Rounds 21 to 24: *K5, p5*; repeat from * to * to end of round. After completing round 22, cut yarn B, leaving a tail at least 8" (20 cm) long.
Round 25: Change to yarn A, *P5, k5*; repeat from * to * to end of round.
Rounds 26 to 30: Knit to end of round. After completing round 30, cut yarn A, leaving a tail at least 8" (20 cm) long. If you are making the club cover with two stripes, do not cut yarn A, and continue repeating round 26 until the length from the cast-on is approximately 101/2" (27 cm).
Round 31: Change to yarn B, *k5, p5*; repeat from * to * to end of round.
Rounds 32 to 35: *P5, k5*; repeat from * to * to end of round. After completing round 33, cut yarn B, leaving a tail at least 8" (20 cm) long.
Round 36: Change to yarn A, *k5, p5*; repeat from * to * to end of round.
3 Shape top. All versions are worked the same from this point.
Round 37: Knit to end of round. To prepare for the decrease rounds, adjust the stitches while knitting this round so that there are 16 stitches on needles 1 and 2 and 8 stitches on needle 3. This will divide the stitches so that whole decrease segments are contained on the needles rather that split between needles.
Round 38: *K6, k2tog*; repeat from * to * to end of round—35 sts remain.
Round 39: *K5, k2tog*; repeat from * to * to end of round—30 sts remain.
Round 40: *K4, k2tog*; repeat from * to * to end of round—25 sts remain.
Round 41: *K3, k2tog*; repeat from * to * to end of round—20 sts remain.
Round 42: *K2, k2tog*; repeat from * to * to end of round—15 sts remain.
Round 43: *K1, k2tog*; repeat from * to * to end of round—10 sts remain.
Round 44: *K2tog*; repeat from * to * to end of round—5 sts remain.
4 Finish the top. To finish the club cover, cut the yarn leaving a tail at least 8" (20 cm) long. Using a yarn needle, thread the tail through the remaining stitches and pass through the hole in the top of the club cover to the inside. Pull the tail firmly to close the hole and weave the ends into the stitches in the inside of the club cover to secure. See the section about finishing the top of a hat for closing the hole in circular knitting shown here. Weave in all loose ends.
MAKING AND ATTACHING THE POMPOMS
1 Cut out a cardboard circle with a diameter of 3" (7.5 cm) and a rectangle that is 31/4" (8 cm) by 6" (15 cm). Cut a strand of yarn A 30" (76 cm) long and set aside for pompom tie. Using one strand of yarn A and one strand of yarn B, wrap yarn around the narrow width of pompom form about 125 times. Finish the pompom as shown here, steps 3 to 7.
2 To attach the pompom to the center top of the club cover, thread one strand of the center cord on a yarn needle. Pass the needle from the outside to the inside of the club cover. Repeat for the other strand working a stitch or two away.
3 Turn the club cover inside out and tie the two strands into a knot. To finish, weave in all loose ends.