Chapter 2. Basic Transformations
Chapter Objectives
Chapter Learning Objectives
 Identify job requirements.
- Set up a project.
- Manage files in the Project panel.
- Create a composition.
- Explore the After Effects user interface.
- Learn basic panel functions.
- Use the Composition and Timeline panels to edit a composition.
- Use the Timeline panel to animate a layer.
- Use Adobe Photoshop and Adobe Illustrator files in a composition.
- Apply an effect to a layer.
- Apply a mask to a layer.
- Add text to a composition.
- Set a layer as a parent to another layer.
- Add audio to a composition.
- Export a composition to Adobe Media Encoder for rendering to one or more final files.
Chapter ACA Objectives
For more information on ACA Objectives, see pages 294–299.
DOMAIN 1.0 Working in the Visual Effects and Motion Graphics Industry
1.1, 1.2, 1.4
DOMAIN 2.0 Project Setup and Interface
2.1, 2.2, 2.3, 2.4
DOMAIN 3.0 Organizing Video Projects
3.1, 3.2
DOMAIN 4.0 Creating and Modifying Visual Elements
4.1, 4.2, 4.3, 4.4, 4.6, 4.7
DOMAIN 5.0 Publishing Digital Media
5.1, 5.2
In the previous chapter, you learned some of the fundamentals of Adobe After Effects CC using a project that was partially completed. In this chapter, you’ll go a step further by starting a completely new project. You’ll animate some of the fundamental transformations that you can apply to a layer, such as scaling and rotation. You’ll also work with text and audio for the first time.
![]() ACA Objective 1.2
ACA Objective 1.2
Identifying Job Requirements
![]() Video 2.1
Video 2.1
Ruby’s Diner Intro
During pre-production you should clearly describe the purpose, audience, deliverables, and other considerations for the promo video that need to be resolved before production begins. Let’s take a look at the job requirements for Project 2:
 Client: Ruby’s Diner. They run a retro-style diner with lots of historic touches.
- Target audience: Customers who remember eating at the old-fashioned diners of the 1950s and 1960s.
- Purpose: Pique viewers’ interest in this historic diner.
- Deliverable: Brief animated splash screen for a phone app, just a few seconds long. Features the iconic flashing neon arrow sign outside the diner.
Listing Available Media Files
In this project, some media has already been acquired or created for the project. Let’s take a look at what’s in the folder for this lesson (Figure 2.1):
- arrow.psd: This is a Photoshop file of the photograph of the diner’s exterior arrow sign.
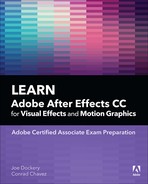
- rubys-diner-logo.ai: This is a layered Illustrator graphic that’s used in the After Effects project.
- starter.wav, short.wav, and long.wav: These are “zip” and “swipe” sounds intended to reinforce the animations.

Figure 2.1 Available media files on the desktop
The objects in the Adobe Illustrator vector graphic are organized using layers. It was organized this way because After Effects can animate each layer separately, and the project will take advantage of this.
There’s one type of file you saw in Chapter 1 that you don’t see here: an After Effects project file. In Chapter 1, that file was provided for you. But when you begin working on a new job, you’ll typically need to create a new After Effects project yourself, so you’ll do that next.
![]() ACA Objective 2.1
ACA Objective 2.1
Starting a New Project
![]() Video 2.2
Video 2.2
Starting a New Project
For this lesson, you’ll create a project that contains one composition. But keep in mind that when needed, one project can contain multiple compositions, as you learned in Chapter 1.
When you start After Effects from the application icon (not from a project document), it opens with the Start screen you saw in Chapter 1. From here, you can create a new project in one click.
To create a new project, do any of the following:
- If After Effects is not running, start After Effects, and when the Start screen appears, click the New Project button (Figure 2.2).

Figure 2.2 When you see the Start screen, simply click the New Project button.
- If After Effects is running and you don’t see the Start screen, choose File > New > New Project. If an unsaved project is open, you’ll be asked to save changes first, that project will be closed, and then a new untitled project will appear.
Choose File > Save As > Save As, name the project, and click Save.
Tip
If After Effects is open and no project is open, you see an empty, untitled project workspace. As long as you can see the Project panel, you can start adding media. Be sure to save this untitled project immediately.
The filename extension for an After Effects project is .aep, which you’ll see at the end of your project filename if your operating system is set to display filename extensions. In the After Effects application window title bar, you’ll see the folder path to the file you saved.
After creating a new project, what you see is an empty After Effects workspace.
The next thing to do is import the media for the composition you’re going to create. After Effects refers to media as footage.
Importing Footage Items into a Project
![]() ACA Objective 2.4
ACA Objective 2.4
All media items you import into After Effects are stored in the Project panel for use in any composition you create in that project. In Chapter 1 you learned that After Effects imports media by linking to them; it remembers the folder path to each media file instead of copying each of them into the project file.
There’s more than one way to import media into After Effects:
Tip
The keyboard shortcut for the File > Import command is Ctrl+I (Windows) or Command+I (macOS).
- Choose File > Import > Import File (or any other command on the Import File submenu), specify import options as needed, and click Import (Windows) or Open (macOS).
- Drag the media from the desktop to the Project panel in After Effects (Figure 2.3).

Figure 2.3 Importing footage can be as easy as dragging and dropping from the desktop into the Project panel.
- If you want to specify import options for an individual file, import that file alone, not as part of a group selection.
Setting Import Options for Photoshop Files
If you import a Photoshop file that uses layers, you can choose to have After Effects import each layer separately, or you can import it as a single footage item.
To import a layered Photoshop file:
Choose File > Import > File.
Navigate to the folder containing the Photoshop file you want to import, and select it.
If you can’t select the Photoshop file, look below the file list and make sure the Enable menu is set to All Acceptable Files or Photoshop. Under that menu, Format should say Photoshop.
In the Import Kind menu (Figure 2.4), choose whether you want to import the Photoshop file as Footage or a Composition:
- Footage means the Photoshop file imports as a single item, no matter how many layers it has.
- Composition means the Photoshop file is imported as a composition, converting each layer in the Photoshop file into a layer in the composition. Use this option when you plan to animate the Photoshop file layers independently.
- Composition – Retain Layer Sizes means the converted layers use the sizes they had in Photoshop, instead of the size of the converted composition. You’d consider this option if you want to preserve each layer’s anchor point—the reference point around which it rotates and scales.

Figure 2.4 Choosing how to import a Photoshop file.
Click Import or Open.
Another dialog box appears asking how you want to handle layer styles, such as drop shadows, in the Photoshop file. The Photoshop file used for this lesson doesn’t use layer styles, so you can leave this set to Editable Layer Styles.
Confirm the Import Kind setting, and select an option under Layer Options. If you select Choose Layer, select which layer to import and how to handle layer styles (Figure 2.5).

Figure 2.5 Choosing to import one layer from a Photoshop file.
After Effects can edit Photoshop layer styles, so choosing Editable Layer Styles preserves maximum flexibility. But if you won’t need to edit the layer styles, choosing Merge Layer Styles Into Footage may allow frames to render slightly faster, but the appearance of the layers may change slightly.
 Video 2.3
Importing Your Media
If you choose to import the Photoshop file as a single footage item, you would instead be asked if you want all the layers merged into one footage item or to pick one layer to import. You can also import just one layer out of the file by selecting Choose Layer; this is what is demonstrated in Video 2.3.
Click OK.
The Photoshop file now appears as a composition or a footage item in the Project panel.
Setting Import Options for Illustrator Files
When you import layered Illustrator files, you get many of the same options you saw for Photoshop files. You can import an Illustrator file as a composition or a footage item, and if you import it as a footage item, you can choose whether to import all layers as one footage item or to import one layer.
When you import a layered Illustrator file as a composition, each layer appears in a folder named after the Illustrator file (Figure 2.6). You can identify the Illustrator layer content in the Project panel by recognizing the Illustrator document icons next to the footage item names.

Figure 2.6 Illustrator file icons indicate that these After Effects layers were converted from Illustrator layers.
![]() ACA Objective 2.2
ACA Objective 2.2
Exploring the Project Panel
![]() Video 2.4
Video 2.4
Organizing Your Files
When you built the Baxter Barn project in Chapter 1, you worked from a partially completed composition, with footage items already imported into the project. You mostly used the Composition and Timeline panels. But in Chapter 1 you learned that there were actually three main panels in After Effects; the third panel is the Project panel. Now that you’re creating a new project yourself, it’s time to take a closer look at the Project panel.
Tip
The keyboard shortcut to display the Project panel is Ctrl+0 (Windows) or Command+0 (macOS).
As with other panels, if the Project panel is hidden but you can see its tab, click the Project panel tab to bring it forward. If you can’t even see the tab, choose Window > Project.
You’ve already seen that the primary purpose of the Project panel is to provide a list of items used in the project. The Project panel lists items you import, such as video clips, still images, and audio. The Project panel can also include items you create in After Effects such as compositions as well as other items you haven’t worked with yet such as solids and adjustment layers.
The Project panel takes up relatively little screen space in the beginning. If you want to see the additional information displayed in Project panel columns, drag its right edge to make the panel wider (Figure 2.7).

Figure 2.7 To see more information about items, make the Project panel wider.
Tip
To temporarily maximize any panel to the size of the After Effects application window, position the pointer inside the panel and press the ` (grave accent) key; this key also has a tilde (~) printed on it. When you’re ready to return to editing, restore the panel to its original size and position by pressing the same key again.
![]() ACA Objective 2.4
ACA Objective 2.4
Organizing Media into Project Panel Folders
The bigger your project, the more important it is to organize your media. If you’re building a composition that uses many elements and you’re on a deadline, you don’t want to waste time looking through a long list of footage, graphics, and audio all mixed together. Instead, organize your media into folders in the Project panel. You can create folders based on media type, as in this lesson, but for some projects it might be more efficient to organize by other criteria such as scene or subject.
Note
If a folder is selected when you create a new folder, the new folder is created inside the selected folder. If you want to create a folder at the top level of the Project panel, choose Edit > Deselect All to make sure no items are selected.
To create a folder:
Click the Create a New Folder button at the bottom of the Project panel.
With the folder name highlighted, enter a new name, and press Enter/Return.
Note
If you’re accustomed to editing names by double-clicking, don’t use that method in After Effects. In After Effects, double-clicking opens a Project item (such as footage or a composition) or a layer. In After Effects, the shortcut to renaming an item is to press Enter or Return.
You can organize items into Project panel folders the same way you do on the desktop. Simply drag items into folders.
In the Project panel, the folders you create apply only to that project. Another project can organize the same media into different folders, and the Project panel folders in both projects can be different than how the media is organized in folders on your desktop.
As demonstrated in Video 2.4, organize the imported files into folders based on their type, such as audio files, visual media, and compositions (Figure 2.8).

Figure 2.8 Media organized into folders in the Project panel.
Looking at the Bottom of the Project Window
As with other panels you’ve seen, the bottom of the Project panel provides a row of buttons and indicators (Figure 2.9):
- Interpret Footage. You won’t use Interpret Footage yet; it’s an advanced feature that’s useful when you’d like to change how After Effects handles a footage item without converting it. For example, if you shot high-speed video at 240 frames per second, you could use Interpret Footage to tell After Effects to read the same number of frames at 24 frames per second, resulting in 10x slow-motion playback.
- Create A New Folder. You’ve already used this to create folders in the Project panel so that you can organize your footage.
- Create A New Composition. This is the same as the Composition > New Composition command, provided as a button for convenience.
- Project Settings. This is the same as the File > Project Settings command, provided as a button for convenience. It displays the bit depth of the selected project.
- Delete. This removes any items selected in the Project panel. If a footage item is selected, it’s deleted only from the project, not from your storage drive.

Figure 2.9 Controls at the bottom of the Project panel
Looking at Project Window Columns
Notice the scroll bar at the bottom of the Project panel. Scrolling the panel horizontally reveals additional columns, similar to a folder window in List view on your desktop. Use the columns to quickly see details about items in the Project windows. For example, looking at the Type column instantly tells you which items are Photoshop files, WAV audio files, or After Effects compositions.
You can display much more information than what’s shown in the default columns. To customize the information displayed in the columns, choose Columns from the Project panel menu and then select or deselect items on the Columns submenu (Figure 2.10).

Figure 2.10 Customizing Project panel columns
Tip
A quick way to control columns is to right-click (Windows) or Ctrl-click (macOS) a column heading. You’ll see both a Hide This command and a list of columns you can show or hide.
Creating a New Composition
It’s important to keep in mind the difference between a project and a composition. You’ve created a new project and imported media items into it, but to combine the media, you have to put them into a composition. Creating a new composition is the next thing you need to do.
![]() ACA Objective 2.1
ACA Objective 2.1
![]() Video 2.5
Video 2.5
Creating a New Composition
To create a new composition:
Do one of the following:
- Choose Composition > New Composition.
- At the bottom of the Project panel, click the Create A New Composition button.
In the Composition Settings dialog box (Figure 2.11), enter the specifications for the composition, and click OK.

Figure 2.11 Click the Create A New Composition button to begin setting up a new composition.
Tip
The keyboard shortcut to create a new composition is Ctrl+N (Windows) or Command+N (macOS).
You were introduced to the three tabs in the Composition Settings dialog box in Chapter 1. The number of settings can be intimidating, but usually there are just a few settings you need to change.
Tip
While the list of Composition Settings presets is very long, typical video projects today are most likely to need one of the Composition Settings presets that start with HDTV or UHD. Many of the other presets (such as those with names starting with NTSC, DV, or HDV) are for older or less commonly used formats.
Many compositions, such as this one, require changing settings only in the Basic tab. Within the Basic tab, in many cases you can simply choose the preset that most closely matches the requirements of your job.
The presets are based on common television and film formats. But the video in this lesson is intended for a phone app with a vertical design, and there is currently no preset for that. In Video 2.5, Joe edits the frame dimensions of the composition to 720x1280 pixels, consistent with a 16:9 aspect ratio screen held vertically.
Most of the other composition settings can be left as they are. Except for the frame size, the rest of the settings are consistent with standard HD video, which uses square pixels and a 29.97 fps frame rate, using drop-frame time code.
Of the options below Frame Rate, Duration is the one that makes a material change in the composition; the lesson uses a 5-second duration (0;00;05;00). As covered in Chapter 1, the Resolution option is for previewing only, and you can also change it in the Composition window. The Start Timecode option simply offsets the time ruler. The Background Color option does not affect the final export. But the Duration sets how much time is visible in the Timeline panel for you to work with, so you want the Duration to be long enough for the intended animation.
![]() ACA Objective 4.4
ACA Objective 4.4
Adding Footage to a Composition
After you create a composition, opening it displays both the composition frame in the Composition panel and the composition timeline in the Timeline panel. At this point, you’re ready to add footage to it.
![]() Video 2.6
Video 2.6
Adding Media to a Composition
When you add footage to a composition, it becomes a layer in the composition. The layer content is visible in the Composition panel, and the layer is visible in the Timeline panel.
Tip
You can add footage directly from the desktop to a composition by dragging and dropping it into the Composition or Timeline panel, bypassing the Project panel. The footage is automatically added to the Project panel
In Video 2.6, Joe demonstrates an important difference between dropping footage into the Composition panel and dropping it into the Timeline panel (Figure 2.12):
- Dropping footage into the Composition panel positions the new layer where you dropped it.
- Dropping footage into the Timeline panel centers the new layer in the Composition window.

Figure 2.12 Controlling the position of a layer you drag into a composition
Both ways are useful depending on whether you want to add the layer at a specific position, or in the exact center of the composition.
Don’t like going through the Import dialog box again and again? Without leaving After Effects, you can use the Media Browser panel (Figure 2.13) to browse your computer and all of the volumes connected to it, including network volumes and media cards. When you locate media using the Media Browser panel, you can import it in one step by simply dragging it into the Project folder.

Figure 2.13 Use the Media Browser to browse connected storage drives from within After Effects.
Whether or not you use the Media Browser, before you import media into a project, always make sure you first copy the media to a drive that will always be connected when you edit that project. This highlights a critical difference between the Media Browser and the Project panel: Content that you see in the Media Browser is not necessarily imported into any project, whereas content you see in the Project panel is definitely imported into that project.
In addition, it’s important to add media in a consistent and organized way. Use the file organization guidelines in the section “Managing Files for Video Production” in Chapter 1. For example, if someone on your team needs to find an audio file, it should be easily found in a folder of audio files, not mixed in with other kinds of files in a folder containing hundreds of items. Good organizational habits also make it easier to locate media in archived projects that you come back to later.
Resizing a Layer
When you want to change the size of the layer, there’s more than one way to do it.
![]() ACA Objective 4.7
ACA Objective 4.7
To resize a layer by dragging:
Select a layer. (If you just added the layer to the composition, it might still be selected.)
In the Composition window, Shift-drag the corner handle of the selected layer (Figure 2.14).

Figure 2.14 Scaling by dragging a transformation handle
Tip
The Fit To Comp, Fit To Comp Width, and Fit To Comp Height commands on the Transform submenu are also available when you right-click (Windows) or Ctrl-click (macOS) a layer.
To resize a layer by specifying a value:
In the Timeline panel, reveal the Scale property for the layer. A quick way to do this is to select the layer and press the S key.
Change the Scale values (Figure 2.15) by entering new ones, or by scrubbing the values.

Figure 2.15 Editing the Scale property of a layer
To scale a selected layer to fit the composition frame:
- Choose Layer > Transform > Fit To Comp, Fit To Comp Width, or Fit To Comp Height.
Creating a Solid
A solid is a flat plane of a single color. It may sound boring...who would need that? In fact, a solid is a versatile type of layer that can help solve a wide range of problems. The most obvious way to use a solid is as a simple background, but a solid also makes a great base for rendering an effect. In Video 2.7, Joe wants to render the Lens Flare effect, but you can’t render an effect out of nothing. Joe solves that problem by creating a solid layer so that there’s something on which to render the lens flare.
![]() ACA Objective 4.1
ACA Objective 4.1
![]() Video 2.7
Video 2.7
Creating a Solid in the Default Workspace
To create a solid:
Tip
The keyboard shortcut to display the Project panel is Ctrl+0 (Windows) or Command+0 (macOS).
Make sure the Composition panel or Timeline panel is active. You can create a solid only in a composition, not from the Project panel.
Choose Layer > New Solid.
Specify options in the Solid Settings dialog box (Figure 2.16). For the Ruby’s Diner composition, set the Background color to black.

Figure 2.16 The Solid Settings dialog box
Typically, you’ll specify Width, Height, and Color; you’ll rarely need to set Pixel Aspect Ratio.
Click OK.
After Effects automatically stores solids in the Project panel, in a folder called Solids.
Applying an Effect to a Layer
Applying effects is one of the most common things you’ll do to a layer. That’s no surprise in an application where the word “effects” is part of its name. Therefore, it’s important that you become familiar with the workflow of adding and editing effects.
![]() ACA Objective 4.4
ACA Objective 4.4
![]() ACA Objective 4.6
ACA Objective 4.6
In Video 2.7, the Lens Flare effect is applied to a solid layer.
To apply an effect:
Make sure the Effects & Presets panel (Window > Effects & Presets) is visible.
Find the effect you want by doing one of the following:
- Expand the category headings in the Effects & Presets panel until you find the effect you want.
- If you already know at least part of the name of the effect, type it into the search field at the top of the Effects & Presets panel, and press Enter or Return.
Drag the effect from the Effects & Presets panel and drop it on the layer in the Composition panel or Timeline panel (Figure 2.17).

Figure 2.17 Applying an effect to a layer
As you dropped the effect on the layer, you might have noticed that the Effect Controls panel popped up to the front. The Effect Controls panel contains the options for a selected effect. If multiple effects are applied to a selected layer, you see those effects presented as a stack in the Effect Controls panel. When the name of an effect is expanded in the Effect Controls panel, you see its properties.
To edit an effect:
Select the layer containing the effect you want to edit.
In the Effect Controls panel, expand the effect to display its properties.
Edit the effect properties the same way you learned to edit layer properties in the Timeline.
This is a good example of the standard effects workflow in After Effects: Apply the effect from the Effects & Presets panel, and edit it in the Effect Controls panel.
Notice that there are stopwatch icons next to the effect properties. It’s just like the Timeline panel; anywhere you see a stopwatch, that’s a property you can animate. In fact, after you apply an effect, its properties appear both in the Effect Controls panel and in the Timeline.
Try it with the Lens Flare effect. Expand the properties for the Black Solid 1 layer and you’ll see that an Effects category was added; expand that and you’ll find the same instance of the Lens Flare effect and its properties. You can edit the effect in the Effect Controls panel or the Timeline panel; do whichever is more convenient for you.
Earlier you learned that much of the work in After Effects takes place in three main panels: Project, Composition, and Timeline. If you work with effects a lot, your typical set of panels expands to five: Project, Composition, Timeline, Effects, and Effect Controls.
Applying a Blending Mode
Many graphics and video applications offer blending modes. A blending mode is a method of combining the pixel color of one layer with the pixel colors of the layers behind it in the composition. A layer starts out using the Normal blending mode, which means when two layers are on top of each other, you see only the top layer (not counting the Opacity setting or masks).
If you have two layers with different colors, applying various blending modes could produce a result that’s brighter, darker, with more contrast, or with more saturation or less saturation.
![]() ACA Objective 3.2
ACA Objective 3.2
In Video 2.7, Joe applies the Screen mode to the Black Solid layer. He does this because he knows that when you apply Screen mode, black drops out so that only the lighter parts affect the layers below, which is exactly what you want when applying an effect that looks like a light source.
To apply a blending mode to a layer:
Click Toggle Switches/Modes at the bottom of the Timeline panel so that the Mode heading appears. This swaps out the row of layer switches with blending mode options.
Choose a blending mode from the Mode pop-up menu (Figure 2.18). For the solid with the lens flare effect, choose Screen so that the darker areas drop out.

Figure 2.18 Applying a blending mode to a layer
It can be a challenge to sort out what the blending modes do and which one to choose. This is because each blending mode represents a mathematical expression, which is not always easy to label in one or two words. But you can think of blending modes in these general categories, and when you know what result you want, you can try the blending modes within a category.
Tip
A quick way to preview blending modes is to press Shift+- or Shift+=. These keyboard shortcuts cycle forward or backward, respectively, through the next or previous blending mode, respectively. This shortcut must be used on the main keyboard, not on a numeric keypad.
After Effects Help describes both the categories of blending modes and each blending mode, here:
helpx.adobe.com/after-effects/using/blending-modes-layer-styles.html
Tip
Many effects include blending mode properties. They give you an additional degree of control over how the effect looks, independently of the blending mode applied to a layer.
Drawing a Mask with a Shape Tool
In Video 2.7, the lens flare is much larger than needed. It needs to be only slightly larger than one of the lights on the sign. There are several ways it could be limited to a small circle; Joe chooses to draw a circular mask. The solid with the lens flare layer appears only within the mask; the rest of that layer outside the mask is hidden.
![]() ACA Objective 3.2
ACA Objective 3.2
To draw a circular mask over the lens flare:
Select a layer.
Select the Ellipse tool (
 ) from the Tools panel (Figure 2.19). If the Ellipse tool is not visible, press and hold the mouse button on the Rectangle tool (or whichever shape tool is visible) to reveal the other tools in the group.
Figure 2.19 Selecting the Ellipse tool
In the Composition window, Shift-drag the tool over the lens flare (Figure 2.20). If it isn’t properly centered, before you release the mouse button reposition the mask by holding down the spacebar and dragging.

Figure 2.20 Drawing a mask
It’s important to remember what’s selected when you use a shape tool. If no layer is selected, drawing with a shape tool creates a new shape layer. If a layer is selected, drawing creates a mask for the selected layer. So, if you intend to create a mask, make sure a layer is selected first.
The mask has a hard edge by default. You can soften its edge by adjusting its Mask Feather property.
Expand the Masks property group for the Black Solid 1 layer, expand properties for Mask 1 (that’s the mask you just drew), and increase the Mask Feature value until the mask looks like a glowing light.
Tip
You can also draw a shape or mask with the Pen tool (
 ), if you’ve learned how to use it. Like the shape tools, the Pen tool creates vector shapes. You can also paste a path you drew and copied from Illustrator.
With the Black Solid 1 layer still selected, drag the Selection tool in the Composition panel to position that layer over the light at the top of the arrow (Figure 2.21).

Figure 2.21 Positioning the mask over the first ligh
Animating Flashing Lights
![]() Video 2.8
Video 2.8
Animating Solids
An important feature of the Ruby’s Diner composition is animating the lights of the arrow sign. Fortunately, the videos you’ve watched so far have already demonstrated all the skills you need to accomplish this. You only need to put them all together within the context of this project.
![]() ACA Objective 4.7
ACA Objective 4.7
The way the lights are animated in this lesson is not the only way to accomplish the look of flashing lights. Again, it’s typical for there to be multiple ways to reach a goal. For example, it would also be possible to simulate a glowing light by drawing a white circle shape with a feathered edge. You can create the glowing light using any method you can think of, as long as it achieves the result without creating workflow complications.
In this lesson, the lights are created by applying a circular mask to a black solid layer with the Lens Flare effect applied and animated by changing the opacity of the layer.
To make the lights flash:
Use the animation skills you learned earlier to reveal the Opacity property for the light layer. Add two keyframes that animate Opacity from 0% to 100% (Figure 2.22). As demonstrated in Video 2.8, you can also add easing to the keyframes, as you learned in Chapter 1.

Figure 2.22 Two keyframes that begin and end, raising the opacity of a light layer from 0% to 100%
Preview the animation to check the timing of the keyframes. If the timing doesn’t seem right to you, adjust how long it takes for the light to come on by dragging the second keyframe closer to or farther away from the first keyframe.
You’ll soon be duplicating the layer, so if you haven’t renamed the black solid layer yet, now is a good time to give it a more descriptive name.
With the layer selected, in the Timeline panel press Enter (Windows) or Return (macOS) and name the layer Light.
With the light layer selected, chose Edit > Duplicate.
In the Composition panel, use the Selection tool to reposition the layer over the next light in the sign (Figure 2.23).

Figure 2.23 Positioning the duplicated light layer
In the Timeline panel, drag the duplicate layer to the right to offset it later in time so that the duplicate layer’s light comes on a few moments after the first light (Figure 2.24).

Figure 2.24 Light layer duplicated and offset in time from the first layer
Tip
The keyboard shortcut to duplicate a layer is Ctrl+D (Windows) or Command+D (macOS).
Preview the animation to check the timing between the lights coming on. Adjust it if you want.
Repeat steps 4 through 6 so that each light on the sign has a switched-on glow positioned over it. Be sure to offset each duplicate in time by the same number of frames, and don’t forget to also reposition each light in the Composition panel (Figure 2.25).

Figure 2.25 Playing back the composition to test the timing and positioning of each light
Turning Off the Lights
The goal is to design the animation so that the lights come on in sequence and then go off in sequence. A quick way to turn off the lights is to trim the end of each light layer so that it simply stops appearing.
![]() ACA Objective 3.1
ACA Objective 3.1
![]() ACA Objective 4.3
ACA Objective 4.3
![]() Video 2.9
Video 2.9
Trimming a Laye
To turn off the lights:
Select the first light layer.
Change the current time to when you want that light to turn off.
Tip
If you have a keyboard with a number keypad, you can select layers by number. In the Timeline panel, look at the number next to the label of a layer. Press that number on a numeric keypad to select that layer.
Tip
If you want to use the keyboard to move the current time, don’t simply press the Left Arrow or Right Arrow key as you might in other time-based software. In After Effects, the arrow keys nudge the position of the current layer. Instead, press Ctrl+Left Arrow (Windows) or Command+Left Arrow (macOS) to go back in time by one frame, and press Ctrl+Right Arrow or Command+Right Arrow to go forward in time by one frame.
Trim the end of the layer to the point in time when you would like the light to turn off. While you can do this by dragging the end of the layer, Video 2.9 demonstrates the fast shortcut of pressing Alt+] (Windows) or Option+] (macOS), which sets the Out point of a selected layer to the current time(Figure 2.26).

Figure 2.26 Layer trimmed.
Repeat steps 3 and 4 for the rest of the lights, setting the trim time to a slightly later frame in each one so that the lights turn off in sequence (Figure 2.27).

Figure 2.27 All layers trimmed.
Putting the Lights in Their Own Composition
In Chapter 1 you learned that it can be useful to build a complex composition out of simpler compositions. When you put one composition into another, that’s called nesting one composition within another.
![]() ACA Objective 3.1
ACA Objective 3.1
Ideally, you’d work out the structure of a composition before you start building it, planning out which parts of animation should be their own compositions within the larger one. But sometimes you don’t realize that part of the animation would be easier to manage as its own composition until you’ve already been working on it for a while.
Fortunately, it’s easy to select one or more layers and convert them into a composition. This is called pre-composing, or pre-comping for short. When you pre-compose, the layers you selected are replaced with a composition containing those layers. In many cases, this doesn’t change the appearance of the composition. In some cases, pre-composing solves a problem that prevented you from giving a composition the appearance you want.
In Video 2.9, all of the light layers are pre-composed into a new composition named Lights Combo. In this case, they’re pre-composed primarily for organizational reasons. You can see how much simpler the Timeline Panel looks when all of the Lights layers are moved into their own composition within the Ruby Diner composition.
To pre-compose layers:
In the Timeline panel, select the layers you want to nest into their own composition. In this lesson, that would be the lights layers you’ve just been working with.
Choose Layer > Pre-Compose.
In the Pre-Compose dialog box, specify options and click OK (Figure 2.28):
- New Composition Name. This is the same as naming a composition in the Project panel. For this lesson you can enter the name Lights combo.
- Leave All Attributes In. This applies only if you had selected a single composition. Selecting it means any edits to the layer become applied to the composition that replaces it.
- Move All Attributes Into The New Composition. Edits applied to the selected layer stay with that layer as it’s moved into the new composition that replaces it in the current composition.
- Adjust Composition Duration To The Time Span Of The Selected Layers. If the selected layers have a different duration than the composition, the new nested composition takes on the duration of the selected layers.
- Open New Composition. Open the pre-composed composition after creating it; useful if you want to edit the new nested composition immediately after creating it.

Figure 2.28 The Pre-Compose dialog box
The selected layers are replaced by a composition called Lights combo.
Using a Nested Composition
A nested composition created by pre-composing works the same way as any other composition. You can edit it the same way you’d open any other composition: by double-clicking it. That composition will appear as tabs in the Composition panel and Timeline panel, and you’ll see the layers that were moved into it.
Because pre-composing creates a new composition, After Effects adds that new composition to the Project panel. It’s added at the same level (in the same folder) as the composition containing it.
In Video 2.9, the lights animation is played twice, but the entire animation didn’t have to be built again, or even copied. Instead, Joe duplicated the animation in a single step by dragging the Lights Combo from the Project panel to the same Ruby’s Diner composition, creating a second instance of the nested composition. Being able to repeat the animation by adding another nested instance of that composition saves a lot of time and effort. And if the animation is edited in the Lights Combo composition, that change will appear in both instances used in the Ruby’s Diner composition.
Adding Text
When you add text to a composition, the text becomes a new layer in the composition. You can work with text in ways that are quite unlike most other applications you may have used. For example, you can animate text position, color, size, character spacing, and other text properties over time.
![]() ACA Objective 4.2
ACA Objective 4.2
![]() Video 2.10
Video 2.10
Working with Text
In After Effects, adding a text layer can take three forms (Figure 2.29):
- Point text. The text you enter grows out from a point that you set by clicking the Horizontal Type tool (
 ). For example, if a paragraph is center-aligned, a line of text grows from the middle of the text layer.
 - Paragraph text. The text occupies a rectangular area that you specify by dragging the Horizontal Type tool.
- Text on a path. Text can follow a line that you draw, for example, using the Pen tool. You’ll try this in Chapter 3.

Figure 2.29 Three types of text you can add to a composition
In this lesson you’ll concentrate on Point text.
To add point text:
Position the Horizontal Text tool in the Composition panel where you want to start typing, and click.
Type the text you want to add (Figure 2.30).

Figure 2.30 Adding point tex
To format the text, do one of the following:
- To format all of the text on a text layer, either highlight all of the text with the Horizontal Type tool, or switch to the Selection tool and make sure the type layer is selected.
- To format some of the text, highlight a range of characters with the Horizontal Type tool.
To edit the characters on a text layer:
Do one of the following in the Composition panel:
- With the Horizontal Type tool, highlight the text or click a text insertion point in the text.
- With the Selection tool, double-click a text layer. All of the layer text is selected.
Edit the text as needed.

Figure 2.31 You can format individual characters by highlighting them first.
Exploring the Character Panel
In the Character panel you can edit text formatting down to the letter. For example, you can apply a different font or color to individual characters.
Character formatting is applied using options that include the following (Figure 2.32):
- Font. This includes the font family, such as Arial, and style, such as Bold.
- Color. You can apply color to the fill and the stroke (outline) of selected characters.
- Stroke. When you add a stroke outline to characters, you can control its width and how it’s combined with the fill.
- Size. You can specify how large characters are, in pixels.
- Spacing. Leading controls space between lines. Tracking controls space between a range of characters. Kerning controls space between a pair of characters. Tsume controls spacing around a character (used for Asian fonts).
- Scaling. You can stretch selected characters vertically or horizontally. This is different from stretching the entire text layer.
- Position. You can use Baseline Shift to offset selected characters higher or lower than other characters on the same line.
- Capitals. Apply All Caps to make characters all capital letters, or Small Caps to use capital letters for lowercase characters.
- Faux styling. When you need a bold or italic variant of a font but the font doesn’t provide one, you can apply Faux Bold or Faux Italic. These alter characters digitally, even though that doesn’t look as good as a true bold or italic font variant.
- Ligatures. Some character pairs, such as th or fl, can be substituted with a single character that represents both, a long tradition in typography. Enabling the Ligatures option lets After Effects automatically substitute ligatures where available in the font in use.
- Hindi digits. If you enter text in a Hindi font, you can represent numbers using Hindi digits rather than Arabic numerals.

Figure 2.32 The Character panel
Many of the other options are included for more precise typographical adjustments.
For more detailed descriptions of Character panel options, see “Formatting characters and the Character panel” in After Effects online help:
helpx.adobe.com/after-effects/using/formatting-characters-character-panel.html
Exploring the Paragraph Panel
The Paragraph panel contains options that apply only at the paragraph level, no matter which characters you select. A paragraph is defined when you press the Enter or Return key while typing text.
You can apply paragraph formatting using options that include the following (Figure 2.33):
- Alignment. This controls whether the lines of a paragraph are all aligned to the left, center, or right edge of a text layer.
- Justification. Justified lines of text fill the full width of a text frame by automatically spacing the characters on each line. Because the last line of a paragraph is typically shorter than the rest, the difference between the justification options comes down to how the last line is aligned.
- Spacing. You can add space before or space after paragraphs. Like leading, this can make text easier to read.
- Indents. Indenting text moves it in from the left or right edges of the text layer. There’s also an Indent First Line option because some style standards indent the first line of a paragraph.
- Reading direction. You can make characters read left to right, or right to left, depending on the language used in a paragraph.

Tip
The options in the Character and Paragraph panels are based on type attributes developed over centuries of traditional typography. To better understand how to use each of them, consider taking a typography class or studying books and videos about typography.
Figure 2.33 The Paragraph panel
For more detailed descriptions of Paragraph panel options, see “Formatting characters and the Paragraph panel” in After Effects online help:
helpx.adobe.com/after-effects/using/formatting-paragraphs-paragraph-panel.html
Aligning Layers
Normally, you’d type a single sentence such as “Eat at Ruby’s” into a single text layer. In this lesson, the only reason the words were entered as separate layers is so that each word can be animated independently. But the three words still need to appear to be one sentence, so it’s important that they align precisely. After Effects offers several ways to align not just text layers, but layers of any kind.
![]() ACA Objective 2.3
ACA Objective 2.3
![]() Video 2.11
Video 2.11
Aligning Layer
How you choose to align layers depends on what you want to use as a reference for alignment. It’s easy to align layers precisely (Figure 2.34) using any of the following methods:
- Align to the composition frame. The Align panel lets you align selected layers horizontally and vertically to the center of the composition, or any of its edges. Just make sure the Align Layers To menu is set to Composition before you click any Align panel buttons.
- Align to other layers. If one of the layers is already in the correct position, you can align other layers to it using the Align panel. Select both layers and make sure the Align Layers To menu is set to Selection before you click any Align panel buttons.
- Align to the grid. In Chapter 1 you learned about the grid display options and preferences. If you enable View > Snap To Grid, layers you drag will snap to grid increments.
- Align to any position. If you know you want a layer at specific numerical coordinates, you can use the Timeline Panel to set its Position property to those values. If you want several layers lined up at that position, you can create a ruler guide as you learned earlier so that when you drag a layer close to a guide it snaps to the guide.
- Nudge layers. You might prefer to precisely position layers visually. When a layer is selected, nudge it by pressing the arrow keys. Or you can click one of its Position values in the Timeline, and then press the Up Arrow or Down Arrow key to change the value by a small amount.

Figure 2.34 The Align panel
For example, say you wanted to line up two of the text layers you created for this lesson:
Select the layers in the Timeline panel.
In the Align panel, choose Selection from the Align Layers To menu.
Click the Align Left button (Figure 2.35).

Figure 2.35 Aligning the left sides of two layers.
The Align panel also includes Distribute Layers options. These create an equal space between the centers or specified edges of selected layers. For example, you might be creating movie credits involving five text layers that you’d like to space equally across the frame. You could select them, align them first, and then click a Distribute Layers option to horizontally space them evenly by their centers.
Rotating a Layer
In Video 2.11, the Ruby’s text layer is rotated 90 degrees. When you want to rotate a layer, you can do it visually or numerically.
To rotate a layer visually:
Select the Rotation tool (
 ) in the Tools panel.
In the Composition panel, use the Rotation tool to drag the layer you want to rotate (Figure 2.36).

Figure 2.36 Layer rotating around its anchor point
Note
If you try to click a layer with the Rotate layer but a different layer becomes selected, try first selecting the layer you want to rotate in the Timeline panel.
Tip
To constrain the Rotation tool to 45-degree increments, hold down the Shift key as you drag.
The layer rotates around its anchor point. If you want the layer to rotate around a different location, you can move the anchor point. See “Customizing the Anchor Point for a Transformation” later in this chapter.
To rotate a layer numerically:
In the Timeline panel, select the layer you want to rotate, and reveal its Rotation property. (Remember that the single-key shortcut to reveal a selected layer’s Rotation property is P.)
Edit the Rotation value using any of the methods you have learned, such as entering a value, nudging the value with the Up Arrow or Down Arrow keys, or scrubbing the value.
![]() ACA Objective 4.6
ACA Objective 4.6
![]() ACA Objective 4.7
ACA Objective 4.7
Using Motion Blur
Our eyes tend to believe that an animation is realistic if it has some amount of motion blur. One reason is that the traditional film frame rate of 24 frames per second and video frame rate of 30 frames per second result in frame durations that are rather long. A moving object can cover a fair distance in 1/30th of a second, so it blurs within that frame.
![]() Video 2.12
Video 2.12
Simple Text Animatio
A synthetic animation is completely sharp in each frame. That represents perfect image quality, but unfortunately it doesn’t line up with the blurred motion our brain expects, so the motion may have that synthetic look to it. You see a similar effect on digital videos shot with automatic cameras (such as in a smartphone) that automatically compensate for bright daylight by using a high shutter speed; motion looks unnatural, because the shutter speed is so high that there is no motion blur. Professional productions use dark neutral density filters to keep the shutter speed down in bright light, to preserve motion blur.
Applying Motion Blur
You can apply motion blur to an animated layer in After Effects. From the Timeline panel overview in Chapter 1, you might remember that each layer has a motion blur switch in the Timeline; that’s exactly what you’ll use.
To apply motion blur (Figure 2.37):
- In the Timeline panel, enable the Motion Blur switch for a layer.

Figure 2.37 Motion blur switch enabled.
Troubleshooting Motion Blur
You might turn on motion blur and not see any blur. There may be nothing wrong if either of the following is true:
Tip
When a composition previews or exports slowly, motion blur is just one of a range of possible causes for slow performance. For example, close applications that you don’t need to currently use, to make more processing power and RAM available to After Effects.
- The layer isn’t moving. Motion blur applies only when there’s motion, so if you have an animated layer that isn’t changing position in the current frame, there won’t be any motion blur to show.
- Motion Blur is disabled for the composition. There’s a switch at the top of the Timeline panel (Figure 2.38) that enables or disables motion blur for all layers in the composition that have motion blur applied. Motion blur is so computation-intensive that it can slow down preview rendering, making composition playback less responsive. Enabling that switch lets a composition render faster by not rendering motion blur. When it’s time to review a composition more closely, you can enable that switch so that all applied motion blur is visible.

Figure 2.38 Click this switch to toggle motion blur display for a composition.
Using a Text Animator
You can animate many aspects of a text layer, including several of the typographical options such as tracking and line spacing. There are so many of these additional properties that if they were always visible, the property list would be too long. For this reason, many text properties are stashed in an Animate menu, made visible only if you enable them.
![]() ACA Objective 4.2
ACA Objective 4.2
![]() ACA Objective 4.7
ACA Objective 4.7
In Video 2.12, Joe demonstrates how to use a text animator to cycle the color of a text layer. To do this:
Expand the properties of a text layer.
Click the Animate menu button (
 ) to the right of the Text property heading, and choose Fill Color > RGB (Figure 2.39).
Figure 2.39 Animate menu
Click the Fill Color swatch for the Range Selector property (Figure 2.40), specify a color, and click OK.

Figure 2.40 Setting up a text fill color to be animated
Tip
In Text Animator properties, the Range Selector lets you animate a property across a range of characters over time. Experiment by animating a property such as Fill Color and scrubbing the Range Selector values.
Add keyframes as needed for your animation. Set the current time to the frame where you want the animation to start, enable the stopwatch icon to add a keyframe there, and change the current time to the frame where you want to add another keyframe.
Click the Fill Color swatch, specify a different color, and click OK. This adds another keyframe at the current time, with the new color value.
You might want to explore all of the additional properties that are available when you click the Animate button. For example, you can add more text animators to the same layer.
Customizing Transformations
You can easily control whether or not a layer scales proportionally, both using the mouse or when entering values. And although transformations happen from the center of a layer by default, you can easily change that too.
![]() ACA Objective 4.4
ACA Objective 4.4
![]() ACA Objective 4.7
ACA Objective 4.7
![]() Video 2.13
Video 2.13
Customizing Layer Transformation
Customizing the Anchor Point for a Transformation
There may be times when you’d like to transform a layer from a point other than the center. Fortunately, that center point is movable. It’s called the anchor point of a layer, and it’s a full layer property that you can not only move, but animate if needed. You can move the anchor point by dragging the Pan Behind tool or by entering values.
The default anchor point for most layers is the center, but the default anchor point for a text layer is set by the alignment applied to it in the Paragraph panel. You may have noticed this in Video 2.12, where the Ruby’s text rotates from the bottom-left corner because it is left-aligned.
To move the anchor point of a layer with the mouse:
In the Tools panel, select the Pan Behind tool (
 ).
).Position the pointer over the anchor point, and drag it (Figure 2.41).

Figure 2.41 Moving an anchor point away from the default center
To move the anchor point of a layer by editing values, do the following in the Timeline panel:
Note
When you move the anchor point of a layer, its Position values change even though the layer doesn’t move. This is because Position values are measured from the anchor point.
Reveal the Anchor Point property for the layer you want to scale. (The keyboard shortcut for revealing the Anchor Point property is A.)
Change the values of the Anchor Point property.
Customizing How You Scale a Layer
The way you control scaling depends on whether you’re dragging layer handles with the mouse or entering values in the Timeline panel.
To scale a layer with the mouse, do one of the following in the Composition panel:
- To scale proportionally, hold down Shift as you drag any handle on the layer bounding box.
- To scale width and height independently, drag any handle on the layer bounding box.
To scale a layer by entering values in the Timeline panel:
Reveal the Scale property for the layer you want to scale. (Remember the keyboard shortcut: If the layer is selected, press the S key.)
Do one of the following:
- To scale proportionally, make sure the Constrain Proportions option is enabled.
- To scale width and height independently, make sure the Constrain Proportions option is disabled (Figure 2.42).

Figure 2.42 Editing the value of the Scale property in the Timeline panel
Change a Scale value. If Constrain Proportions is enabled, the other Scale value changes to match. If Constrain Proportions is disabled, the other Scale value won’t change; edit it if needed.
Nesting One Composition in Another
Earlier in this chapter you saw an example of pre-composing—replacing selected layers with a composition containing those layers so that you then have one composition nested inside another. When you’ve already created a composition and you simply want to make it a layer in another composition, you can nest those compositions a different way.
![]() ACA Objective 3.1
ACA Objective 3.1
![]() Video 2.14
Video 2.14
Nesting Composition
In Video 2.14 you see an example of nesting without pre-composing. The rubys-diner-logo composition is added to the ruby diner composition, where it becomes a layer. This type of composition nesting is an easy drag-and-drop operation, similar to when you add footage to a composition.
To nest one composition in another:
Make sure the destination composition is visible in the Timeline and Composition panels.
Drag a composition from the Project panel, and drop it into the open composition’s Timeline panel or Composition panel (Figure 2.43). The composition you dragged from the Project window becomes a layer in the open composition.

Figure 2.43 Nesting one composition inside another
If needed, adjust the new nested composition’s position in the Composition panel and its position in the layer stacking order in the Timeline panel.
You don’t lose anything by nesting a composition. You can always edit the nested composition by double-clicking it in the Composition panel, Timeline panel, or Project panel. Any changes you make will show up in all instances of that composition. For example, if you created a composition of a rotating airplane propeller and added four instances of it to an airplane composition, editing the propeller composition would update all four instances of that propeller.
Using Illustrator Graphics in a Composition
Being able to import Illustrator graphics into an After Effects project is not just the ability to import another file format. Illustrator graphics have some special advantages.
![]() ACA Objective 4.1
ACA Objective 4.1
![]() Video 2.15
Video 2.15
Working with Illustrator Graphic
Options for Importing Illustrator Graphics
Unlike video frames, which are made up of pixels, Illustrator graphics are made up of vector-based paths. This lets you scale them freely without ever seeing jagged pixel edges—instead, edges can remain perfectly smooth at any size.
The shapes you can create in After Effects using the shape tools or Pen tool are also vector paths. Illustrator shapes are compatible with After Effects shapes, and that’s another advantage of bringing in Illustrator graphics: You can use the superior drawing tools in Illustrator to create shapes, masks, and other paths, and then bring them into After Effects where they are fully supported. Or you can hire a graphic designer to create beautiful artwork for your project in Illustrator, and you’ll be able to bring in the Illustrator artwork with full compatibility—no conversion needed—and the ability to format and animate Illustrator layers independently.
In the previous chapter’s Baxter Barn project and earlier in this chapter, you learned about some of the options provided for when you import Illustrator graphics. In Video 2.15, the imported Illustrator graphic is imported as a composition (to preserve individual layers), and also converted to shape layers—editable vector-based layers, as opposed to pixel-based video layers.
Let’s look a little closer at how one Illustrator graphic can become multiple shape layers in After Effects. You can import an Illustrator graphic:
- As footage. After you import an Illustrator graphic as a single footage item, it exists as a single item that you can animate and apply effects to.
- As a composition. After you import an Illustrator graphic as a composition, in the Project window you see the composition as well as a folder of footage items converted from each layer in the Illustrator graphic.
- As shape layers. You have the option of converting any or all of the imported Illustrator footage items into After Effects shape layers. Why would you do this? Converting graphics to shape layers gives you finer control over how you apply effects to them and lets you use After Effects tools to edit the shape paths.
Converting Illustrator Layers to Shape Layers
To convert an imported Illustrator graphic’s footage layer into shape layers:
In the Timeline panel, select one or more Illustrator footage layers you want to convert.
For this lesson, if you’re working in the Ruby Diner composition, double-click the rubys-diner-logo composition to see the layers inside that have Illustrator icons, and then select all of those.
Choose Layer > Create > Create Shapes From Vector Layer.
In the list of layers in the Timeline panel you’ll now see duplicates of each Illustrator layer, but they have star icons (Figure 2.44), indicating that the layer is now a shape layer.
Figure 2.44 Four selected shape layers resulting from converting Illustrator layers to shape layers.
Delete the Illustrator layers, leaving the shape layers. Otherwise, the composition will contain each layer in two forms.
Tip
You can also convert Illustrator layers to After Effects shape layers by right-clicking (Windows) or Ctrl-clicking (macOS) an imported Illustrator footage item and choosing Create > Create Shapes From Vector Layer.
To see and work with the individual objects in a converted shape layer:
In the Timeline panel, expand the properties of a layer you converted to shapes, and then expand the Contents property group.
Expand a Group heading to see the shape paths and properties inside that group (Figure 2.45). A complex Illustrator footage item may contain a large number of groups and paths.

Figure 2.45 Groups and paths in a shape layer converted from an Illustrator file
Within a group, select a Path item to edit it or apply animation and effects. When you select a group or path, you can see its handles appear in the Composition panel.
![]() ACA Objective 4.4
ACA Objective 4.4
![]() ACA Objective 4.7
ACA Objective 4.7
Applying Advanced Rotation
When you rotated the Ruby’s text layer, you rotated it 90 degrees. But there’s more to the Rotation property, and this becomes evident when you try more advanced rotations.
![]() Video 2.16
Video 2.16
Rotating Layer
There are 360 degrees in a circle, so in many graphics programs you can rotate up to 360 degrees. In After Effects it’s possible to rotate a layer more than 360 degrees. Why would you do this? You might want to animate a layer spinning around multiple times, the way the Ruby’s Diner logo text does in Video 2.16. To rotate multiple times, you need to go past 360 degrees.
The Rotation property contains two values that you read together (Figure 2.46). When a layer is not rotated, the Rotation value reads 0x+0.0°. The first value is the number of revolutions, and the second value is the number of degrees. Each time you rotate more than 360 degrees clockwise, one revolution is added. For example, if you rotate a layer 800 degrees, it will read 2x+80.0° (2 x 360 degrees plus the remainder, 80 degrees). If you rotate counterclockwise past zero degrees and zero rotations, the Rotation values become negative.

Figure 2.46 Reading the Rotation value
Using Markers
As you work through building a composition, you might want to indicate times to insert keyframes or other edits, or leave notes for yourself or for your colleagues. The need for this usually grows as a composition becomes more complex, or when you’re working together with others. Markers are a handy way to designate or provide additional information about specific frames.
![]() ACA Objective 2.3
ACA Objective 2.3
![]() Video 2.17
Video 2.17
Working with Marker
Adding a Marker
You can add markers to a composition in the Timeline panel or to footage in the Footage panel. If you add a marker to the time ruler of a composition, it can be numbered or not. You can also add a layer marker, attached to a specific layer in a composition.
Tip
You can add a numbered marker at the current time by pressing Shift and any number key from 0 through 9. For example, press Shift-4 to create marker 4 at the current time. To change the current time to any of those markers, press a number without Shift.
To add a numbered marker to a composition:
- Drag a marker out of the Comp Marker Bin and to the left, and drop it at a time on the composition time ruler.
Notice that there’s a number on the marker. The first one you drag is automatically numbered 1, and subsequent markers use the next available number.
To add an unnumbered marker to a composition:
Tip
The keyboard shortcut for adding an unnumbered marker is * (asterisk) on the number pad of an extended keyboard. You can’t use Shift-8 because that adds a marker numbered 8.
In the Timeline panel, change the current time to the frame where you want to add a marker.
Do one of the following:
- If the marker is for a specific layer, select the layer.
- If the marker is for the composition, choose Edit > Deselect All to make sure no layers are selected.
Choose Layer > Add Marker (Figure 2.47).

Figure 2.47 Before and after adding a marker.
If a layer was selected, the marker appears on the layer at the current time. If no layer was selected, the marker appears on the composition time ruler at the current time.
Annotating a Marker
A marker can be a simple visual indicator, as long as you know what it’s for. But if a marker needs more explanation, you can add all kinds of information to it.
To annotate a marker:
Double-click the marker.
In the Composition Marker dialog box, edit any of the options (Figure 2.48):
- Time. The frame where the marker sits on the time ruler.
- Duration. The range of time indicated by the marker.
- Comment. Any text notes you want to type in. Note that the beginning of this text is visible in the labels in the Timeline panel.
- Label. A color label, like the labels you can apply to layers.
- Chapter and Web Links, and Flash Cue Point. You might not need to use these older features. Chapter and Web Links are for authoring interactive QuickTime movies, and Flash Cue Point is for authoring interactive Flash movies. Both are no longer commonly produced.

Figure 2.48 The Composition Marker dialog box
Tip
You can also set the marker duration directly on the time ruler. Position the pointer over the marker, and then hold down Alt (Windows) or Option (macOS) as you drag to the right on the timeline. You’ll see the marker extend.
Parenting to Coordinate Two Layers
In many compositions, there are animations that are synchronized with other changes. Sometimes it’s as simple as wanting one layer to move at the same time as another layer. Instead of laboriously creating more keyframes, After Effects offers an easier way. Parenting lets one layer exactly follow the property changes of another layer.
![]() ACA Objective 3.1
ACA Objective 3.1
![]() ACA Objective 4.7
ACA Objective 4.7
![]() Video 2.18
Video 2.18
Animating Multiple Layers at Once with Parenting
Technically, one layer inherits the properties of another layer. In Video 2.18, the white rectangle inherits the properties of the rubys-diner-logo composition to which it is parented.
The layered that leads is the parent layer, and the layer that follows is the child layer.
To set a layer as a parent:
In the Timeline panel, set the current time to the first frame where both layers should be in sync.
Do one of the following:
- Click the Parent & Link menu for the child layer, and choose the name of the parent layer (Figure 2.49).

Figure 2.49 Choosing a layer to be a parent of the selected layer
- Drag the pick whip (
 ) of the child layer, and drop it on the parent layer.
That’s basic parenting, but even that level is useful. Advanced parenting techniques can tie specific properties together and can involve mathematical expressions that manipulate the parenting relationship.
![]() ACA Objective 1.4
ACA Objective 1.4
![]() ACA Objective 3.1
ACA Objective 3.1
Adding Audio to a Composition
You’ve imported three sound footage items into this project. In After Effects, you work with sound similarly to how you work with visual elements. You can add audio footage items to a composition, where they become layers. Of course, there’s no visual component of an audio layer except that you can view its waveform.
![]() Video 2.19
Video 2.19
Syncing Your Animations to Audio
Tip
If you want to watch audio levels, display the Audio panel (Window > Audio). A general guideline is for the audio level to peak at –6dB or more depending on your specific production requirements. But never let a digital audio level go into the red zone of the audio meter (above 0dB), or bad-sounding distortion will result.
To add audio to a composition:
- Drag an audio footage item from the Project panel and drop it in the Timeline panel.
To view the audio waveform:
- In the Timeline panel, expand the audio layer’s Audio property group, and then expand the Waveform property (Figure 2.50).

Figure 2.50 Viewing the Waveform property of an audio layer
Tip
To change the audio level over time, enable the stopwatch for the Audio Levels property and add keyframes as needed.
To set the level of an audio layer:
- In the Timeline panel, expand the audio layer’s Audio property group, and then adjust the Audio Level property.
You can trim the start and end of an audio layer the same way you can with a video layer, by dragging the start or end of the layer in the Timeline panel.
![]() ACA Objective 3.1
ACA Objective 3.1
Reviewing Symbols in the Project and Composition Panels
![]() Video 2.20
Video 2.20
Reviewing What You’ve Learned So Far
If you’ve followed along with the Ruby’s Diner project, building the composition as shown in the videos, you’ve created a working animation that includes sound. Great job! It’s a good time to review what you’ve learned.
In Video 2.20, Joe reviews the icons and visual indicators primarily in the Project and Timeline panels. You can do the same by referring to the overviews of those panels in Chapter 1 and earlier in Chapter 2:
- To review the Timeline panel, see Figure 1.28 on page 38.
- To review the Project panel, see “Exploring the Project Panel” on page 64.
![]() ACA Objective 5.1
ACA Objective 5.1
![]() ACA Objective 5.2
ACA Objective 5.2
Proofing and Exporting a Composition
The composition for this lesson might not take long to export, but a composition created for a professional job may be complex enough to require extended rendering time. You may not want to wait that long to find a mistake that you’ll need to correct, so take a careful look at the composition before you export it.
![]() Video 2.21
Video 2.21
Proofing the Project
Before you export, use the Preview panel to watch the composition all the way through. Here’s a quick checklist of things to watch out for:
- Is the duration of the composition correct?
- Are all text and graphics readable at all times when they need to be? For example, it’s okay that the Ruby’s Diner logo text is blurry when it’s spinning, but when it comes to a stop, it should be legible.
- Is the timing of all elements acceptable?
- Are layers in the correct stacking order?
Tip
If you know you’ll want to watch the composition more than once before rendering, consider enabling the Loop option in the Preview panel.
- If you hid layers while editing, did you remember to show them again before the final render?
- Are layer switches in the correct positions? For example, if you turned off motion blur for some layers so that they would preview faster, do you need to turn it back on?
- Does the composition audio sound okay? Does it start and stop as expected? Are the audio levels of the various audio tracks balanced with each other?
Sending the Composition to Adobe Media Encoder
There’s more than one way to render a composition to a finished file. In Chapter 1, the composition was rendered using the After Effects Render Queue. For this lesson, you’ll export the composition to Adobe Media Encoder, which is a separate application.
Rendering through Adobe Media Encoder has several advantages, described in the sidebar “Comparing the Render Queue to Adobe Media Encoder.”
To send a composition to Adobe Media Encoder (Figure 2.51), do one of the following:
- With the composition active in the Composition panel or Timeline panel, choose Export > Add to Adobe Media Encoder Queue.
- In Adobe Media Encoder, use the Media Browser panel to navigate to the After Effects project, drag the After Effects project to the Queue panel, select the composition you want to render from the Import After Effects Composition dialog box, and click OK.

Figure 2.51 A composition added to the Queue panel in Adobe Media Encoder.
Note
In Adobe Media Encoder, using the Media Browser to add a composition to the Queue works as long as Dynamic Media Server is set up. This is usually the case for an individual user, but may not be for some organization-level installations.
Tip
You aren’t restricted to exporting compositions only. You can export an item from the Project panel, including footage items. Select the item in the Project panel, make sure you leave the Project panel active (with an outline highlight), and choose a command from the File > Export submenu.
There are two ways to export a sequence to a video file. You can export it from After Effects directly to a video file as you did in Chapter 1, or as in this chapter, you can export the composition to Adobe Media Encoder CC, a separate program that can be installed as part of your Adobe Creative Cloud membership. It’s important to understand how the Media Encoder queue differs from the Render Queue.
Both the After Effects Render Queue and Adobe Media Encoder let you queue multiple jobs for rendering. The biggest advantage of using Media Encoder is that it can process exports in the background, so if you’d like to return to After Effects to work on other sequences while your exports are processing, you can.
Both the After Effects Render Queue and Adobe Media Encoder let you export a job once and render multiple versions from it. A potential advantage of Media Encoder is that it uses the same export presets as Premiere Pro, so you can choose (or make your own) export presets that work for Premiere Pro, Media Encoder, and After Effects.
Because Media Encoder is a stand-alone video converter, you can use it on its own to convert video files from their current format to another, a process called transcoding. For example, you can drag multiple video files from the desktop into the Media Encoder queue, and apply an export settings preset that converts them all for YouTube.
Setting Up an Item in the Queue Panel
Once an item is in the Queue panel in Adobe Media Encoder, you need to do a few things before you render it. Remembering what to do is easy. Notice that three of the columns in the Queue panel—Format, Preset, and Output File—provide highlighted text in queue items (Figure 2.52). All you have to do is click each of them, one after the other, to make sure they’re set up properly. It is important that you go from left to right, because the choice you make in the first option determines what’s available in the second option.

Figure 2.52 The three important Queue options to configure
Note
When editing a queue item, note that clicking the down-facing arrow lets you choose from a menu, and clicking the highlighted text opens a dialog box where you can make changes that differ from the presets.
Choosing a Format
The Format option of a queue item determines the general format of the exported file.
To choose a format:
- Click the down-facing arrow next to the highlighted option under the Format column for a queue item and choose the delivery format required for your composition.
The list of choices is long, but for many projects today the safe choice is H.264. (If you are creating a project for specific client requirements, choose the format they specified.)
The list of formats also includes audio and still image formats, in case you want to export just audio, or export an animation to a sequence of still images.
Choosing a Preset
The Preset options of a queue item are saved sets of export settings. This is a great thing, because export settings are numerous and complicated. When an export preset matches the requirements of your job, simply choose that preset instead of having to configure many settings.
To choose a preset:
- Click the down-facing arrow next to the highlighted option under the Preset column for a queue item; then choose the preset that best represents the delivery requirements for your composition.
For example, if you want to export a 1080p video to YouTube, you don’t have to understand all of the intricacies of frame sizes, bitrates, multiplexers, and so on, because choosing the YouTube 1080p HD preset automatically enters appropriate settings for you.
The default preset is Match Source – High Bitrate, which means the settings and quality level are as close as possible to the composition. That’s always a good starting point. You can either apply a preset from there or change anything that needs to match job requirements more closely.
In Video 2.21, no export preset matches the frame dimensions of the vertical video composition, so the export frame dimensions are manually altered in the Video tab.
Setting Up Output File Options
Even if you don’t need to change the Format and Preset options of an item in the Queue panel, you should always verify the last highlighted item, Output File. It’s the filename of the file that will be exported, as well as the folder location where it will be saved.
To set Output File options:
- Click the highlighted text under the Output option for a queue item, specify the filename and location for the file exported from that item, and click Save.
Note
If you forget to set the Output Name and location, and you don’t know what filename and path were specified for an exported file, you may not know where the exported file went or what it was named. But you don’t have to lose track of rendered files; simply click the Output Name highlighted text for any item that’s already rendered, and Media Encoder will reveal the file on the desktop.
Exploring the Export Settings Dialog Box
When a preset doesn’t exactly match the delivery requirements of your job, you can customize the export settings. Doing so requires at least a basic understanding of the different parts of the Export Settings dialog box, so let’s take a brief tour of them.
The top section of the Export Settings dialog box contains the essentials: the format, preset, and the filename and folder location.
In the middle of the Export Settings dialog box are six tabs of options. Again, these are automatically set up by the preset you choose, so in many cases you don’t have to touch any of them. But if you do need to customize them, here’s what each of the tabs cover:
- Effects (Figure 2.53). Sometimes you want to apply an effect only to an exported video without applying it to the original composition. One reason is when the composition needs to meet specific technical requirements for delivery, such as video limiting or loudness normalization. Another reason would be to overlay a logo that you don’t want to have on the original composition.

Figure 2.53 You can use the Effects tab to modify the exported video without altering the original composition.
- Video (Figure 2.54). If there’s one tab you’re most likely to adjust, it’s the Video tab, because it’s here that you can change the frame size and bitrate. Lowering the bitrate is one tactic for lowering the file size of a video, although it reduces image quality.

Figure 2.54 In the Video tab, you can customize video export options.
Tip
In the Encoding Settings in the Video tab of the Export Settings dialog box, set Performance to Hardware Encoding whenever possible, for faster renders. Hardware Encoding requires Intel QuickSync in your computer’s CPU.
- Audio (Figure 2.55). The Audio tab lets you configure details such as the audio format and bitrate.

Figure 2.55 In the Audio tab, you can customize audio export options.
- Multiplexer (Figure 2.56). You’ll probably leave the Multiplexer tab as it was configured by the preset you chose, unless you understand MPEG multiplexing or have been given a setting to use.

Figure 2.56 The Multiplexer tab contains MPEG multiplexing options.
- Captions (Figure 2.57). This tab is provided for applications such as Adobe Premiere Pro, which can create closed and open captions in standard industry formats. It’s not available for After Effects compositions.

Figure 2.57 You can adjust caption export options in the Captions tab.
- Publish (Figure 2.58). If you’re exporting a composition that’s ready to be delivered straight to social media, you can set up your social media accounts in this tab, and the video will be uploaded after export.

Figure 2.58 To upload your video after it finishes rendering, configure the options for online services in the Publish tab.
If you do customize the settings, you can save them as your own preset by clicking the Save Preset button (![]() ).
).
If you want to know more about the options in the Export Settings dialog box, refer to the Export Settings Reference:
helpx.adobe.com/media-encoder/using/export-settings-reference.html
Rendering Multiple Versions
It’s easy to render multiple versions of a composition, and you have to export it only once. For example, you can export a composition to Adobe Media Encoder and then quickly set it up to render three versions optimized for a television, a smartphone, and a web page.
To render multiple versions of a composition in Adobe Media Encoder:
Add the composition to the Render Queue, and set up the item for rendering.
With the item selected in the Queue panel, do one of the following:
- Click the Duplicate button (Figure 2.59).
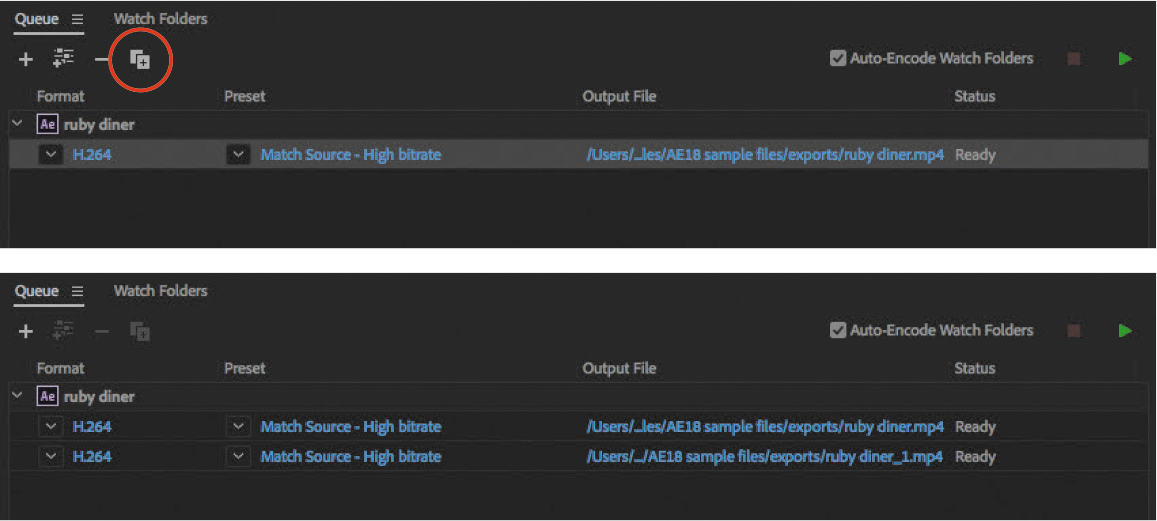
Figure 2.59 Duplicating a queue item
- Choose Edit > Duplicate.
- Press Ctrl+D (Windows) or Command+D (macOS).
Set up the duplicate item for rendering. This can be as easy as choosing a different preset from the Preset menu, or you can click the Preset highlighted text to customize the export settings.
Repeat steps 2 and 3 for any additional versions you’d like to render.
Challenge
Come up with your own way to animate the Ruby’s Diner composition. For example, you can change how the Eat at Ruby’s text in the corner appears on the screen; you can make all of the text items rotate or slide into place, or you can fade them in by animating the Opacity property.
You can also play with different ways to animate the lights. For example, instead of having them turn on and then turn off in turn, you can have them turn on in sequence and then all turn off at the same time, or have them all flash on and off together.
Using the skills learned in this lesson, add a lens flare effect that brightens up and then fades behind the Ruby’s Diner logo as it stops spinning.