12
GETTING CLASSY WITH OBJECT-ORIENTED PROGRAMMING

Reusability is a very important aspect of programming. It saves time and effort. You’ve seen this with loops and functions, and now you’ll learn about object-oriented programming.
Object-oriented programming is an approach to programming that groups functions and variables together to create classes. Each class can be used to create objects that share the same variables and functions as the class. You can create many objects from the same class, making the class’s variables and functions reusable.
When a function is part of a class, it’s called a method, and a variable that’s part of a class is called an attribute.
In this chapter, you’ll learn object-oriented programming and use classes to reuse code. Mastering object-oriented programming and classes makes building programs a breeze, and you can even use object-oriented programming to make games. In the missions in this chapter, you’ll use classes to make some basic programs. You’ll start by creating a simple building, but soon you’ll build an entire town.
OBJECT-ORIENTED BASICS
Object-oriented programming is very popular, and you can use it to create all kinds of cool software, but it can be a tricky concept to understand. Let’s relate it to something that’s more familiar: you.
You’re a person. You have a number of methods: you can eat, breathe, sleep, count to 10, and do lots of other things. You also have attributes: name, age, height, shoe size, and so on.
Your friend Mary has the same methods as you; she too can eat, breathe, sleep, count to 10, and do lots of other things. She also has the same attributes (name, age, and so on), although they contain different values.
In fact, everyone has these methods and attributes. You can describe people as a class. You and Mary are both people, so you could say you are both objects in the Person class.
In object-oriented programming, objects are called instances of a class. All objects share the methods and attributes of the class, but the values of the attributes can be different for each object.
Let’s jump into Python and make a class.
CREATING A CLASS
You’ll start by creating a class and then create all your objects from that class. To create a class, you use the class keyword, the name you want to call the class, and the object class in parentheses (I’ll explain the object class in “Inheriting a Class” on page 274):
class ClassName(object):
def __init__(self):
# Body of init
It’s good practice to capitalize the names of your classes. This makes it easier to tell the difference between classes and functions, which should start with a lowercase letter.
When you create a new class, you need to include the __init__() method and pass in self as an argument. The self argument is required by every method in a class. It references the class the method belongs to. The __init__() method tells Python what you want the class to do when you use it for the first time in a program. This is called initializing the class, which is what __init__() is short for.
For example, let’s create a class called Cat and then make some cat objects. The Cat class will store two attributes for each cat, their name and their weight in kilograms. Each cat object will have its own name and weight values. Open a new file in IDLE’s text editor and save it as catClass.py in a new folder called classes. Enter the following code to create a class called Cat:
catClass.py
class Cat(object):
➊ def __init__(self, name, weight):
➋ self.name = name
➌ self.weight = weight
In this example, the __init__() method takes three arguments ➊. The first is self, which is a required argument in every class method. The second argument, name, and the last argument, weight, are additional arguments to create attributes for all the cats.
The last two lines create the attributes name ➋ and weight ➌ and set them to the values of the name and weight arguments. When you create attributes inside a class, you use dot notation with self. Attributes are always identified by a self, which tells Python that an attribute belongs to the class.
Next, you’ll learn how to use this class to create instances of objects.
CREATING AN OBJECT
Using the newly created class, let’s create some cat objects, or instances of the Cat class.
Initializing an object is similar to creating a variable. To initialize an object, you enter the name of the object, an equal sign (=), and the class name. You pass arguments to the class in parentheses, just as you do with a function call.
For example, let’s adopt a cat and name it Fluff. Using the Cat class, we can create a cat object called fluff by adding the following code on the last line of catClass.py (notice that it’s not indented):
catClass.py
class Cat(object):
def __init__(self, name, weight):
self.name = name
self.weight = weight
fluff = Cat("Fluff", 4.5)
When you create an object, the number of arguments you provide depends on the arguments in its __init__() function. Here we include two arguments, one for name ("Fluff") and one for weight (4.5). You don’t need to include the self argument when creating an object because the self argument is added automatically by Python.
Creating an object is also known as calling a constructor. The __init__() method is often referred to as a constructor because it constructs a class when called. The __init__() method is a special type of method because you don’t reference it by name. Instead, it runs when you create an object using the name of the class. For example, here the code fluff = Cat("Fluff", 4.5) calls the __init__() method, which constructs a Cat object called fluff.
Next, you’ll learn how to access the fluff object’s attributes.
ACCESSING ATTRIBUTES
You can access the attributes of an object to get more information about that object. For example, add the following code to catClass.py after the fluff object to print the weight attribute of the fluff object:
catClass.py
print(fluff.weight)
The value that prints when you run the program should be 4.5, because that’s what you set the weight attribute to when you created the object.
Notice that we’re using dot notation between the object’s name, fluff, and the weight attribute. The dot means you want to use the attribute that belongs to a specific object. In this case, the value of the weight attribute belongs to the fluff object. Whenever you get or set the value of an object’s attribute, you use dot notation.
You can change the value of an attribute as you would any other variable—by using an equal sign (=). For example, let’s change Fluff’s weight to 5 because he gained weight during the winter holidays. We do this by changing the weight attribute in the fluff object to 5:
catClass.py
fluff.weight = 5
Now whenever you access the weight attribute on the fluff object, it will be 5.
Using the knowledge you now have about making a class and creating an instance of it, let’s make some cool stuff in Minecraft.
MISSION #68: LOCATION OBJECTS
Throughout the book, you’ve stored locations, such as your house, a castle, or a palace, in your Minecraft world. You’ve used variables, lists, tuples, and dictionaries to do this in a variety of ways.
You can also create and store related information, like locations, using object-oriented programming. For example, you can use objects to store the coordinates of a bunch of different locations.
Each location has an x-, y-, and z-coordinate, but the values for each location are different. By creating a location class, you can store and access the coordinates of different locations. That will help you keep track of all the awesome things you build in Minecraft. You’ll be able to easily access the coordinates of all your Minecraft creations so you can teleport the player to them in an instant!
Listing 12-1 contains the start of the Location class. When the code is finished, it can be used to store the coordinates of a location in a single object. Copy the code into a new file called locationClass.py in the classes folder.
locationClass.py
from mcpi.minecraft import Minecraft
mc = Minecraft.create()
➊ class Location(object):
def __init__(self, x, y, z):
➋ self.x = x
➌ # Add the y and z attributes here
➍ bedroom = Location(64, 52, -8)
➎ mc.player.setTilePos(bedroom.x, bedroom.y, bedroom.z)
Listing 12-1: The start of the Location class
To start the class, I included the class keyword and named the class Location ➊. At ➍ is the code to initialize an object called bedroom, which will store the location of the bedroom in my Minecraft home. The setTilePos() method sets the player’s position to the bedroom’s location—the bedroom object’s x, y, and z attributes ➎. However, the program is incomplete. You need to finish the __init__() method of the class and set the y and z attributes to the values of the arguments passed to the __init__() method. I set the value of the x attribute ➋, but it’s your task to do the same for the y and z attributes ➌. Don’t forget to use the location of your own bedroom at ➍!
Figure 12-1 shows the completed program in action as it teleports the player into my bedroom.
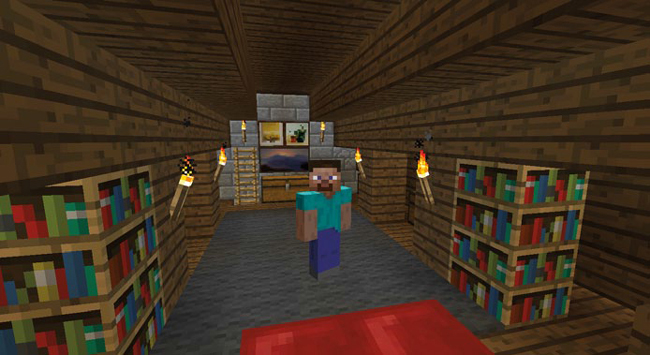
Figure 12-1: The program has teleported the player into my bedroom.
UNDERSTANDING METHODS
Classes can contain methods, which are functions associated with the class. Writing class methods lets you create functions that all instances of that class can use. This is a great way to save time and reuse code, because you’ll only have to write one method.
To create a method, you write a function in the body of a class using the def keyword. You’ve used the def keyword in previous chapters to create functions. Methods are also created with the def keyword, but they’re indented under the class they belong to. For example, let’s update the Cat class in catClass.py. We want the cat to be able to eat, so let’s add a method called eat() to the Cat class. Enter the code and make the changes to catClass.py as you follow along:
catClass.py
class Cat(object):
def __init__(self, name, weight):
self.name = name
self.weight = weight
def eat(self, food):
self.weight = self.weight + 0.05
print(self.name + " is eating " + food)
Notice that the method definition and body of the method are indented by an extra four spaces so Python knows they belong to the class.
Like functions, methods can take arguments. Here the eat() method takes an argument called food that states what the cat is eating. The eat() method increases the weight attribute of the cat by 0.05 and then prints a message that the cat is eating the food.
After creating an object, you can call any of its class’s methods. For example, you can call the eat() method using the fluff object. Add this code to the end of catClass.py:
catClass.py
fluff = Cat("Fluff", 4.5)
fluff.eat("tuna")
Here we see our earlier code, where we created an object called fluff that is part of the Cat class. Then we call the eat() method and give it the argument "tuna". When you run the program, the output will look like this:
Fluff is eating tuna
Now Fluff is happily eating tuna. Remember that the eat() method also increases the weight attribute. After calling the eat() method, add the code to print fluff’s weight.
You can also call methods from inside the class by calling a method inside another method. Let’s create another method called eatAndSleep() inside the Cat class. The eatAndSleep() method calls the eat() method and then prints that the cat is sleeping. Add this code to catClass.py, just after the eat() method (make sure you indent the new method as shown so Python knows it’s part of the class):
catClass.py
def eatAndSleep(self, food):
self.eat(food)
print(self.name + " is now sleeping...")
To call a method from inside the class it belongs to, you add self. to the beginning of the method name. Here the eat() method is called using self.eat(). Note that this is different from calling a method outside of a class. When you do that, you only have to enter the object name and the method you’re calling. For example, the following code calls the new eatAndSleep() method on the fluff object. Add it to your catClass.py file. This should be the last line of code in your program:
catClass.py
fluff.eatAndSleep("tuna")
Here is the output that you should get when you run the program:
Fluff is eating tuna
Fluff is now sleeping...
Here’s the full program so you can see where all the pieces belong:
class Cat(object):
def __init__(self, name, weight):
self.name = name
self.weight = weight
def eat(self, food):
self.weight = self.weight + 0.05
print(self.name + " is eating " + food)
def eatAndSleep(self, food):
self.eat(food)
print(self.name + " is now sleeping...")
fluff = Cat("Fluff", 4.5)
print(fluff.weight)
fluff.eat("tuna")
fluff.eatAndSleep("tuna")
Let’s take the new skills you’ve learned into the world of Minecraft!
MISSION #69: GHOST HOUSE
The best thing about programming with Python and Minecraft is that you can start with a silly idea and run with it. Your idea might start small, but with just a few lines of code, you can build a fun program very quickly.
Wouldn’t it be fun to build a ghost house that appeared in a game, only to disappear 30 seconds later? The house could then reappear somewhere else and then disappear again if you wanted it to.
Here’s the first version of the ghost house program. Save Listing 12-2 in a file called ghostHouse.py in the classes folder.
ghostHouse.py
from mcpi.minecraft import Minecraft
mc = Minecraft.create()
import time
➊ class Building(object):
➋ def __init__(self, x, y, z, width, height, depth):
self.x = x
self.y = y
self.z = z
self.width = width
self.height = height
self.depth = depth
➌ def build(self):
mc.setBlocks(self.x, self.y, self.z,
self.x + self.width, self.y + self.height,
self.z + self.depth, 4)
mc.setBlocks(self.x + 1, self.y + 1, self.z + 1,
self.x + self.width - 1, self.y + self.height - 1,
self.z + self.depth - 1, 0)
➍ # Call the buildDoor() and buildWindows() methods here
➎ def clear(self):
mc.setBlocks(self.x, self.y, self.z,
self.x + self.width, self.y + self.height,
self.z + self.depth, 0)
➏ # Remove the doors and windows here
pos = mc.player.getTilePos()
x = pos.x
y = pos.y
z = pos.z
➐ ghostHouse = Building(x, y, z, 10, 6, 8)
ghostHouse.build()
time.sleep(30)
ghostHouse.clear()
➑ ghostHouse.x = 8
Listing 12-2: The Building class creates a building.
Listing 12-2 uses a class called Building ➊ with an __init__() method to set the house’s position and size ➋. It creates a Building object with the name ghostHouse ➐. The building appears and then mysteriously disappears after 30 seconds using the build() ➌ and clear() ➎ methods. The only problem is that it doesn’t look like a house. Right now it looks like a large, empty shell made of cobblestone.
You need to make the ghost house look more like a house and less like a shell, because ghost shells aren’t as scary as ghost houses. To make the building look more house-like, your mission is to add a method that builds a door at the front of the house and a second method that adds windows. Call these two methods from inside the build() method so they’re built at the same time ➍.
After adding the methods to build a door and windows, you’ll need to update the clear() method to delete them ➏; otherwise, they’ll be left behind when the house disappears.
When you’ve added the extra methods, move the building to a new location by changing the x, y, and z attributes of the ghostHouse object and adding more calls to the build() and clear() methods. I’ve started this for you by changing the house’s x position ➑.
When you run the program, the ghost house should suddenly appear and then disappear 30 seconds later, only to reappear somewhere else. Spooky!
Figure 12-2 shows my ghost house.

Figure 12-2: The ghost house appears and then disappears.
RETURNING VALUES WITH METHODS
Like functions, methods can also return values, or an object’s attributes, using the return keyword. For example, let’s say we want to convert Fluff the cat’s weight from kilograms to grams. A kilogram is equal to 1000 grams, so to make the conversion, you multiply the weight attribute by 1000 and return it. Add the following getWeightInGrams() method to the Cat class in catClass.py:
catClass.py
class Cat(object):
def __init__(self, name, weight):
self.name = name
self.weight = weight
def getWeightInGrams(self):
return self.weight * 1000
To output the value returned by the method, you create an object and call the method. In the following code, the fluff object is used, and the method is called inside a print() function to get the cat’s weight in grams:
catClass.py
fluff = Cat("Fluff", 4.5)
print(fluff.getWeightInGrams())
Now when you run the file, it will output the following:
4500
In the next mission, we’ll extend the ghost house program to include a method that returns information about the building.
MISSION #70: GHOST CASTLE
I have all kinds of names in mind for the different places I’ve built in my Minecraft world: the beach house, the plant farm, the animal farm, the storage room, the palace, the underwater palace, the underground palace, and loads more. The problem is that the names only exist in my head!
With classes, you can create attributes like location and size for things you build, as you saw in Mission #69 (page 263). You can also include names!
Let’s name the ghost house and have Python remember it for us. We’ll update the Building class from Mission #69 to add an extra method that returns the name of the building. Copy Listing 12-3 into a new file called ghostCastle.py in the classes folder.
ghostCastle.py
from mcpi.minecraft import Minecraft
mc = Minecraft.create()
import time
➊ class NamedBuilding(object):
➋ def __init__(self, x, y, z, width, height, depth, name):
self.x = x
self.y = y
self.z = z
self.width = width
self.height = height
self.depth = depth
➌ self.name = name
def build(self):
mc.setBlocks(self.x, self.y, self.z,
self.x + self.width, self.y + self.height,
self.z + self.depth, 4)
mc.setBlocks(self.x + 1, self.y + 1, self.z + 1,
self.x + self.width - 1, self.y + self.height - 1,
self.z + self.depth - 1, 0)
def clear(self):
mc.setBlocks(self.x, self.y, self.z,
self.x + self.width, self.y + self.height,
self.z + self.depth, 0)
➍ def getInfo():
# Add the body of the getInfo() method here
pos = mc.player.getTilePos()
x = pos.x
y = pos.y
z = pos.z
ghostCastle = NamedBuilding(x, y, z, 10, 16, 16, "Ghost Castle")
ghostCastle.build()
➎ mc.postToChat(ghostCastle.getInfo())
time.sleep(30)
ghostCastle.clear()
Listing 12-3: NamedBuilding is very similar to the Building class, except it has an extra attribute called name and an extra method that returns a description of the building.
First, I changed the name of the class to NamedBuilding so we won’t confuse it with the Building class from the previous mission ➊. I’ve added an extra argument and attribute to the constructor called name ➋. The argument allows you to give a name to the building, and the constructor assigns the name to the name attribute ➌.
Your mission is to add a method called getInfo() to the new class NamedBuilding that returns the name and position of the building. I’ve added the start of the getInfo() method for you at ➍. You just need to add the body. The getInfo() method is called on the ghostCastle object at ➎ so it outputs the string returned by the method to the Minecraft chat. For example, if the ghost castle is located at x = -310, y = 64, z = 1081, the getInfo() method should return the string "Ghost Castle's location is at -310, 64, 1081".
Figure 12-3 shows my working program. Although the ghost castle is taller, it looks like the house from Mission #69. This is because the build() methods are the same for both, but feel free to change your version of the code so your building looks more like a castle.

Figure 12-3: The description of the ghost castle is displayed.
CREATING MULTIPLE OBJECTS
You can make several objects from the same class by creating objects with different names using the same class constructor (remember that constructor is another name for the __init__() method). For example, let’s say we found a second cat named Stella who is now friends with Fluff. Open catClass.py and enter the following code to add Stella:
catClass.py
class Cat(object):
def __init__(self, name, weight):
self.name = name
self.weight = weight
fluff = Cat("Fluff", 4.5)
stella = Cat("Stella", 3.9)
Now we have two cat objects, fluff and stella. Each has the same attributes, name and weight, but with different values.
Add the following code to catClass.py to print the cats’ names:
catClass.py
print(fluff.name)
print(stella.name)
When you run the file, you’ll get this output:
Fluff
Stella
The two cat objects also have access to the same methods. Both can call the eat() function. Add this code to catClass.py:
catClass.py
fluff.eat("tuna")
stella.eat("cake")
And the output will look like this:
Fluff is eating tuna
Stella is eating cake
Writing a class makes creating lots of objects very easy. Let’s try creating multiple objects with Minecraft!
MISSION #71: GHOST TOWN
What’s scarier than one ghost house? That’s right, two ghost houses. But three ghost houses would be even scarier. And more than three ghost houses? I need to stop thinking about this, or I won’t get any sleep tonight!
In Mission #69 (page 263), you made a class that builds a house that disappears. Now you can create several objects using the same class, and Python will remember each of the object’s attributes and methods. You can make as many houses as you want, and you can make them appear and disappear with ease.
Your mission is to create four or more ghost house objects and arrange them in a village. After a certain amount of time, make them all disappear and reappear elsewhere on the map, just like a real ghost town.
Open ghostHouse.py in IDLE—we’ll use this as a base. When you created a house in the ghostHouse.py program, your code should have looked like this:
ghostHouse.py
ghostHouse = Building(17, 22, -54, 10, 6, 8)
ghostHouse.build()
time.sleep(30)
ghostHouse.clear()
Save ghostHouse.py as a new file called ghostVillage.py, and then create three or more objects in the file using the Building class to build the village. To help you get started, I’ve created a second object called shop in Listing 12-4. I’ve also set the variables x, y, and z to hold the player’s current position, which we find using player.getTilePos(). This makes it easier to build the village all around you.
ghostVillage.py
pos = mc.player.getTilePos()
x = pos.x
y = pos.y
z = pos.z
ghostHouse = Building(x, y, z, 10, 6, 8)
shop = Building(x + 12, y, z, 8, 12, 10)
# Create more ghost building objects here
ghostHouse.build()
shop.build()
# Build more ghost building objects here
time.sleep(30)
ghostHouse.clear()
shop.clear()
Listing 12-4: Creating multiple ghost building objects
Figure 12-4 shows my ghost village. After 30 seconds, the ghost buildings suddenly disappear.

Figure 12-4: Look at all the ghost buildings in the ghost village!
CLASS ATTRIBUTES
Sometimes you might want to set attributes that have the same value for every object instance in a class. It would be redundant to pass the same argument to the class every time an object is created. Instead, you can create a preset attribute in the class, and all the instances of objects in that class will share those attributes.
When multiple objects share the same attribute, it’s called a class attribute. For example, all the cat objects we’ve created are owned by Craig (me). I can revisit the Cat class in the catClass.py file, create a class attribute called owner, and set it to "Craig":
catClass.py
class Cat(object):
owner = "Craig"
def __init__(self, name, weight):
self.name = name
self.weight = weight
As you can see, class attributes don’t use self before their name. In this example, owner is a class attribute and self.name is an attribute. Notice that you define class attributes outside the __init__() function.
Class attributes work the same as any other attribute in an object. For example, you can access the value of a class attribute as you would a normal attribute. In this case, to find Fluff’s owner, we can print the owner class attribute of the fluff object:
catClass.py
fluff = Cat("Fluff", 4.5)
print(fluff.owner)
The printed value should be "Craig". If we printed Stella’s owner, the value would be the same because class attributes are the same for every object in that class:
catClass.py
stella = Cat("Stella", 3.9)
print(stella.owner)
The printed value here is also "Craig".
You can change the value of class attributes for individual objects. This will change the value of the attribute for that object, but no other objects in the class. For example, Stella has been adopted by my friend Matthew, so we need to change Stella’s owner to "Matthew":
catClass.py
stella.owner = "Matthew"
print(stella.owner)
print(fluff.owner)
When the owner attribute of stella is printed, it shows "Matthew", but fluff’s owner is still "Craig".
After all the changes we’ve made to catClass.py, the final program looks like the following. It’s also available in the book’s resources at https://www.nostarch.com/pythonwithminecraft/.
catClass.py
class Cat(object):
owner = "Craig"
def __init__(self, name, weight):
self.name = name
self.weight = weight
def eat(self, food):
self.weight = self.weight + 0.05
print(self.name + " is eating " + food)
def eatAndSleep(self, food):
self.eat(food)
print(self.name + " is now sleeping...")
def getWeightInGrams(self):
return self.weight * 1000
fluff = Cat("Fluff", 4.5)
print(fluff.owner)
stella = Cat("Stella", 3.9)
print(stella.owner)
print(fluff.weight)
fluff.eat("tuna")
fluff.eatAndSleep("tuna")
print(fluff.getWeightInGrams())
print(fluff.name)
print(stella.name)
fluff.eat("tuna")
stella.eat("cake")
stella.owner = "Matthew"
print(stella.owner)
print(fluff.owner)
Now that you’ve seen how to use objects, let’s see how to make them even more powerful with inheritance.
UNDERSTANDING INHERITANCE
Inheritance occurs when classes share the same methods and attributes as other classes. For example, ducks are a type of bird. They share the same methods as other birds (flying, eating, and so on), and they have the same attributes as other birds (weight, wingspan, and so on). So you could say that ducks inherit their attributes and methods from the class birds. Figure 12-5 shows this relationship in a diagram.

Figure 12-5: Penguins and ducks are both types of birds.
The class that other classes inherit from is called a superclass; the class that inherits from the superclass is called a subclass.
Inheritance is useful because it allows you to create subtle differences between similar objects. For example, penguins are also a type of bird, but they can swim underwater, unlike most birds. To represent penguins, you need to create a subclass that inherits from the bird class but has adaptations so the penguins can swim underwater. These adaptations are the reason you create subclasses: you can keep the main superclass features to avoid having to write the code again, and just add the methods and attributes you need in the subclass.
INHERITING A CLASS
When a subclass inherits from a superclass, the subclass can use all the superclass’s methods and attributes. The subclass can also add extra classes and attributes without altering the original superclass.
Let’s use the birds example to illustrate this. First, we’ll write the code for the Bird superclass. Open a new file in IDLE, name it birdClass.py, and then add the following code to make the class:
birdClass.py
➊ class Bird(object):
➋ def __init__(self, name, wingspan):
self.name = name
self.wingspan = wingspan
➌ def birdcall(self):
print("chirp")
➍ def fly(self):
print("flap")
We create a class called Bird ➊, but notice that the Bird class inherits from object. The object class is a base class that all other classes will be built on top of. All classes inherit from the object class, and you use it when there are no other superclasses to inherit from. Even if there are several levels of inheritance where lots of classes inherit from each other, the object class will always be the superclass used on the highest level of inheritance.
The Bird class’s __init__() method takes two arguments that set two attributes: the name of the bird and its wingspan ➋. It has two methods: birdcall() ➌ and fly() ➍. At the moment, the birdcall() method just prints "chirp" and the fly() method just prints "flap".
In the same file, create an object called gardenBird using the Bird class:
birdClass.py
gardenBird = Bird("Geoffrey", 12)
gardenBird.birdcall()
gardenBird.fly()
This code will output:
chirp
flap
Now that you’ve created a superclass, you can create a subclass that inherits from the superclass but gets its own method. You’ll do that in the next section.
ADDING NEW METHODS TO SUBCLASSES
Let’s add a class for penguins to birdClass.py and call it Penguin. Because penguins can swim underwater, you can add an extra method to the Penguin class called swim():
birdClass.py
class Penguin(Bird):
def swim(self):
print("swimming")
When you define a subclass and want it to inherit from another superclass instead of object, you put the name of the superclass to inherent from in parentheses. Notice that I didn’t create an __init__() method for the Penguin class. The reason is that it inherits from the Bird class, so it uses the Bird class __init__() method. Let’s use that __init__() method and test the swim() function by creating a penguin:
birdClass.py
sarahThePenguin = Penguin("Sarah", 10)
sarahThePenguin.swim()
This code will output the following:
swimming
The Penguin class can also use the fly() and birdcall() methods because it inherits them from Bird.
birdClass.py
sarahThePenguin.fly()
sarahThePenguin.birdcall()
In this case, the output will look like this:
flap
chirp
But flap and chirp don’t make sense for a penguin because penguins can’t fly and their birdcall is more of a quack! We’ll learn how to override inherited methods and fix this in “Overriding Methods and Attributes” on page 278.
But first, let’s return to Minecraft and create some new ghost buildings using inheritance.
MISSION #72: GHOST HOTEL
Houses and hotels are both types of buildings: they have doors, windows, rooms, stairs, and walls. Hotels are just fancy houses with extras like balconies, lots of rooms, and a pretty entrance.
How can you program some ghost hotels using the code you’ve already created for ghost houses? The basic structure of the buildings is the same. So let’s say the only difference is that ghost hotels have extra methods to create carpets inside the rooms and add flowers around the edge of the building. That means the ghost hotel class can inherit all the methods from the ghost house class. Then all the ghost hotel class needs is two extra methods for the carpets and flowers.
In IDLE, create a new file and save it as ghostHotel.py in the classes folder. Copy and paste the code for the Building class from the ghostHouse.py program into the file.
Create a new class called FancyBuilding that inherits from the Building class. The FancyBuilding class should have a new method called upgrade() that adds carpet inside the building and flowers around the walls. Listing 12-5 shows my code for the upgrade() method, but feel free to customize your hotels.
ghostHotel.py
# Create a FancyBuilding class here
def upgrade(self):
# Carpet
mc.setBlocks(self.x + 1, self.y, self.z + 1,
self.x + self.width - 1, self.y, self.z + self.depth - 1,
35, 6)
# Flowers
mc.setBlocks(self.x - 1, self.y, self.z -1,
self.x - 1, self.y, self.z + self.depth + 1,
37)
mc.setBlocks(self.x - 1, self.y, self.z - 1,
self.x + self.width + 1, self.y, self.z – 1,
37)
mc.setBlocks(self.x + self.width + 1, self.y, self.z - 1,
self.x + self.width + 1, self.y, self.z + self.depth + 1,
37)
mc.setBlocks(self.x - 1, self.y, self.z + self.depth + 1,
self.x + self.width + 1, self.y, self.z + self.depth = 1,
37)
# Create an instance of the FancyBuilding class
# Call the build() and upgrade() methods
Listing 12-5: A method for the FancyBuilding class that adds carpet and flowers to the building
After you’ve created the class and added the new method, create an instance of the FancyBuilding class and call it ghostHotel. Build the ghost hotel using the build() method, and then add the extra bits using the upgrade() method.
Figure 12-6 shows my fancy ghost hotel.

Figure 12-6: Look at those flowers and that carpet!
OVERRIDING METHODS AND ATTRIBUTES
It’s possible for a subclass to redefine methods and attributes from its superclass. This is useful when you want to use the same name for a method but you want it to behave differently in the subclass.
In “Understanding Inheritance” on page 273, we created a Bird class and a Penguin class. The Penguin class inherited from Bird so it shared all its methods. But penguins can’t fly, and their birdcall is more of a quack sound than a chirp. So, we should change the fly() and birdcall() methods to reflect this. Open birdClass.py and add this code:
birdClass.py
class Penguin(Bird):
def swim(self):
print("swimming")
➊ def birdcall(self):
print("sort of a quack")
➋ def fly(self):
print("Penguins cannot fly :(")
I’ve made two changes to the Penguin class. I’ve added a birdcall() ➊ method and a fly() ➋ method. Because both methods are spelled the same as they are in the Bird superclass, they will override the superclass’s methods.
Call the methods by adding this code to birdClass.py:
birdClass.py
sarahThePenguin.fly()
sarahThePenguin.birdcall()
Now when you run the program, you’ll get this output:
Penguins cannot fly :(
sort of a quack
Overriding a method from a superclass will change what the method does for the subclass but not the superclass. So penguins won’t be able to fly, but other birds that inherit from Bird will still be able to fly.
You can also overwrite the __init__() method in a subclass. This means that when the subclass object is created, it can have different attributes or behaviors than the superclass.
For example, let’s create a Parrot subclass of Bird in the same file. Parrots can be different colors, so let’s include an extra argument in the __init__() method for a color attribute:
birdClass.py
class Parrot(Bird):
➊ def __init__(self, name, wingspan, color):
self.name = name
self.wingspan = wingspan
self.color = color
I’ve included a new __init__() method for the Parrot class that has an extra argument, color ➊, when compared to the original Bird class.
Now when we create a new Parrot object, we can access the color attribute. We can also access the birdcall() and fly() methods because they were inherited from the Bird superclass:
birdClass.py
freddieTheParrot = Parrot("Freddie", 12, "blue")
print(freddieTheParrot.color)
freddieTheParrot.fly()
freddieTheParrot.birdcall()
This code will output the following:
blue
flap
chirp
Remember that you can overwrite any method that a subclass inherits from a superclass; you can even overwrite the __init__() method. This gives you a lot of control over objects and their many attributes and methods.
After all the changes we’ve made to birdClass.py, the final program looks like the following. It’s also available in the book’s resources at https://www.nostarch.com/pythonwithminecraft/.
birdClass.py
class Bird(object):
def __init__(self, name, wingspan):
self.name = name
self.wingspan = wingspan
def birdcall(self):
print("chirp")
def fly(self):
print("flap")
class Penguin(Bird):
def swim(self):
print("swimming")
def birdcall(self):
print("sort of a quack")
def fly(self):
print("Penguins cannot fly :(")
class Parrot(Bird):
def __init__(self, name, wingspan, color):
self.name = name
self.wingspan = wingspan
self.color = color
gardenBird = Bird("Geoffrey", 12)
gardenBird.birdcall()
gardenBird.fly()
sarahThePenguin = Penguin("Sarah", 10)
sarahThePenguin.swim()
sarahThePenguin.fly()
sarahThePenguin.birdcall()
freddieTheParrot = Parrot("Freddie", 12, "blue")
print(freddieTheParrot.color)
freddieTheParrot.fly()
freddieTheParrot.birdcall()
You’ll try overriding methods and attributes in the next mission.
MISSION #73: GHOST TREE
You’ve created several forms of ghost buildings. Let’s take it to the next level and create a ghost tree. That’s an amazing idea, but how can we do it? The Building class is for buildings, which have walls and ceilings—trees don’t have walls or ceilings. Worry not! You can work around this by modifying your ghost Building class.
Like the ghost buildings, the ghost tree will appear and disappear using the build() and clear() methods. But the methods need to work differently because trees look different from houses. So, you need to create a class that inherits from the Building class and then override the build() and clear() methods.
To get you started, I’ve grabbed the function that creates a tree from the forest.py file (page 149) and put it in Listing 12-6. Copy it into a new file called ghostTree.py in the classes folder.
ghostTree.py
from mcpi.minecraft import Minecraft
mc = Minecraft.create()
# Paste the ghostHouse.py program here
# Create a Tree class here
➊ def growTree(x, y, z):
""" Creates a tree at the coordinates given """
wood = 17
leaves = 18
# Trunk
mc.setBlocks(x, y, z, x, y + 5, z, wood)
# Leaves
mc.setBlocks(x - 2, y + 6, z - 2, x + 2, y + 6, z + 2, leaves)
mc.setBlocks(x - 1, y + 7, z - 1, x + 1, y + 7, z + 1, leaves)
# Create build() and clear() methods for the Tree class here
Listing 12-6: A function to create a tree
To finish the program, copy and paste the code for the Building class from ghostHouse.py into the new file. Then create a new class called Tree that inherits from the Building class. Inside the Tree class, add a build() method and a clear() method to override the methods from the Building class and build a tree instead of a house. Make sure you include the self argument in front of the attributes in the final growTree() method ➊.
After you’ve created the program, make a Tree object called ghostTree. Call the build() method to make the tree appear, wait a bit, and then make it vanish using clear().
Figure 12-7 shows the result of my program.
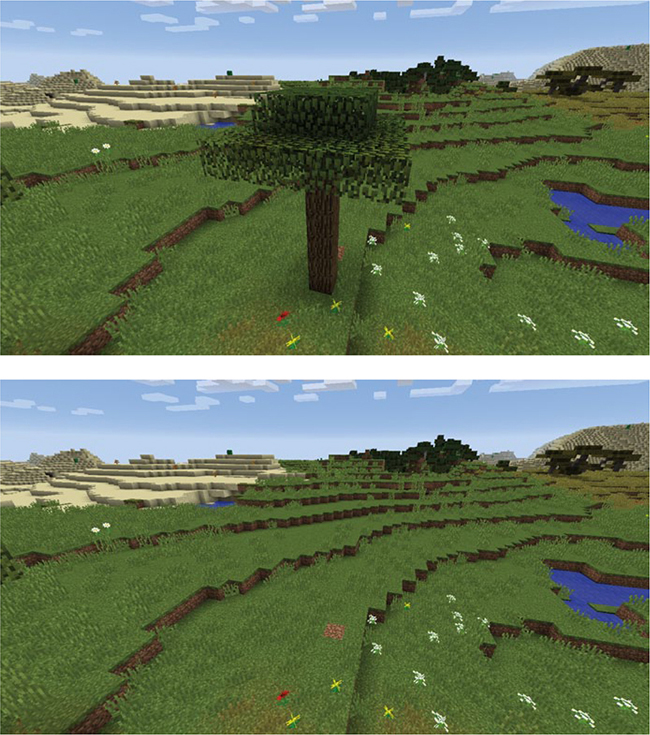
Figure 12-7: That’s a spooky tree!
WHAT YOU LEARNED
You just learned the basics of one of the most important concepts in programming today: object-oriented programming! You learned how to write a class and create objects, and you learned how to use inheritance to customize classes and object behavior. You’ll be able to apply this very useful skill not only in Minecraft but also in any kind of programming adventure that you choose to go on to next!