
NetworkMiner is a passive network sniffing or network forensic tool. It is called a passive tool as it does not send out requests—it sits silently on the network, capturing every packet in the promiscuous mode.
NetworkMiner is host-centric. This means that it will classify data based on hosts rather than packets, which is what most sniffers such as Wireshark do.
The different steps to NetworkMiner usage are as follows:
- Download and install the NetworkMiner.
- Then, configure it.
- Capture the data in NetworkMiner.
- Finally, analyze the data.
NetworkMiner is available for download at SourceForge: http://sourceforge.net/projects/networkminer/.
Though NetworkMiner is not as well known as it should be, it's host-centric approach is refreshingly different and effective. Allowing the users to classify traffic based on the IP addresses and not packets helps us to zero in on activities related to the specific computers that are under suspicion or are being investigated.
The NetworkMiner interface is shown in the following screenshot:

To begin using NetworkMiner, we start by selecting a network adapter from the drop-down list. NetworkMiner places this adapter in the promiscuous mode. Clicking Start begins NetworkMiner on the task of packet collection.
While NetworkMiner has the capability of collecting data packets across the network, its real strength comes in to play after the data has been collected. In most of the scenarios, it makes more sense to use Wireshark to capture packets and then use NetworkMiner to do the analysis on the .pcap file that is captured.
As soon as data capturing begins, NetworkMiner swings into action by sorting the packets based on the host IP addresses. This is extremely useful since it allows us to identify traffic that is specific to a single IP on the network. Consider that we have a single suspect with a known IP on the network, then we can focus our investigative resources on just that single IP address.
Some really great additional features include the ability to identify the media access control (MAC) address of the network interface card (NIC) in use and also the OS of the suspect system. In fact, the icon on the left-hand side of the IP address shows the OS icon, if detected, as shown in the following screenshot:

As we can see in the preceding image, some of the devices that are connected to the network under investigation are Windows and BSD devices.
The next tab is the Frames tab. The Frames tab view is similar to that of Wireshark and is perhaps one of the lesser used tabs in NetworkMiner, due to the fact that there are so many other richer options available, as shown in the following screenshot:

It gives us inputs on the packet length, source and destination IP address, as well as Time to Live (TTL) of the packet.
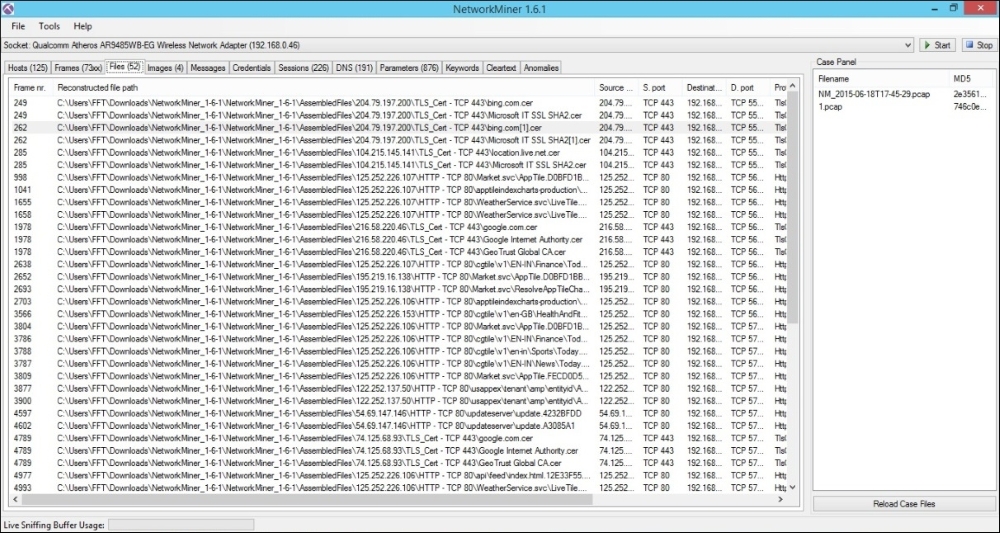
NetworkMiner has the ability to collate the packets and then reconstruct the constituent files for viewing by the investigator. These files are shown in the Files tab.
Assuming that some files were copied/accessed over a network share, it would be possible to view the reconstructed file in the Files tab.
The Files tab also depicts the SSL certificates used over a network. This can also be useful from an investigation perspective, as shown in the following screenshot:
Similarly, if pictures have been viewed over the network, these are reconstructed in the Images tab.
In fact, this can be quite useful especially, when scanned documents are a part of the network traffic. This may happen when the bad guys try to avoid detection from the keyword-based searching.
The following is an image depicting the Images tab:

The reconstructed graphics are usually depicted as thumbnails. Right-clicking the thumbnail allows us to open the graphic in a picture editor/viewer.
DNS queries are also accessible via the DNS tab, as shown in the following image:

There are additional tabs available that are notable from the perspective of an investigation.
One of these is the Credentials tab.
This stores the information related to interactions involving the exchange of credentials with resources that require logons. It is not uncommon to find usernames and passwords for plain-text logons listed under this tab. One can also find user accounts for popular sites such as Gmail and Facebook.
A screenshot of the Credentials tab is as follows:

In a number of cases, it is possible to determine the usernames and passwords of certain websites.
Another great feature in NetworkMiner is the ability to import a set of keywords that are to be used to search within packets in the captured .pcap file.
This allows us to separate packets that contain our keywords of interest.
The following screenshot shows the Keywords tab with the option to search for specific keywords:
