
Brushes are used in many different areas of Pixelmator. You might use a brush to simply paint something onto a scene, or you might also use brushes in a layer mask to hide a certain area of an image. Here we will walk through the Brushes toolbar and give you a good feel of how to work with the settings for brushes.
First let's open up the brushes toolbar by navigating to View | Show Brushes or using the Command + 4 shortcut key.
A good way to get a handle on brushes and the differences between the different types of brushes is to start with a blank canvas and select the brush tool choosing black as your color. Then paint onto the canvas with all of the different preset brushes to see the difference between all of these.
The default brush set includes some very basic brushes, but Pixelmator does have a few additional brush sets that they provide you with. To access these other brush presets, click on the gear icon from the brush toolbar and select from any of the brush sets they provide, including Abstract, Artistic, Default, Grunge, Nature, Smoke, and Sparkle. Play around with the defaults first to get a feel of what they look like and how you might be able to apply them to your artwork.
You can also create your own brush. To do this, click on the gear icon in the brush toolbar and choose the Show Brush Settings option at the bottom. This will open up many options that you can customize to create your own brush preset. Here you can change basic things about the brush, such as the diameter and the hardness, to more advanced things such as Jitter. The Jitter basically means randomness, so if you see the value of Size, Stroke, Angle, or Opacity in the Jitter section each time you use the brush, it will be slightly different. This helps if you are stamping a shape onto your image to fill a background but want a bit of randomness to show up in each brush. Take some time and play around with each one of these sliders to see how it affects the brush. You will always see a live preview of the brush at the very bottom.
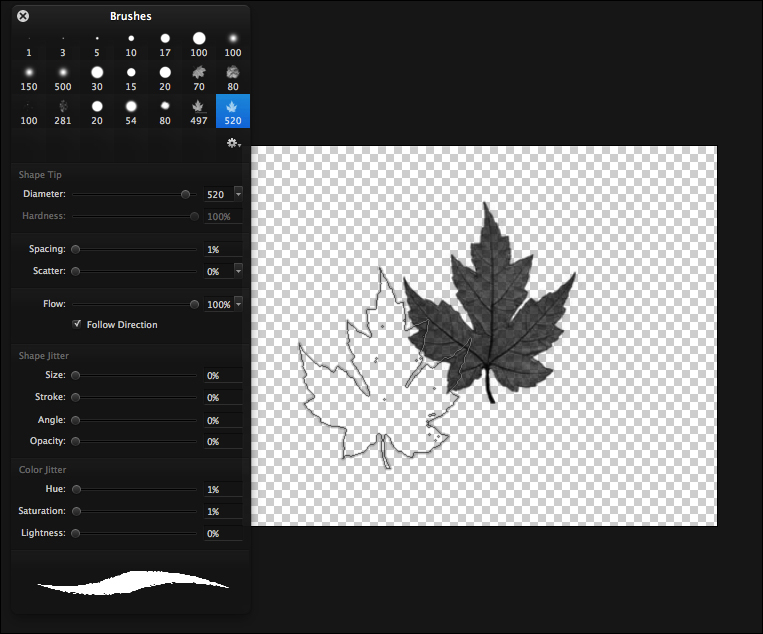
The following screenshot is a view of the brush settings toolbar and all of the things you can control:
Another fun thing you can do with brushes is create a custom brush by copying another image. In the following example, let's use a photo of a leaf that was set against a white background. We can make a brush out of this so that it can be turned into a stamp, and add this into any image; it's really easy. To create a custom brush, perform the following steps:
- Click on the gear icon in the brush toolbar and select New Brush From Image.
- Select your image and it will appear in your brush's presets.
- From here you can make the brush smaller or larger and control any of the other brush settings.
Any custom brushes that are created can also be used with the eraser tool.
If you have used Photoshop in the past and have a set of custom brushes for Photoshop, you can import those into Pixelmator. Click on the gear icon at the bottom of the brushes toolbar and then click on Import Brushes. Find the Photoshop presets and click on them in the Import dialog box. Just one step and now you can have all of your Photoshop brushes in Pixelmator!