Exploring Colors
Using Selective Focus for Artistic Expression
Introducing Grain
Painting with Light
Emphasizing Obscure Details
Taking a Closer Look at Magazines
A lot of macro photography is met with the relatively predictable response of "What the heck is that?" Taking the incomprehensibility of macro photography one step further might seem to be a little bit ridiculous. Come to think of it, it probably is, but then again, in the case of abstract macro photography, "ridiculous" can look rather gorgeous.
What is an abstract macro photo, exactly? The term is actually quite difficult to define, partly because both macro and abstract mean different things to different people. Think of macro photography as an attempt to document something small. In contrast, abstract photos are not about documentation or exploration of a particular item, but rather about utilizing techniques used in macro photography to capture shapes and colors that are aesthetically pleasing, like the creative way of photographing macro photography gear utilized in 8-1.

Figure 8.1. ABOUT THIS PHOTO An extension tube lit by a tea candle placed inside the tube. Taken with a Canon 50mm f/1.8 lens on a 13mm extension tube. 1/20 sec., f/1.8 at ISO 100.
Shedding the demand of having your photos tell a story or be recognizable in any way is liberating. In a way, this chapter about abstracts is a result of all the macro photos that didn't quite work out as planned: Photos that turned out looking unintentionally beautiful. It is a matter of taste, of course, but personally I love the idea of sharing my love of quirky photos with the world.
There are a lot of surfaces that can give some truly mesmerizing color. Any surface that reflects a rainbow of colors, for example, can give subtle, yet deeply intriguing macro shots. Commercial CDs, CD-R discs, CD-RW discs, and DVDs all live slightly different reflections under different types of light, which can give dramatically different, yet exquisite effects. Photo 8-2 is a blue burned CD-R disc, 8-3 is a dual-layer DVD-R disc, and 8-4 is a commercially pressed music CD. All these photos were lit with a simple halogen desk lamp, but you can get a huge variety of effects by using different light sources. Candlelight, flood lighting, colored light, and multi-colored light sources all give diverse results. Experiment to find which combination of disc and light works for what you are trying to achieve!

Figure 8.2. ABOUT THIS PHOTO CDs and DVDs. All taken with a Canon MP65E f/2,8 macro lens at around 3x life-size magnification. All taken at 1/4 sec., f/2.8 at ISO 100.

Figure 8.3. ABOUT THIS PHOTO CDs and DVDs. All taken with a Canon MP65E f/2,8 macro lens at around 3x life-size magnification. All taken at 1/4 sec., f/2.8 at ISO 100.

Figure 8.4. ABOUT THIS PHOTO CDs and DVDs. All taken with a Canon MP65E f/2,8 macro lens at around 3x life-size magnification. All taken at 1/4 sec., f/2.8 at ISO 100.
Capturing reflected light from CDs and DVDs is not difficult, but it does take a lot of patience. You have to get everything just right. For one thing, you don't want to catch a reflection of the light source, you want the internal reflections from the disc.
When using this technique, you are photographing into a light source, which means that your photos are prone to stray light (much like the solar flare you sometimes get on outdoor photos). To avoid this, make sure that your light doesn't hit the front element of the lens directly. If you have a lens hood, use it. If not, it is easy enough to tape a bit of cardboard to your light. Angle the board in such a way that it blocks any light that might hit the lens.
Cars, bicycles, and other lacquered surfaces are other sources for interesting colors, as the techniques used to paint them can be distinctively different from each other. Flat paint surfaces don't make for particularly exciting photography, but pearlescent, metallic, metal flake, and so-called "flip paints" (a type of automotive paint that appears to be a different color depending on which direction you see it from) all give opportunities for up close photography. When trying macro photography on car paints, I'd recommend using available light, because capturing the intricacies of painted and lacquered surfaces using an electronic flash is extremely difficult.
You'll get the best results by photographing a part of the car body that has a bend or a natural crease or kink in it. If the car you are photographing has a conversion from concave to convex with a ridge in between (such as seen on the BMW Z4 roadster, for example), it allows you to capture a lot of lighting situations in a single photo.
I've touched on selective focus — deliberately leaving a part of the frame out of focus — before, but this technique really shines as a weapon in your quest to take creative abstract macro photographs. Because you can effectively reduce all but a thin sliver of the photograph to a colorful blur and leave just enough of the photo in focus to pique the interest of your viewers, the selective focus technique opens the possibility of photographing surfaces and items that wouldn't normally be all that exciting, like, say, nuts. What? You say nuts can't be interesting? I think picture 8-5 begs to differ!
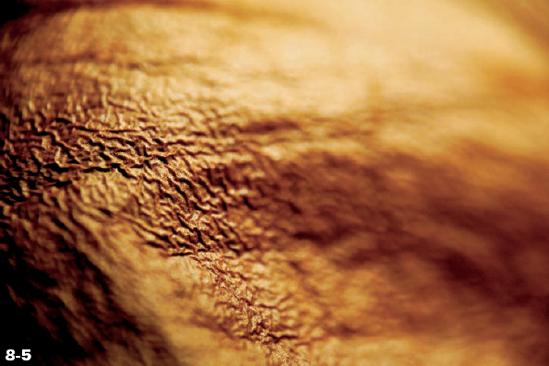
Figure 8.5. ABOUT THIS PHOTO Go nuts for this photo. Taken with a 60mm macro lens and a stacked 50mm lens. 1/500 sec., f/5.6 at ISO 100. Photo by Hilary Quinn.
When using extension rings, bellows, or reversal techniques, your depth of field is limited anyway, and you don't have to take many photos to figure out how to get only part of your frame in focus: By holding your camera at an angle, your subject partially falls out of focus. Personally, I find that band of focus running diagonally through the image gives an interesting effect. Other gradients, however, such as sharp on one side or in a corner and tapering off to completely out of focus through the rest of the frame can also look attractive.
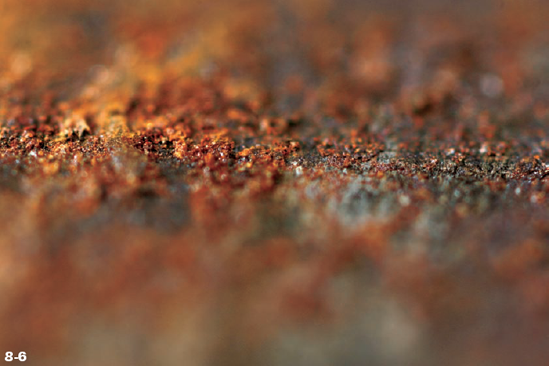
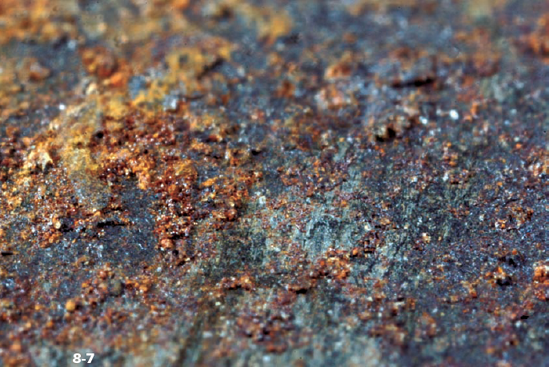
Although using narrow bands of focus throughout an image can look attractive, it is easy to overdo the effect. I believe 8-6 is pushing it, but 8-7 (which essentially is the same area) doesn't have nearly the same impact. To me, the strength of selective focus lies in the transition between in and out of focus. In other words, if you are shooting with a shallow depth of field, try not to use too sudden a drop-off between the in-focus and out-of-focus areas. A more gradual fading tends to be more captivating and gives the reader more to look at.
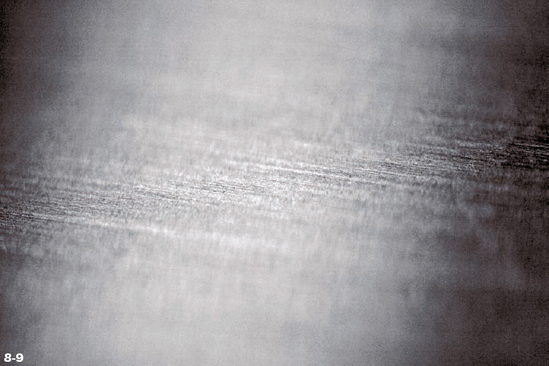
Because a lot of what you do with macro photography is to try to uncover or document extremely minute details, it is generally preferable to capture as much of the subject as cleanly as possible. The best way to do this is to use a low ISO setting on your camera. All dSLR and most digital compact cameras have ISO settings that are variable between 100 and 1600. Some even have a high speed setting that allows you to set your camera to ISO 3200. Photo 8-8, for example, was taken at a high ISO speed and illustrates the clean focus possible. Notice, however, that the higher ISO introduces more noise. The trick is to keep the noise from looking noisy — giving it a feeling more like creative grain from film.
The way ISO works is that you trade off noise and resolution against shutter speeds. Here's how the sacrifice works: If you assume that the aperture and lighting conditions stay the same, slower shutter speeds equal lower ISO and less noise. Higher shutter speeds require higher ISO and result in more noise. For most macro work you want ISO 100 or 200.
Tip
ISO is a way to set the sensitivity of the imaging chip inside your digital camera. A higher ISO value means that you can take photos in lower light, but you introduce digital noise, which lowers the quality of your photo. It is a remnant from the time when you physically had to change the silm from 100 (which is standard) to a more light- sensitive film, such as ISO 800 or ISO 1000.
A quirk with many digital cameras is that if you shoot at a medium fast ISO (400 or 640, for example), the resulting photos look as if they have been taken with an old fashioned film-based camera, getting that grainy look. If you go to even higher ISO values, the added noise changes character again, and it can become obvious that this is digital noise, rather than film grain.
One of the techniques I have been experimenting with when working with macro photography is to deliberately introduce a high level of noise into the images by setting my camera to ISOs of 1600 or 3200. Photo 8-8 is an example. At ISO values this high, the digital noise is noticeable and quite disturbing, but it does add a certain organic feel to the photos, more like film grain. In addition, the distraction of colored digital noise can be largely counteracted by converting the image to black and white, as I did on 8-9, which makes the noise look a lot like the characteristic film grain found on the classic Kodak T-Max film.

Most types of photography lighting are based around fixed lights, such as natural lighting, flash units, and flood lighting. However, there is no reason why you can't use moving lights to light your subjects. That is where painting with light comes in. It's an old technique used with many genres of photography and is especially elegant when used with still life. It does require that you use a camera that can support longer shutter times (2 sec. or longer).
The idea of painting with light is quite simple and applies well to large objects, such as cars. It can also be applied to much smaller objects. Painting with light is accomplished photographically by opening the shutter on your camera and then moving a light source over your subject. If you move the light source quickly in one area and slower in others, the areas get less and more light, respectively. They show up darker or brighter compared to other parts of the photo. An additional bonus is that you can eliminate shadows under your object, by briefly shining your light underneath. The little figure photographed in 8-10, for example, has a dynamic shadow and even lighting. The streak of light along its back is due to the slow movement of the light source.
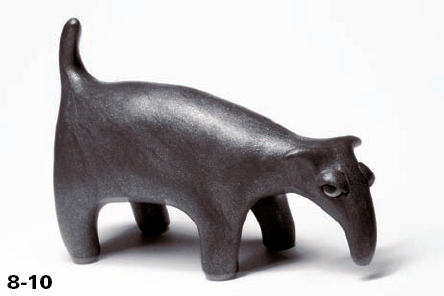
Figure 8.10. ABOUT THIS PHOTO A photo of a Fimo figurine painted with light. Taken with a Canon 28–135mm macro lens. 3 sec., f/32 at ISO 100.
With this in mind, it is possible to achieve lighting effects with a moving light source that are impossible when using any other source of lighting. When photographing small objects with fixed lights, it can be extremely difficult to eliminate all shadows — a problem that is easily overcome by using a simple halogen desk lamp to paint with light.
When painting with light, it is important to keep the light source moving at all times, otherwise the light tends to look blotchy and unnatural. Even if you wish to highlight or emphasize a particular element of your subject, it is better to move the light in even circles or back and forth over your subject to achieve a more even lighting situation.
In conventional photography, painting with light can be used to apply advanced lighting to larger subjects. In the world of macro, however, this is a lot more difficult, because even small light sources are likely to illuminate a large proportion of your subjects. If you are struggling to achieve the results you want, it is possible to focus the light. Whether you are using a halogen desk lamp or a flashlight, you can make a snoot for your light source by rolling up a piece of black cardboard into a cone. The light is aimed into the broad end of the cone and shines out of the hole in the narrow end of the cone. You can adjust the size of the light beam by adjusting the hole in the cone or by adjusting how far into the cone you place the light source.
Apart from creative applications, I've found that painting with light is useful when photographing electronics. Due to the highly reflective surfaces of print boards, it is nearly impossible to capture them without getting highlights from your light source somewhere on the item. By painting with light, you can make sure that the highlights are less obvious. Or, you can get more creative and keep the highlight present, but let it take on a more appealing form, like a streak of light across the print board, which gives an illusion of speed.
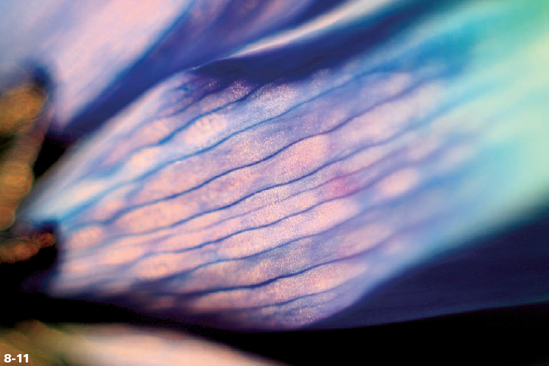
Photographing flowers to look like flowers is one thing. Taking the outlandish qualities that some plants have and emphasizing them to turn them into surrealist works of art is a different issue altogether.
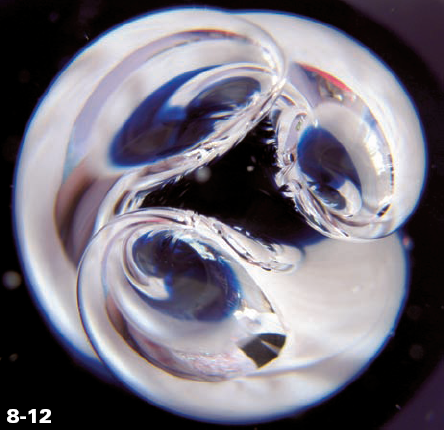
There are a lot of plants out there that don't look like anything that should be growing in nature. Strange colors, extravagant shapes, and stems stretching for the sun and the sky, plants (see 8-11) are the natural extension into abstract artwork. The same is true for many everyday objects, such as paperweights (see 8-12).
Note
Methods and tips for photographing flowers are examined in Chapter 5.
Anywhere you can find interesting patterns is practically screaming out to be photographed up close. You can find inspiration in the oddest places, but did you know that printed goods can actually be phenomenally interesting? Glossy boxes, magazines (see 8-13), book covers, CD and DVD booklets (see 8-14), newspapers, soda cans (see 8-15), and even milk cartons are printed with printing techniques that vary and give interesting results.
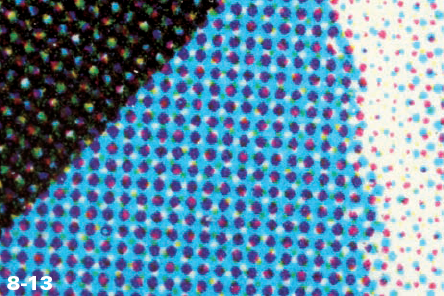
Figure 8.13. ABOUT THIS PHOTO A variety of printed goods make for interesting photography. 8-13: Brochure detail.
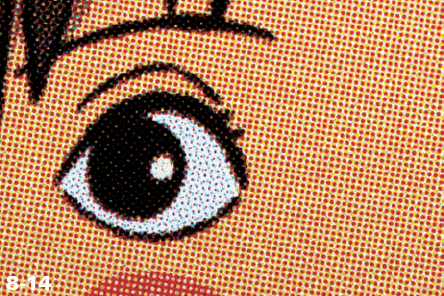
Figure 8.14. ABOUT THIS PHOTO A variety of printed goods make for interesting photography. 8-14: DVD booklet.
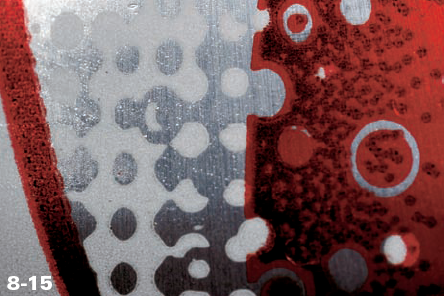
Figure 8.15. ABOUT THIS PHOTO 8-15: Soda can. All taken with a Canon MP65-E f/2.8 macro lens and a MT-24EX Macro Twin Lite flash. 1/125 sec., f/9.5 at ISO 100.
Even more exciting is paper that is printed in a way designed to make it difficult to copy — bank notes (8-16), checks, passports (8-17), and other valuables or identification papers often use some of the most high-tech printing techniques available. This means that the print is of extremely high quality and can look exquisite up close. In some countries it is even against the law to reproduce these types of papers in full or in part, so in addition to beautiful art, you get to be rebellious and live on the edge.
Photographing printed papers is relatively easy; you just have to make sure that you get enough light on the surface of which you are trying to take a photo. If you are trying to take photos of items that have raised print (a common feature of security documents), you can get a three-dimensional feel to your images by adding a light source that shines along the paper you are photographing from the side.
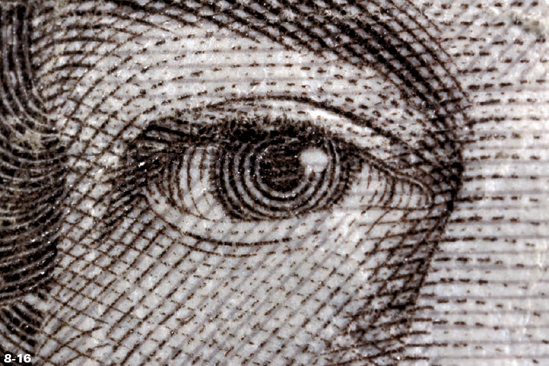
Figure 8.16. ABOUT THIS PHOTO A portion of an English bank note taken with a Canon MP65-E macro lens and a MT-24EX Macro Twin Lite flash. 1/125 sec., f/9.5 at ISO 100.
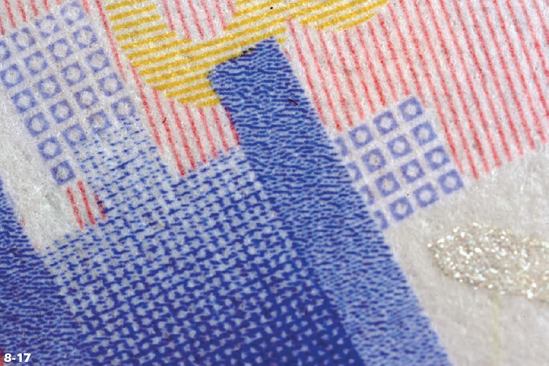
Figure 8.17. ABOUT THIS PHOTO A passport detail taken with a Canon MP65-E macro lens and a MT-24EX Macro Twin Lite flash. 1/125 sec., f/9.5 at ISO 100.
Assignment
It's a Meeting....
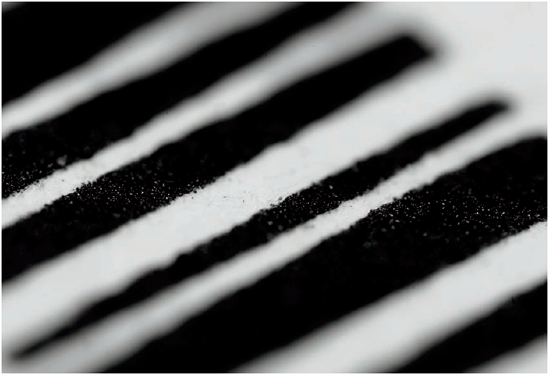
For this assignment, take a photo of two separate materials intersecting. Ideas for materials include paper and plastic, bricks and mortar, and water and glass. Use creative lighting and selective focus to create an original photograph. Post your best image to the Web site.
I decided to explore the intersection of ink and paper: A bar code from the back of a magazine seen up close. I particularly like how the limited depth of field adds to the photo as the ink and the paper fall in and out of focus throughout the photograph. I took my photo with a Canon MP65-E macro lens and a Macro Twin Lite flash, 1/125 sec., f/9.5 at ISO 100.
Note
Don't forget to go to www.pwassignments.com when you complete this assignment so you can share your best photo and see what other readers have come up with for this assignment. You can also post and read comments, encouraging suggestions, and feedback.