
When you install Magento, it creates a default storefront. This storefront uses some of Magento's optional features, such as callouts, to display ads and a newsletter subscription on the front page. It also uses a fictional logo and a welcome message on the front page. All of these features need to be customized for your storefront.
Let's see what our store looks like so far. We will look at both a Category page and the front page.
Let's look at the features of the default Magento store. Later in the chapter, we will learn how to customize each of these.
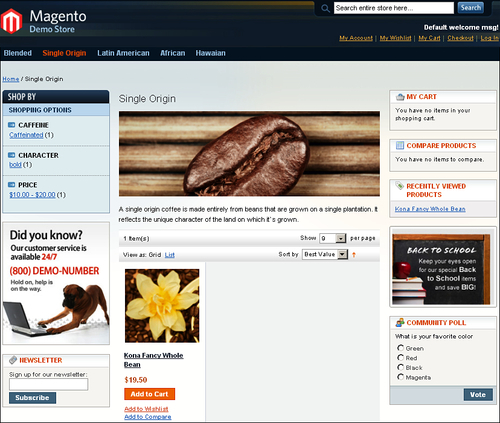
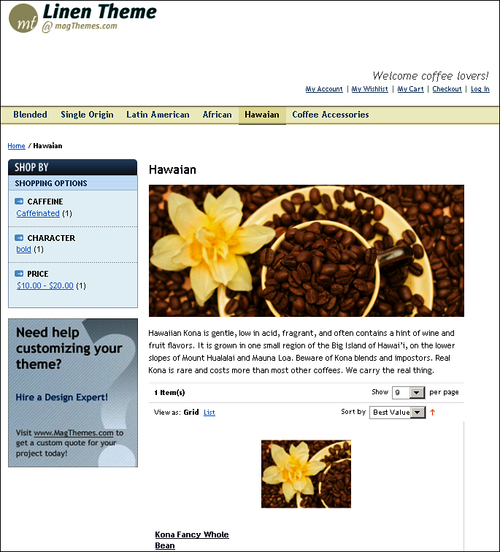
The default Category page contains many features in common with the default front page, and some that are unique to the Category page.


Notice the Shop By block in the upper left corner? This is the Layered Navigation Menu. This menu holds the Attributes that we designated as filterable. If this Category had any Child Categories, they would also appear in the Layered Navigation Menu.
These blocks appear by default. The Magento Designer's Guide contains extensive instructions on how to customize the content and layout of your store pages. However, you do not need to customize these blocks for your store to function. Therefore, for this quick-start guide, we will not learn how to customize these standard blocks.
Note
The Magento Designer's Guide can be found at http://www.magentocommerce.com/design_guide.
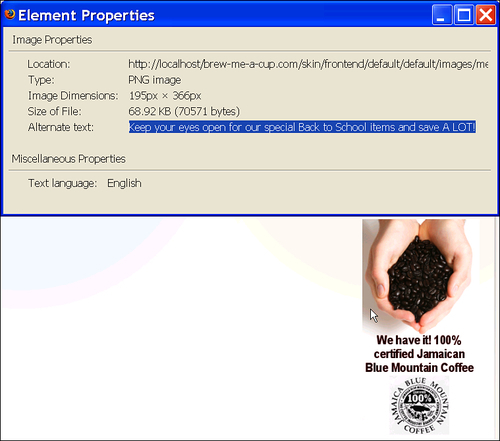
In the default layout, you can see two callouts on each catalog page: Did you know? and Back to School. These are the graphics on the left and right. Obviously, these callouts are not appropriate for most stores. We will learn how to remove or replace them with callouts that are appropriate for your store.

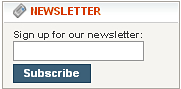
Magento's default front page contains a block that enables your customers to sign up for your newsletter. We will learn how to hide this block.
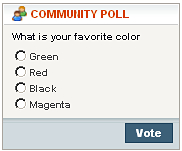
Magento's default front page contains a block that displays a single-question survey, or a poll. We will learn how to hide this block.
In the upper right corner of the page, notice Default welcome msg!. We will learn how to customize this welcome message.
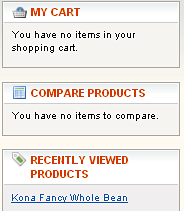
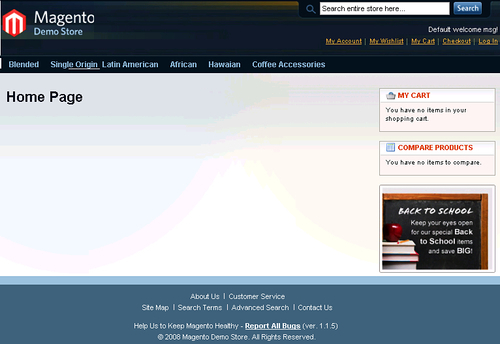
The default front page is simpler than the default Catalog page. However, it does have some links at the bottom of the page that are also on the catalog pages as shown in the following screenshot:

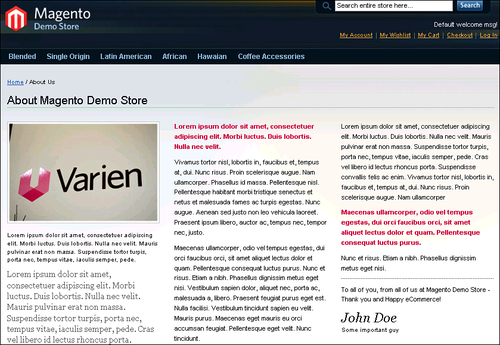
The default About Us and Customer Service pages contain dummy text and a graphic that you can edit as shown in the following screenshot:
Later, we will learn how to customize these pages. Because the process for customizing the About Us and Customer Service pages is the same, we cover them together.
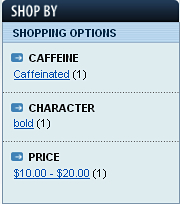
Notice that the Layered Navigation Menu enables the shopper to filter Products by three Attributes: Caffeine, Character, and Price.
In the following screenshot of the Manage Attributes page, you can see two of the Attributes that we created: caffeine and character. They have been designated as Filterable as shown in the following screenshot:
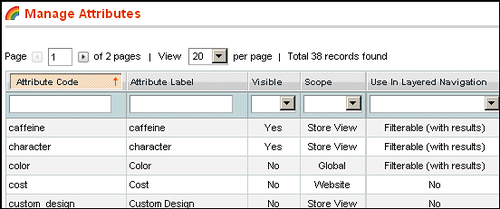
Because these two Attributes are filterable, and not blank, they appear in the Layered Navigation Menu. Remember, only Anchor Categories appear in the Layered Navigation Menu, and then you will see the filterable Attributes under those Categories.
You can also see one of Magento's default Attributes, color, which is also filterable. However, color does not appear in the Shop By block because we did not make it visible, as you can see from the No option in the third column.
Most store owners choose to use the Layered Navigation Menu. If you don't want to use it, you can edit your site's templates to remove that block. However, that is unnecessarily complicated. Instead, simply make all of the Attributes that you use not filterable, and the block will disappear.
Let's look at how we can customize the default callouts. Notice that the callouts display in the left and right columns:
Now look at the default front page. Notice that it does not have a column to the left of the main area. Therefore, the left callout is not displayed on the front page. However, the right column and the right callout are displayed on the front page as shown in the following screenshot:
The left callout, which does not appear on the front page, links to your store's Shopping Cart.
To customize these callouts, you will need to do two things:
Replace the default graphic for each callout.
Replace the default alt text for each callout.
Both are covered in the next section.

Make sure that you have named the new graphic col_right_callout.jpg or col_left_callout.jpg, whichever one you are replacing.
Navigate to the Magento directory skinfrontenddefaultdefaultimagesmedia.
Rename the existing col_right_callout.jpg or col_left_callout.jpg to something else, such as ORIGINAL_col_right_callout.jpg.This preserves the original graphic so that you can roll back to the original condition.
Copy your new graphic into skinfrontenddefaultdefaultimagesmedia and name it col_right_callout.jpg or col_left_callout.jpg, whichever one you are replacing.
If your customer's browser is unable to display a graphic, it will display the alternative text for that graphic instead. We call this alt text. Also, search engines use a graphic's alt text to help them classify a page. When you replace the graphic for your callout(s), you should also replace the alt text for those graphics.
Navigate to the Magento directory appdesignfrontenddefaultdefault emplatecallouts.
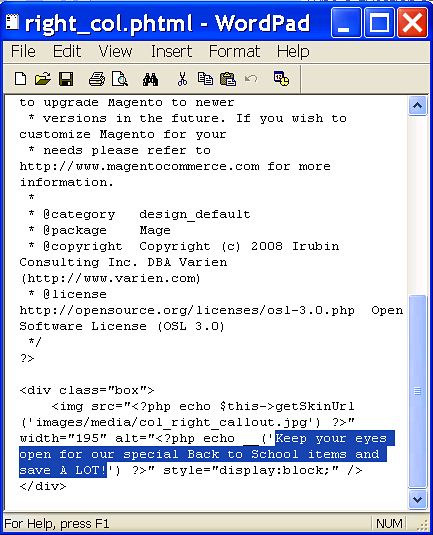
Locate the file right_col.phtml.
Before changing the file, make a duplicate of it. Name it to something like ORIGINAL_right_col.phtml.
Open the file in a text editor such as WordPad, or in an HTML editor such as DreamWeaver.
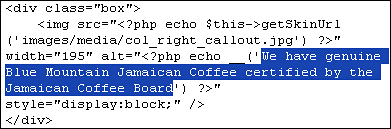
In the text file, locate the alt text as shown in the following screenshot:
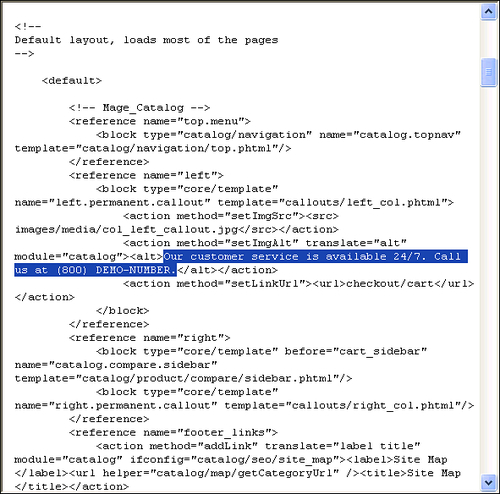
Navigate to the Magento directory appdesignfrontenddefaultdefaultlayout.
Locate the file catalog.xml.
Before changing the file, make a duplicate of it. Name it to something like ORIGINAL_catalog.xml.
Open the file in a text editor such as WordPad, or in an HTML editor such as DreamWeaver.
Locate the default alt text. An easy way to do this is to use the search for (800) DEMO-NUMBER.
You just replaced the graphics, alt text, and links for the callouts. To do this, you needed to go outside of Magento and work with files directly in Magento's directory. You might not see a change in your page yet, which we will address in the next section.
At this point, if you display and refresh a page, you probably won't see the new link. Why would Magento still display the old link for the callout? Let's take a quick detour from customizing the store and talk about Magento's page cache.
As we performed the customizations, we had to navigate through the many folders that make up your Magento installation. There are thousands of files in Magento. When you view a Magento page, you see the result of Magento assembling many different files and displaying them together. Assembling a page takes time and processing power.
Magento holds pages that it displays in a separate storage area called the cache. For example, suppose a shopper navigates to the Single Origin Coffees category page. Magento will assemble this page, display it for the shopper, and store the page in its cache. When the next shopper asks for the Single Origin Coffees category page, Magento retrieves the page from its cache. This is faster than assembling the page again.
Magento's cache speeds up the display of pages reducing the load on the server. However, it has a disadvantage. After you customize your store, Magento might hold on to the old versions of pages. Instead of assembling the latest version of a page, sometimes Magento will display the old, cached version. To correct this, we usually turn off the cache while customizing our storefront. When we finish with our changes, we turn the cache on again.
You can select which types of information Magento will cache. However, when performing the basic customization on your site, it is usually easiest to enable and disable all of them at once.
From the drop-down menu next to All Cache, select Disable or Enable.
Click on the Save cache settings button.
Refresh the page that you are testing.
By turning off Magento's cache, you have ensured that any changes you make to your pages will show up as soon as you refresh them in your browser. However, you have also increased the load on your web server. When you're done with developing your site, you will want to turn the cache back on.
Customizing and using the newsletter feature is covered later book when we discuss about customer relationships . If you are not going to publish a newsletter soon, you might want to disable this feature for now. Also, if you are not going to customize the poll, you should disable it.
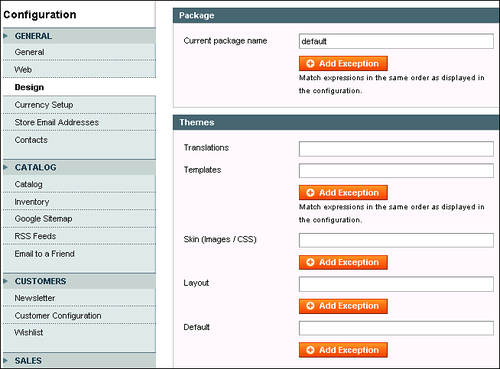
From the Admin interface, select System | Configuration | General | Design.

This page enables you to customize several items. For now, let's look at the ones that are necessary.
Recall that we talked about metadata when creating a product. Metadata helps search engines to determine the content of a web page, and to categorize the page. The HTML Head section enables you to customize the metadata for your entire store. The data you enter into the fields on this page will appear in the header of each page in your store. Your shoppers won't see this data, but search engines will.
If a page in your site does not have a customized title, then it will use the title given here. For example, when you created products, each Product page used the name of the Product as its title. All of Magento's built-in pages have their own titles, and so this field should not affect your system unless you create custom pages.
The fields in this section are used to customize the logo and the welcome message.
By default, Magento looks in skinfrontenddefaultdefaultimageslogo.gif for the store's logo. The graphic is 157-by-47 pixels in size. The easiest way to customize your store's logo is to make a direction replacement, the same size and file name, and replace the existing one.
The field Logo Image Alt holds the alt text for the logo. This will be displayed if the graphic is not displayed.
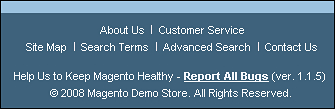
On this page, you can change the Copyright notice. This is the last line in the previous screenshot.
The links About Us, Customer Service, and Contact Us are customized elsewhere, as is the message immediately above the copyright notice.
There is also a field on the configuration page for Miscellaneous HTML. This enables you to add any HTML code immediately below the copyright. For example, you can add Google Analytics, or some other code, to help you track visitors on your site.
Your store's layout, terminology, colour scheme, typestyles, and images are controlled by its theme. Creating an entirely new theme for your site is beyond the scope of this book. Covering it will require an entire book by itself. However, you can easily replace your site's default theme with a theme that someone has built for you. In addition to many paid themes, you can find plenty of free themes on the web as well.
The files for your store's theme reside in these two directories:
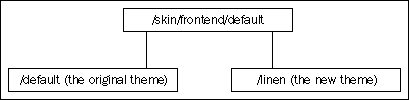
/app/design/frontend/default/default/—This directory contains the layout, translations for the labels and terms, and templates./skin/frontend/default/default/—This directory contains images, style sheets, and JavaScript for the blocks.
The last part of those paths, /default, is the name of the theme that comes with Magento, default theme. When you install a new theme, you will place its files under /app/design/frontend/default and /skin/frontend/default. For example, I downloaded the free Linen theme from www.magthemes.com, and copied its files into /app/design/frontend/default/linen and /skin/frontend/default/linen.
When I unzipped the package for the Linen theme, it contained these directories:
/skin/frontend/LinenTheme/default/app/design/frontend/LinenTheme/default
To install this theme, perform the following steps:
Rename
skin/frontend/LinenTheme/defaulttoskin/frontend/LinenTheme/linen.Rename
app/design/frontend/LinenTheme/defaulttoapp/design/frontend/LinenTheme/linen.Copy the directory
linenand its subdirectories from/skin/frontend/LinenTheme/lineninto the Magento directory,/skin/frontend/default/. Your directories now look like the following.
Copy the directory
linenand its subdirectories from/app/design/frontend/LinenTheme/lineninto the Magento directory,/app/design/frontend/default/linen. Your directories now look like the following:

In the Admin interface, navigate to System | Configuration | General | Design. You should see a section on that page labeled as Themes:
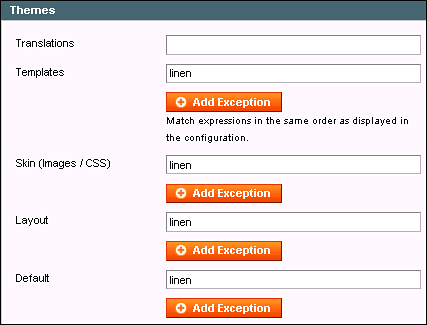
Notice that this theme changed the store's appearance in several ways. Now, only one callout is displayed, and it is not one of the callouts that we customized. Also, the logo has changed. It is no longer the one which we customized. If we want to preserve the graphics that we customized, we need to move them into the /images directory of the new theme.
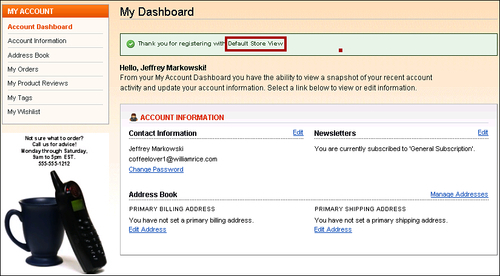
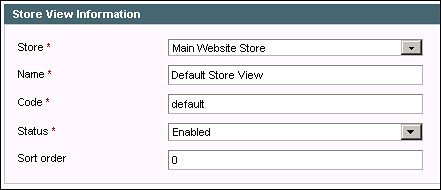
Out of the box, Magento gives your store the name Default Store View. This name appears in several places, such as when a customer creates an account on your site.
You should change this to your store's name.
Magento enables you to customize almost every aspect of your store's appearance. A complete customization requires you to create a new theme, which is beyond the scope of this book. However, you can easily customize the default Magento installation in significant ways. Without getting into making a new theme, you can still make your store unique.
If you plan on customizing the logo, callouts, or any other graphics; and installing a new theme (either free or paid for), install the new theme first. Once the installation is complete, customize the elements of the new theme. If you customize the elements on your store's default theme, and then replace the default theme with a new theme, you will have wasted time customizing the default theme.