STROBOSCOPE
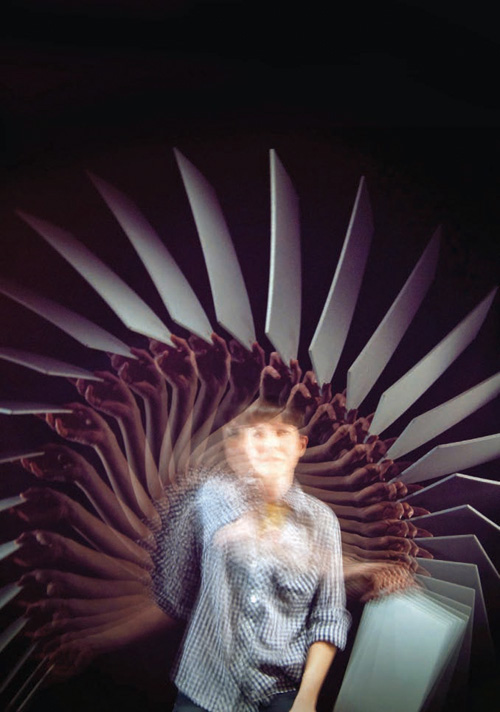
Photography by Walter Kitundu
PLAY WITH SPACE AND TIME
Make a mechanical strobe with a toy motor and construction paper, pair it with a digital SLR camera, and take stunning photographs of objects in motion.
We were inspired to play with stroboscopic photography after seeing photographs taken by 19th-century French scientist Étienne-Jules Marey. In the 1880s, Marey invented a camera with a rotating shutter that could capture multiple images on a single photographic plate. He used this camera to study locomotion in humans, animals, birds, sea creatures, and insects.
Marey used clockwork mechanisms and photographic plates for his contraption, but you can make a much simpler version with a slotted paper disk, a toy motor, and a digital camera. The camera is set to take long exposures while the slotted disk spins in front of its lens. Each time the slot spins past the lens, the camera gets a glimpse of your subject and adds another layer to the image. The resulting photograph is a record of your subject moving through space and time, and these images often reveal beautiful patterns that would otherwise be invisible to us.
Set up: p.93 Make it: p.94 Use it: p.99
Nicole Catrett is an exhibit developer at the Exploratorium in San Francisco. You can play with her stroboscope exhibit there and see more of her work at nicolecatrett.com. Walter Kitundu is an artist and bird photographer. You can see more of his work at kitundu.com.
Freeze Frame
A spinning disk with a single slit lets your camera see serial glimpses of a moving subject — and record them all in a single image.
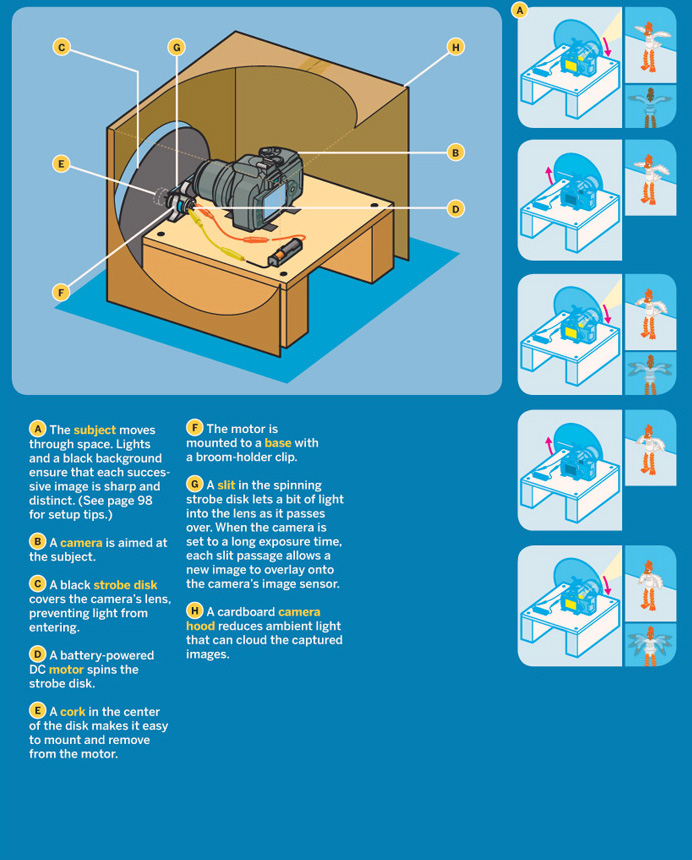
Illustration by Rob Nance
SET UP.
MATERIALS
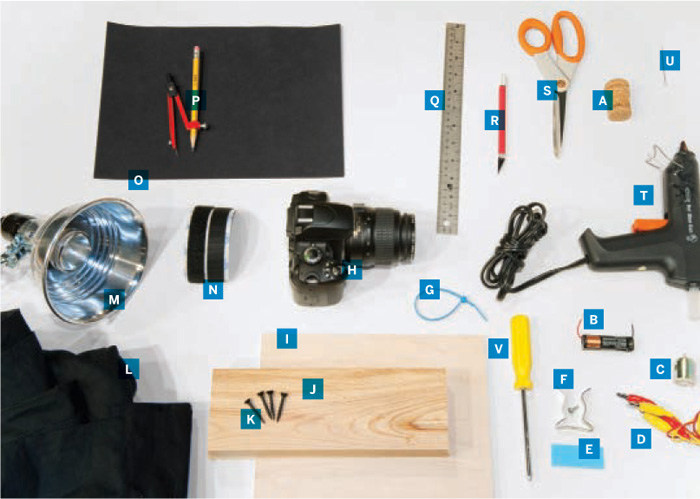
[A] Cork from a wine or champagne bottle
[B] Battery holder, 1xAA and battery RadioShack (radioshack.com) part #270-401, $1
[C] Motor, small, 1.5V–3V DC RadioShack #273-223, $3
[D] Alligator test leads (2) RadioShack #278-001, $7 for a set of 4
[E] Foam sheet (“Foamies”), 2mm×9″×12″ Craft Supplies For Less #F2BB10 (craftsuppliesforless.com), $4 for a pack of 10
[F] Broom-holder spring clip with mounting screw McMaster-Carr #1722A43 (mcmaster.com), $11 for a pack of 10. You can also use a zip tie.
[G] Zip tie
[H] Digital SLR camera with manual focus that can take long exposures Some good options are the Nikon D40, D3000, and D5000, and the Canon EOS Rebel Ti, XTi, XS, or XT. You might be able to use a point-and-shoot camera, but it needs to have a manual focus and exposure mode.
[I] Plywood, ½″ thick, 10″×10″
[J] Lumber, 2×4, 10″ lengths (2)
[K] Wood screws, 1¼″ (4)
[L] Black fabric, enough to work as a backdrop A queen sheet is a good size, and black cotton works well. Avoid anything shiny or reflective. You could also use matte-finish black paint for your backdrop.
[M] Clamp lights (2 or more) Home Depot #CE-303PDQ (homedepot.com), $13 each
[N] Velcro tape, 3½″ strips OfficeMax #09015086 (officemax.com), $4 for a pack of 10
[O] Construction paper or cardstock, black (1 sheet)
[NOT SHOWN]
Cardboard box approximately 12″ square
TOOLS
[P] Drawing compass and pencil
[Q] Ruler or calipers
[R] X-Acto knife
[S] Scissors
[T] Hot glue gun
[U] Sewing needle, large
[V] Phillips screwdriver
[NOT SHOWN]
Drill and drill bits
MAKE IT.
 BUILD YOUR STROBOSCOPE
Time: 2–3 Hours Complexity: Easy
START >>
1. MAKE THE STROBE DISK
1a. Use a compass to draw an 8½″-diameter circle on black construction paper or cardstock; apply enough pressure with the compass point to mark the circle’s center.

1b. Measure the diameter of your cork. Use the compass to draw a circle of that diameter at the center of the larger circle. This will come in handy later when you mount the strobe disk on the motor shaft.

1c. For the strobe disk slot, use a ruler to draw a line from the center mark to the outer edge of the big circle. Then draw a second line ⅛″ away from and parallel to the first line.

1d. Make a perpendicular mark across the 2 slot lines ½″ in from the edge of the big circle. The slot will run from this mark to the closest edge of the inner circle.

1e. Cut out the slot with an X-Acto knife, using the ruler as a guide to make the cuts clean and straight.
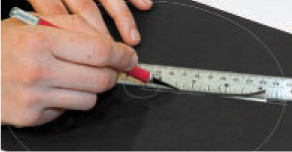
1f. Use scissors to cut out the large circle.
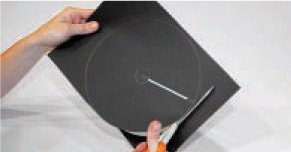
2. ATTACH THE DISK TO THE MOTOR
2a. Use an X-Acto knife to slice a round section from the cork, ½″ thick.
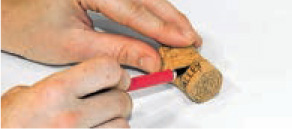
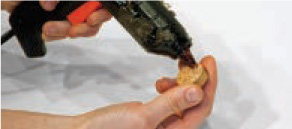
2b. Hot-glue the flat side of the cork section to the center of the strobe disk, using the small center circle you drew as a guide.
2c. Use a large sewing needle to pierce the center of the cork through the disk. This will make a pathway for the motor shaft.
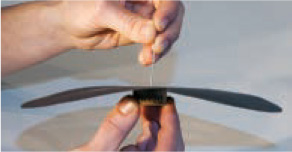
2d. Push the strobe disk and cork onto the motor shaft, with the cork facing out. This should be a snug fit.
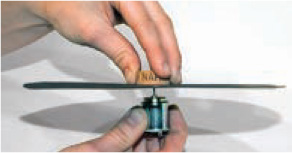
2e. To test the motor and strobe disk, use alligator test leads to connect the toy motor to your AA battery holder. The strobe disk should begin to spin.
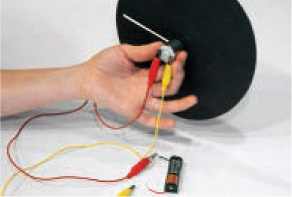
You now have the fundamental parts of your stroboscope. Peer through the contraption at anything moving, and the scene will turn into an old-time movie. Watching your friends dance will be a whole new syncopated experience. Also try looking at a vibrating guitar string or a stream of water.
3. BUILD THE BASE
3a. Cut a 10″ square piece of plywood for the base platform. Position a broom-holder clip (screw-hole down) with its long side parallel to an edge of the plywood, spaced approximately ¼″ in from the edge and 2″ in from a corner. Screw the clip down tight. (If you’re using a zip tie instead of a broom clip, see Step 3c.)
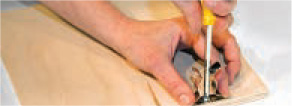
3b. Remove the strobe disk from the motor and set it aside. Wrap a thin foam sheet (cut to fit) around the motor and pop it into the broom holder, shaft pointing out. The foam keeps the motor from vibrating.
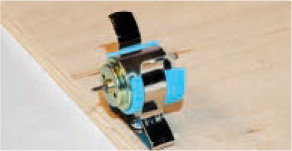
3c. (Alternative) If you don’t have a broom holder, you can use a zip tie. Drill 2 parallel holes (each large enough to accommodate the diameter of your zip tie) ¼″ in from the edge of the plywood and 2″ and 3″ from the corner, respectively, and pass the zip tie through the holes and around the motor to secure it to the plywood.
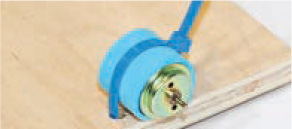
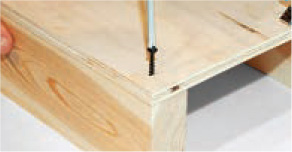
3d. For the “legs” of the base, cut two 10″ lengths of 2×4 lumber. Position the legs parallel to each other (upright on their long sides) about 7″ apart, and place the plywood square on top so it lines up with the outside edges of the legs. Mark and drill pilot holes in the corners of the plywood square and legs, about ¾″ in from each outside edge, and use the 4 wood screws to securely attach the base together.
3e. Put the strobe disk back on the motor shaft.
4. MOUNT THE CAMERA
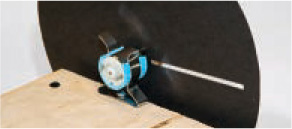
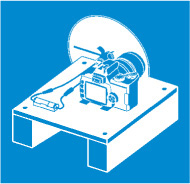
4a. If your camera has a zoom lens, set it to the widest angle possible. Place your camera on the wooden base so that its lens points at the strobe disk, completely within the slot’s path. To keep extra light from entering the lens, the disk and lens should be as close as possible without touching.

4b. Use a pencil to mark the location of the camera’s body on the base. Set your camera aside.
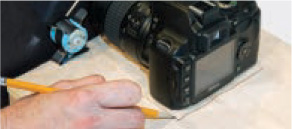
4c. Adhere two 3½″ strips of velcro tape (hook side) onto the wooden base in the camera body location, parallel to each other and perpendicular to the image plane. The velcro will hold the camera in place and let you make fine adjustments to its position.
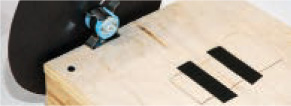
4d. Place one strip of velcro (loop side) along the bottom of the camera body. Make sure you can still access the battery compartment.

4e. Position your camera on the base. If it tips forward, slice a round section of cork to place flat under the lens for support; dry-test the fit, then remove the camera and hot-glue the cork to the base.

4f. Put your camera back in position, and locate a place for your battery holder a couple of inches behind your camera and opposite the motor. Remove the battery and use hot glue to attach the battery holder to the base.

4g. Replace the battery and reattach all but one of the alligator test lead connections.

5. MAKE THE HOOD
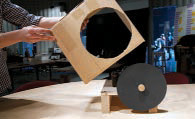
5a. Find a cardboard box big enough to turn upside down and fit over your whole rig, with room to spare. Use an X-Acto knife to cut out the back wall so you can access the camera. Cut a round opening in the front of the box, to give your camera and strobe disk a clear line of sight.

5b. Place the box over your rig to check the fit. Make sure the camera still has a clear view and that the slot in your strobe disk isn’t obscured. Voilà — your stroboscope is complete!
GETTING SET UP
Backdrop, Subject, and Lighting
Good stroboscope photography requires a black backdrop, preferably fabric, which makes your subject show up clearly without being lost in a bright clutter of background noise. With a black background, light and brightly colored objects will “pop,” while dark objects will disappear.
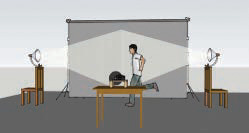
Your subject also needs to be well lit, or else it won’t show up. Clamp lights work well and are easy to adjust. With the camera pointing straight toward the backdrop and your subject in between, place 2 clamp lights pointing in from the left and right, respectively, lighting up the subject rather than the backdrop.
You can also set up your stroboscope outside, using sunlight instead of clamp lights. As long as you have a black background and bright light, you’re in business.
Camera Settings
To set up your camera, temporarily remove the strobe disk and focus your lens on the place where your subject will be moving. Make sure the focus remains set to manual. Here are some good typical settings you can experiment with for starters:
Shutter/exposure: Two seconds. With a too-short exposure, you won’t see much happening in the image, but if it’s too long, the image will be washed out.
Aperture: Set this to the lowest number possible to gather the maximum amount of light with each pass of the strobe disk slot.
FINISH X
NOW GO USE IT »
USE IT.
 HAPPY TRAILS!
THE FUN PART
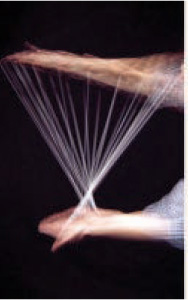
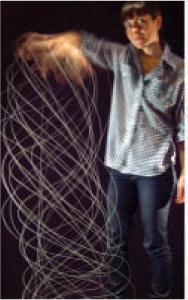
Now you can start to play with stroboscopic photography. Have a friend press the shutter while you try tossing or bouncing balls, juggling, releasing balloons, throwing sticks or paper airplanes, doing cartwheels, or dancing. Almost anything that moves is fun to photograph with a stroboscope. One of our favorite things to play with is string. Try twirling it in spirals or jumping rope.

Don’t be discouraged if your first few images are out of focus or washed out. You can solve these issues by adjusting your camera settings, making sure the cardboard hood is in place, and adjusting or adding lights.
The camera will be focused at a single fixed distance, so it helps to mark the floor to remind yourself or your subject to stay in the plane of focus. This will instantly improve your images.
DISK VARIATIONS
Large, slower-moving subjects (like people) look better when the disk only has one slot. However, certain fast-moving subjects — such as thrown objects or vibrating strings — look better if you use a strobe disk with 2 or 3 slots, which doubles or triples the number of exposures per second. Follow Steps 1a–2c to make additional disks that have multiple slots, and make sure that the slots are spaced apart evenly, so the disk stays balanced while it spins.


