
Photograph by Sam Murphy
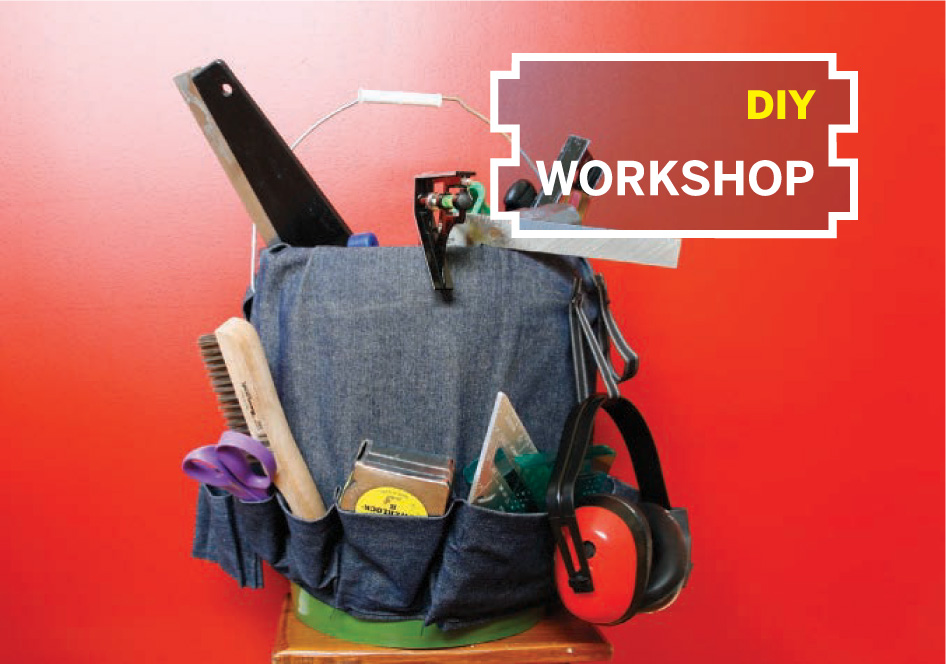
BUCKET FULL O’ POCKETS
 Make your tool bucket even handier with a nifty cover.
For almost any project, organization goes a long way toward making things go more smoothly. A tool bucket helps with that organization. It’s portable, and it keeps your tools organized, visible, and accessible.
This caddy cover, which fits over a 5-gallon bucket, costs about $10 and will take about a day to make. If you can get your hands on a heavy-duty sewing machine, we strongly recommend you do so — it will save you considerable time.
1. Customize your design.
When making your cover, it helps to have an idea of what kind of tools you want to store in your bucket. Make a mental list so you can customize the design to meet your needs. Adjust the pocket sizes according to what you’ll store in them. For heavy, large objects you’ll want to make the pockets as tall as possible, and you’ll need to increase their depth.
MATERIALS
5-gallon bucket Heavy fabric, 3’×5’ such as canvas or denim
Elastic, 1″ or 2″ wide, 40″ in length
8″ straps, 1″–2″ wide (3) Nylon straps work well, or you can use excess fabric, hemmed to prevent fraying.
Snap buttons (3)
Thread
TOOLS
Scissors, sharp
Needle
Pins
Tape measure
Sewing machine preferably heavy-duty
Pen or fabric chalk

Fig. A: The basic items necessary to create your caddy cover, including 2 sizes of rolled white elastic. (Not pictured: 5-gallon bucket, 8″ straps, and sewing machine.)
2. Hem your panels and pockets.
When we say “hem” we mean fold over the edge of the fabric 1″ and sew the folded piece to the main piece of fabric. This helps prevent fraying and makes the edges a little stiffer.
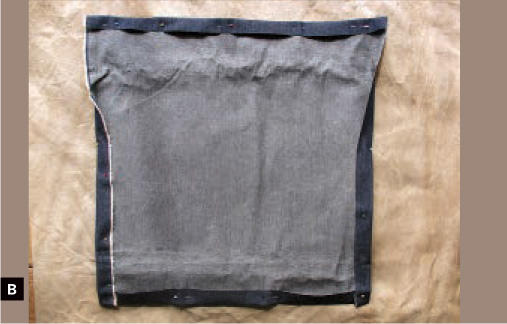
It helps to first pin down where you’ll be sewing. This keeps the fabric in place as you sew and helps you visualize where you’ll be sewing (Figure B).
2a. Cut 2 pieces of fabric, each 23″×22″. Hem the 22″ sides of both pieces. These are the tops and bottoms of your panels. Hem the 23″ sides of both panels, leaving 9½″ at the top unstitched (these sections will be hemmed at the end of the project).
2b. Cut pieces to the following 3 sizes and hem on all sides: 6½″×28″ (the final hemmed piece will be 4½″×26″); 8″×19” (final piece will be 6″×17″); and 5½″×13″ (final piece will be 3½″×11″).
3. Sew the pockets.
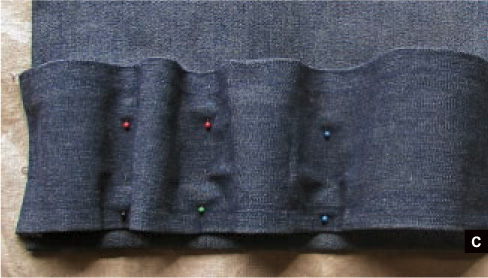
Figure C shows a hemmed pocket piece pinned and ready to be sewn to the first panel.
First Panel
3a. Lay one of the large panels on a flat surface, hemmed edges facing down, with the unstitched sections at the top. Use a pen or fabric chalk to mark the bottom edge from left to right at 2″, 4″, 7″, 13″, and 17″ (there should be 3″ remaining at the right edge). Place the 4½″×26″ pocket piece on a flat surface, hemmed edges down. From the left, mark the bottom edge at 3″, 6″, 10″, 17″, and 22″ (there should be 4″ remaining at the right edge).
3b. Place the 4½″ pocket piece horizontally on top of the panel, lining up the left and bottom edges of both pieces, and pin the 2 pieces together along the left edge, keeping the pin vertical (parallel to the left edge). Line up the first mark on the large panel with the first mark of the 4½″ pocket piece and pin it vertically. Do the same for the next 4 marks, then pin the right edges of the pieces together.
3c. Sew vertically along the 7 pinned lines, then sew the 2 pieces together horizontally along the bottom edge. Because of the depth of the pockets, there will be excess fabric. Try to bunch this up evenly along the whole pocket or into the corners of each pocket.
Second Panel
3d. Take the other large panel and lay it on a flat surface, hemmed edges down, with the unstitched sections at the top. From the left, mark the bottom edge at 6″, 8″, 11½″, 13″, and 17″ (there should be 3″ remaining at the right edge). Take the 6″×17″ pocket piece and place it on a flat surface. From the left, mark the bottom edge at 9″ and 12½″ (there should be 4½″ remaining on the right side).
3e. Place the 6″ pocket on top of the panel, lining up the left and bottom edges, and pin the 2 together along the left edge. Match up the first mark on the large panel with the first mark of the 6″ pocket and pin it vertically. Line up and pin the second mark, then line the right edge of the 6″ pocket with the 11½″ mark on the panel and pin.
3f. Sew along the 4 pinned lines, then sew the 2 pieces together along the bottom edge, trying to bunch the excess fabric evenly or into the corners of the pockets.
3g. Place the 3½″×11” pocket piece on a flat surface and mark the bottom edge 7″ from the left (there should be 4″ remaining to the right). Place the 3½″ pocket on top of the panel, with bottom edges aligned and the pocket’s left edge lined up with the 13″ mark on the panel (1½″ to the right of where the 6″ pocket ends) and pin it vertically to the panel. Line up and pin the mark on the 3½″ pocket with the last mark on the panel (at 17″), then line up and pin the right edges of the panel and the 3½″ pocket.
3h. Sew along the 3 pinned lines, then sew the bottom edges together as you did with the previous pockets.
4. Sew the elastic.
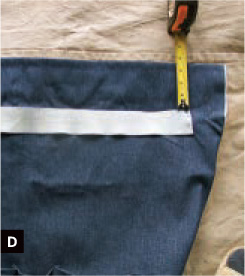
4a. Cut 2 pieces of elastic 20″ in length (you can use 1″ or 2″ elastic, or one of each). Line up one piece of elastic horizontally on the pocket side of one of the panels, 3½″ from the top (Figure D).
4b. Mark lines vertically on the elastic. The distance between the marks depends on what you’ll want to hang. Mark lines ¾″ apart for screwdrivers, 1½″ apart for pliers, 3″ apart for scissors, and so on.
4c. Sew along these lines, making 2–3 passes for extra strength.
Then follow the same steps for the other piece of elastic on the other panel.
5. Add the buttons and straps.
Three 8″ pieces of nylon strap (or hemmed pieces of excess caddy fabric) are used to attach rolls of tape (such as electrical, duct, or teflon), and small objects with an opening that a strap can fit through.
5a. Sew one part of a snap button to one end of each strap, centered about ¾″ from the end. With the button end below, place each strap vertically on the panel (above the 3½″ or 4½″ pockets), spaced a few inches apart and 10½″ down from the top.
5b. Make sure that the snap button piece on the bottom of each strap is facing outward. Sew the other part of the snap button to the top of each strap, securely sewing through the panel as well.
6. Sew the panels together.
Figure E shows the panels placed together with all parts attached, pinned and ready to be sewn.
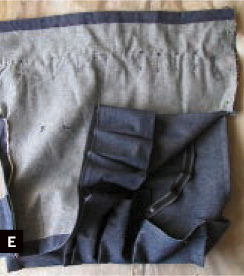
Photography by Josie Moores
6a. Using sharp scissors, carefully cut a horizontal slit on both sides of each panel, 1″ long, where the stitched and unstitched parts of the sides meet, so that the unstitched sections are no longer folded in. This will give you a total of 4 slits. Place one panel on top of the other, so that the pockets and elastic are facing in toward each other.
6b. Pin the 2 left edges of the unstitched sides together, then do the same for the right edges. Sew the 2 pinned sections together, being sure to sew along the 1″ slits you just made to prevent fraying.
6c. Turn the caddy inside out, so that the pockets are on the outside. It should resemble a tube.
7. Put the caddy on the bucket.
7a. Line up the 2 joins of the panels where the handle comes out of the bucket. Place the caddy over the bucket, and feed one panel through the handle.
7b. Fold the elastic sides down into the bucket, and place your tools in their new bucket home. Your tool caddy is complete and rarin’ to go!