
A library is a place where you learn what teachers were afraid to teach you.
Several times during this book, we’ve added items to Kodi’s libraries. The media libraries—for videos, music, and pictures—give us power databases for managing our collections of movies, TV shows, albums, songs, photos, graphics, and all the other types of media a media center should have. That’s all good, but one question comes to mind—who manages the managers?
Kodi’s libraries do not store the actual movies, music, or any other media file. Instead these databases remember links to places where files exist, what we call resources. Resources can be directories on the SD card (not the best practice; slow retrieval and limited space), hard drives attached to your Raspberry Pi (much better), drives on the local network, directories in accessible storage out in the cloud, web sites, and others.
However, in the library databases, Kodi scrapes metadata from the Internet and/or records data you enter. Titles, actors, genre, plots, music, album covers, liner copy, writers, composers, fanart, and all sorts of other information making your entertainment even more interesting. Lots of stuff.
With the introduction of Kodi 17.3, the version we’ve used throughout, the Kodi development team has made control and maintenance of the resource links easier to find and manage. That’s what this chapter shows you.
We begin by working with video, then music, and then pictures.
Video
Once you understand that library management concerns resource link management, you’ll find this part of Kodi simple and useful. We start by clicking the gear-shaped icon on the upper left of Kodi’s main screen (at least in the default Estuary skin it’s there). This opens the System screen as shown in Figure 13-1.

Figure 13-1. Kodi's System screen gives us access all the configuration settings
On the System screen, click Media settings. The next screen, Settings/Media, has several items. Clicking the icon in the lower left, currently shown as Standard, lets us rotate around through Basic, Standard, Advanced, and Expert levels, each added more choices. Play with that but we’ll use the Standard choice in this chapter since it provides the simple maintenance options we need.
Manage Sources
Hover your cursor over Library and you’ll see the screen shown in Figure 13-2.
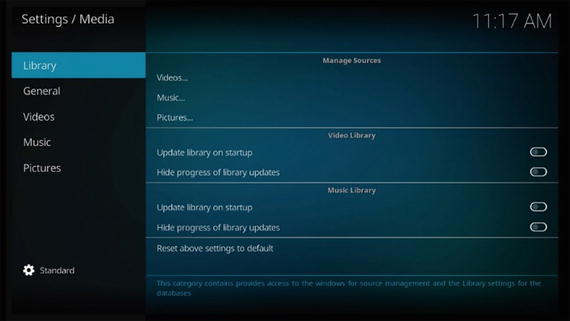
Figure 13-2. The items we need for library management
We’ll refer to this screen a few times. Note the first section heading, Managing Sources. We’ll look at this section for all three libraries first, and then come back to this screen for the other items on it.
Slide the cursor over to highlight Videos and click. We now get a listing of video resources, as shown in Figure 13-3. Yours will be different from mine with the exceptions of the last item, Add videos. More about it in a moment (and yes, we’ve certainly seen it before in setting up the resources scanned into our video library originally). The choices are here as a convenience in managing, specifically on this screen, the video library’s resource links.
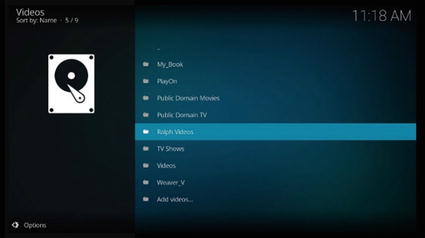
Figure 13-3. The list of video resources on my Kodi media center with one highlighted (selected by hovering the cursor over its title)
Select a resource you might want to change and right-click it. The dialog box in Figure 13-4 appears.

Figure 13-4. Dialog box for editing a resource link
An important point here is that you can get to this dialog box on any screen where resource titles appear. The developers just pulled them together here for ease of management tasks. Let’s look at each choice in Figure 13-4.
Play: A shortcut presenting a listing of the resource’s contents. Click a title to play.
Add to favorites: Add this resource to the Favorites quick access listing (the entry with a star icon next to it near the bottom of the main menu on Kodi’s main screen).
Edit source: Brings up the dialog box shown in Figure 13-5. You can edit the path to the source (in the example here, it’s on the 4TB drive attached to my Raspberry Pi) and/or change the title of the source. Clicking Browse lets you move the source to another directory, drive, online location, and so on. Two reasons for changing the resource’s path are:
You’ve moved the resource to another location.
Replacing the current resource link with another.

Figure 13-5. Editing the video source link
Remove source: Delete this source. Be careful here; this step deletes all references in the library to any title in the source directory (but not the original files).
Choose thumbnail: Add a photo or graphic for this resource, which appears whenever it’s accessed. In this case, the resources are videos I’ve produced, so I put in my photo (Figure 13-6). You can have anything you like. It’s your media center.

Figure 13-6. Add a picture or other graphic to better identify the resource. For a collection of my videos, I used my picture.
Set content: Configuration for the way this link works (Figure 13-7).

Figure 13-7. Configure parameters concering the operation of this link.
Scan for new content: Ask Kodi to scan for new content you’ve downloaded into this resource link and add it to the library (Figure 13-8).

Figure 13-8. Use this choice in scanning for new content, that is, when you’ve download new movies into the resource directory and want to add them to the video database
Video Library
Referring back to Figure 13-2, the next section on the screen is entitled Video Library and offers a couple of configurations for adjusting the way our video libraries work; see them in Figure 13-9.

Figure 13-9. Configuring how and when Kodi scans new content to the video library
The top choice, Update library on startup, sounds reasonable. However, once you’ve accumulated hundreds of movies and music files, updating can take a good long time and slow your media center down. I know when I decide to turn my home theater on, flop on the couch, and look for a movie to watch, any delay is irksome. Best practice, in my opinion, is to update manually (scan for new content as described earlier and also elsewhere in this book) and do so only when you know you’ve downloaded new stuff. No need to scan every single time the system is powered up.
My preference on the second parameter, Hide progress of library updates, is leaving it on. I enjoy watching all that activity happening in the upper right of the screen. Your choice on your system, on or off as you like.
OK, now on to managing your music library, which is handled much the same as we did for the video library above.
Music
Taking care of resource links in your music library or making changes to them is very similar to what we learned earlier about the same operations for your video library. However, a few minor differences pop up.
On the screen shown in Figure 13-2, choose Music and you’ll see the screen in Figure 13-10. Here you’ll see your music resource links and using or configuring them works, as noted, much like for the video library. You can, of course, reach this same screen from within Music on Kodi’s main menu and clicking the Files icon. As mentioned earlier, this section is just a convenience, pulling all the library maintenance items into one place.
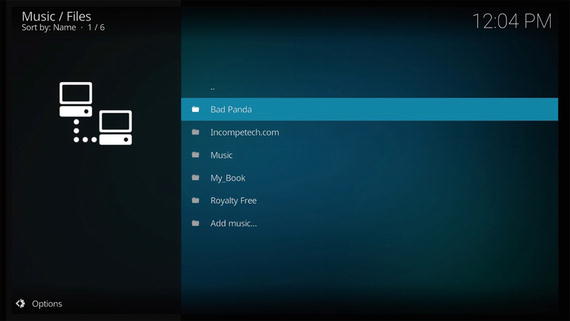
Figure 13-10. Listing of music resource links
Click (left-click) on any resource (I’ve highlighted my public domain Bad Panda music, downloaded from the Internet’s archive, http://archive.org ). Clicking it shows (just as in the video library section earlier) the titles in the resource (which in this case is a directory on another computer connected to my local network), as shown in Figure 13-11.

Figure 13-11. Music files in my Bad Panda resource; just click and play
Go back up to the Music ➤ Files screen and right-click a resource link. You’ll get the dialog box in Figure 13-12, which differs slightly from the one from a video link. First, there are only six items instead of seven.

Figure 13-12. Right-clicking a music resource link yields a slightly different dialog box from the video one
Missing are Play and Change Content. New is Make Default and Scan for New Content changed to Scan Item to library (but works the same. The Make default choice causes this to be the source first shown under Music. Otherwise, managing links works just like video.
Referring again to Figure 13-2, the Music Library section has the same two configuration choices on updating the library on startup and whether you want to watch it scroll through files or not. The same preferences noted earlier apply but these operate independently of those in the video section.
And, not to forget, at the bottom of the listed music resources links is the Add music link. As in videos, this is how you add new music resources.
Pictures
Once more yet again we look at Figure 13-2 and click Pictures to manage picture links to resources. Unlike video and music, the two choices on when and how checks for new content occurs are not available (Figure 13-13).
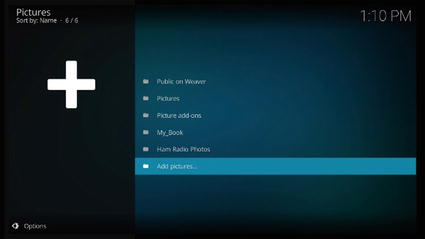
Figure 13-13. Manage or add picture links from this screen
Managing the links works the same way you’ve seen. Click on a link to list and play it. Right-click a link for the dialog box in Figure 13-14.
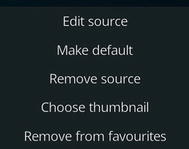
Figure 13-14. Fewer choices than in video or music
Choosing Add pictures at the bottom of the links list, as with the other two libraries, allow new links to be added to the pictures library.
What We Learned
The three library databases in Kodi work using links to resources—which can be directories on attached media, on other computers on the local network, or out on the Internet. Movies, music, picture files are not stored in the database but rather Kodi links to them. What does get stored is metadata scraped from the Internet—such as actors, plots, singers, music groups, and all sorts of other information about specific media files (if available).
This area in Kodi duplicates others under the movies, music, pictures choices from Kodi’s main menu but is conveniently grouped here for when you need to perform library maintenance.