
HUMAN HANDS ARE master storytellers. Second only to the face, the hands have the most expressive potential in our figurative sculptures, capturing a sense of yearning and grasping or serenity and peace with the slightest variations in shape and orientation. Hands can activate the story of a body. Like developing the gaze on a face, positioning the hands can take me quite a long time as I play and explore the myriad possibilities that could actuate the gesture in unique and unexpected ways.
In this chapter, we will start by establishing the structure of the hands. I will offer a set of guidelines to develop a basic hand that can be further adjusted and fine-tuned once it is attached to the body. The gestural energy and positioning of your sculpture’s hands will extend the dynamics of your figurative composition, offering an extreme point of attention as the viewer’s eye moves throughout the sculpture.

FORMING THE HANDS
The first thing to understand is how big your hands need to be. As a starting place, I envision the hands being roughly the size of the face. There is quite a bit of variability here. Some hands range in size from chin to brow, while others—particularly within the realm of the masculine—extend almost as far as the hairline.
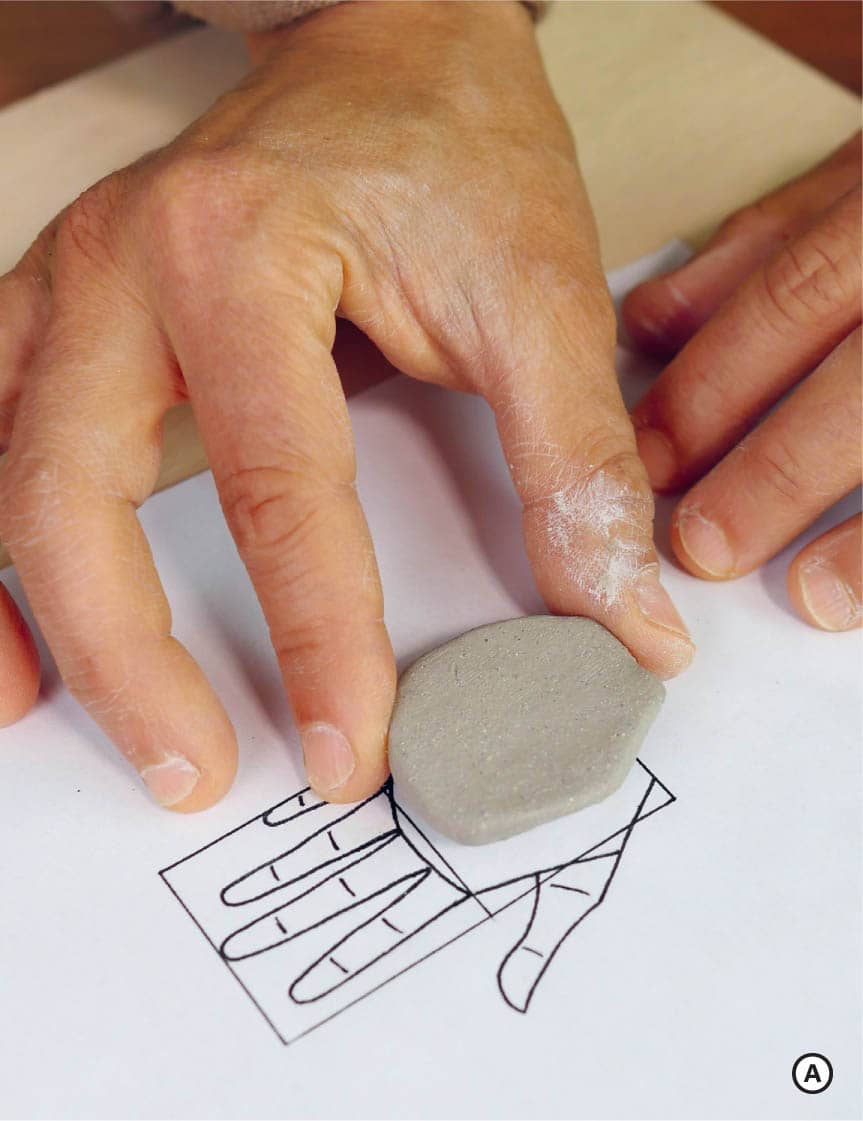
As a starting point, turn to your left-side photographic reference image and use calipers to measure the distance between the wrist and the first knuckle line. Place your calipers over a ruler and note this distance. In this case, we have a measurement of 1¼ inch (3.2 cm). Generic hand proportions dictate that the palm constitutes about half of the overall hand length, so we can deduce that our target size for our hands will be 2½ inches (6.3 cm). Mark this overall measurement onto a piece of paper and find the halfway mark.
This simple guide will ensure that the hands stay in proportion to the overall figure. The palm will fit on the lower half of the guideline, while the fingers will stretch towards the upper part of that mark, with the middle finger reaching full length while the others reach varying shorter lengths.
Looking at your hand diagram in Appendix D, let’s make some notes and observations around the structure and alignments in the hand.
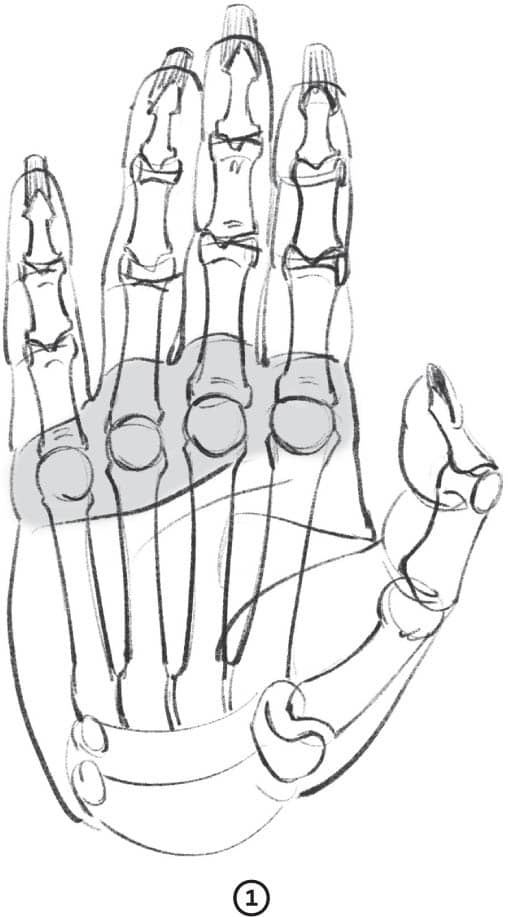
- Two planes interact in the hand: we have the plane that holds the four external fingers and a plane that holds the thumb. The interaction between these two planes allows us to grab effectively, yet it also has the power to convey whether the energy running through the figure is tensed or relaxed.

- The middle finger is the longest finger, followed by the index and ring fingers slightly lower. Although they rest at comparable heights, the index finger is often a bit higher than the ring finger.

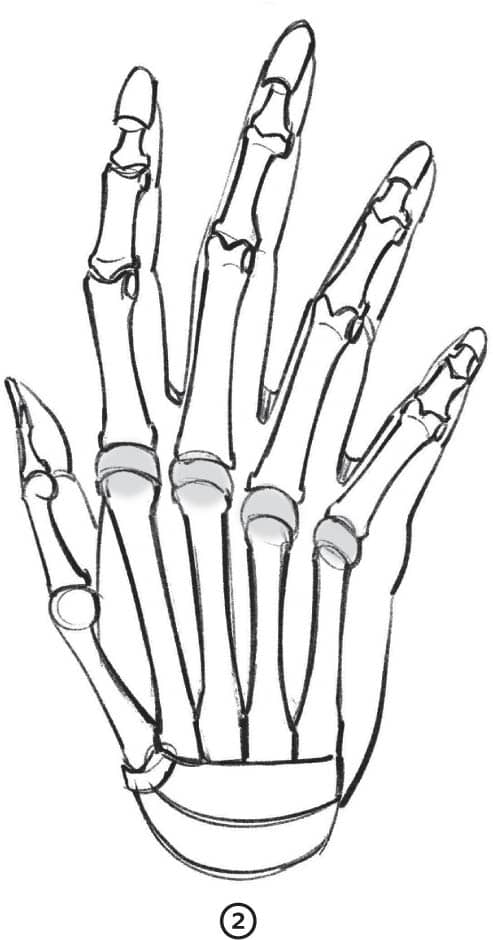
- Generic proportions dictate that, when the palm is flat and open, the top of the pinky finger lines up at a slight diagonal with the top knuckle of the ring finger and the top of the thumb lines up with the middle knuckle of the pointing finger.
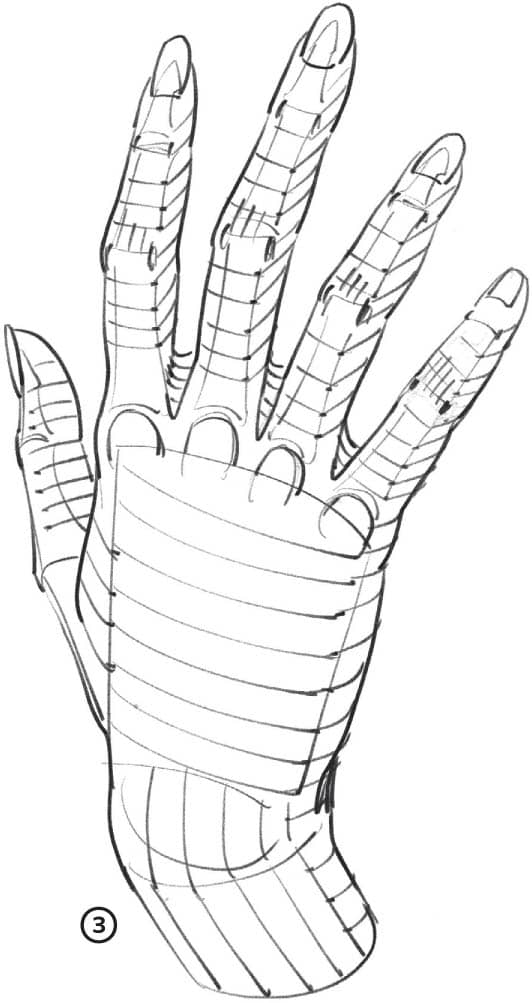
- Since the top of the palm forms an arch, the fingers extend from the palm in a radial way, not in a perpendicular way along a straight edge. Each finger, comprised of phalanges and a metacarpal, transverses the palm and comes together with the other fingers at a central area where the carpal bones meet the radius and ulna. Together, these bones make up the wrist.

- Finally, in considering the profile view of a finger, notice the curving base of the fingertip in contrast to the flat top of the nail bed.
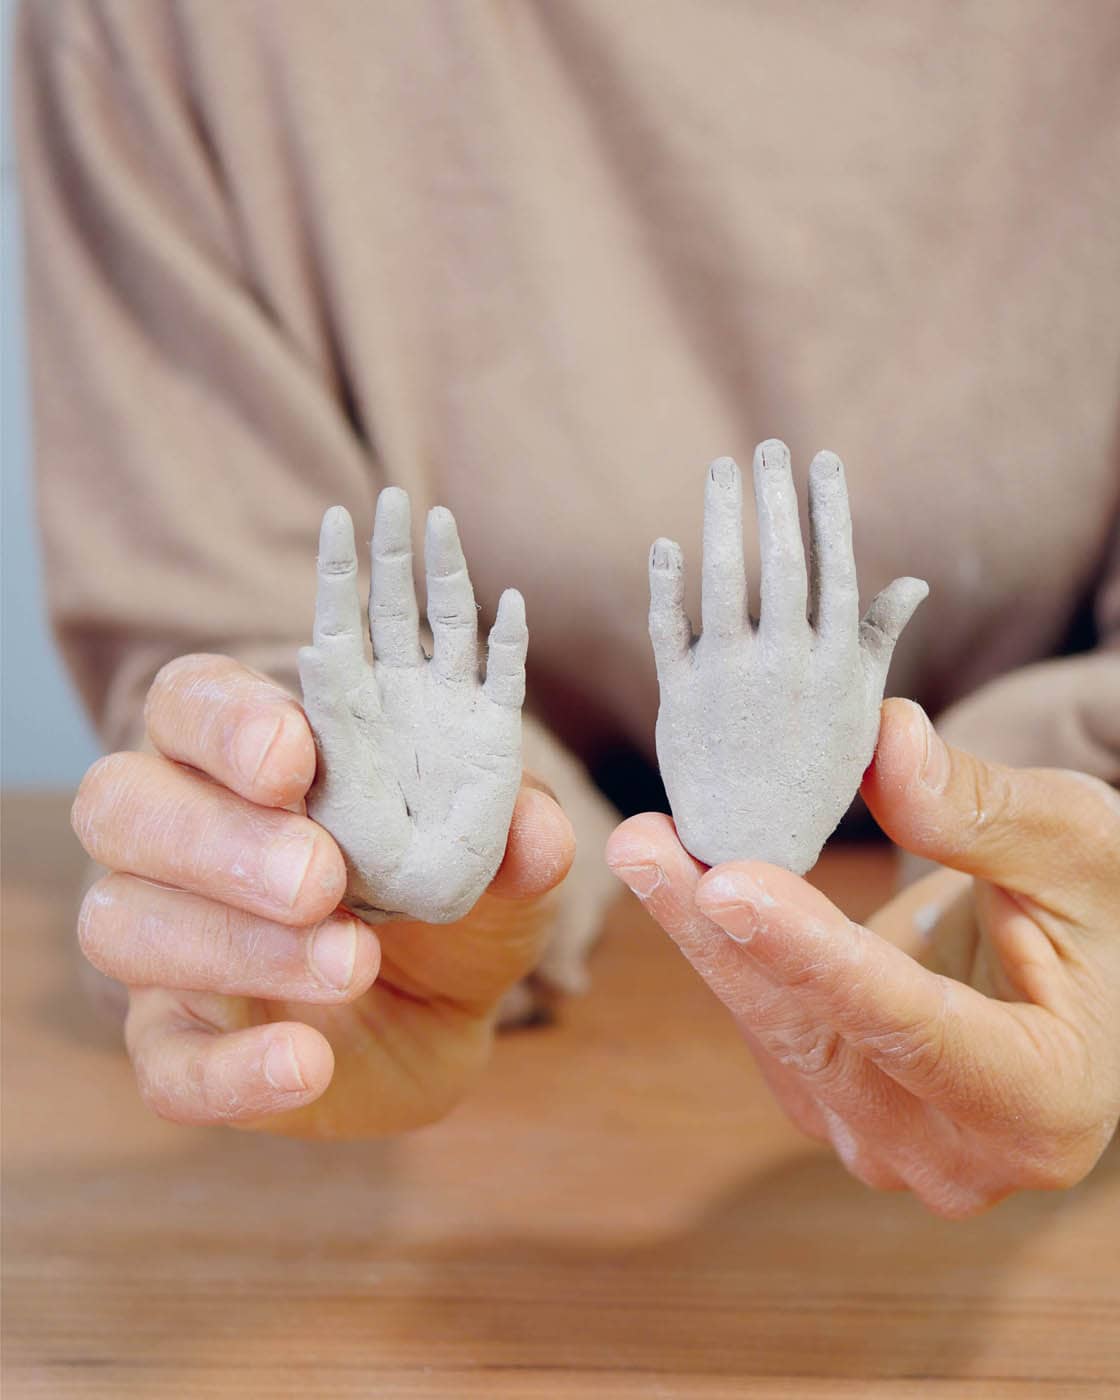
While holding all these notes present, let’s start forming our hand. First, develop the shape of the palm. With your hand facedown on a piece of paper, trace your handprint tight along the perimeter to get a clear sense of the shape you are after. If you want to go the extra mile, you can photograph a female hand in both front and back views, digitally reduce these images to measure 2¾ inches (7 cm) in height from the bottom of the palm to the top of the middle finger, and print them out to use as blueprints. If you are continuing without photographic blueprints, you can use the provided hand diagram in Appendix D or use your traced handprint as a guide to draw a smaller palm shape within the bounding lines you drew onto a piece of paper in the previous step. Next, transfer your small palm shape onto a ¼ inch (6 mm) slab. ![]() Cut out your palm shape then flip it over, using it as a template to cut its mirror image for the palm of the opposite hand. Place these palm shapes under plastic while you work on the fingers.
Cut out your palm shape then flip it over, using it as a template to cut its mirror image for the palm of the opposite hand. Place these palm shapes under plastic while you work on the fingers.
On top of your guidelines, draw in your fingers with the length of the middle finger reaching the top line and the other digits moving down accordingly based on our previous notes and your own hand observations. Roll eight tapered coils of comparable width in between your palms. Next, make two slightly thicker tapered coils for your thumbs. Leave extra material at the base of each coil, exceeding the respective lengths dictated by your diagram. This extra material will keep the clay hydrated where your fingers will attach to your palm.
Pinch each fingertip to create a finger silhouette that is round on the bottom and flat on top. Next, put some marks onto the coils and develop the knuckle articulations to bring these fingers to life. In your paper diagram, divide each finger into nine equal sections. Each articulation will take a fraction of that overall, nine with the first one from the base out measuring around 4/9, the second articulation around 3/9 and the last one around 2/9. Draw these articulations onto your diagram and then place your rolled clay fingers on top of your diagram, registering them with your fingertip marks.
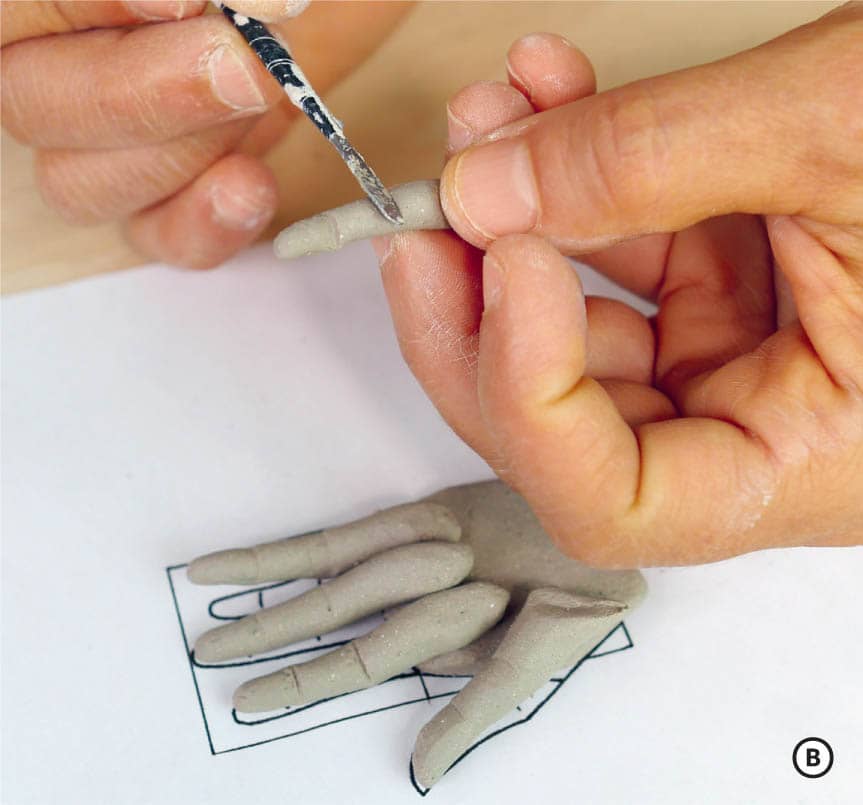
Now transfer the information from the diagram onto the clay, marking where each finger meets the palm as well as the articulations that establish where the fingers will bend. ![]() For a simpler path, you can approximate your articulations. Starting at the base of the fingers where they intersect with the palm, the first articulation will fall just under the halfway point of each finger.
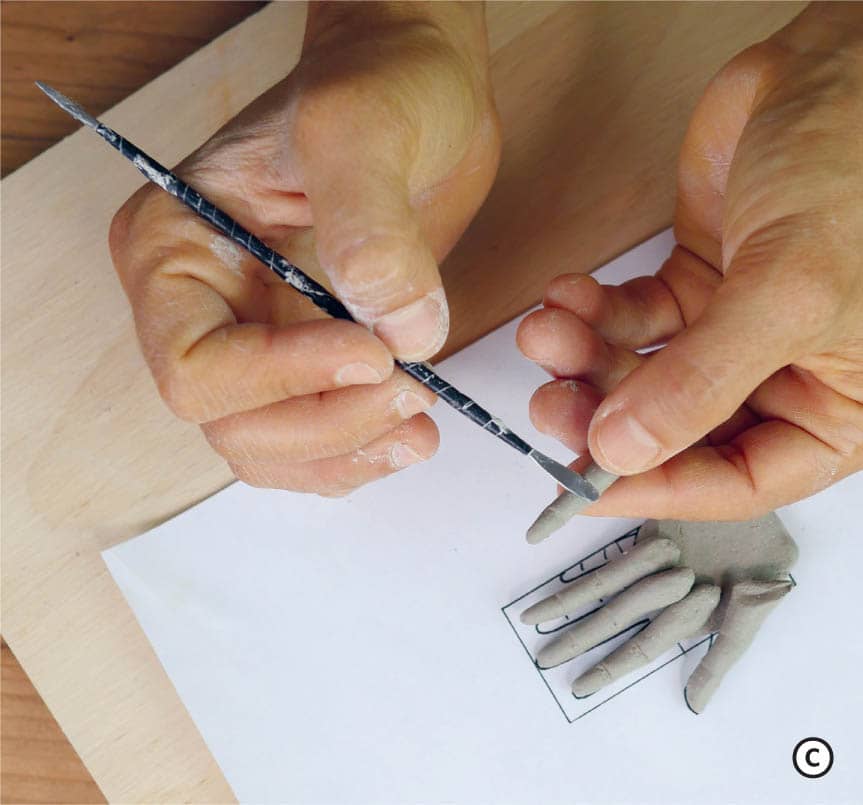
For a simpler path, you can approximate your articulations. Starting at the base of the fingers where they intersect with the palm, the first articulation will fall just under the halfway point of each finger. ![]() From there you can eyeball your second articulations. With these articulation marks in place, hold the back side of your knife to each mark and roll the fingers to create soft indentations that encircle your coils.
From there you can eyeball your second articulations. With these articulation marks in place, hold the back side of your knife to each mark and roll the fingers to create soft indentations that encircle your coils.
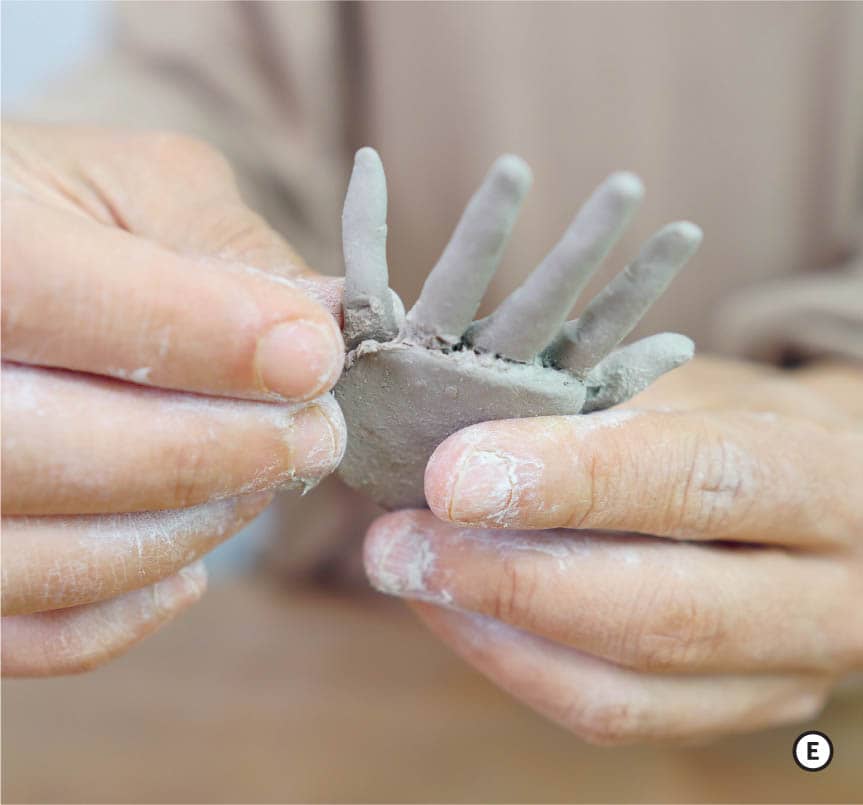
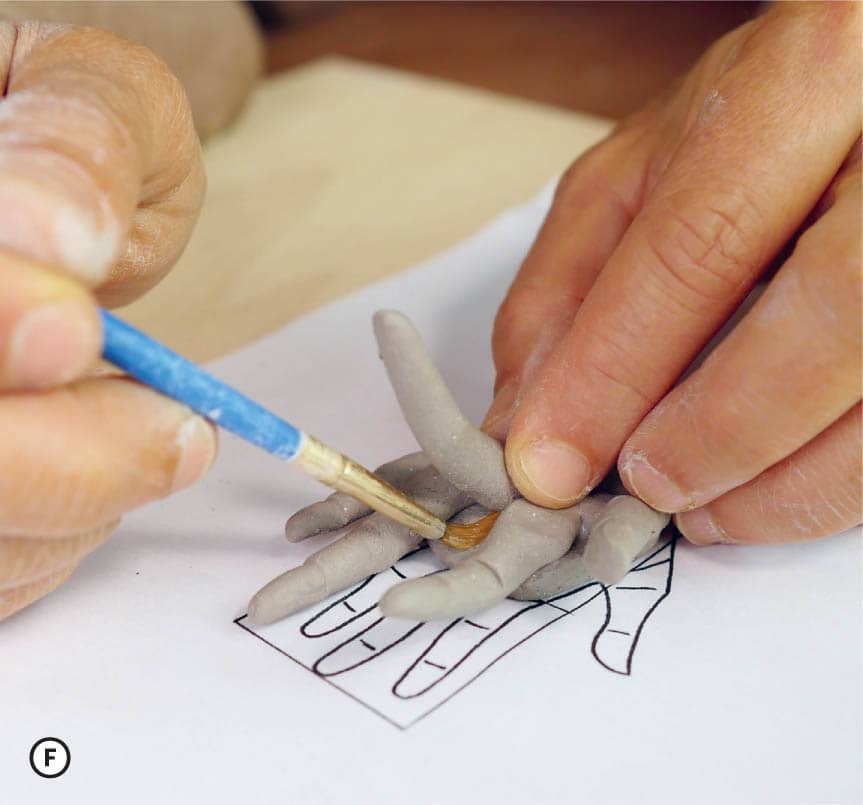
To attach the fingers to the palm, start by beveling the top edge of the palm-shaped slab before slipping and scoring the underside. ![]() Begin attaching the fingers to that beveled underside by aligning each drawn-in base line with the upper edge of the palm.
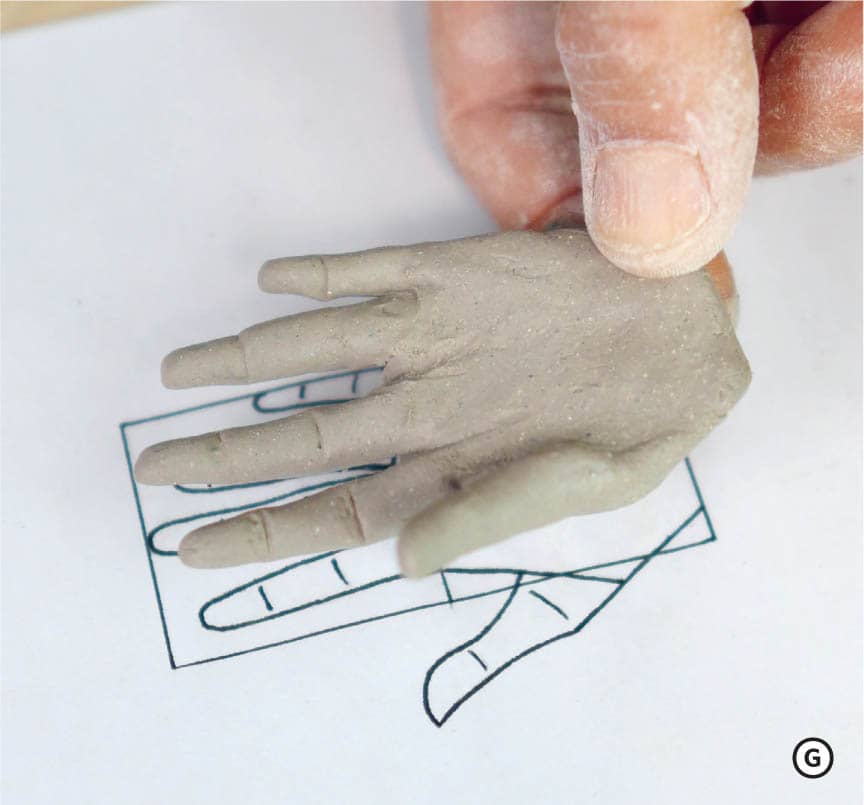
Begin attaching the fingers to that beveled underside by aligning each drawn-in base line with the upper edge of the palm. ![]() Strive to maintain a sense of radial connection. Take a minute to integrate these fingers with your palm by compressing with your stainless-steel tool, adding bits of clay if necessary, to secure the connection.
Strive to maintain a sense of radial connection. Take a minute to integrate these fingers with your palm by compressing with your stainless-steel tool, adding bits of clay if necessary, to secure the connection. ![]()
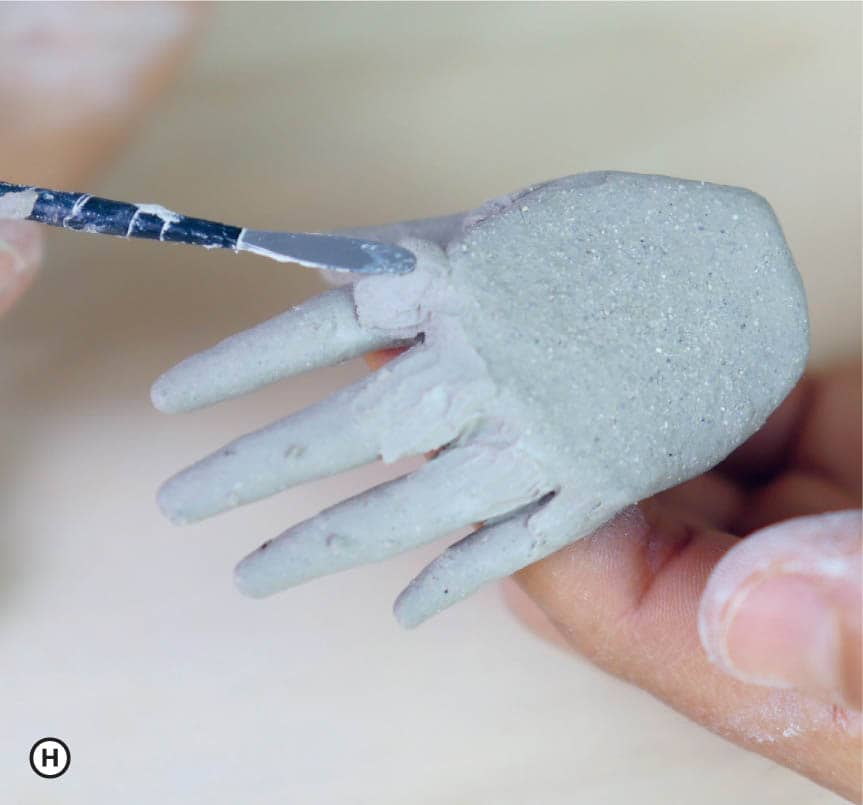
![]() Using your own hands as models, add bits of clay along the backside of this connection curve to articulate the knuckles.
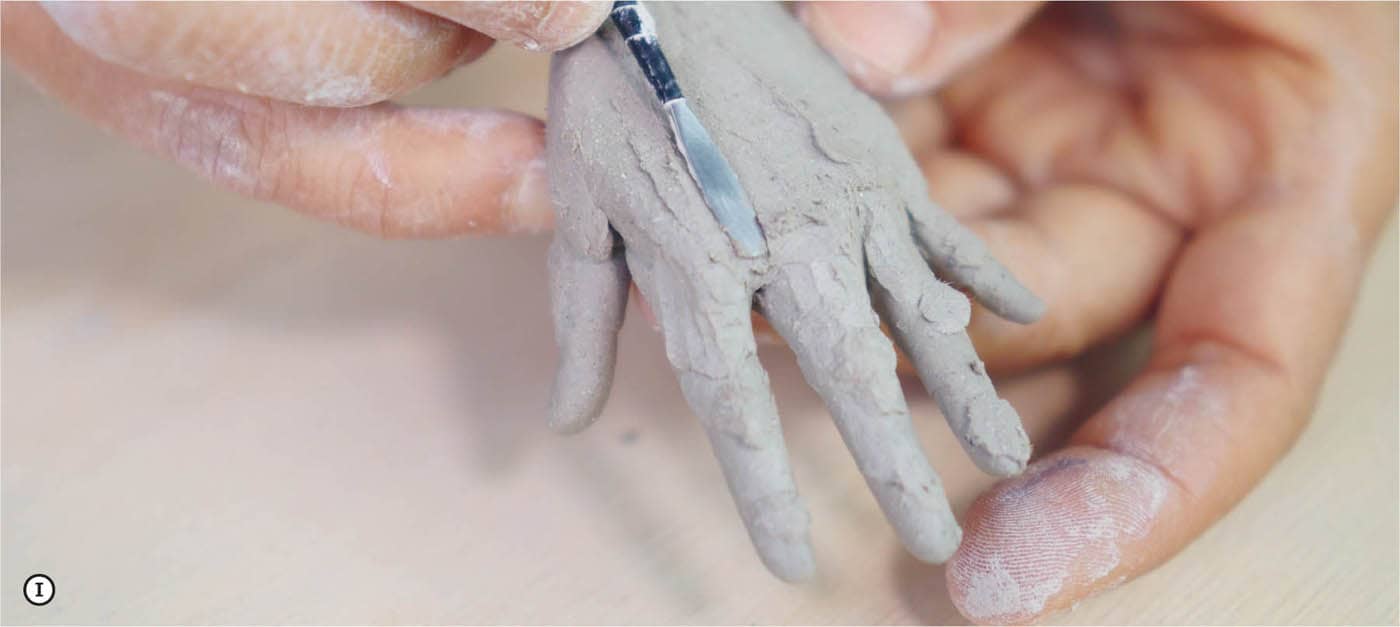
Using your own hands as models, add bits of clay along the backside of this connection curve to articulate the knuckles. ![]() At this scale, small nylon brushes are going to be essential allies. They will help you apply, shape, and smooth these tiny clay additions. Next, add small clay coils tracing the movement of the metacarpal bones across the palm, then smooth these in with your brush.
At this scale, small nylon brushes are going to be essential allies. They will help you apply, shape, and smooth these tiny clay additions. Next, add small clay coils tracing the movement of the metacarpal bones across the palm, then smooth these in with your brush. ![]()
An easy way to suggest fingernails is by taking a small knife and running it across the tip of each finger in an arch motion. Pressing in at either edge of the nail and releasing pressure at the top will create the effect of the nail bed grabbing the finger tissue.
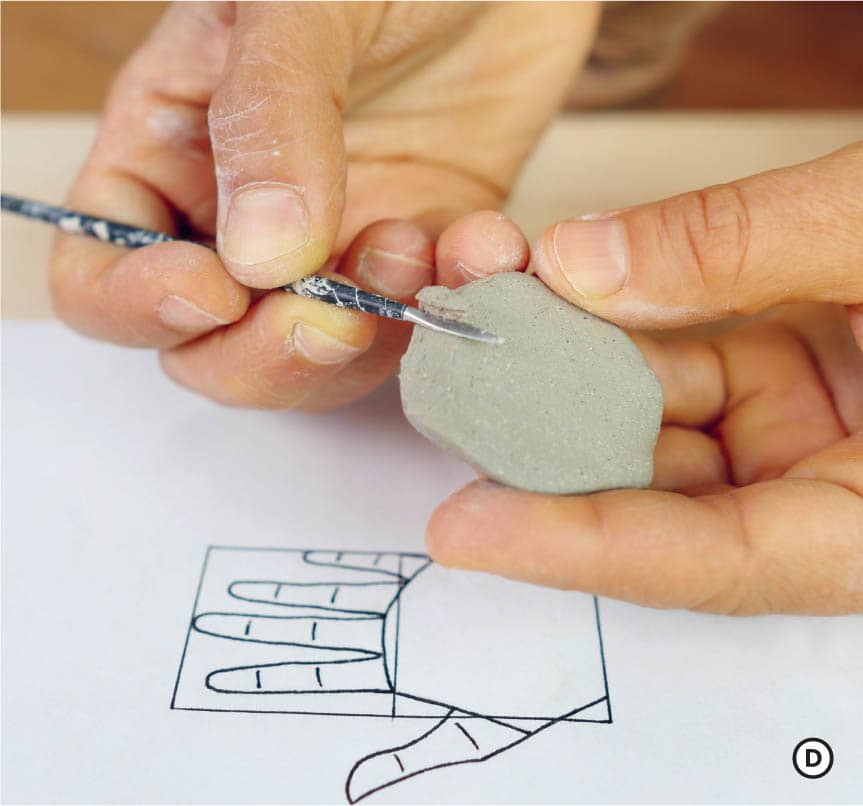
The level of attention that I pay to the inner palms depends on their ultimate visibility within my composition. If they face outwards rather than inward and towards the body, I need to account for them. To develop the inside of the palm, start by carving a groove on the inside of the hand that follows a path just below each of the fingers. ![]() Next, make a small, pinched flap about ⅛ inch (3 mm) thick that matches the contour of the palm. Slip and score both the grove and the perimeter of the flap, and then affix the flap over the palm, guiding it into place with your stainless tool and brush. Your palm will resemble a little pillow full of trapped air.
Next, make a small, pinched flap about ⅛ inch (3 mm) thick that matches the contour of the palm. Slip and score both the grove and the perimeter of the flap, and then affix the flap over the palm, guiding it into place with your stainless tool and brush. Your palm will resemble a little pillow full of trapped air.
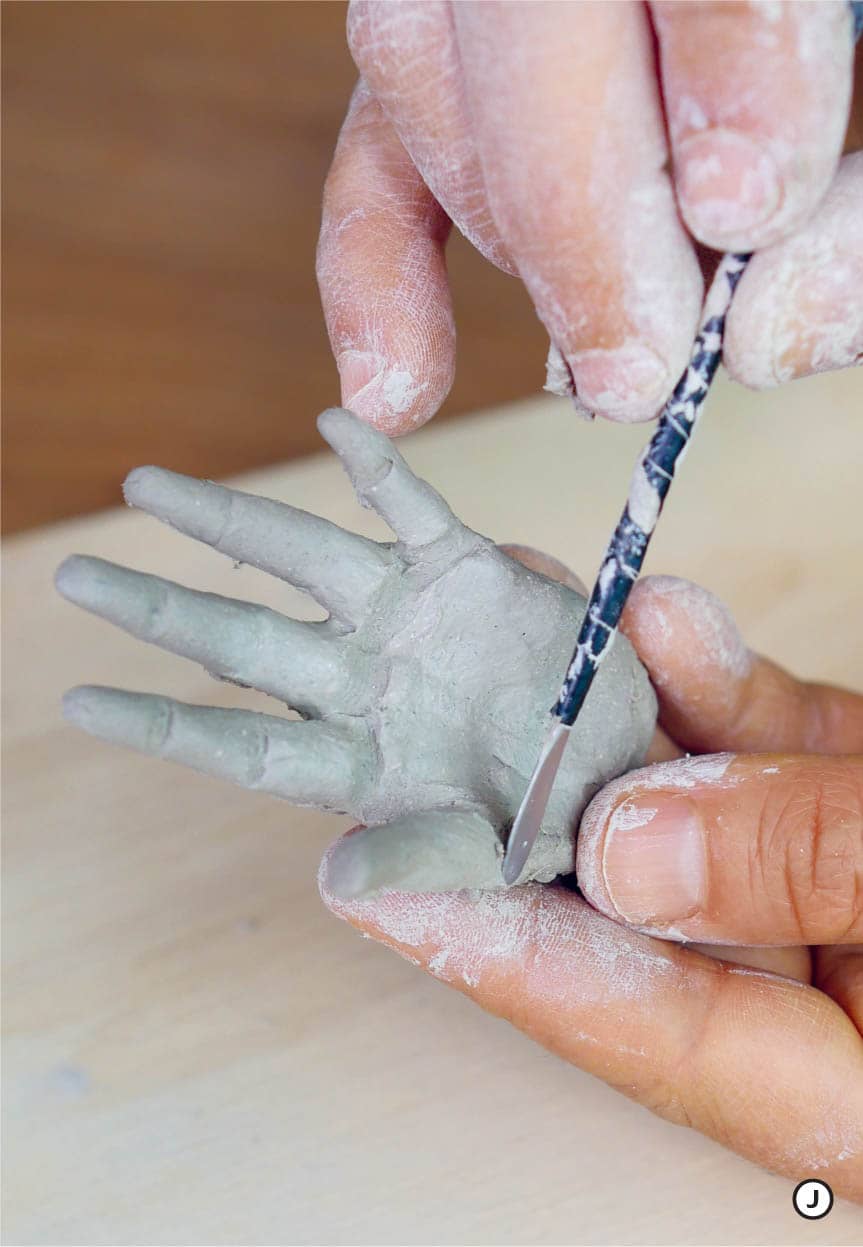
Using the trapped air to your benefit, gently push down to articulate the palmar flexion creases, looking at your own palm from the front and sides and transposing what you see onto the small hand. ![]() Your pressure should be firm yet gentle so as to not collapse the volume. Once you are satisfied, take a small needle tool and pierce a vent hole along one of the creases to allow air to flow during the firing. Remember to turn your hands so that you can experience how the volumes are developing from the sides as well as from the front and make adjustments accordingly.
Your pressure should be firm yet gentle so as to not collapse the volume. Once you are satisfied, take a small needle tool and pierce a vent hole along one of the creases to allow air to flow during the firing. Remember to turn your hands so that you can experience how the volumes are developing from the sides as well as from the front and make adjustments accordingly.
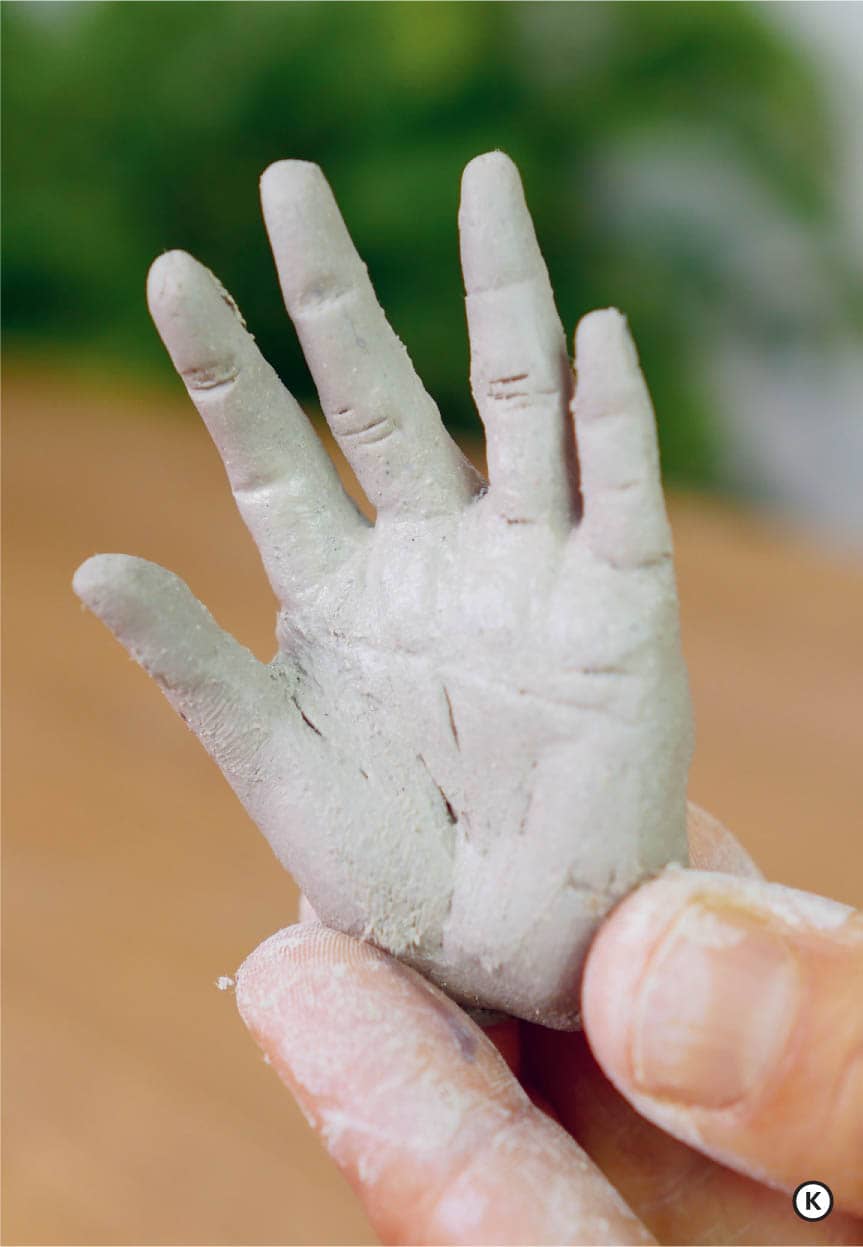
At this stage, place the hands in a safe place to keep them moist and pliable until you attach them to your sculpture.
ATTACHING THE HANDS
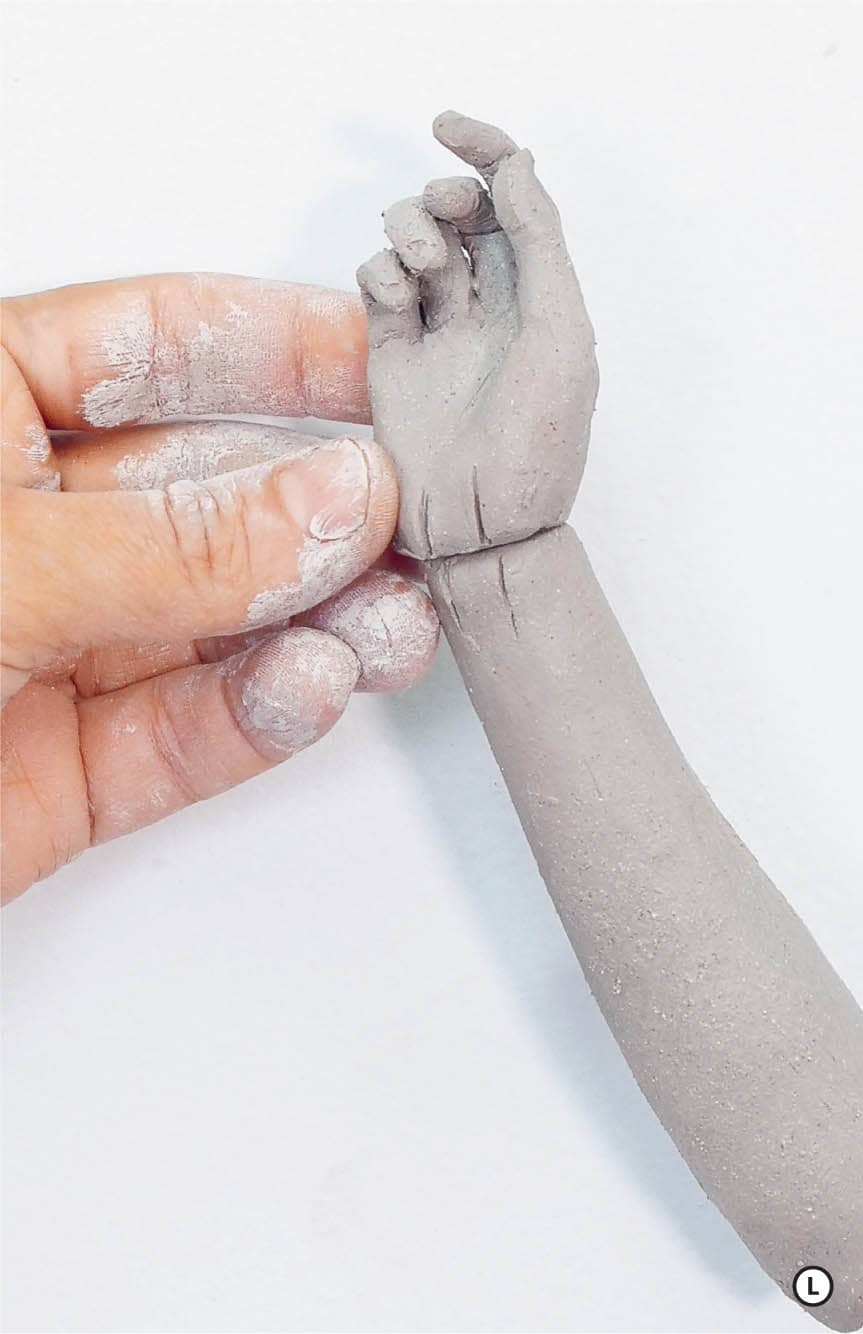
To attach the hands, establish with your calipers the distance between the elbow and the wrist, right before the palm, and trim accordingly on both sides. Use your calipers, back and forth, to make sure both sides are consistent in length. Take each hand and trim it right below the palm, adjusting the angle of the cut to get the desired position as the hand attaches to the cylinder of the lower arm. Once in place, make gentle adjustments to the fingers, focusing on the individual sections as they bend to create a sense of articulated bone. Look at the positioning from all angles and compare it to the photographic references to replicate the gesture. Once satisfied, make your keys before slipping, scoring, and attaching. Use extra clay to reinforce the connection and articulate the tendons, knuckles, and the bony parts of the wrist. ![]()
![]()
![]()
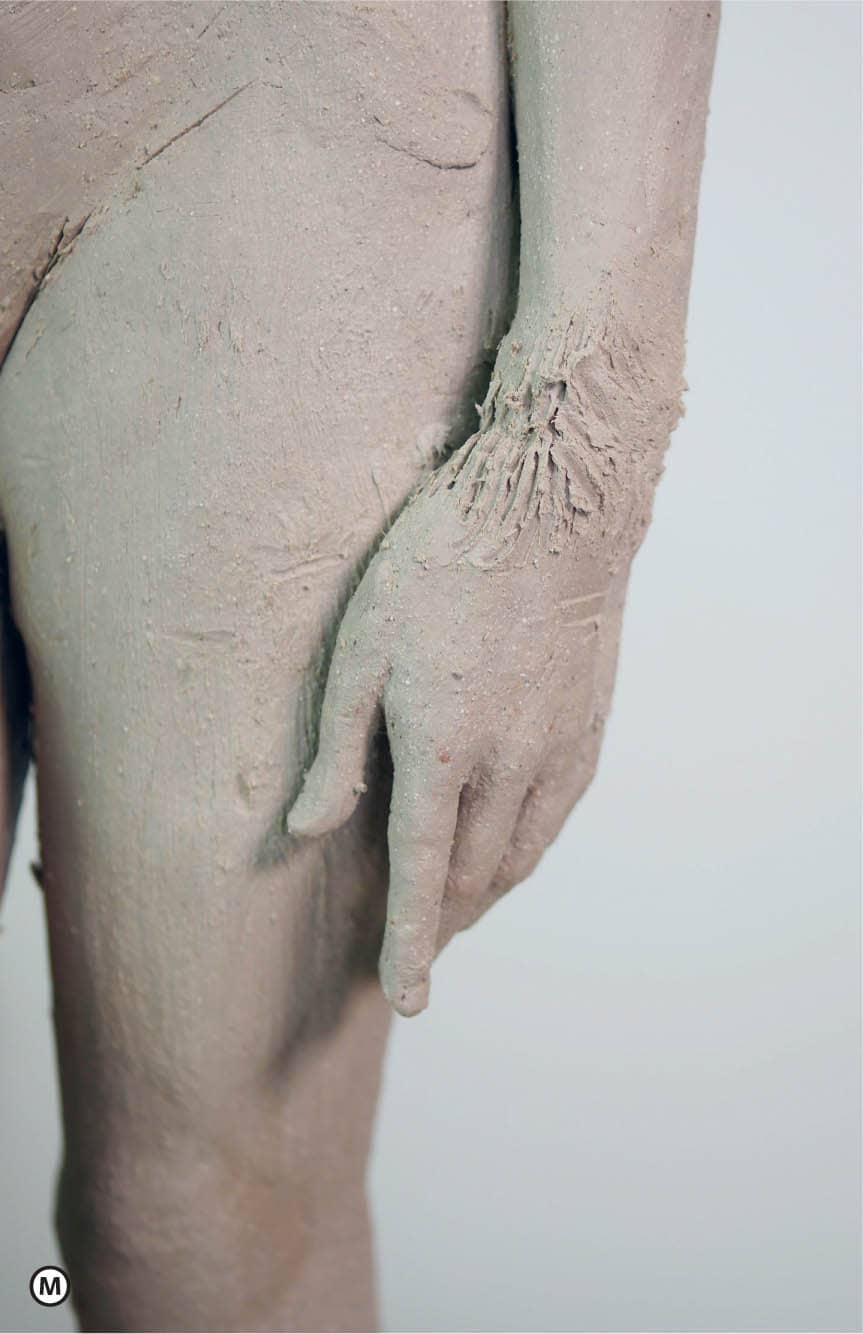
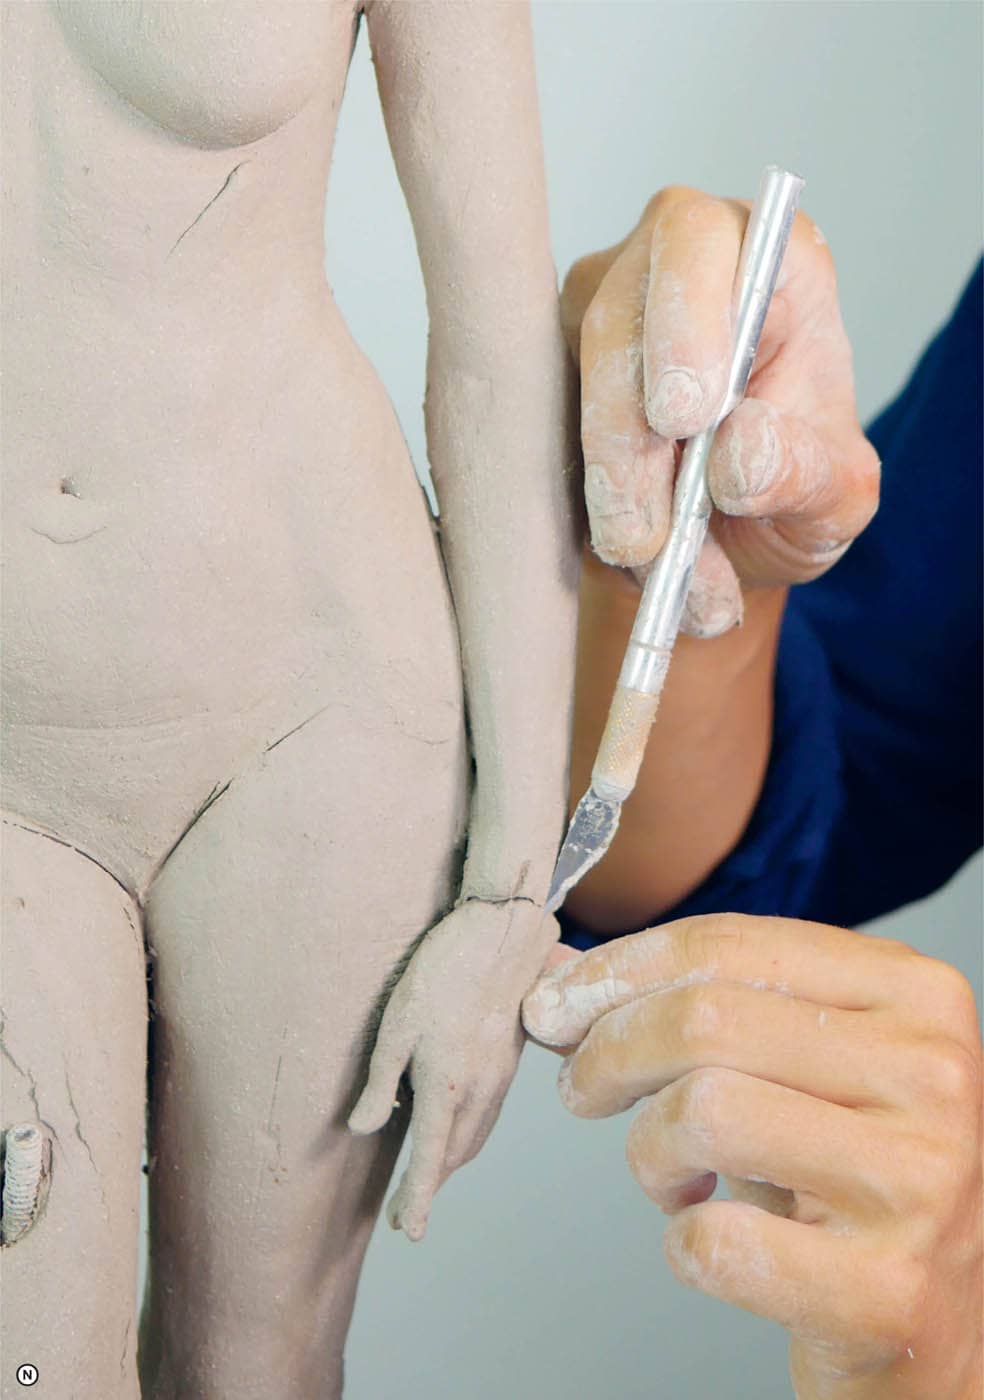
Once you have attached your hands, explore positioning possibilities. Play around with either echoing your photographic reference or developing variations to convey a specific energy moving through the figure. The expression of your hands can be either in alignment or in slight contrast to what you set in motion with the gesture of the body. This tension can build on the conceptual resonance of a piece. As with every part of this process, the full articulation of the forms will happen in cycles or refinements as dryness allows for more and more detail to accumulate, revealing the interplay between the hands and the whole of the body.