THE HEAD STANDS as the universal archetype of consciousness and reason, of power and inspiration. It is a symphony of movement—a richly eloquent dance between the bony structure of the skull and the muscles, cartilage, and skin. As the most expressive part of the body, it offers a boundless array of communication possibilities, expressed through the myriad of muscles that contract and release in accordance with our thoughts and emotions.
I am drawn to many different artistic presentations of the head, ranging from the poetic archetypes of Benjamin Lira to the hyperrealistic human echoes of Tip Toland and Ron Mueck. Across the board, there is something primal about imbuing a head with a sense of aliveness, gradually building up layers of information, then suddenly tipping into the realm of the sentient. In my own practice, I usually sculpt a head using anatomical and photographic guides. However, at times I may choose to sculpt more freely, seeking symbolic or archetypal attributes that are not always apparent in direct, realistic renderings.
What follows is a basic sequence of steps to create a generic head in clay, drawn from both universal proportions and my own discoveries. You may combine these steps with specific reference information to render a portrait or expand on them through a process of free interpretation. In this book, we will be working on a small head to fit our 25 inch (63.5 cm) sculpture, but I invite you to print the pattern at different sizes to continue your exploration.
USING A PATTERN TO CREATE A HEAD SHAPE
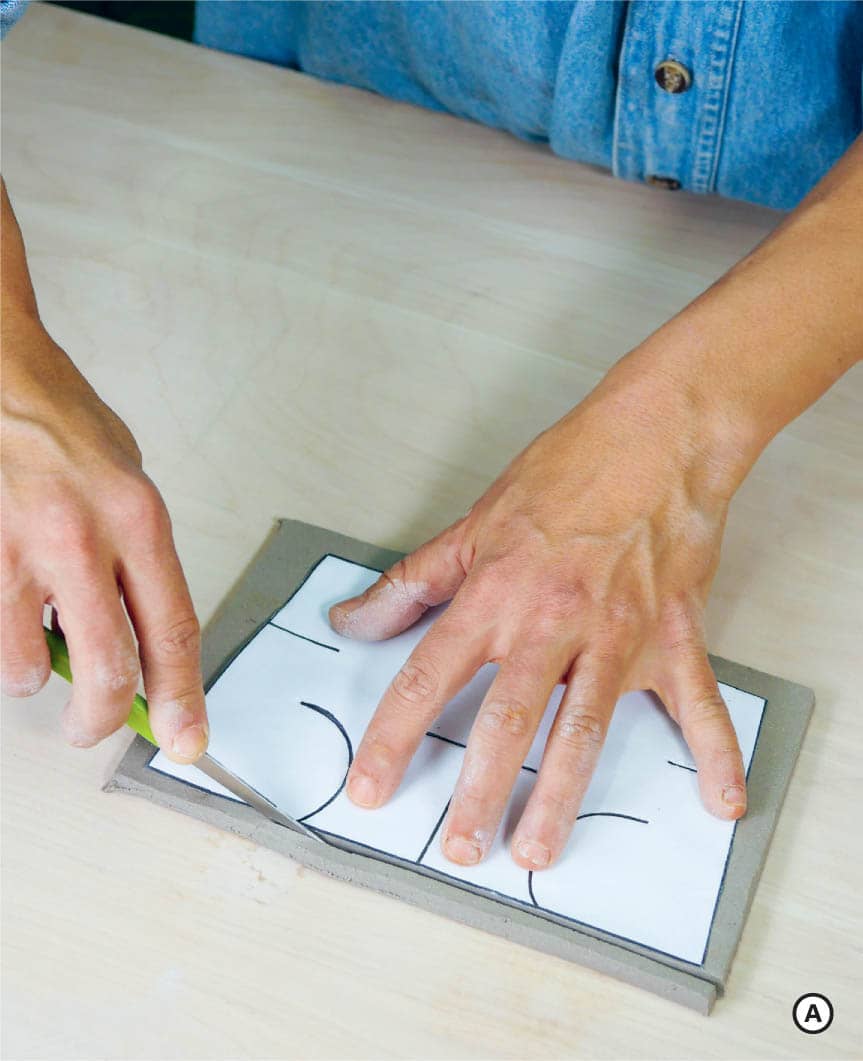
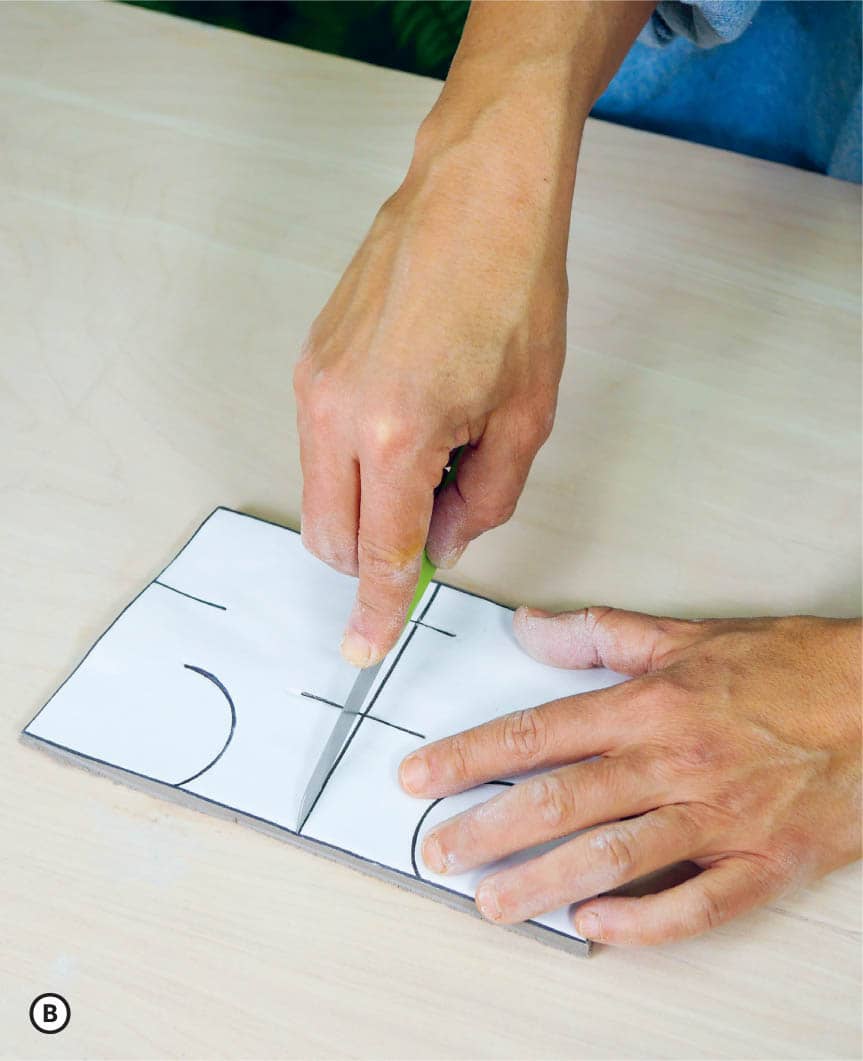
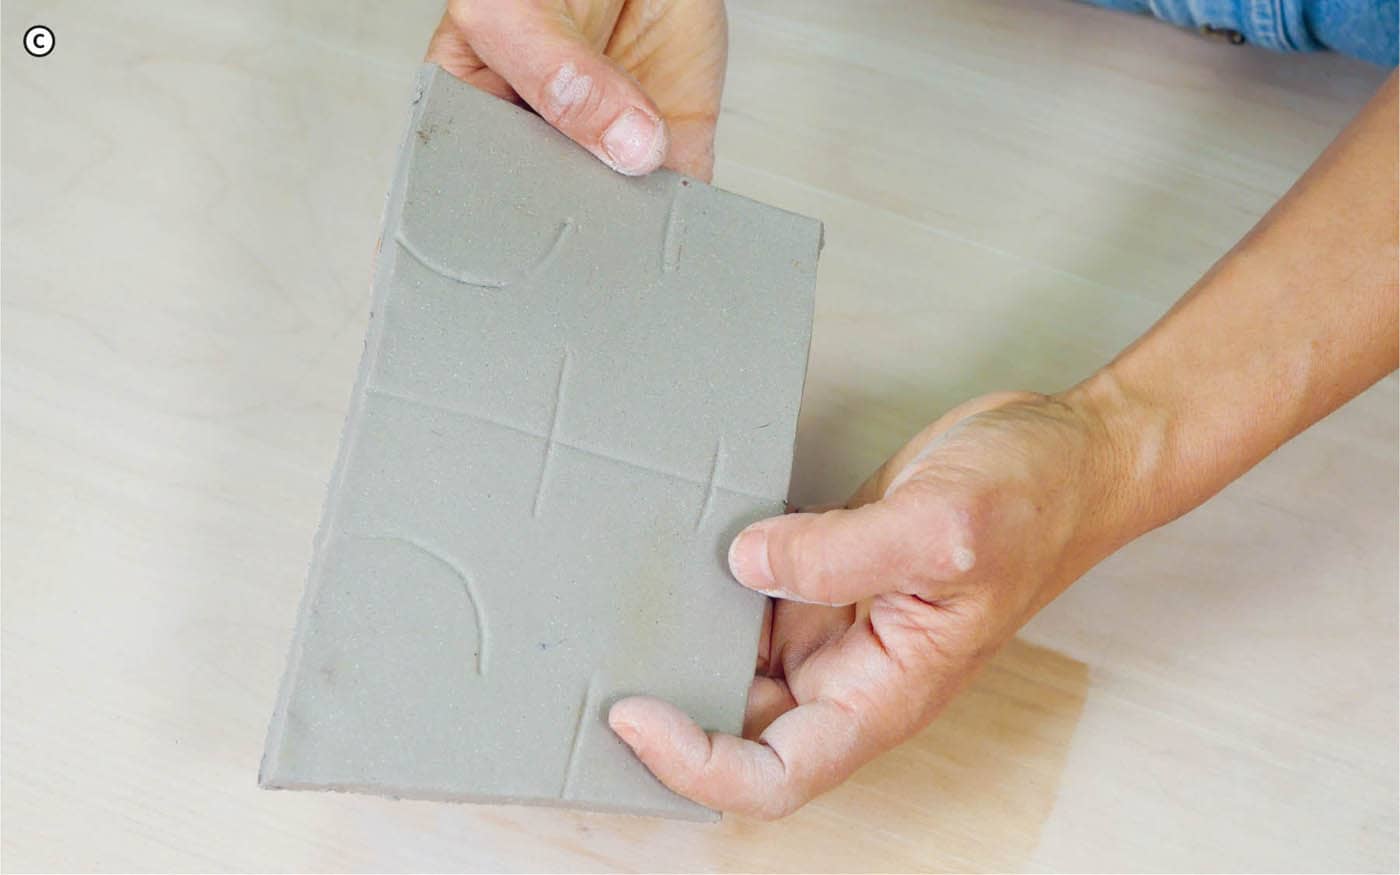
Before you begin this section, print and cut out the head template from this page. Prepare a ⅜ inch (1 cm)–thick slab of clay and place the template over it, cutting around the outside profile and marking all the reference lines with the back of your knife. ![]()
![]()
![]()
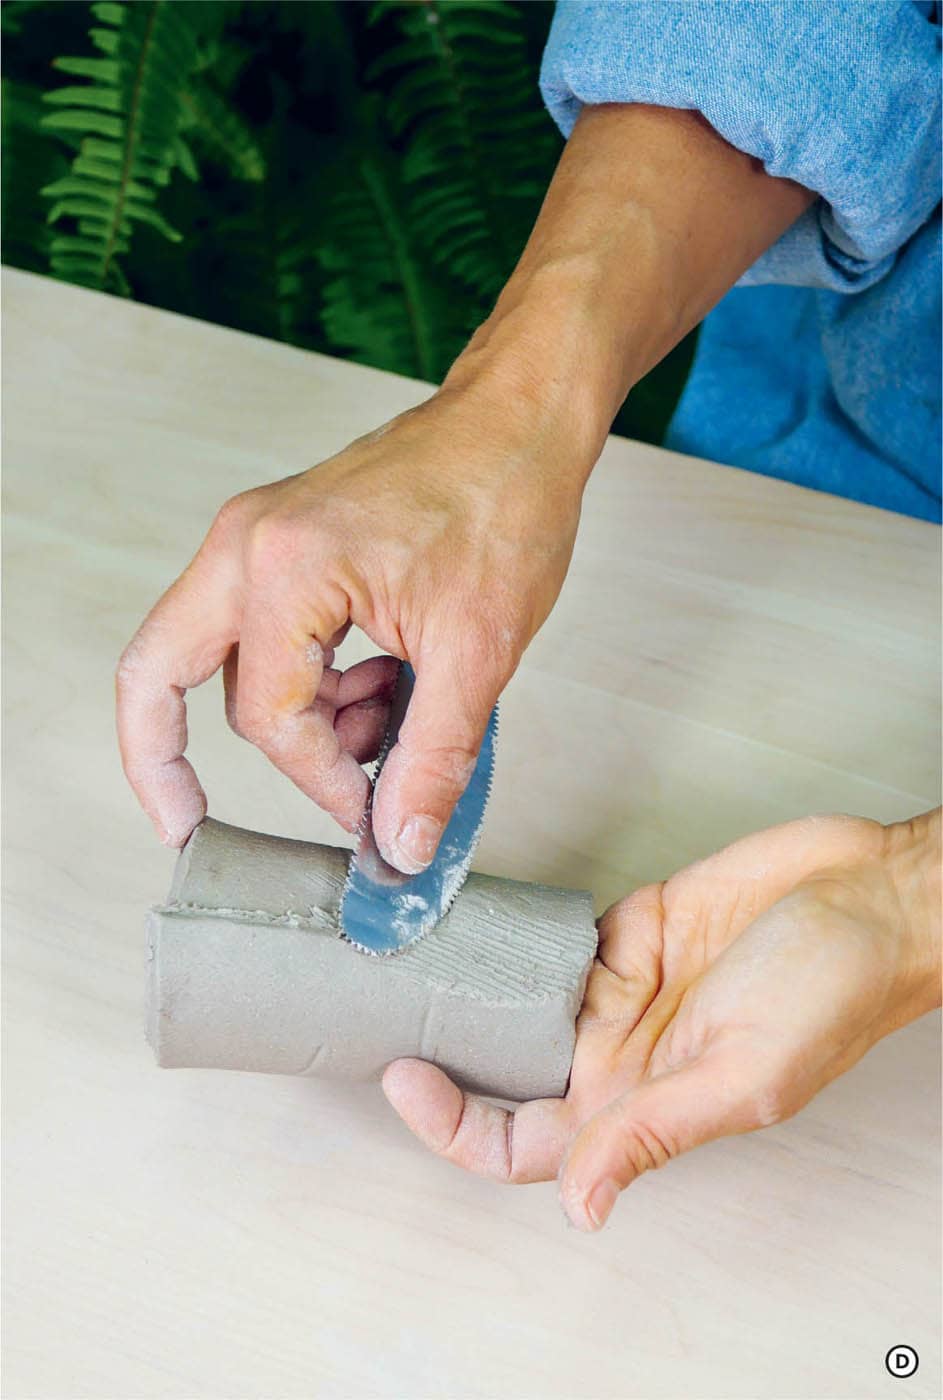
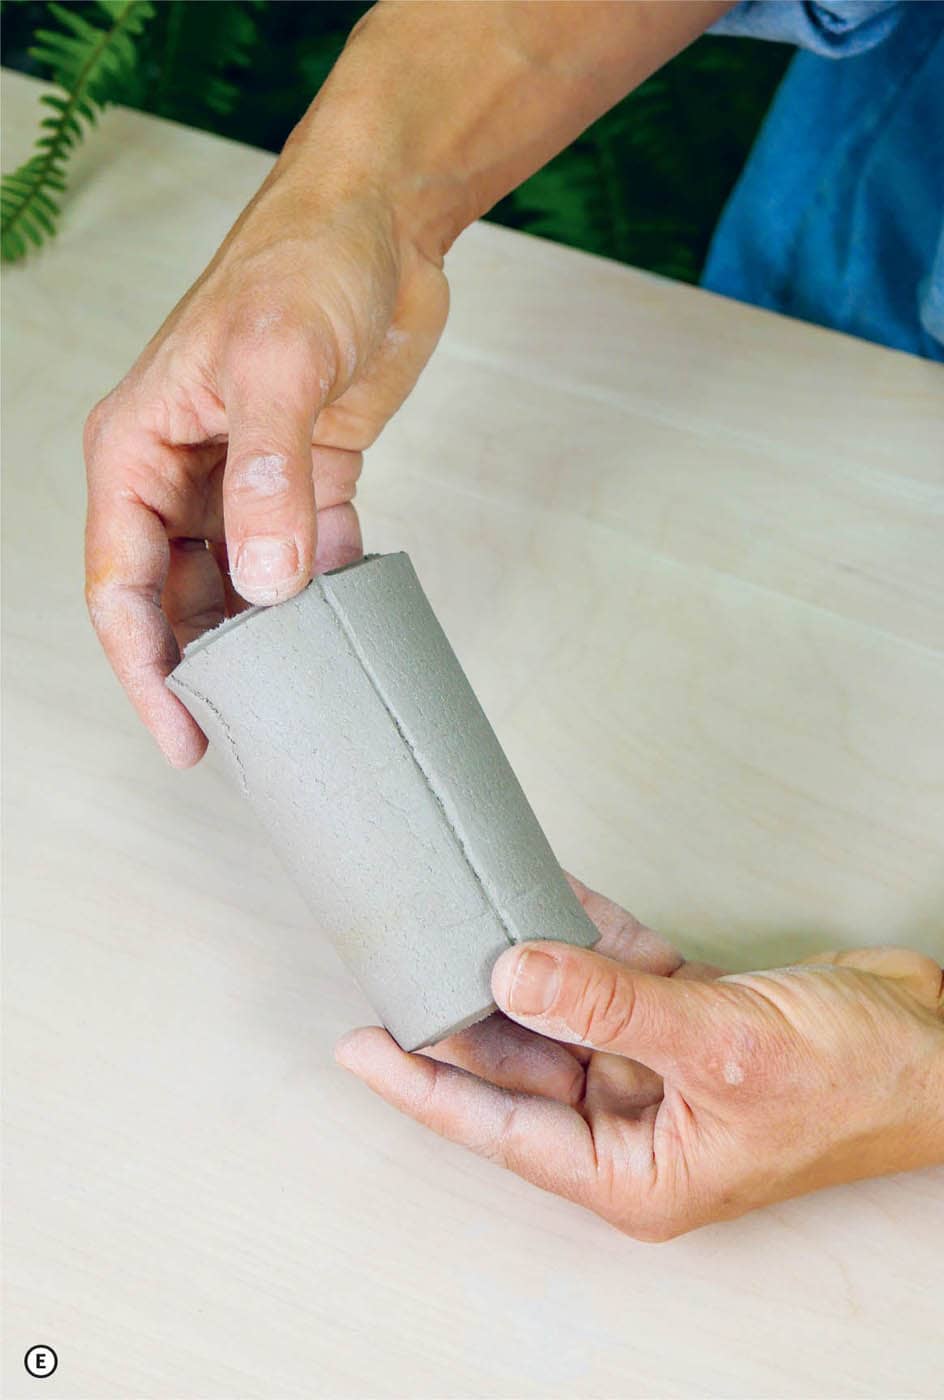
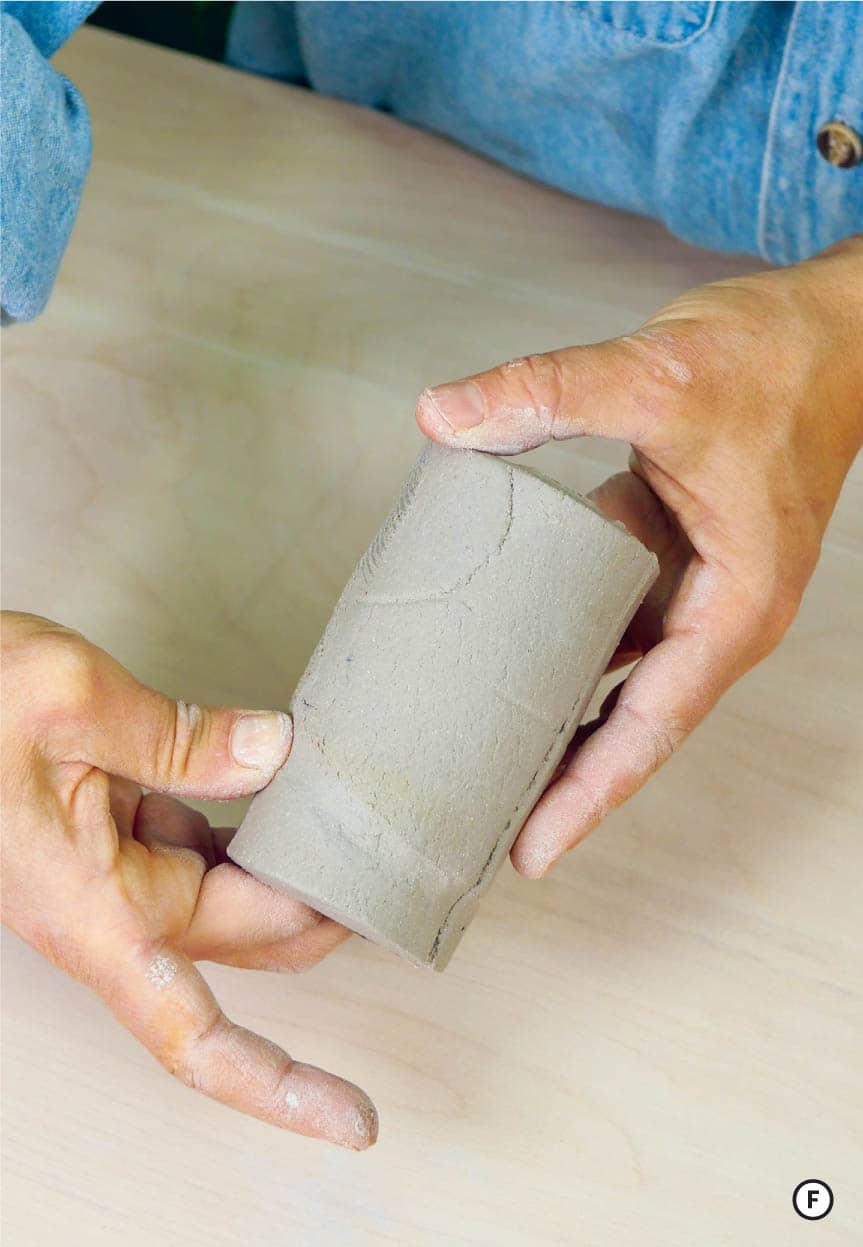
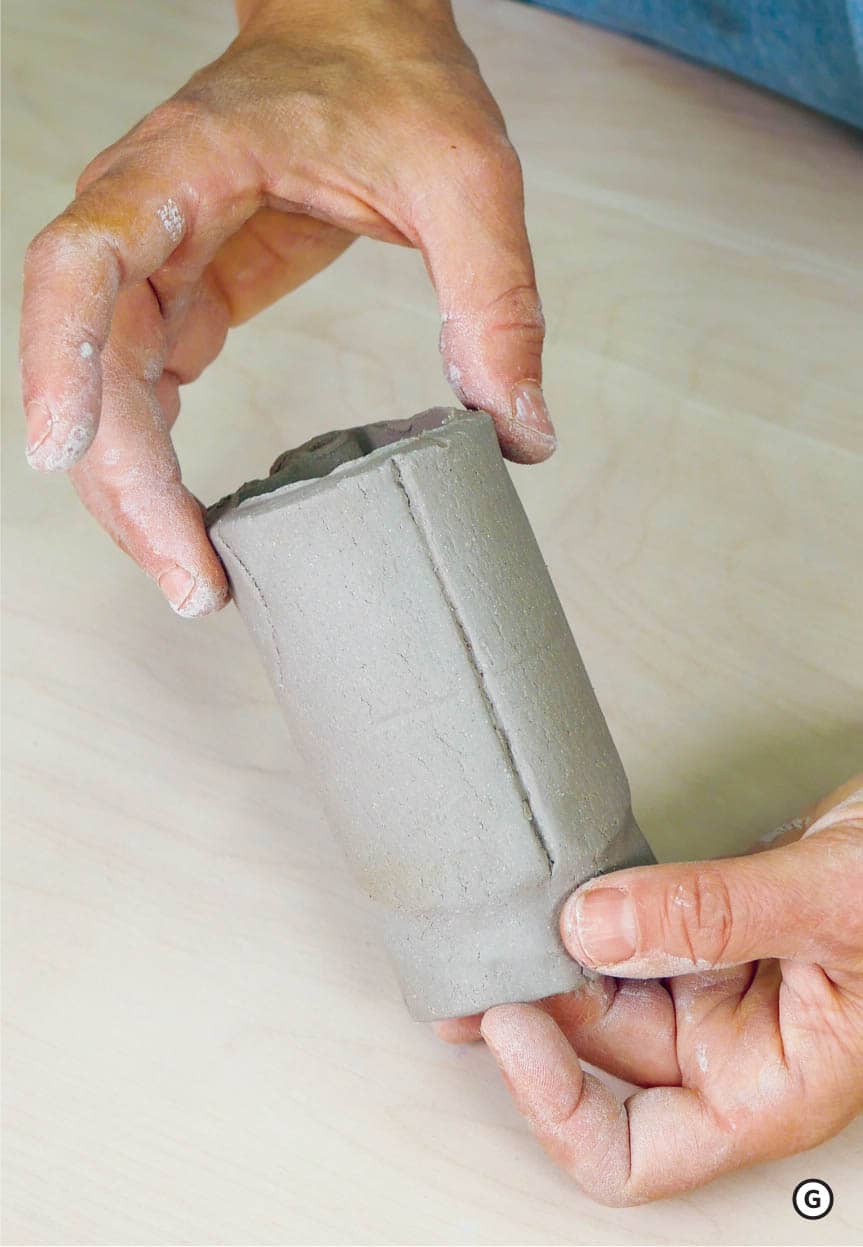
Assemble your primary shape by overlapping the edges of the slab by ¼ inch (6 mm) before slipping and scoring, and then compressing that vertical seam to create a cylinder. Remember, your reference lines should end up on the outside of the form. ![]()
![]()
For the step sequence that follows, we will begin adjusting the form by establishing the jawline, cutting darts, pushing inward and outward to articulate the bony landmarks of the skull, and drawing onto the surface to guide the placement of the features. Let’s jump in.
DEVELOPING THE CRANIAL FORM
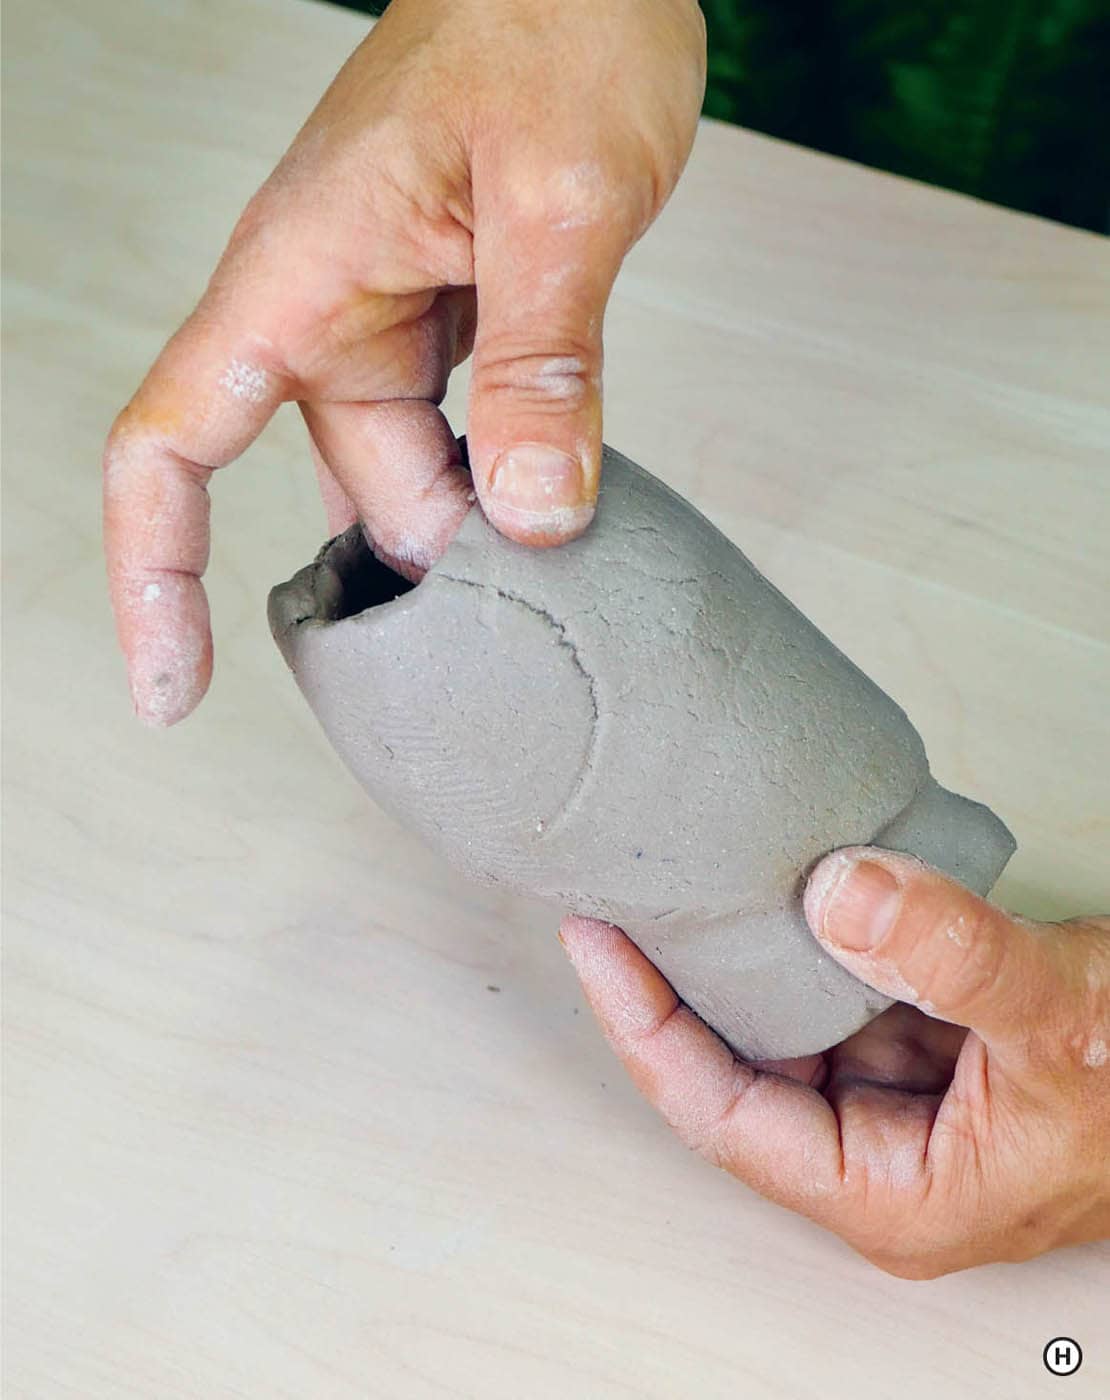
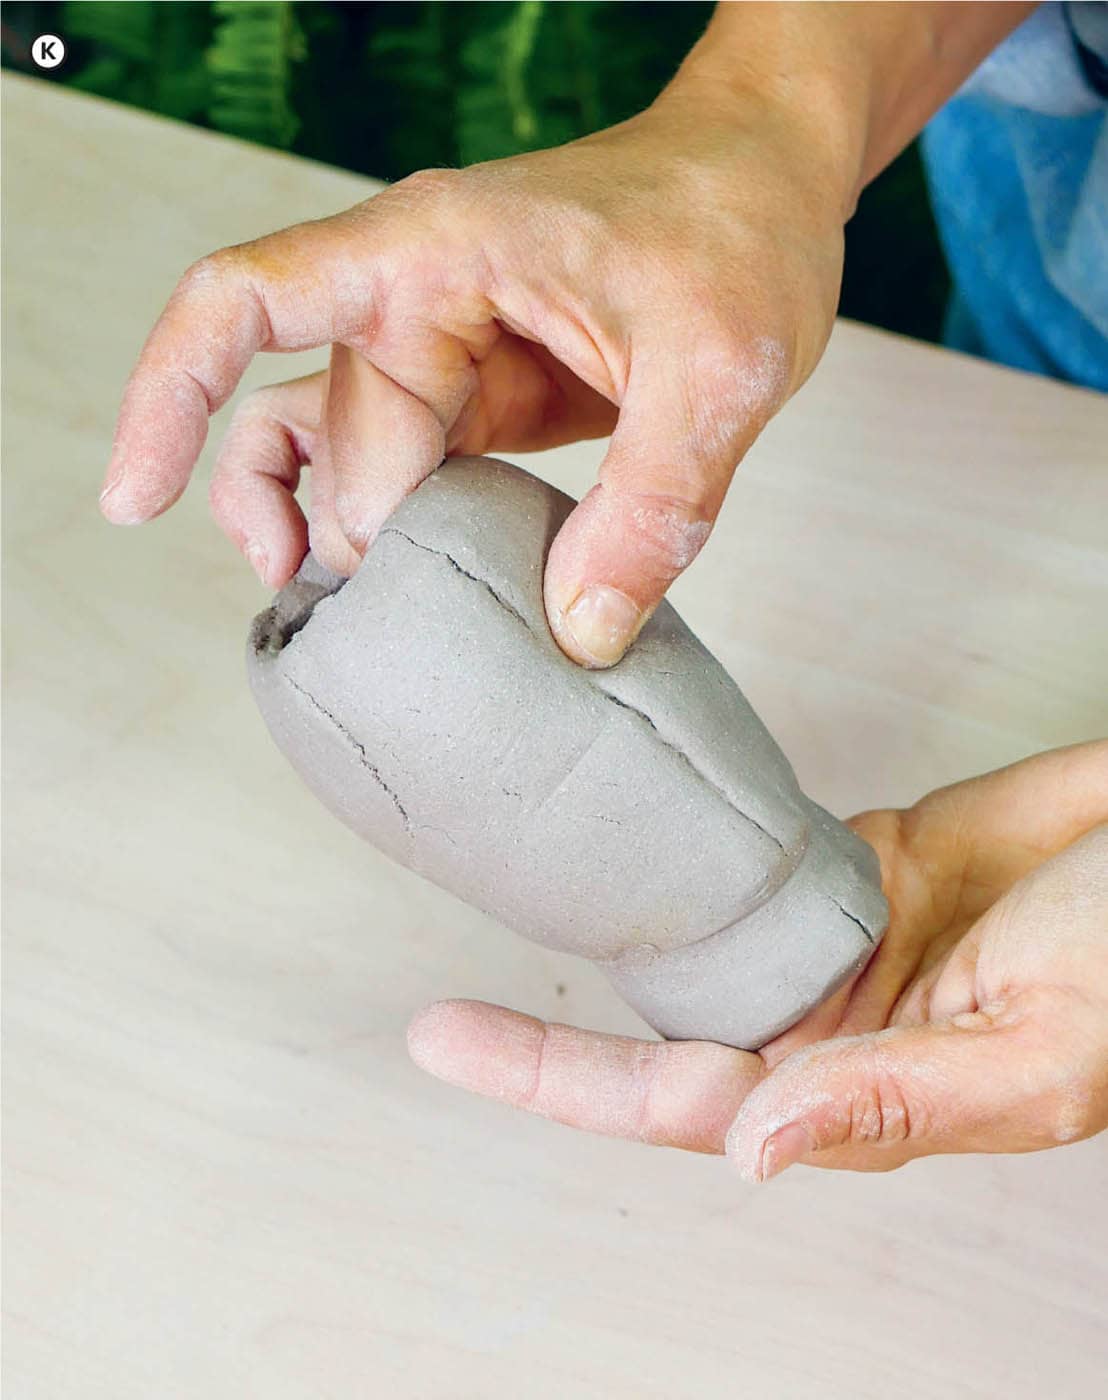
- 1.Find the lowest reference mark (last down from the top on the front of the face) and move your finger from there to the mark toward the back of the cylinder, pressing firmly in a diagonal motion to establish the jawline and the back of the skull.


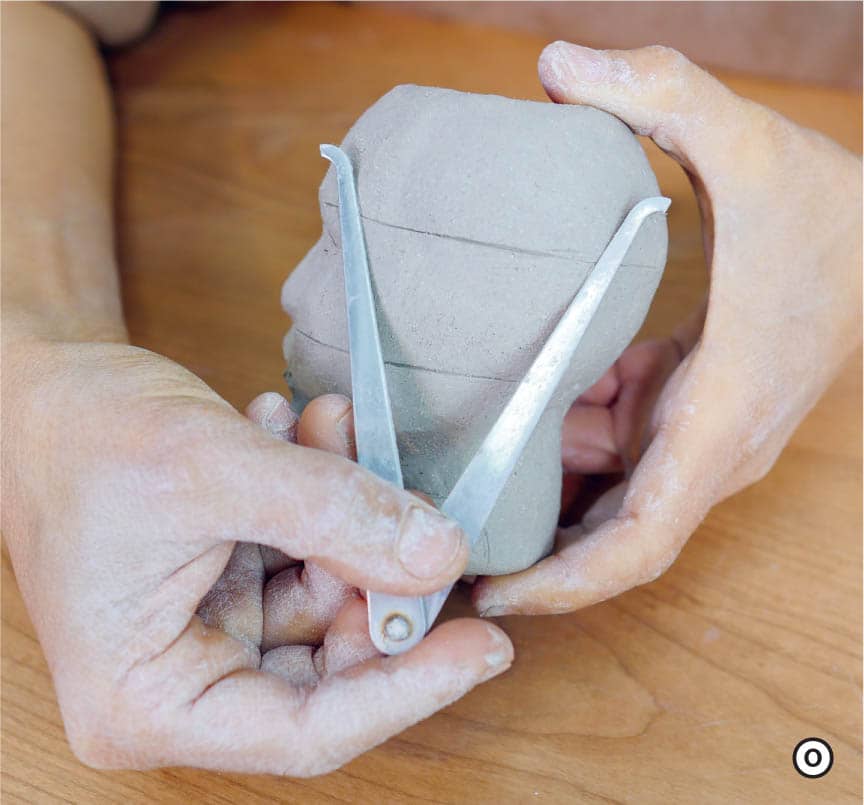
- 2.Focus on articulating the curve at the top of the skull. With smaller heads, you can just pinch and tap the curve into shape. With larger heads, you will need to cut four darts, at the front, back, and on each side, to develop the cranial curves.
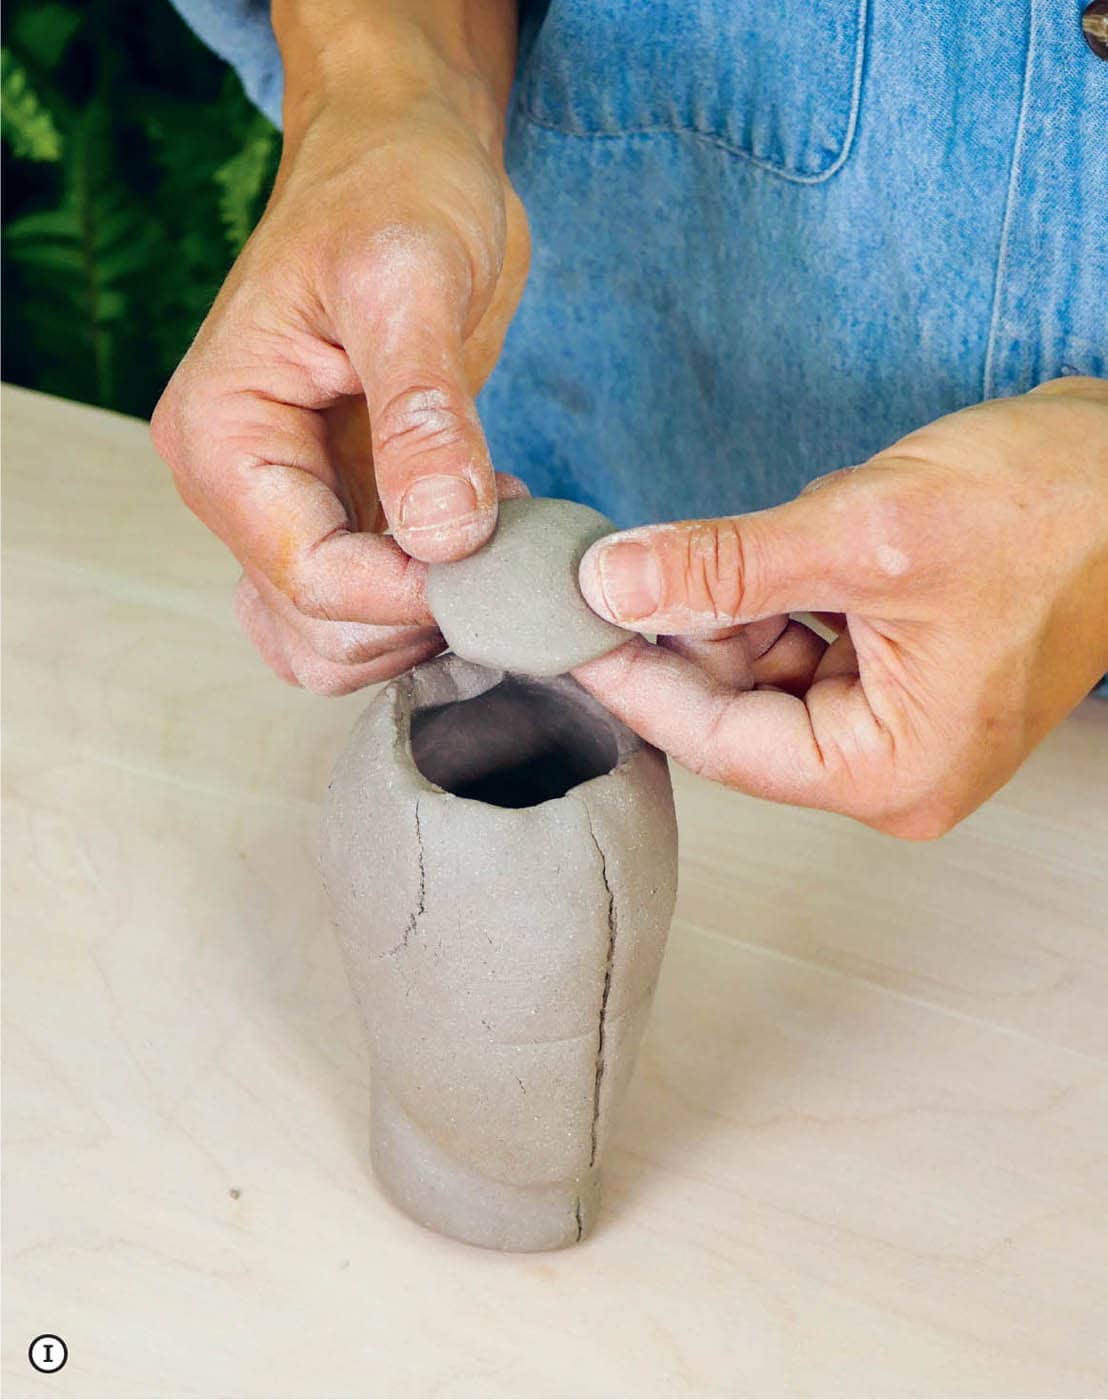
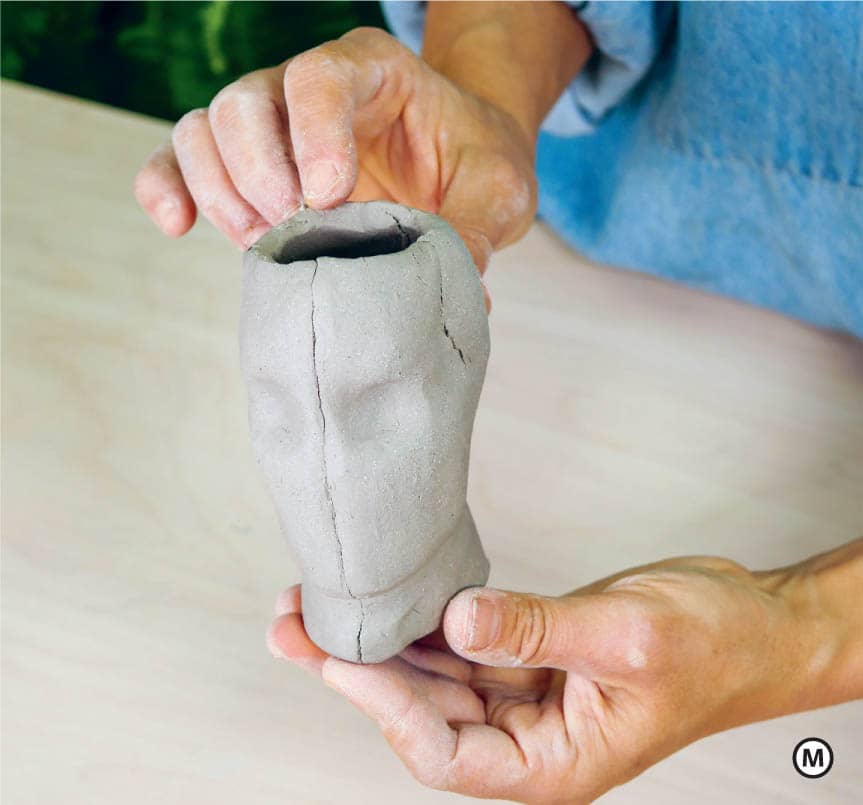
- 3.Once the curves are established, create a small cap to sit on the cranial opening to close the form. This piece will stay unattached throughout most of the process so you can access the inside of the cavity while sculpting, but putting it in place periodically will help you visualize the whole form and allow you to take measurements from the very top of the head.


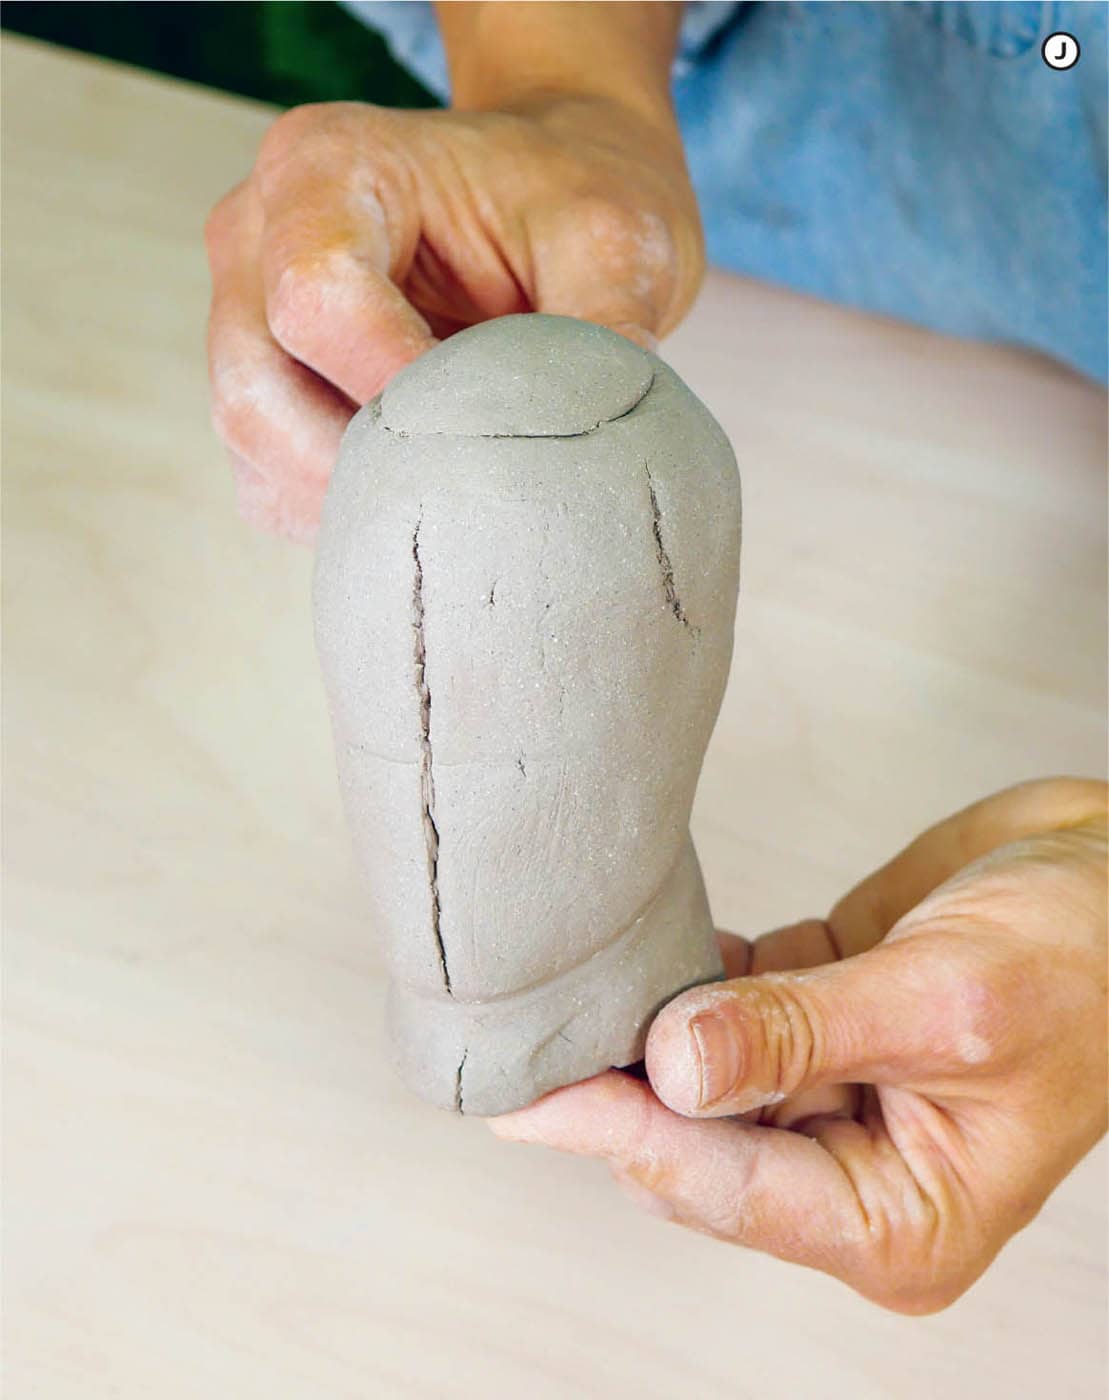
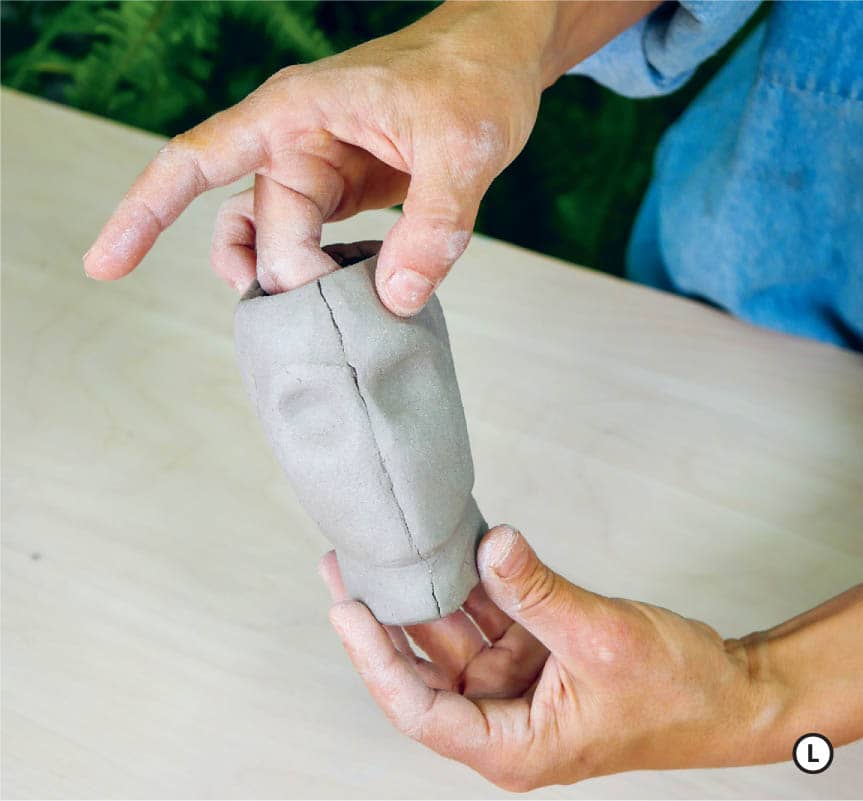
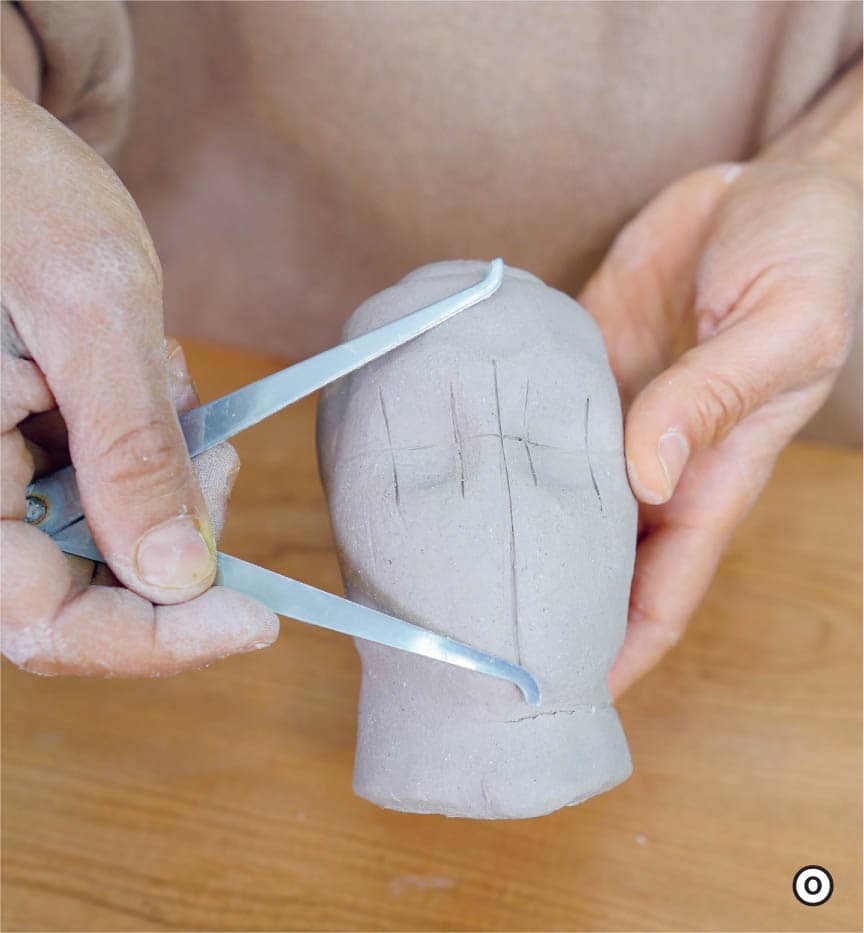
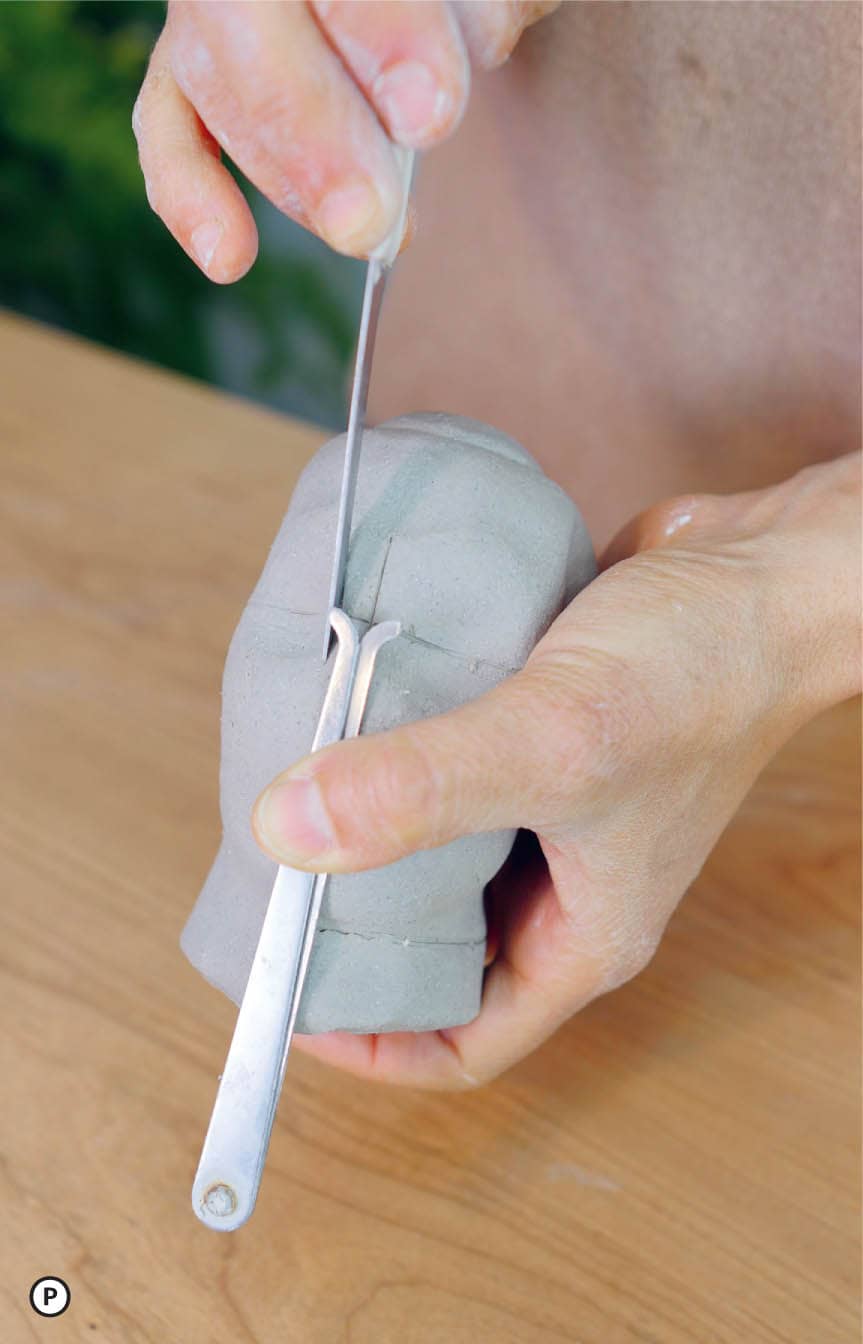
- 4.Now that the boundaries of the skull are defined, remove the cap and move your finger vertically along the inside of the shape, starting with the middle vertical line that you transferred from the template. Begin rounding the form gently, taking care not to exert excessive pressure that could distort the form too aggressively. As you gradually push from the inside, you are supporting and guiding the pressure from the outside with your other hand. Your goal is to begin articulating a spherical shape as seen from the front and back of the head and an egg-like shape as seen from the side.

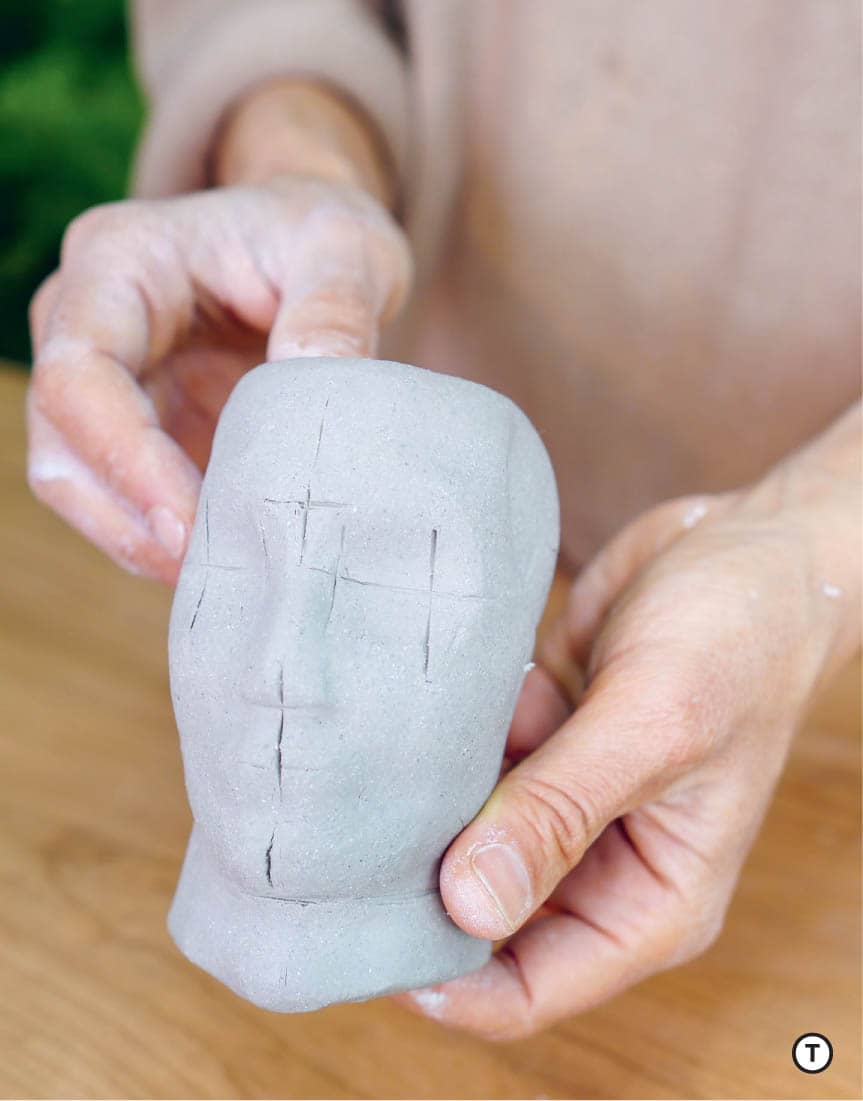
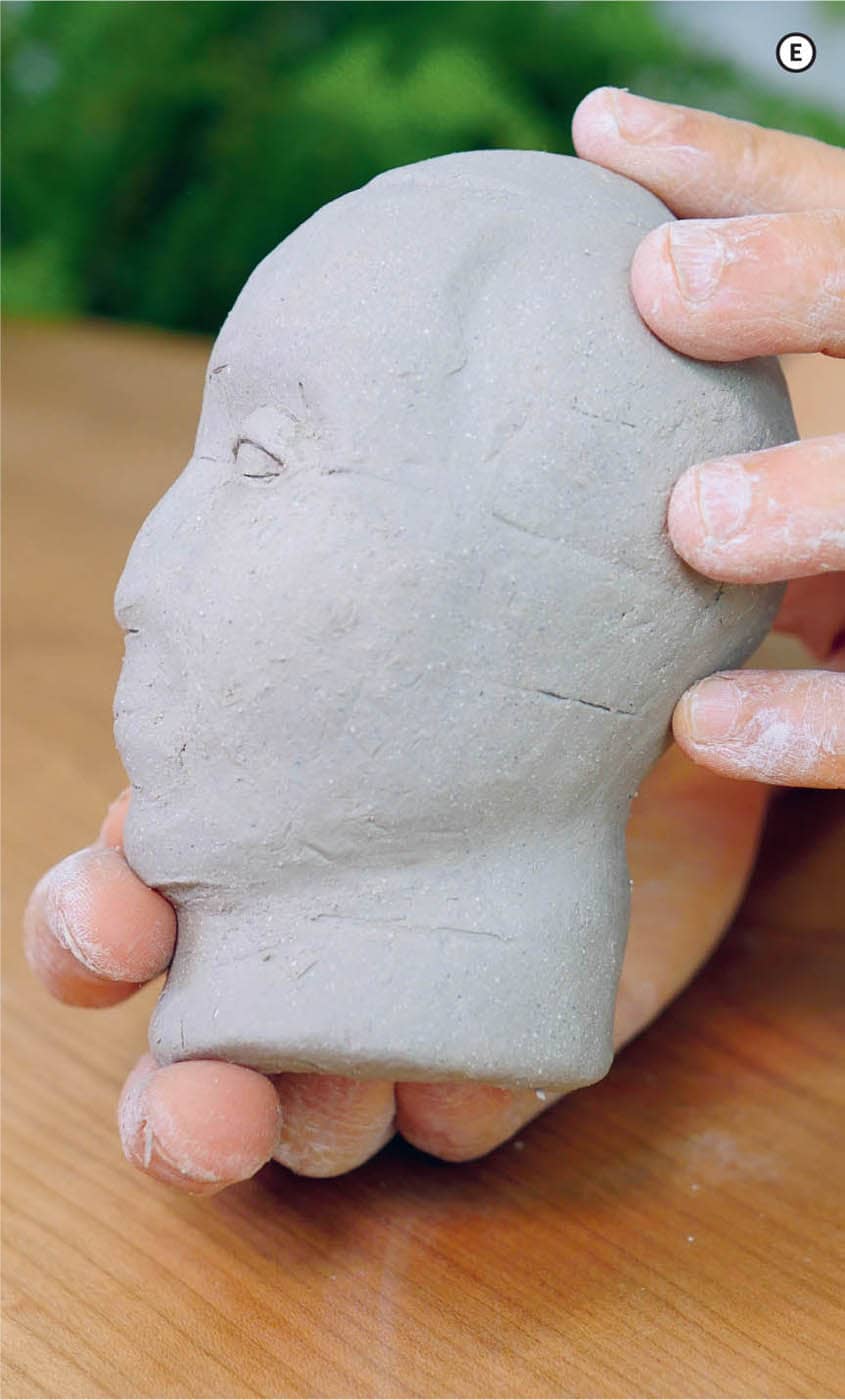
- 5.Once the basic head shape is articulated, push inward, just above your horizontal center reference line, while supporting with your finger from the inside. These indentations will be your ocular cavities. By offering support from the inside both above and below the cavities as you push in from the outside, you will start to develop the brow line and the cheekbone area.
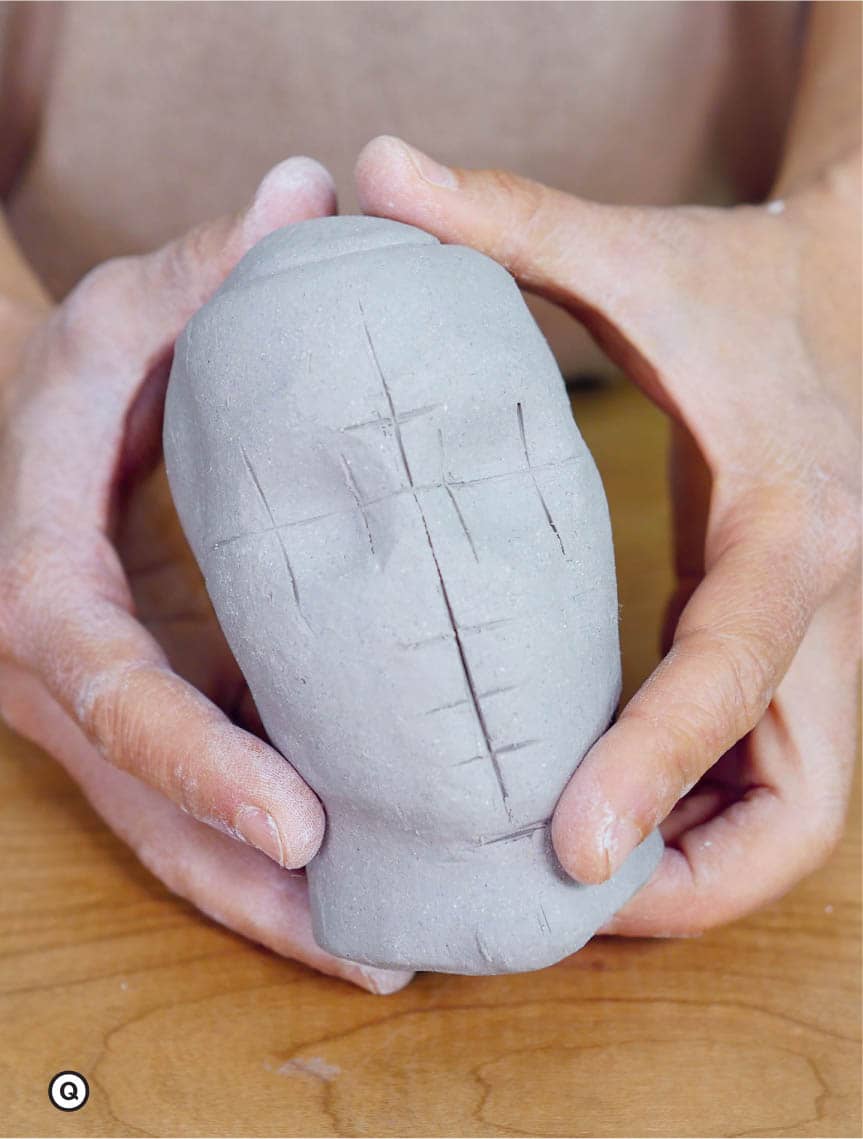
- 6.Gently press inward in the shape of a squat “M” over the brow area to articulate the glabella and the contiguous brow bones. You are still working on the cranial, or bony interior, structure of the head, so remember that the final articulation of the form will happen through the addition of a layer of soft clay onto that core.

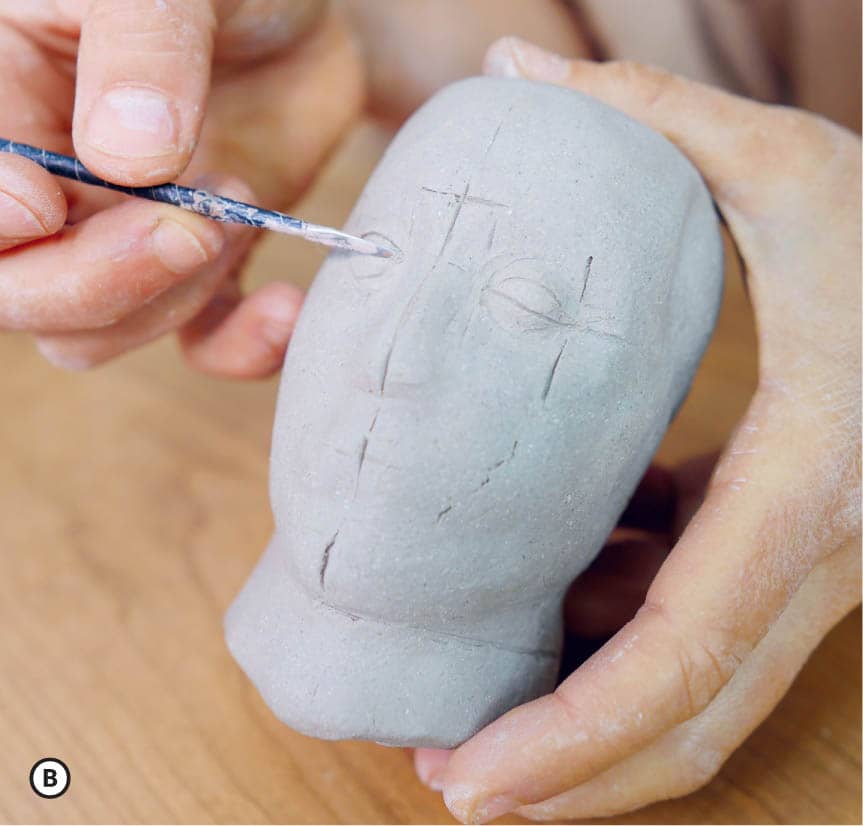
- 7.To further develop that bone structure, you will now create a shift in plane between the forehead and the temples by moving your thumb along the curved reference line from the template while offering internal support around the outside edge of the ocular cavity to establish the zygomatic arch and the temporal line.

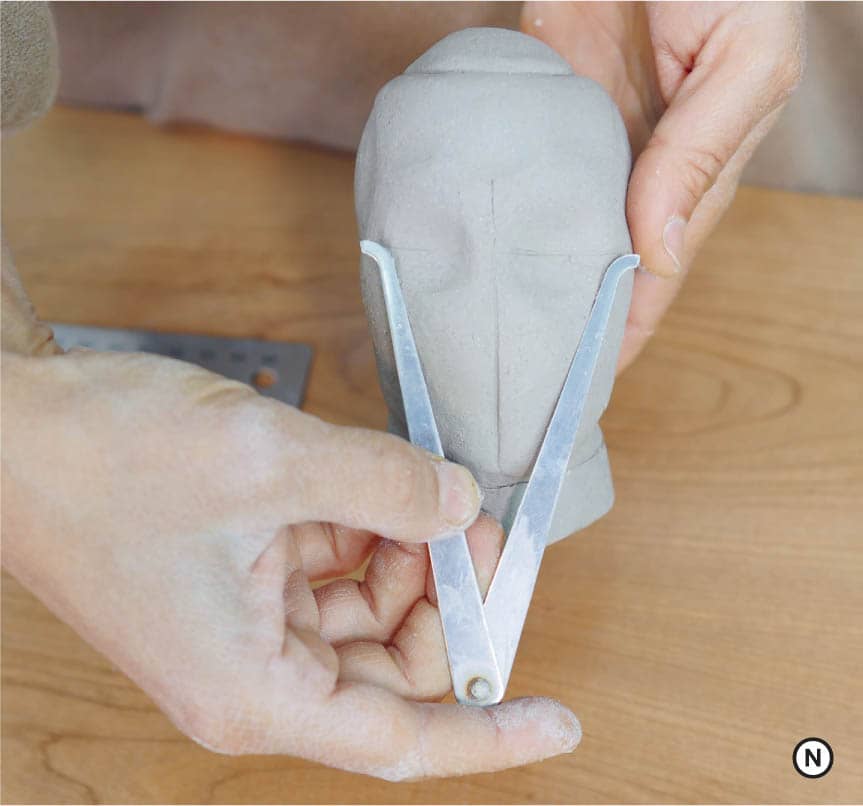
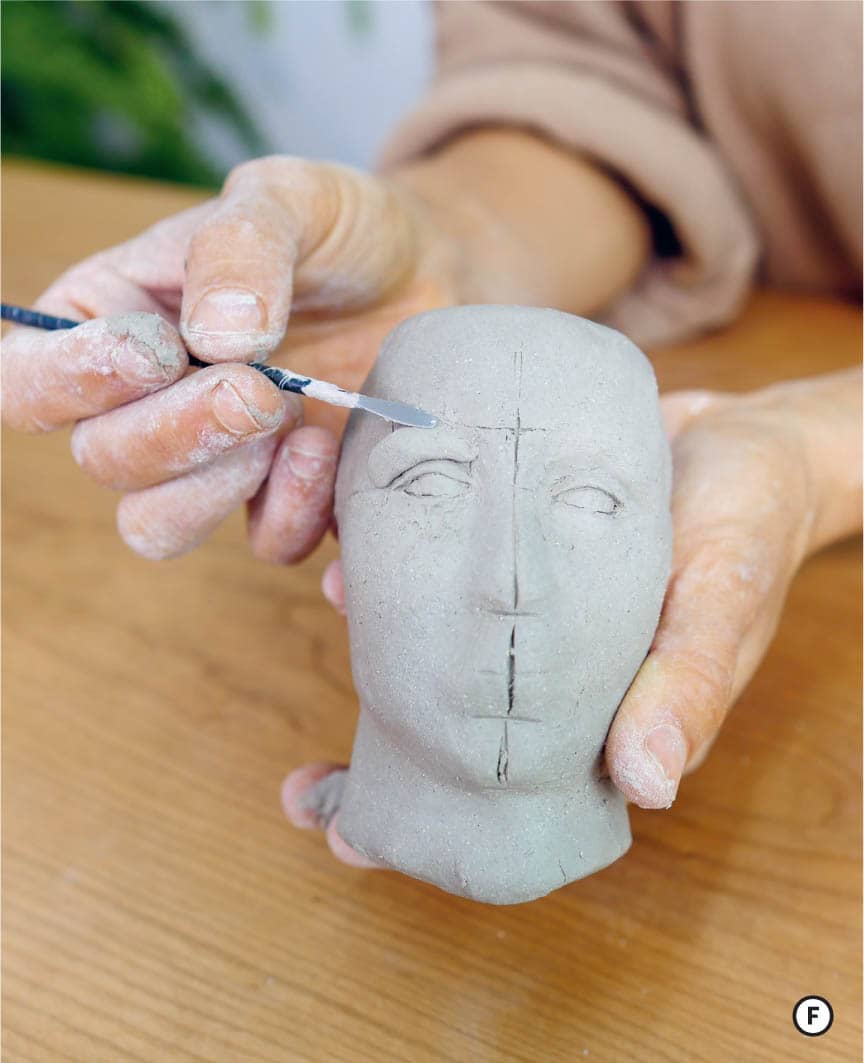
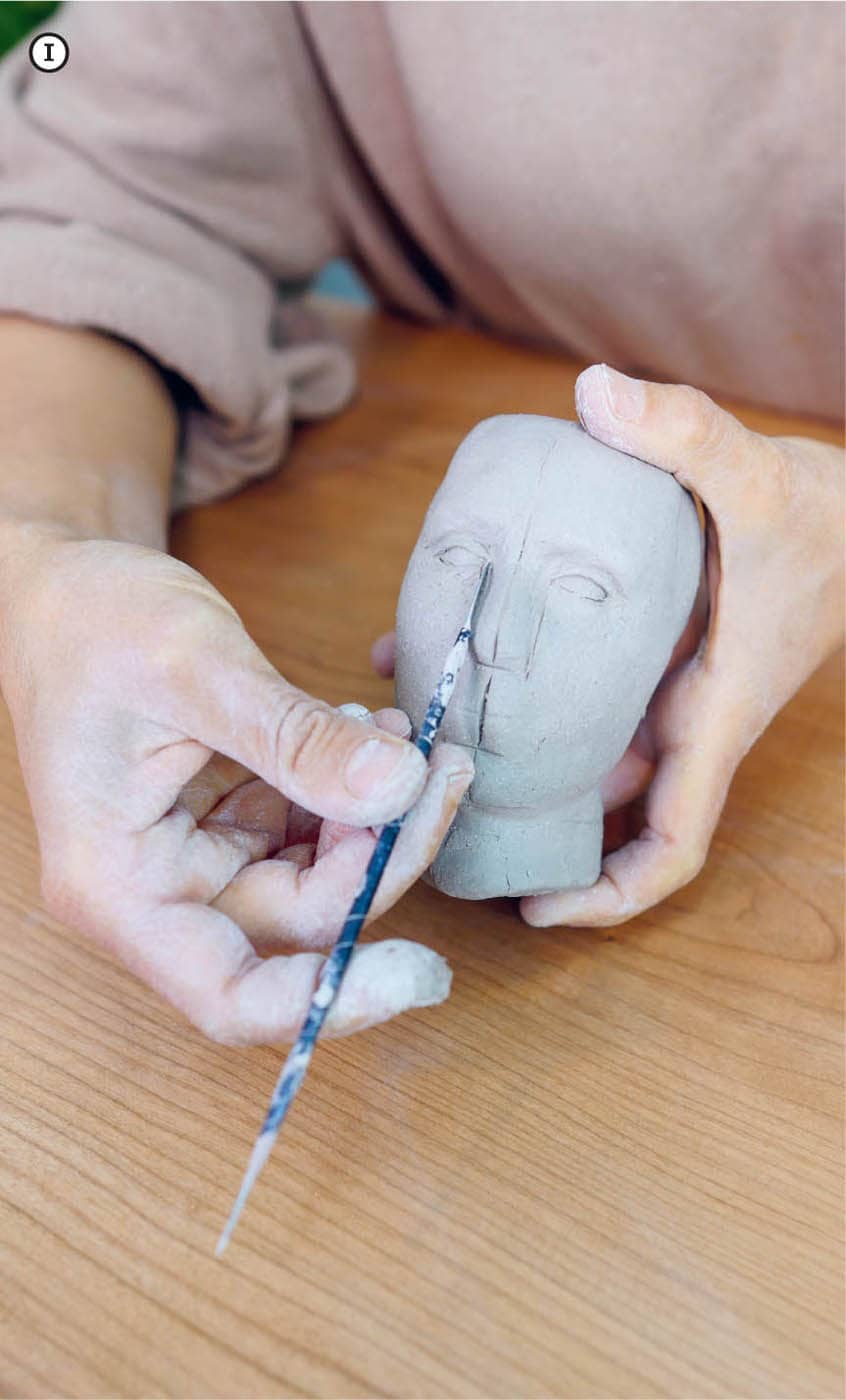
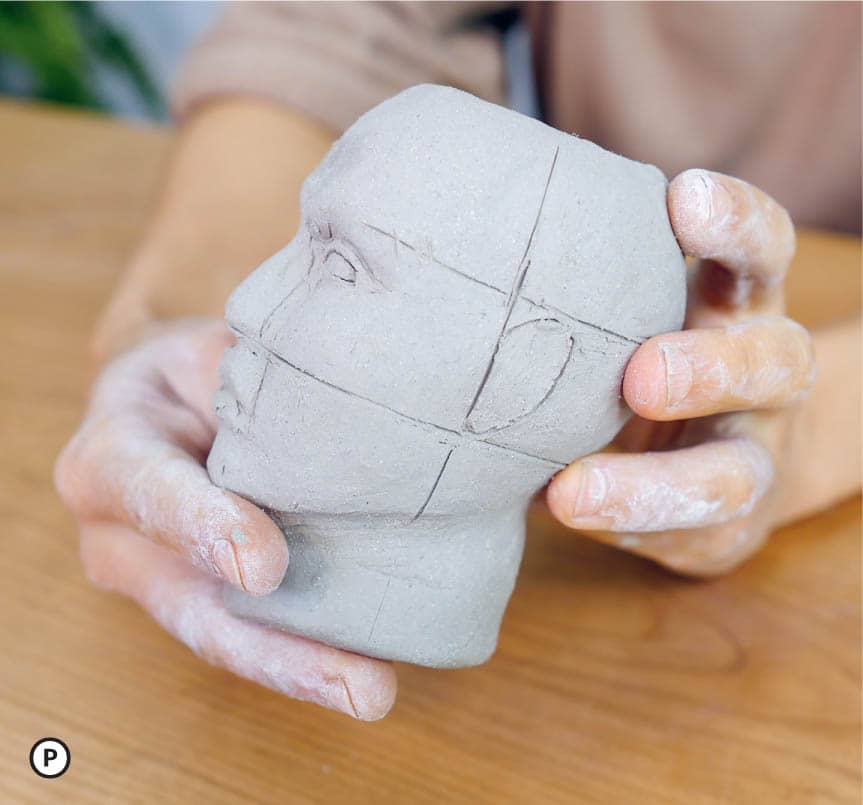
- 8.With the help of calipers, a ruler, and photographic blueprints, you can establish new reference marks that will guide the placement of the facial features. The first measurement will capture the distance between the top of the head, or vertex, and the bottom of the chin. Using your calipers and your ruler, find that measurement, divide it in half, set your calipers to this new value, and mark that distance onto your skull. Make a horizontal line through this point across both ocular cavities. This will be your eye-line.
 Next, use your calipers and ruler to measure the width of your head at its widest point, around the cheekbone area. Divide this value by 5. Adjust your calipers to this new measurement and divide your eyeline into five equal segments.
  These will guide the placement of your eyes.
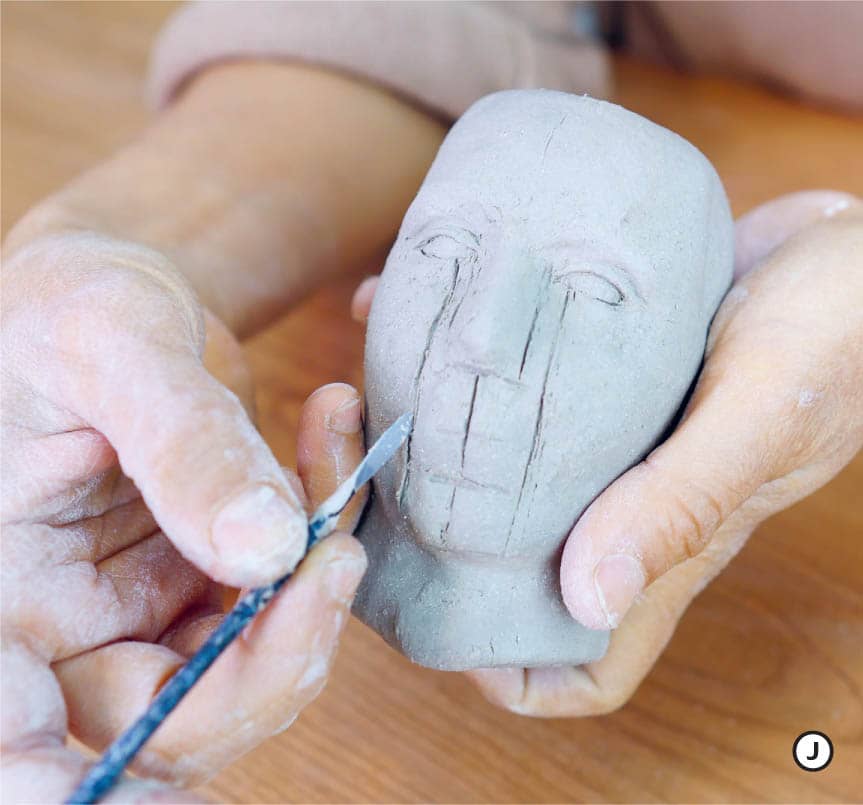
- 9.To find the placement of the nose, use your calipers and ruler to find the measurement between the hairline mark and the bottom of the chin.
 Divide this measurement by 3, adjust your calipers, and use them to plot two marks that divide the distance between the hairline and the chin into three equal segments: the hairline to the brow; the brow to the bottom of the nose; and the bottom of the nose to the bottom of the chin.
- 10.Using the same process, divide the distance between the bottom of the nose and the bottom of the chin into three equal segments. Draw horizontal lines dividing these segments. The upper line marks the site of the mouth, and the lower line is where the top of the chin will be.
 (Also see Appendix C.)
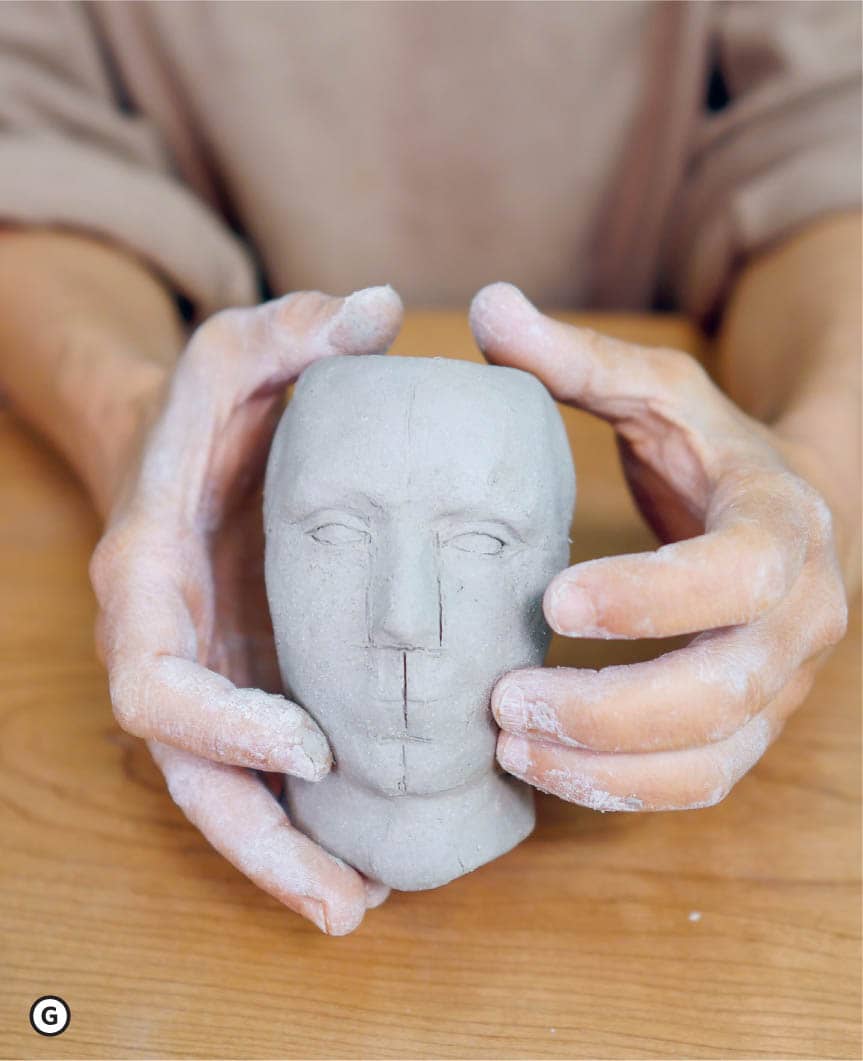
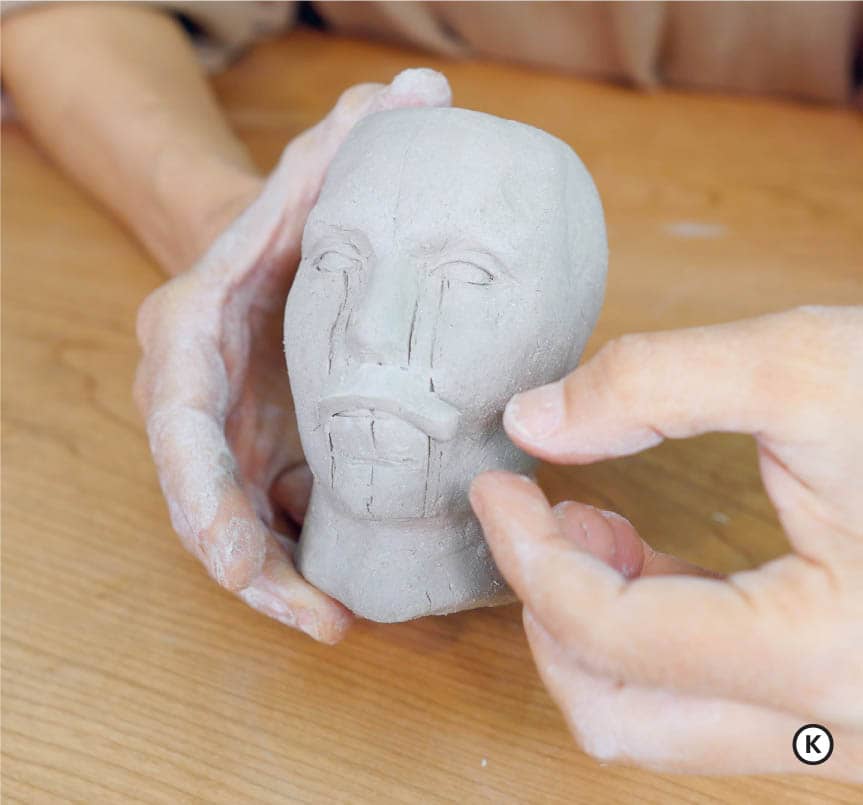
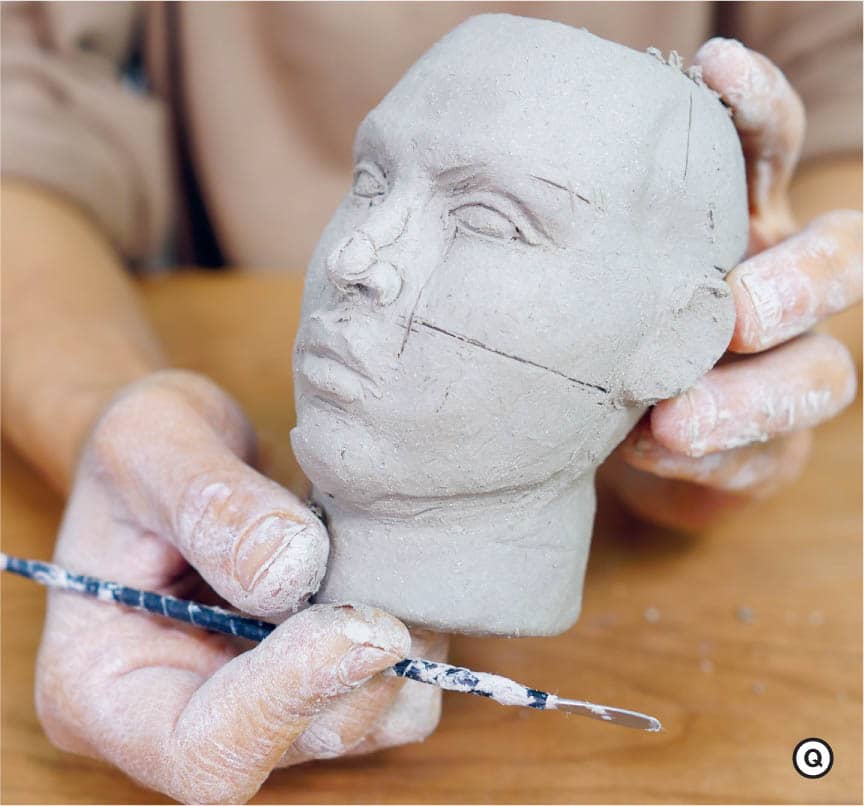
- 11.Using these reference lines, push outwards from the inside, starting to articulate the projection of the nasal bone, while supporting and helping guide the gesture from the outside with your other hand.
 Again, the goal is developing volumes that represent the bone structure. The final, fleshy features will be achieved by adding material in subsequent steps.

- 12.Moving down, push out at the upper horizontal mark between the bottom of the nose and the chin. You are looking to articulate the arch of the maxilla, the bone that holds teeth in a semicircular formation. To control this projection, place your thumb and index finger at the edges of the curve from the outside as you gently push out from the inside.

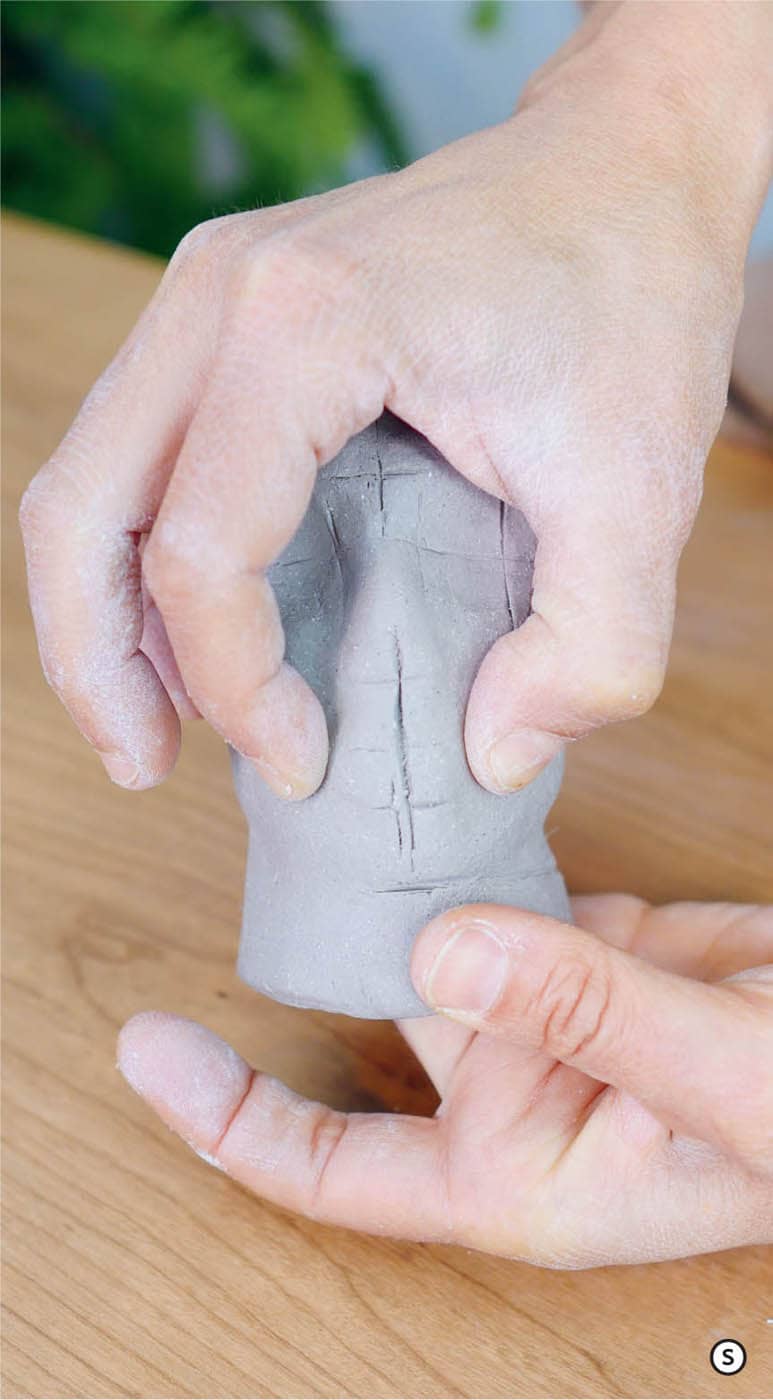
- 13.To finish up this section, push out to accentuate the chin or mental protuberance.

ADDING FACIAL FEATURES
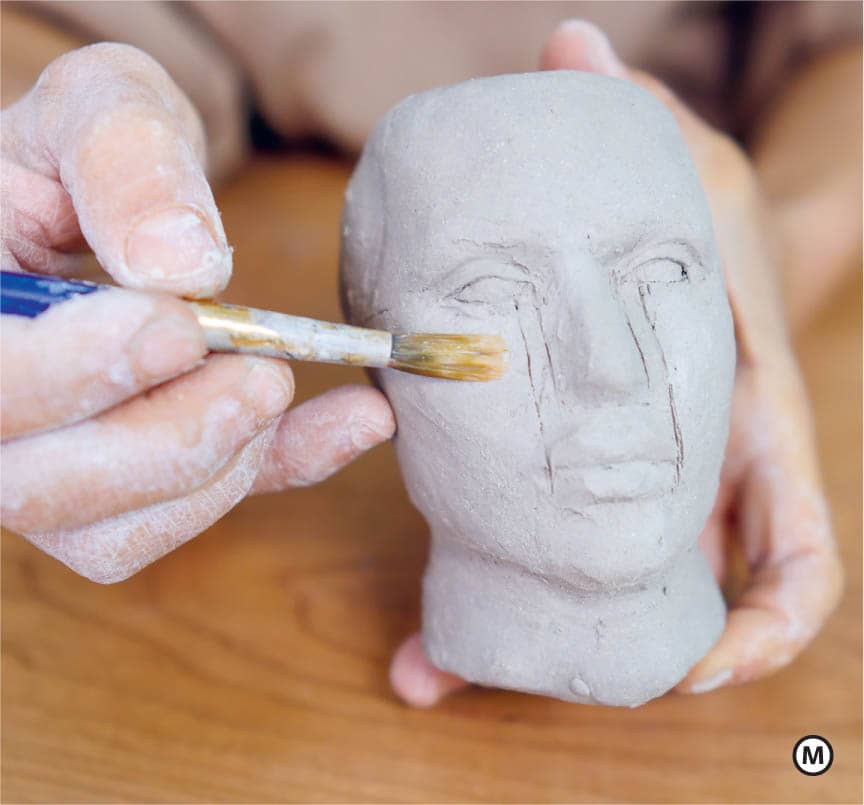
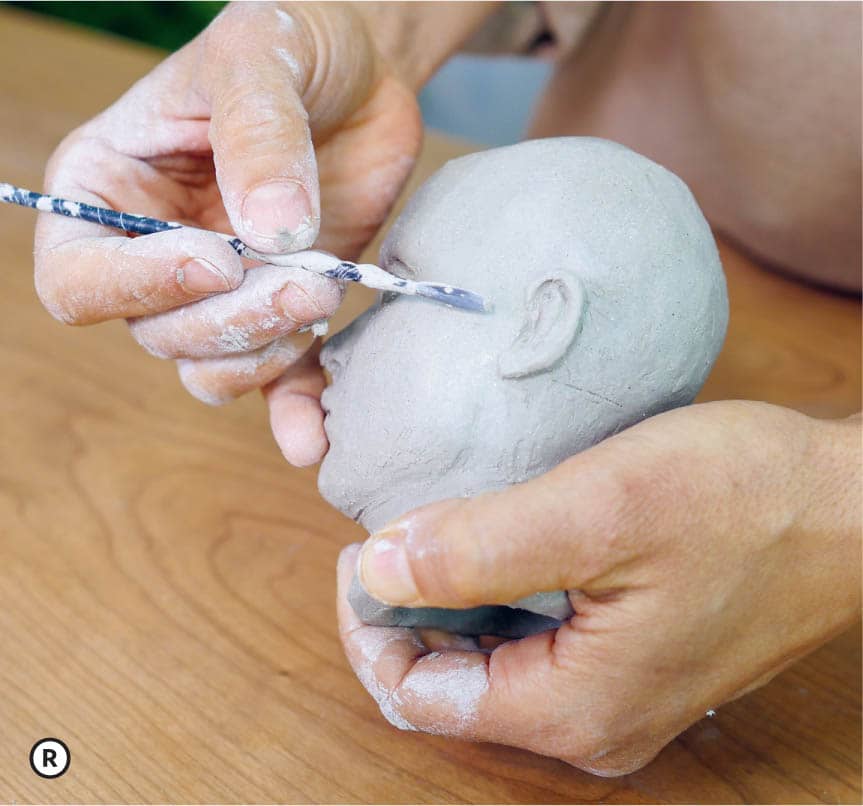
At this stage, it is a good idea to take measurements from your photographic references with your calipers to ensure the head feels proportionally aligned with the rest of the body. Once the cranial core has dried enough to hold its form under the pressure of your fingers, you will begin adding more features over the bony landmarks you have established. Note that your clay must still be wet enough to receive a new layer of clay, so tracking moisture level is an important part of this process. You are now shifting into the realm of cartilage and tissue. For smaller heads like the one we will be developing, it works well to hydrate a specific area with a brush and then model over that area with soft clay. For larger heads, it helps to slip and score before adding any new material to ensure proper adhesion.
The following steps describe my process to develop generic features that will serve as the foundation for a more specific facial rendering in subsequent waves of refinement.
ADDING PRIMARY FACIAL MASSES
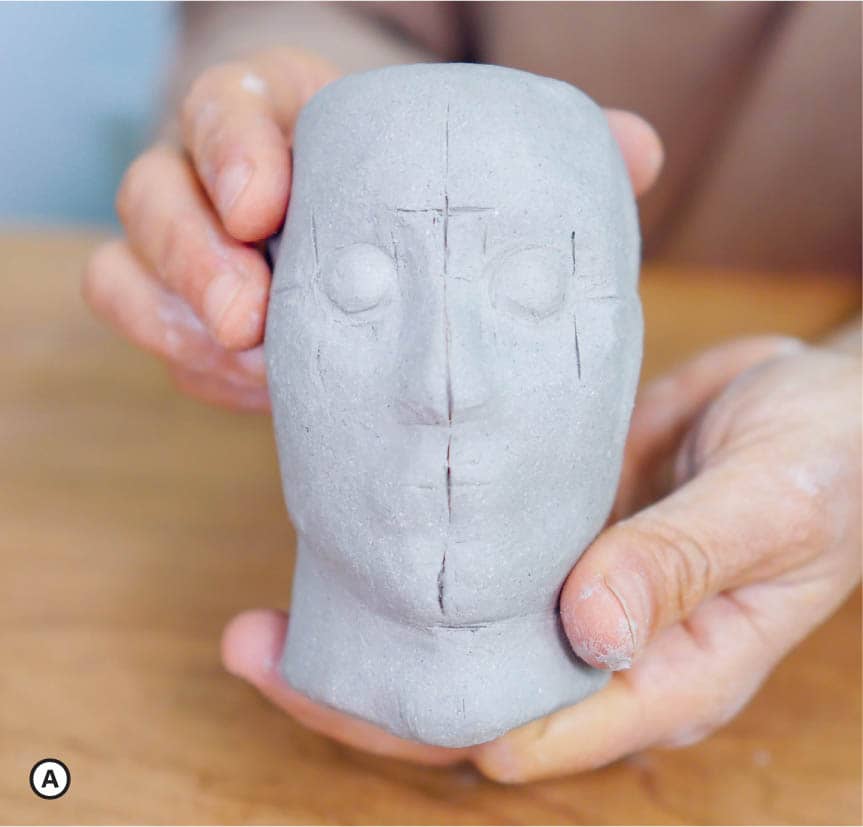
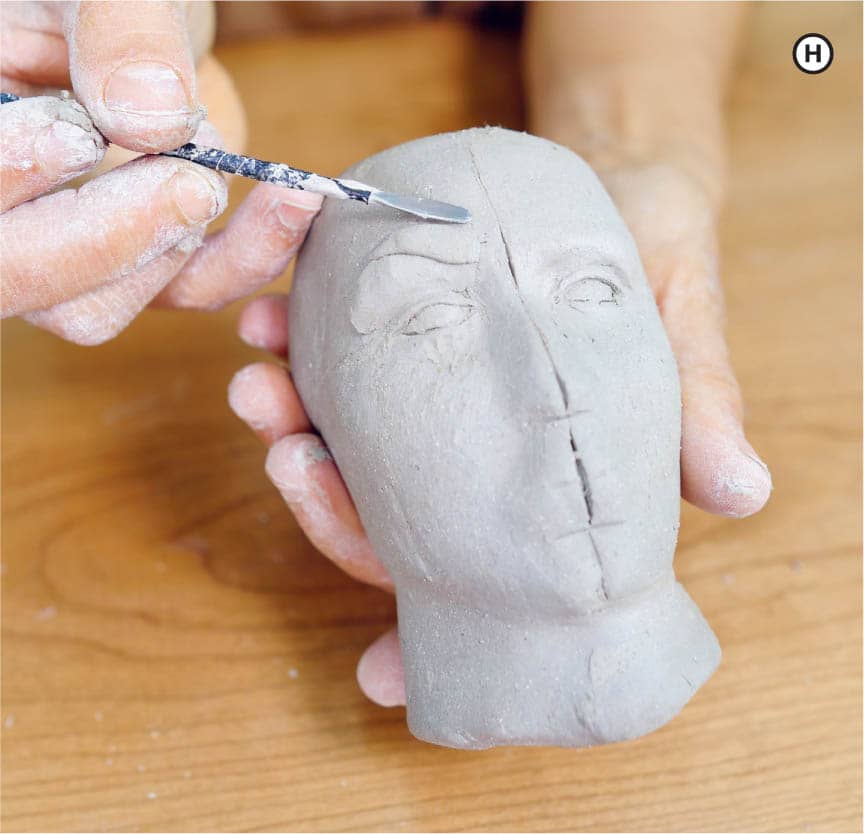
- 1.Let’s start with the eyes. Locate the vertical marks perpendicular to the lines inside the ocular depressions. To guide your eye placement, use a stainless modeling tool and draw in the shape of the eyes in relationship to these marks. Next, roll two small balls of clay of equal size. Keep these small bits of clay hydrated and place one in each ocular cavity, moistening the surface with a brush or slipping and scoring if necessary or to ensure a good connection.
 Shape these mounds into half spheres with your tool by moving it across the top and bottom edges. As you move your tool across the front of the eye volume, let up on your pressure to avoid flattening the mass. Our goal is to preserve the convex nature of these half spheres.
- 2.Next add lids, top and bottom, using small tapering coils that will be compressed and adjusted against the eyeballs with your small stainless tool or knife.

 It is important here to check your head from the side to ensure the eye is not projecting beyond the brow bone.
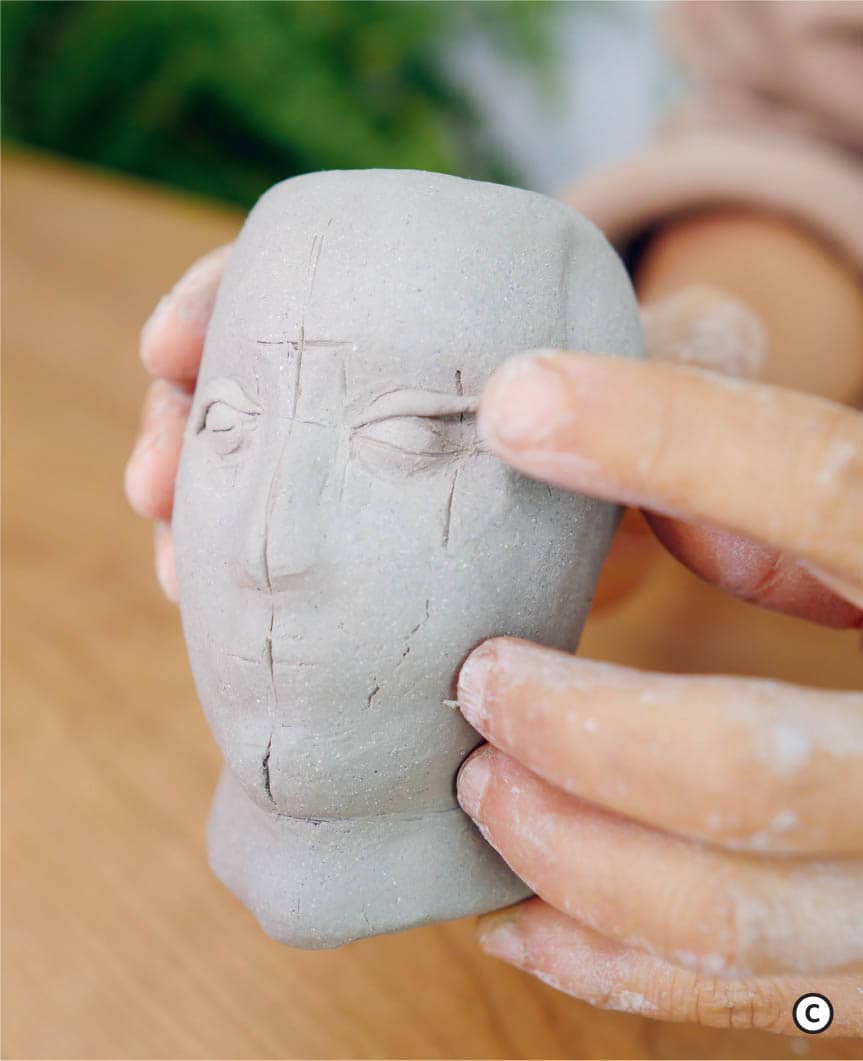

- 3.Add some clay in a teardrop shape to the outer eye area. This area is also known as the superior orbital compartment. Orient your teardrop with the thin end pointing inwards toward the nose and place it above the upper lid and below the brow bone. (Also see Appendix C.) You are looking to create a convex shape at the outer part of the eye that turns gently into a concave hollow as you approach the inner eye, right below the eyebrow. Use a small brush to integrate this new material, while preserving the projection of the convex curve.
- 4.Next, add a bit of clay, also in a teardrop shape, to accentuate the brow.
- 5.Moving into the nasal area, establish the width of the nose by extending your inner eyelines down to intersect with your bottom of the nose line. Lay a mass of clay between these two vertical lines in the form of an elongated triangle. Vertically, your triangle should extend from the eyeline to the bottom of the nose line.
- 6.Establish the thickness of the mouth by drawing vertical lines from the inside of each eye, where the iris would start, all the way down to intersect the mouth line. Add a coil of clay just under the base of the nose sloping down, laterally and back, in the shape of a mustache. You have attached more material than you will need, so once you have developed the philtrum, upper lip area, and upper lip in the subsequent steps, you can carve or smooth away any excess. Now apply the lower lip material, pressing against the upper lip. This mass will comprise the lower lip a well as the tissue around the lip and the transition to the chin.
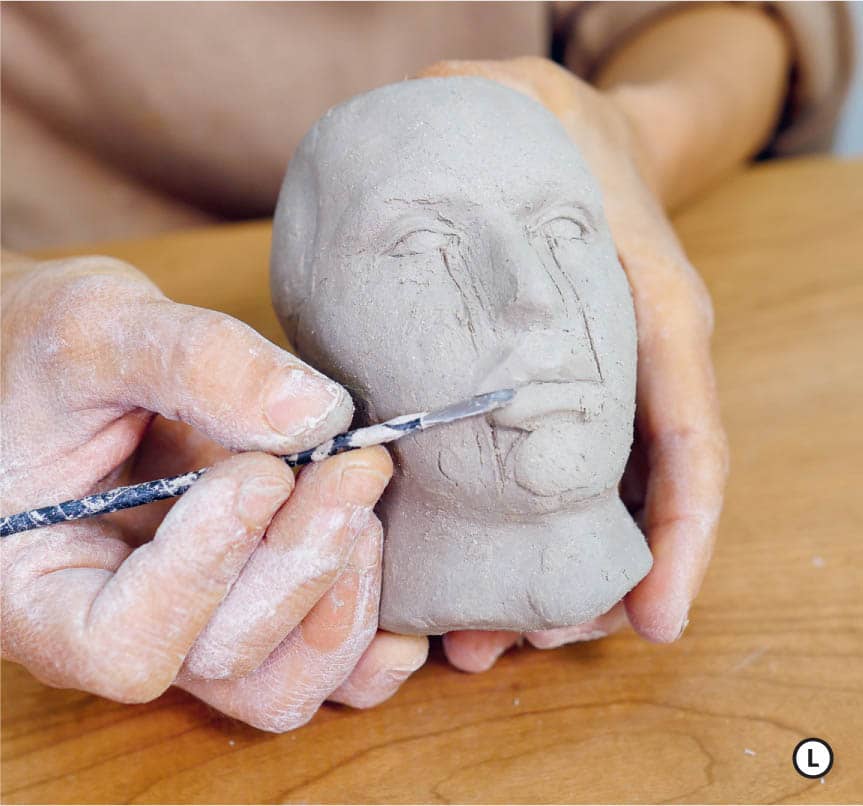
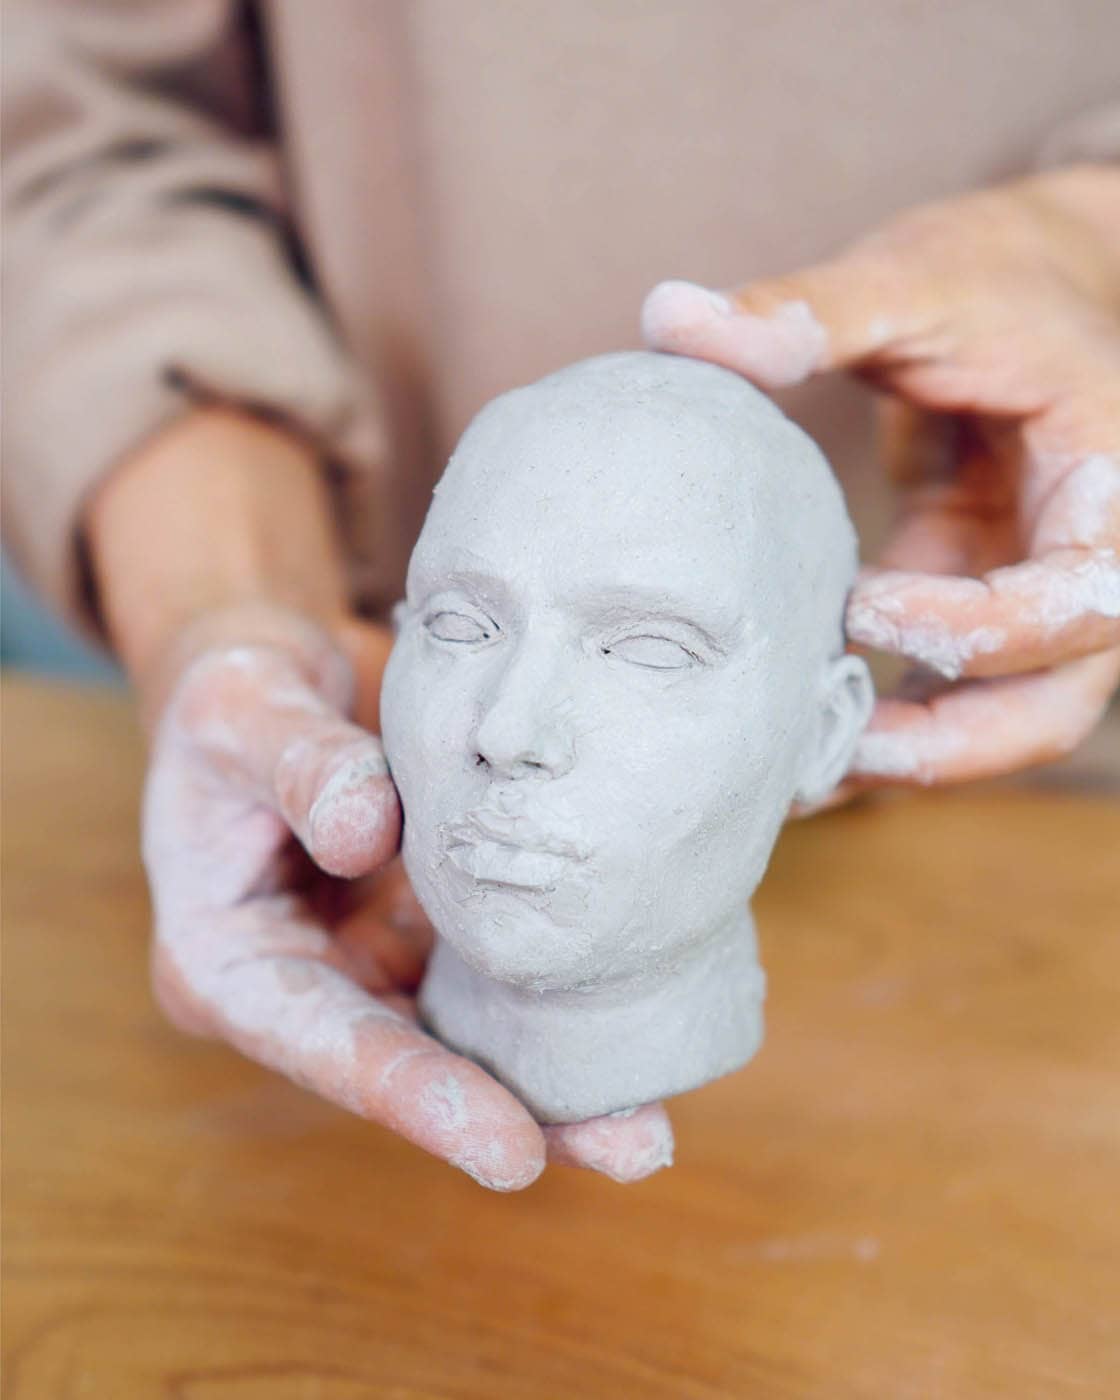
- 7.Add some clay to articulate the chin. Turn your head to the side to adjust the relationship between the forehead, brow, nose, upper and lower lip, and chin.

- 8.To find the placement of the ears, turn your head to the profile view and find the center points on each side of the cranium, halfway between the front of the brow to the back of the cranium. Draw a vertical line down either side of the head through these midpoints. Looking at the head from the front, find the brow line and the bottom of the nose line. Extend both lines around the side of the head until they intersect with your vertical centerline at a perpendicular angle. Draw an outline of each ear right behind the vertical centerline and in between the two horizontal lines brought from the front of the head. To establish the basic shapes of the ears, add masses of clay on either side to fit within the guides, turning your head to assess them from the front to make sure they have a proper lateral projection, created by the concha, and are not lying flat against the skull. It may help to think about a wedge shape when initially laying down these masses.
REFINING FEATURES
EYES
Determine the shape of the lids, cutting and resetting the eye opening with an X-acto knife and small stainless tools, if necessary. (See Appendix C, image a.)
NOSE
By carving and adding bits of clay to the generalized nose mass, you are looking to divide the nose into four distinct parts: the bridge, the ball, and two teardrop-shaped wings. (See Appendix C, images d, e, f.) As you develop the nose, turn your head to the side to gauge your adjustments from a profile view. Remember, we see relationally—try to understand how your nose is relating to the other features and where adjustments need to be made to create a coherent alignment between the forms.
LIPS
- 1.Move to the upper lip area and use your tool to mark the philtrum—the small concavity above the center of the upper lip—just under the nose. The philtral ridges found at either side of the philtrum will be the forward-most points on your upper lip area. Note the curved quality of the form that creates a transition between the nose and the upper lip.
- 2.From there, adjust the projection of the lips by looking at the head from the side. The standard alignment creates a diagonal between the upper lip to the chin.
- 3.To begin defining the lips, it is helpful to envision the top and bottom lip as each containing three planes—a frontal plane and two diagonal planes—onto which small bits of clay will be added to further describe the tissue.
- 4.Start by finding the outer edge of the lip width mark (established by the two verticals coming down from the inner part of the eyes—see proportional breakdown of the head in Appendix C) and move your knife tool from there to the edge of the peak of the lip at a slight diagonal on both sides. As I do this, I turn my edged tool slightly and release pressure as I move towards the front to avoid flattening the projection of the volume. Draw in the planar structure of the lips over your preliminary mouth shape to create one frontal plane and two diagonal planes, and adjust the form to follow the logic of the planes. (See Appendix C, image b.)
- 5.Position your knife near the outer edge of the lip width mark (established by the two verticals coming down from the inner part of the eyes) and move your knife tool in a diagonal from the outer edge of the lip to the edge of the peak of the lip, establishing the vermillion border. Repeat on the other side. As I do this, I turn my edged tool slightly and release pressure as I move towards the front to avoid flattening the projection of this volume. Repeat this process for the lower lip, noting slight variations in the distribution of the planes and making sure the lower lip tucks under the upper at the edges.
- 6.Once the lip edges and planes are established you can add bits of clay to further flesh out this area. (See Appendix C, image c.)
- 7.As you transition below the lower lip, note the two ovular shapes that rest on top of the chin. Carve at the center, right above the chin and add small amounts of clay at either side to describe this lower segment of the orbicularis oris.
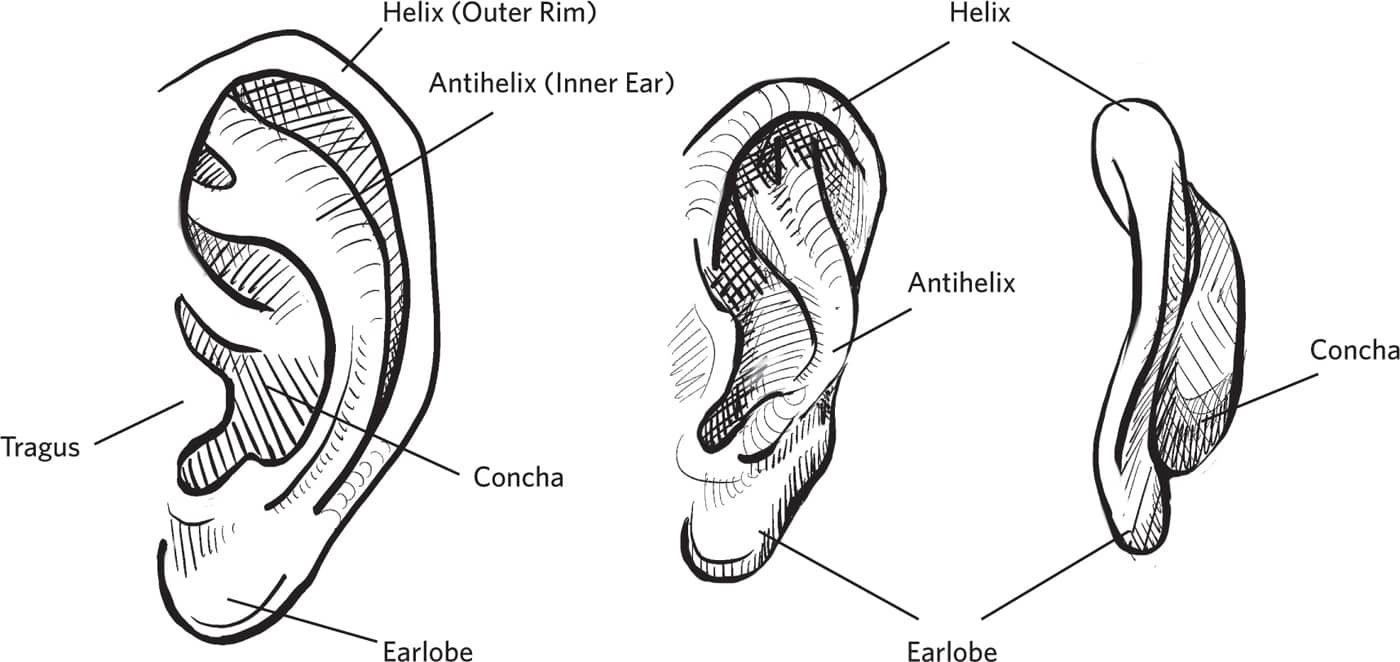
EARS
Once the generalized mass of the ear has slightly firmed, carve away the outer curve of the ear called the helix. Establish the tragus, which is the small projection that meets the skull and partially overlaps the ear hole. Begin carving the inner parts of the ear: the fossa, antihelix, and concha. In tandem with the carving, add bits of material where needed and continue to turn the head to gauge alignments and projections from all vantage points. Study your reference images and use value to gauge the depth of different ear elements.
CHIN
Move down to the chin and add material as needed, informing your assessment by turning the head in profile to check for balance.
FLESHING: CREATING FLOW AND CONTINUITY
To develop all the features in depth, we have isolated each part of the face and broken it into its basic structural components. Now let’s consider the transitional tissues that tie the features together into a coherent whole.
- 1.Start by locating the area between the bridge of the nose and the cheek. Lay a small coil of clay to create a connection between these two sections. Smooth in with your tool and brush to soften the transition.
- 2.Locate the area just outside and slightly above the oral commissures or edges of the mouth. Several facial muscles converge at this point, including the orbicularis oris muscle that circles our mouth. This confluence creates a subtle projection, known as the modiolus, that punctuates either side of the mouth. Add little bits of clay here to describe this junction.
- 3.Under the mouth, at either side of the mentolabial crease, you can add clay to describe the inferior part of the orbicularis oris, creating a transition between the lips and chin area.
- 4.Continue to scan your composition, adding bits of clay where needed, to enhance volumes and create a smooth correlation between the features.

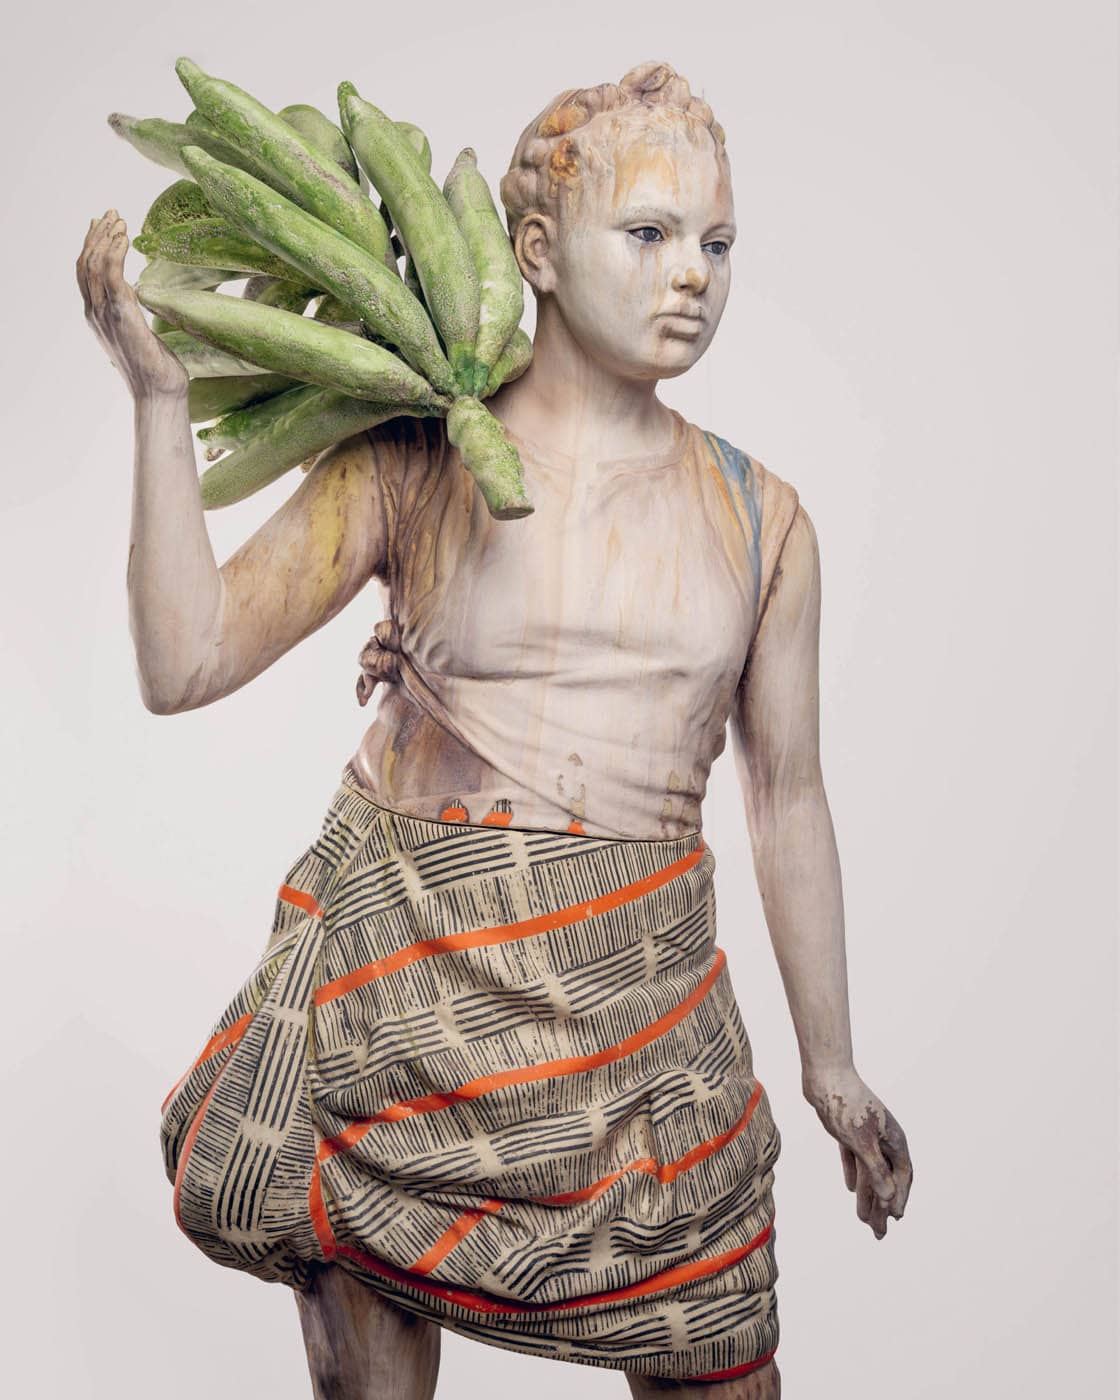
HAIR
Once the head is fully sealed with the cap permanently affixed, slip and score the head to add fresh clay and begin shaping your hair. The hair can be made solid, if not too thick (no thicker than ¾ inch [2 cm]), or as a hollow shape above the head, as shown in these images.

I have a very loose approach to hair and normally add it at the end of the sculptural process when most of the composition is resolved. When developing the hair, there are two considerations that drive my decisions. The first is the silhouette of the hair mass and how it punctuates the dynamics of the rest of the body, in particular the face. The second is the resolution of the strands and how specific or abstract I choose to develop the textual quality of the hair.
ATTACHING HEAD TO NECK
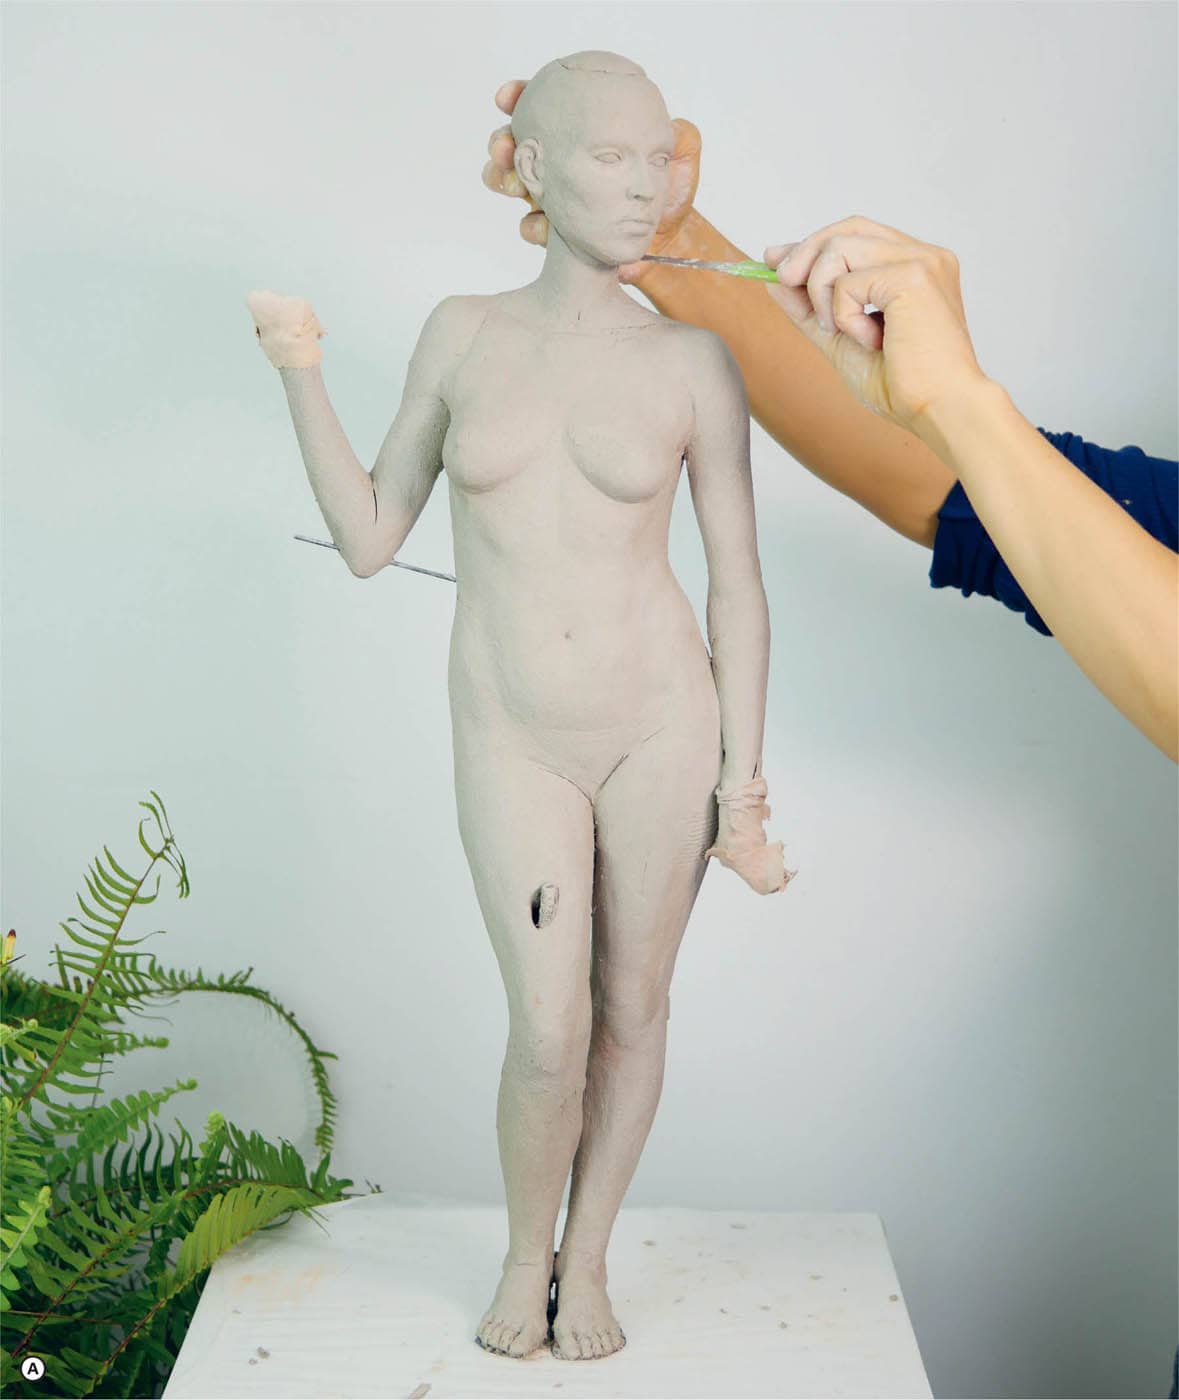
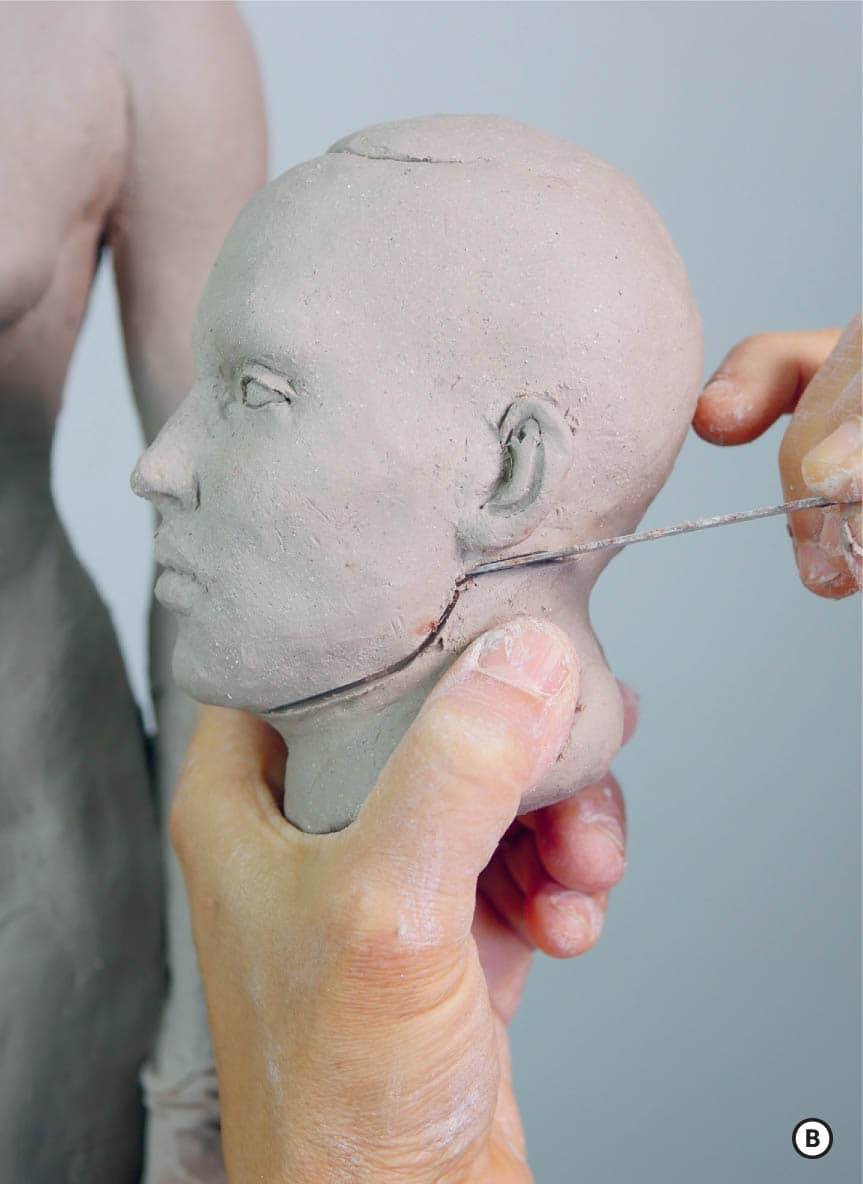
I develop all my heads with extra material under the chin that serves as a handle or stand and is trimmed off when affixing the head to the body. The trim line will be guided by the shape of the cranium and will move from just below the mandible to below the ears and at the level of the bottom of the nose towards the back of the skull. ![]()
Once you have trimmed your head, bring it to your neck to check proportions, play with gestural possibilities and begin reconciling the head opening to the thickness of the neck in preparation to join. As you slide the head over the neck, you are looking to have enough surface contact between the inner edge of the head and the outer part of the neck to allow for a strong, snug connection. ![]() You can accomplish this by trimming or adding fresh clay where needed. When the proper placement of the head has been established, make a horizontal mark under the chin to note the height on the neck and several vertical lines transversing the bottom of the head and the top of the neck that will key the alignment between the two parts. After keying, remove the head and slip and score both sides before attaching. Slip and score around the seam from the outside and compress some fresh clay to ensure a strong joint.
You can accomplish this by trimming or adding fresh clay where needed. When the proper placement of the head has been established, make a horizontal mark under the chin to note the height on the neck and several vertical lines transversing the bottom of the head and the top of the neck that will key the alignment between the two parts. After keying, remove the head and slip and score both sides before attaching. Slip and score around the seam from the outside and compress some fresh clay to ensure a strong joint.