
In the previous chapter, we learned about managing the sales force and the pipeline. However, sales without marketing is like shooting in the dark. A big part of the success of any business depends on how it understands the target market and promotes its products and services to the right audience in the right time, and on the right promotional channels.
Zoho CRM offers a number of essential tools and features that help you stay on top of your marketing game without breaking the bank or going crazy managing a toolset of apps from different vendors. There are also a number of complementing Zoho apps that can greatly boost your CRM-centric marketing efforts.
Before delving into these tools, let’s quickly touch on some of today’s marketing challenges.
Marketing in the World of Micromoments
According to Dr. Philip Kottler, the father of modern marketing, “Marketing is the science and art of exploring, creating, and delivering value to satisfy the needs of a target market at a profit. Marketing identifies unfulfilled needs and desires. It defines, measures, and quantifies the size of the identified market and the profit potential. It pinpoints which segments the company is capable of serving best, and it designs and promotes the appropriate products and services”.1
The core definition of marketing hasn’t changed, but the tactics, methods, channels, and challenges are ever changing. With digital marketing taking over most of the marketing efforts of the modern businesses these days, it is very important to utilize the latest tools and trends to stay competitive in this noisy market.
In the recent years, mobile has been taking over as a major platform for people to interact online. People (in America) spend almost five hours on their phones every day,2 and we can assume that the rest of the world are following suit.
The average attention span of the modern buyer is less than that of a goldfish (8.25 seconds, compared to 9 seconds, http://www.statisticbrain.com/attention-span-statistics/ ). This is impacted even more by hundreds of marketing messages and a million other distractions, such as messages and notifications on various devices that bombard people on a daily basis.
We, as a species, are struggling with unprecedented chronic information fatigue and it is only getting worse. So, it is important that you as a business get the most out of those precious seconds here and there that customers spend discovering, researching, or purchasing. These are called micromoments.
Reference
Google, as the leading platform of digital marketing, has a fantastic collection of resources to learn more about the latest trends and best practices of content marketing called Think with Google. You can learn about micromoments and ways to turn those micromoments into successful marketing opportunities for your brand from https://www.thinkwithgoogle.com/marketing-resources/micro-moments/ .
The marketing department of today needs, more than ever, to stay in constant touch with other parts of the business, especially sales and client servicing. It also needs to have access to an arsenal of tools to perform effective and efficient marketing.
Landing pages, email and social media campaigns, feedback collection, social listening, paid (digital) advertising, and other tools and platforms will help you better understand your market and tell your story better and to more people.
Campaign Management
Marketing activities often happen within a defined campaign. CRM Campaigns are often time bound and have clear objectives and are goal defined. They also have success measures defined and the performance of the campaign monitored.
Participating in a trade show, renting a booth in a mall, renting a billboard, and running an email campaign, all fit in the definition of a marketing campaign and can all be managed within Zoho CRM.
Creating Campaigns
Let’s start learning about Zoho CRM campaign management features by creating our very first campaign.
On the top menu bar, click Campaigns. In the Campaigns page (Figure 5-1), click Create Campaign to continue.
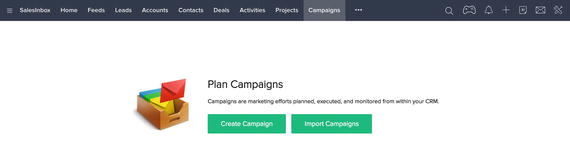
Figure 5-1. Campaigns page opened for the first time
In the Create Campaign page (Figure 5-2), populate the campaign details. Campaign Date is the only mandatory field, but make sure you enter the Start Date, End Date, Estimated Revenue, and Budgeted Cost as every serious campaign needs to have this information in place.
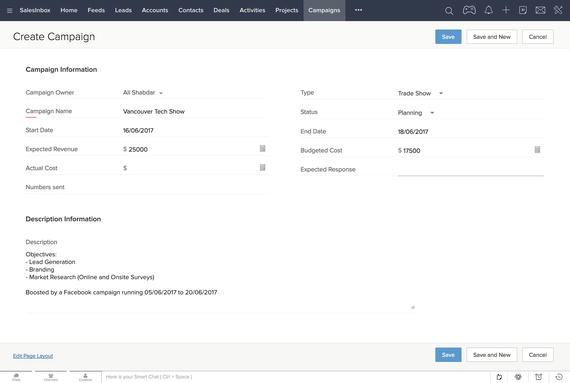
Figure 5-2. Creating a new campaign
After entering campaign details , click Save to store the information. Then you will be redirected to the campaign details page (Figure 5-3).
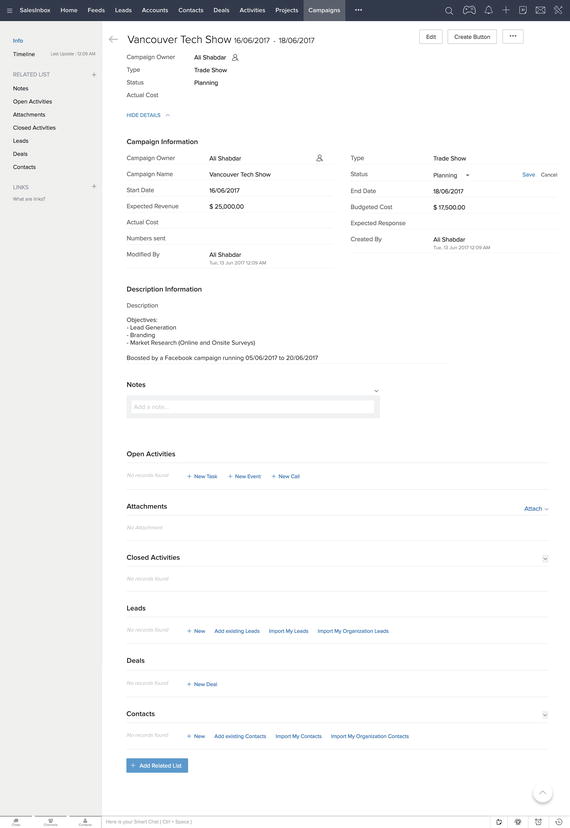
Figure 5-3. Campaign detail page
The campaign details page is quite similar to leads and contacts pages in terms of look and feel. You can add notes, tasks, and attachments to the campaign. You can also add leads, contacts, and deals to the campaign. We will learn more about this in a bit.
When you created the campaign the Status was set to Pending by default. Come back and update this field as you go forward with the campaign (Figure 5-4).
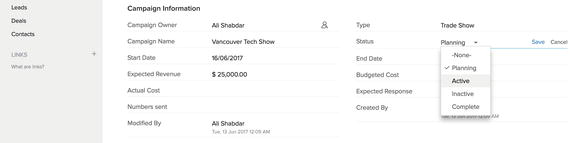
Figure 5-4. Changing campaign status
Customizing Campaigns Module
Like any other standard module in Zoho CRM, you can customize the Campaigns module. You can add, edit, or remove fields to make the module match your business requirements.
In the next section, we will be adding leads already existing in the CRM to the campaign we just created. For that, we need a specific value to be set to a field called Campaign Member Status, which is not available in the preset values by default.
To fix this issue, we need to make a tiny change in the Campaigns module itself:
In Zoho CRM, open the Setup page by clicking on the Tool icon on the top menu bar and selecting Setup in the drop-down menu.
In the Setup page, under Customization, click Modules. A list of existing modules will be displayed.
Find Campaigns in the list and hover the mouse cursor on it. Then click the circular (…) icon appearing next to it (Figure 5-5) and click on Campaigns Member Status item in the drop-down list.
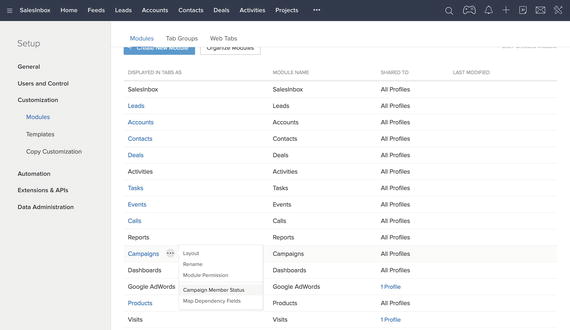
Figure 5-5. Customizing the Campaigns module
In the customization form (Figure 5-6), add “Visited” to the end of the list. This indicates that a person has visited our premises (or outlet) in person.
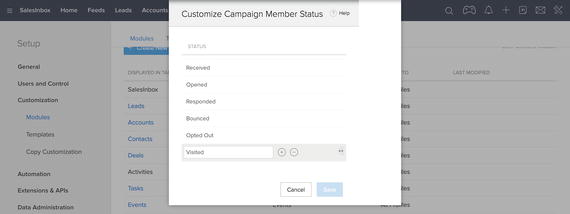
Figure 5-6. Adding a new member status to Campaigns module
Click Save to apply the changes and close the form .
Adding Leads to Campaigns
The main idea of running a campaign is to generate leads and turn them into paying customers down the road. To keep track of the leads generated from a specific campaign and then evaluate the performance of that campaign better, you can add leads, contacts, and deals to a campaign.
It is possible to add leads and contacts one by one, or add them in bulk from the leads already existing in the CRM. For deals, you can only add them one by one.
Suppose we have generated a number of leads, thanks to our recent participation in a trade show in Vancouver, BC. The leads are already in the CRM and now we need to add them to the campaign we created previously.
Follow these steps to add leads whose country is set to Canada to the campaign:
In the campaign details page, scroll down to the Leads section and click on the Add Exiting Leads link. The Add existing Leads to Campaign wizard will open (Figure 5-7).
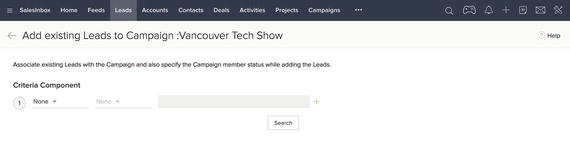
Figure 5-7. Adding existing leads to a campaign
For the Criteria Component, select “Country,” “is,” and type in “Canada” (Figure 5-8). Then click search to see the results, that is, the leads with the country field set to Canada.
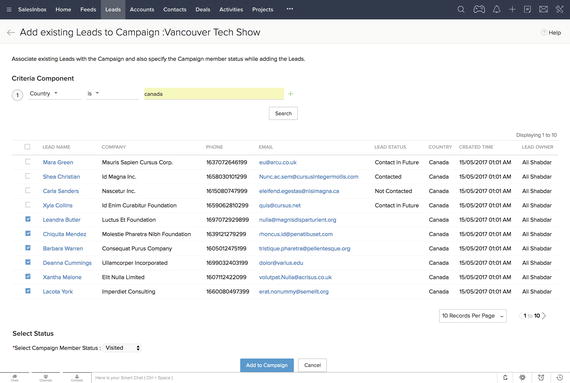
Figure 5-8. Selecting which leads to add to the campaign
Select all or some of the leads in the result list . These selected leads will be added to the campaign.
Select “Visited” in the Select Status drop-down list. This value is what we just added to the Campaigns module in the previous section.
Click the Add to Campaigns button to proceed. You can see the selected leads are added to the campaign and the Member Status is set to Visited (Figure 5-9). These are the people who dropped by our stand in the trade show.
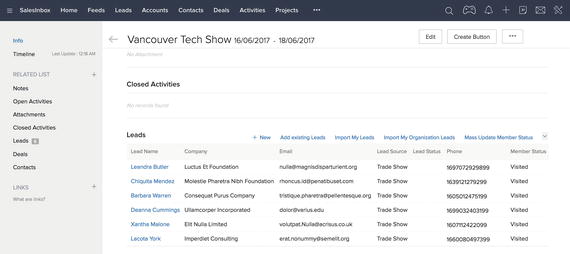
Figure 5-9. Leads added to the campaign
Webforms
Despite the ever-growing power of social networks, such as Facebook, the most effective marketing platforms remain emails.3 The more you grow your email database, the more the chance of people seeing your message and acting upon it.
One of the most common ways of collecting email addresses and generating leads are HTML forms, often embedded in the contact or inquiry pages of websites. Sign-up forms that pop up on the screen or are placed in the footer of websites are also examples of webforms.
These forms collect the name, email address, and other information and send it back to marketers via email, saving in a database, pushing to email marketing services (e.g., Zoho Campaigns, MailChimp) or to CRM solutions (e.g., Zoho CRM, Salesforce).
Zoho CRM offers an intuitive way to generate forms and embed them into your website to collect information from the visitors. This information can then be pushed automatically to Leads, Contacts, Cases, or any custom module created in Zoho CRM for storing and further processing.
Creating a Webform
To have a form on your website that automatically pushes information collected on your site back to the CRM, first you need to create a webform in the CRM.
Suppose we need a simple form on our e-commerce site that collects visitors’ basic information to sign them up for our monthly special offer newsletter. Follow these steps to create a webform for this purpose:
Open Zoho CRM Setup page. Under Extensions & APIs, click on Webforms. The Webforms page opens waiting for you to create your first webform (Figure 5-10).
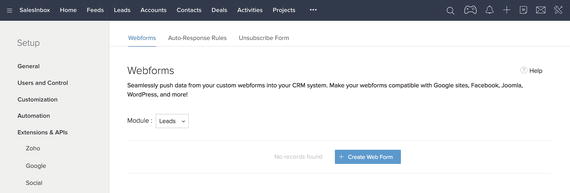
Figure 5-10. Leads added to the campaign
Make sure the “Leads” module is selected in the drop-down list and then click the click Create Webform button. The webform designer opens (Figure 5-11).
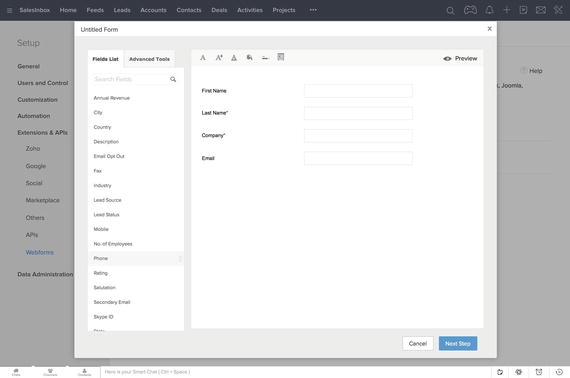
Figure 5-11. Designing the form in Webform designer
The designer adds two fields to the form by default: Last Name and Company. Add two more fields: First Name and Email, by dragging them from the fields list on the left sidebar and dropping them on the form in the order you see above.
Hover the mouse cursor on the Email field and click on the gear icon that shows up next to it (Figure 5-12).

Figure 5-12. Changing the settings of the Email field
In the Field Properties dialog box, tick the Mark as required field check box to make Email a mandatory field on the webform (Figure 5-13). Click Done to get back to the webform designer.
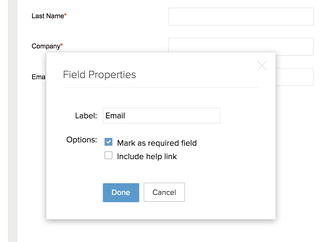
Figure 5-13. Making Email field mandatory
Similarly, open Field Properties for the Company field and remove the required field check mark (Figure 5-14). Click Done to get back to the webform designer.
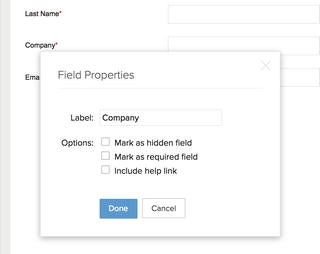
Figure 5-14. Making Company field optional
Add a new field Lead Source to the bottom of the form. We don’t want visitors to see this field. Instead, we need this field to set a value to the lead (in CRM) without user input. So, we should hide this field.
Open Field Properties for Lead Source (Figure 5-15). Tick Mark as hidden field and set the Default Value to Online Store. Click Done to get back to the webform designer.
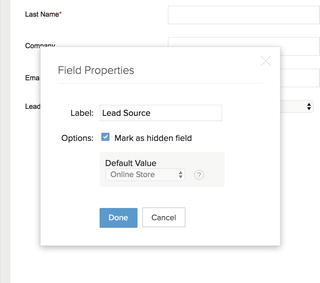
Figure 5-15. Making Lead Source field hidden
Back in the webform designer feel free to use formatting tools available via icons on top of the form to change fonts, colors, etc. (Figure 5-16).
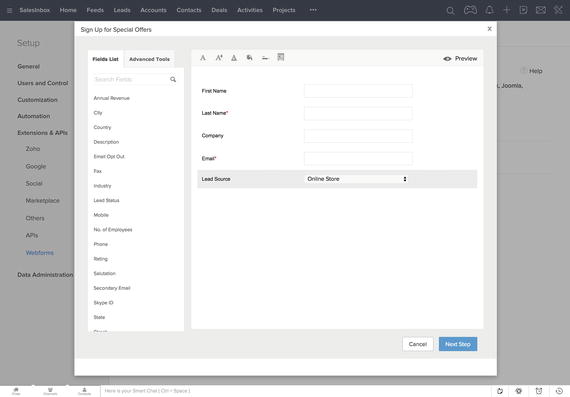
Figure 5-16. Webform design completed
Click on the Preview link on the top right of the designer to see how your webform will look like in action (Figure 5-17). Close the preview when you are done reviewing the form.
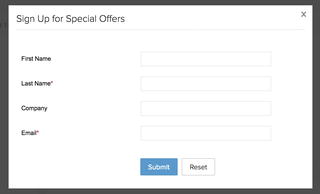
Figure 5-17. Previewing the webform
When you are happy with the webform, click Next Step to continue.
In the Form Details page, enter Form Name, Form Location URL (where the page that contains the webform will reside on your site), and Landing Page URL (link to the web address to be displayed once the form is submitted). Also, choose a CRM user who will be assigned as the lead owner once the form data gets stored in the CRM (Figure 5-18).
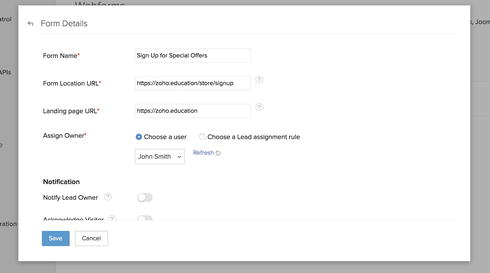
Figure 5-18. Setting webform behavior
Under Notification, enable Notify Lead Owner and leave System Generate Mail selected. Also, enable Acknowledge Visitor to send them an acknowledgment email once they submit a form. Select Choose a default response for all visitors (Figure 5-19).
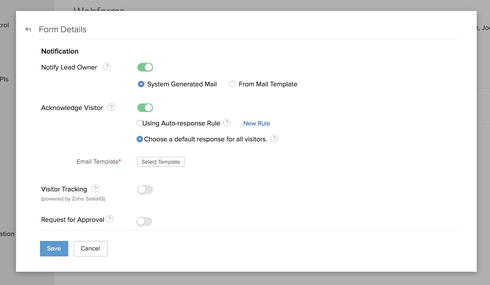
Figure 5-19. Setting webform behavior
Click on Select Template to choose an email template for the default response that will be sent to visitors. The Select Template window opens with no templates to choose from (Figure 5-20). Click on Create Template on the bottom.
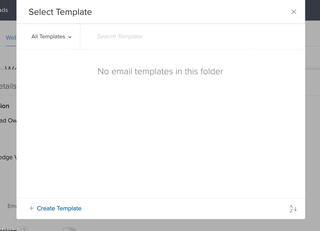
Figure 5-20. No email templates to pick from
If you have a template to pick, skip to step 23.
The Zoho CRM email template gallery will open in a new window (Figure 5-21). Here you can choose from a collection of email ready-made templates and modify them to your liking.
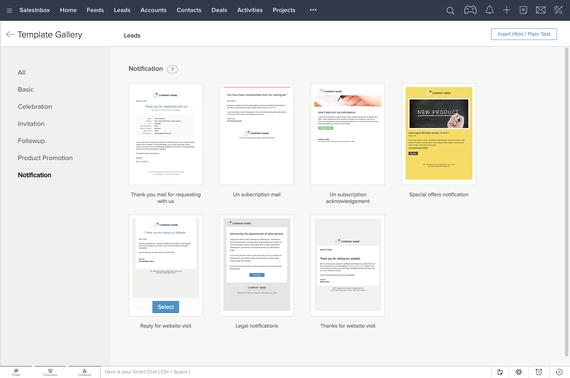
Figure 5-21. Email template gallery
In the template gallery, click on Notification category on the left sidebar and choose a notification template. Click Select as your choice to continue. The template opens in a template designer ready for you to take an artistic stab on it (Figure 5-22).
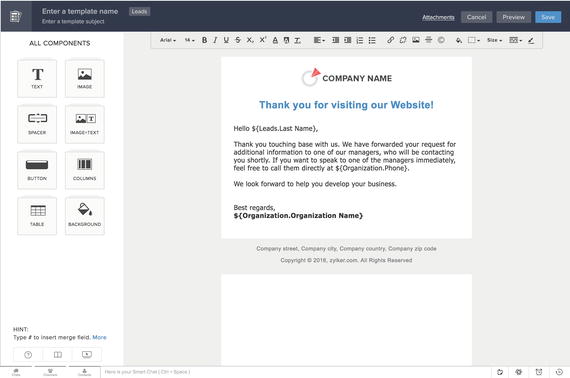
Figure 5-22. Customizing the selected email template
Click on the logo image on top of the template to change it to your organization logo. Image Selection dialog box opens, allowing you to choose a logo image (Figure 5-23). Click Insert when you are finished.
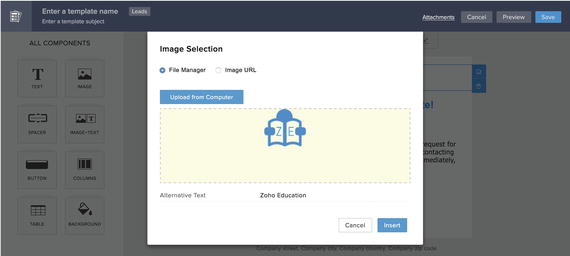
Figure 5-23. Replacing the logo on the template
Click on the body of text below the main title (Figure 5-24). You can edit the content and add merge fields to the text. Merge fields allow you to send more personalized emails by extracting personal information of the lead, such as first name (formatted as “${Leads. First Name}”) and placing in the email body for every email sent out.
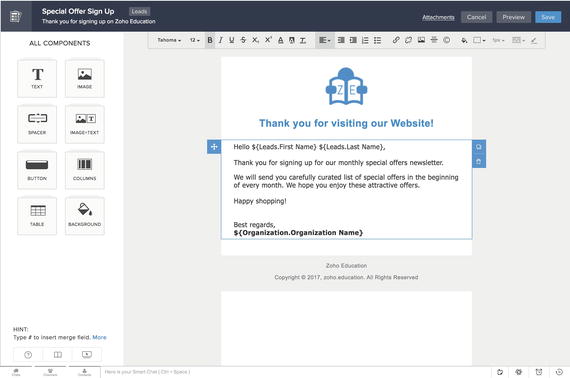
Figure 5-24. Changing the message body
Feel free to change the fonts, colors, and other design elements of the email template using the toolbar placed on top of the designer window.
You should name your email template and set an email subject to it too. Click on the corresponding placeholders on top bar (left) of the designer and type in the name and the subject.
When you are finished designing, click Preview on the top bar to see what your masterpiece will look like when received by the lead (Figure 5-25). Of course, those weird merge tags will be replaced by real values coming from the lead. You can click Send Test Mail to receive a copy of the email in your inbox for further reviewing. Then close the preview.
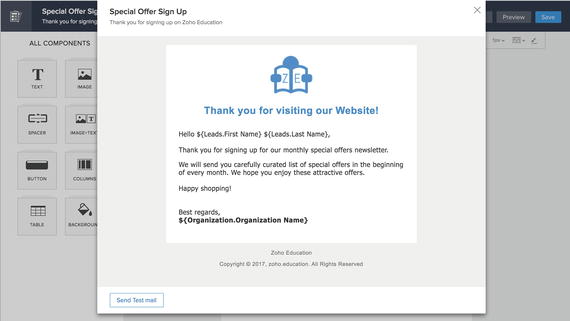
Figure 5-25. Previewing the email template
Click the Save button on to the top bar (right), check the Template Name, and select Public Email Templates for Save To (Figure 5-26). Click Save to continue.
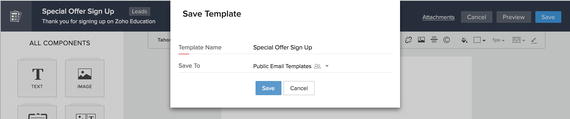
Figure 5-26. Saving the email template
Go back to Select Template screen and click the little Refresh button appearing there. The newly created template will show up in the list (Figure 5-27). Click on the template to select it.
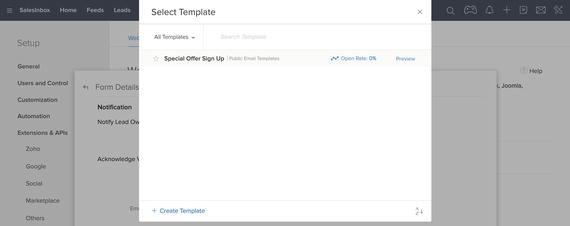
Figure 5-27. New template shows up in the templates list
On the Form Details screen, you can see the email template is selected (Figure 5-28). Review the email address mentioned in the From field and click Save to continue.
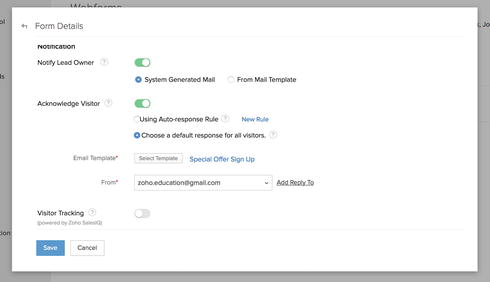
Figure 5-28. Done with the form configuration
On the Embed options screen, select the code you prefer to use to embed the webform into a webpage on your site (Figure 5-29). Consult with a web developer if you have no clue what that gibberish code is. Click Done to finish the process.
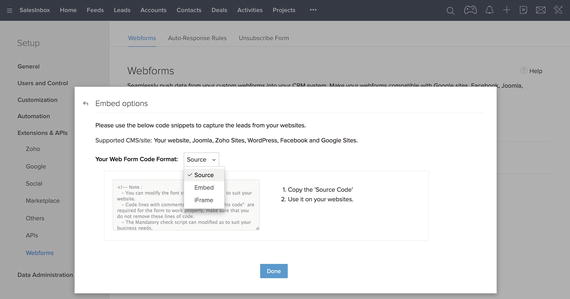
Figure 5-29. Getting the HTML source code of the webform
Now you can see the new webform listed in the Webforms page (Figure 5-30). The Status shows that the form is active. You can deactivate the form and it won’t take information. This is quite useful as it gives you power over the forms that are published on external websites.
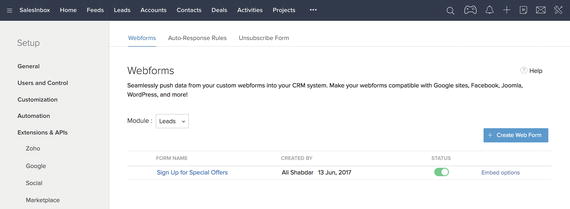
Figure 5-30. Newly created webform listed and active
To access the form embed code at any time in the future, you can click on Embed options.
Mass Email
One of the key features of Zoho CRM is that you can send emails from within the CRM and also keep a track of them too. For instance, you can perform the entire email correspondence with a lead right from the lead details page itself.
However, sometimes you need to send an email to a group of people at once. For instance, you may want to send a public announcement about your holiday hours to your contacts, or send a limited offer to your contacts.
For such scenarios, Zoho CRM offers a mass email feature, which allows you to send hundreds of emails to a select group of leads or contact at once.
This useful feature saves you a lot of time and also allows you to set up scheduled email dispatches and the possibility that your recipients can opt-out from future communications.
Note
There is a limit to how many emails you can send per day to your leads and contacts. See https://www.zoho.com/crm/help/email/mass-email.html to check the current limits for your edition of Zoho CRM.
It is worth mentioning that although the mass email feature of Zoho CRM is quite useful in many scenarios, if you want to get serious about email marketing and send thousands of emails to different people and monitor the performance of your email campaigns among other things, you need a full-fledged email marketing service, such as Zoho Campaigns. We will have a quick look at this service later in this chapter.
Sending Mass Emails
For now, let’s try the mass email feature by sending a promotional email to all of our leads:
Open the Leads page. Open the … menu on top of the leads list and select Mass Email (Figure 5-31).
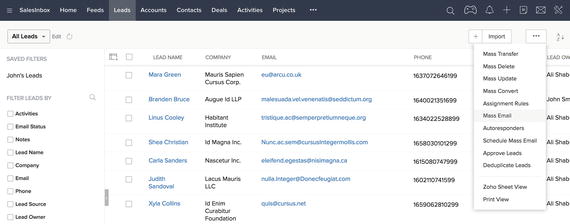
Figure 5-31. Sending mass emails to leads
In the Mass Email wizard (Figure 5-32), review the information about email sending limits and spamming considerations.
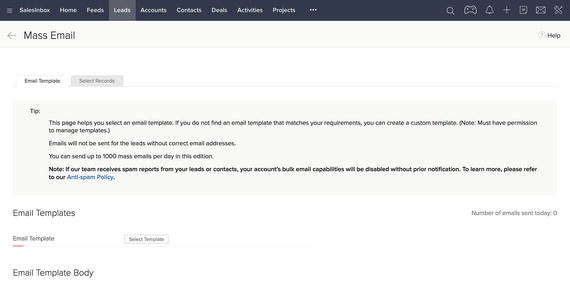
Figure 5-32. Mass Email wizard
Click the Select Template button under Email Template section.
In the Select Template screen (Figure 5-33), select an email template. Create a new template if you need one.
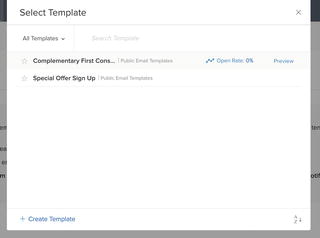
Figure 5-33. Selecting an email template
Once you select an email template, it will be previewed (Figure 5-34). Review the template and set the From field to the right CRM user.
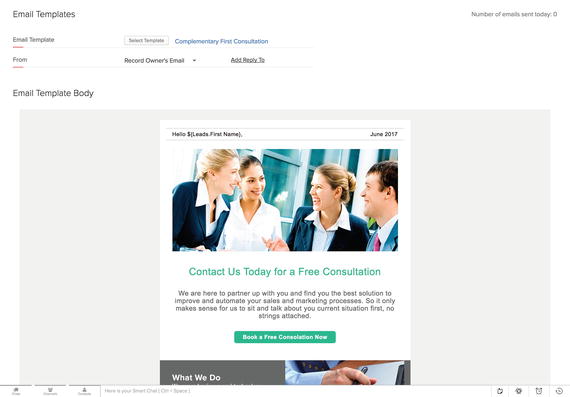
Figure 5-34. Rviewing the template and setting the email sender
Choose the second tab, Select Record, to specify the recipients of the mass email.
Under Specify Criteria, select Custom View Criteria and pick My Leads from the drop-down list. A list of all leads in My Leads view will be listed (Figure 5-35).
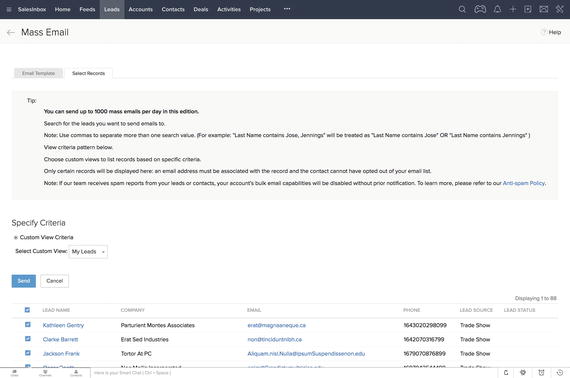
Figure 5-35. Selecting the target leads
Select all or some of the leads in the list. Then click on the Send button and proceed with confirmation to send the mass email. Et voilà!
After a few moments (depending on how many emails are being sent), you will be receiving a confirmation message informing you about the number of emails sent successfully (Figure 5-36).

Figure 5-36. Sucessful email dispatch confirmation
Sending Schedules Mass Email
As mentioned before, you can also schedule mass emails to be sent on a specific date and time in the future. This is quite similar to the previous section, so I leave exploring it to you.
Feel free to refer to the official documentation if you get stuck: https://www.zoho.com/crm/help/email/mass-email.html#Schedule_Mass_Email .
Zoho CRM for Google AdWords
Google AdWords® is the Holy Grail on online advertising outside of social networks, especially if you want to advertise on Google search and a Google network of partners.
Zoho CRM integrates well with Google AdWords to offer you a better understanding of possible connections between online marketing efforts and offline customer interactions with your business, such as calling in, buying, or visiting your outlet.
This integration also helps with fine-tuning your AdWords campaigns by exporting information from CRM to AdWords.
It is safe to assume that not all readers utilize Google AdWords. Those who do either have an in-house skillset to work with the complexities of AdWords, or they outsource talent to do the same.
In either case, we are going to skip delving into this integration and leave it to experts who are in charge of your AdWords campaign. Just make sure that you refer to Zoho official documentation at https://www.zoho.com/crm/help/google-adwords/ before.
Zoho Suite Marketing Arsenal
Apart from the essential marketing tools and features offered in the CRM, Zoho suite offers three more apps that each cover a major part of digital marketing.
In the beginning of this book, Zoho Suite from 10,000 feet, we mentioned the name of these apps. In this section, we will have a super quick view at how each one of these apps integrates with Zoho CRM and extends its marketing capabilities.
Email Marketing with Zoho Campaigns
Based on personal experience and recent reviews, Zoho Campaign is quickly becoming one of the best email marketing tools for SMEs finding its place among the household names, such as MailChimp.
It also integrates well with Zoho CRM. An added bonus is that you get to enjoy the single sign-on to Campaigns, CRM, and all other Zoho apps.
You can import existing leads and contacts from CRM into Campaigns and add them to mailing lists. You can then send emails to these lists and enjoy the advanced reporting features of Zoho Campaigns to evaluate how successful your campaign has been.
Zoho Campaign also allows you to set up sign-up forms to be embedded in the websites to generate leads. You can export these newly generated leads back to CRM.
By enabling two-way periodic syncing, you can configure Campaigns in a way that acts as an extension to CRM. With the CRM at the center of your of your sales force automation, Campaigns can add a lot of value to your marketing efforts.
Reference
Zoho Campaigns is a full-fledged email marketing app worth learning about and using in your business, especially if you are a Zoho CRM user. Refer to official documentation to learn more about Zoho Campaigns: https://www.zoho.com/campaigns/help/ and https://www.zoho.com/campaigns/help/integrations/zoho-apps.html#Integrate_Zoho_CRM .
Managing Social Media Channels with Zoho Social
With all the craziness in the social media space and the multitude of outlets for the marketers (or marketing departments) to take care of, social media management tools have become a de facto part of a marketer’s toolbox.
Zoho Social is becoming a contender in this crowded space. Offering many useful features while being competitively priced, and also integrating well with Zoho CRM, Zoho Social is well worth the investment.
The integration enables a host of useful features, such as helping you stay engaged with your clients and prospect on social media, and creating leads from your social conversations and interaction with prospects on social media. You can even automate some activities, setting Zoho Social to turn new “likes” or “retweets” on social media automatically into leads on CRM .
Reference
Zoho Social is a full-fledged social management app worth learning about and using in your business, especially if you are a Zoho CRM user. Refer to official documentation to learn more about Zoho Social: https://www.zoho.com/social/help/ ; https://www.zoho.com/social/help/integration-zoho-crm.html ; and https://www.zoho.com/social/zohocrm-integration.html .
Collecting Customer Feedback with Zoho Survey
If you remember from Chapter 2, the CRM triangle consists of marketing, sales, and customer service. All three of these require staying engaged with clients and prospects alike. No matter how happy or unhappy a client is, their feedback is always golden for the success of the business.
Zoho Survey is a powerful tool that helps you interact with clients and prospects by asking them key questions about their preferences, experience, feedback, etc. The output of such surveys could be invaluable for your sales force and other team members.
With Survey integrated with CRM, your team can see the results of surveys in real time, sync survey responses back to CRM, and view responses in customer contexts.
Reference
Zoho Survey is a full-fledged survey management app worth learning about and using in your business, especially if you are a Zoho CRM user. Refer to official documentation to learn more about Zoho Survey: https://www.zoho.com/survey/help/ ; https://www.zoho.com/survey/help/integrations.html#integrate-with-zoho-crm ; and https://www.zoho.com/survey/crm-integration.html .
Summary
In this chapter, you learned about the marketing automation features of Zoho CRM: campaigns, webforms, and mass email. There was also an honorable mention of scheduled mass emails and integration with Google AdWords.
We also touched on other Zoho suite apps that integrate with CRM and extend its marketing capabilities: Zoho Campaigns, Zoho Social, and Zoho Survey.
In the next chapter, we will discuss in detail how Zoho CRM integrates with other Zoho apps as well as some useful external services to go beyond just being a CRM for your business.