
Although it's possible to create and send email messages using all of Outlook's default settings, you would be missing a lot of flexibility and convenience if you did so. The various email options that Outlook offers let you use email in the way that is most convenient and productive for you. These options fall into two categories: those that apply to a single message and those that apply globally. These are covered in turn. A third category of options, those that apply to an individual email account, was covered in Chapter 3.
This section explains a variety of options available for individual email messages that you create.
This is relevant only if you have two or more email accounts. By default, messages are sent as follows:
Messages you create from scratch are sent using the default email account.
Messages that are replies to a message you received are sent using the account through which the original message was received.
Messages you forward are sent using the account through which the original message was received.
To change the send account for a message:
Click the Account button on the Message ribbon. A menu is displayed with the current send account checked.
Select the desired account from the menu.
By default, email messages that you send are saved in the Sent Items folder. You can change this location for an individual message as follows:
Click the Save Sent Item button on the Options ribbon.
To save the item to a folder other than the default, click Other Folder and select the folder.
To not save the item at all, click Do Not Save.
You learned in Chapter 4 how you can attach a file to a message. Outlook also lets you attach certain items, specifically calendars and business cards, to a message.
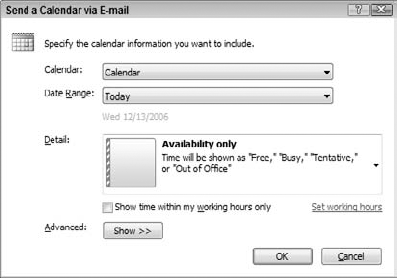
Sending calendar information with a message can be useful to let colleagues know when you are and are not available for a meeting. To send calendar information with an email message, click the Calendar button in the Include section of the Message ribbon. Outlook displays the Send a Calendar via E-mail dialog box, shown in Figure 7.1. You make entries in this dialog box to specify the calendar information that will be sent, as follows:
If you have more than one calendar, select the calendar to use from the Calendar list.
Select the date range from the Date Range list. Predefined ranges include Today, Tomorrow, and Next 7 Days. Select Specify Dates from the list to enter a custom date range.
From the Detail list, select the level of calendar detail that you want included in the message. The choices are
Availability Only: Time will be shown as Free, Busy, Tentative, or Out of Office.
Limited Details: In addition to availability, this option includes the subjects of calendar items.
Full Details: In addition to availability, this option includes the full detail of calendar items.
Select the Show Time within My Working Hours Only option to limit the sent calendar information to these hours. By default they are 8:00 AM to 5:00 PM Monday-Friday. Click the Set Working Hours link to change this.
Click the Show button to display three additional options. Two of them relate to what information is included in the message. These options are relevant only if you selected Limited Details or Full Details. The third option determines the format of the sent calendar: Daily Schedule or List of Events. See the main text for information on these two layouts.
Click OK to close the dialog box and insert the calendar information in the message.
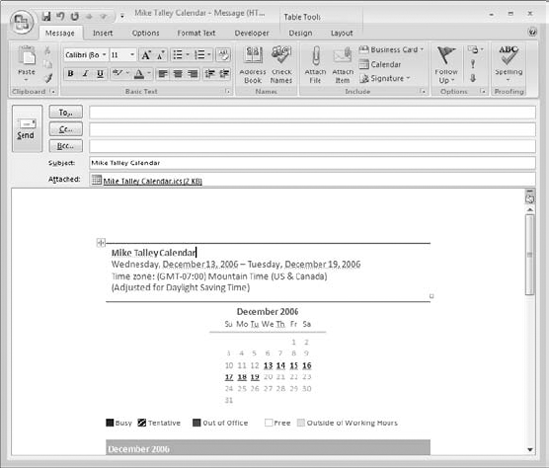
When calendar information is inserted in an email message, at the top is a calendar of the month or months involved with the relevant days highlighted and underlined, as shown for July 13–19 in Figure 7.2. The recipient can click these days to go to the detail section for that day.
If the calendar information was sent using the Daily Schedule option, the details appear as shown in Figure 7.3. You can see that blocks of time during each day are marked as Free, Busy, and so on.
If the calendar information was sent using the List of Events option, the details appear as shown in Figure 7.4. This option lists specific calendar events only—free time is not explicitly marked.
A business card is just what it sounds like—an electronic representation of the information normally found on a paper business card. Every entry in a contacts list automatically has a business card created for it. You can insert these cards into email messages to send contact information to email recipients. When you do so, a visual representation of the business card is added to the message and a VCF file is attached to the message. The recipient can use the VCF file to quickly add the contact information to his or her own contacts list.
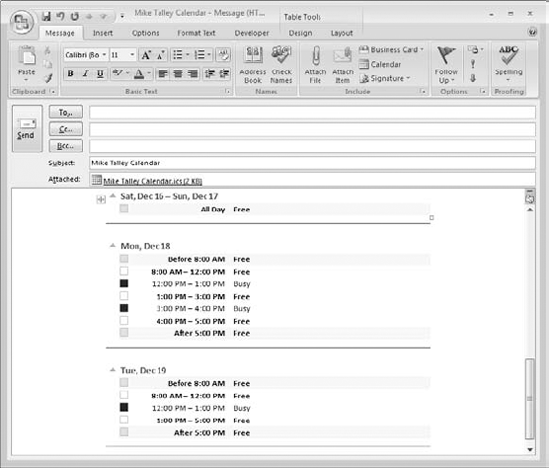
Figure 7.3. Display of calendar details when the Daily Schedule option is used to send the calendar.
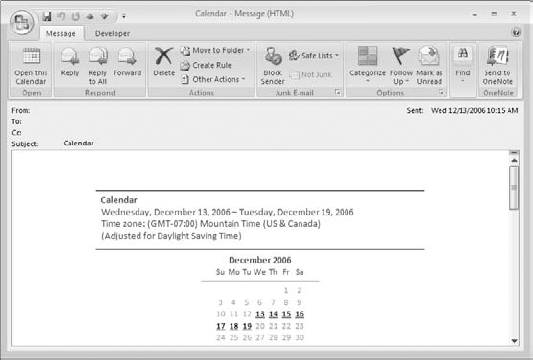
Figure 7.4. Display of calendar details when the List of Events option is used to send the calendar.
To send a business card with an email message:
Click the Business Card button in the Include section of the Message ribbon.
The menu that is displayed lists recently sent business cards. Select the one you want to send, or select Other Business Cards to select from your contacts list.
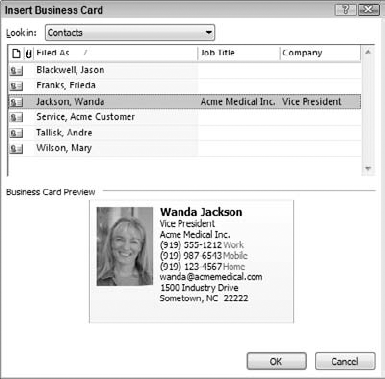
If you selected Other Business Cards, Outlook displays the Insert Business Card dialog box as shown in Figure 7.5.
If you have more than one address book, select the desired one from the Look In list.
Click the contact whose business card you want to include. The card is previewed in the lower part of the dialog box.
If you want to include more than one card, hold down Ctrl while clicking.
Click OK
An email message can be flagged as having low importance or high importance. Low is the default. The recipient's email program may indicate the importance of a message in some way. For example, Outlook displays an exclamation point next to the message in the Inbox if it is marked as having high importance. Many email clients, including Outlook, also allow recipients to sort their received messages by importance.
To mark a message with high importance, click the High Importance button (a red exclamation point) in the Options section of the Message ribbon. To return a message to the default setting of low importance, click the Low Importance button (a downward-pointing arrow).
Message restrictions, or permissions, let you restrict who can view your email messages and what they can do with them (for example, can the message be forwarded?). This feature, which is applicable to all Office documents as well as email messages, is part of Information Rights Management, or IRM.
IRM is based on the concept of credentials. To create rights-restricted content, such as an email message, you must possess appropriate credentials to associate with the message. The recipient must also possess the appropriate credentials to view or take other actions with the content.
IRM requires that both the creator and the recipient of restricted content be subscribed to an IRM server. Many people use the Windows Right Management (WRM) service, which at present is free (but with no guarantee that Microsoft will continue the service indefinitely). WRM uses .Net Passport as a means of verifying identities and validating credentials. Some companies use their own IRM server or one provided by a third party.
The steps described in this section assume that you have a rights management client installed on your computer and have set up the necessary credentials.
By default, email messages are created with no restrictions. You can add a Do Not Forward restriction by clicking the Permissions button on the Message ribbon and selecting Do Not Forward from the menu. This button will be displayed only if you are set up for IRM. This restriction permits the recipient to view the message if they have the required credentials, but not to forward, print, or copy the message.
You may be asked which credentials to use for this message (it's possible for an individual to possess multiple credentials). When a message you are composing is restricted it displays a banner below the ribbon describing the restrictions, as shown in Figure 7.6.
If you attach a document, workbook, or presentation to a message, the restricted permissions of the message will be applied to the attachments as well. If the attachment has already had restrictions set in the originating program (Word, Excel, or PowerPoint) those restrictions also remain in effect.
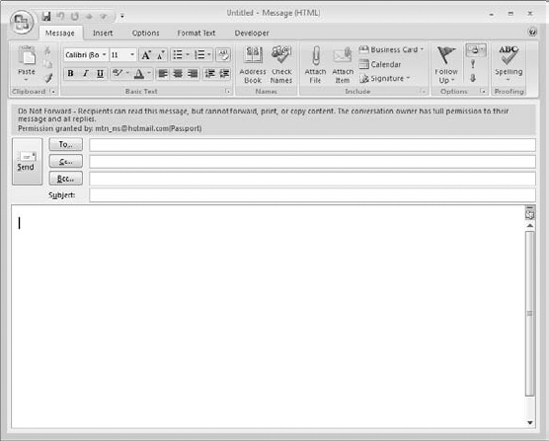
Figure 7.6. A message that has restrictions applied displays a notification of that fact below the ribbon.
You may also have custom restrictions available to you. In a company, the IT department may have defined a restriction level that restricts contents to people on the company network. Your IT person can provide you with information on custom restrictions if they are in use in your organization.
Sometimes, when you send a message, you would like to be reminded to follow up on the message—for example, to make sure that you have received a reply. You can flag a message for follow up and, optionally, have Outlook remind you. Here's how.
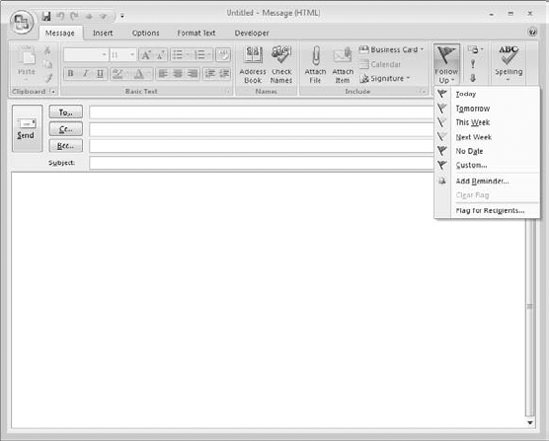
Click the Follow Up button on the Message ribbon. Outlook displays the menu shown in Figure 7.7.
To flag for follow up at one of the predefined times (for example, tomorrow or next week), click the corresponding command on the menu.
To specify a custom time, click the Custom command. Outlook displays the Custom dialog box as shown in Figure 7.8.
Make sure the Flag for Me option is selected.
From the Flag To list, select the type of follow up (for example, follow up, reply, and so on).
Enter the desired start and due dates in the corresponding fields. Click the down arrow next to each field to select from a calendar.
If you want Outlook to remind you of this item, select the Reminder option and enter the date and time in the adjacent fields.
Click OK.

You can also flag a message for the recipient. All you need to do is select Flag for Recipients from the Follow Up menu (see Figure 7.7) and then enter the relevant information in the lower part of the Custom dialog box (see Figure 7.8).
When an Outlook user receives a message with such a flag, the flag status column in the Inbox will display a special icon indicating that there is follow-up information included with the message. The user can right-click this icon to add the message to his or her to-do list. Email programs other than Outlook may ignore this information or handle it differently.
Outlook's categories are a powerful tool for organizing all kinds of information. Categories are covered in more detail in Chapter 17. When you create a message, you can assign it to a category. Then you'll be able to find the message—the saved copy of the sent message, that is—based on this category. To assign a category to a message:
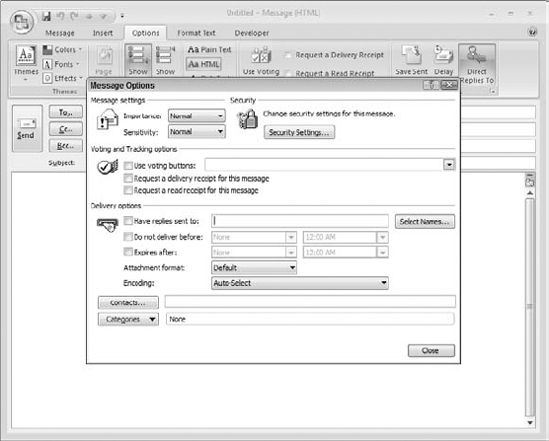
Click the dialog box launcher in the More Options section of the Options ribbon to display the Message Options dialog box.
At the lower left of the dialog box, click the Categories button.
Select the desired category from the menu. Or, click Clear All Categories to remove any category assignment from the message.
When you send a message you can request delivery and/or read receipts by selecting the corresponding option in the Tracking section of the Options ribbon. A delivery receipt is generated when the message is delivered to the recipient, and a read receipt is generated when the message is opened by the recipient. The receipt consists of an email message back to you that contains the date and time that the original message was delivered or read.
Delivery and read receipts sound like a great idea but their usefulness in practice is limited. The delivery receipt must be generated by the email server software, and sometimes this feature is turned off by the server administrator to reduce the load on the server. Even if you do receive a delivery receipt, there is no guarantee that the recipient has read the message. Likewise, the read receipt is sent by Outlook (or whatever other email program the recipient is using), and the user may have this feature turned off.
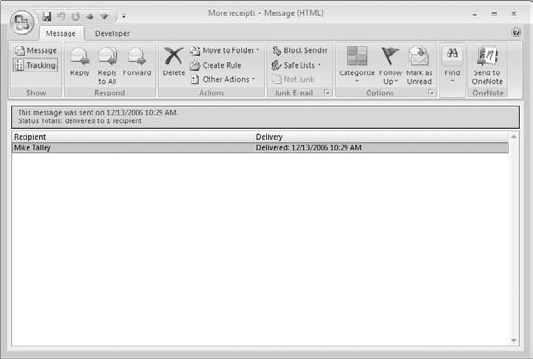
When you have sent a message and requested a receipt, Outlook automatically processes the receipt(s) when and if they arrive (unless you have turned this feature off under Tracking Options, as explained later in this chapter). When you open the message in the Sent Items folder, the ribbon displays a Show section with Message and Tracking buttons (see Figure 7.9). Click the Tracking button to view the details of the receipt(s) received for this message. Click the Message button to return to the message text.
Be aware that if Outlook has not yet received and processed any receipt for a message, the Tracking button will not be available on the ribbon.
If you do not want a message delivered right away, you can specify a "do not deliver before" date, as follows:
Click the Delay Delivery button in the More Options section of the Options ribbon. Outlook displays the Message Options dialog box (see Figure 7.10).
In the Delivery Options section, turn on the Do Not Deliver Before option.
Click the Close button.
If you are using a Microsoft Exchange email account, the message will be sent to the server and held there until the specified date and time. If you are using another kind of email account, the message will be held in Outlook's outbox until the first send operation that occurs after the specified date and time.
If you are sending a message relevant for only a limited period, you can set an expiration date for the message. When the recipient receives the message, it will behave normally until the expiration date, after which it will display in the Inbox (or whatever folder it is in) with a line through the header. The recipient can still open the message, but the strikethrough provides a visual indication that the message has expired. Other email programs may handle message expiration differently.
To set an expiration date:
Click the dialog box launcher in the Options section of the Message ribbon. Outlook displays the Message Options dialog box (shown previously in Figure 7.10).
In the Delivery Options section of the dialog box, turn on the Expires After option.
Enter the desired expiration date and time in the adjacent fields.
Click Close.
Outlook lets you define signatures that can be quickly added to an email message. You can have multiple signatures; one for business use and another for personal messages, for example. Creating signatures is covered in Chapter 5, as is defining a default signature that is automatically added to all messages. To manually add a signature to a message, click the Signature button in the Include section of the Message ribbon and select the desired signature from the menu. If you have not defined any signatures, none will be listed here.
A number of Outlook's options apply globally to all messages and to email in general. You select these options using several dialog boxes, which display the options in related groups. This section follows the same organization.
To view and change email preferences:
Select Tools, Options from the main Outlook menu to display the Options dialog box.
If necessary, click the Preferences tab.
At the top of this dialog box, click the E-mail Options button. Outlook displays the E-mail Options dialog box (see Figure 7.11).
Set options in this dialog box as explained next.
Click OK.
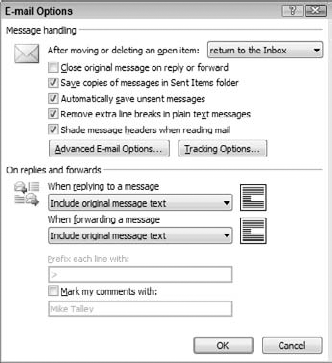
The options in the Message Handling section of this dialog box are as follows:
Close Original Message on Reply or Forward: When you select Forward or Reply in a message that you received, the original message is closed.
Save Copies of Messages in Sent Items Folder: When you send a message, a copy is saved in the Sent Items folder (recommended!).
Automatically Save Unsent Messages: Messages you have started composing but not sent are saved in the Drafts folder.
Remove Extra Line Breaks in Plain Text Messages: Unneeded line breaks are stripped from plain text messages.
Shade Message Headers when Reading Mail: When you are reading a message that contains quoted components, Outlook will use subtle shading to mark the quoted section (this does not always work properly, I have found).
Advanced E-Mail Options: Click this button to view and set advanced email options (explained in the following section).
Tracking Options: Click this button to view and set tracking options (explained later in the chapter).
The On Replies and Forwards section of this dialog box determines what Outlook does when you reply to a message or forward a message. You set each independently but the options are essentially the same:
Do Not Include Original Message: Replies are sent without the original message. Not applicable to forwarded messages.
Attach Original Message: Replies and forwards are sent with the original message included as an attachment.
Include Original Message Text: Replies and forwards are sent with the original message included as part of the new message.
Include and Indent Original Message Text: Replies and forwards are sent with the original message included as part of the new message, indented with respect to the other parts of the message.
Prefix Each Line of the Original Message: Replies and forwards are sent with the original message included as part of the new message, with each line of the original message prefixed by what is entered in the Prefix Each Line With field (by default this is >).
The final option in this dialog box is Mark My Comments With. You use this option when you prefer to reply to or forward messages with your comments included along with the original message text. When this option is selected, your comments are each preceded by your name (or whatever you specify) in brackets.
When you click the Advanced Email Options button in the E-mail Options dialog box, Outlook displays the dialog box shown in Figure 7.12.
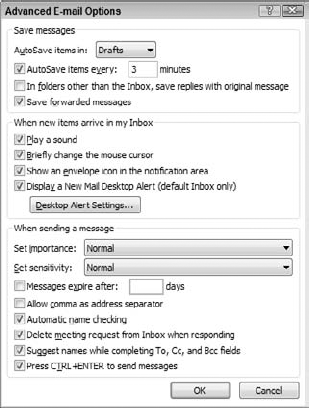
Most of these options are self-explanatory so I will not go into details. The few that may require explanation are
AutoSave Items In: Specifies the folder when Outlook autosaves items (for example, messages you have started composing but not yet sent).
In Folders Other Than the Inbox...: When you reply to a message that is located in any folder other than the Inbox, your reply is saved in that folder rather than in the Sent Items folder. This can help to keep related messages together.
Display a New Mail Desktop Alert: When a new message arrives, Outlook displays a small, semitransparent preview of the message in the lower-right corner of your screen. Click the Desktop Alert Settings button to specify the details of how this alert appears.
Set Importance/Sensitivity: Specifies the default importance and sensitivity levels for new messages you create.
If you click the Tracking Options button in the E-mail Options dialog box, Outlook displays the dialog box shown in Figure 7.13.
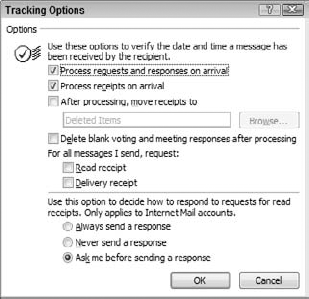
The options in the top portion of this dialog box determine how Outlook handles requests for read and delivery receipts and receipts that have been returned to you:
Process Requests and Responses on Arrival: When a read or delivery receipt is received, Outlook records the receipt as part of the original item (the sent message).
Process Receipts on Arrival: Receipts are deleted on arrival (after processing).
After Processing, Move Receipts To: Specify a folder for saving processed receipts.
In the middle of this dialog box are options that you can set if you want every message you send to include a request for a delivery and/or read receipt.
At the bottom of the dialog box you can specify how Outlook handles requests for receipts that you receive.
To access the Mail Setup dialog box, select Tools, Options from the main Outlook menu and click the Mail Setup tab in the Options dialog box. This tab is shown in Figure 7.14.
The E-mail Accounts button lets you access Outlook's email accounts to add, delete, or modify accounts. Working with email accounts was covered in Chapter 3.
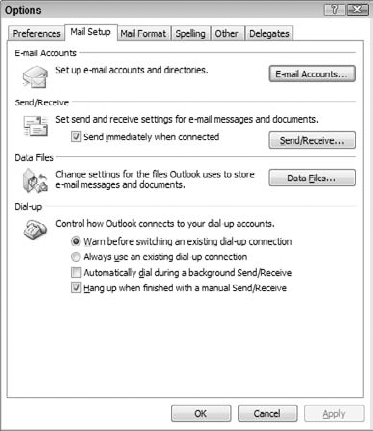
The Send Immediately When Connected option specifies that a message you create and send is sent immediately rather than being put in the Outbox and sent the next time a send/receive operation takes place. If you click the adjacent Send/Receive button, Outlook opens a dialog box where you can specify how often Outlook performs an automatic send/receive. The default is 30 minutes.
If you click the Data Files button on the Mail Setup tab, Outlook opens a dialog box where you can change settings related to the data files that Outlook uses to store information (messages, calendar, and so on). This topic is covered in Chapter 18.
The final group of options on the Mail Setup tab are relevant only if you are using a dial-up (modem) connection to the network. For most users, the default settings are fine and need not be changed.
To access the Mail Format dialog box, select Tools, Options from the main Outlook menu and click the Mail Format tab in the Options dialog box. This tab is shown in Figure 7.15.
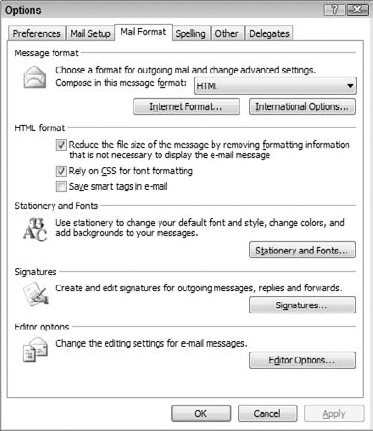
The Message Format section of this dialog box has the following elements:
Compose in this Message Format: Select the default format (HTML, Rich Text, or plain text) for new messages. See Chapter 5 for details.
Internet Format: Click this button to specify that messages you create in RTF format are converted to HTML or plain text when being sent to Internet mail accounts (which generally cannot read RTF messages).
International Options: Click this button to set language options for new messages.
The HTML Format section has these options:
Reduce the File Size...: Make HTML messages as small as possible by removing unneeded formatting information.
Rely on CSS for Font Formatting: Select this option if you want to use Cascading Style Sheets for font formatting.
Save Smart Tags in Email: Smart Tags are sent as part of a message rather than being present only while you are composing the message.
The Stationery and Fonts button and the Signatures button give you access to the tools for creating and modifying these items, specifying the defaults to use with new messages, and so on. Stationery and signatures are covered in Chapter 5.
Click the Editor Options button to display the window shown in Figure 7.16. You use this window to set a variety of options that control how the email editor works. Note there a list of categories on the left. Click each one to display a different set of related options.
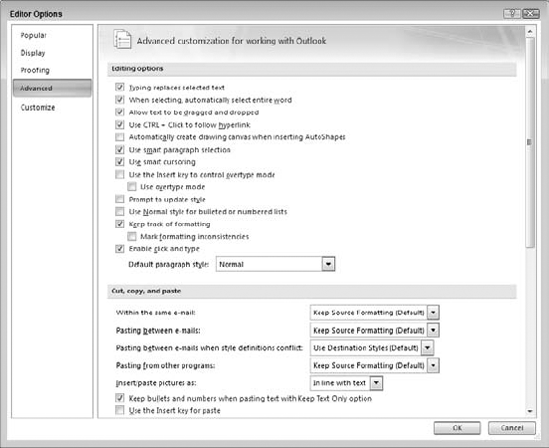
Many people use Outlook without ever making changes to any of these options, but they are available if you want to make the editor better suit your working style. If you have used the Microsoft Word word processing program, you may recognize a lot of overlap between Outlook's editor options and the options available in Word. There a good reason for this—Outlook's editor is in fact based on Word.
It seems that Outlook has an overwhelming number of email options—it can seem overwhelming to try to understand them all. Fortunately, most options can be left with their default settings and changed only when you have a specific reason to do so. As you become more familiar with Outlook, you gain a better understanding of how to set options to maximize your convenience and productivity.