Chapter 15. Customizing the IDE
In This Chapter
• Customizing Visual Studio LightSwitch
• Customizing Commands and Toolbars
• Using, Creating, and Managing Reusable Code Snippets
The Visual Studio LightSwitch integrated development environment (IDE) is not just a place in which you prepare data, write code, or design screens. In previous chapters, especially in Chapter 2, “Exploring the IDE,” you learned about some important features and tools that make your development experience easier. In this chapter, you learn about other interesting features and tools that are not necessarily related with code writing but that provide advanced control over the environment and that in most cases provide a way to reuse existing work. Notice that this chapter focuses only on features available in Visual Studio LightSwitch as a standalone environment and which are common to Visual Studio 2010, as well.
Customizing Visual Studio LightSwitch
You can customize Visual Studio LightSwitch in a number of ways. These affect the following areas:
• Command bars and toolbars
• User settings
• Reusable code snippets
If you are running Visual Studio 2010 or higher, you have additional options to customize the IDE, such as extending the Tools menu and Project/Item templates (which you can read about in detail on the official Visual Studio blog: http://blogs.msdn.com/VisualStudio).
Customizing Commands and Toolbars
Visual Studio LightSwitch enables you to customize menus (including context menus) and toolbars so that you have the commands that you use most frequently readily available. The next subsections cover the customization of both menus and toolbars.
Customizing an Existing Toolbar
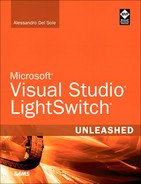
Suppose you want to add another button to the Standard toolbar, such as the Print command (actually available in the File menu), which allows printing your source code. Select Tools, Customize. When the Customize dialog is open, select the Commands tab. Then select the Toolbar item, and from the related combo box, pick up the Standard toolbar. At this point, you need to add a button; so, click Add Command. This action displays the Add Command dialog; here you just select the menu where the command is located (on the left) and the command itself (on the right). For example, select File on the left and then Print on the right. Figure 15.1 shows the result of this step.
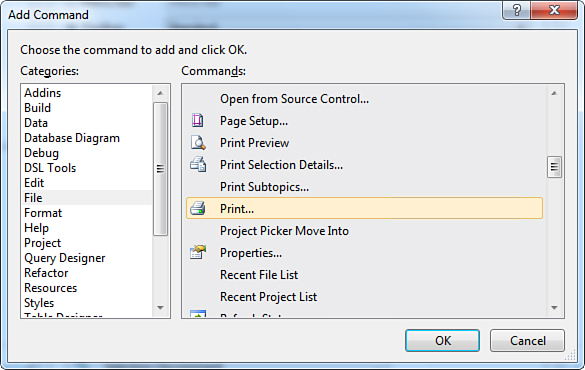
Figure 15.1. Selecting the command to be added to the Standard toolbar.
When you click OK, the command is added to the desired toolbar, as shown in Figure 15.2. In the Customize dialog, simply click Move Up or Move Down to place the command in the preferred position.
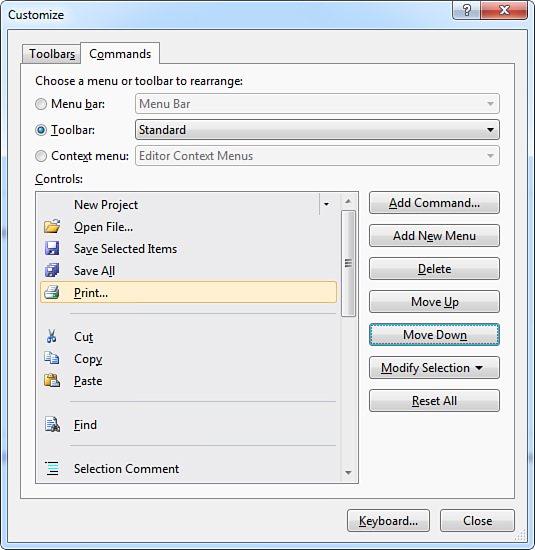
Figure 15.2. Arranging the command position in the toolbar.
When you click Close, the IDE shows the newly added command in the Standard toolbar.
Creating a New Custom Toolbar
You might sometimes want to create a custom toolbar (for example, to group a number of buttons that you use often but that are currently in different menus). The creation of a new custom toolbar in LightSwitch is a straightforward process. To create a custom toolbar that groups buttons for quick access, just follow these steps:
1. Select Tools, Customize and ensure that the Toolbars tab is selected.
2. Click the New button; the New Toolbar dialog appears. When ready, type the Help Bar name into the dialog text box and click OK (see Figure 15.3).
Figure 15.3. Adding a new custom toolbar.
3. Select the Commands tab, and from the Toolbar combo box, select the Help Bar toolbar; Figure 15.4 shows what the Customize dialog looks like at this particular point.
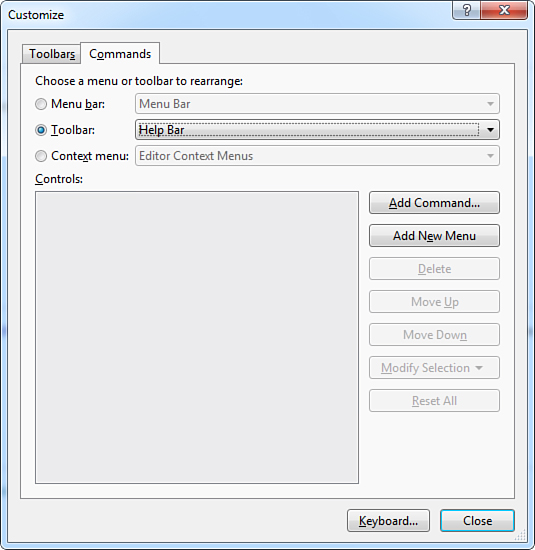
Figure 15.4. Preparing the new toolbar for customization.
4. Click Add Command and follow the instruction explained in the previous subsection to add two commands (for example, View Help and Manage Help Settings). Figure 15.5 shows an example.
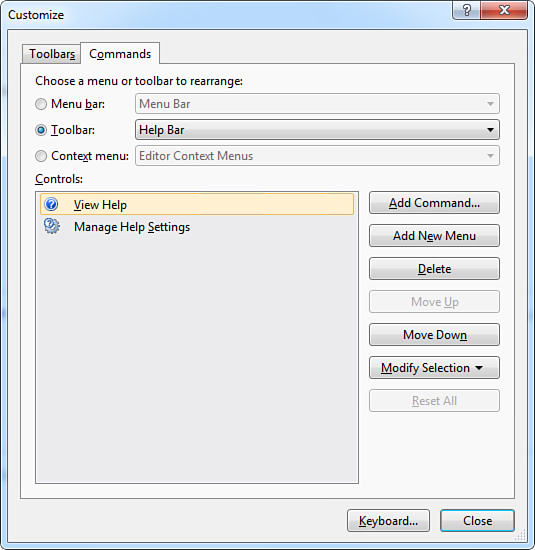
Figure 15.5. Configuring the new custom toolbar.
At this point, the new toolbar is available in the IDE. To remove it, simply right-click one of the existing toolbars and unselect the new one from the pop-up list.
Managing User Settings
When you customize the IDE by following the techniques described in the previous section, Visual Studio LightSwitch (as well as different editions of Visual Studio) stores your preferences into the so-called settings. Settings are files with a .vssettings extension, and LightSwitch loads setting files at every startup so that your preferences are immediately available. Setting files not only stores customizations but also every single setting or option for tools in the IDE. It is worth knowing that you can export settings to disk into a .vssettings file as a backup for later reuse, meaning that you can also import existing settings into the environment. This can be useful if you want to have different settings available. This section explains how you manage Visual Studio LightSwitch settings.
Exporting Settings
You export Visual Studio LightSwitch settings by selecting Tools, Import and Export Settings. This action starts the Import and Export Settings Wizard, shown in Figure 15.6.
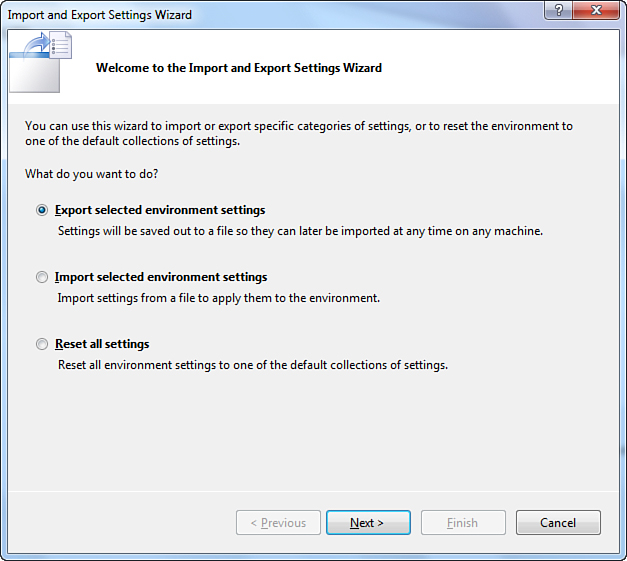
Figure 15.6. Starting the Import and Export Settings Wizard.
In the first screen, you can decide what you want to do (in this case, export settings, and therefore leave unchanged the default option) and then click Next. The second dialog enables you to establish settings to export. Figure 15.7 shows how the wizard displays the full list of available settings.
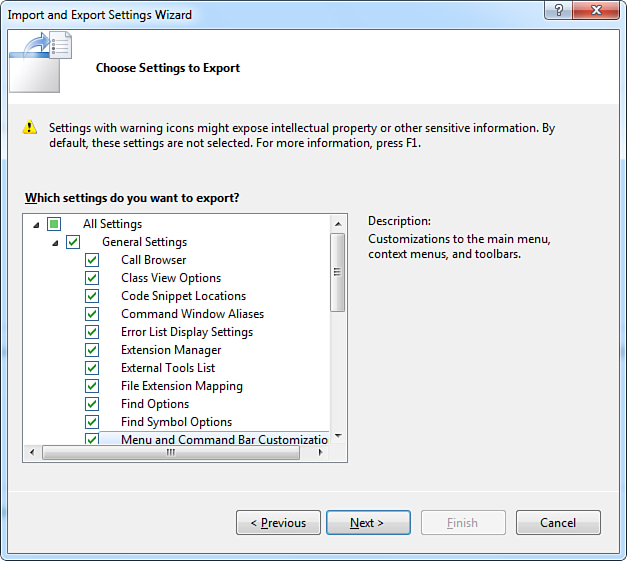
Figure 15.7. Selecting settings to export.
Basically, you can export all settings available in the Options dialog and other settings such as menu bars and command bars, window layouts, general development settings, and so on. After you select the desired settings, click Next.
Exporting Sensitive Information
Visual Studio LightSwitch is polite enough to inform you that some settings might contain sensitive information or expose intellectual property. This is an important reminder because you are exporting such information to a file that can be potentially accessed by other users. Such settings are marked with a yellow warning symbol; just take care of what you are sending to disk.
In the next dialog, you are asked to specify a filename and the target folder. By default, Visual Studio LightSwitch proposes a filename based on the current date/time and the user-level settings folder as the target folder, as shown in Figure 15.8.
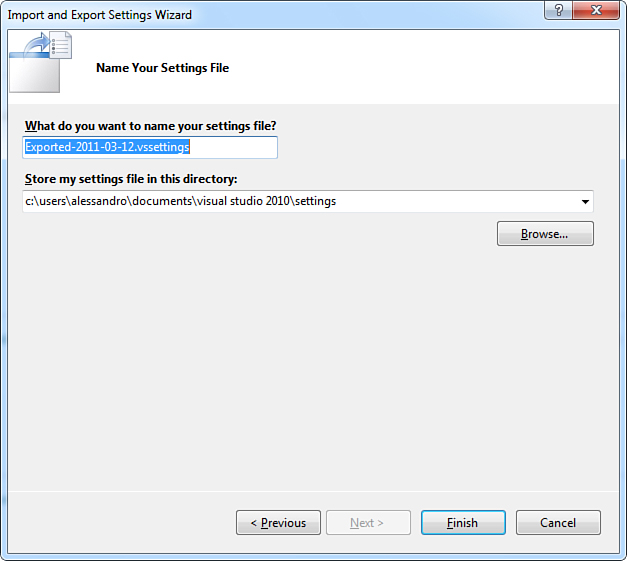
Figure 15.8. Providing target filename and folder for exporting settings.
When you click Finish, your settings are saved to disk with the specified filename.
Importing Settings
To import existing settings, select again Tools, Import and Export Settings. When the wizard appears, select Import Selected Environment Settings (refer to Figure 15.6). In the current scenario, the second dialog asks your agreement for backing up the current settings before proceeding (see Figure 15.9). This is your choice. When ready, click Next.
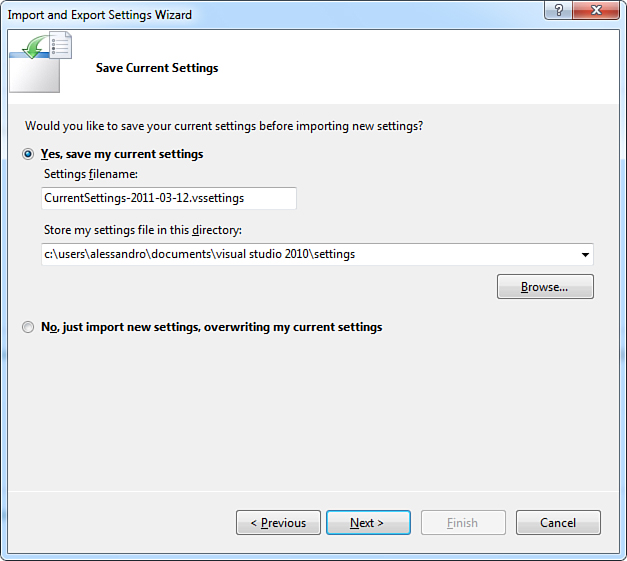
Figure 15.9. The second dialog of the wizard enables backing up current settings.
In the last dialog, the wizard asks you to select settings to import from the list of available files. Notice in the list the .vssettings file saved earlier in this example (see Figure 15.10).
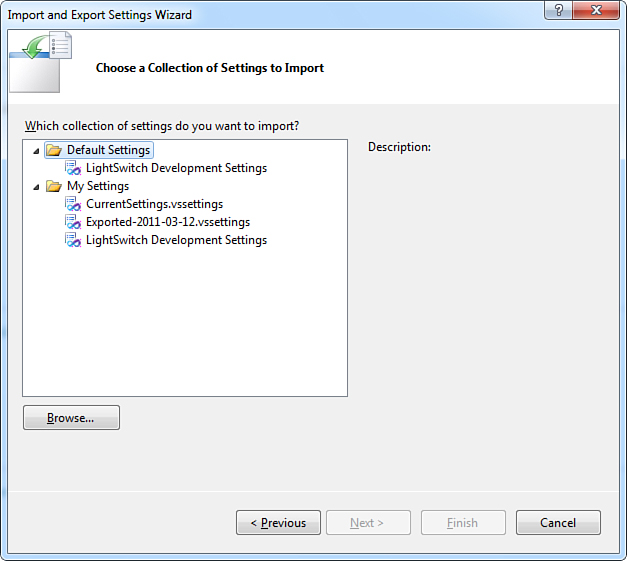
Figure 15.10. Selecting settings to be imported into the IDE.
If you have previous experience with Visual Studio 2010, you will immediately notice that Visual Studio LightSwitch has just one default settings profile: LightSwitch Development Settings. This is also why you are not prompted to specify a user profile when launching LightSwitch for the first time. (By the way, this is true if you are using LightSwitch as a standalone environment. If you are running Visual Studio 2010 with LightSwitch, you will see a full list of available profiles, as you would correctly expect at this point.)
Select the desired settings file, and then click Finish. At this point, selected settings replace existing ones.
Using, Creating, and Managing Reusable Code Snippets
Visual Studio LightSwitch provides support for reusable code snippets, known as IntelliSense code snippets. The idea is that you can add into the code editor existing code snippets stored in external files (which have a .snippet extension), reachable from and integrated with Visual Studio IntelliSense without having to create your own custom archive. Another huge benefit of code snippets is that they can be shared with other developers (so you and others can expand the code library). Code snippet support is offered in several ways, as covered in this section.
Visual Studio LightSwitch ships with a large number of code snippets ready for use. In addition, if you are using Visual Studio 2010 Professional or higher, the code library is even larger, because it focuses on technologies like Windows Presentation Foundation (WPF), ASP.NET, and so on. To prevent accidental deletions, default code snippets reside in the IDE’s own folder and cannot be removed from the Code Snippets Manager. Later in this chapter, you learn how to extend and manage (including removing) code snippets that are in the user-level snippets folder.
Using Code Snippets
Adding existing code snippets into your code is a straightforward process. Just for demo purposes, open any code file in the Invoice Management project and, when ready, place the cursor within the code editor. Right-click and select Insert Snippet. At this point, the IDE shows a list of available snippets categories, as shown in Figure 15.11.
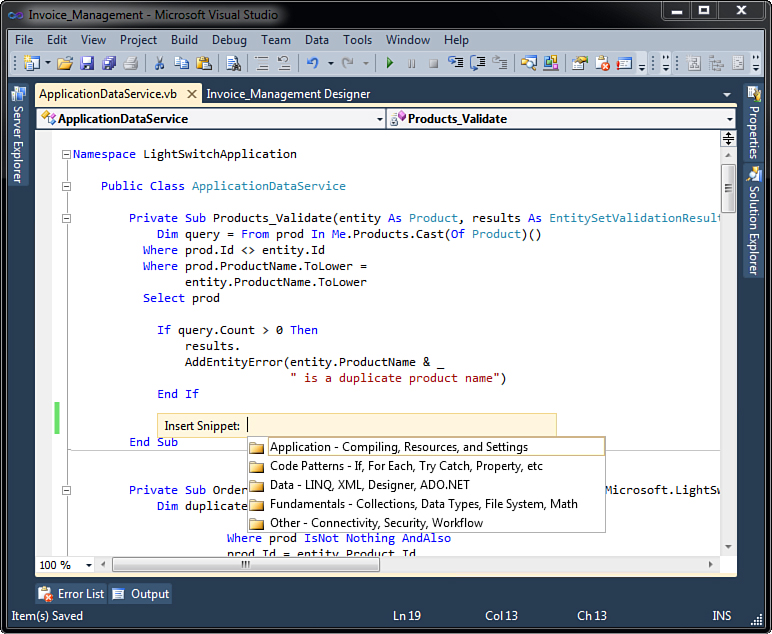
Figure 15.11. The IDE shows a list of available snippets categories.
The first thing to mention is that code snippet files are organized in categories, such as Data, Code Patterns, Fundamentals, and so on. Basically, a category is nothing but a folder containing a number of .snippet files. Double-click the desired category (for example, Code Patterns). At this point, the IDE shows a list of subcategories; click Error Handling (Exceptions). Now Visual Studio offers the list of available code snippets within the given category, as shown in Figure 15.12.
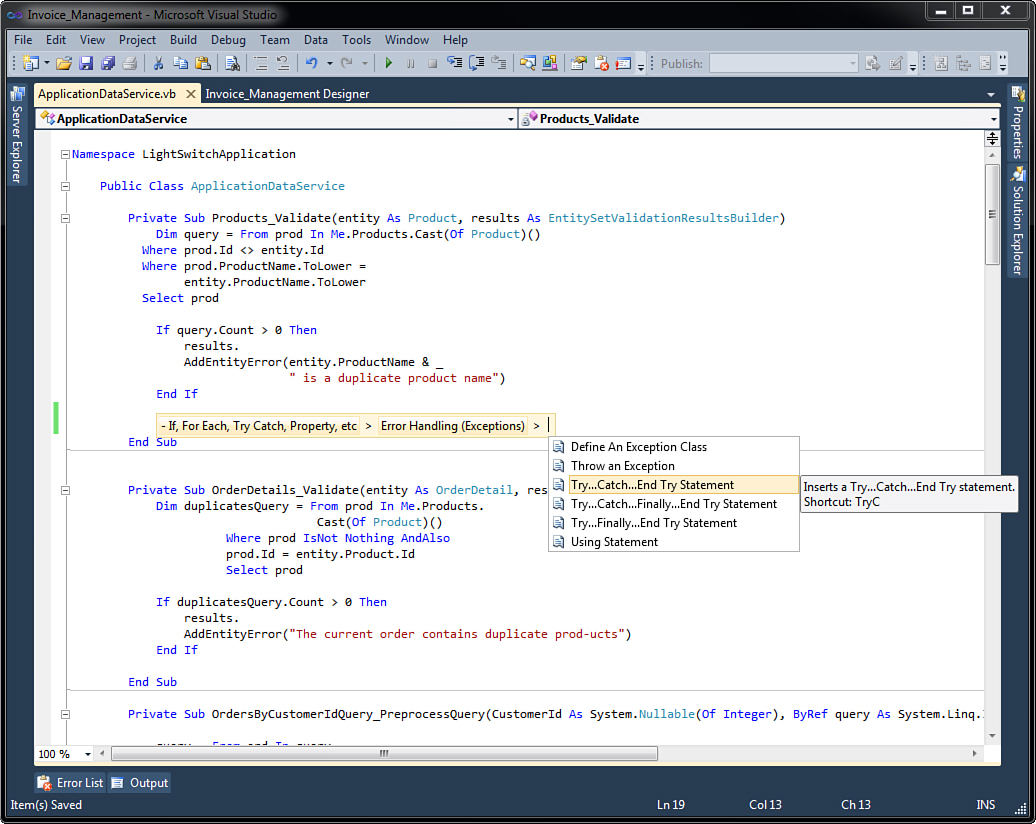
Figure 15.12. A list of code snippets.
Every time you select a code snippet from the list, a tooltip describes what that code snippet is related to. In addition, using the integrated tool is not the only way to insert code snippets; you can just type the shortcut described in the tooltip and then press Tab. This means that you have to remember shortcuts, but in case of frequently added snippets, this should be easy.
Double-click the Try..Catch..End Try Statement snippet so that code is added in the code editor. At this point, Visual Studio inserts a code snippet for intercepting an exception within a Try..Catch block, as shown in Figure 15.13.

Figure 15.13. The code snippet has been added to the current code.
Notice how the ApplicationException has been highlighted. Highlights are also known as replacements because they indicate to developers that they should replace the highlighted code with a more appropriate code block according to the current scenario. For example, you might want to catch a FileNotFoundException instead of an ApplicationException; therefore, you should make this replacement, but the rest of the code snippet is still valid. In other words, the code snippet provides the concept of catching an exception, but the type of exception depends on your needs.
If you pass with the mouse pointer over replacements, you get information via a tooltip about what the replacement is about.
Code snippets also offer additional useful information, such as the author name, support website, and shortcut. This information is also available in the Code Snippet Manager, described in the next section.
The Code Snippet Manager
The Code Snippet Manager is an integrated tool for adding, removing, and getting information about code snippets. You invoke it selecting Tools, Code Snippets Manager. Figure 15.14 shows the Code Snippet Manager.
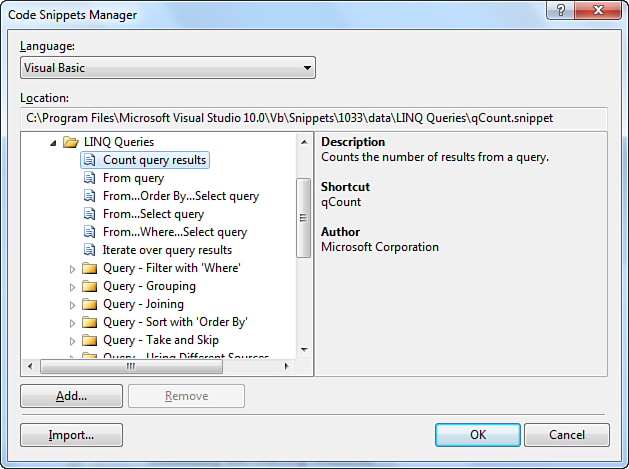
Figure 15.14. The Code Snippet Manager.
You can first select one of the available programming or markup languages from the Language combo box. The Code Snippet Manager automatically shows a list of available code snippets related to that specific language. Notice that Windows Forms and Windows System code snippets are listed but marked with a warning symbol, because they are not actually available in Visual Studio LightSwitch (but they are in Visual Studio 2010). You can browse the snippets tree and select one to get information, such as the Description, the Shortcut, and the Author. As you can see, code snippets can be organized into subfolders. To create a new subfolder, just click Add and provide the folder name. If you want to import existing code snippets, simply click Import and select the .snippet files you want to add to the current collection. Notice that you can also remove code snippets from the collection, but this is allowed only with custom code snippets. (You cannot remove code snippets from the Visual Studio library.) As mentioned previously, the Shortcut property for snippets is useful because in the code editor, you can simply add a code snippet by typing its shortcut and then pressing Tab (without having to perform all the steps described in the previous subsection). When you know how to manage snippets, you are ready to learn to build custom ones.
Creating and Using Custom Code Snippets
Code snippets are files with a .snippet extension, and behind the scene they are Extensible Markup Language (XML) files containing the code and information about the snippet. Code snippets have their own XML schema that Visual Studio LightSwitch uses to identify them correctly within the IDE. If you want to take a look at the schema, it is available at the MSDN website: http://msdn.microsoft.com/en-us/library/ms171418.aspx. To understand how a code snippet is made, consider the following code, which is stored in a snippet named Calculate Cosine of an Angle (available from the Visual Studio snippets library):
Dim radians As Double = 120 * Math.PI / 180
Dim cos As Double = Math.Cos(radians)
If you open the CalculateCosineOfAngle.snippet file with an XML editor (or just with Windows Notepad), the file content looks like the content of Listing 15.1.
Listing 15.1. Examining an Existing Code Snippet
<?xml version="1.0" encoding="utf-8"?>
<CodeSnippets xmlns="http://schemas.microsoft.com/VisualStudio/2005/CodeSnippet">
<CodeSnippet Format="1.0.0">
<Header>
<Title>Calculate the Cosine of a specified Angle</Title>
<Author>Microsoft Corporation</Author>
<Description>Converts an angle from degrees to radians and then calculates
cosine of the angle</Description>
<Shortcut>mathCos</Shortcut>
</Header>
<Snippet>
<Imports>
<Import>
<Namespace>System</Namespace>
</Import>
<Import>
<Namespace>Microsoft.VisualBasic</Namespace>
</Import>
</Imports>
<Declarations>
<Literal>
<ID>Degrees</ID>
<Type>Double</Type>
<ToolTip>Replace with the measurement in degrees.</ToolTip>
<Default>120</Default>
</Literal>
</Declarations>
<Code Language="VB" Kind="method body"><![CDATA[Dim radians As Double =
$Degrees$ * Math.PI / 180
Dim cos As Double = Math.Cos(radians)]]></Code>
</Snippet>
</CodeSnippet>
</CodeSnippets>
Code snippets in Visual Studio LightSwitch and 2010 still adhere to the first XML schema introduced with Visual Studio 2005, so there are no changes. Basically, a snippet structure is divided into some XML nodes. The Header node provides information on the snippet; the Snippet node contains code, required Imports directives, and assembly references. Notice how the real code is stored inside a CDATA section. As you may know, such kinds of sections can store any kind of characters, and so it is the most appropriate for storing code. Finally, the Declarations node stores information on the replacement. The ID element specifies an ID for the replacement, the Type element specifies the data type of the object that should be replaced, ToolTip provides a descriptive tooltip when the user passes the mouse over the replacement, and Default provides a default value. Now suppose you want to create a custom code snippet that will be added to the code snippets library so that you can reuse it inside Visual Studio. First, you need a Visual Basic code snippet. As an example, consider the following code that we used previously to check for duplicates within the Products entity collection:
Dim query = From prod In Me.Products.Cast(Of Product)()
Where prod.Id <> entity.Id
Where prod.ProductName.ToLower =
entity.ProductName.ToLower
Select prod
If query.Count > 0 Then
results.
AddEntityError(entity.ProductName & _
" is a duplicate product name")
End If
Now the goal is to build a custom .snippet file to make the preceding code reusable. Therefore, you must create an XML file according to the snippet schema. Listing 15.2 shows how to do so. You can use any text editor, such as the Windows Notepad or the Visual Studio XML editor.
Listing 15.2. Building a Custom Code Snippet
<?xml version="1.0" encoding="utf-8"?>
<CodeSnippets xmlns="http://schemas.microsoft.com/VisualStudio/2005/CodeSnippet">
<CodeSnippet Format="1.0.0">
<Header>
<Title>Entity Duplicates</Title>
<Author>Alessandro Del Sole</Author>
<Description>Checks for duplicate elements within an EntitySet
</Description>
<HelpUrl>http://community.visual-basic.it/Alessandro</HelpUrl>
<SnippetTypes />
<Keywords />
<Shortcut>chkDup</Shortcut>
</Header>
<Snippet>
<References />
<Imports>
<Import>
<Namespace>Microsoft.LightSwitch.Framework</Namespace>
</Import>
</Imports>
<Declarations>
<Literal Editable="true">
<ID>Products</ID>
<Type>EntitySet(Of T)</Type>
<ToolTip>Replace with a different entity set</ToolTip>
<Default>Products</Default>
<Function></Function>
</Literal>
<Literal Editable="true">
<ID>Product</ID>
<Type>Object</Type>
<ToolTip>Replace with a different entity</ToolTip>
<Default>Product</Default>
<Function></Function>
</Literal>
<Literal Editable="true">
<ID>ProductName</ID>
<Type>String</Type>
<ToolTip>Replace with a different property name</ToolTip>
<Default>ProductName</Default>
<Function></Function>
</Literal>
</Declarations>
<Code Language="VB" Kind="" Delimiter="$"><![CDATA[query = From prod In _ Me.$Products$.Cast(Of $Product$)()
Where prod.Id <> entity.Id
Where prod.$ProductName$.ToLower =
entity.$ProductName$.ToLower
Select prod
If query.Count > 0 Then
results.
AddEntityError(entity.$ProductName$ & _
" is a duplicate product name")
End If]]></Code>
</Snippet>
</CodeSnippet>
</CodeSnippets>
The XML schema for C# code snippets is the same for Visual Basic. The difference is that you must indicate CSharp in the Code Language XML element. In the Imports node, you must indicate all the required using directives; here the schema recalls the Visual Basic syntax, in which such directives are represented by the Imports keyword.
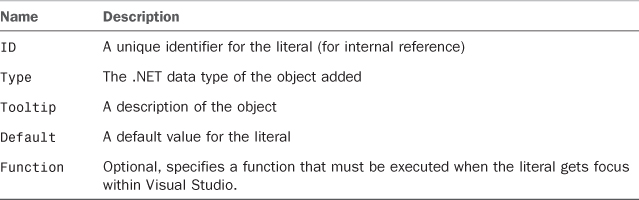
XML elements are self-explanatory, but some clarification can be useful about the replacement. If you locate the Declarations node, you can see how this stores a number of Literal elements; each literal represents a word in the code that should be highlighted when the snippet is inserted. Table 15.1 summarizes the available properties for each literal.
Table 15.1. Literal Properties
Replacements will be useful if you want to reuse the code snippet against entities different than Product. At this point, you just need to save the preceding snippet to the C:UsersUserNameMy DocumentsVisual Studio 2010Code SnippetsVisual BasicMy Code Snippets folder. For example, save it as ProductsDupes.snippet. Now go back to the code editor, and right-click to insert a snippet until you find the new My Code Snippets|Entity Duplicates element. If you add it, you should get a result similar to the one shown in Figure 15.15.
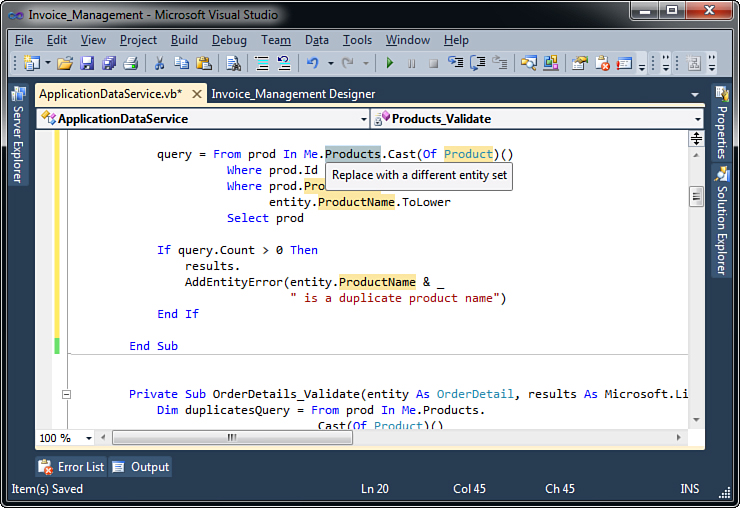
Figure 15.15. Adding the new code snippet in Visual Studio.
Notice how, when the mouse pointer passes over the replacement, you get information about the replacement via the specified tooltip.
Tools for Producing Code Snippets
Writing code snippets manually can be annoying. Fortunately, there are a lot of tools (most of them are open source) for generating code snippets via a graphical user interface to make this task easier. Search for code snippets editors in the CodePlex community (www.codeplex.com/site/search?query=code%20snippet%20editor&ac=8) or take a look at the code snippet editor featured in the Visual Basic Developer Center: http://msdn.microsoft.com/en-us/vbasic/bb973770.
Maybe you want to know how to deploy code snippets to share with other developers or to create a code snippets database. The most appropriate way to share snippets is by creating a redistributable .vsi package based on the Visual Studio Content Installer (VSCI), a particular engine dedicated to sharing additions for Visual Studio (particularly add-ins and code snippets, the only two additional contents not covered by the new extensibility model in Visual Studio 2010). This is appropriate because such an engine can install content into the correct folders (and so developers do not do this manually). The VSCI is not covered here; you can read the MSDN documentation about it at http://msdn.microsoft.com/en-us/library/ms246580(VS.100).aspx. The author of this book wrote an extension for Visual Studio 2010 called Vsi Builder 2010, which is available for free and which integrates in the Visual Studio 2010 Professional or higher and allows automating the generation of redistributable .vsi packages. You can find Vsi Builder 2010 on CodePlex at http://vsibuilder.codeplex.com. As an alternative, you can create compressed archives that store .snippet files that you can send to other developers; then, the other developers just extract the archive content into the snippets folder.
Summary
This chapter covered some important information about how to customize Visual Studio LightSwitch. We started by customizing the IDE’s toolbars (the existing one and then a new one we created). Then you learned how to export and import Visual Studio settings to keep your environment up-to-date with your preferences. We then took an important tour through code snippets to see how they can improve the way you write code as you create your own code library and take advantage of the Visual Studio code snippets library.