
Find In Files and Find And Replace represent the most advanced search-and-replace functionality in the editor. This section covers the ins and outs of using these searches, while providing tips for associated features, such as the Find Results window.
Find In Files has the most options and will search the broadest scope, including files located on your computer that live outside the solution.
Press Ctrl+Shift+F to bring up the Find In Files window.
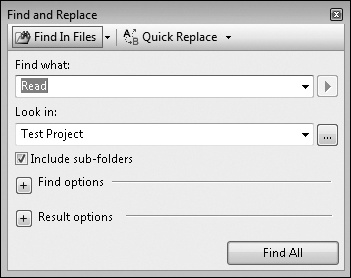
Additionally, you can type in text in the Find combo box and click the Find In Files icon to the left of it, as shown here:
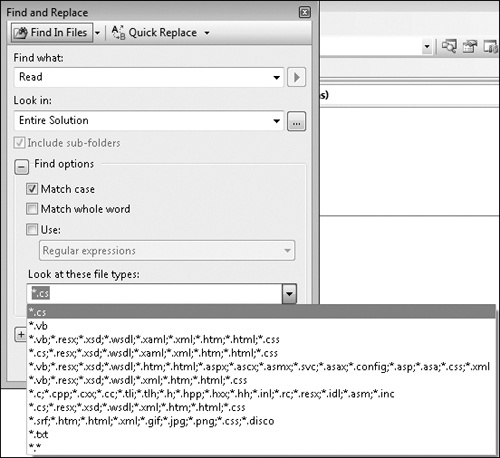
There are a lot of options associated with Find In Files, which I’ll cover in this chapter.
With the Find In Files window showing, change the Look In combo box to anything except Current Document or All Open Documents. This enables the Look At These File Types option, allowing you to select what file types to search for.
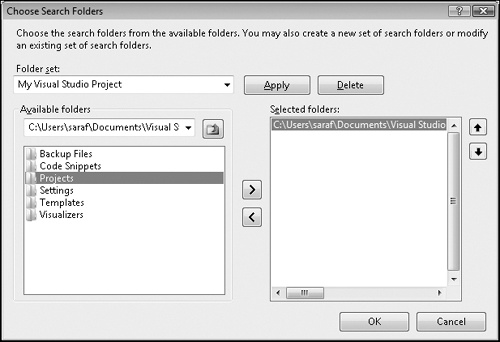
And for a more advanced searching experience, there’s a "..." button next to the Look In combo box.

Clicking this button pops up the Choose Search Folders window. Here you can create a set of folders to search in.
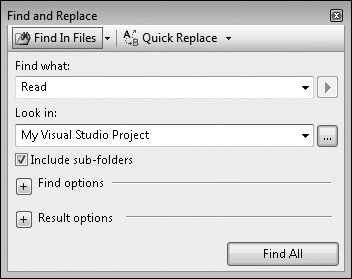
And now you can find your custom folder set as a Look In option.
Press the keyboard chord Alt+F3, S to stop a background search. The command is Edit. StopSearch.

You can also press the Stops A Background Find toolbar icon on the Find Results window.

Just like Ctrl+H performs a Quick Replace, Ctrl+Shift+H brings up the Replace In Files window.
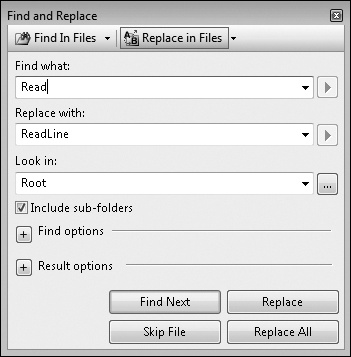
Note that another option, Keep Modified Files Open After Replace All, appears in the Result Options section.
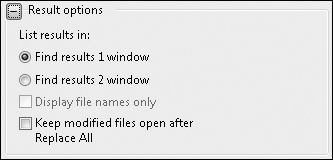
Obviously, if you check this option, all modified files will be opened in the editor. The significance of this is that you can use the undo command if you change your mind.
The Find And Replace feature uses Find In Files to find all the occurrences of the search term and then replace it with the desired text.
The Find And Replace window is not a dialog box, but actually a tool window. Thus, you can dock it to the side if you find it in your way. Since this window begins in a floating state, it may not be obvious that you can dock it.
Right-click the tool window title bar and select Dockable. Now the tool window can be docked using a docking target. Additionally, you can go to the Window menu and select Dockable.

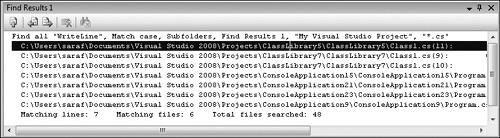
Using the Find In Files search returns all search hits in the Find Results tool window.
You can use F8 (with the focus either in the Find Results window or in the editor) to navigate to the next result, or you can use Shift+F8 to go to the previous result. The commands are Edit.GoToNextLocation and Edit.GoToPrevLocation.
And yes, you can use Quick Find, using Ctrl+F, within the Find Results window.
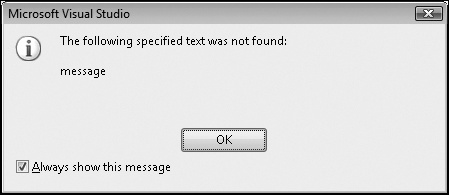
Far too often, I uncheck the Always Show This Message check box, not knowing how to get the message back.
For Find And Replace, you can specify whether to hide or show these message boxes on the Tools–Options–Environment–Find And Replace page. The options are Display Informational Messages and Display Warning Messages.
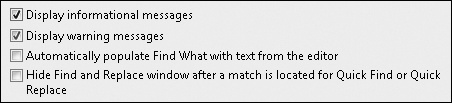
Informational messages are those "FYI—for your information" style messages. Examples include "No more occurrences found," "The specified text was not found," "Find reached the starting point," and so forth. They are indicated by a blue "i" in a white circle.
Warning messages are those that ask a question along the lines of "Are you sure?" For example, "Do you want to cancel?", "Do you want to open files when you perform a find and replace in closed files to enable undo?", and so forth. They are indicated by a yellow triangle with an exclamation point in the middle.
The results of a Find Symbol or a Quick Find Symbol action appear in the Find Symbol Results window. Press Ctrl+Alt+F12 to bring up the Find Symbol Results window. The command is View.FindSymbolResults.
Press F8 to navigate to the next result, and press Shift+F8 to navigate to the previous result. The commands are Edit.GoToNextLocation and Edit.GoToPreviousLocation, respectively.
Press F12 within the Find Symbol Results window to jump to the definition for the symbol in the editor. The command is Edit.GoToDefinition.
Additionally, you can right-click the symbol to bring up the context menu and select Browse Definition to view the symbol in the Object Browser. This command is Edit.BrowseDefinition, in case you want to bind it to a keyboard shortcut.
