
This section focuses on how you can tweak anything in your editor that has some visual element to it, whether you just want to increase your text editor font sizes or display line numbers.
It is fairly well known that you can go to Tools–Options–Environment–Fonts And Colors and select Plain Text to increase the overall font size of text in the editor. But there are a couple of other options for increasing font size that might come in handy.
Go to Tools–Options–Environment–Fonts And Colors and, under Show Settings For, select Editor Tooltip.
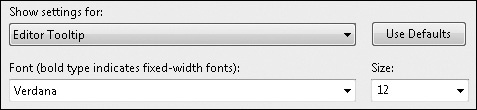
Then you can customize the font and font size.

Go to Tools–Options–Environment–Keyboard and, in the Show Settings For edit box, type macro. You’ll see a list of samples at the top.
There are two accessibility macros worth noting: the increase and decrease text editor font size macros.
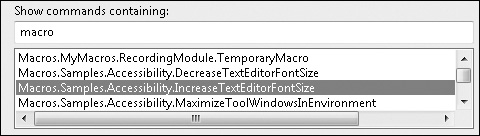
If you are using the General Development Settings and do not want to cause any conflicts with other keyboard shortcuts, bind the increase macro to Ctrl+Alt+Shift+UpArrow and the decrease macro to Ctrl+Alt+Shift+DownArrow. Of course, you can bind them to whatever shortcut you want, but these will not conflict with General Development Settings.
Now open the editor and try out the keyboard shortcuts. Remember that you have to hold down the Ctrl+Alt+Shift keys and press the up or down arrow repeatedly to really experience the full effect. Enjoy!
Beyond just changing font sizes, you probably have wanted to change font colors. These next tips walk you through the various options available.
It’s all about the simple things in life.
Go to Tools–Options–Environment–Fonts And Colors and, in Display Items, select Plain Text. Now set Item Foreground to White and Item Background to Black. And enjoy!
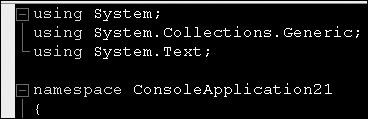
In the preceding screen shot, I set Keywords to Cyan to make the picture look pretty. (Of course, you can’t see this change in this black-and-white book.)
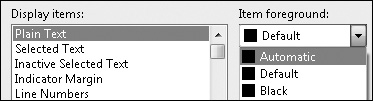
I’m referring to the two settings, Automatic and Default, that appear in the colors drop-down list in Fonts And Colors.
Hold on tight, because here we go with my attempt at an explanation....
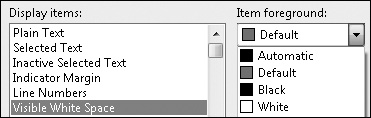
Automatic means that the color is inherited from some other element. For example, consider the Foreground Color for the Display Item: Visible White Space. Automatic is black, whereas Default is blue. Automatic in this context is inherited from the operating system’s Window Text.
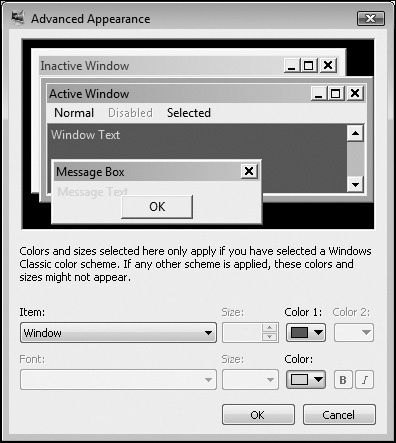
To change the operating system’s Window Text on a computer running Windows Vista, go to Control PanelAppearance and PersonalizationPersonalization–Window Color And Appearance–Open Classic Appearance Properties For More Color Options, and click the Advanced button. Then select Window to change Window Text Foreground and Background, Color and Color 1 respectively.
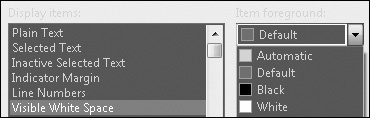
To illustrate the point about it being inherited from some other element, I’ve set Window Text to use a little green, setting the foreground color to bright green and the background color to dark green. For example, the text "Window Text" is in bright green and the background is in dark green.
Let’s look at Visible White Space again. Automatic is bright green (coming from the Window Text setting), and Default is still blue. If you are wondering why everything else is green, I’ll explain that shortly, but first, let’s take it one step at a time.
Default is what Visual Studio says the default is, which may depend on your .vssettings file you selected at first launch (for example, in the General Development Settings) or the last .vssettings file you reset to via the Tools–Import And Export Settings. You can also use the Use Default button on the Tools–Options–Environment–Fonts And Colors page to do this quick reset.
For my configuration and probably for all the .vssettings files, Visible White Space has a default color of blue. It’s up to you whether you want to have it come from the operating system’s Window Text or from what Visual Studio says the best default color is.
Okay, cool. But why did so many other elements change colors?
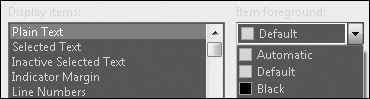
Plain Text is interesting because its Default is set to Automatic. This is why whenever you try to set it to Automatic, it shows Default the next time you bring up the UI. In other words, think of Plain Text as always coming from the operating system’s Window Text. And since we set Plain Text to Green, every UI element in the IDE that derives its colors from Plain Text turned to green.
I call out the bookmark color since it appears at the top of the Fonts And Colors Display Items list. But this tip applies to all items that appear in the indicator margin, like current statement, breakpoints, and so on. But let’s focus on bookmarks for this tip.
This picture shows a bookmark icon/glyph in the indicator margin:

So let’s change the color to red! Go to Tools–Options–Environment–Fonts And Colors. Under Display Items, select Bookmark. Now change the background color to something else, like red. You’ll notice that nothing changes in the editor.
To have a different bookmark color, you need to remove the indicator margin. Go to Tools–Options–Text Editor–General and uncheck Indicator Margin. Now you’ll see the bookmark appear in red.

The indicator margin just shows icons (or glyphs, to be more accurate), which are not customizable. This is why you’re only able to change the foreground color and why you may not see the change. I guess a better title for this tip is "Why didn’t the bookmark color change?" I hope this helps clarify any confusion.
Some of the following tips are enabled by default whereas others you might have a hard time trying to find, like viewing visible white space.
The tracking changes feature provides the following visual aids to let you know where your last saved and unsaved edits are:
Yellow. You’ve edited these lines since your last save. Yellow becomes green upon saving.
Green. These are the lines you edited before your last save. Save again and green disappears.
Not seeing it? Go to the Tools–Options dialog box and, on the Text Editor–General page, check the Track Changes check box. And now you know how to turn it off.
Still not seeing it? Make sure the Text Editor–General page has the Selection Margin check box checked.
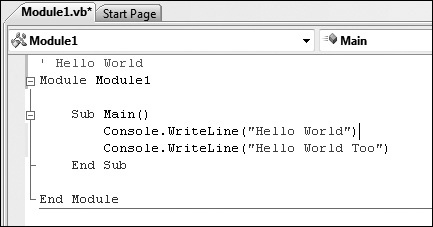
Go to Tools–Options–Text Editor–All Languages–General, and check Line Numbers to show line numbers for all files.
If you just want to see (or not see) the line numbers of a specific file, you can override this global setting by going to the Text Editor–<specific language>–General page.
There are two ways to enable this feature:
From the menu bar, go to Edit–Advanced–View White Space.
From the keyboard, press Ctrl+R, Ctrl+W.
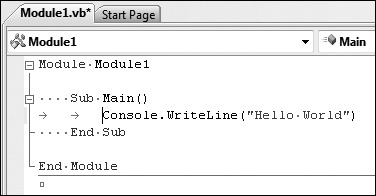
Note that this command is available only when a file is open. Even though this command is shown only in the menu, the visible white space setting persists for all files and all Visual Studio launches.