The window management feature area for Microsoft Visual Studio represents the basic functionality for tool windows, document windows, and menu and command bars. As the feature area tester on the Visual Studio Core team, I covered the breadth of the window management features, which included generic scenarios such as tool window docking and autohiding. It was the responsibility of the language teams to focus on depth testing for their particular scenarios.
Window management was one of my favorite feature areas to test. Because the feature area was so large and there were so many UI combinations to choose from, I got to be creative in the ways I found bugs. I loved coming up with new ways to break stuff and then getting to log the bugs. Testing is the ultimate "Hey developer, you broke it and I’m telling" experience. And not surprisingly, my favorite bug of all time comes from this area.
We had one particular tool window test case that test performance under stress by attempting to dock a tool window to the same dock target many, many times in a row. What was cool was how the tool window client area, the UI within the tool window, would get smaller and smaller with each dock after approximately 100 times. Then, at some point, the client area would somehow draw itself with a negative size and paint over the tool window title bar—quite odd. Obviously, the test began to fail at this point because the automation framework couldn’t find the tool window title bar. I’ll never forget looking at the screen shot captured at that point of the test case failure and seeing this half-eaten title bar. It was such a cool bug. Of course, it took what felt like forever to get "the repro," which is the term we use to describe the exact steps needed to reproduce the bug. Having to dock a tool window 100 times gets very old very quickly when doing it by hand, but it was well worth doing it when I finally did get that repro.
A document window is any window that is opened in the center of the IDE. It has a file tab and behaves just as any opened file would. Obvious examples include files and designers. Not-so-obvious examples include the project properties and tool windows in a tabbed document state. And note that any tool window can act as a document window, but not vice versa.
The file tab channel is the UI strip that contains all the file tabs for the open documents. It also contains a lot of quick shortcuts and powerful commands for manipulating and navigating files.
A fellow program manager and I were trying to out "Did you know..." each other about Visual Studio the other day in my office. I won with this one:
On the file tab channel, all the way to the right side, there’s an inverted triangle (that is, a drop-down arrow) that, when pressed, invokes the File menu drop-down list.
There are two "Did you know..." points here:
You can press Ctrl+Alt+Down Arrow to show the File menu drop-down list. This keyboard shortcut is bound to the global scope, meaning you can press this chord anywhere in the IDE and get the File menu drop-down list to appear. The command is Window.ShowEzMDIFileList. In case you are curious, EzMDI stands for Easy MDI, representing the default tabbed document view rather than the multiple documents view, or MDI (multiple document interface).
The File menu drop-down list supports type-ahead selection. If you have a lot of files listed, you can type the name of the file, and when there‘s an exact match (meaning there isn‘t a conflict), the focus will jump to that file in the list, allowing you to hit Enter to open it.
This is a really, really useful feature, but I’ll always remember how difficult it was for me to find bugs with it. That really frustrates a tester, when you can’t break a developer’s newly written code.

Right-click a file tab, and select Close All But This. This command closes all the other files in the editor, except for the currently active file, obviously.
And yes, you can bind it to a keyboard shortcut. The command is File.CloseAllButThis. In the General Development Settings, this isn’t bound to any keyboard shortcut, so have fun!
Now this is a feature I absolutely cannot live without. This was one of the best features added in Visual Studio 2005 (in my humble, biased opinion).
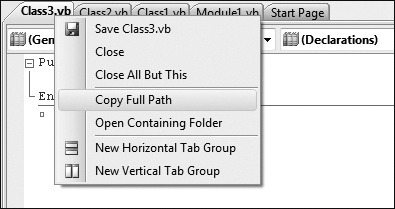
On the file tab channel, you can right-click and select Copy Full Path—voilà, you have the full path for that file.
In previous versions of Visual Studio (such as Visual Studio .NET 2003), you had to go to the Properties window and copy the full path from there. In even earlier versions, well, um, I don’t recall. (I started working at Microsoft in September 2001.)
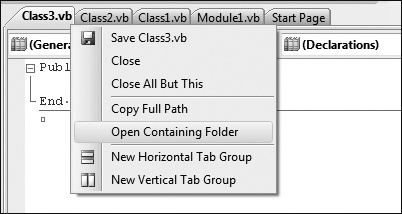
Right-click any file tab, and select Open Containing Folder. I love this feature, although it is my second favorite tip. The previous Tip 4.3: You can copy a file’s full path from the file tab channel is my all-time favorite. It’s great to be able to jump from the file to the folder on disk to look for stuff, to change attributes on the file, to do a rename, or whatever else. It is very, very useful.
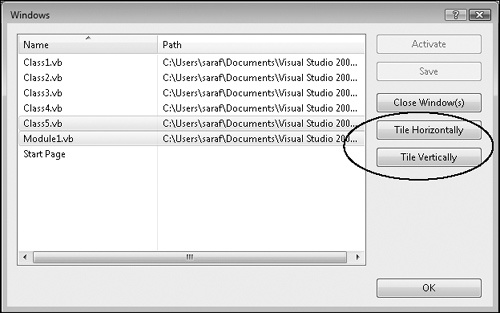
Okay, this is not one of my better "Tip of the Day" titles, but it’s my way of introducing the Window Windows dialog box. It is such a simple dialog box, but for some reason I loved testing it. Maybe it was because it didn’t have that many (if any) automated test-case failures to analyze.
You can bring up the Window Windows dialog box by choosing Windows from the Window menu.
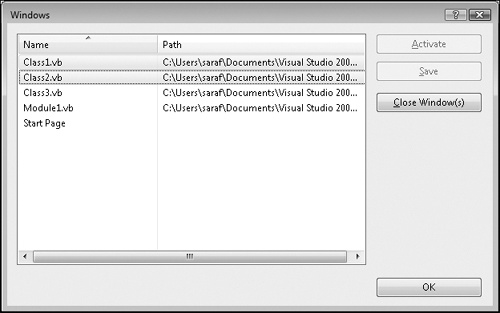
There are several things you can do with this dialog box:
Select which files you want to close, in case the Close All But This command doesn’t meet your needs. That’s my best tip on why and when to use this dialog box.
Select which file to activate; but there are numerous faster ways to do this.
Select which files you want to save; but then again, you would most likely use Save All.
When you’re working in MDI mode, you get an additional two buttons: Tile Horizontally and Tile Vertically.
See Tip 4.12: How to show the Tile Horizontally and Tile Vertically buttons in the Window Windows dialog box for more information.
I strongly recommend using Window Windows for navigation if you are using any sort of accessibility options or assistive technologies (for example, screen readers, screen magnifiers). Window Windows provides an easy and quick way to navigate among files and to close files.
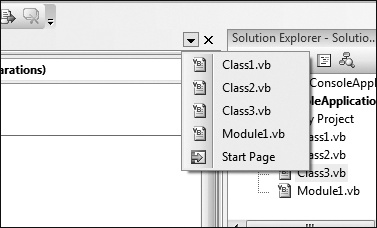
Next you see a picture containing the right portion of the file tab channel. The drop-down arrow to the right of the tabs drops down the list of open files.
Now, when does a bar appear over the drop-down arrow (as shown next)?
When at least one file tab has fallen off the file tab channel, the icon will change, representing the hidden file or files.
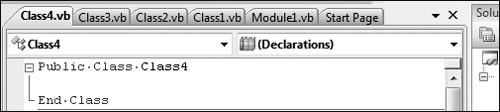
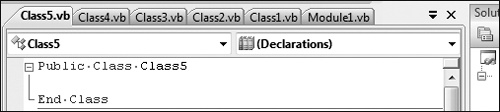
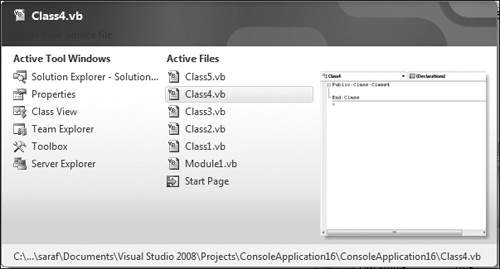
In Visual Studio 2005, we introduced the IDE Navigator. It’s that window that pops up when you press Ctrl+Tab. When the window pops up, keep holding down the Ctrl key while you use either the arrow keys or the mouse to pick a file or tool window to activate.
The IDE Navigator is bound to the Window.NextDocumentWindowNav command, in case you want to change it. I know some settings have Ctrl+Tab bound to Window.NextDocumentWindow (no Nav).
In Visual Studio 2008, they (since I technically didn’t work on that version of Visual Studio) did a lot of UI tweaks with the IDE Navigator. You’ll notice that there’s more real estate (which is what we call the actual space in a UI dialog box), so you can see more of the file path. And of course, there’s the preview window, which is pretty cool. (I said "Oooh!" when I first saw it, but I’m a little biased.)
The IDE Navigator isn’t for everyone. Some developers prefer that Ctrl+Tab quickly cycle through all their open documents instead of flashing an additional piece of UI.
To disable the IDE Navigator, do this:
To go back to previous Visual Studio Ctrl+Tab behavior, do the following:
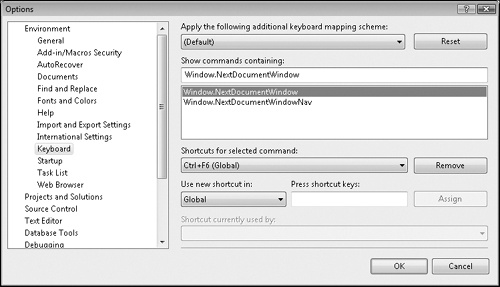
Under Show Commands Containing, type Window.NextDocumentWindow.
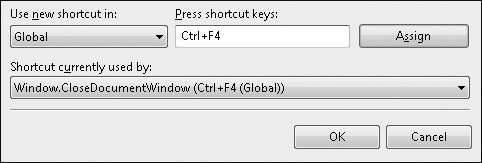
Position the cursor in the Press Shortcut Keys box, and then press Ctrl+Tab.
Click Assign to bind the keyboard shortcut.
Click OK to accept the changes and dismiss the Tools–Options dialog box.
And Ctrl+Tab will cycle through all open documents without the IDE Navigator popping up.
You’ll want to remove the Ctrl+Shift+Tab keyboard shortcut from the Window.PreviousDocumentWindowNav command and bind it to the Window.PreviousDocumentWindow command instead so that you can have both forward and backward navigation in the file tab channel.
There are keyboard shortcuts for navigating among the various documents opened in your editor. All the keyboard shortcuts are customizable on the Tools–Options–Environment–Keyboard page.
Similar to Ctrl+Tab functionality, Ctrl+F6 and Ctrl+Shift+F6 allow you to navigate to the next and previous opened documents, respectively, based on a most-recently used sort order. One clear difference here is that the IDE Navigator does not appear, unlike when you use Ctrl+Tab.

As already mentioned, MDI stands for Multiple Document Interface. Early versions of Windows were MDI-mode based, with the classic minimize, maximize, and close buttons in the upper-right corner. In an MDI interface, you can have multiple files opened, where you can tile horizontally and tile vertically. Visual Studio, by default, uses what we call tabbed documents. The code name is ezMDI, but this is one of the few places where you’ll see the command referred to as such.
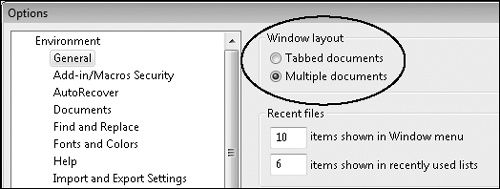
There’s a setting to toggle Visual Studio from the default tabbed documents mode to the MDI mode. Go to the Tools–Options–Environment–General page, and select Multiple Documents under Window Layout.
For you Visual Studio .NET 2003 users, you may remember that you had to restart Visual Studio to use MDI. We fixed this (well, the developer fixed it and I tested it) in Visual Studio 2005, so restarting Visual Studio is no longer required.
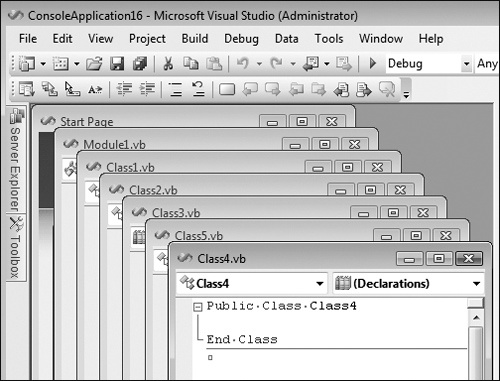
If you’re familiar with MDI mode, you might ask, "Can you tile horizontally or vertically? Can you cascade?" Go to the Window menu, and you’ll find new options.
Note that both Auto Hide All and Reset Window Layout apply to tool windows. The Cascade, Tile Horizontally, Tile Vertically, and Close All Documents commands apply to document editors, designers, and any tool windows in a tabbed document state.
Starting in Visual Studio 2005, the IDE hides the Tile Horizontally and Tile Vertically buttons on the Window Windows dialog box until you are in MDI mode (discussed in Tip 4.11: How to enter MDI mode) with several files open.