
8. Using the Quick Tag Tools
Introduction to the Quick Tag Tools
Years ago, I obtained a copy of HomeSite. HomeSite was a web development tool created by Nick Bradbury, and it was a great tool as long as you knew HTML. However, if you didn’t know HTML well, you could get lost quickly. HomeSite didn’t have a nice what-you-see-is-what-you-get (WYSIWYG) interface like those we enjoy in today’s web development tools.
Pages in those days were simple compared to today’s pages, and yet even in those simpler times, it was often difficult to keep track of nested HTML elements such as table cells. As pages have increased in complexity, and as new HTML elements have been added to our repertoire, it has become even more difficult to comprehend the relationship between a page element and the underlying HTML code.
Tables are an excellent example of this increasing level of complexity. In the days of pure HTML editors, web developers (no one called them “designers” at that time) kept tables pretty simple. Creating a large nested table structure was just asking for trouble because it would quickly become unmanageable. The advent of WYSIWYG editors removed that barrier, and heavily nested tables became so commonplace that locating the HTML code for a particular table cell was like finding the proverbial needle in a haystack.
Microsoft provided a nice solution to that problem with the introduction of Quick Tag Tools in FrontPage 2003. Fortunately for all of us, Quick Tag Tools are still available in Expression Web. Quick Tag Tools, shown in Figure 8.1, provide a context-sensitive way of locating and working with specific elements in a page.
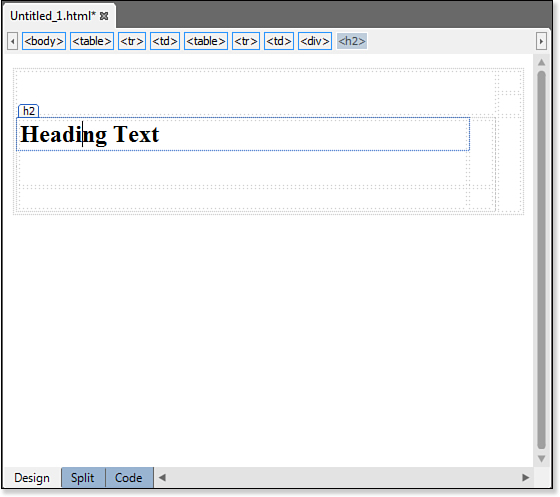
Figure 8.1. Expression Web’s Quick Tag Tools make it easy to locate and work with elements in your pages.
The Quick Tag Tools consist of two sets of tools: the Quick Tag Selector and the Quick Tag Editor. Let’s look at each of these Quick Tag Tools separately and at how you can use them to effectively edit your page content.
In Design View, only visible page elements have a corresponding tag selector. You will not see tag selectors for CSS code, script, or other such elements.
To access tag selectors for code elements such as script tags, switch to Code View or Split View.
Locating and Selecting Elements Using the Quick Tag Selector
If you’ve ever tried to work with the HTML code in a page with nested elements such as the nested table scenario I mentioned earlier, you no doubt understand how difficult it can be to locate HTML code for a specific element. The Quick Tag Selector in Expression Web makes editing complex pages ridiculously easy by providing a series of context-sensitive buttons for each page element.
As you select different elements in Design View or select code in Code View or Split View, the Quick Tag Selector displays one or more tag selectors in a toolbar above the view, as shown previously in Figure 8.1.
![]() For more information on Design View, Code View, and Split View, see Chapter 4, “Using Page Views.”
For more information on Design View, Code View, and Split View, see Chapter 4, “Using Page Views.”
The Quick Tag Selector works a little differently in Design View than in the other views. As you hover over individual tag selectors, Expression Web draws a highlighted border around the corresponding page element in the designer, as shown in Figure 8.2.
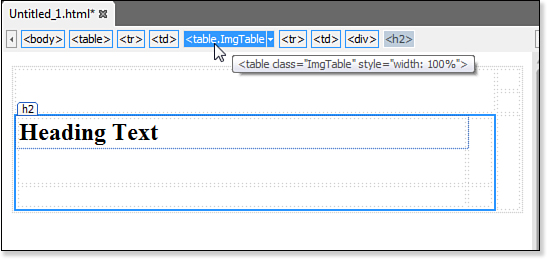
Figure 8.2. As you hover over tag selectors, Expression Web displays a highlighted border around the corresponding page element.
You can see the entire HTML code for any tag simply by hovering over the tag selector with your mouse. A ScreenTip appears showing the HTML code for that tag.
Not only is this convenient when you’re trying to identify page elements, but it’s also an extremely valuable tool when you are working with CSS elements because it displays CSS classes and IDs as part of the tag selector. Notice in Figure 8.2 that the tag selector for the table indicates that the ImgTable CSS class was applied to the table.
![]() For more information on CSS classes and IDs, see Chapter 17, “Creating Style Sheets.”
For more information on CSS classes and IDs, see Chapter 17, “Creating Style Sheets.”
To select a page element or block of code using the Quick Tag Selector, simply click the tag selector button. If you are in Design View, the selected page element will be highlighted, as shown in Figure 8.3. If you are in Code View or Split View, the code for the selected element will be highlighted, as shown in Figure 8.4.
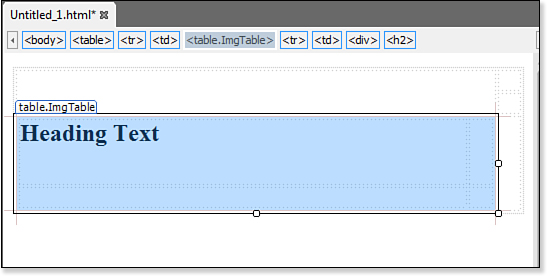
Figure 8.3. In Design View, selecting a quick tag selector highlights the corresponding page element.
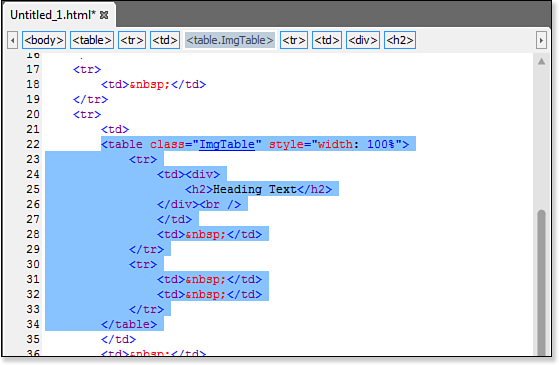
Figure 8.4. In Code View or Split View, selecting a quick tag selector highlights the corresponding code.
If you click the small arrow at the right edge of a selected tag selector or right-click a tag selector, a menu appears. You can then choose Select Tag from the menu to select the page element or code block. Alternatively, if you choose Select Tag Contents from the menu, only the contents of the tag are selected and not the tag itself.
If you choose Select Tag Contents for a <table> tag, both the <td> tags and the content within them will be selected. The <tr> tags will remain unselected.
Editing Page Content Using the Quick Tag Editor
Now that you know how to locate and select content using the Quick Tag Selector, let’s look at how to edit your page’s content using the Quick Tag Editor.
The Quick Tag Editor is accessible by either clicking the small arrow at the right edge of a selected tag selector or by right-clicking a tag selector. The following options are available:
• Edit Tag—Displays a Quick Tag Editor dialog populated with the HTML for the tag for easy editing.
• Remove Tag—Removes the selected tag. If the tag wraps any other content, the content that it originally wrapped remains on the page.
• Insert HTML—Displays a Quick Tag Editor dialog where you can enter HTML to be inserted onto the page.
• Wrap Tag—Displays a Quick Tag Editor dialog where you can enter HTML. The HTML entered wraps the selected tag.
• Positioning—Provides easy access to the Positioning menu for the positioning of page elements.
• Tag Properties—Allows you to easily access the Properties dialog for the selected tag.
Let’s look at each of these options and learn how to use them to edit your content.
Editing a Tag
Selecting the Edit Tag option in the Quick Tag Editor provides you with a Quick Tag Editor dialog containing the HTML tag, as shown in Figure 8.5. Expression Web provides color-coding and IntelliSense support in this dialog as well.

Figure 8.5. The Quick Tag Editor dialog allows for the editing of a specific HTML tag and is complete with IntelliSense and color-coding.
![]() For more information on color-coding, see Chapter 11, “Configuring Page Editor Options.”
For more information on color-coding, see Chapter 11, “Configuring Page Editor Options.”
![]() For more information on IntelliSense, see Chapter 3, “Creating Pages and Basic Page Editing.”
For more information on IntelliSense, see Chapter 3, “Creating Pages and Basic Page Editing.”
The easiest way to fully comprehend the Quick Tag Editor is to create a simple page and experiment with the tools. Follow these steps:
1. Create a new page.
2. Insert a new table using the default settings.
3. Place the insertion point inside one of the table cells.
4. Insert a new table inside the first table’s cell using the default settings.
The Quick Tag Tools disappear from Code View after you make a change to your code. This is by design for performance reasons.
Instead of clicking the green check mark button to commit your change, you can simply press Enter on your keyboard.
If you now click within the tables you’ve inserted, you’ll see that the tag selectors available will change. Click inside the inner table and you should see a tag selector for both tables. Let’s add an ID attribute to the inner table using the Quick Tag Editor:
1. Right-click the tag selector for the inner table and select Edit Tag from the menu to open the Quick Tag Editor, as shown in Figure 8.6.
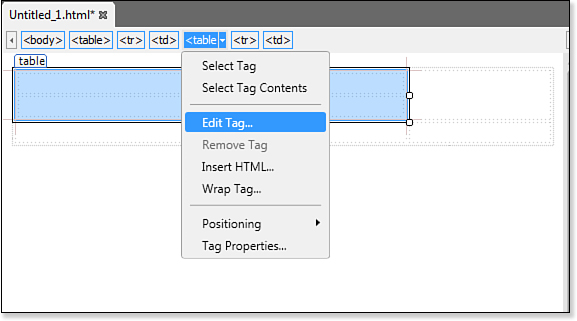
Figure 8.6. The Edit Tag option displays the Quick Tag Editor where you can edit the HTML code for the selected element.
2. The insertion point should be just to the right of the <table> tag. Press the spacebar to open the IntelliSense window.
3. Type i to jump to the id attribute, as shown in Figure 8.7.

Figure 8.7. IntelliSense support in the Quick Tag Editor allows you to easily and accurately add an ID attribute to the table.
4. Double-click the id attribute to add it.
5. Enter innerTable as the value of the id attribute.
6. Click the check mark button at the right end of the Quick Tag Editor dialog to commit the new code to the page.
You can enter invalid attributes or other errors that will not cause an error dialog. For example, the Quick Tag Editor happily allows me to add an attribute to a <p> tag called jim even though there is no such attribute.
Be careful when editing your HTML to avoid accidental errors.
The Quick Tag Editor does a cursory check on the HTML you enter, and if it’s blatantly invalid, Expression Web displays an error, as shown in Figure 8.8.
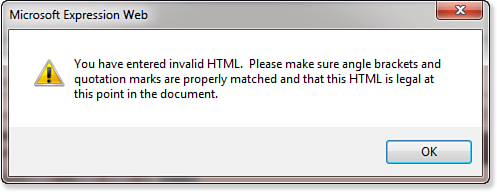
Figure 8.8. The Quick Tag Editor displays an error if you attempt to enter obviously incorrect HTML.
Even if the Quick Tag Editor approves an edit, Expression Web’s Code View might warn you that your code is invalid. Check Code View for any possible problems.
Removing a Tag
The Remove Tag option is a convenient way of removing the selected HTML tag. When you choose this option, only the selected HTML tag is removed. Any content contained within the tag remains.
To use the Remove Tag option, do the following:
1. Place the insertion point inside a table cell and enter the text Microsoft.
2. Double-click the text you entered to select it.
3. Right-click the selected text and select Hyperlink from the menu.
4. Enter http://www.microsoft.com in the Address box and click OK.
After completing these steps, Expression Web inserts an <a> tag into the page that links to the Microsoft site. To remove that tag follow these steps:
1. Click the hyperlink you just created in Design View.
2. Right-click the tag selector for the <a> tag and select Remove Tag from the menu.
When the <a> tag is removed, the text for the hyperlink remains. Only the tag that wrapped the text is removed.
Inserting HTML
The Insert HTML option provides you with a Quick Tag Editor dialog for inserting HTML code into a page. As simple as that may sound, it is sometimes difficult to predict where code gets inserted.
If nothing is selected, code that you insert using the Insert HTML option is inserted at the insertion point. However, if you have an element selected on the page, the HTML is inserted immediately before the selected element. Because of this, you can attempt to insert HTML that alone is perfectly valid, but in the context of the selection, the code is invalid. For example, if you select a <td> tag and attempt to insert a <div> before it, you see the dialog displayed previously in Figure 8.8 and Expression Web prevents you from inserting the code.
Expression Web performs only a cursory examination of the HTML code you are entering. It allows you to enter invalid HTML as well. For example, if you omit a closing tag on an element that requires one, your invalid code is inserted without warning.
To insert HTML using the Insert HTML option, follow these steps:
1. Create a new page.
2. Right-click the <body> tag selector and select Insert HTML.
3. In the Quick Tag Editor, replace the empty opening and closing brackets with the following HTML:
<font>Inserted with the Quick Tag Editor</font>
4. Press Enter or click the green check mark button to add the HTML to the page.
The HTML code you just entered is not standards-compliant because the <font> element is deprecated. The Quick Tag Editor does not prevent you from inserting the deprecated code. It does, however, highlight the code as falling outside the standards in Code View, as shown in Figure 8.9.

Figure 8.9. The Quick Tag Editor happily inserts HTML that falls outside current standards, but Code View warns you about it.
![]() For more information on developing standards-based sites, see Chapter 12, “Maintaining Compatibility and Accessibility.”
For more information on developing standards-based sites, see Chapter 12, “Maintaining Compatibility and Accessibility.”
Expression Web was designed to produce standards-compliant code. Therefore, be careful when inserting your own HTML code so you don’t add code that falls outside the standards.
Wrapping a Tag
The Wrap Tag option wraps the selected HTML element with the tag that you enter in the Quick Tag Editor dialog. Consider the HTML that we just entered using the Insert HTML option. We inserted some text wrapped in a <font> tag. As I mentioned, the <font> tag is deprecated and we should have used the <p> tag instead. To correct that problem using the Wrap Tag option, do the following:
1. Click inside the text you entered using the Insert HTML option.
2. Right-click the <font> tag selector and select Wrap Tag.
3. In the Quick Tag Editor dialog, enter p between the opening HTML tag characters, as shown in Figure 8.10.

Figure 8.10. The Wrap Tag option wraps an HTML tag with the tag that you enter in the Quick Tag Editor.
4. Press Enter or click the green check mark button to commit the change.
5. Switch to Code View or Split View to examine the code that was entered. Notice that the <font> tag is now wrapped in a <p> tag.
6. Click inside the text again.
7. Right-click the <font> tag and select Remove Tag.
After completing the steps, the <font> tag is removed and replaced with a <p> tag, and the code is now compliant with current standards.
Controlling Positioning
The Positioning option provides easy access to CSS positioning settings for the selected element. The following positioning options are available:
• (None)—This is the default setting.
• position:absolute—When this option is chosen, the selected element can be dragged to any position within the page. You can also set the z-order of the element.
• position:fixed—This option is similar to the position:absolute option except that fixed elements do not move when the page is scrolled in the browser.
• position:relative—This option allows you to position an element relative to where it was originally inserted onto a page.
• position:static—This option is functionally the same as setting positioning to (None).
![]() For more information on CSS positioning and z-order, see Chapter 23, “Using Layers.”
For more information on CSS positioning and z-order, see Chapter 23, “Using Layers.”
Editing Tag Properties
The Tag Properties option provides a means of accessing Properties dialogs of HTML elements using the Quick Tag Editor. To use the Tag Properties option:
1. Create a new page and insert a new table using the default settings.
2. Place the insertion point inside the table.
3. Right-click the <table> tag selector and select Tag Properties.
The Table Properties dialog is displayed so you can alter the properties of the table. Alternatively, if you select the Tag Properties option for a <td> tag, the Cell Properties dialog is displayed.
Some HTML tags do not have a corresponding Properties dialog in Expression Web. If you click Tag Properties for a tag that does not have a corresponding Properties dialog, Expression Web will not display a dialog.
When to Use the Quick Tag Editor
The Quick Tag Editor is a powerful tool for making changes to your HTML code. However, as Spider-Man would say, “With great power comes great responsibility.” Microsoft put a lot of work into ensuring that the code Expression Web creates is standards-compliant. They did that because professional web designers asked for a tool they could trust to create pages that would validate against current standards. Using the Quick Tag Editor indiscriminately can easily sabotage Expression Web’s code. For example, although Expression Web goes to great lengths to keep from generating inline CSS styles that might make it difficult to maintain a page, you can add inline styles yourself and override any styles that Expression Web has already created.
Speaking of CSS, one of the greatest uses for the Quick Tag Editor is making changes to CSS code. For example, applying a CSS class or ID to a specific tag is simple and fast using the Quick Tag Editor. However, you can certainly use the Quick Tag Editor for editing any code. When you do, check Code View often to ensure you haven’t introduced nonstandard code into your page. Remember that Expression Web does not prevent you from shooting yourself in the foot. Keeping your code standards-compliant is up to you.