
After completing this chapter, you will be able to
View CSS properties with JavaScript
Set CSS properties with JavaScript
View and set current CSS classes with JavaScript
Use advanced effects and widgets from jQuery UI
CASCADING STYLE SHEETS (CSS) ARE USED to provide styling information for webpages. You see CSS all over but don’t even think about it. That fancy background color on a webpage? CSS. Adding style to make web forms look good? CSS. Changing fonts and font sizes? CSS. With CSS, it’s possible to create complex layouts while still making user interaction easy and intuitive.
Both JavaScript and jQuery have functions and ways in which to manipulate CSS and page styling. The chapter will primarily look at how to manipulate CSS with jQuery’s functions because they are far superior to those offered through JavaScript.
JavaScript is frequently used to manipulate and change page styling. This is accomplished by either setting styles on HTML elements or by adding and removing CSS classes. For example, you saw how JavaScript is used to validate data entered into forms. By using CSS, you can also highlight the incorrectly filled-in form field. This section looks at styling with CSS using JavaScript and jQuery.
In Chapter 1, there was some initial coverage of CSS and its use to style webpages. In that chapter, you saw that CSS is placed onto HTML elements through selectors such as id selectors, class selectors, and overall element selectors. Through the selectors, one or more properties—such as font-color, background, font-size—are then set to values to provide styling for the selected elements. Here’s an example:
p {
font-size: 12px;
}
In this example, all <p> elements are selected, thus p is the selector. The property is font-size, and the value for that property is 12px.
Applying that style to an individual paragraph through its id selector looks like this, assuming an id of myParagraph:
<p id="myParagraph">Here's some text</p>
#myParagraph { font-size: 12px; }
And applying a class to that same <p> tag and then applying the CSS to the class looks like this:
<p class="myClass" id="myParagraph">Here's some text</p>
.myClass { font-size: 12px; }
You use CSS classes when you need to apply the same style to a number of elements on the page, such as headings or paragraphs that you want styled all in the same way. This is more efficient than assigning an id to each element and applying those styles to each element through each id.
CSS styles also cascade, thus the name Cascading Style Sheets. This means that properties and their values are inherited within a page. For example, all paragraphs can be styled with a 12-px font size, certain elements can use a class to obtain a blue font, and then certain paragraphs can have borders assigned through their ids. The most specific properties, assigned through their ids, would still have a 12-px size font with blue color, inherited from their parent element’s CSS.
It’s typical to apply CSS through external style sheets, in much the same way you use external JavaScript files. External style sheets are connected to an HTML file with the <link> element, using this syntax:
<link rel="stylesheet" type="text/css" href="mycss.css" />
This <link> tag is placed inside of the <head> section of the page. The external style sheet contains the CSS itself—again, in much the same way that external JavaScript contains only the relevant JavaScript.
CSS can also be placed inside of the page itself and on elements themselves, but doing so is typically less favorable than using an external style sheet because external style sheets are easier to maintain and they promote reusability.
CSS is a broad and powerful language unto itself, and creating successful CSS-based layouts is a complex subject. If you’d like more information on CSS I recommend a book such as CSS Mastery: Advanced Web Standards Solutions, by Simon Collision, Andy Budd, and Cameron Moll (friendsofED, 2009) or the website http://www.w3schools.com/css.
The jQuery css() function is used to both get and set individual CSS properties. With this function, you can select an individual element and see the value for any of its CSS properties. For example, if you have a <div> element styled with a red color, you could interrogate its CSS color property and find out that the value is set to red. Using this same css() function, you could also then change that value to something different, like green for example.
Here’s an exercise that builds on the temperature-conversion program from Chapter 6, to add CSS and also add dynamic styling with the css() function.
Begin this exercise by opening your StartHere project if it’s not already open. In that project, you should have files named index.html, external.js (located in the js folder), and WebForm1.aspx. These were created in Chapter 6. If you don’t have those files, refer to the exercises in Chapter 6. You can also find these files as exercise1.html, exercise1.js, and exercise1.aspx in the Chapter 7 companion content. Additionally, the CSS for this exercise is found as exercise1.css in the Chapter 7 css folder.
Inside the StartHere project, right-click the css folder within Solution Explorer and select Add, New Item from the menu. The Add New Item dialog will appear.
Within the Add New Item dialog, shown in Figure 7-1, select Style Sheet from the Web menu.
A style sheet will be created. By default, it is called StyleSheet1.css. Inside of that file, place the following CSS:
body {
    font-family: Arial, helvetica, sans-serif;
}

h1
{
    text-align: center;
    border: 1px solid black;
}
Save StyleSheet1.css.
Open index.html. Inside of index.html, and add a <link> element to include a style sheet:
<link rel="stylesheet" type="text/css" href="css/StyleSheet1.css" />
The <link> element should be placed within the <head> section, just below the <title> line. Here’s the entire index.html. Note the only change made since Chapter 6 was adding that <link> element.
<!doctype html>
<html>
<head>
<title>Start Here</title>
<link rel="stylesheet" type="text/css" href="css/StyleSheet1.css" />
<script type="text/javascript" src="js/jquery-1.7.1.min.js"></script>
<script type="text/javascript" src="js/external.js"></script>
</head>
<body>
    <h1>Temperature Conversions Galore!</h1>
    <form name="myForm" id="myForm" method="POST">
        <label id="tempLabel" for="temp">
            Temperature to Convert:
            <input type="text" size="5" name="temp" id="temp" />
        </label>
        <br />
        <br />
        <label id="tempTypeLabel" for="tempType">
            Type of Conversion:
            <select name="tempType" id="tempType">
                <option value="f2c">Fahrenheit to Celsius</option>
                <option value="c2f">Celsius to Fahrenheit</option>
            </select>
        </label>
        <br />
        <br />
        <input type="submit" value="Convert!" name="submit" id="submit" />
        <br />
        <hr />
        <br />
        <span id="resultText">Result: <span id="result"></span></span>
    </form>
</body>
</html>
Save index.html.
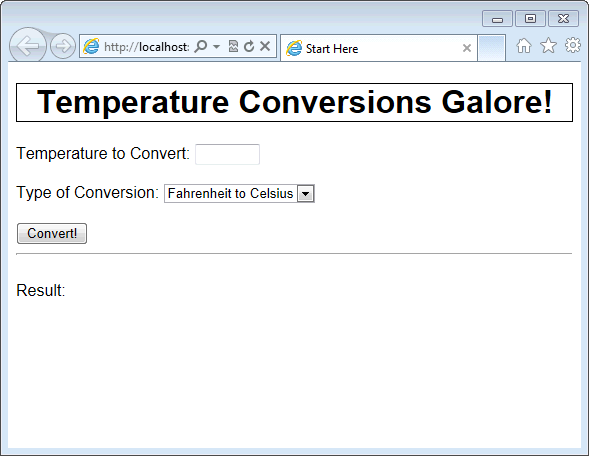
View index.html in a web browser by running the project. You’ll see a page like that in Figure 7-2. Notice that the main <h1> element is now centered and that the fonts for the page are in the arial, helvetica, and sans-serif family.
Close the browser.
Open external.js. Inside of external.js, you’ll add some CSS styling as part of the form submission handler and also add a new click event handler. The code looks like this:
$(document).ready(function () { $('#myForm').on('submit', function () { var inputTemp = $('#temp').val(); var inputTempType = $('#tempType').val(); $.post('/WebForm1.aspx', { "temp": inputTemp, "tempType": inputTempType }, function (resp) { $("#result").text(resp["Temp"] + " " + resp["TempType"]);$("#result").css("background-color", "#00FF00");}, "json" ).error(function () { $("#result").text('An unknown error has occurred.'),$("#result").css("background-color", "#FF0000");}); return false; });$('#temp').on('click', function () {$("#result").text("");$("#result").css("background-color", "");});});Save external.js.
Now view index.html again by running it in Microsoft Visual Studio. This time type in a temperature and click the Convert! button. When a value is returned, the area with the result turns green. Additionally, when you click into the text field again, the result and its color are both cleared. This second part is accomplished with the new click event handler added to the temp text field.

In this exercise, you added styling to a web form with an external CSS file and you made changes to the fields with the help of the css() function. However, in doing so you now have two places where style information is set: in the external CSS file and in the JavaScript. This makes maintenance more difficult because you need to figure out where all the different styles come from and then make changes in multiple places.
There’s a better way to change styles on HTML elements with JavaScript: by either adding or removing classes. This is the preferred method for styling elements. The next section shows how to use JavaScript to style with CSS classes.
Classes are a primary method for applying CSS-based styles to elements on a page, and using classes is preferable when applying styles with JavaScript. jQuery has several functions for applying styles through classes using JavaScript, and this section looks specifically at the following functions:
hasClass()
addClass()
removeClass()
Just as the css() function can be used to get the current status of a given CSS property, the hasClass() function can be used to determine if an HTML element currently has a certain CSS class applied to it. For example, you can create a class that adds a border and then apply that class’ style to all the elements on a page that need a border. The CSS class definition looks like this:
.myBorder { border: solid 1px black; }That class is then applied to an element with the class attribute, like so:
<h1 id="mainTitle" class="myBorder">Temperature Conversions Galore</h1>
Now you can use the hasClass() function to determine if the <h1> element has the border class. This is accomplished like so:
$('mainTitle').hasClass('myBorder");The hasClass() function is helpful when you want to determine if an element is styled a certain way or has already been styled with a class.
jQuery includes functions to add classes and remove classes, aptly named addClass() and removeClass(), respectively. The class to be added needs to exist already in the CSS within the page or be linked through an external style sheet.
In the next exercise, you’ll add some basic form validation to the temperature conversion application.
A frequent use of JavaScript is to provide real-time or near real-time feedback for form validation. You worked through form validation exercises already in the book. This next exercise highlights the field that hasn’t been filled in so that the user can visually see the missing field. The code for this exercise is found in formerror.html, formerror.js, and formerror.css in the companion content. The code uses the same server-side program from the previous exercise, which can be found as exercise1.aspx in the companion content.
Open your StartHere project if it’s not already open.
Within the StartHere project, open your style sheet. If you followed the previous exercise, the style sheet is located in the css folder and is called StyleSheet1.css.
Add the following class to the CSS file:
.formErrorClass
{
    background-color: #FF9999;
}
The CSS file should look like this:
body { font-family: Arial, helvetica, sans-serif; } h1 { text-align: center; border: 1px solid black; } .formErrorClass { background-color: #FF9999; }Open external.js.
In external.js, prior to the AJAX post() function, add the following validation logic:
if (inputTemp == "") {
    $("#temp").addClass("formErrorClass");
    return false;
} else {
    $("#temp").removeClass("formErrorClass");
}
Within the click event handler for the #temp field, add a call to the removeClass() function:
$("#temp").removeClass("formErrorClass");The final external.js should look like this:
$(document).ready(function () {
    $('#myForm').on('submit', function () {
        var inputTemp = $('#temp').val();
        var inputTempType = $('#tempType').val();
        if (inputTemp == "") {
            $("#temp").addClass("formErrorClass");
            return false;
        } else {
            $("#temp").removeClass("formErrorClass");
        }
        $.post('/WebForm1.aspx',
            { "temp": inputTemp, "tempType": inputTempType },
            function (resp) {
            $("#result").text(resp["Temp"] + " " + resp["TempType"]);
            $("#result").css("background-color", "#00FF00");
            },
            "json"
        ).error(function () {
            $("#result").text('An unknown error has occurred.'),
            $("#result").css("background-color", "#FF0000");
        });
        return false;
    });
    $('#temp').on('click', function () {
        $("#result").text("");
        $("#result").css("background-color", "");
        $("#temp").removeClass("formErrorClass");
    });

});
Save external.js.
Now view index.html in your web browser.
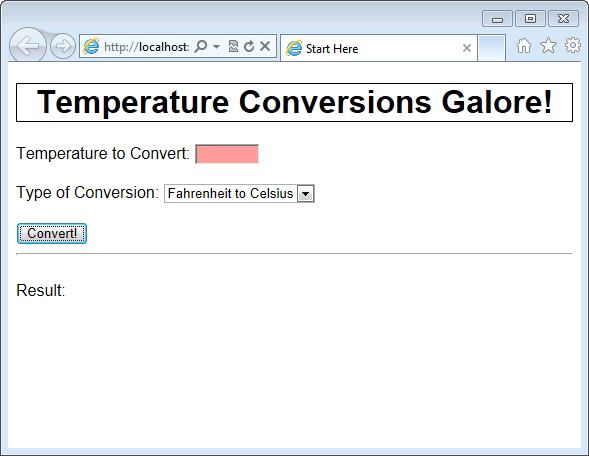
Without filling in any temperature, click the Convert! button. The Temperature To Convert text box should turn a pale red color. This is shown in Figure 7-3, though the color might not show quite clearly in the book.
Now click into the Temperature To Convert box. The error class will be removed.
This exercise used addClass() and removeClass() to add a CSS class to a text field when the field wasn’t filled in.
jQuery UI is a collection of advanced JavaScript and CSS combined to create effects and other user-interface elements. jQuery UI makes it easy to add things like pop-up calendars, drag-and-drop effects, and form autocompletion fields, and also to create advanced animated effects. In jQuery UI terms, there are interactions (such as drag and drop), widgets (such as a calendar/datepicker and tab), and effects (such as animation). This section looks at some of the effects available with jQuery UI and how to integrate those effects into your JavaScript. Note that the exercises in the rest of this chapter assume you have jQuery UI installed and configured. If this isn’t the case, refer to the section Getting jQuery UI in Chapter 4, for an exercise used to install jQuery UI.
jQuery UI includes numerous effects that can be applied to elements. These effects do things like slide the element in or out of the page, highlight an element, create a transfer effect, and more. This section builds a demonstration page so that you can see these effects in action. This code can be found as effect.html, effect.js, and effect.css in the companion content for Chapter 7.
Begin by opening your StartHere project.
Within the StartHere project, open index.html.
Clear any HTML out of index.html, and place the following markup there:
<!DOCTYPE html>
<html>
<head>
    <title>Start Here</title>
    <link type="text/css" href="css/ui-lightness/jquery-ui-1.8.18.custom.css"
        rel="stylesheet" />
    <link type="text/css" rel="stylesheet" href="css/StyleSheet1.css" />
    <script type="text/javascript" src="js/jquery-1.7.1.min.js"></script>
    <script type="text/javascript" src="js/jquery-ui-1.8.18.custom.min.js">
        </script>
    <script type="text/javascript" src="js/external.js"></script>
</head>
<body>
    <div id="workBox">
    <div id="startHereBox">
        <div id="startHereHeader">
            <h1>Start Here</h1>
        </div>
        This is text, it goes inside the box, below the header.
    </div>
    <form action="#" method="POST">
        <select name="effect">
        <option value="bounce">Bounce</option>
        <option value="drop">Drop</option>
        <option value="explode">Explode</option>
        <option value="fade">Fade</option>
        <option value="fold">Fold</option>
        <option value="highlight">Highlight</option>
        <option value="puff">Puff</option>
        <option value="pulsate">Pulsate</option>
        <option value="shake">Shake</option>
        <option value="slide">Slide</option>
        <option value="transfer">Transfer</option>
        </select>
    <input type="submit" name="submit" value="Run Effect">
    <input type="button" name="reset" value="Reset Page">
    <span id="trash"></span>
    </form>
    </div> <!-- end workBox -->
</body>
</html>
Save index.html.
Open your CSS style sheet (typically called StyleSheet1.css), which should be in the css folder.
Delete any existing CSS from the style sheet, and replace it with this:
body { font-family: arial, helvetica, sans-serif; } #workBox { border: 3px solid black; padding: 10px; } #startHereHeader { width: 300px; background: #999999; text-align: center; } #startHereBox { width: 300px; height: 200px; background: #CCCCCC; margin-bottom: 25px; } .transfer { border: 2px solid black; }Open external.js, and delete any existing code from that file.
Place the following code inside of external.js:
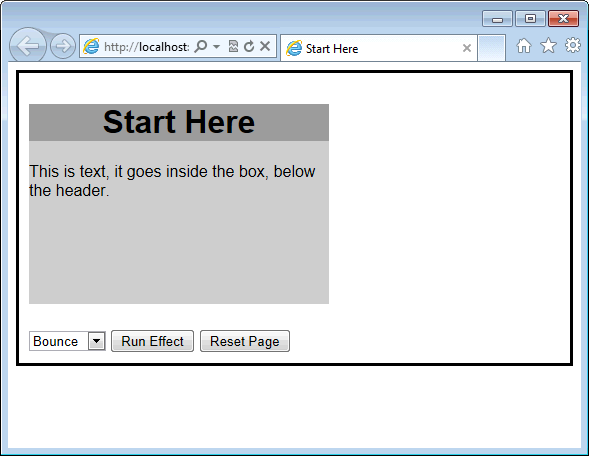
$(document).ready(function () { $("form").on('submit', function () { var effect = $(":input[name=effect]").val(); var options = {}; var effectTime = 1000; if (effect === "transfer") { options = { to: "#trash", className: "transfer" }; effectTime = 500; } $("#startHereBox").effect(effect, options, effectTime); return false; }); $(":input[name=reset]").on('click', function () { $("#startHereBox").removeAttr("style"); }); });View index.html in a web browser. You should receive a page like that in Figure 7-4.
Select any of the effects from the drop-down list (or leave the default Bounce effect selected), and click Run Effect. That particular effect will run.
Some effects cause the Start Here box to disappear. If that happens, click Reset Page to bring the box back.
Work with the effects in the drop-down list, and think about ways in which those effects might be incorporated into a web application.
Note
If you receive error messages about CSS or other items not being found, check the versions of both jQuery and jQuery UI that you include inside of index.html. These versions change rapidly and will be different by the time you read this sentence.
This exercise built a test page for jQuery effects. These effects are added with the effect() function.
The form’s submit event was captured, just as you saw in previous exercises. Within the submit event handler, the value of the input element with the name of effect was gathered. Note the use of the :input selector rather than selecting by the element’s id (because it didn’t have an id):
var effect = $(":input[name=effect]").val();Next, some default values are created. The effect() function accepts certain arguments, such as the name of the effect. Additionally, some effects—such as the transfer effect—require additional options to be set. The final argument is the time to be used to run the effect, in milliseconds. This time is set to 1000 milliseconds (1 second) by default in this script. You can change this value to see how it changes the effect.
var options = {};
var effectTime = 1000;
Next, a conditional is used to determine if the incoming effect requested is the transfer effect. If it’s the transfer effect, additional options need to be set. The transfer effect makes it look like the element was moved to another element and can be used to simulate throwing an element into a trashcan. The options set for the transfer effect tell it where to transfer to and how to style the transfer. Additionally, I set the effectTime to 500 milliseconds because that looks better with this particular effect (in my opinion, at least).
if (effect === "transfer") {
    options = { to: "#trash", className: "transfer" };
    effectTime = 500;
}
Finally, well, almost finally, the effect() function is called with the name of the effect, any options, and the effectTime:
$("#startHereBox").effect(effect, options, effectTime);The submit event was used, so it should be set to false so that the form doesn’t actually submit, and that’s done next:
     return false;
});
And finally, a click event is added to the reset button to remove the effect styles and return the page to its normal state:
$(":input[name=reset]").on('click', function () {
    $("#startHereBox").removeAttr("style");
});
The power of these effects comes in when you incorporate them into pages to enhance the user experience. The concepts you learn and use here will assist you when building JavaScript applications in Microsoft Windows 8.
Now you’ve seen some effects that can be added to a web application with jQuery UI. This section looks at jQuery UI widgets, which are prebuilt combinations of effect, styling, and JavaScript that save time on common tasks.
Slider effects are frequently found on websites for hotel or airline reservations or places where there is a need to portray a range of values, such as acceptable takeoff and landing times for a flight. This section looks at using jQuery UI to build a slider effect.
Like other things related to jQuery and jQuery UI, the slider effect is simple to use but comes with powerful options. The most basic slider is accessed simply by calling the slider() function and attaching it to an element on the page, typically an empty <div>.
For example, here’s a basic page and JavaScript for the slider effect, found as basicslider.html in the companion content:
<!DOCTYPE html>
<html>
<head>
    <title>Start Here</title>
    <link type="text/css" href="css/ui-lightness/jquery-ui-1.8.18.custom.css"
        rel="stylesheet" />
    <script type="text/javascript" src="js/jquery-1.7.1.min.js"></script>
    <script type="text/javascript" src="js/jquery-ui-1.8.18.custom.min.js"></script>
</head>
<body>
        <div id="slider"></div>
<script type="text/javascript">
$(document).ready(function () {
    $("#slider").slider();
});
</script>
</body>
</html>
When viewed in a browser, that HTML and JavaScript yields a very basic (and difficult to see) slider effect on the page, as shown in Figure 7-5.

The slider() function can use numerous arguments that make the slider more useful and help tailor it to your needs. For example, the value and values options enable you to set values for points on the slider and the step option enables you to create stop points within the slider itself. In addition to the options for determining the behavior of the slider, sliders also have events that enable you to react as the user interacts with the slider. One such event is the slide event, which is fired when the user interacts with the slider to move it.
For example, here’s a page that creates a slider and changes the amount by 50 for each point or step on the slider, found as slider.html in the companion content:
<!DOCTYPE html>
<html>
<head>
<title>Start Here</title>
<link type="text/css" href="css/ui-lightness/jquery-ui-1.8.18.custom.css"
rel="stylesheet" />
<script type="text/javascript" src="js/jquery-1.7.1.min.js"></script>
<script type="text/javascript" src="js/jquery-ui-1.8.18.custom.min.js"></script>
</head>
<body>
<div id="amount">$500</div>
<br />
<div id="slider"></div>
<script type="text/javascript">
$(document).ready(function () {
$("#slider").slider({
step: 50,
min: 500,
max: 2000,
slide: function (event, uiElement) {
$("#amount").text("$" + uiElement.value);
}
});
});
</script>
</body>
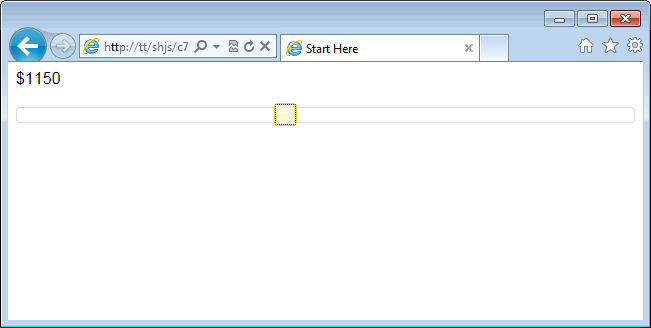
</html>This code uses the slider() function and sends in several arguments, including the minimum and maximum amounts for the slider, how much to change the slider, and a function to handle the slide event. Viewing the page in a web browser results in a page like that shown in Figure 7-6.
Note
See Also See http://jqueryui.com/demos/slider for more information on sliders and their options.
jQuery UI includes a calendar function called a datepicker that enables a themed pop-over calendar for use in forms and elsewhere. Like other functions, the datepicker is added with the datepicker() function. A basic sample page with a datepicker looks like the following code (which you can find as datepicker.html in the companion content):
<!DOCTYPE html>
<html>
<head>
    <title>Start Here</title>
    <link type="text/css" href="css/ui-lightness/jquery-ui-1.8.18.custom.css"
        rel="stylesheet" />
    <script type="text/javascript" src="js/jquery-1.7.1.min.js"></script>
    <script type="text/javascript" src="js/jquery-ui-1.8.18.custom.min.js"></script>
</head>
<body>
        Date: <input type="text" name="date" id="date">
<script type="text/javascript">
$(document).ready(function () {
    $("#date").datepicker();
});
</script>
</body>
</html>
When viewed in a browser, it results in a page with an empty text field, like Figure 7-7.

Clicking into the text field reveals a date picker, like the one shown in Figure 7-8.

Once a date is selected, it’s automatically placed into the Date text box.
You can change the styling of the datepicker with jQuery UI, and you can set several options related to the datepicker, such as a range of dates, the formatting, and other such options. See http://jqueryui.com/demos/datepicker for more information on the datepicker and its options.
You’ve now seen just two of the many widgets that jQuery UI offers. There are many additional widgets available and many other aspects of jQuery UI that won’t be discussed in this book. However, I invite you to peruse the jQuery UI website at http://jqueryui.com, paying special attention to the Demos And Documentation area, which contains excellent working demonstrations of jQuery UI features.
You’ve come a long way in the book, seeing all sorts of HTML, CSS, and JavaScript used to create webpages, create web forms, react to events, style webpages, and create advanced effects. It’s time to show a web application that uses many of the elements you’ve seen.
This section creates a web application to accept reservations for interplanetary travel. Your client, Adventure Works, wants people to book spaceflights on its site. The company also wants to provide an interface that lets people pick their price range, after which time the Adventure Works reservation system will tell the visitor which planets are available and the length of the trip.
At this time, your task is to create some basic mocked-up forms, which will then be used by a designer to add pretty pictures and other graphics and design elements. In other words, you don’t need to make it look pretty, but it should be functional and responsive so that the Adventure Works executives can click through the application and see how it flows.
This application requires two server-side programs: one called details.aspx and one called flights.aspx. Both of these files can be found in the companion content (along with PHP equivalents). The other code is found as space.html, space.js, and space.css in the companion content for Chapter 7.
To begin creating the application, open your StartHere project.
Within the StartHere project, open index.html.
Delete any existing code from within index.html.
Place the following markup in index.html:
<!doctype html>
<html>
<head>
<title>Start Here</title>
    <link type="text/css" href="css/ui-lightness/jquery-ui-1.8.17.custom.css"
        rel="stylesheet" />
    <link rel="stylesheet" type="text/css" href="css/StyleSheet1.css" />
    <script type="text/javascript" src="js/jquery-1.7.1.min.js"></script>
    <script type="text/javascript" src="js/jquery-ui-1.8.17.custom.min.js">
        </script>
    <script type="text/javascript" src="js/external.js"></script>
</head>
<body>
    <h1><span class="underline">Adventure Works</span>
        <span id="subhead">Interplanetary Space Travel</span> </h1>
    <hr>
    <div id="container">
    <p>Price of Space Flight: $<span id="spanPrice">500,000</span></p>
        <div id="priceSlider"></div>
    </div>
    <div id="flights">
        <p>Available Flights at that Price</p>
        <ul id="flightList">

        </ul>
    </div> <!-- end flightList -->

  <div class="hidden" id="flightDetails">
        <p>Flight Details</p>
    </div>
</body>
</html>
Save index.html.
Open the style sheet, which is found in the css folder as StyleSheet1.css.
Clear any CSS from that file.
Place the following CSS in the style sheet:
body {
        font-family: arial, helvetica, sans-serif;
}
.underline { text-decoration: underline; }
.hiddenPrice { display: none; }
.hidden { display: none; }
#formDiv { height: 250px; }
#subhead { font-size: .6em; }

.detailsLi {
        list-style-type: none;
}

#priceSlider {
        height: 250px;
        margin-left: 100px;
}
#container {
        float: left;
        padding-left: 50px;
        width: 290px;
}

#flightList li {
        list-style-type: none;
        border: 1px dashed grey;
        text-align: center;
}

#flightList li:hover {
        background-color: grey;
}
#flights {
        float: left;
        height: 250px;
        padding-left: 50px;
}

#flightDetails {
        float: left;
        height: 250px;
        padding-left: 50px;
}

#priceSlider .ui-slider-handle {
    background: #000;
}

#priceSlider {
    background: #808080;
}
Save StyleSheet1.css.
Open external.js, and delete any JavaScript from that file.
Place the following JavaScript in external.js:
$(document).ready(function () {
    $.ajax({
        url: 'flights.aspx',
        dataType: "json",
        success: function(data) {
            var counter = 0;
            $.each(data, function(key, value) {
                $("#flightList").append('<li ' +
                       'id="flight' + counter + '"' +
                       ' class="flightLi">' +
                       value['trip'] + '<span class="hiddenPrice">' +
                       value['price'] + '</span></li>'),
                counter++;
            });
        }
    });
    $("#priceSlider").slider({
        orientation: "vertical",
        min: 10000,
        max: 500000,
        step: 10000,
        value: 500000,
        slide: function (event, uiElement) {
            $("#flightDetails").html("<p>Flight Details</p>").
                addClass("hidden");
            var numRegex = /(d+)(d{3})/;
            var inputNum = uiElement.value;
            var strNum = inputNum.toString();
            strNum = strNum.replace(numRegex, '$1' + ',' + '$2'),
            $("#spanPrice").text(strNum);
            $("#inputPrice").val(uiElement.value);
            $(".hiddenPrice").each(function() {
                if ($(this).text() > inputNum) {
                    $(this).parent().addClass("hidden");
                }
                else if ($(this).text() < inputNum) {
                    $(this).parent().removeClass("hidden");
                }
            });
        }
    });
    $(".flightLi").on('click', function () {
        $("#flightDetails").html("<p>Flight Details</p>").addClass("hidden");
        var myId = $(this).attr("id");
        $.ajax({
            url: "details.aspx",
            dataType: "json",
            data: { "flightID": myId },
            type: "POST",
            success: function (data) {
                $("#flightDetails").removeClass("hidden").append('<ul>' +
                        '<li class="detailsLi">Trip Duration: ' +
                          data['duration'] + '</li>' +
                        '</ul>'),
            }
        });
    }); //end flightLi live click.
});
Save external.js.
Add a new item to the project. (See Chapter 6 for details on how to add a server-side program.) The new items should be a web form.
Clear any code from inside of the newly created web form, and place the following code in the file:
<%
    Dim str = "[ " & _
        "{ ""trip"": ""Around the block"", " & _
        " ""price"": 10000 " & _
        "}, " & _
        "{ ""trip"": ""Earth to Moon"", " & _
        " ""price"": 50000 " & _
        "}, " & _
        "{ ""trip"": ""Earth to Venus"", " & _
        " ""price"": 200000 " & _
        "}, " & _
        "{ ""trip"": ""Earth to Mars"", " & _
        " ""price"": 100000 " & _
        "}, " & _
         "{ ""trip"": ""Venus to Mars"", " & _
        " ""price"": 250000 " & _
        "}, " & _
        "{ ""trip"": ""Earth to Jupiter"", " & _
        " ""price"": 300000 " & _
        "}, " & _
        "{ ""trip"": ""Earth to Sun - One Way"", " & _
        " ""price"": 450000 " & _
        "}, " & _
        "{ ""trip"": ""Earth to Neptune"", " & _
        " ""price"": 475000 " & _
        "}, " & _
         "{ ""trip"": ""Earth to Uranus"", " & _
        " ""price"": 499000 " & _
        "} " & _
        "]"
    Response.Write(str)
%>
Choose Save As from the File menu.
Name this file flights.aspx.
Create another server-side program in the same way, by adding a new web form. Clear any code from this second web form.
Place the following code inside of this file:
<%
    Dim flightID As String
    Dim outputStr As String
    If IsNothing(Request("flightID")) Then
        flightID = "Unknown"
    Else
        flightID = Request("flightID")
    End If
    If flightID = "flight0" Then
        outputStr = "1 minute"
    ElseIf flightID = "flight1" Then
        outputStr = "5 Days"
    ElseIf flightID = "flight2" Then
        outputStr = "7 Days"
    ElseIf flightID = "flight3" Then
        outputStr = "8 Days"
    ElseIf flightID = "flight4" Then
        outputStr = "9 Days"
    ElseIf flightID = "flight5" Then
        outputStr = "12 Days"
    Else
        outputStr = "15 Days"
    End If

    Dim str = "{ ""duration"": """ & outputStr & """ }"
    Response.Write(str)
%>
Save this file as details.aspx.
Now view index.html in your web browser. You’ll see a page like the one shown in Figure 7-9.
Move the slider down to lower the price. Notice how the list of available flights changes as the slider moves.
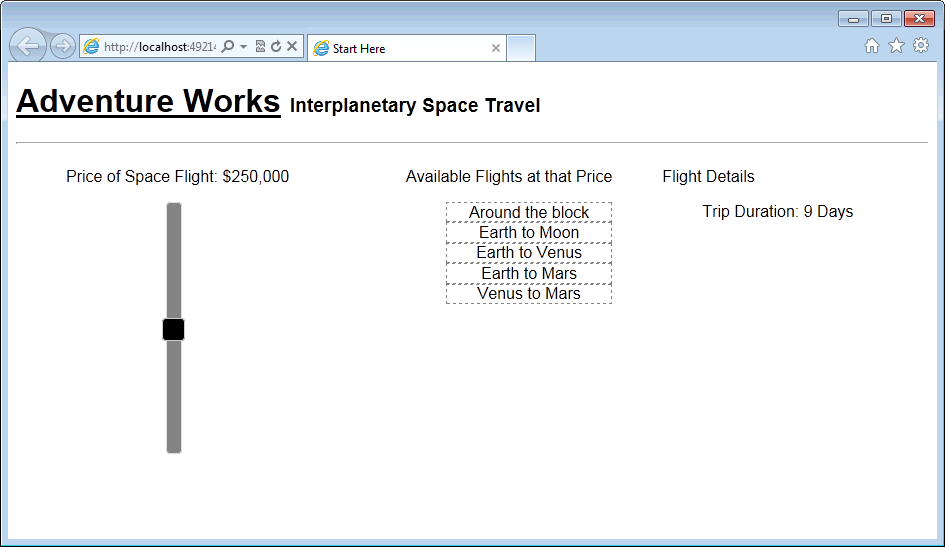
Set the slider at $250,000 and then click the Venus To Mars trip. You’ll see the flight duration on the right side, as shown in Figure 7-10.

I’ll analyze the JavaScript for this project in a few different parts. The first portion retrieved a list of all available flights from the server (flights.aspx). Each of the returned results is appended to the flightList ul element on the page, and a hidden <span> element is created with the price for that flight:
$.ajax({
    url: 'flights.aspx',
    dataType: "json",
    success: function(data) {
        var counter = 0;
        $.each(data, function(key, value) {
            $("#flightList").append('<li ' +
                   'id="flight' + counter + '"' +
                   ' class="flightLi">' +
                   value['trip'] + '<span class="hiddenPrice">' +
                   value['price'] + '</span></li>'),
            counter++;
        });
    }
});
Next in the code, the slider is built. The slider’s orientation is set to vertical, and ranges are set:
$("#priceSlider").slider({
    orientation: "vertical",
    min: 10000,
    max: 500000,
    step: 10000,
    value: 500000,
The slide() function presents some interest. This function formats the value from the slider into a friendlier-looking display, such as $450,000 rather than just $450000. Within that function, each of the available flights is enumerated. If the slider’s value (like 300000, 250000, etc) is greater than the current value from the flightDetails, then that flight is hidden. Conversely, if the flight details price is lower than the slider’s value the flight is shown:
    slide: function (event, uiElement) {
        $("#flightDetails").html("<p>Flight Details</p>").addClass("hidden");
        var numRegex = /(d+)(d{3})/;
        var inputNum = uiElement.value;
        var strNum = inputNum.toString();
        strNum = strNum.replace(numRegex, '$1' + ',' + '$2'),
        $("#spanPrice").text(strNum);
        $("#inputPrice").val(uiElement.value);
        $(".hiddenPrice").each(function() {
            if ($(this).text() > inputNum) {
                $(this).parent().addClass("hidden");
            }
            else if ($(this).text() < inputNum) {
                $(this).parent().removeClass("hidden");
            }
        });
    }
});
The last major piece of the JavaScript for this application sets up the click event handler for the flight. When a flight is clicked, its details are retrieved from a web service. These details could include seating availability, exact departure and arrival times, and so on. The example shows just a simple overall duration for that flight:
$(".flightLi").on('click', function () {
    $("#flightDetails").html("<p>Flight Details</p>").addClass("hidden");
    var myId = $(this).attr("id");
    $.ajax({
        url: "details.aspx",
        dataType: "json",
        data: { "flightID": myId },
        type: "POST",
        success: function (data) {
            $("#flightDetails").removeClass("hidden").append('<ul>' +
                    '<li class="detailsLi">Trip Duration: ' +
                      data['duration'] + '</li>' +
                    '</ul>'),
        }
    });
}); //end flightLi live click.
Here are the server-side programs written in PHP. The first file returns available flights (flights.php):
<?php

$travels = array();

$travels[] = array("trip" => 'Around the block',"price" => 10000);
$travels[] = array("trip" => 'Earth to Moon',"price" => 50000);
$travels[] = array("trip" => 'Earth to Venus',"price" => 200000);
$travels[] = array("trip" => 'Earth to Mars',"price" => 100000);
$travels[] = array("trip" => 'Venus to Mars',"price" => 250000);
$travels[] = array("trip" => 'Earth to Sun - One Way',"price" => 450000);
$travels[] = array("trip" => 'Earth to Jupiter',"price" => 300000);
$travels[] = array("trip" => 'Earth to Neptune',"price" => 475000);
$travels[] = array("trip" => 'Earth to Uranus',"price" => 500000);

print json_encode($travels);

?>
Here’s details.php:
<?php

if (!isset($_POST['flightID'])) {
        die();
}
$data = array();
switch ($_POST['flightID']) {
        case "flight0":
                $data = array("duration" => "1 Minute");
                break;
        case "flight1":
                $data = array("duration" => "5 Days");
                break;
        case "flight2":
                $data = array("duration" => "7 Days");
                break;
        default:
                $data = array("duration" => "9 Days");
}

print json_encode($data);

?>
This application was created in just 59 lines of JavaScript with the help of jQuery and jQuery UI.
This chapter covered the use of JavaScript with CSS. The chapter looked at CSS itself, and then it examined methods for determining and setting current CSS property values through the jQuery css() function. The ability to add and remove CSS classes was shown next by giving examples of the hasClass(), addClass(), and removeClass() functions.
Advanced effects with jQuery UI were shown in the chapter, and you built a test page to look at the effect() function. Some jQuery UI widgets were shown in the chapter as well. Finally, the chapter wrapped up with a web application that tied together concepts from throughout the book to build a flight reservation front page using elements from jQuery UI as well as AJAX calls.