
After completing this chapter, you will be able to
Install and use jQuery
Install and use jQuery UI
Work with the Browser Object Model
Work with the Document Object Model
THROUGHOUT THE BOOK SO FAR, you’ve used a web browser to view the results of your JavaScript programming efforts. You’ve also gained a sense of the central role that the web browser plays in JavaScript and for JavaScript programming. And with that, you’ve only scratched the surface of how JavaScript interacts with the browser.
The Document Object Model, or DOM, is the interface through which JavaScript works with webpages. Just as JavaScript is defined by the ECMA-262 specification, the DOM is defined by the World Wide Web Consortium (W3C). And just as different browsers implement JavaScript in slightly different ways, so too do browsers implement the DOM in different ways. This means that you need to program in one way for one browser and another way for another browser.
Note
See Also The W3C site at http://www.w3.org/DOM has much more information on the DOM.
Browsers are getting better in their interpretation of both JavaScript and the DOM, where “better” means that browsers are moving toward each other to standardize how they implement both JavaScript and the DOM. The result is less work for the JavaScript programmer and less one-off solutions to make a webpage work in a certain browser. The DOM can be used for much more than JavaScript programming, but because this is a JavaScript book, the focus will remain on its use and relation to JavaScript.
The DOM is actually one item of the overall Browser Object Model (BOM). The BOM enables you to do things like work with events, detect information about the visitor and the visitor’s browser, create and resize windows, and more.
This chapter looks at the BOM and the DOM and how to use JavaScript with both. Working with the BOM and DOM can be difficult because of the sheer number of subtle differences between browsers. Luckily, there are collections of code functions, known as libraries, available to assist in this effort and remove much of the effort of programming around browser differences. This chapter begins with a look at one of the more popular JavaScript code libraries, jQuery, and its companion for advanced effects, jQuery UI.
Programming libraries and frameworks assist developers by providing tools and helpers for common and time-consuming tasks. One of the greatest additions to the JavaScript programmer’s toolbox over the past several years is the popularity and strength of libraries and frameworks for JavaScript. Prior to the various libraries becoming available, the JavaScript programmer needed to write extensive code to perform things like changing content, validating web forms, and other behavioral aspects of websites. Today’s JavaScript programmers take advantage of libraries to make their job easier.
One of the most popular JavaScript libraries is called jQuery. jQuery, along with its complementary project, jQuery UI, are essential additions for JavaScript development. jQuery’s popularity is confirmed by its inclusion in some versions of Microsoft Visual Studio.
This book features jQuery, and you’ll see it used heavily throughout the book. Where appropriate, I’ll also point out the traditional JavaScript method for accomplishing the same task. In the upcoming sections, you’ll download jQuery and jQuery UI and add them to your StartHere project from previous chapters.
jQuery and jQuery UI can be downloaded and used locally in your project, or they can be hosted elsewhere and accessed via a Content Delivery Network (CDN). For production websites, I strongly recommend downloading jQuery for use in your local project or site; see the Hosted vs. Local for Libraries sidebar for reasons why you should keep jQuery local for live websites. However, during development and for this book, it’s acceptable to use the CDN-hosted version of jQuery. jQuery UI is a bit different insofar as there are also Cascading Style Sheets (CSS) themes that come with it. This makes it a bit more difficult to use in a CDN-based solution. With that in mind, I’ll show how to use jQuery UI locally.
This section looks at how to obtain jQuery for the locally hosted option. If you use a CDN-hosted copy of the jQuery library to follow the examples in this book, you can safely skip this and jump to the Using a CDN-Hosted jQuery Library section in this chapter.
You can obtain jQuery from http://jquery.com. Once you are there, download the production version and save it to an appropriate location on your computer—typically, your Downloads folder. You’ll copy it into the Visual Studio project later; for now, just save it somewhere that you can remember (or find) for the upcoming exercise.
Note
You can find the code for this exercise, along with version 1.7.1 of jQuery in the companion content for Chapter 4. However, I recommend using the latest version of jQuery available when you work on this exercise. The HTML for this exercise is called jquery.html in the companion content for Chapter 4. Also, note that the Development version of jQuery (which you’ll see on the jQuery website) is used if you want to do development on jQuery itself.
To add jQuery to your project and to the specific page in which it will be used, follow these steps:
Open your StartHere project in Visual Studio, if it isn’t open already, by clicking File and then clicking Open Project.
Within the StartHere project, right-click within the Solution Explorer pane (usually on the right side of the screen). In the context menu that opens, click Add and then click Existing Item.
You’ll be presented with the Add Existing Item dialog.
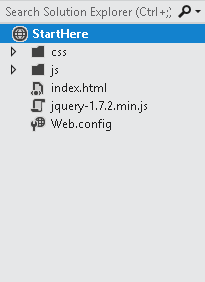
Within the Add Existing Item dialog, navigate to your jQuery file (for example, mine’s called jquery-1.7.1.min.js) and click Add. Note that you might need to select Script or All Files from the file type drop-down in order to see the jQuery file. This dialog is shown in Figure 4-1.
When you do so, Visual Studio copies the jQuery file into your project and Solution Explorer is updated, like the one shown in Figure 4-2.
With jQuery added to your project, the next step is to add it to the page in which it will be used. You accomplish this using the <script> tag with the addition of the src attribute, like so:
<script type="text/javascript" src="jquery-1.7.1.min.js"></script>
Place this <script> tag within the <head> section of the page. For example, adding jQuery to the page created earlier in the chapter looks like this:
<!DOCTYPE html>
<html>
<head>
    <title>Start Here</title>
    <script type="text/javascript" src="jquery-1.7.1.min.js"></script>
</head>
<body>
    <script type="text/javascript">
        document.write("<h1>Start Here!</h1>");
    </script>
</body>
</html>

In this code, you can see the addition of the <script> tag within the <head> of the page.
Note
Depending on your settings, if you view this page some versions of Internet Explorer prompt you to allow blocked content. If you receive such a warning when viewing this page, allow the content.
You’ve now added jQuery to the page, but you haven’t yet done anything with it. You’ll see how to use jQuery in an upcoming section of this chapter and throughout the book.
You can use the jQuery library hosted on a CDN. This section looks at how to add the CDN-hosted version of jQuery to your project. Note that you don’t need to perform the actions in this section if you followed the previous section and already added jQuery to your project.
Adding jQuery, whether hosted locally or through a CDN, is essentially the same task, with the same syntax. The only change you make is to the location provided to the src attribute. With a locally hosted jQuery copy, the src attribute points to that copy on the server itself. With CDN-hosted jQuery, the src attribute uses the URL of the remote jQuery copy, like so:
<script type="text/javascript" src="http://ajax.aspnetcdn.com/ajax/jQuery/
jquery-1.7.1.min.js"></script>
Place the <script> tag in the <head> section of the document. Using the page created earlier as an example, the full markup with CDN-hosted jQuery looks like the following code (which you can find as cdnjquery.html in the Chapter 4 companion content):
<!DOCTYPE html>
<html>
<head>
    <title>Start Here</title>
    <script type="text/javascript" src="http://ajax.aspnetcdn.com/ajax/jQuery/
jquery-1.7.1.min.js"></script>
</head>
<body>
    <script type="text/javascript">
        document.write("<h1>Start Here!</h1>");
    </script>
</body>
</html>
Note
Depending on your settings, some versions of Internet Explorer prompt you to allow blocked content when you try to view this page. If you receive such a warning, choose to allow the content. Also, the example code points to the Microsoft CDN for jQuery. There are other CDNs available, including one from Google. See http://docs.jquery.com/Downloading_jQuery#CDN_Hosted_jQuery for the most up-to-date list of CDNs and their corresponding URLs.
That’s all there is to adding jQuery to your page. Next you’ll see how to test jQuery to make sure it’s working as expected on this sample page. jQuery will be used throughout the book.
Now that jQuery is linked within your page, either locally or through a CDN, it’s time to use it for the first time. To do so, you’ll start with the simple page created earlier in the chapter:
Begin with the example page from earlier in the chapter. Remove the existing <script> within the body so that you have a base that looks like the following. Note that your location for jQuery might be different. (The one shown here is a CDN-hosted version from the previous section; you might be using the locally hosted version from earlier in the chapter.)
<!DOCTYPE html>
<html>
<head>
    <title>Start Here</title>
    <script type="text/javascript" src="http://ajax.aspnetcdn.com/ajax/jQuery/
jquery-1.7.1.min.js"></script>
</head>
<body>
</body>
</html>
Add an empty <div> element within the body of this markup. The markup will look like this:
<!DOCTYPE html>
<html>
<head>
    <title>Start Here</title>
    <script type="text/javascript" src="http://ajax.aspnetcdn.com/ajax/jQuery/
jquery-1.7.1.min.js"></script>
</head>
<body>
    <div id="testDiv"></div>
</body>
</html>
The <div> element was added with an identifier (id) of “testDiv”. Now let’s add some jQuery.
Just prior to the closing </body> tag, add the following JavaScript:
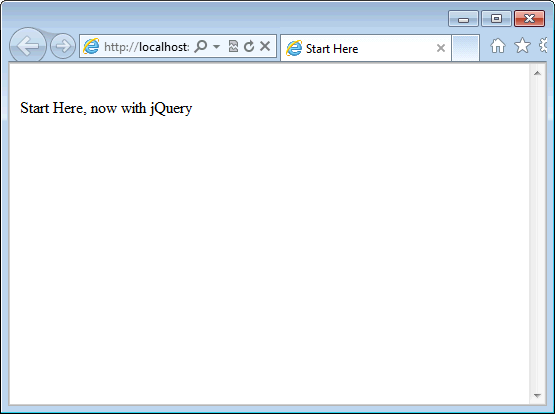
<script type="text/javascript">
$(document).ready(function () {
    $("#testDiv").text("Start Here, now with jQuery");
});
</script>
The final page should look like this:
<!DOCTYPE html>
<html>
<head>
    <title>Start Here</title>
    <script type="text/javascript" src="http://ajax.aspnetcdn.com/ajax/jQuery/
jquery-1.7.1.min.js"></script>
</head>
<body>
    <div id="testDiv"></div>
    <script type="text/javascript">
        $(document).ready(function () {
            $("#testDiv").text("Start Here, now with jQuery");
        });
    </script>
</body>
</html>
With that code in place, run the project by pressing F5 or choosing Start Debugging from the Debug menu. You should see a page like Figure 4-3.
If you don’t see the page as expected, Visual Studio should show you an error. For example, I purposefully (as far as you know) had a syntax error in my version of this file. Visual Studio alerted me that I had a typo and even highlighted the line where the error appeared, as you can see in Figure 4-4.
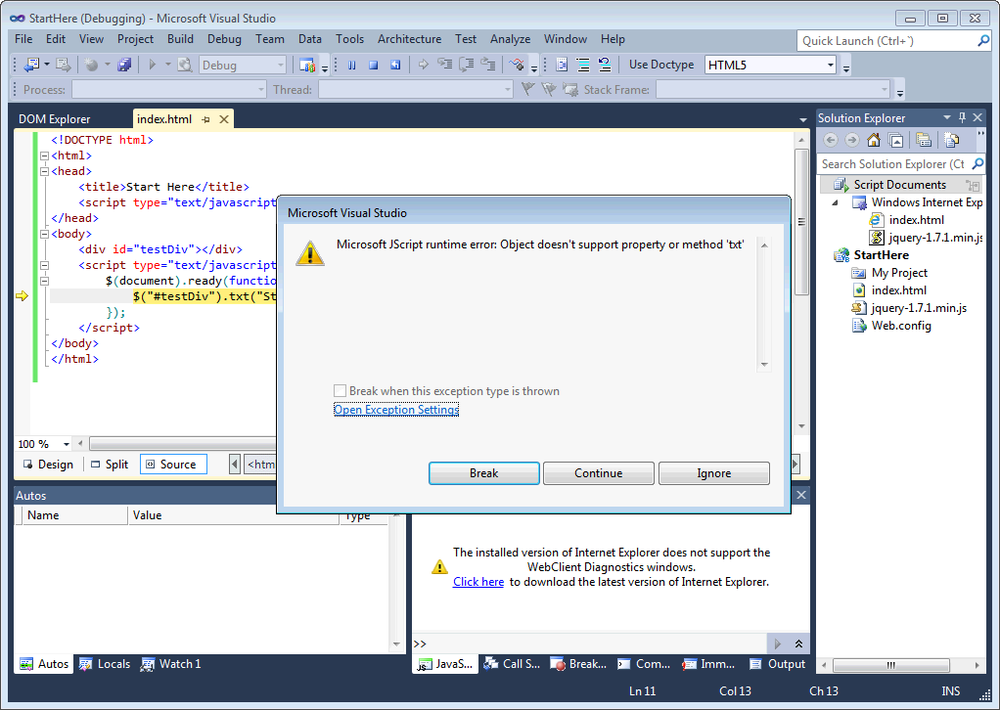
The error I created for this example is one that Visual Studio can find. However, if you receive nothing more than an empty page when attempting to run the example, troubleshooting becomes a bit more difficult. However, Internet Explorer includes some additional debugging that is available through its Developer Tools add-in. In Internet Explorer 9, you can view the F12 developer tools by pressing F12. Take a look back at Chapter 3, for more information on debugging.
I will cover much more detail about jQuery throughout the book to help explain what the code example did. The short explanation is that you used the jQuery ready() function, which ensures that the DOM-related elements on the page are ready for manipulation by scripts. Within the ready() function, you accessed the testDiv using an id selector and changed its text.
You’ve now added jQuery to your page and used it to add content to a page. Next up is jQuery UI.
You can obtain jQuery UI from http://jqueryui.com. jQuery UI is built around a modular architecture that enables developers to download only components that are used in their application. For the purposes of this book, you’ll download all of it. On the jQuery UI site, click the Build Custom Download link. By default, all of the components are selected, so simply select Download and save the file to your computer.
Note
The steps for downloading jQuery UI might change over time. The goal of the download is to get all of the jQuery UI components regardless of how that’s accomplished by the time you read this book.
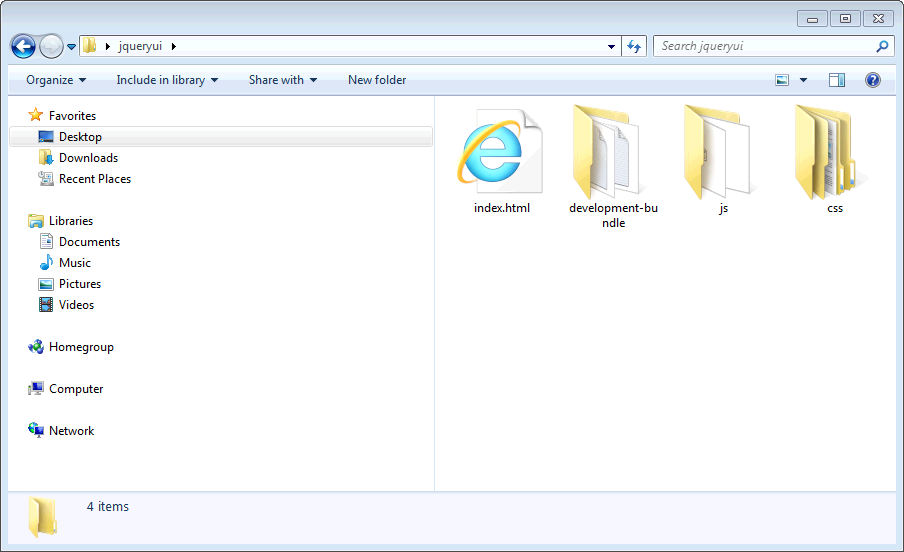
jQuery UI comes as a zip file with JavaScript contained in the js folder and related CSS stored in the CSS folder. Extract the contents of this zip file to your computer. For example, I created a folder called jqueryui on my Desktop and extracted the contents into that folder, as shown in Figure 4-5.
Adding jQuery UI to a project isn’t quite as simple as adding jQuery. The difficulty is because jQuery UI includes themes and CSS. But the power and ease jQuery UI provides makes the additional work to get it worthwhile. And the process really isn’t that cumbersome once you’ve done it a couple times. Essentially, the process involves placing the CSS and JavaScript within your project. If you’re not using Visual Studio, you need to place the css and js directories in a location that’s available to your web browser (or web server, if you’re using a server for development). Here’s an exercise for creating the folders, which also includes moving the jQuery file into the js folder. If you already created css and js folders in your project from previous chapters, you only need to move the jQuery file as part of this exercise.
Open your StartHere project if it isn’t already open within Visual Studio.
Within Solution Explorer (usually on the right side like in the figures you’ve seen so far), right-click the project name StartHere, navigate to Add and select New Folder. A new folder will be created within your project. The new folder should be named css.
Do the same action again: right-click, navigate to Add, select New Folder, and add a folder named js.
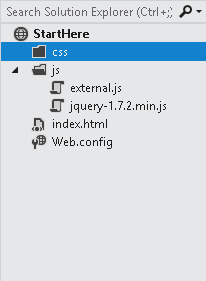
If you have an external.js file in the project, ensure that it appears in the js folder as shown, or drag it to the js folder. Finally, drag the jQuery file (if you have one locally) into the js folder. Your project should look like the one shown in Figure 4-6, with two folders (css and js) and the jQuery file within the js folder.
With the folders created, you’ll next copy the CSS extracted from the jQuery zip file and place it into the css folder you created in your project. Using Windows Explorer, navigate to the folder where you extracted the jQuery UI zip file. (See Figure 4-5.)
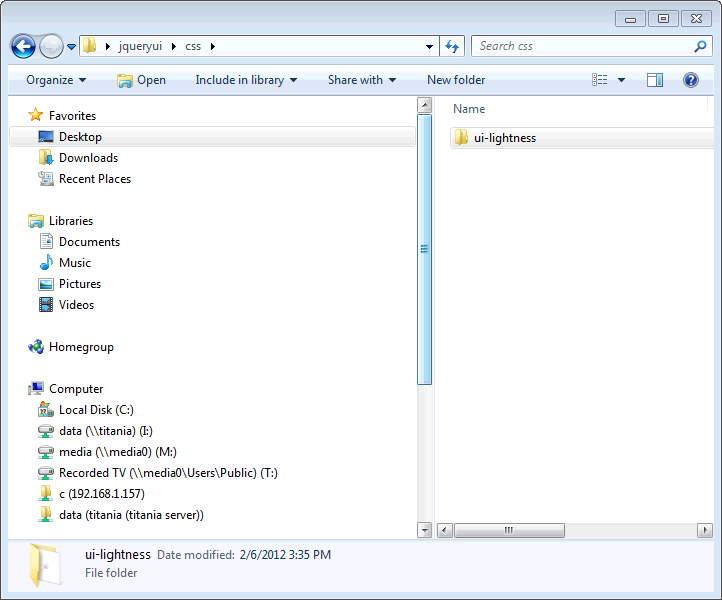
Within the extracted folder, open the CSS folder. You’ll see another folder with the name of the theme you chose. Currently, the default theme is named ui-lightness. You can see an example of this folder in Figure 4-7.
Right-click the theme folder (ui-lightness) and select Copy.
Now navigate back to Visual Studio and click the css folder inside of Solution Explorer. Right-click the css folder and select Paste. Your Solution Explorer should now look Figure 4-8, with the ui-lightness folder inside of the css folder.
Note
If you didn’t paste into the correct area, right-click and delete the ui-lightness folder and try again.

And finally, you can add the jQuery UI JavaScript file within the js folder in your project. Right-click the js folder in Solution Explorer and select Add, and then click Existing Item. The Add Existing Item dialog opens so that you can navigate to the folder in which you extracted the jQuery UI zip file. Within the jQuery UI folder, open the js folder and select the jQuery UI js file. As before, you might need to change the file type so that you can see All Files or Script files in order to see the js file. An example is illustrated in Figure 4-9.

Solution Explorer for your project will now look similar to Figure 4-10.

Now that jQuery UI has been added to your project, it’s time to test it. To do so, you’ll add references to the CSS as well as a reference to the jQuery UI JavaScript file, both of which are now included in your project. These references are added in the <head> section, wrapping around the reference you added for jQuery earlier in the chapter. Note that the order is important for these. You should load the CSS file first, then jQuery itself, and finally jQuery UI.
You need to first add a reference to the CSS, which looks like this:
<link type="text/css" href="css/ui-lightness/jquery-ui-1.8.17.custom.css"
rel="Stylesheet" />
You’ll then add a reference to the jQuery UI JavaScript file, which looks like this:
<script type="text/javascript" src="js/jquery-ui-1.8.17.custom.min.js"></script>
Note that the theme, ui-lightness, included as the href value might be different in your implementation. This name corresponds to the name you see within Solution Explorer within the css folder. Additionally, the version of jQuery UI will certainly be different in your version and will likely even change during the writing of this book. This caveat applies to both the jQuery UI css file and the jQuery UI js file found within your project. Be sure to change these versions to correspond to your version!
Using the code in index.html created earlier as a base, here’s the code with the addition of links to the CSS and JavaScript for both jQuery UI and jQuery. Note that I’ve removed the <div> and <script> within the body. Otherwise, the main two changes are to add the <link> for the jQuery UI CSS and the <script> tag for the jQuery UI JavaScript file:
<!DOCTYPE html>
<html>
<head>
    <title>Start Here</title>
    <link type="text/css" href="css/ui-lightness/jquery-ui-1.8.18.custom.css"
rel="Stylesheet" />
    <script type="text/javascript" src="js/jquery-1.7.1.min.js"></script>
    <script type="text/javascript" src="js/jquery-ui-1.8.18.custom.min.js"></script>
</head>
<body>
</body>
</html>
You’ll now build on the code here to test one of the effects included in jQuery UI. For this exercise, use the HTML code just shown within your StartHere project in Visual Studio. This HTML, found as jqueryui.html in the companion content, should be placed in the index.html file and replace any existing HTML in that file.
Using the previous HTML code as a base, the following HTML markup should be added to the <body> section of the page:
<div id="startHere" style="border: 3px solid black;">
    <h1>Start Here</h1>
</div>
<div>
    <a href="#" id="hiderLink">Hide it!</a>
</div>
Below the markup (but still within the <body> section), add the following JavaScript:
<script type="text/javascript">
    $("#hiderLink").click(function () {
        $("#startHere").hide();
    });
</script>
The entire page should look like the following (noting, again, that your jQuery version numbers will be different):
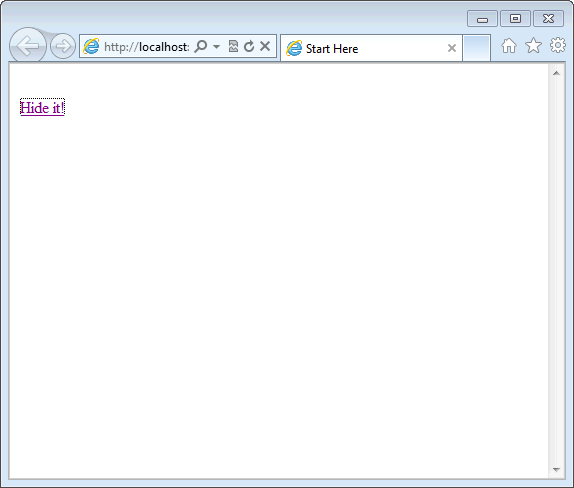
<!DOCTYPE html>
<html>
<head>
    <title>Start Here</title>
    <link type="text/css" href="css/ui-lightness/jquery-ui-1.8.18.custom.css"
      rel="stylesheet" />
    <script type="text/javascript" src="js/jquery-1.7.1.min.js"></script>
    <script type="text/javascript" src="js/jquery-ui-1.8.18.custom.min.js">
      </script>
</head>
<body>
    <div id="startHere" style="border: 3px solid black;">
        <h1>Start Here</h1>
    </div>
    <div>
        <a href="#" id="hiderLink">Hide it!</a>
    </div>
    <script type="text/javascript">
        $("#hiderLink").click(function () {
            $("#startHere").hide();
        });
    </script>
</body>
</html>
View this page in a web browser. You should see a page similar to the one shown in Figure 4-11.
You might already have clicked it, but if you haven’t, click the “Hide it!” link. The words “Start Here” will disappear. See Figure 4-12.

Admittedly, you might not be too impressed. In fact, jQuery itself includes a hide() function. But there’s a couple points to realize: first, there’s a corresponding show() function you can use to get your content back. Second, jQuery UI offers several effects that define exactly how the element should hide. Here’s a taste of one of them.
Within the script section in your page, change the hide() function to look like this:
$("#startHere").hide("slide", {}, 2000);Reload the page, and click the “Hide it!” link. The Start Here div now slides off the screen, taking about 2 seconds (2000 milliseconds) to do so.
jQuery UI will be covered in much greater depth throughout the book. For now, the take-away is that jQuery and jQuery UI can be used to make your life better, taking some of the hard work in creating complex behaviors and making it easy.
The Browser Object Model (BOM) defines a set of objects that are available to the JavaScript programmer for working with a web browser, and it defines the documents rendered within the browser window. That’s quite a sentence. I’ll try to explain it another way. Using the BOM, you can get information about the user’s browser (through the navigator object), you can look through the browser history (through the history object), and you can work with the webpage (through the document object. There are other objects or pieces of the BOM as well. This section will look at some of the objects included in the BOM.
Developers can use the window object to work with and react to events in the browser, such as when the mouse cursor moves over an element or when a click is encountered. Additionally, the window object contains methods for working with timers. You’ll see an example of using a timer later in this chapter.
Much of the window object’s functionality revolves around the event models presented by web browsers. There are several event models and several levels of support for those event models within and across web browsers. This means that you need to program for each and every difference and nuance within each browser. In general, working with events is much more efficient and easier when using jQuery. jQuery accounts for these differences in both event-model support and model implementation within browsers. With this in mind, I’ll pay particular attention to using jQuery for event handling rather than show you less efficient (and less preferred) methods for event handling. Event handling is discussed more in Chapter 7.
The screen object is used to determine things about the user’s viewing environment. Some of the properties of the screen object are
availHeight
availWidth
colorDepth
height
width
These properties can be used to help make decisions about how to display content. For example, if you know that the available height of a user’s window is smaller than an element in your design, you can choose to not display that content or display a substitute item that’s more appropriate for the user’s viewing ability.
A simple way to view the properties of the screen object is to write them to your screen using a for..in loop. This pattern will be used in the next few sections to enumerate the properties of the various BOM objects. The following code can be found in screen.html in the companion content and screen.js in the js folder of the Chapter 4 companion content:
If your StartHere project isn’t open, open it now. Clear any code inside of external.js, and place the following code in the file:
for (propt in screen) {
    document.write("Screen property " + propt + " is currently: ");
    document.write(screen[propt] + "<br />
");
}
Save external.js. It should look similar to Figure 4-13.
With external.js saved, open index.html and clear any HTML from that file, replacing it with the following:
<!doctype html>
<html>
<head>
<title>Start Here</title>
<script type="text/javascript" src="js/external.js"></script>
</head>
<body>
</body>
</html>
View the corresponding index.html in a web browser. You’ll be presented with a page containing the properties of your current window, like the one shown in Figure 4-14.

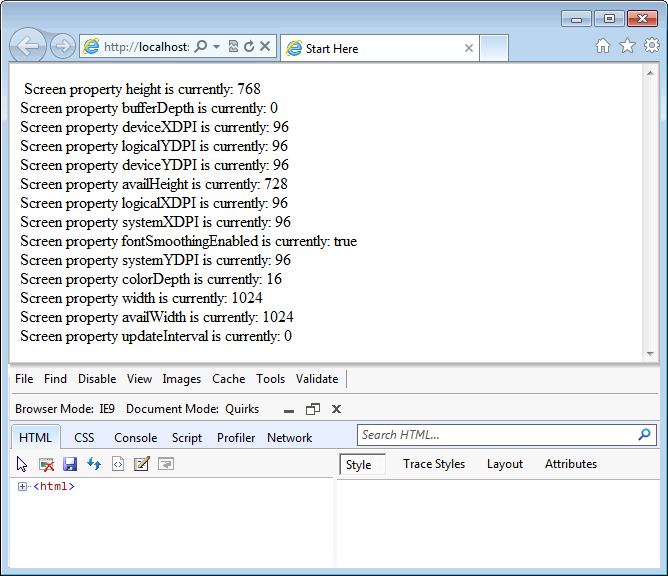
Note that your screen properties will likely look different depending on the version of the browser that you’re using and your actual screen size.
Whereas the screen object contains information about the user’s screen such as the screen resolution, the navigator object provides information about the actual browser itself. Things like the name of the browser, its version, and other items are obtained through the navigator object. To see the properties available through the navigator object, modify the code from the previous section to enumerate the navigator object instead of the screen object, like so:
for (propt in navigator) {
    document.write("navigator property " + propt + " is currently: ");
    document.write(navigator[propt] + "<br />
");
}
If you want to see this code in action, simply replace the existing code in external.js with the code from this example and view index.html in your web browser. Alternatively, the HTML can be found in navigator.html in the Chapter 4 code and navigator.js in the Chapter 4 js folder. The result should look like Figure 4-15.

The navigator object is frequently used to gather information about the visitor, such as the name of the browser that the visitor is using and a list of available plugins. This information is sometimes accurate, but saying that also implies that the information coming from the navigator object is also sometimes inaccurate.
For example, the userAgent property can be used to crudely determine the browser but, like everything else coming from the client, that userAgent can be trivially altered or faked by the visitor. Additionally, as discussed in Chapter 1, JavaScript might not be available at all, and if so, the navigator object would be unavailable, as well.
This book won’t show any examples of using the userAgent property because doing so is not a best practice. The best practice for designing across browsers is to enhance the sites features based on what the client has available. This concept is called progressive enhancement, and you’ll see examples of it throughout the book.
Another interesting object within the BOM hierarchy is the location object. The location object contains information about the currently loaded URL (Uniform Resource Locator), the query string, and other information about the request as it arrived at the web server. Modifying the previous for..in loop to enumerate the location object results in code that looks like this:
for (propt in location) {
    document.write("location property " + propt + " is currently: ");
    document.write(location[propt] + "<br />
");
}The location object is frequently used to redirect a visitor to another page. Depending on the browser, a replace() method might be available that places the new page into the browser’s history. If the replace() method isn’t available, an href property is available that results in the browser being redirected. Here’s an exercise to create an immediate redirect to another page. This code can be found as redir.html and redir.js in the companion content. Later in this chapter, you’ll see an example that uses a timer to automatically redirect or provides a link for the visitor to click if JavaScript isn’t available.
Begin by opening the StartHere project in Visual Studio and then opening index.html.
Within index.html, place the following markup:
<!doctype html>
<html>
<head>
<title>Start Here</title>
<script type="text/javascript" src="js/external.js"></script>
</head>
<body>
<a href="http://www.braingia.org?shjs">Click here if you're not redirected</a>
</body>
</html>
Save index.html.
Open external.js, and place the following code, replacing any other code that’s already there from previous exercises:
if (typeof(location.replace) !== "undefined") {
    location.replace("http://www.braingia.org?shjs-replace");
} else {
    location.href = "http://www.braingia.org?shjs-href";
}
This code first looks to see if the location.replace() method is available. It does this by making sure that the typeof the location.replace() method is not undefined. (Note the strict form of equality test, !==.). If location.replace() is available, it’s used to send the visitor to a website. If location.replace() is not available, location.href is used instead. Within the index.html page itself, there’s an anchor <a> element that contains a link to the same site. If JavaScript isn’t available in the visitor’s browser, the visitor can click this link.
Save external.js, and run the project. A web browser opens, and you’re immediately redirected to the page specified in the code.
The code just shown can be called from a timer so that an interstitial page is shown prior to the redirect occurring. Here’s the code to do so (also found as timer.js and timer.html in the companion content):
function redirect() {
    if (typeof(location.replace) !== "undefined") {
        location.replace("http://www.braingia.org?shjs-replace");
    } else {
        location.href = "http://www.braingia.org?shjs-href";
    }
}

setTimeout('redirect()',5000);
This code takes the if conditional from the previous exercise and wraps it in a function called redirect(). After the redirect() function is closed, the setTimeout() method is called. setTimeout() accepts two parameters: the function or code to execute when the timer expires, and the length of the timer itself, in milliseconds. In this example, the redirect() function is called after 5 seconds (5000 milliseconds).
The Document Object Model (DOM) provides a way to access elements of an HTML document. The DOM creates a tree-like structure to represent an HTML document, and through this hierarchical structure you can manipulate the DOM through JavaScript. This section discusses the DOM and then shows examples of using the DOM through JavaScript. The examples shown in JavaScript are rather brief in favor of showing more examples in jQuery, which is more likely how you’ll work with the DOM in practice.
As alluded to earlier, the DOM is a specification put forth by the W3C to define a hierarchical representation of a document. In the case of this book, I’m going to concentrate on the DOM and how it relates to HTML. Then, even more specifically, I’ll show you how to use JavaScript to work with the DOM.
The DOM has different versions, known as levels. DOM Level 0 is known as the legacy DOM and concentrates mainly on giving programmatic access to form elements. Support for DOM level 0 still exists in web browsers, but its use is frowned upon. You should use later levels of DOM support—namely, levels 1 and 2.
Web browsers offer various amounts of support for each level of the DOM, and most of them implement that support in slightly different ways. The biggest differences have historically been found in Internet Explorer, where an entirely different event model was used.
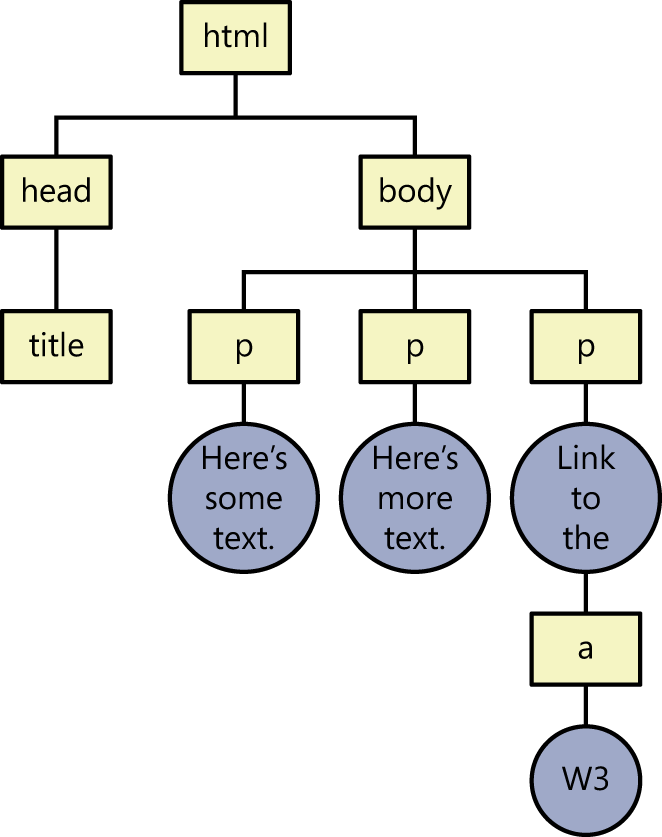
The DOM represents HTML documents in a tree-like structure, or rather an uprooted tree structure because the trunk of the tree is on top. For example, consider this simple HTML structure:
<html>
<head>
<title>Hello World</title>
</head>
<body>
<p>Here's some text.</p>
<p>Here's more text.</p>
<p>Link to the <a href="http://www.w3.org">W3</a></p>
</body>
</html>
Figure 4-16 shows this HTML structure represented as the DOM tree.
This section looks at retrieving elements using JavaScript and jQuery. The section begins with a look at jQuery and its use and then jumps back into the DOM.
The following HTML structure will be used for this and subsequent sections unless otherwise noted. This code is found in elements.html in the companion content. Note that this code still refers to the old external.js from the previous exercise and therefore will redirect you. Later in the chapter, you’ll update external.js, so don’t try to view this HTML in a browser just yet!
<!doctype html>
<html>
<head>
<title>Start Here</title>
<script type="text/javascript" src="js/jquery-1.7.1.min.js"></script>
<script type="text/javascript" src="js/external.js"></script>
</head>
<body>
<div id="myDiv">
<p><a id="silverwareLink" href="http://en.wikipedia.org/wiki/
Silverware">Silverware</a></p>
    <ul id="myUL">
        <li class="classList">Fork</li>
        <li class="classList">Spoon</li>
        <li class="classList">Knife</li>
    </ul>
</div>
</body>
</html>Earlier in this chapter, you saw how to include jQuery in a webpage, and the example shown in this section contains a <script> tag for jQuery. jQuery really shines when it comes to working with the DOM. jQuery’s syntax is slightly different than the DOM, as you saw earlier in this chapter.
jQuery defines its own function, called jquery(). This enables you to call any jQuery-related functions through the jquery() function itself. However, jQuery also defines a shortcut to the jquery() function, $(). Using $() to access jQuery-related functions is far more common than using jquery(), and this is the syntax you’ll see throughout the book. When you see $(), you should know that it’s a reference to jquery() itself, so whatever follows within the parentheses is jQuery-specific. This will become clearer (and seemingly unimportant) as you work with jQuery.
This section explains jQuery in more depth to prepare you for working with the DOM later in the chapter. There are two key things you need to know about right now: the ready() function and selectors.
When a webpage is loaded, the web browser reads and parses the JavaScript and HTML in order, from top to bottom. This means that JavaScript code might be loaded and executed prior to the page being loaded. Therefore, if the JavaScript code needs to work with a certain element of the page before that element is loaded, the JavaScript might fail.
JavaScript solves this by using a load() or onload() method that is executed when the page is loaded. However, doing so has some drawbacks and, when using jQuery, it is not recommended. The jQuery ready() function, part of the document object, provides a way to execute JavaScript after the DOM has loaded. The jQuery ready() function is different than the onload() method, however, because the onload() method will wait to execute after everything is loaded in the page, including images. The jQuery ready() function waits only for the DOM—the HTML itself, not the images.
The ready() function is used when you have JavaScript that needs to execute immediately on page load, such as when you need to change something on the page prior to the page being completely loaded by the browser.
Both the onload() method and the ready() function can be invoked only once per page, and using both is generally not recommended. This means you need to plan your programs accordingly so that they’re invoked or called from within the ready() function. Note that this does not mean that you need to place all of your JavaScript inside of the ready() function; rather, you need to place any load-dependent functions inside of the ready() function—anything that needs to occur right away or react to something that the user does.
Later in this section and throughout the book, you’ll see the ready() function in use, and the function will become clearer as you work through examples throughout the book.
The selector is central to jQuery. The selector defines the elements on which the jQuery code will execute. Selectors are incredibly powerful ways of grouping elements in the DOM and performing group operations on them. Not only can you select elements by their HTML id and class, but you can also select elements by their ancestry—for example, only <a> elements that are within an <li> element—and you can select elements in numerous other ways.
In the example found earlier in the chapter, you retrieved an element by using a jQuery id selector, and you’ll see more examples of this later in the chapter as well. You can also retrieve elements by their class, and you’ll see examples of this later in the chapter too. The more advanced selectors will be discussed as they’re encountered in the book.
The getElementById() method is a primary method for working with the HTML elements and the DOM through JavaScript. A typical usage of the getElementById() method is to instantiate a variable with an element and then work with one or more of the element’s attributes. Using the HTML from earlier in this section as a guide, here’s an example that retrieves the value of the href attribute from the <a> element on the page, using its id as the selector. You can find the code as getelementbyid.js in the companion content.
var aLink = document.getElementById("silverwareLink");
alert(aLink.href);
Once it is retrieved, you can set or change attributes. This behavior will be shown later in this chapter.
The typical use of jQuery doesn’t call for element retrieval as in the example just shown. When using jQuery, it’s typical to chain operations together. For example, rather than retrieve the element and set it to a variable as in the previous example, you typically just retrieve the attribute directly when using jQuery, as in this example:
alert($('#silverwareLink').attr('href'));In this example code, the href attribute is retrieved from the HTML element with the id silverwareLink. This is accomplished with the help of the jQuery attr() function. The jQuery-related code is enclosed in the standard JavaScript alert() function.
Here’s an exercise to work with this code and the HTML presented earlier in the section. To prepare for this exercise, open your StartHere project if it isn’t already open. The entire code for this exercise can be found in retrievebyid.html and retrievebyid.js in the companion content.
Within the index.html file, change the HTML to match the example from earlier in this section. The changes from the existing index.html are highlighted in bold.
<!doctype html> <html> <head> <title>Start Here</title>
<script type="text/javascript" src="js/jquery-1.7.1.min.js"></script><script type="text/javascript" src="js/external.js"></script> </head> <body><div id="myDiv"><p><a id="silverwareLink" href="http://en.wikipedia.org/wiki/Silverware">Silverware</a></p><ul id="myUL"><li class="classList">Fork</li><li class="classList">Spoon</li><li class="classList">Knife</li></ul></div></body> </html>Save index.html.
Clear any code out of external.js, and place the following code inside the file. (You can find this code as retrievebyid.js in the companion content.)
$(document).ready(function(){
    alert($('#silverwareLink').attr('href'));
});
Save external.js.
Now run the code by pressing F5 or viewing the index.html in a web browser. You should receive an alert like the one shown in Figure 4-17.

The code in this exercise used the jQuery ready() function. Within the ready() function, the alert() was called with jQuery inside to retrieve the value of the href for the HTML id silverwareLink.
The next section discusses retrieving elements by their CSS class, and later you’ll see how to change attributes such as href and others using jQuery.
Like the getElementById() function, JavaScript also offers a getElementsByClassName() function. The getElementsByClassName() function retrieves all elements with the given CSS class. However, getElementsByClassName() is not supported in older versions of Internet Explorer (starting around version 8); therefore, its use isn’t recommended quite yet. However, jQuery includes a perfectly valid class selector that does work in older browsers. Whereas the jQuery id selector uses a hash or pound sign (#), the class selector uses a single dot, like this:
$('.classList')That code selects all elements on a page with the class of classList. Yes, it really is that easy. A primary difference between an id selector and the class selector is that the class selector typically returns multiple items. A typical scenario is to use the jQuery each() function to iterate through the elements retrieved. The each() function is akin to a for loop, iterating through a group of things. The HTML shown earlier includes several <li> elements that share the same class. Retrieving those elements and then iterating through them with jQuery’s each() function looks like this:
$('.classList').each(function() {
    alert($(this).text());
});
This code, which you can find as classlist.html and classlist.js in the companion content, creates a function inside of the each() function. This inner function, which by the way is an anonymous function, merely uses the alert() function to show the text of each element. The each() function is roughly equivalent to the for loop you worked with earlier in the book. Two new items here are the jQuery version of this, which is written as $(this) in jQuery, and the text() function, which retrieves the plain text of the selected item.
If you want to run this code, simply add it within the $(document).ready() function from the exercise earlier in the chapter.
You can also work with the DOM by retrieving HTML elements through their tag name, as in <li>, <a>, <div>, and so on. Like the class example, retrieving elements by tag name is useful when you need to do something with the elements as a group. You might notice already, though, that retrieving by tag name is somewhat less specific than retrieving by class. For example, you can easily retrieve all of the <a> elements on a page, but it’s more likely that you want to retrieve only one of those elements or a more specific grouping of the <a> elements on a page. There are two ways to solve the specificity problem when retrieving by tag name: one uses standard JavaScript, and the other uses jQuery. I’ll show both in this section.
JavaScript has a function called getElementsByTagName() you can use to retrieve HTML elements. An easy way to add some specificity when using this function is to retrieve its parent element. For example, in the HTML example being used in this chapter, you have this hierarchy:
<ul id="myUL">
    <li class="classList">Fork</li>
    <li class="classList">Spoon</li>
    <li class="classList">Knife</li>
</ul>
Using JavaScript, a typical scenario is to retrieve the parent element and then use a for loop to enumerate its children. Here’s the code to do so:
window.onload = function() {
    var ulElm = document.getElementById("myUL");
    var liElms = ulElm.getElementsByTagName("li");
    for (var i = 0; i < liElms.length; i++) {
        alert(liElms[i].innerHTML);
    }
};
This code, which you can find in getelementbytagname.html and getelementbytagname.js in the companion content, sets the onload method of the window object to a function. Inside of that function, the <ul> element is selected with the help of the previously seen getElementById() method, and the result is placed in a variable called ulElm. Next, each of the <li> elements within the ulElm are retrieved with the getElementsByTagName() method. Those <li> elements are placed in a variable called liElms. Finally, a simple for loop is created and each of the liElm variables is sent to the screen using an alert().
jQuery includes selectors for retrieval by tag name. They have essentially the same syntax you already saw for jQuery selectors. Recall that the id-based selector is a pound sign (#) and the class-based selector is a dot (.). Retrieving by tag name with jQuery leaves those off and retrieves by the tag name itself, much like the native JavaScript getElementsByTagName() function. Here’s an example:
$(document).ready(function() {
    $('li').each(function() {
        alert($(this).text());
    });
});
This example uses the same each() function you already saw and iterates through each <li> element on the page displaying its text. You might notice the difference between this example and the previous native JavaScript example. The native JavaScript example first retrieved the specific <ul> by its id and then only iterated through the <li> elements within or beneath that <ul>. The jQuery example shown here actually retrieves all <li> elements on the page. However, the same positional or hierarchical behavior can be accomplished thanks to the advanced selector syntax of jQuery. Here’s one way to accomplish the same hierarchical syntax, which you can find as tagselector.html and tagselector.js in the companion content:
$(document).ready(function() {
    $('#myUL li').each(function() {
        alert($(this).text());
    });
});
The syntax used for this example selects all <li> elements within the id myUL. There are several ways to select elements based on their position within the document. See http://api.jquery.com/category/selectors for more information on selectors.
This chapter showed a lot of material on the power and strength of using JavaScript with the web browser. The Browser Object Model (BOM) and the Document Object Model (DOM) provide the structure within which JavaScript accesses elements of a web browser and webpage.
The chapter first showed how to install and use jQuery and jQuery UI. These libraries are important pieces in a JavaScript programmer’s toolkit and enable you to use advanced behaviors and styling that works across multiple web browsers. This means that you can concentrate on the logic of your program rather than on how to get something to work in all browsers.
The chapter looked next at the BOM and some important objects within it. This included a look at event handling, the screen object, and the navigator and location objects.
The chapter wrapped up with an explanation of the DOM and its importance in JavaScript programming. Examples were shown using native JavaScript functions to retrieve elements from a webpage. Examples were also shown using jQuery.
You’ve now seen how to retrieve elements. In later chapters, you’ll see some of the things you can do with those elements once they’re retrieved.