Chapter 3
Azure Managed Disks
Overview
In February 2017, Microsoft announced the general availability for the Azure Managed Disks service, starting with the Standard and Premium disk types. Managed disks enable Azure customers to reduce overhead associated with managing and scaling storages account while creating or managing virtual machine (VM) disks. Microsoft also introduced numerous features that made managed disks a compelling solution for every Azure-hosted infrastructure as a service (IaaS) environment and for customers considering migrating to the cloud. Over time, the list of features and benefits associated with the Azure Managed Disks service has grown, and it has become the default disk solution for most organizations that use Azure for their VMs.
Each Azure managed disk is a fully managed block-level storage volume designed for the highest level of redundancy and availability. Azure currently offers different types of managed disks, including Ultra Disks, Premium SSD Disks, Standard SSD Disks, and Standard HDD disks. Each disk type provides varying levels of performance and scalability.
Key features
Some key features and benefits of using managed disks in your Azure environment include the following:
High availability, resiliency, and redundancy Microsoft provides 99.999% availability for VM workloads that use managed disks. Managed disks are designed to maintain multiple replicas—three to be exact, spread across an Azure region. This makes managed disks extremely resilient, and ensures that your workload can continue to process even if there are issues with one or two replicas. Microsoft provides an industry leading 0% annualized failure rate.
High scalability Microsoft currently supports the deployment of 50,000 managed disks per region per subscription, allowing large enterprises to deploy thousands of VMs in a single subscription.
Support for large Virtual Machine Scale Sets (VMSS) You can use managed disks with VMSS. The scalability of managed disks makes it possible to deploy large VMSS consisting of up to 1,000 nodes.
Support for availability sets Azure Managed Disks provides native integration with availability sets. Disks for VMs that are part of an availability set are spread across multiple fault domains with the selected Azure region and isolated from each other.
Support for availability zones You can deploy managed disks across availability zones to improve redundancy. Availability zones provide additional redundancy over availability sets because the power and networking in each availability zone is independent of the others.
Support for existing virtual hard disks (VHDs) You can easily upload existing VHDs up to 32 terabytes (TB) in size to Azure for use as managed disks. This process makes it extremely easy for organizations to migrate their existing workloads to Azure.
Role-based access control (RBAC) Azure Managed Disks supports permission management using Azure RBAC, making it possible to granularly assign permissions to managed disks to administrators based on their roles and responsibilities.
Native integration with Azure Backup You can use Azure Backup to back up managed disks from within the Azure Managed Disks service. You can schedule backups during off-peak hours and retain backups based on your organizational policies. You restore backups from the Azure Backup service.
Disk encryption Managed disks are encrypted by default. They support multiple types of encryption, including Microsoft-managed encryption keys, customer-managed encryption keys, and double encryption with both types of keys. In addition, managed disks support Azure Disk Encryption, which allows you to encrypt the disk inside the VM using BitLocker for Windows or DM-Crypt for Linux VMs.
Easy migration for unmanaged disks You can easily migrate unmanaged disks stored in Azure Storage accounts to managed disks. This increases the resiliency and redundancy of your IaaS VMs and provides significantly higher availability for your workloads.
Support for shared disks for clustered applications You can set up managed disks as shared disks. This allows you to attach them to multiple VMs to host or migrate clustered applications to Azure.
Disk bursting for better performance Managed disks allow you to increase the IOPS available for use for Premium and Standard SSD disks with on-demand or credit-based bursting models. Each model provides different capabilities to maximize the performance of your workloads when needed.
Private Link Support You can use Private Link to import or export managed disks to or from Azure. This enables organizations to securely transfer disk data over a completely private connection.
Key concepts
Now that you have an initial understanding of the Azure Managed Disks service, let’s spend some time going through all the different components and features in detail.
Disk roles
In Azure, disks play three primary roles:
Operating system (OS) disk An OS disk is created by default for every VM you create in Azure. This disk contains the OS running on the VM as well as the boot volume. The OS disk supports partitioning with a master boot record (MBR) and GUID partition table (GPT) depending on the OS requirement. By default, most operating systems use partitioning with MBR, which limits the OS disk capacity to 2 TB. However, you can increase this to 4 TB by converting the disk from MBR to GPT.
Temporary disk Microsoft provides a temporary disk as a non-persistent disk for specific VM models in Azure. When selecting the VM size in Azure, you can see the size of the temporary disk provided with that VM type. Any data you store on the temporary disk should be data that you are willing to lose, such as page files, swap files, or temporary logs. Each time a VM undergoes a forced restart, maintenance, or a redeployment, data on the temporary disk is erased. The VM can retain data stored on these disks only during standard reboot operations. Temporary disks are not encrypted by default, although you can enable encryption if needed. These disks are mapped as D: in Windows VMs and /dev/sdb in Linux-based VMs.
Data disk Data disks are optional, and you can use them based on your workload requirements—for example, separating database installation files from data and log files, which can be stored on their own or individual data disks. As mentioned, OS disks have a maximum capacity of 4 TB, so any data-storage requirements that exceed that would require you to use data disks. The maximum disk capacity for a single data disk is currently 32,767 gigabytes (GB) for Standard HDD, Standard SSD, and Premium SSD disks. However, Ultra disks can be scaled up to 65,536 GB. The number and type of data disks that you can use with a VM depends on the size and type of the VM. Be sure to consider this when selecting the size for your VM.
Disk types
Azure offers four types of disks:
Standard HDD disks
Standard SSD disks
Premium SSD disks
Ultra disks
Standard HDD disks
Standard HDD disks are suitable for workloads that are less critical and are not latency sensitive and for dev/test environments. These disks provide write latencies of less than 10 milliseconds (ms) and read latencies of less than 20 ms. Their performance varies depending on numerous factors, including IO size and workload pattern. Standard HDD disks are the least expensive (per gigabyte) disk option in Azure.
Standard SSD disks
Standard SSD disks are a great alternative for customers that want better performance, scalability, availability, and reliability than is possible with Standard HDD disks. Standard SSD disks are a great choice for low-intensity workloads that require consistent performance, such as web servers, low-usage business applications, and low IOPS applications. Standard SSD disks of 512 GB or more support credit-based bursting, making them ideal for applications that require a burst of performance only on rare occasions. All Azure VMs support Standard SSD disks.
Premium SSD disks
Premium SSD disks offer the second highest level of disk performance, with single-digit millisecond latencies, targeted IOPS, and defined throughput 99.9% of the time. They are suitable for high-intensity workloads, such as production applications and databases.
Premium SSD disks come in different sizes, and the level of IOPS support differs depending on the size of the Premium SSD disk. For example, P1 4 GB to P4 32 GB disks provide 120 IOPS, P10 128 GB disks provide 500 IOPS, while P80 32 TB disks provide 20,000 IOPS. Disk throughput and burst performance also increase as the capacity of the Premium SSD disks go up.
A few more features of Premium SSD disks are as follows:
Premium SSD disks support one-year reservations to help you save on costs. You can set reservations for disks 1 TB and larger.
Premium SSD disks support on-demand and credit-based bursting models. Bursting enables the Premium SSD to increase its performance in the short term to meet workload requirements.
Only specific Azure VM types support Premium SSD disks. When you select a VM type, Azure shows you which types of disks that VM type supports. Because Microsoft adds and removes VM SKUs on an ongoing basis, I have not listed the VM types here, because they may change by the time you read this.
Ultra disks
Ultra disks currently provide the highest level of performance in terms of IOPS and disk throughput, with sub-millisecond latency 99.99% of the time. This makes Ultra disks suitable for critical high-performance workloads such as SAP HANA, mission-critical databases, and transaction-heavy applications.
By default, each Ultra disk can be scaled up to 32 TB. However, you can contact Azure support to request an increase of up to 64 TB. In terms of IOPS, each Ultra disk supports a minimum of 300 IOPS per gibibyte (GiB) and currently maxes out at 160,000 IOPS per disk.
Ultra disks allow you to adjust IOPS and throughput performance during runtime. You are permitted four adjustments every 24 hours. Each adjustment can take up to one hour to take effect and requires sufficient performance bandwidth capacity to prevent failures.
At present, Ultra disks have numerous limitations. These include lack of support for the following:
Availability sets
Azure Dedicated Host
Disk snapshots
Azure Backup
Azure Site Recovery
Disk exports
VM image creation
In addition, Ultra disks cannot be used as OS disks. They can only be set up as data disks. For high-performance workloads that call for the use of an Ultra disk, you will want to set up the OS disk as a Premium SSD disk and leverage Ultra disks for all your workload data.
Managed disk creation walkthrough
The following sections step you through the process of creating a managed disk using the Azure portal, Azure PowerShell, and the Azure CLI.
Using Azure portal
To create a managed disk using the Azure portal, follow these steps:
Log in to the Azure portal, type disks in the search box, and select the Disks option in the list that appears. (See Figure 3-1.)

FIGURE 3-1 Searching for the Disks service in the Azure portal.
On the Disks page (see Figure 3-2), click Create.
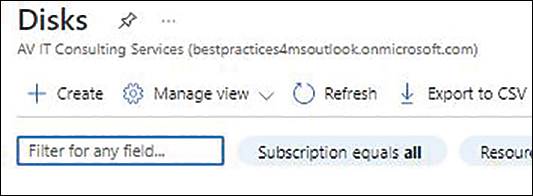
FIGURE 3-2 Creating a new disk.
In the Basics tab of the Create a Managed Disk wizard (see Figure 3-3), enter the following information:
Subscription Select the subscription in which you want to create the new managed disk.
Resource Group Select an existing resource group in which to create the new managed disk or create a new one.
Disk Name Enter a unique name for the managed disk.
Region Select the Azure region where you want to host the managed disk.
Availability Zone Select the availability zone you want to use or leave this option set to None (the default).
Source Type If the disk will be created from source data, such as a snapshot, storage blob, another disk, etc., select the source type.

FIGURE 3-3 The Basics tab of the Create a Managed Disk wizard.
To create a disk that is a different redundancy level, type, size, or performance tier from the default (1,024 GiB Premium SSD LRS), click the Change Size link in the Size section of the wizard’s Basics tab.
In the Select a Disk Size dialog box, open the Disk SKU drop-down list and choose a disk type/redundancy level pairing. (See Figure 3-4.)

FIGURE 3-4 Choose a disk type and redundancy level.
Click a size option in the list to select it. Alternatively, use the Custom Disk Size (GiB) and Performance Tier drop-down lists to choose a custom size/tier pairing. Then click OK. (See Figure 3-5.)
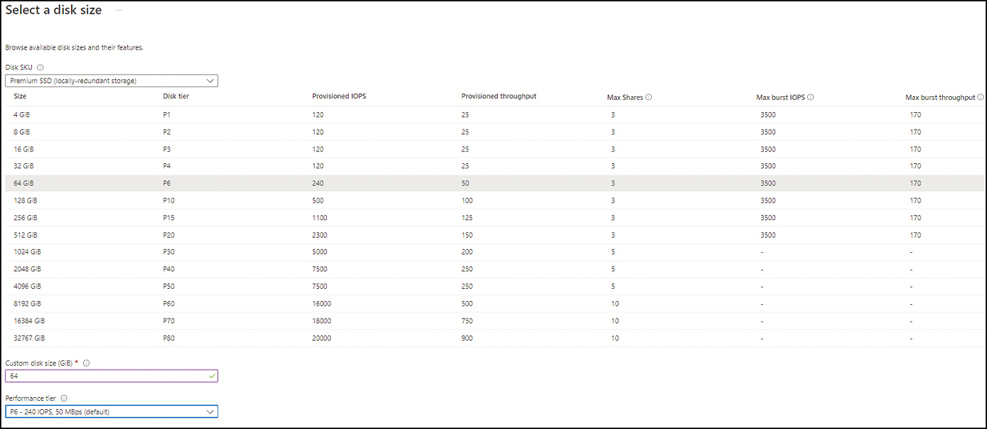
FIGURE 3-5 Selecting a different disk size and performance tier.
Back in the Basics tab of the Create a Managed Disk wizard, click Next.
In the Encryption tab of the Create a Managed Disk wizard (see Figure 3-6), open the Key Management drop-down list and choose Platform-Managed Key, Customer-Managed Key, or Platform-Managed and Customer-Managed Keys. Then click Next.
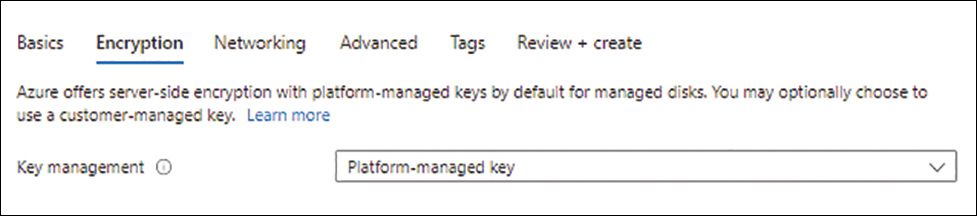
FIGURE 3-6 The Encryption tab of the Create a Managed Disk wizard.
In the Networking tab of the Create a Managed Disk wizard (see Figure 3-7), in the Network Access section, leave the Enable Public Access from All Networks option button selected and click Next.

FIGURE 3-7 The Networking tab of the Create a Managed Disk wizard.
In the Advanced tab of the Create a Managed Disk wizard (see Figure 3-8), enter the following information and click Next:
Enable Shared Disk If you want to use this managed disk as a shared disk, select the Yes Option button. Then use the Max Shares drop-down list to specify how many VMs will share the disk.

FIGURE 3-8 The Advanced tab of the Create a Managed Disk wizard.
On-Demand Bursting If you want this managed disk to be capable of on-demand bursting, select the Enable On-Demand Bursting check box.
Enable Data Access Authentication Mode Optionally, select this check box to enable data access authentication. When you enable data access authentication, you can limit who can download the disk to admins who are authorized using Azure AD and authenticated using an approved account.
In the Tags tab (see Figure 3-9), enter any tags you want to associate with the managed disk and click Next.

FIGURE 3-9 The Tags tab of the Create a Managed Disk wizard.
In the Review + Create tab (see Figure 3-10), review your settings, and click Create to create the managed disk.

FIGURE 3-10 The Review + Create tab of the Create a Managed Disk wizard.
After the managed disk is created, click Go to Resource to access its page. (See Figure 3-11.)

FIGURE 3-11 Managed disk deployment completion.
Using Azure Powershell
Use the following Azure PowerShell code to create a managed disk:
#Define variables
$resourceGroup = "RG01"
$location = "EastUS2"
$vm = "SourceVM"
$MgdDiskName = "ManagedDisk01"

#Create a disk config object – Change the disk redundancy as needed
$MgdDiskConfig = New-AzDiskConfig `
    -Location $location `
    -CreateOption Empty `
    -DiskSizeGB 64 `
    -EncryptionType EncryptionAtRestWithPlatformKey `
    -PublicNetworkAccess true `
    -Architecture X64 `
    -SkuName Standard_LRS/Premium_LRS/StandardSSD_LRS/UltraSSD_LRS/Premium_ZRS/
StandardSSD_ZRS

#Create Data Disk
$MgdDisk = New-AzDisk `
    -ResourceGroupName $resourceGroup `
    -DiskName $MgdDiskName `
    -Disk $mgddiskConfig

#Verify disk
Get-AzDisk `
    -ResourceGroupName $resourceGroup `
    -DiskName $MgdDiskName

#Optional - Attach disk to VM
$Azvm = Get-AzVM `
    -ResourceGroupName $resourceGroup `
    -Name $vm

$Azvm = Add-AzVMDataDisk `
    -VM $vm `
    -Name $MgdDiskName `
    -CreateOption Attach `
    -ManagedDiskId $MgdDisk.Id `
    -Lun 1

Update-AzVM `
    -ResourceGroupName $resourceGroup `
    -VM $Azvm
Using Azure CLI
Use the following code to create a managed disk in the Azure CLI:
#Define variables
resourceGroup="RG01"
location="EastUS2"
vm="SourceVM"
MgdDiskName="ManagedDisk01"

#Create managed disk – Change the disk redundancy as needed
az disk create
                       --resource-group $resourceGroup
                       --name $MgdDiskName
                       --size-gb 64
      --architecture x64
      --encryption-type EncryptionAtRestWithPlatformKey
      --location $location
      --public-network-access Enabled
      --sku Premium_LRS/PremiumV2_LRS/Premium_ZRS/StandardSSD_LRS/StandardSSD_ZRS/
Standard_LRS/UltraSSD_LRS

#Verify disk
mgddisk=$(az disk show
                       --name $MgdDiskName
                       --resource-group $resourceGroup)

#Optional - Attach disk to VM
az vm disk attach
                       --disks $mgddisk
      --name $MgdDiskName
      --resource-group $resourceGroup
                       --vm-name $vm
Private Link integration
Private Link provides secure connectivity to Azure PaaS services and Azure hosted services from your networks over a private endpoint. A private endpoint is a network interface connected to the Azure PaaS service or Azure hosted service, such as Managed Disks, that is attached to an Azure virtual network. With Private Link and private endpoints, you can safely and securely transfer managed disk files between regions using a private connection on the Microsoft backbone network instead of the public internet. You can also import VHD files from an on-premises environment directly to an empty managed disk in Azure over a private connection. Time-restricted Shared Access Signature (SAS) URLs can provide access to the unused managed disks and snapshots for transfer.
Private Link integration walkthrough
The following sections step you through the process of creating a private endpoint and integrating Private Link with the managed disk using the Azure portal and the Azure CLI.
Using Azure portal
To create a private endpoint and integrate Private Link with a managed disk using the Azure portal, follow these steps:
Log in to the Azure portal, type disk accesses in the search box, and select the Disk Access option from the list that appears. (See Figure 3-12.)

FIGURE 3-12 Searching for disk accesses in the Azure portal.
On the Disk Access page, click Create Disk Access. (See Figure 3-13.)
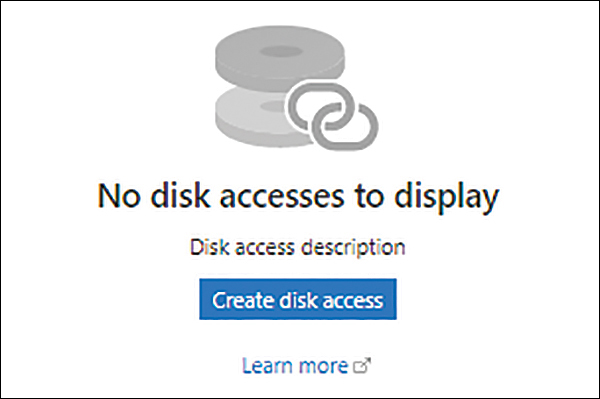
FIGURE 3-13 Create disk access.
In the Basics tab of the Create a Disk Access wizard (see Figure 3-14), enter the following information:
Subscription Select the subscription in which you want to create the disk access resource.
Resource Group Select an existing resource group in which to create the disk access resource or create a new one.
Name Enter a unique name for the disk access resource.
Region Select the Azure region where you want to host the disk access resource.

FIGURE 3-14 The Basics tab of the Create a Disk Access wizard.
Before you continue with the Create a Disk Access wizard, you need to create the private endpoint. You’ll do that next.
At the bottom of the Basics tab, click Add.
In the Create a Private Endpoint dialog box (see Figure 3-15), enter the following information and click OK:
Subscription Select the subscription you want to use to create the private endpoint.
Resource Group Select an existing resource group in which to create the private endpoint or create a new one.
Location Select the Azure region where you want to host the private endpoint.
Name Enter a unique name for the private endpoint.
Target Resource Select Disks.
Virtual Network Select the virtual network on which to create the private endpoint.
Subnet Select the subnet on which to create the private endpoint.
Integrate with Private DNS Zone Select Yes to integrate with a private DNS zone or select No if you plan to create a DNS record in your own DNS servers or on the host files of the workloads VMs. In this case, select Yes.
Private DNS Zone Select the private DNS zone with which you want to integrate the private endpoint. In this case, leave it set to the default, privatelink.blob.core.windows.net.

FIGURE 3-15 The Create Private Endpoint dialog box.
Click the Tags tab (see Figure 3-16), enter any tags you want to associate with the private endpoint, and click Next.

FIGURE 3-16 The Tags tab of the Create a Disk Access wizard.
In the Review + Create tab (see Figure 3-17), review your settings and click Create to create the private endpoint.

FIGURE 3-17 The Review + Create tab of the Create a Disk Access wizard.
After the private endpoint is created, click Go to Resource to access its page. (See Figure 3-18.)
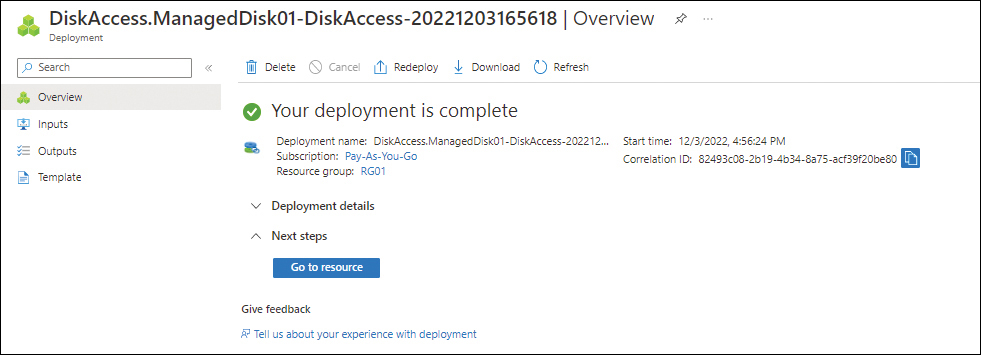
FIGURE 3-18 Private endpoint deployment completion.
In the left pane of the page for the managed disk you created earlier, under Settings, click Networking.
On the managed disk’s Networking page (see Figure 3-19), perform the following steps and click Save:
Network Access Select the Disable Public Access and Enable Private Access option button.
Disk Access Select the private endpoint you just created.

FIGURE 3-19 The managed disk’s Networking page.
Using Azure CLI
Use the following code to create a private endpoint and integrate Private Link with a managed disk in the Azure CLI:
#Define variables
resourceGroup="RG01"
location="EastUS2"
vm="SourceVM"
MgdDiskName="ManagedDisk01"
diskAccess="ManagedDisk01-DiskAccess"
vnet="VNET-01"
subnet="default"
privateEndPoint="ManagedDisk01-DiskAccess-PrivateEndpoint01"
#Create disk access
az disk-access create
                       --name $diskAccess
                       --resource-group $resourceGroup
                       --location $location

diskAccessId=$(az disk-access show
                       --name $diskAccess
                       --resource-group $resourceGroup
                       --query [id] -o tsv)

#Create private endpoint
az network private-endpoint create
    --resource-group $resourceGroup
    --name $privateEndPoint
    --vnet-name $vnet
    --subnet $subnet
    --private-connection-resource-id $diskAccessId
    --group-ids disks
    --connection-name $privateEndPoint

#Create Private DNS zone config
az network private-dns zone create
    --resource-group $resourceGroup
    --name "privatelink.blob.core.windows.net"

az network private-dns link vnet create
    --resource-group $resourceGroup
    --zone-name "privatelink.blob.core.windows.net"
    --name $privateEndPoint-DNSLink
    --virtual-network $vnet
    --registration-enabled false

az network private-endpoint dns-zone-group create
   --resource-group $resourceGroup
   --endpoint-name $privateEndPoint
   --name $privateEndPoint-ZoneGroup
   --private-dns-zone "privatelink.blob.core.windows.net"
   --zone-name disks

#Update managed disk with Private Link config
diskAccessId=$(az resource show
   --name $diskAccess
   --resource-group $resourceGroup
   --namespace Microsoft.Compute
   --resource-type diskAccesses
   --query [id] -o tsv)

az disk update
   --name $diskName
   --resource-group $resourceGroup
   --network-access-policy AllowPrivate
   --disk-access $diskAccessId
Encryption
Managed disks support two types of disk encryption:
Server-Side Encryption (SSE) SSE manages encryption on the storage layer and is handled by the Azure Storage service. It provides encryption-at-rest and during write operations to the underlying storage, thereby ensuring that disks stored in Azure are not readable in the event of data theft. SSE is enabled by default for all managed disks, snapshots, and images across all Azure regions. SSE supports two types of key management: Azure platform-managed keys or customer-managed keys. You can choose which type of key management you want to use for each managed disk you create.
Azure Disk Encryption (ADE) ADE refers to encryption within the system. It applies to the OS and data disks in an Azure IaaS VM. ADE encryption is performed using BitLocker technology in Windows and DM-Crypt technology in Linux. In both scenarios, the keys are integrated and stored in Azure Key Vault to make it easier for you to manage them.
Managed disk snapshots
Snapshots provide an easy way to back up a point-in-time copy of your managed disk for restore or cloning operations. Snapshots are read-only, crash-consistent copies of the disk. You can use them to create new managed disks without affecting the source managed disk in any way. Snapshots are, by default, stored as standard managed disks, but you can change this during the snapshot creation process.
The first time you take a snapshot of a managed disk, it will be a full snapshot. Subsequent snapshots, however, can be incremental. An incremental snapshot captures all changes to the managed disk since the last snapshot of the disk. This reduces your storage footprint. If you need to restore from a single incremental snapshot, Azure automatically identifies all the incremental and full snapshots preceding the current one to reconstruct the entire disk. This makes incremental snapshots extremely cost-effective, making them the preferred option for regular snapshot management.
Incremental snapshots can also be useful for disaster recovery between Azure regions—that is, you can identify changes between two snapshots of the same disk, and then transfer only the differential changes to the secondary region instead of the entire snapshot. Then, when you restore/rebuild in the secondary region, you can use the snapshot of the base blob of the managed disk in combination with these differential changes. (See Figure 3-20.) This strategy can reduce time, costs, and network requirements for disaster recovery for managed disks.

FIGURE 3-20 Incremental snapshots.
Incremental snapshots are a great feature, but they do have some limitations that exist at the time of this writing. By the time you read this, these limitations may have been addressed. Be sure to review Microsoft’s latest guidance before finalizing your snapshot management strategy. Some key limitations at present include the following:
Unlike full snapshots, incremental snapshots always use Standard HDD disks, regardless of the disk type used for the full snapshot.
A single managed disk supports a maximum of 500 incremental snapshots.
Each managed disk limits you to creating seven incremental snapshots, with a wait time of 5 minutes between each snapshot.
The managed disk and snapshots must all be part of the same subscription.
If you want to move a managed disk to another subscription, you will not be able to do so if the disk has incremental snapshots. You will need to keep this in mind when planning any such migrations.
Differentials do not work for disks larger than 4 TB.
Managed disk snapshots walkthrough
The following sections step you through the process of creating a snapshot of a managed disk using the Azure portal, Azure PowerShell, and the Azure CLI.
Using Azure portal
To create a managed disk snapshot using the Azure portal, follow these steps:
In the Overview page for the managed disk you created earlier, click Create Snapshot. (See Figure 3-21.)

FIGURE 3-21 The Overview page for ManagedDisk01.
In the Basics tab of the Create Snapshot wizard (see Figure 3-22), enter the following information and click Next:
Subscription Select the subscription in which you want to create the snapshot.
Resource Group Select an existing resource group in which to create the snapshot or create a new one.
Name Enter a unique name for the snapshot.
Snapshot Type Leave this set to the default value of Full.

FIGURE 3-22 The Basics tab of the Create Snapshot wizard.
Storage Type Select Standard HDD, Standard SSD, or Premium SSD, depending on your needs. (Remember, this is for the full snapshot; incremental snapshots always use Standard HDD disks.)
In the Encryption tab of the Create Snapshot wizard (see Figure 3-23), open the Key Management drop-down list and choose Platform-Managed Key, Customer-Managed Key, or Platform-Managed and Customer-Managed Keys. Then click Next.

FIGURE 3-23 The Encryption tab of the Create Snapshot wizard.
In the Networking tab of the Create Snapshot wizard (see Figure 3-24), in the Network Access section, select the Enable Public Access from All Networks option button.

FIGURE 3-24 The Networking tab of the Create Snapshot wizard.
The Advanced tab of the Create Snapshot wizard (see Figure 3-25) includes an Enable Data Access Authentication Mode check box. For this example, leave it unchecked. Then click Next.

FIGURE 3-25 The Advanced tab of the Create Snapshot wizard.
In the Tags tab (see Figure 3-26), enter any tags you want to associate with the snapshot and click Next.

FIGURE 3-26 The Tags tab of the Create Snapshot wizard.
In the Review + Create tab (see Figure 3-27), review your settings, and click Create to create the snapshot.

FIGURE 3-27 The Review + Create tab of the Create Snapshot wizard.
After the snapshot is created, click Go to Resource to access its page. (See Figure 3-28.)

FIGURE 3-28 Snapshot deployment completion.
The snapshot’s Overview page displays the properties of the snapshot, as well as Create Disk, Copy Snapshot, Delete, and Refresh options. (See Figure 3-29.)

FIGURE 3-29 The new disk snapshot’s Overview page.
Using Azure Powershell
Use the following Azure PowerShell code to create a disk snapshot:
#Define variables
$resourceGroup = "RG01"
$location = "EastUS2"
$vm = "SourceVM"
$snapshotName = "SourceVM-Snapshot-20230228"

#get the VM
$vminfo = Get-AzVM `
    -ResourceGroupName $resourceGroup `
    -Name $vm

#Create the snapshot configuration
$snapshotconfig =  New-AzSnapshotConfig `
    -SourceUri $vminfo.StorageProfile.OsDisk.ManagedDisk.Id `
    -Location $location `
    -CreateOption copy

#Take the snapshot.
New-AzSnapshot `
    -Snapshot $snapshotconfig `
    -SnapshotName $snapshotName `
    -ResourceGroupName $resourceGroup

#Verify snapshot
Get-AzSnapshot `
    -ResourceGroupName $resourceGroup
Using Azure CLI
Use the following code to create a disk snapshot in the Azure CLI:
#Define variables
resourceGroup="RG01"
location="EastUS2"
vm="SourceVM"
snapshotName="SourceVM-Snapshot-20230228"

#get the VM
DiskInfo=$(az vm show
   --resource-group $resourceGroup
   --name $vm
   --query "storageProfile.osDisk.managedDisk.id"
   -o tsv)

#Take the snapshot.
az snapshot create
   --resource-group $resourceGroup
                       --source "$DiskInfo"
                       --name $snapshotName

#Verify snapshot
az snapshot list
   --resource-group $resourceGroup
   -o table
Managed images
Managed images enable you to create hundreds of copies of customized VMs in Azure without having to create multiple copies of the underlying disks associated with each VM or manage any storage accounts to host them. You can easily create managed images out of managed disks; the resulting managed image will contain the configuration of the source VM, including all the managed disks associated with that source VM. This helps you to scale your VM resources using features like VMSS or Azure Virtual Desktop Session Host Pools, where capacity is added as load increases.
The primary difference between managed disks and managed images is that an image is built from a generalized VM and includes all the associated disks, whereas a snapshot is specific to a single disk and is a point-in-time copy of that disk. Generalizing a VM removes machine and user-specific information from the VM. So, for a VM that has multiple disks using disk spanning, a snapshot currently does not support a coordinated restore of all the disks and, therefore, might not be the right solution.
Managed images walkthrough
The following sections step you through the process of creating a managed image using the Azure portal, Azure PowerShell, and the Azure CLI.
Using Azure portal
To create a managed image using the Azure portal, follow these steps:
On the Overview page of the VM for which you want to create an image, click Capture. (See Figure 3-30.)

FIGURE 3-30 The Overview page for the VM.
In the Basics tab of the Create an Image wizard (see Figure 3-31), enter the following information and click Next:
Resource Group Select an existing resource group in which to create the new managed image or create a new one.
Share Image to Azure Compute Gallery For this walkthrough, select the No, Capture Only a Managed Image option button.
Automatically Delete this Virtual Machine After Creating the Image Leave this checkbox unchecked (the default).
Zone Resiliency Select this check box if you want to create a zone redundant image.
Name Enter a unique name for the managed image.

FIGURE 3-31 The Basics tab of the Create an Image wizard.
In the Tags tab (see Figure 3-32), enter any tags you want to associate with the managed image and click Next.

FIGURE 3-32 The Tags tab of the Create an Image wizard.
In the Review + Create tab (see Figure 3-33), review your settings, and click Create to create the managed image.
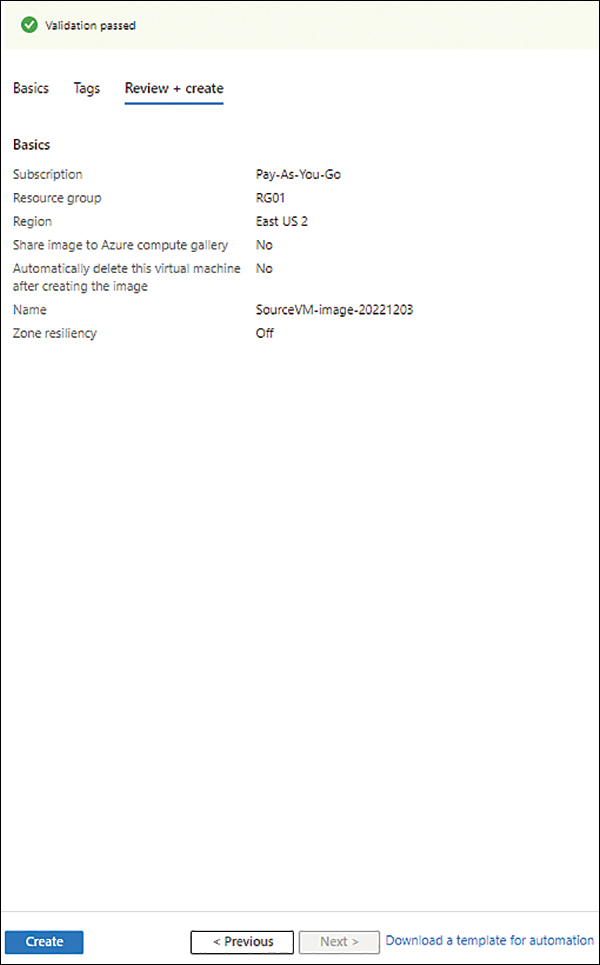
FIGURE 3-33 The Review + Create tab of the Create an Image wizard.
The source VM will be stopped automatically if you haven’t turned it off already. (See Figure 3-34.) Azure will then generalize the VM and create the image.

FIGURE 3-34 The VM is stopped (unless you stopped it already).
After the managed image is created, click Go to Resource to access its page. (See Figure 3-35.)

FIGURE 3-35 Managed image deployment completion.
The managed image’s Overview page displays the properties of the managed image as well as Create VM, Clone to a VM Image, Delete, and Refresh options. (See Figure 3-36.)

FIGURE 3-36 The new managed image’s Overview page.
Using Azure Powershell
Use the following Azure PowerShell code to create a managed image:
#Define variables
$vm = "SourceVM"
$resourcegroup = RG01
$location = "EastUS2"
$imageName = "SourceVM-Image-20221203"

#VM has been deallocated
Stop-AzVM -ResourceGroupName $resourcegroup -Name $vm -Force

#Set the status of the virtual machine to Generalized.
Set-AzVm -ResourceGroupName $resourcegroup -Name $vm -Generalized

#Create the image configuration.
$vminfo = Get-AzVM -Name $vm -ResourceGroupName $resourcegroup
$vmimage = New-AzImageConfig -Location $location -SourceVirtualMachineId $vminfo.Id

#Create the image.
New-AzImage -Image $vmimage -ImageName $imageName -ResourceGroupName $resourcegroup
Using Azure CLI
Use the following code to create a managed image in the Azure CLI:
#Define variables
vm="SourceVM"
resourcegroup=$RG01
location="EastUS2"
imageName="SourceVM-Image-20221203"

#VM has been deallocated
az vm deallocate
    --resource-group $resourcegroup
    --name $vm

#Set the status of the virtual machine to Generalized.
az vm generalize
    --resource-group $resourcegroup
    --name $vm

#Create the image.
az image create
    --resource-group $resourcegroup
--location $location
--zone-resilient false
 --name $imageName --source $vm
Performance tiering
When you create a managed disk, Azure automatically assigns a default performance target for that disk. This is based on predefined targets associated with the disk provisioned for the managed disk. This determines the IOPS and throughput available for that managed disk. This default performance target is not the maximum performance available for that managed disk, however. You can change the performance tier for a managed disk, without having to change the size of the disk. This can be beneficial in scenarios when you are running workloads that require high IOPS but do not require a lot of space for data storage.
You should use performance tiering in combination with disk bursting (discussed later in this chapter) to determine the ideal performance targets for your managed disks. If you observe your managed disks consistently requiring burst capacity to handle workload traffic, it is highly recommended that you compare any additional costs you are incurring to the costs of permanently changing the performance tier for that managed disk.
Using performance tiering does have some limitations. These include the following:
Performance tiering is supported only for Premium SSD managed disks.
Currently, P60 and higher performance tiers can be used only by 4 TB or larger disks.
Shared disks cannot use performance tiering.
On managed disks created before June 2020, the performance tier can only be changed to the baseline tier for the managed disk size.
Performance tiering walkthrough
The following sections step you through the process of updating the performance tier of an existing managed disk using the Azure portal, Azure PowerShell, and the Azure CLI.
Using Azure portal
To update the performance tier for an existing managed disk using the Azure portal, follow these steps:
Log in to the Azure portal, type disks in the search box, and select the Disks option in the list that appears. (See Figure 3-37.)
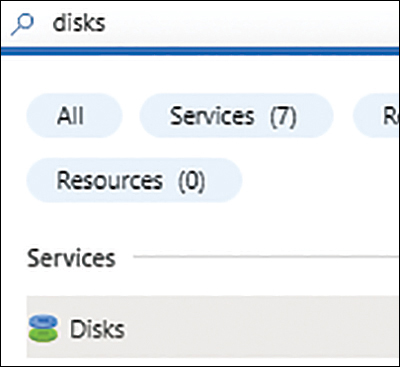
FIGURE 3-37 Searching for the Disks service in the Azure portal.
On the Disks page (see Figure 3-38), select the check box for the managed disk whose performance tier you want to update.

FIGURE 3-38 Select the managed disk whose performance tier you want to update.
In the left pane of the page for the managed disk you selected, under Settings, select Size + Performance.
On the managed disk’s Size + Performance page, click the Performance Tier drop-down list and choose P40 – 7500 IOPS, 250 Mbps option (see Figure 3-39). Then click Save.

FIGURE 3-39 Changing a managed disk’s performance tier.
The change will take place immediately, without downtime.
Using Azure Powershell
Use the following Azure PowerShell code to update the performance tier for an existing managed disk:
#Define variables
$resourceGroup = "RG01"
$location = "EastUS2"
$MgdDiskName = "ManagedDisk01"
$performanceTier='P40'
#Update disk performance tier
$newmgddiskconfig = New-AzDiskUpdateConfig -Tier $performanceTier
Update-AzDisk
                       -ResourceGroupName $resourceGroup
                       -DiskName $MgdDiskName
                       -DiskUpdate $newmgddiskconfig
Using Azure CLI
Use the following code to update the performance tier for an existing managed disk in the Azure CLI:
#Define variables
resourcegroup="RG01"
location="EastUS2"
vm="SourceVM"
mgddiskname="ManagedDisk01"
performancetier="P40"
#Update disk performance tier
az disk update
                       --name $mgddiskname
                       --resource-group $resourcegroup
                       --set tier=$performancetier
Disk redundancy
The Azure Managed Disks service supports two disk-redundancy options:
Locally-redundant storage (LRS) With LRS, three replicas of the managed disk is maintained in a single datacenter within your primary Azure region. This protects against local storage hardware, server rack, or network component failures. However, because all three replicas of the managed disk are stored in the same datacenter, if that datacenter experiences some type of disaster, all data stored on those managed disks could be lost. LRS disks have an SLA of at least 99.999999999% (11 nines) of durability over a given year.
Zone-redundant storage (ZRS) Like an LRS managed disk, a ZRS managed disk synchronously commits and maintains three replicas in your primary Azure region. However, instead of being in a single datacenter, the replicas are spread across three availability zones. An availability zone is an independent datacenter in your Azure primary region with its own power, cooling, and networking components. So, if a disaster occurs in one availability zone, replicas of your managed disk will still be accessible (unless the disaster also affects the other availability zones). You can also share ZRS managed disks between VMs for clustering databases or distributed applications, such as SQL Failover Clustering and Remote Desktop Services User Profile Disks. At present, only Standard SSD disks and Premium SSD disks support ZRS. ZRS disks have an SLA of at least 99.9999999999% (12 nines) of durability over a given year.
Although ZRS managed disks provide higher redundancy, their write latency is higher than LRS managed disks, because their write operations are performed across multiple availability zones rather than within the same datacenter. Apart from that, ZRS managed disks are identical to LRS managed disks.
You can set the disk redundancy option for a managed disk in two different ways:
Using the Create a Managed Disk wizard As described earlier in this chapter, you can set a managed disk’s redundancy level at the time of creation. To do so, you click the Change Size link the Size section of the wizard’s Basics tab. Then, in the Select a Disk Size dialog box, you use the Disk SKU drop-down list to choose a disk type/redundancy level pairing.
Using the Create Virtual Machine wizard You can set a managed disk’s redundancy level when you create a virtual machine that will use that disk. You do so in the wizard’s Disks tab by setting the OS Disk Type option. (See Figure 3-40.)
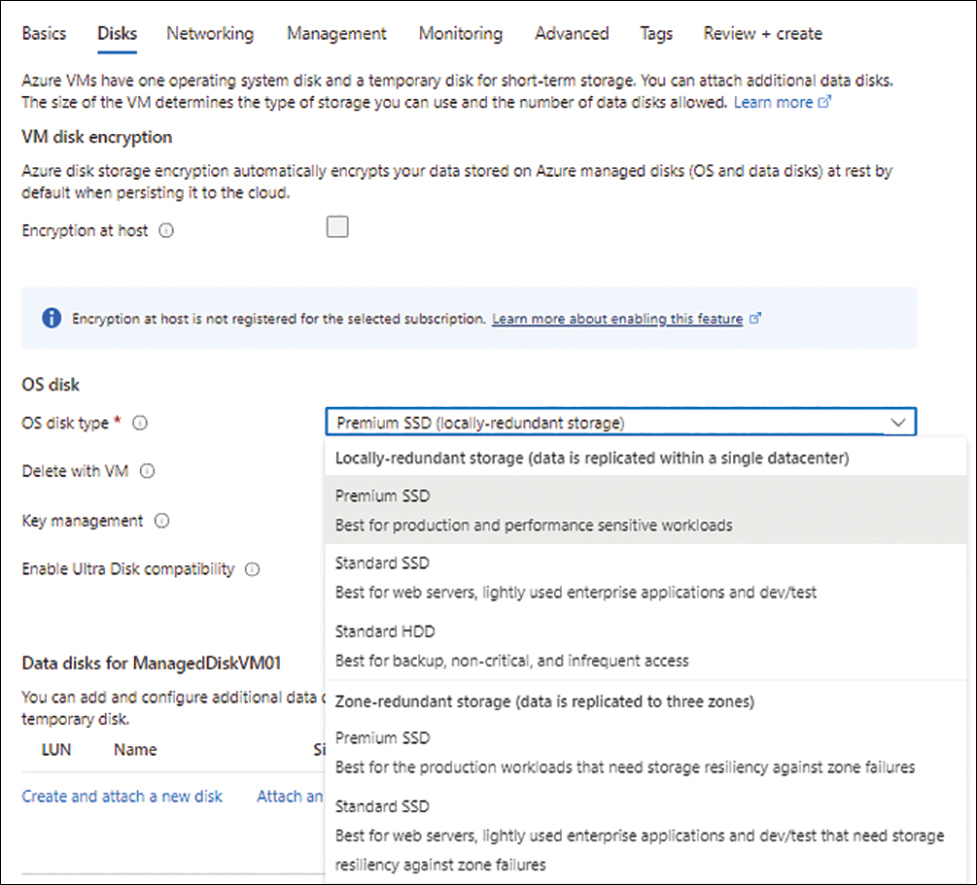
FIGURE 3-40 The Disks tab of the Create a Virtual Machine wizard.
Shared disks
You can use certain types of Azure managed disks as shared disks. These allow you to attach the same disk to multiple VMs simultaneously. In this way, you can deploy or migrate databases or applications that require clustering capabilities.
Clustered applications use SCSI Persistent Reservations (SCSI PR) to reserve the active node in the cluster. This node determines which VM will perform read and write operations to the shared disk. SCSI PR is an industry standard, and applications designed to run on storage area network (SAN) storage are built to this standard. This makes it possible to migrate clustered applications to Azure or to deploy them in Azure and migrate the required code or databases later.
As described earlier in this chapter, you can share a managed disk at the time of creation using the Create a Managed Disk wizard. (In the Advanced tab, click the Yes option button next to Enable Shared Disk. Then use the Max Shares drop-down list to specify how many VMs will share the disk.) You can also change an existing managed disk so it becomes a shared disk.
Shared disks have numerous limitations, including the following:
Only Ultra, Premium, and Standard SSD disks can be used as shared disks.
Shared disks do not support Azure Disk Encryption (ADE). They only support Server-Side encryption (SSE).
Azure Site Recovery is not supported to replicate shared disks. You must use Azure Disk Backup to build any redundancy plans.
Host caching isn’t available for Premium and Standard SSDs.
Both Windows and Linux support shared disks. In the case of Windows, Windows Server 2008 and above support shared disks. For Linux, shared disks are supported by a few different distributions:
SUSE SLE HA 15 SP1 and above
Ubuntu 18.04 and above
RHEL 8.3 and above
Oracle Enterprise Linux
Shared disks walkthrough
The following sections step you through the process of setting up an existing managed disk as a shared disk using the Azure portal, Azure PowerShell, and the Azure CLI.
Using Azure portal
To set up an existing managed disk as a shared disk using the Azure portal, follow these steps:
In the Overview page for the managed disk that you want to share, under Settings, click Configuration.
On the managed disk’s Configuration page (see Figure 3-41), enter the following information and click Save:
Enable Shared Disk Select the Yes option button.
Max Shares Use this drop-down list to specify the number of VMs that will share the disk (in this case, select 2).

FIGURE 3-41 Sharing an existing managed disk.
Using Azure Powershell
Use the following Azure PowerShell code to convert an existing managed disk to a shared disk:
#Converting an existing managed disk to shared
#Define variables
$region = "EastUS"
$resourcegroup = "RG01"
$diskname = "ManagedDisk01"
#Define Shared disk config
$shareddiskconfig = Get-AzDisk -DiskName $Diskname
$shareddiskconfig.maxShares = 2
#Update disk config to shared
Update-AzDisk -ResourceGroupName $ResourceGroup -DiskName $Diskname -Disk
$shareddiskconfig
Using Azure CLI
Use the following code to convert an existing managed disk to a shared disk in the Azure CLI:
#Converting an existing managed disk to shared
#Define variables
region="EastUS"
resourcegroup="RG01"
diskname="ManagedDisk01"
#Update disk config to shared
az disk update --name $diskname --max-shares 2 --resource-group $resourcegroup
Managed disk bursting
Premium and Standard SSDs managed disks support disk bursting. This important feature allows managed disks to handle additional IOPS and MB/s in bursts to boost their performance when faced with a sudden spike in resource requirements or a resource crunch. Disk bursting is great for tackling common problems like sudden unplanned traffic spikes on application and web servers, batch jobs that require additional capacity during processing, increased IOPS requirements at server startup, and simultaneous profile logins in virtual desktop infrastructure environments.
Azure offers two forms of disk bursting:
On-demand bursting Premium SSD managed disks that are 512 GB or larger can use on-demand bursting to boost their IOPS and MB/s performance when needed to meet workload requirements. Microsoft levies charges for additional consumption used at the end of every billing cycle. On-demand bursting is ideal for critical workloads for which an occasional spike in performance is anticipated.
Credit-based bursting By default, when a Standard or Premium SSD managed disk that is 512 GB or smaller consumes less IOPS and/or MB/s than its performance target, it accrues credits. The managed disk can then “spend” these credits on credit-based bursting to boost its IOPS and MB/s performance to meet higher workload requirements as needed, at no extra charge. Once the credits are consumed, the managed disk will be limited to the performance target defined for it.
Managed disk backup
Azure Backup provides a simple and cost-effective cloud-native backup solution for regular backups of managed disks. It provides snapshot lifecycle management of managed disks by performing incremental snapshots—as often as multiple times a day—which are retained for the period defined in the backup policy. It is an agent-less backup solution that does not interact with or affect the application performance.
You can use managed disk backup in conjunction with the once-a-day application-consistent VM-level backups via Azure Backup for a comprehensive backup solution. You can back up disks whether they are connected and actively in use by a VM or unattached to any workload. Because no backup agents, custom scripts, or service accounts are required to carry out these backups, they are considered to be highly secure.
Backup walkthrough
The following sections step you through the process of creating a backup of a managed disk using the Azure portal.
Using Azure portal
To create a backup of a managed disk using the Azure portal, follow these steps:
Log into the Azure portal, type backup center in the search box, and select Backup Center from the list that appears. (See Figure 3-42.)

FIGURE 3-42 Searching for the Backup Center in the Azure portal.
On the Backup Center’s Overview page (see Figure 3-43), click Backup.

FIGURE 3-43 The Backup Center’s Overview page.
In the Basics tab of the Configure Backup wizard (see Figure 3-44), enter the following information:
Datasource Type Select Azure Disks.
Vault You can select an existing backup vault or create a new one. In this example, click Create Vault to create a new one.

FIGURE 3-44 The Basics tab of the Configure Backup wizard.
In the Basics tab of the Create Backup Vault wizard (see Figure 3-45), enter the following information and click Next:
Subscription Select the subscription in which you want to host the vault.
Resource Group Select the resource group you want to use to host the vault. Alternatively, to create a new resource group, click the Create New link and follow the prompts.
Backup Vault Name Enter a unique name for the vault. If the name you type is already in use, the wizard will prompt you to select another name.
Region Select the Azure region in which you want to host the vault.
Backup Storage Redundancy Select the redundancy level for the backup storage.

FIGURE 3-45 The Basics tab of the Create Backup Vault wizard.
In the Vault Properties tab (see Figure 3-46), enter the following information and click Next:
Enable Soft Delete Select this check box if you want to enable the soft delete feature (recommended).
Retention Period Specify how many days data should be retained before it is permanently deleted.

FIGURE 3-46 The Vault Properties tab of the Create Backup Vault wizard.
In the Tags tab (see Figure 3-47), enter any tags you want to associate with the backup vault and click Next.

FIGURE 3-47 The Tags tab of the Create Backup Vault wizard.
In the Review + Create tab (see Figure 3-48), review your settings and click Create.
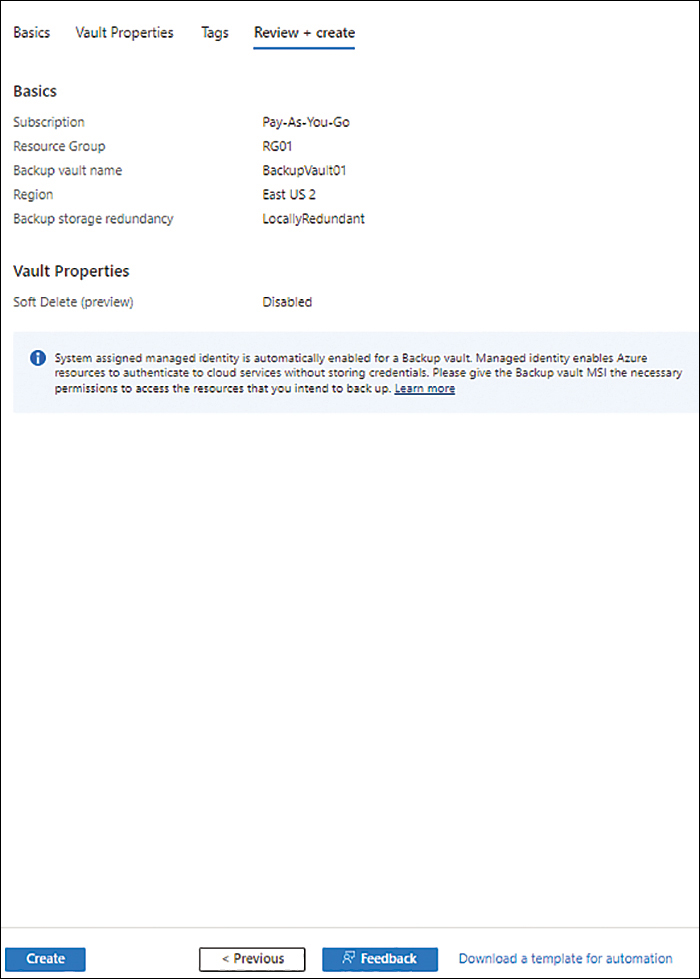
FIGURE 3-48 The Review + Create tab of the Create Backup Vault wizard.
Back in the Basics tab of the Configure Backup wizard, click Next.
In the Backup Policy tab (see Figure 3-49), you can select an existing backup policy or create a new one. In this example, click Create New to create a new one.

FIGURE 3-49 The Backup Policy tab of the Configure Backup wizard.
In the Basics tab of the Create a Backup Policy wizard (see Figure 3-50), in the Policy Name box, enter a unique name for the policy. Then click Next.
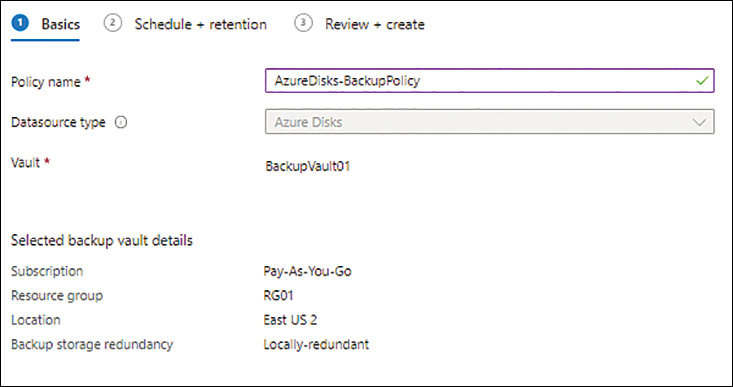
FIGURE 3-50 The Basics tab of the Create a Backup Policy wizard.
In the Schedule + Retention tab (see Figure 3-51), choose the Hourly or Daily option button next to Backup Frequency and choose the desired option from the Time drop-down list.
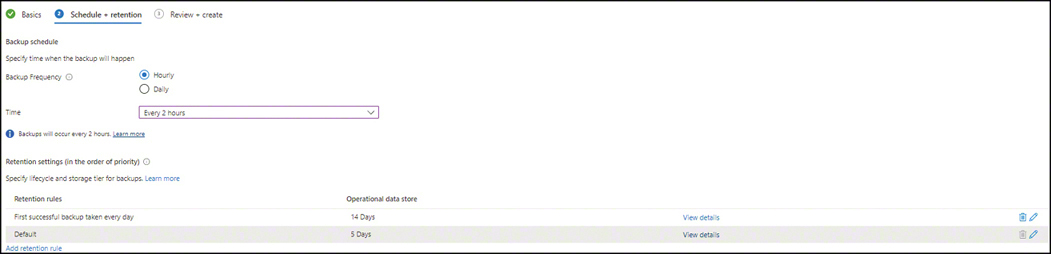
FIGURE 3-51 The Schedule + Retention tab of the Create a Backup Policy wizard.
Click the Add Retention Rule link (see Figure 3-52), set up a custom backup retention policy based on your retention requirements, and click Next.

FIGURE 3-52 Retention settings.
In the Review + Create tab (see Figure 3-53), review your settings and click Create.

FIGURE 3-53 The Review + Create tab of the Create a Backup Policy wizard.
Back in the Basics tab of the Configure Backup wizard, click Next.
Back in the Backup Policy tab of the Configure Backup wizard (see Figure 3-54), click Next.
In the Datasources tab (see Figure 3-55), click Add.

FIGURE 3-54 The Backup Policy tab of the Configure Backup wizard with the new backup policy selected.
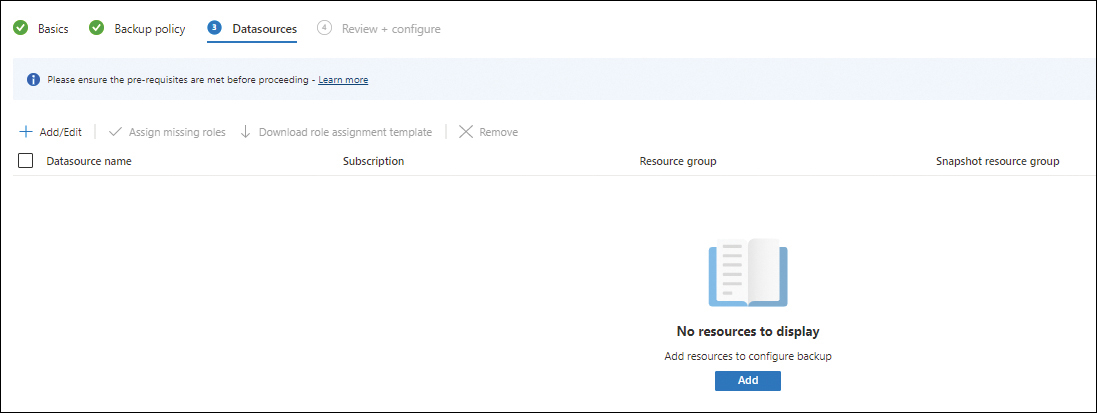
FIGURE 3-55 The Datasources tab of the Configure Backup wizard.
On the Select Resources to Backup page (see Figure 3-56), select the managed disks you want to back up and click OK.

FIGURE 3-56 Select the managed disks you want to back up.
Back in the Datasources tab of the Configure Backup wizard (see Figure 3-57), open the Snapshot Resource Group drop-down list and select the resource group where the managed disk’s snapshots are stored. Then click Validate.
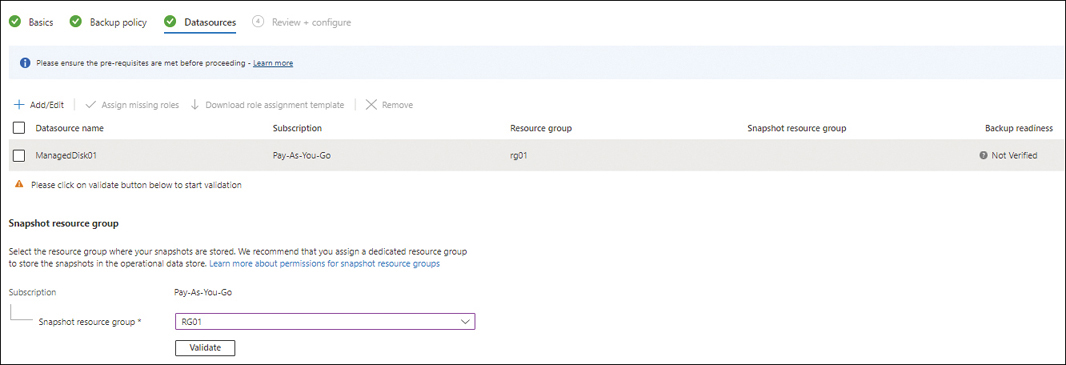
FIGURE 3-57 The updated Datasources tab of the Configure Backup wizard.
For the sake of example, let’s step through what happens if the validation fails.
If the validation fails, click the View Details link on the right-most side of the managed disk’s entry in the list of data sources. (See Figure 3-58.)
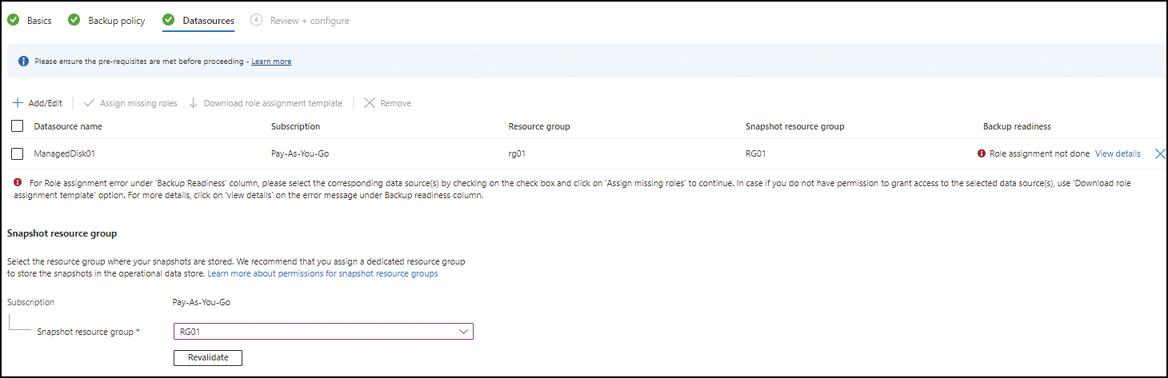
FIGURE 3-58 Viewing details about the data source.
As shown in Figure 3-58, the reason for the failure is a role assignment error. To fix this, you must assign the correct role.
Select the check box next to the entry for the managed disk. Then click Assign Missing Roles. (See Figure 3-59.)
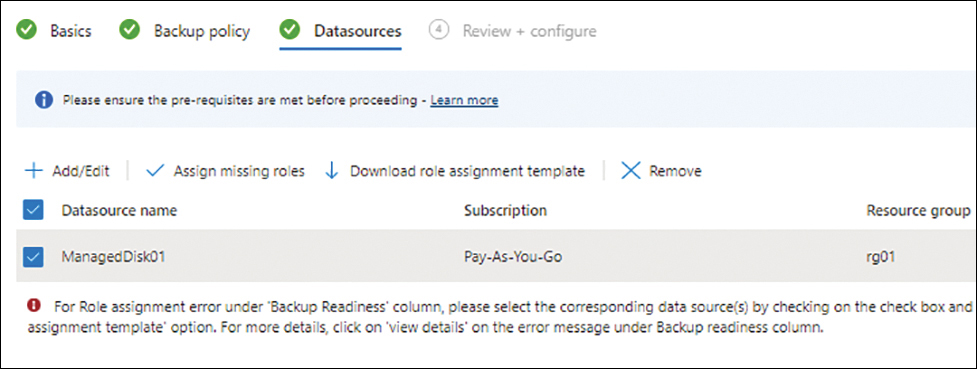
FIGURE 3-59 Correcting failures in the Datasources tab.
In the Grant Missing Permissions dialog box (see Figure 3-60), open the Scope drop-down list and select a scope for the role assignment—Resource, Resource Group, or Subscription. Then click Confirm.
Click the Validate button under Snapshot Resource Group a second time.
Assuming the validation is successful (see Figure 3-61), click Next.

FIGURE 3-60 The Grant Missing Permissions dialog box.

FIGURE 3-61 The corrected failure in the Datasources tab.
In the Review + Configure tab (see Figure 3-62), review your settings and click Configure Backup to configure the backup.

FIGURE 3-62 The Review + Configure tab of the Configure Backup wizard.
After the backup is configured, click Go to Resource. (See Figure 3-63.)

FIGURE 3-63 Backup configuration completion.
Backup instances are listed in the Backup Instances page of the Backup Center. (See Figure 3-64.) You can wait for your backup instance to trigger automatically based on the backup policy you created. Alternatively, you can trigger the backup manually. We’ll do that next.
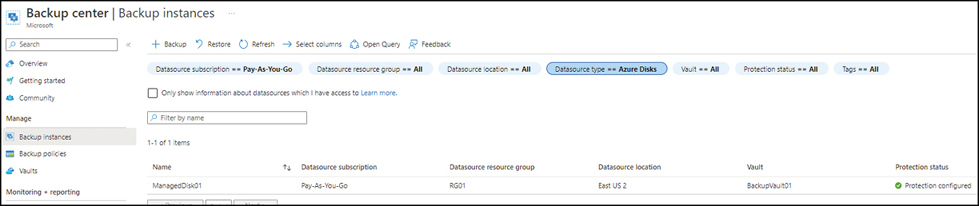
FIGURE 3-64 The backup is located in the Backup Instances page of the Backup Center.
Click the entry for the backup instance.
On the page for the backup instance (see Figure 3-65), click Backup Now.

FIGURE 3-65 Click Backup Now.
On the Backup Now page (see Figure 3-66), select the retention policy you want to use for the backup job. Then click Backup Now.

FIGURE 3-66 The Backup Now page.
Back on the page for the backup instance, you will see the on-demand backup job you just triggered is in progress. (See Figure 3-67.) Click the In Progress link.

FIGURE 3-67 The on-demand backup job is in progress.
The Backup Jobs page shows more details on the status of the backup job. (See Figure 3-68.)

FIGURE 3-68 More details on the status of the backup job.
Best practices
Following are some general best practices for setting up and managing managed disks:
Encrypt OS and data disks You should encrypt OS and data disks using Azure Disk Encryption to ensure the data is encrypted at rest. This way, the contents of the encrypted disks will be completely unreadable without access to the encryption keys. This will protect your disks from unauthorized access—for example, if a bad actor copies them from Azure.
Disable public access to managed disks Limit access to managed disks to private networks over the private endpoint. You should disable public access as soon as possible unless you need it for some specific scenario. In such cases, limit access only to disks that require this capability, and monitor this access to detect brute-force attacks used to access the storage.
Perform regular backups for all production disks Set regular backups for all production persistent disks, taking into account recovery, data loss, and redundancy requirements for your applications hosted on the managed disks.
Regularly monitor disk performance Monitoring disk performance will provide you with a better understanding of potential bottlenecks before applications are affected. You can then resize or increase disk IOPS or reallocate disk data to reduce IOPS requirements.
Restrict access to custom managed images Managed images contain the base image, including custom configurations and settings. This information can help an attacker analyze and plan their attack. You should restrict access to managed images to authorized personnel only. Do not share managed images with anyone else unless you have a good reason to. Review and ensure that access is in line with your security guidelines.