
One of the biggest challenges for AV administrators is ensuring that every Windows PC or server on your network has anti-malware solution installed and running. For whatever reason, it's inevitable that someone will stick an unprotected PC on your network. Finding those PCs and remediating the issue quickly is vital.
The built-in SCEP reports will do a good job of maintaining awareness for the collections to which SCEP has been deployed; but unless you've elected to deploy SCEP to the All Systems collection, maintaining awareness for your SCCM environment as a whole is another matter. This recipe will first show you how to create a collection with a query that lists all of the PCs that have SCEP installed, and then show you how to build a second collection that shows you the PCs that are not in the first collection. This will tell you which systems do not have SCEP installed; this is sometimes referred to as creating a "does not" collection. As complicated as this might sound, it will make sense by the end.
If you have elected to deploy SCEP to your built-in All Systems collection, this recipe might not be necessary for you. Even so, if you're new to SCCM, creating a "does not" collection will be an important skill to have.
In order to complete this recipe, you'll need to utilize an account that has the SCCM full administrator's role assigned to it.
Follow these steps:
- Log into your SCCM CAS server and launch your SCCM 2012 management console.
- Navigate to
Assets and Compliance|Overview|Device Collections. - In the upper left-hand side of the interface, click on the Create Device Collection button.
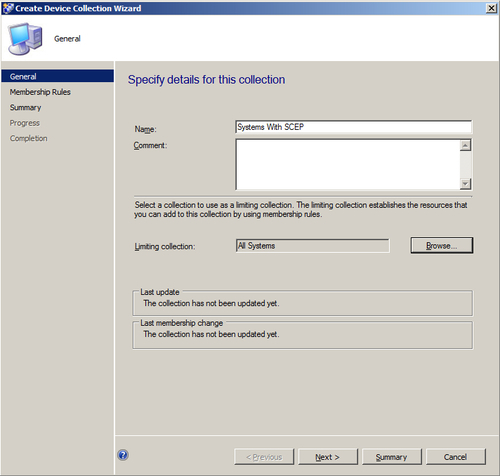
- Give the new collection a descriptive name. It's always a good idea to add some comments that may help you recall at a later date the purpose for which this collection was created (this will also gain you favor with your co-workers).
- In the Limiting collection field, click on the Browse... button and select the All Systems collection. Click on Next to proceed, as shown in the following screenshot:
- On the Membership Rules page, click on the Add Rule button and select Query Rule from the options. The Query Rules Properties window should appear.
- Start by giving the rule a name and then click on Edit Query Statement. The Query Statement Properties window should appear.
- Switch to the Criteria tab and click on the button labeled with a yellow starburst, the Criterion Properties window should appear.
- Click on the Select button under the Where field to bring up the Select Attribute window. Refer to the following screenshot:
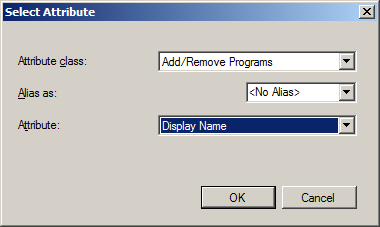
- Click on the drop-down menu next to Attribute Class and select Add/Remove Programs from the list.
- Click on the drop-down menu next to the Attribute field and select Display Name from the list. Click on OK to close the window, as shown in the following screenshot:
- You should be returned to the Criterion Properties window. In the Value field, enter
System Center 2012 Endpoint Protectionand click on OK. Refer to the following screenshot: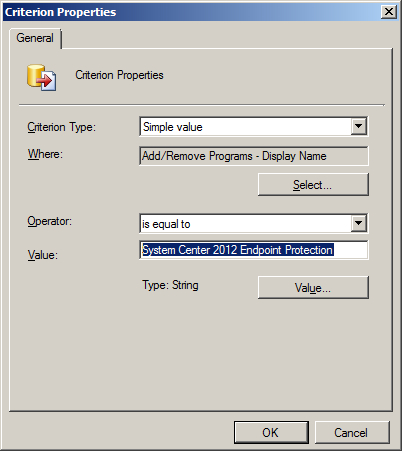
- You should be returned to the Query Statement Properties window, where there should now be an entry in the list of criteria. We now have to repeat the process for 64 bit systems. Click on the button marked with a starburst again.
- Click on the Select button under the Where field and the Select Attribute window should appear.
- Click on the drop-down button next to Attribute class and select Add/Remove Programs (64). Click on the drop-down button next to the Attribute field and select Display Name. Click on OK to close the window.
- You should now be looking at the Criterion Properties window. In the Value field, enter
System Center 2012 Endpoint Protectionand click on OK to close the window. Refer to the following screenshot: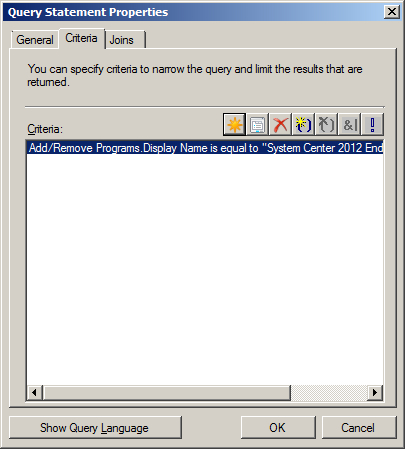
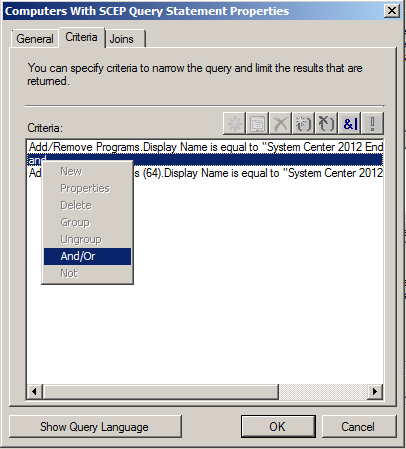
- This should take you back to the Query Rule Properties window. There should now be two entries in the Criteria field. SCCM will default to putting an And value between them, you must change this to an Or value for this procedure to work correctly. To do this, right-click on the word And, select And/Or from the short cut menu. This should change And to an Or. Click on OK to close the window, as shown in the following screenshot:
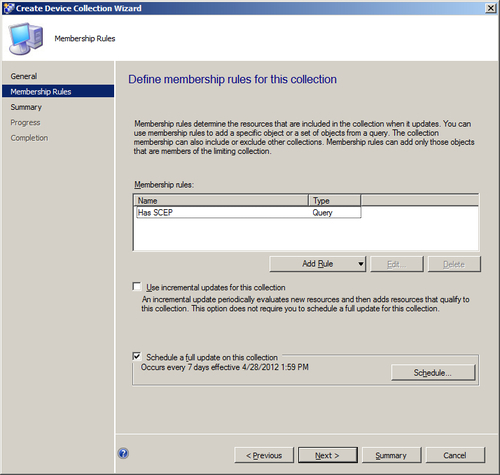
- At this point, you should be looking at the Create Device Collection Wizard again. If all changes are applied correctly, you should now have a single item under Membership rules, as shown in the following screenshot:
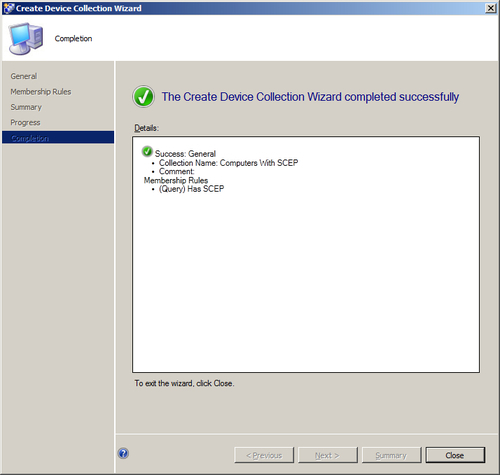
- Click on Next twice to proceed through the Summary and Progress windows. If all updates were successful, you should be presented with a big green checkmark on the Completion screen (you just have to love big green checkmarks!). Refer to the following screenshot:
- Under Devices in the Assets and Compliance window, you should see the newly created collection. In the first few minutes after you created the collection, it may be empty as it is waiting for the membership rule to process. Eventually, it will be populated with a complete list of all the systems that have SCEP installed.
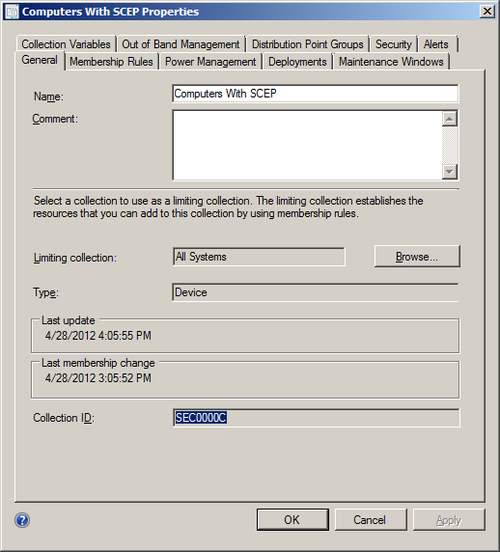
- Next, we will be creating a collection to find the systems that do not have SCEP installed. To do this, the first thing we need to know is the Collection ID of the collection we just created. To find the Collection ID, simply right-click on the Computers With SCEP collection. The Collection ID can be found at the bottom of the General tab. Record this value in a text file. Refer to the following screenshot:
- Navigate to
Assets and Compliance|Overview|Device Collectionsand click on the Create Device Collection button. - You should again be looking at the Create Device Collection wizard. Give the collection a name and add some meaningful comments.
- Next to the Limiting Collections field, click on Browse and select the All Systems Collection. Click on Next to proceed.
- Click Add Rule and select Query Rule. The Query Rule Properties window should pop up. Give the new rule a name, and then click Edit Query Statement.
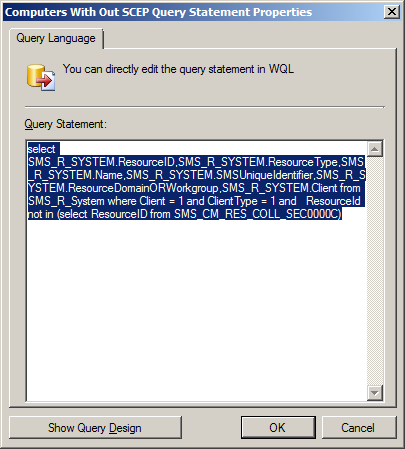
- The Query Statement Properties window should appear. Click on the Show Query Language button. In the Query Statement field, first remove the existing text and then paste or type in the following text. You will need to change the value XXXXXXXX to the Collection ID which you found in step 21.
SELECT SMS_R_System.ResourceID, SMS_R_System.ResourceType,
SMS_R_System.Name, SMS_R_System.SMSUniqueIdentifier, SMS_R_System.ResourceDomainORWorkgroup, SMS_R_System.Client
FROM SMS_R_System
WHERE Client = 1
AND ClientType = 1
AND ResourceId NOT IN (SELECT ResourceID FROM SMS_CM_RES_COLL_XXXXXXXX)
- Click on OK and continue to do so until you are returned to the Create Device Collection Wizard.
- Click on Next on the Summary and Progress pages and Close on the Completion page.
- You will again need to wait a few minutes for the collection membership to process.
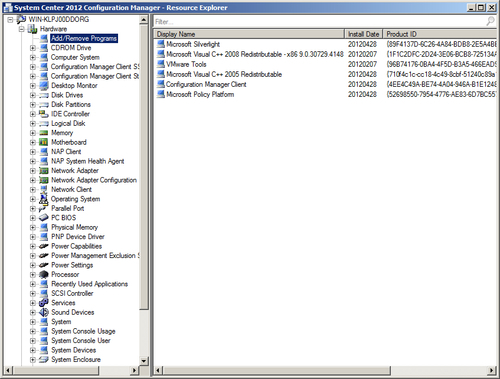
- Once the member of the Does Not Have SCEP Collection has been updated, you can spot-check your work by right-clicking on any members of the collection and left-clicking on Start/Resource Explorer. Then, expand the Hardware object and select Add/Remove Programs or Add Remove Programs (64), depending on the OS. System Center 2012 Endpoint Protection should not appear in the list. Refer to the following screenshot:
If this was your first foray into WQL and query-based collections, then congratulations, the headache you are feeling right now will subside. Just remember, the more time you spend playing with collection queries, the more you will discover its almost unlimited usefulness.
One important thing to remember, when you are trying to remediate missing SCEP clients, is that because we've tied the membership of the "does not have" SCEP collection to the "does have" SCEP collection; you will first need to manually update the collection membership of the "does have" SCEP collection to see any change in the "does not have" SCEP collection. For this reason it might be a good idea to make the "does not have" collection a sub-collection of the "does have" collection. That way when you right-click on the first collection, you can simply check the box in the dialog message to have it also update all sub-collections at the same time.
In addition, it's worth noting that Hardware Inventory is the basis for whether or not SCCM thinks that a given application is installed on a system. By default, Hardware Inventory only runs once a week, so the information that SCCM has on installed applications could be dated. It is possible to adjust the frequency of hardware inventories in client settings.