This chapter explains how to load and draw bitmaps using the pygame.Surface and pygame.image classes. We have already been using this class a bit and just taking it for granted up until now out of necessity. When the Pygame window is created with the call to pygame.display.set_mode(), a Surface object is returned, which we have called screen up to this point. Now we will learn more about this elusive Surface class and what its capabilities are between now and the following chapter, and really in every chapter from now on. Admittedly, we’ve done some interesting work with vector (line-based) graphics up to this point, but now it’s time to study bitmaps, which is where you want to go for a good-looking game.
In this chapter we learn:
How to load a bitmap
How to draw a bitmap
How to make a ship orbit a planet
How to point an image in the right direction
The Orbiting Spaceship Demo shows how to use some of the math functions in Python to cause a spaceship to rotate around a planet, like the NASA Space Shuttle and ISS (International Space Station) orbits the Earth. The calculations are not actual acceleration-versus-gravity in nature, but just rotation of a point around a center point based on radius, but the end result looks the same and is good enough for a game. See Figure 6.1.
In Pygame, a bitmap is called a Surface. The “screen” object that we have been using until now with very little explanation is itself a Surface object (returned by the pygame.display.set_mode() function). Rather than demonstrate bitmap programming with several examples, we’ll just get started on The Orbiting Spaceship Demo from the start and add to it as we go along.
First, let’s learn how to load a bitmap, starting with the background image for the chapter demo. Pygame can handle quite a few bitmap file types via the pygame.image.load() function:
Our orbiting spaceship demo must have a background image of space, but I suppose just a black background would work too. Or, how about drawing random dots all over the background? You could do that with pygame.gfxdraw.pixel()! The pygame.gfxdraw module is based on the SDL drawing functions, which offer a few more shapes than pygame.draw has. Now let’s just load a bitmap:
space = pygame.image.load("space.png").convert()
The trailing convert() function converts the image into the native color depth of the program window as an optimization. This really is required without exception. If you don’t convert an image at load time, then it will be converted every time you draw it!
There’s another variation of the function called convert_alpha() that you will want to use when loading foreground objects that have to be drawn with transparency. A TGA or PNG file can have alpha channel transparency in it, but some formats don’t support it (like the older BMP format). If you just want to use convert_alpha() every time, even with images without transparency, there’s no harm in doing that and it would be a bit more consistent.
Drawing a bitmap is done with the Surface object, usually called screen, but it could be another Surface in memory, like a back buffer. We haven’t covered double buffered drawing yet, but first things first, we’re just now learning to draw a bitmap for the first time! To draw, use the Surface object. The Surface class has a function called blit() that draws a bitmap. The function name is short for “bit block transfer”, a method of drawing by copying a chunk of memory from one location to another: from system memory to video memory, in this case. To draw the space bitmap starting at the upper-left corner:
screen.blit(space, (0,0))
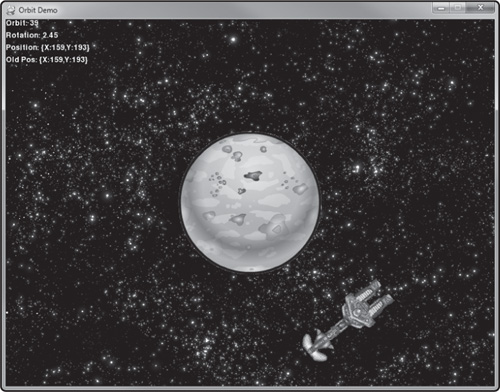
This is assuming the screen (i.e., window) has been initialized to a size that is large enough to hold the bitmap. I have used a size of 800,600. Here’s our demo at this point (see Figure 6.2).
import random, math, pygame
from pygame.locals import *

#main program begins
pygame.init()
screen = pygame.display.set_mode((800,600))
pygame.display.set_caption("Orbit Demo")

#load bitmaps
space = pygame.image.load("space.png").convert()

#repeating loop
while True:
    for event in pygame.event.get():
        if event.type == QUIT:
            sys.exit()
    keys = pygame.key.get_pressed()
    if keys[K_ESCAPE]:
        sys.exit()

    #draw background
    screen.blit(space, (0,0))

    pygame.display.update()
Note
The online reference manual for Pygame covers the Surface class in detail at this location: http://pygame.org/docs/ref/surface.html#pygame.Surface. I recommend keeping your web browser pointed here while learning bitmap programming as there will be some features here that you may find interesting but that are not covered in this chapter.
Now we’ll load and draw the planet image. Note that the artwork for these examples is found in the resource files for this and every chapter—a fact that is important now that we’re relying on asset files that have to be loaded for our examples to work properly. First, let’s load the planet before the while loop:
planet = pygame.image.load("planet2.png").convert_alpha()
Now, to draw the planet in this demo, we want to make it centered in the game window. Since the image dimensions could change (by someone editing the bitmap file), we would prefer to get the image dimensions in order to center it with code. This is better than “hard coding” the size of the bitmap. First, get the width and height of the bitmap using Surface.get_size(). Optionally, the width and height can be retrieved separately with Surface.get_width() and Surface.get_height(), respectively.
    width,height = planet.get_size()
    screen.blit(planet, (400-width/2,300-height/2))
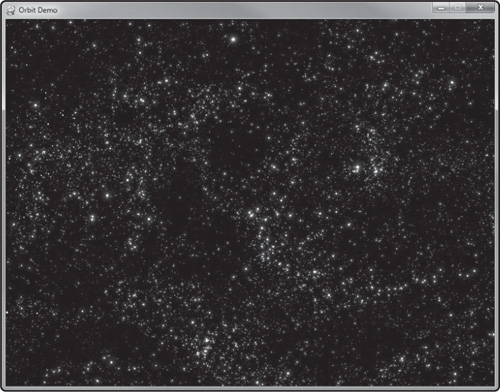
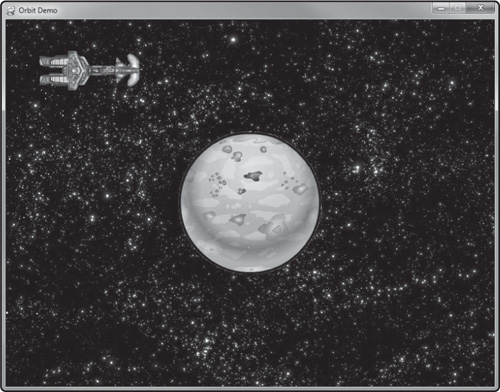
In the code here, I have hard-coded the screen center but not the image. The screen’s dimensions could change, but most likely this is something I’ve decided upon before working on the game. But, it is easy enough to get the center of the screen as well because it is also a Surface object. Figure 6.3 shows the planet.
There are two spaceship bitmaps included with this chapter if you would like to use them for your own sci-fi themed games. The ships are quite nice looking, drawn by artist Ronald Conley for a game called Starflight—The Lost Colony. This game is free to download and play at www.starflightgame.com. The artwork is copyrighted but may be shared for non-commercial use. If you want to borrow any of the artwork from Starflight (or any other source!) for your own games, please give credit to the artist and source website to avoid legal problems. This is completely illegal with a commercial game, of course! Let’s load the ship bitmap:
ship = pygame.image.load("freelance.png").convert_alpha()
The next line draws it, and the output is shown in Figure 6.4. Uh oh, the ship image is gigantic!

screen.blit(ship, (50,50))
We could edit the bitmap with a graphic editor like Microsoft Paint, Paint.net, Gimp, or another similar tool. But, let’s see if we can just shrink down the ship image with code instead. In order to do this, we have to sort of cheat. Surface has no means to change the scale of an image, so we have to shrink the spaceship by some other means. There is a class called pygame.sprite.Sprite that excels at drawing and manipulating images for use in a game, but that’s a bit premature at this stage.
Digging around in the Pygame docs (http://pygame.org/docs/ref/index.html), it turns out there is a module called pygame.transform that will meet our needs. This module has a bunch of helpful functions for working with images in creative ways, like scaling, flipping, and other things. First, let’s look at pygame.transform.scale()—a fast scaling function that produces a quick scaled image but the pixels will look kind of chunky. Let’s try it. This function is added right after the image is loaded. If you call this function inside the while loop it will just keep scaling the same image over and over until it’s too tiny to see or too large to fit on the screen!
ship = pygame.image.load("freelance.png").convert_alpha()
width,height = ship.get_size()
ship = pygame.transform.scale(ship, (width//2, height//2))
Do you remember what the double division sign does in Python? It still does division, but it performs integer division rather than floating-point division. The result of this code is shown in Figure 6.5. It works! But, admittedly, the image is not very good.
So, let’s try a better scaling function. There is a variation called pygame.transform.smoothscale(). This function takes more time to change the scale of the image because it over-samples the pixels and smoothes them out using one of two algorithms. For shrinking an image, like what we want to do, the pixels are averaged. For enlarging an image, a bilinear filter is used (a sort of blocky anti-aliasing technique). See Figure 6.6. The difference should be pretty clear even on the printed page, but if you want to really see clearly how the smooth version improves the appearance of the image, you’ll need to open up the source code and run the program, changing the function call to see the difference.
ship = pygame.transform.smoothscale(ship, (width//2,height//2))
We have learned how to do basic bitmap drawing now, so we can use this new knowledge to make our demo. As you may recall from Chapter 5, “Math and Graphics: The Analog Clock Demo,” the trigonometry functions sine and cosine are used to draw circles and calculate trajectories. There’s a third function we haven’t used yet, tangent, that is useful in a similar but tangential way: pointing things in a certain direction. So, here’s what we want to do: make the spaceship orbit around the planet with sine and cosine, and then have it rotate so the front is always pointing in the direction it’s moving as it goes around the planet.
Let’s work on just getting the ship to orbit around the planet first. It will look kind of funny at first going around without changing orientation, although that is exactly how spaceships orbit planets. Making the ship’s nose always point in the direction it’s moving in orbit is totally not necessary, and not even realistic! But, for a video game, the usual player has certain expectations, and this is one of them—make the ship point in the direction it’s going. In some sci-fi movies, you might have noticed another thing they always do—keep the rocket engines firing constantly! That is also not done. Spaceships travel ballistically. This word is related to shooting a gun or cannon. Literally, a ship is fired and then it coasts along its path, just like a bullet or cannon ball. But, it just doesn’t look cool. If you want realistic, watch the movie 2001: A Space Odyssey. Stanley Kubric got it right! Well, he had to, with the late great Sir Arthur C. Clark advising him on the making of the movie!
Based on the math code we learned in the previous chapter, we can cause the spaceship to move around any point on the screen at a certain radius. We’ll set that point at the center of the screen and rotate the ship around in a circle at a radius of 250 (based on a window size of 800,600). Now, there’s something we have to remember here, or else run into problems: the position is at the upper-left corner of the image, not at the center! So, when the ship is orbiting around the planet, we have to account for the ship size and adjust the position so that it is moving from the center of the ship image, not the upper-left corner.
Here’s a variation of the Point class introduced way back in Chapter 1 with some improvements: X and Y properties and an override of __str__() so the class data can be printed out with pre-coded formatting. Not familiar with Python properties? Well, this is a good time to learn how they work. Create a pair of “get” and “set” methods that return and set a private class variable. Then, using the desired name of the property (such as x or y), use the property() function to assign the “get” and “set” methods associated with that class variable. The benefit of a property over just using a global variable is the ability to control its bounds while keeping the code clean.
class Point(object):
    def __init__(self, x, y):
        self.__x = x
        self.__y = y

    #X property
    def getx(self):
        return self.__x
    def setx(self, x):
        self.__x = x
    x = property(getx, setx)

    #Y property
    def gety(self):
        return self.__y
    def sety(self, y):
        self.__y = y
    y = property(gety, sety)

    def __str__(self):
        return "{X:" + "{:.0f}".format(self.__x) +
            ",Y:" + "{:.0f}".format(self.__y) + "}"
Putting the Point class to work, we need two instances in our program:
pos = Point(0,0)
old_pos = Point(0,0)
Next, here’s how we’ll move the ship in its “orbit”:
    angle = wrap_angle(angle - 0.1)
    pos.x = math.sin( math.radians(angle) ) * radius
    pos.y = math.cos( math.radians(angle) ) * radius
Here’s the code to draw the ship, taking into account the image size:
    width,height = ship.get_size()
    screen.blit(ship, (400+pos.x-width//2,300+pos.y-height//2))
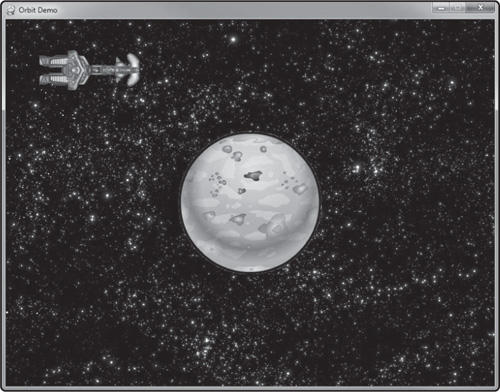
The current version of the demo now with the ship orbiting is shown in Figure 6.7.
So far, so good! The ship now will need to be rotated so that it’s pointing in the direction it’s moving around the planet. This is going to be a little tricky. There’s a little-known math function that’s pure magic! It’s called math.atan2(), and is a function that calculates arc-tangent with two parameters. We pass to this function two parameters: delta_y and delta_x. These delta values represent the difference between the X and Y properties of two coordinates on the screen. Almost as if by magic, the resulting value returned by math.atan2() is the angle to the target! All we do after that is rotate the image to that target angle and it will appear to point in the direction it’s moving.
Now for the tricky part. How do we know where the spaceship image is going to be in the next frame while the demo is running? By making a prediction! We can write code to predict where the ship will be in the future! Here’s the magic algorithm: Keep track of the last position of the ship; then use math.atan2() using the current and last position; then add 180 degrees to the resulting angle returned by math.atan2(). Do you see how that works? We get the angle to the previous position of the ship moments ago, and rotate the ship to that angle, but flip it around 180 degrees, completely backward from that angle, and presto, that is where the ship is heading! This is another one of those phenomenally awesome functions that is used all the time in game development for all sorts of things!
Let’s put math.atan2() to work. We’ll need a
    delta_x = ( pos.x - old_pos.x )
    delta_y = ( pos.y - old_pos.y )
    rangle = math.atan2(delta_y, delta_x)
    rangled = wrap_angle( -math.degrees(rangle) )
I’ve used the rangle variable to represent the radian angle calculated by math.atan2(), and the rangled variable is the angle converted to degrees and wrapped. Once the angle is available, then we can rotate the ship image to the desired angle. This requires the pygame.transform module again. It’s a pretty useful module, as you can see! The function we need is pygame.transform.rotate(), with the source image and desired rotation angle as parameters, and a new image returned. A scratch variable is used for the new image.
scratch_ship = pygame.transform.rotate(ship, rangled)
Now we can draw the ship. But we can’t use the original ship image that hasn’t changed; we have to use the new image called scratch_ship, for both the position calculation and drawing. Note in the code that follows that the scratch_ship image is used to get the width and height. Surface.get_size() calculates the width and height of the rotated image in this case.
    width,height = scratch_ship.get_size()
    x = 400+pos.x-width//2
    y = 300+pos.y-height//2
    screen.blit(scratch_ship, (x,y))
After everything else, all we have to do is “remember” the position of the ship for use next time through the while loop (also called “the next frame” in game parlance).
    old_pos.x = pos.x
    old_pos.y = pos.y
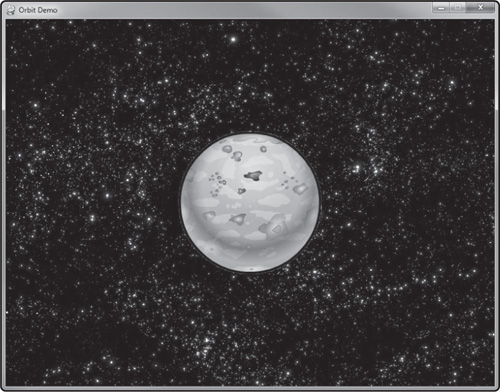
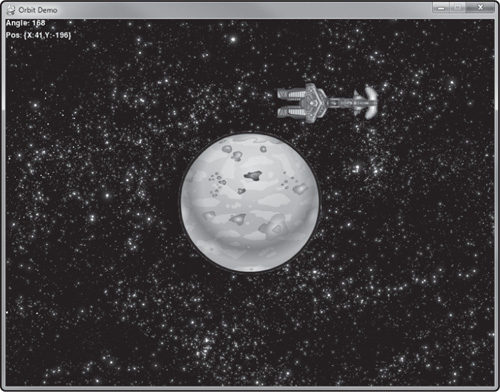
Figure 6.8 shows the finished program. The complete code listing follows for reference (less the Point class, which was already shown in its entirety).

import sys, random, math, pygame
from pygame.locals import *

#Point class definition goes here . . .

#print_text function
def print_text(font, x, y, text, color=(255,255,255)):
    imgText = font.render(text, True, color)
    screen.blit(imgText, (x,y))

#wrap_angle function
def wrap_angle(angle):
    return angle % 360

#main program begins
pygame.init()
screen = pygame.display.set_mode((800,600))
pygame.display.set_caption("Orbit Demo")
font = pygame.font.Font(None, 18)

#load bitmaps
space = pygame.image.load("space.png").convert_alpha()
planet = pygame.image.load("planet2.png").convert_alpha()
ship = pygame.image.load("freelance.png").convert_alpha()
width,height = ship.get_size()
ship = pygame.transform.smoothscale(ship, (width//2, height//2))

radius = 250
angle = 0.0
pos = Point(0,0)
old_pos = Point(0,0)

#repeating loop
while True:
    for event in pygame.event.get():
        if event.type == QUIT:
            sys.exit()
    keys = pygame.key.get_pressed()
    if keys[K_ESCAPE]:
        sys.exit()

    #draw background
    screen.blit(space, (0,0))

    #draw planet
    width,height = planet.get_size()
    screen.blit(planet, (400-width/2,300-height/2))

    #move the ship
    angle = wrap_angle(angle - 0.1)
    pos.x = math.sin( math.radians(angle) ) * radius
    pos.y = math.cos( math.radians(angle) ) * radius

    #rotate the ship
    delta_x = ( pos.x - old_pos.x )
    delta_y = ( pos.y - old_pos.y )
    rangle = math.atan2(delta_y, delta_x)
    rangled = wrap_angle( -math.degrees(rangle) )
    scratch_ship = pygame.transform.rotate(ship, rangled)

    #draw the ship
    width,height = scratch_ship.get_size()
    x = 400+pos.x-width//2
    y = 300+pos.y-height//2
    screen.blit(scratch_ship, (x,y))

    print_text(font, 0, 0, "Orbit: " + "{:.0f}".format(angle))
    print_text(font, 0, 20, "Rotation: " + "{:.2f}".format(rangle))
    print_text(font, 0, 40, "Position: " + str(pos))
    print_text(font, 0, 60, "Old Pos: " + str(old_pos))

    pygame.display.update()

    #remember position
    old_pos.x = pos.x
    old_pos.y = pos.y
This chapter was a fun romp through more rocket science and the addition of the bitmap features of Pygame! There is just no comparison between vector shapes and bitmap graphics. As The Orbiting Spaceship Demo in this chapter demonstrated, we can do a lot with bitmaps and some interesting math functions, and we haven’t even touched upon sprite programming yet! That’s coming up in the very next chapter.