19. Optimizing and Troubleshooting
In this chapter, you discover how to use your phone more efficiently by managing your plan, available storage, and memory; adding a memory card; updating system software; and performing basic troubleshooting. Topics include the following:
→ Using Task Manager to manage memory
→ Conserving the battery manually and by enabling Power Saving Mode
→ Making the most of your talk and data plans
→ Viewing and expanding current storage
→ Installing or replacing your SIM card
→ Troubleshooting and resetting the phone
There’s more to understanding your Galaxy S 4 than making phone calls and mastering a handful of favorite apps. This chapter delves into material that you don’t need to commit to memory or even read immediately—but when you need it, you’ll be happy to have it.
Managing Memory
You’ve noticed that most apps don’t have a Quit or Exit command. That’s because the Android operating system is designed to handle memory management behind the scenes. If free memory is running low, for example, unnecessary processes automatically shut down. However, if you occasionally feel the need to take a hands-on approach to quitting apps and freeing memory, you can use the Task Manager.
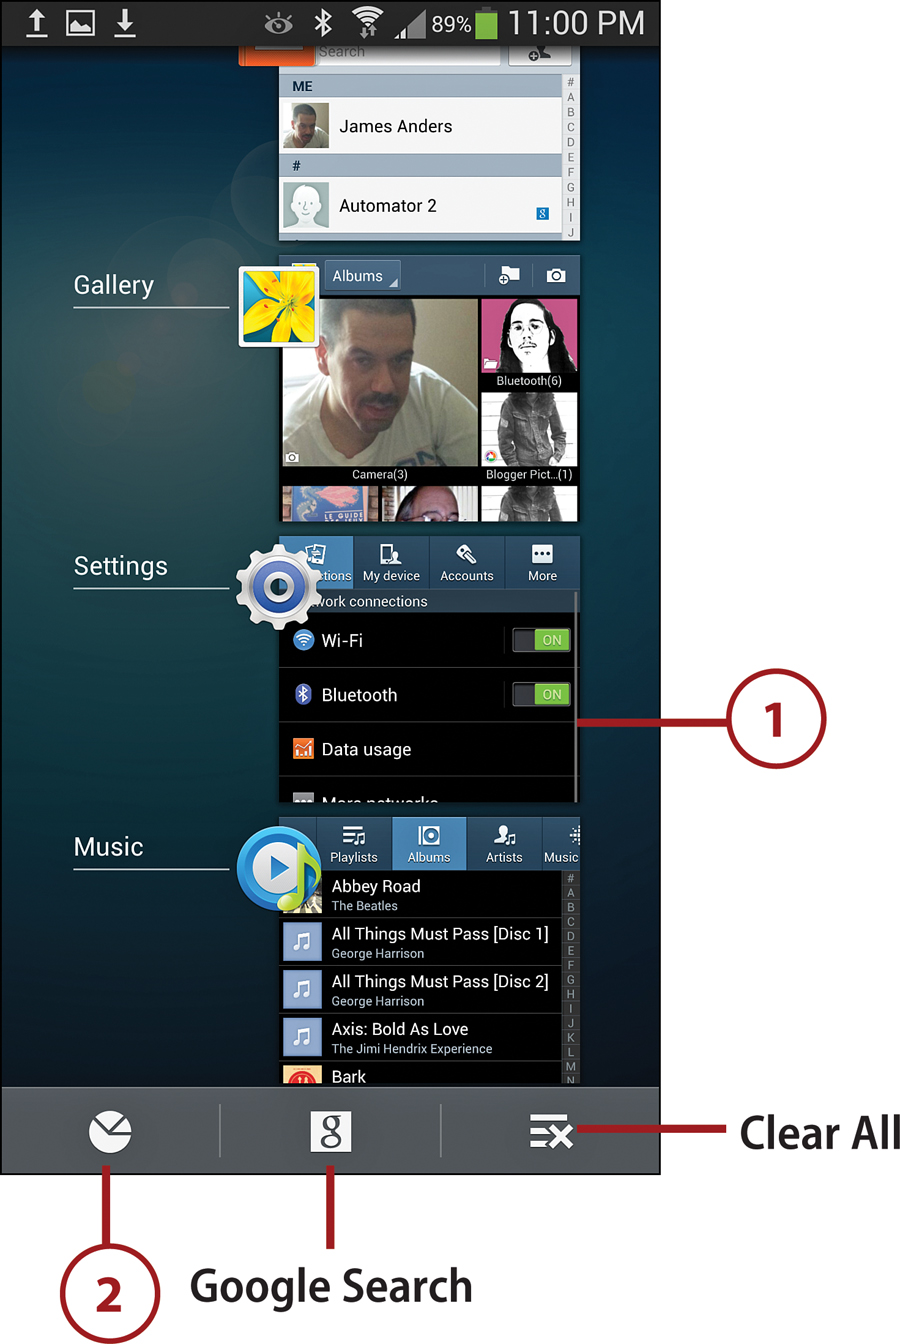
1. Press and hold the Home key. A vertically scrolling list of apps that you’ve recently run or are currently running appears.
2. To launch Task Manager, tap its icon.
Other Options
In addition to launching the Task Manager, you can do any of the following on this screen:
• Tap an app thumbnail to immediately switch to or launch the app.
• Drag an app thumbnail off the left or right edge of the screen to remove it from the list. If the thumbnail is that of a running app, the app quits.
• To clear the list and simultaneously quit any apps within the list that are running, click the Clear All icon. (The list is also cleared whenever you restart or power off the phone.)
• Click the Google Search icon to perform a search.
3. Select the Active Applications tab to view the currently running applications. To close a listed app, tap its End button. To simultaneously close all running applications, tap End All.
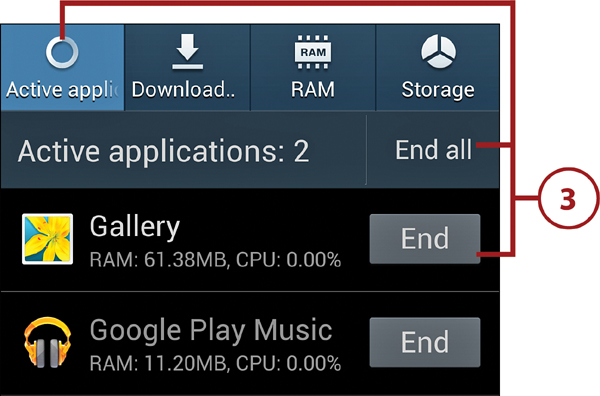
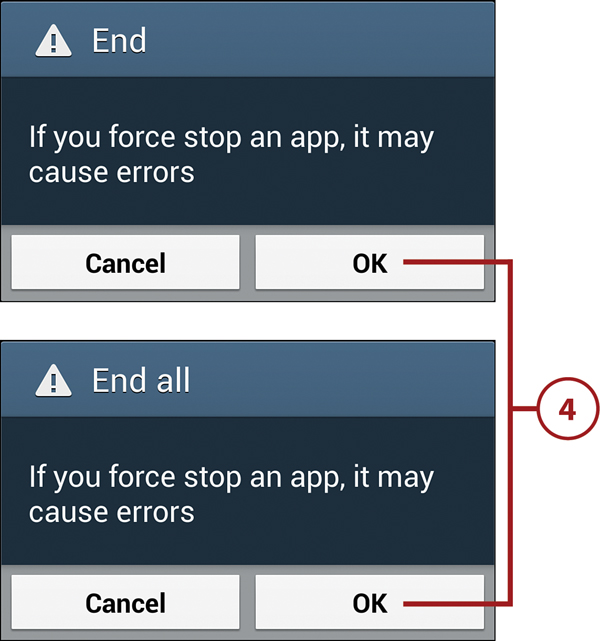
4. Tap OK in the End or End All confirmation dialog box.
5. Optional: If exiting running applications doesn’t solve your memory issue, select the RAM tab, and then tap Clear Memory to clear all inactive and background processes. Note the change in the memory bar.

Clear Memory Consequences
As is the case with using the Force Stop command (described in “Viewing Battery Usage by Features and Apps” later in this chapter), Clear Memory can have consequences other than simply freeing memory that unnecessary processes are using. As the RAM screen explains, “Completed and ongoing application functions will be removed from RAM.” This causes running apps to abruptly quit and background processes to halt.
Conserving the Battery
Depending on how frequently you use the phone and what you typically do with it, there are several approaches to conserving the battery. First, you can automatically conserve the remaining charge by enabling Power Saving Mode. Second, if you prefer to take the manual approach, you can disable features that aren’t currently needed or change certain default settings so that less power is used. Finally, to monitor how various apps and the operating system use the battery, you can run the Battery utility.
Show the Battery Percentage
Although the battery indicator in the status bar gives a rough indication of the remaining charge, you can alter it to show the percentage remaining. Open Settings, select the My Device tab, tap Display, and enable Display Battery Percentage.
Configuring and Enabling Power Saving Mode
When Power Saving Mode is enabled and a low battery level is detected, selected features are automatically changed or disabled to extend the remaining charge.
1. On the Home screen, tap Apps, followed by Settings.

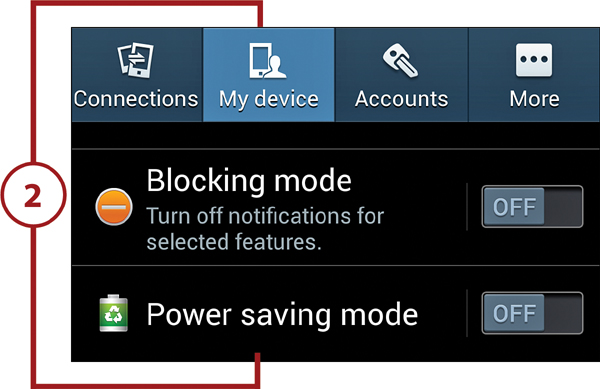
2. Select the My Device tab. Scroll as necessary and tap Power Saving Mode.
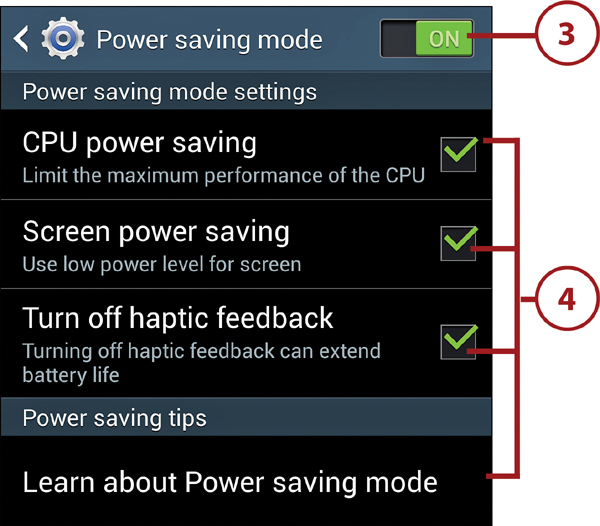
3. Ensure that the Power Saving Mode switch is in the On position.
4. Enable or disable power-saving options by tapping check boxes. To view a brief explanation of what each option does, tap Learn About Power Saving Mode.
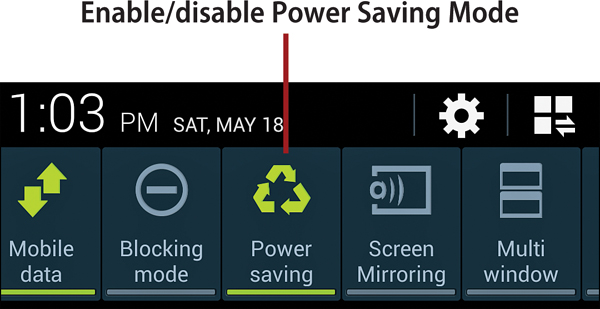
Using the Notification Panel
If you don’t need to change the Power Saving Mode settings, you can quickly enable or disable Power Saving Mode by opening the Notification panel, scrolling the icons to the right, and tapping the Power Saving icon. To quickly make changes to the settings, you can press and hold the icon to go directly to the Power Saving Mode screen in Settings.
Tips for Manually Conserving the Remaining Charge
If the battery is generally draining too quickly or you want to extend usage time when the battery is almost depleted, you can manually change certain settings as needed or set new defaults.
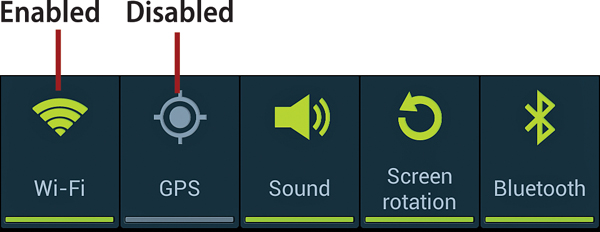
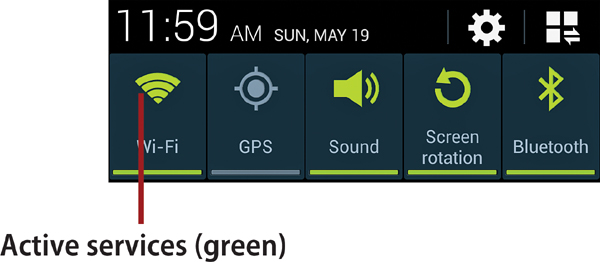
• If you aren’t currently using some services, such as GPS or Bluetooth, disable them in the Notification panel by tapping their icons. Turn them back on only when you need them.
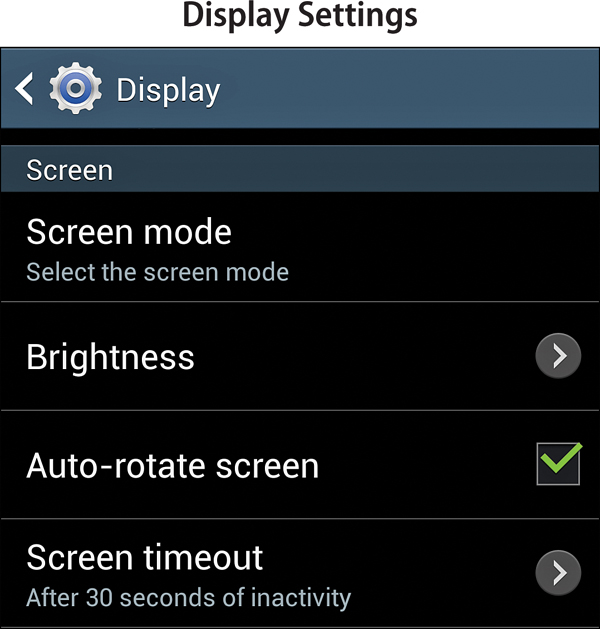
• The phone’s screen draws considerable power. Consider reducing the Screen Timeout value or the Brightness setting (Settings, My Device tab, Display). Whenever you’re done using the phone for a bit, tap the Power button to instantly darken the display—rather than waiting for the Screen Timeout.
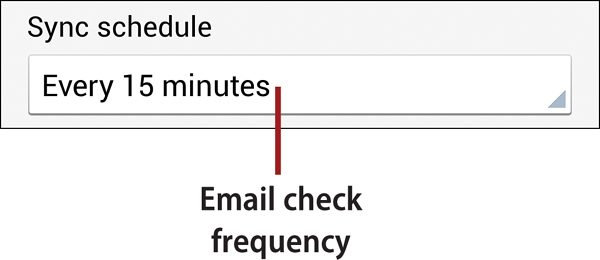
• Consider checking less frequently for new email. For unimportant email accounts, you could set the frequency to Once a Day or Never, for example. You can still perform manual checks as often as you want. To change the retrieval frequency, launch Email, press the Menu key, tap Settings, and tap the account that you want to manage. Tap Sync Schedule, tap Set Sync Schedule, and then select a new frequency.
• Avoid battery-intensive activities. Playing videos and games prevents the display from timing out. Streaming videos or music transfers large amounts of data to the phone, requiring that the connection be constantly running.
• In standby mode, the phone consumes little battery power. Although it may be sacrilege to suggest this, you can take things a step further by powering off the phone when you won’t need it for an extended period. For instance, if you never answer the phone after you go to bed, consider turning it off nightly—or leave it on while you charge it during this period.
Plug It In
Before the battery dies, you can continue a conversation and other activities by quickly plugging the phone into a wall outlet or USB port. The phone charges as you continue to work. When your call or app activity concludes, power off the phone and allow the battery to charge normally.
Viewing Battery Usage by Features and Apps
If you want to get a handle on which features and applications are draining your battery the most, you can find the answer in Settings.
1. On the Home screen, tap Apps, followed by Settings.
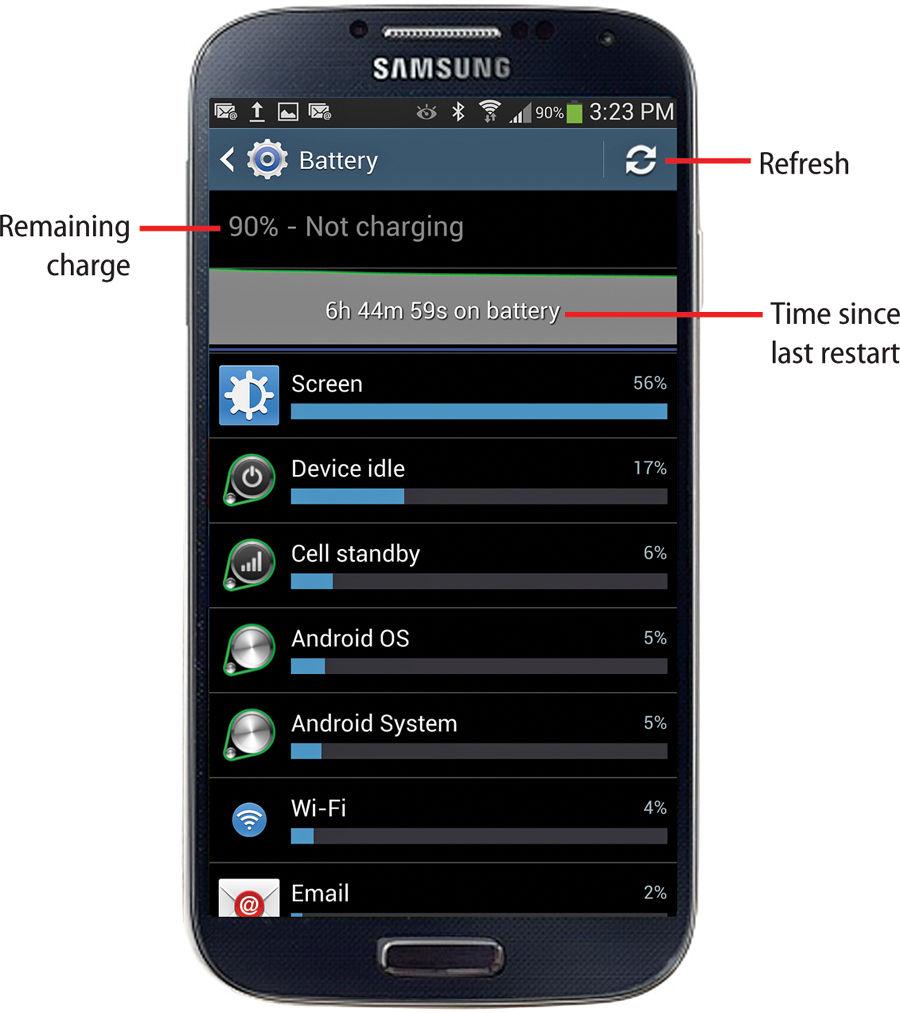
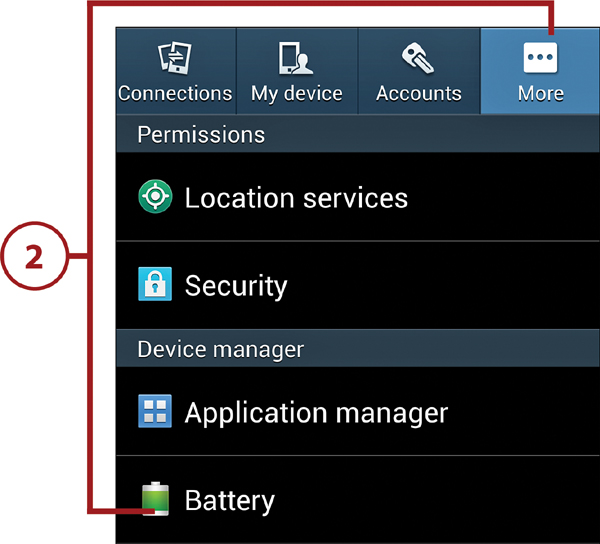
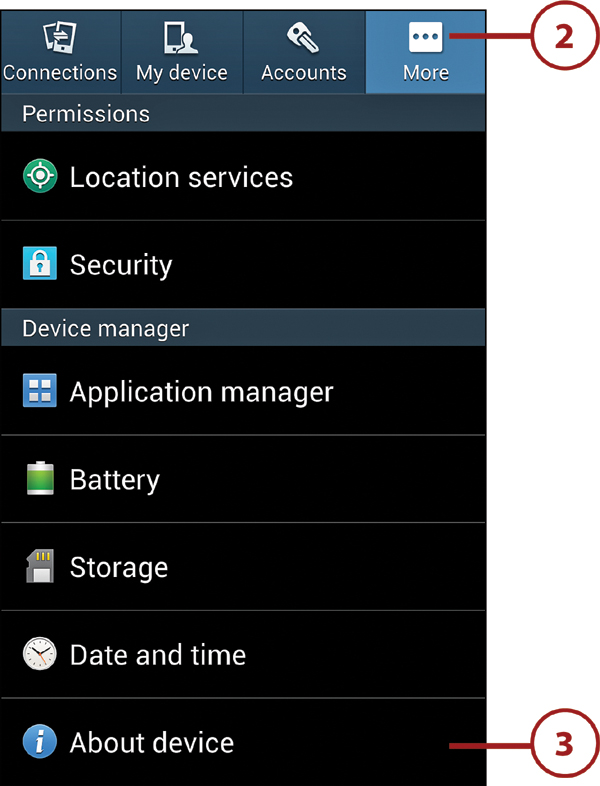
2. Select the More tab, and then tap Battery.
3. The scrolling summary that appears lists the features and applications that have been consuming the battery since the last time you charged the phone and shows the percentage of consumption attributable to each.
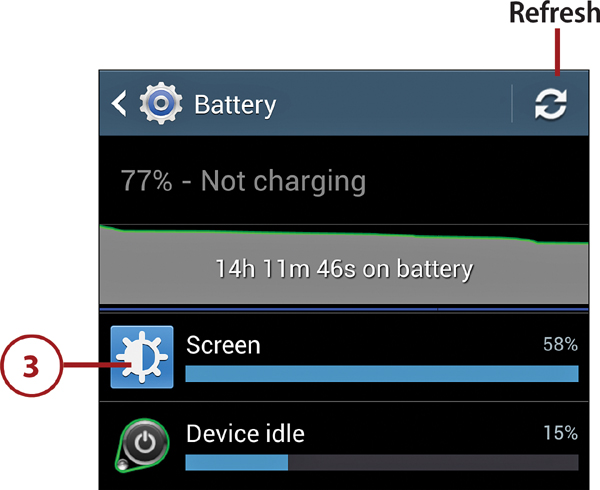
Refreshing the Data
While viewing the Battery screen, you can force a refresh to display up-to-date consumption figures.
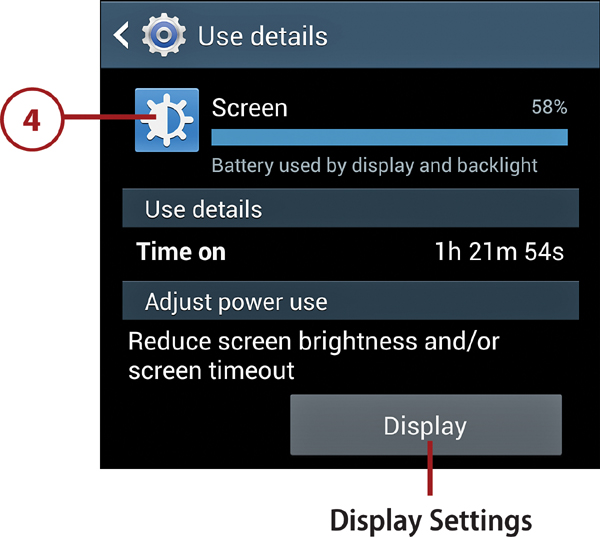
4. Optional: Tap an entry to view additional information. Depending on the item, you may be able to alter its settings to reduce battery consumption or execute a force stop for it (in the case of an application).
Managing Talk Time and Data Usage
If you’re on a limited talk, messaging, or data plan, the key to avoiding overage charges is relatively simple: Know and monitor your plan.
Checking Current Usage
Each carrier generally offers several ways for you to check the current month’s usage. For example, if AT&T is your carrier, usage data can be viewed in the myAT&T app.
Carriers typically provide a phone number that you can call to check your minutes and other usage. If you use Sprint, for example, dial *4 from your cell phone. If you’re a T-Mobile customer, you can dial #MIN# to check minutes, #MSG# for text messages, or #WEB# for Internet and data usage.
You can also check the carrier’s website. At a minimum, you should see your usage for the current billing cycle. In addition, there might be an option to automatically receive a notification if you come close to exceeding a plan limit. Forewarned is forearmed. (It has taken my entire life to come up with a decent reason for using that phrase.) For example, when you’re precariously close to hitting your monthly data limit, you can take steps to ensure that additional data-intensive activities (such as streaming videos or music) occur only over Wi-Fi.
Managing Data Usage
If your data plan has a monthly limit, you can enable the Data Usage setting on the phone to automatically warn you when you come close to exceeding your data limit—ignoring data transmitted over Wi-Fi, which doesn’t count toward usage. You can also manually disable mobile data (using the cell network to transmit data) if you’re close to exceeding your plan limit.
1. On the Home screen, tap Apps, followed by Settings.
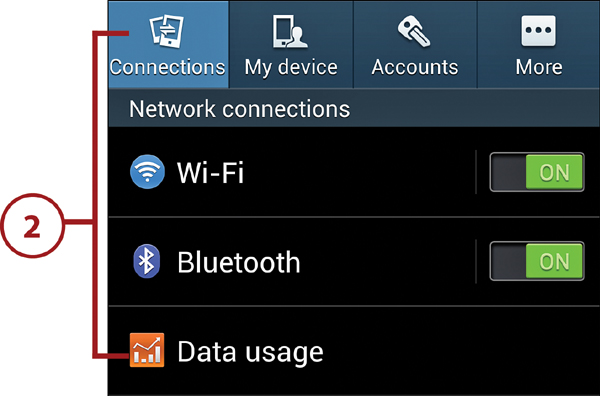
2. Select the Connections tab, and then tap Data Usage.
3. The Data Usage screen appears. The state of the Mobile Data check box determines whether the cell network can be used to transfer data to and from the phone (checked) or whether you’re restricting it to Wi-Fi data transfers (unchecked). If you’re close to or have exceeded your monthly limit, disable it to prevent additional overage charges.
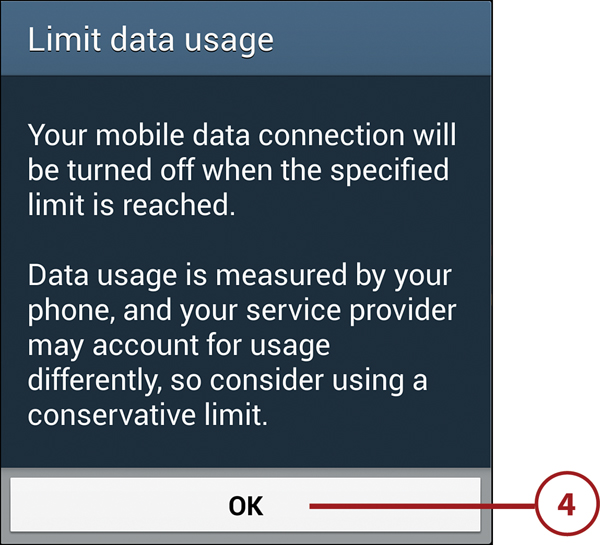
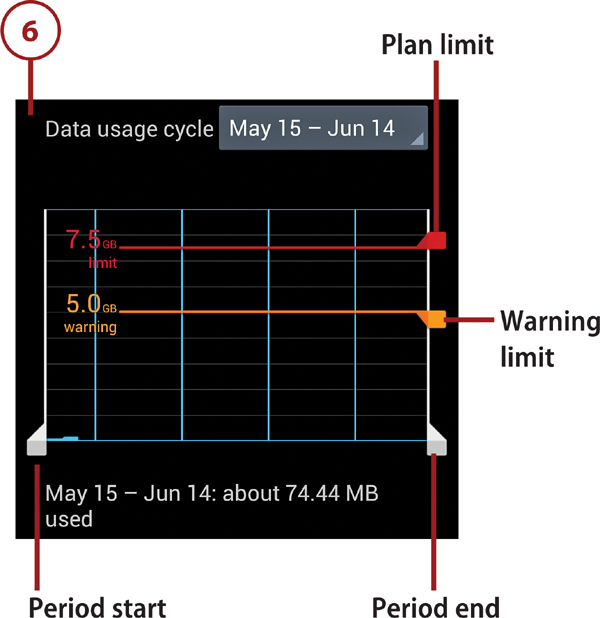
4. Tap the Set Mobile Data Limit check box to instruct the phone to warn when you’re approaching your monthly limit. Read the explanatory material in the Limit Data Usage dialog box and tap OK. When the data limit (red line) is reached, mobile data is automatically disabled; you must do additional data transfers over Wi-Fi. Continue with the remaining steps.
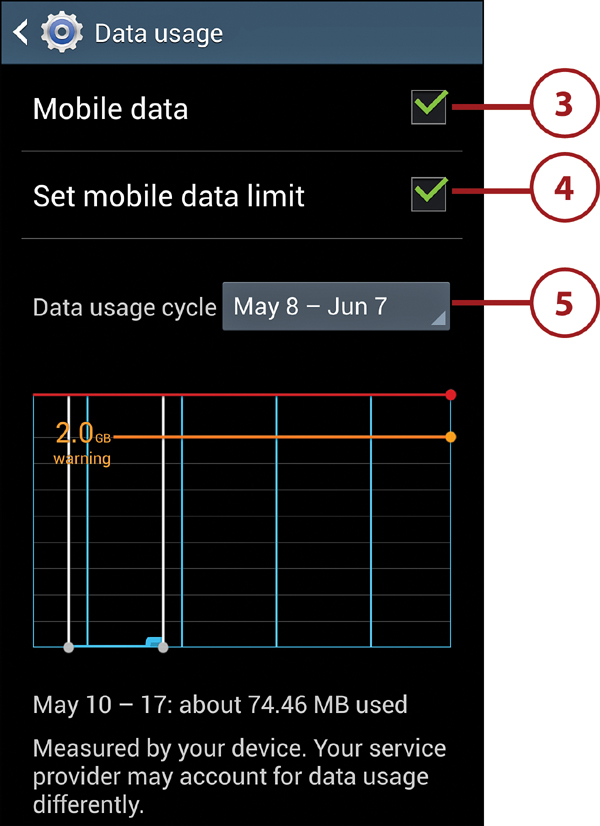
5. Ensure that the Data Usage Cycle matches your monthly billing cycle and represents the current cycle. If the billing period is incorrect, tap it, tap Change Cycle, specify the date when the usage cycle resets, and tap Set. If the cycle is incorrect, tap it to select a different 30-day period.

6. Set the red slider to match your plan’s data limit (in gigabytes), set the orange slider to reflect the usage amount at which you want to be warned, and set the white bars to the period that you want to monitor.
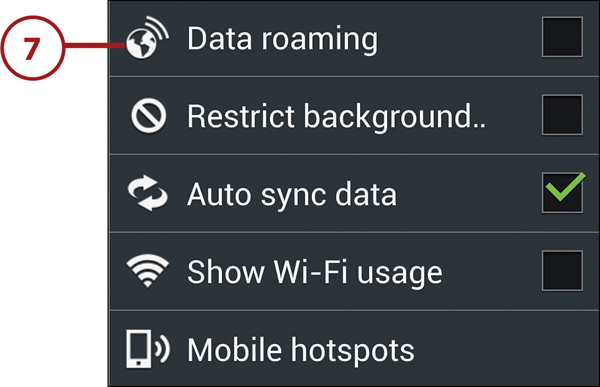
7. Press the Menu key to enable or disable these additional Data Usage options:
• Enable Data Roaming to allow your phone to use other networks for data access when roaming.
• Enable Restrict Background Data to prevent background data access of apps and services, restricting them to working only when a Wi-Fi connection is available.
• Enable Auto Sync Data if you want your accounts to sync automatically—regardless of whether only a cellular connection is available.
• Enable Show Wi-Fi Usage to add a separate Wi-Fi tab to the Data Usage screen, showing the last 30 days of Wi-Fi data usage and the apps that contributed to the usage. You aren’t billed for Wi-Fi data usage, so it can be useful to see how much of your usage was free (Wi-Fi) versus paid (cellular).
• Tap Mobile Hotspots to view enabled Wi-Fi hotspots within range of your phone.
What’s Cheaper?
If you have unlimited or inexpensive text messaging, it may be advantageous to send texts rather than make short calls. Conversely, if you’re billed 25¢ per message, it may be cheaper to call. Note that your carrier may allow you to block incoming text messages (see the carrier’s website for details). Received text messages—including unwanted ones—may be billed to your account at the same rate as messages that you send.
Can This Call Be Made Later?
The distinction between free and paid calls is typically determined by the time of day at the location where you make the call. If your free minutes begin at 7:00 p.m. each weeknight, for example, try to reserve lengthy, chatty calls for evenings and weekends.
If you’re traveling and are in a different time zone, your daytime and evening calling periods generally change to match the current time zone. Before heading out, check your plan to be sure. Similarly, if you’re leaving the country, ask how out-of-country minutes are billed. Thinking that he was covered or that the rate would be reasonable, a friend didn’t bother to check before leaving and returned to discover that his handful of international calls resulted in a bill of several hundred dollars.
Viewing and Expanding Storage
Although the 16GB version of the Galaxy S 4 has almost 10GB of internal memory available for storage, you can exhaust it with a combination of apps, photos, videos, music, and other data. You can expand the available storage by inserting a microSD (Secure Digital) or microSDHC (Secure Digital High Capacity) card into the phone’s internal slot, adding as much as an additional 64GB.
Viewing Used and Available Space
Consult the Storage section of Task Manager to view the total, used, and available storage on your phone.
1. Launch the Task Manager by pressing and holding the Home key, and then tapping the Task Manager icon at the bottom of the screen.

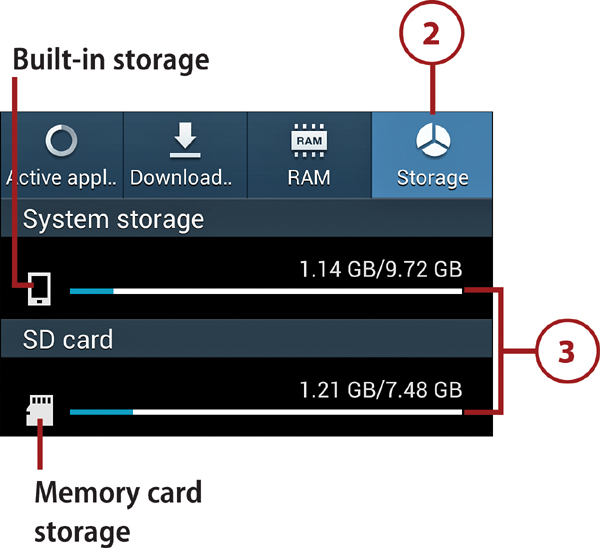
2. Select the Storage tab.
3. Interpret the displayed information as follows:
• System Storage is the phone’s built-in storage.
• An SD Card entry is shown if you’ve inserted a microSD or microSDHC card into the phone’s internal slot.
• The blue section of each bar represents the used space; the white section is the unused/available space. Above each bar are two figures. The first represents used space; the second is the total space.
Storage Shrinkage
When viewing the Storage section of Task Manager, you may think that the total space listed is less than the stated specs. Don’t be alarmed; the figures are correct. Although the Galaxy S 4 includes at least 16GB of internal storage, part of it is used as system memory. And when formatted for use, an 8GB microSDHC card has only 7.48GB of usable space, for example.
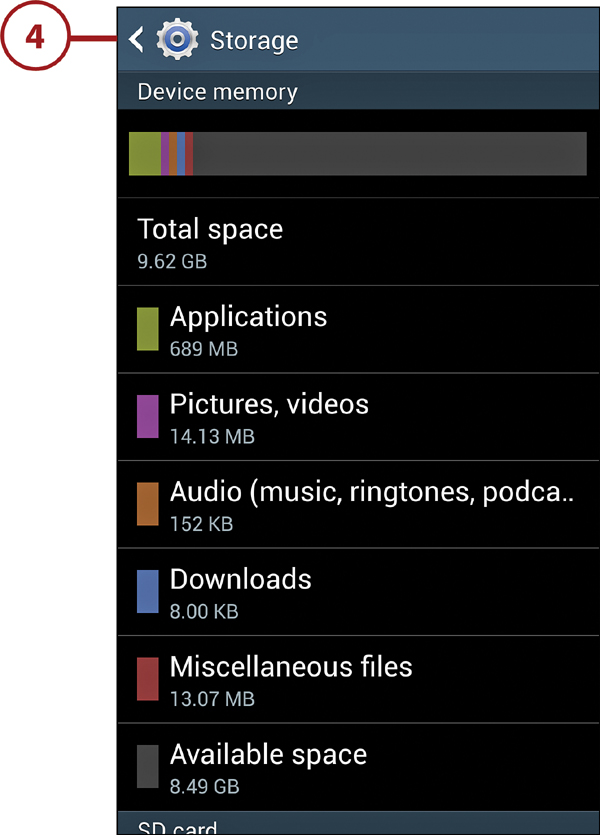
4. Optional: To view a breakdown of the storage space being used by different types of data, open Settings, select the More tab, and tap Storage.
Adding a Memory Card
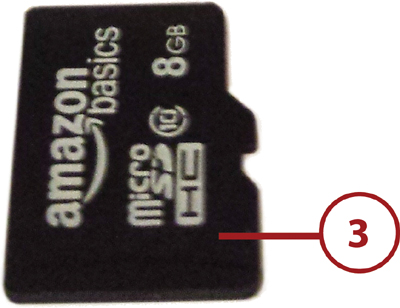
The Galaxy S 4 can accommodate up to a 64GB memory card in its internal slot. When picking a card, take note of its class in the item description. The lower the class number (2, 4, 6, 8, or 10), the slower the card. Under current class specifications, the class indicates the card’s minimum sustained write speed in megabytes per second. Thus, a Class 2 card should be capable of writing data to the card at 2 Mps (megabytes per second) or faster. (If a card’s description or packaging doesn’t mention a class, assume that it’s Class 2 or slower. That frequently explains why such cards are so inexpensive.) Currently, you can purchase Class 10 cards for less than $1 per megabyte. Unless you already have an older, slower card, there’s little monetary incentive to go slower than Class 10.
Next, determine the amount of storage you need. An 8GB or 16GB card suffices for most people. If you intend to pack it with videos and music or regularly shoot hundreds of photos or lengthy movies, go for the highest-capacity card you can afford—64GB is the max.
All Cards Aren’t Equal
Even within a class, cards aren’t identical. First, some Class 10 cards can sustain a minimum 10MB/second read speed, as well as write speed. Second, the minimum speed on some of these cards is occasionally much faster than 10MB/second. Third, based on user reviews and ratings on sites such as Amazon.com and NewEgg.com, some cards appear to be knockoffs that are slower than their stated class, fail quickly, or don’t work at all.
When choosing a card from an online source, read the user comments, note the ratings, and check the seller’s return policy. Amazon.com, for example, sells a card called AmazonBasics that’s highly rated by purchasers and is inexpensive, too.
Although it isn’t necessary, make a note of whether your chosen card includes a microSD to SD adapter. If it does, you can slip your tiny card into the postage stamp-sized adapter and use it in devices that require an SD card rather than a microSD card. (In the same vein, be sure that your chosen card is a microSD or microSDHC, not an SD or SDHC. Only a micro card will fit in the phone’s slot.)
Inserting a Memory Card
Whether the card is new or being moved from another phone or device, the first step is to insert it into your phone.
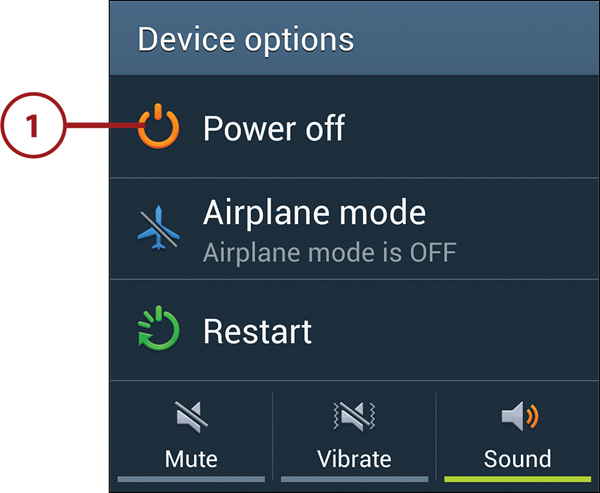
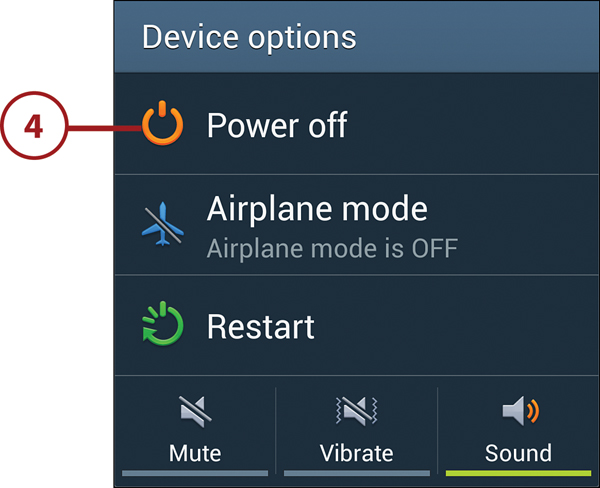
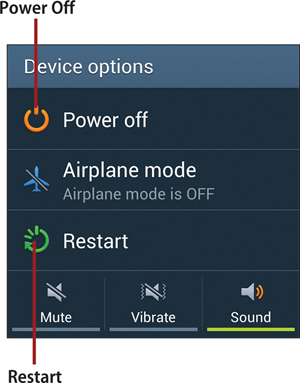
1. Shut down the phone by holding down the Power button, tapping Power Off in the Device Options dialog box, and then tapping OK in the confirmation dialog box.
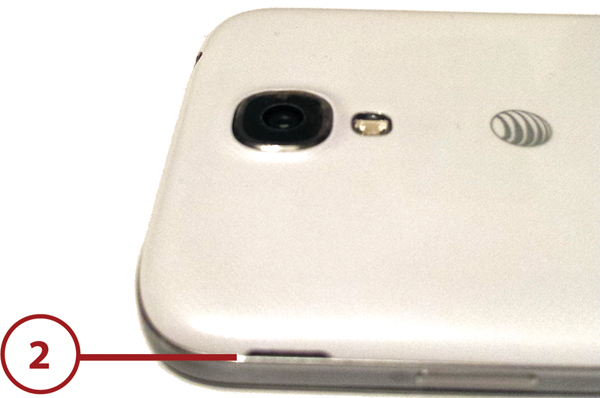
2. Remove the cover from the back of the phone by slipping your fingernail into the slot on the side (above the Power button) and prying off the back.
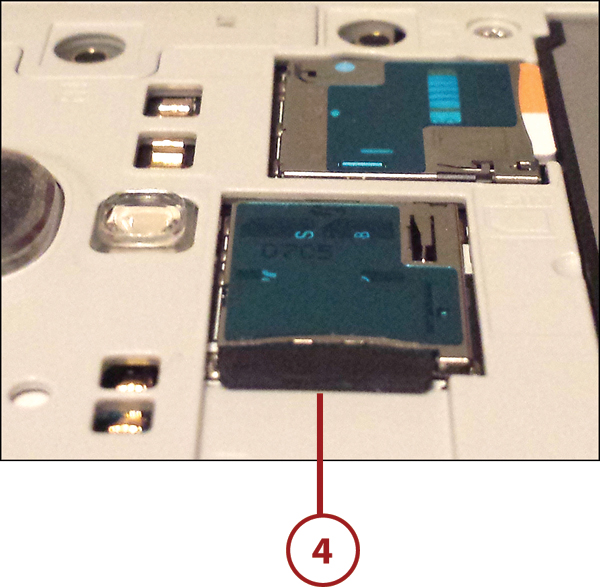
3. Grasp the memory card by its edges and turn the card so that its gold contact strips face down. The labeled side of the card should face up.
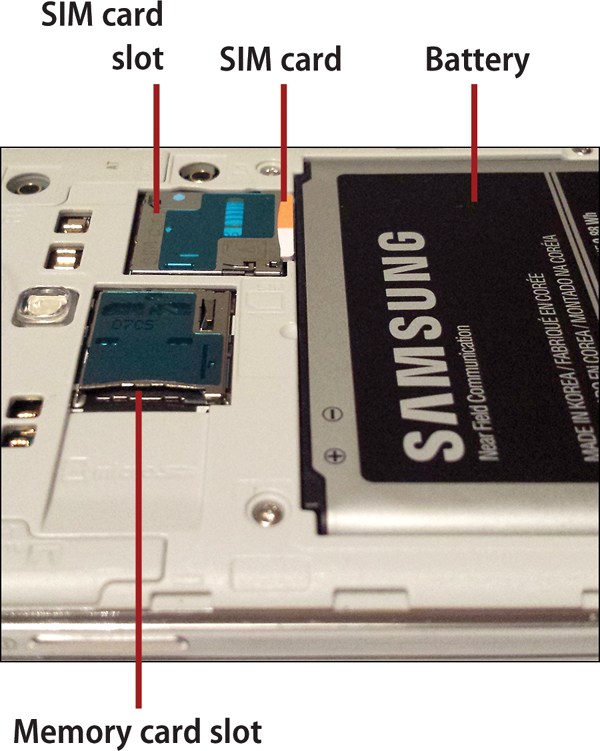
4. Carefully push the card into the slot until it clicks into place, and then replace the phone’s back cover. Ensure that the cover is sealed around all edges.
Formatting a Memory Card
If the memory card contains unwanted data from another phone or device or isn’t recognized by the phone as formatted, you can format the card (erasing any current data and preparing it for use in the phone).
1. On the Home screen, tap Apps, followed by Settings.

2. Select the More tab, and tap Storage.
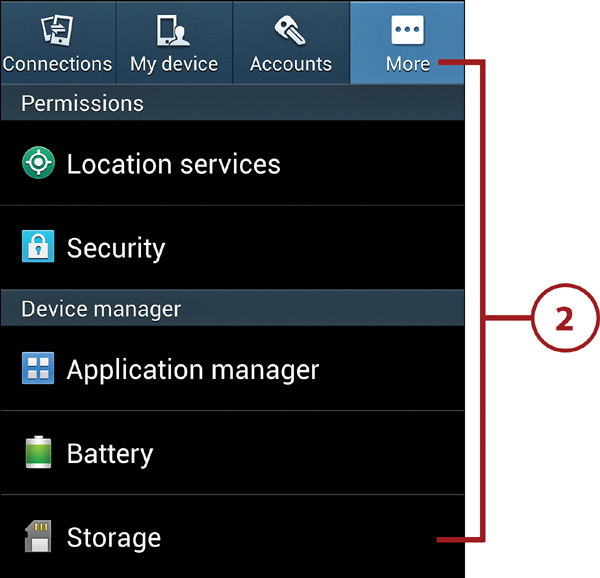
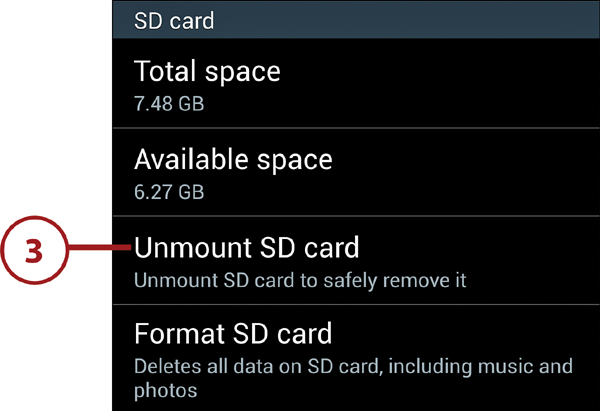
3. Scroll down to the SD Card section, and tap Format SD Card.
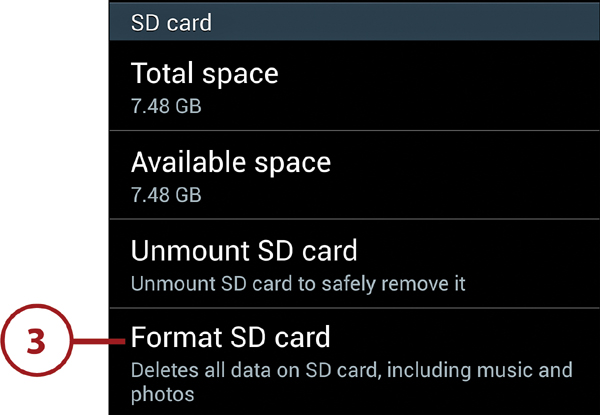
4. Tap the Format SD Card button.
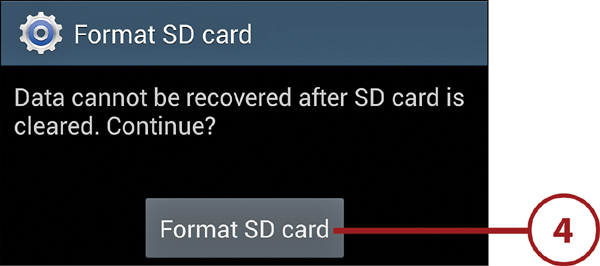
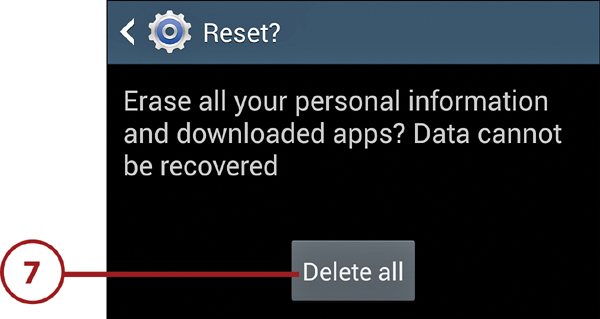
5. Tap the Delete All button.
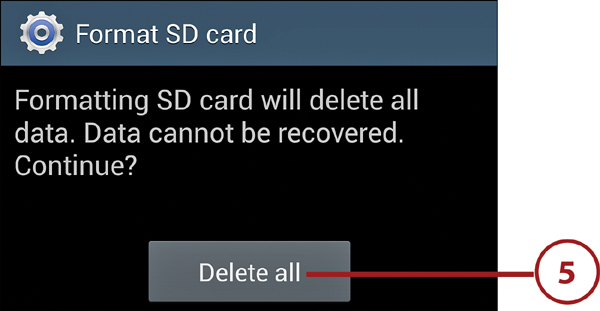
6. The memory card is unmounted, formatted, and remounted to enable the phone to see and use it.
Removing a Memory Card
The following steps explain how to safely remove a memory card from the phone to replace it with a different card or to move the card to another device. You begin by unmounting the card so that it can be safely removed.
1. On the Home screen, tap Apps, followed by Settings.
2. Select the More tab, and tap Storage.
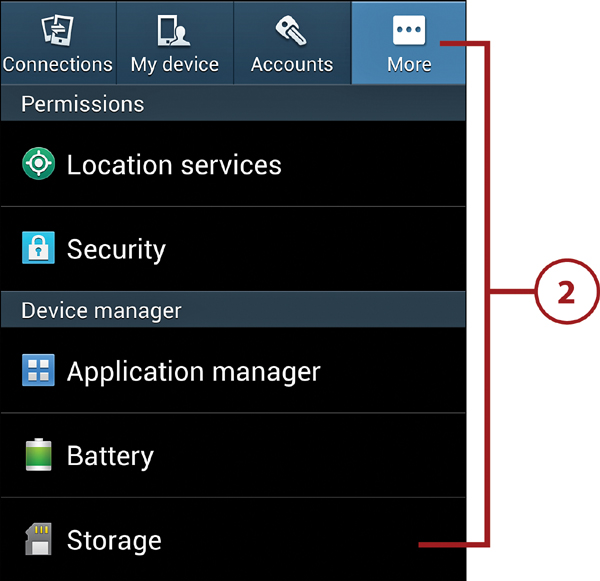
3. Scroll down to the SD Card section, and tap Unmount SD Card. Tap OK in the confirmation dialog box.
4. Shut down the phone by holding down the Power button, tapping Power Off in the Device Options dialog box, and then tapping OK in the confirmation dialog box.
5. Remove the cover from the back of the phone by slipping your fingernail into the slot on the side (above the Power button) and prying off the back. For photos relevant to this and the remaining steps, see “Inserting a Memory Card,” earlier in this section.
6. To free the SD card, press it into the slot. The card will spring free. Carefully slide the card out of the slot. (When handling the card, be sure to grasp it only by its edges.)
7. Replace the battery cover.
Using a Memory Card as a USB Drive
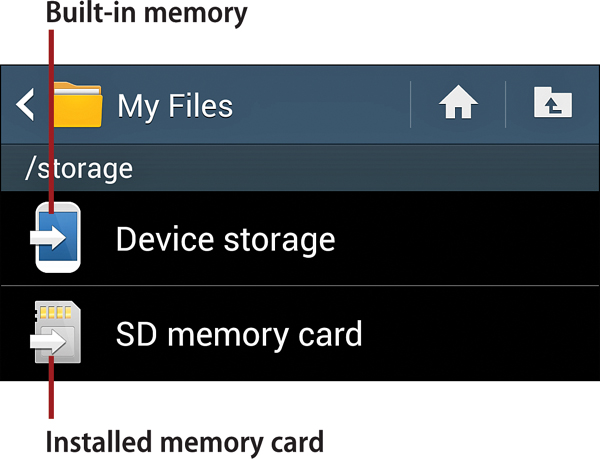
By following the instructions in “Transferring Files over USB” in Chapter 15, you can mount your phone as an external drive on your Mac or PC (like a flash drive), enabling you to freely copy files in either direction. You can view and access the files on your phone by going to the Home screen and tapping Apps, My Files. When you open the All Files folder, you can see separate icons for the phone’s built-in memory (Device Storage) and your installed memory card (SD Memory Card). If you tap these icons to view the files within, you’ll note that all files stored in built-in memory have the path prefix /storage/emulated/0/. Files on an installed memory card have the path prefix /storage/extSdCard.
Installing or Replacing the SIM Card
To be recognized by your carrier’s network, every Galaxy S 4 must have a carrier-specific Subscriber Identify Module (SIM) card. If the SIM card wasn’t preinstalled when you purchased the phone, follow the procedure and photos in “Inserting a Memory Card” to open the case and insert the SIM card into its slot. Ensure that the notched edge goes into the slot first and that the card’s gold contacts face down.
To replace an existing SIM card with a new one, start by removing the battery. (Although you can remove and replace the SIM card with the battery in place, it’s much easier if you take it out.) To remove the current SIM card, gently press it into its slot until it pops out. Remove the card. Slide the new SIM card into the slot—notch first, gold contacts down—until it clicks into place. Finish by replacing the battery and the phone’s back cover.
Checking for System Updates
It’s a good idea to periodically check for system updates. Although you may automatically receive notices of firmware updates, for example, you can still perform manual checks whenever you like, as explained in the following task. The notification method and process of updating to a newer version of the Android operating system and firmware are carrier-dependent. When notified of an available update, refer to your carrier’s website for additional instructions.
Check the Battery First
Before performing any kind of system update—especially firmware and Android—be sure you have sufficient charge to complete the process. Interrupting updates can have dire consequences for the phone.
1. On the Home screen, tap Apps, followed by Settings.
2. Select the More tab.
3. Depending on your carrier, do one of the following:
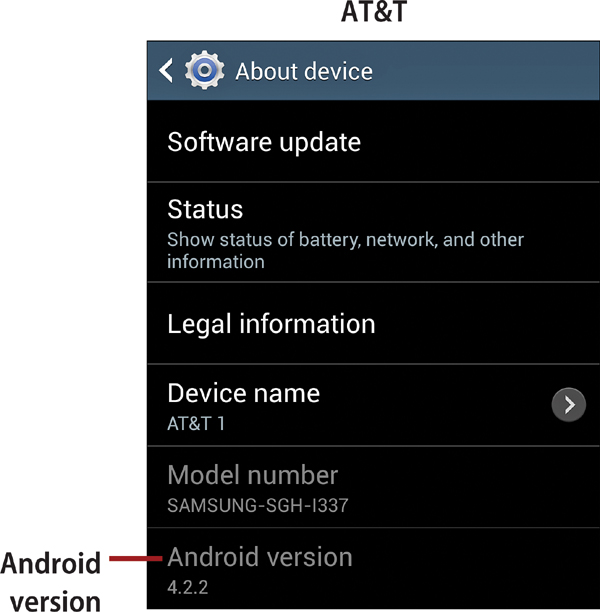
• AT&T. Tap About Device, Software Update, Check for Updates, OK.
• T-Mobile, U.S. Cellular. Tap About Device, Software Update, OK.
• Sprint. Tap System Update, followed by Update item type to check for a particular type of update, such as Update Samsung Software or Update Firmware.
• Verizon. Tap About Phone. Check the Build Number and Baseband Version for the software that’s currently installed on your phone.
What Version of Android Do I Have?
The About Device or About Phone screen shows the version of the Android operating system that’s currently installed.
Troubleshooting
This section provides suggestions for correcting simple and complex problems that can arise with the phone.
General Troubleshooting
When trying to correct an app-related or OS-related problem, you should generally work from the least to the most extreme solution.
• Try appropriate button presses. Try pressing the Home or Back key to leave the current screen, or press the Power button.
• Use the Task Manager to close unnecessary apps. (Press and hold the Home key, and then tap the Task Manager icon at the bottom of the screen.)

• For app-related issues, check the app’s settings (if it provides them) by pressing the Menu key and tapping Settings. You can also try uninstalling and reinstalling the app to see if the problem is corrected. If the issue continues, check Google Play for an update, visit the developer’s website for troubleshooting information, or consider uninstalling the offending app.
• For battery-drain issues, turn off services that you aren’t currently using, such as GPS, Bluetooth, and Wi-Fi. Open the Notification panel and tap icons to enable or disable services.
• Restart or shut down the phone by pressing and holding the Power button, tapping Restart or Power Off, and then tapping OK in the confirmation dialog box.
• To determine if a downloaded app or update is causing the problem, restart the phone in Safe Mode (as described in the section “Testing in Safe Mode”).
• For a complete lock-up or similar issue, remove and replace the battery (as described in the section “Fixing a Lockup”).
• Perform a Factory Data Reset (as described in the section “Performing a Factory Data Reset”), but only if the phone is so messed up that no other solution remains. Call your carrier’s customer service/technical support before performing this procedure or, if one of its stores is nearby, take the phone in to be checked out.
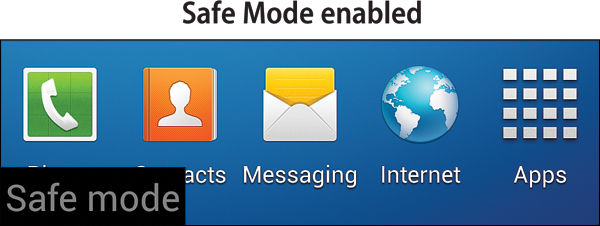
Testing in Safe Mode
When the phone is in Safe Mode, only the standard, built-in apps are active; apps that you’ve downloaded are disabled. If the problem isn’t present in Safe Mode, the likely culprit is an app that you’ve recently installed or updated. To enable Safe Mode, start by turning the phone off. Then turn the phone back on and—when the Samsung logo appears during the startup sequence—press and hold the Volume down key until the lock screen appears. (You can exit Safe Mode at any time by restarting the phone normally.)
While in Safe Mode, test to see if the problem persists. If it does, refer to the section “Performing a Factory Data Reset.” On the other hand, if the problem isn’t present in Safe Mode, you’ll have to determine which new app is the troublemaker. Uninstall the most recently installed app (see “Uninstalling Apps” in Chapter 10), restart the phone normally, and test again. One by one, continue uninstalling the newest apps until the problem goes away. Others that you’ve uninstalled during this testing can generally be reinstalled.
Fixing a “Lockup”
Yes, some apps have bugs, so what you expect to happen sometimes doesn’t match what actually happens. When the worst occurs—the phone locks up so solidly that it ignores all taps, swipes, button presses, and attempts to power down, restart, or recharge—there’s still something you can try. Open the back cover, remove the battery, wait 2 minutes, and reinsert the battery. Note that this is a solution of last resort. If you perform it while the phone is writing to memory, you can lose data.
Performing a Factory Data Reset
Using the Factory Data Reset procedure, you can restore your phone to its initial factory-default apps and settings. If you’re planning to trade it in, sell it, or give it to a family member, performing a factory data reset also removes the applications you’ve installed and erases your personal data, such as contacts, photos, and music files. If this data is important to you, be sure to back it up to a memory card prior to performing the reset.
1. On the Home screen, tap Apps, followed by Settings.
2. Select the Accounts tab, and tap Back Up and Reset.
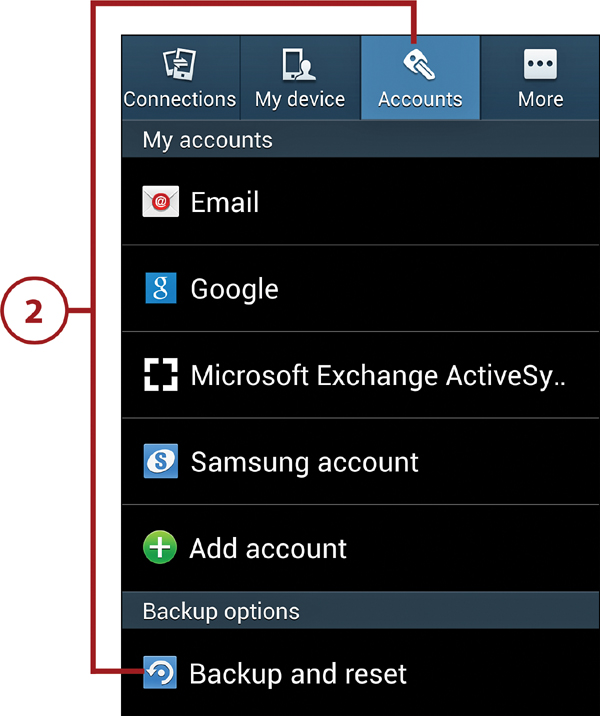
3. In the Personal Data section, tap Factory Data Reset.

4. On the Factory Data Reset screen, review the explanatory text.
5. Optional: Tap the Format SD Card check box if you also want to erase an installed memory card.
6. Tap the Reset Device button.
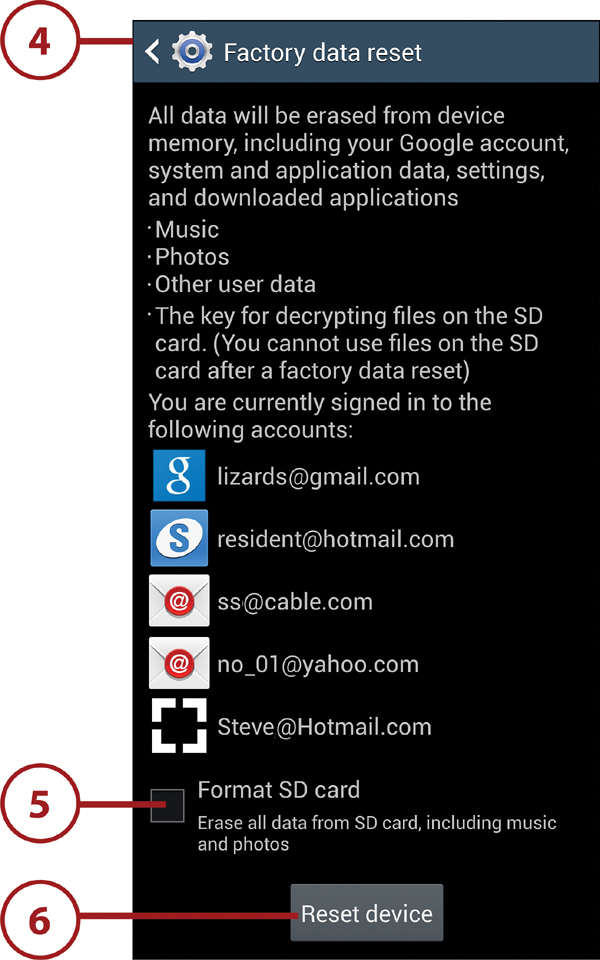
7. Tap the Delete All button to perform the factory reset. (Or if you’ve changed your mind, press the Back key.)