10. Installing and Using Applications
This chapter covers the essentials of downloading, installing, running, and maintaining applications on your phone. Topics include the following:
→ Downloading and installing applications from Google Play (Android Market)
→ Enabling application downloads from other sources
→ Downloading applications from the Amazon.com Appstore
→ Adding Home screen shortcuts to your favorite applications
→ Uninstalling unwanted applications
→ Installing application updates
Applications (or apps, as they’re called when referring to smartphone software) are programs that run on your phone. They add new functionality to the phone, such as enabling you to stream video, manipulate databases, play video games, and do almost anything else you can imagine.
The Galaxy S 4 comes with dozens of apps preinstalled, ready for you to use. In addition, you can download and install other apps from Google Play, the Amazon Appstore, Samsung Apps, and developers’ websites.
Running an App
In this section, you learn the fundamentals of running apps: launching an app, using the hardware keys (Menu, Home, and Back) with apps, switching among running apps, and exiting from an app. The information covered here applies to any app you encounter.
Launching an App
As with programs on a computer, you can launch phone apps directly or indirectly (by performing an action that requires the app to be running).
Directly Launching an App
To launch a particular app, you can do any of the following:
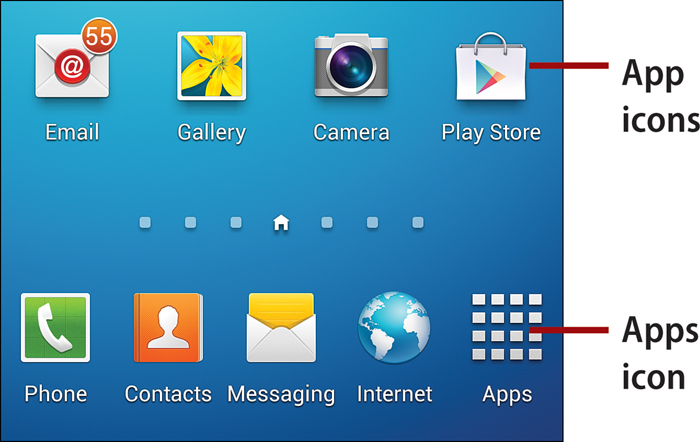
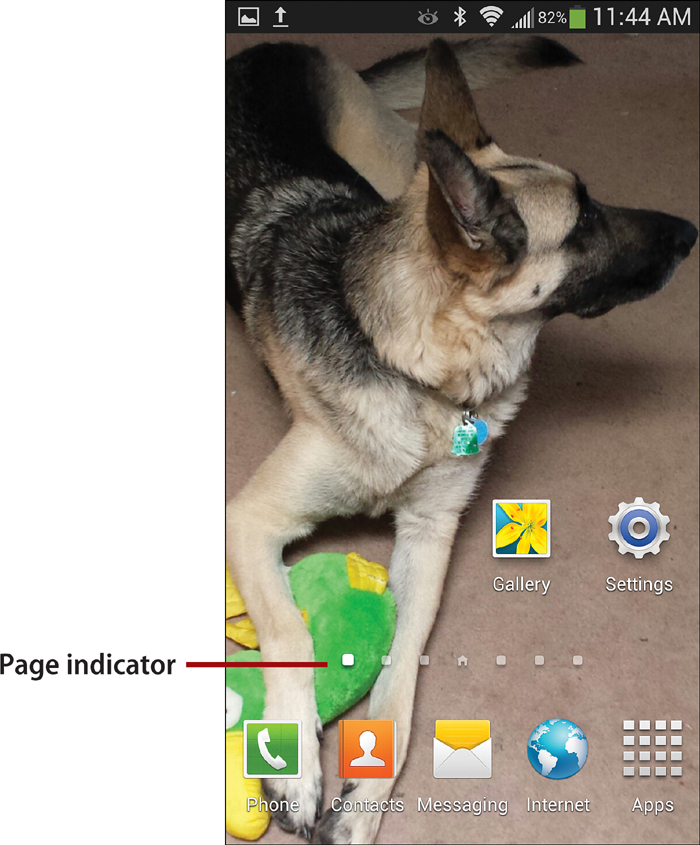
• On any Home screen page, tap the app’s icon. (In addition to the app icons that are preinstalled on the Home screen pages, you may have added shortcuts to some of your favorite apps to make them more readily accessible.)
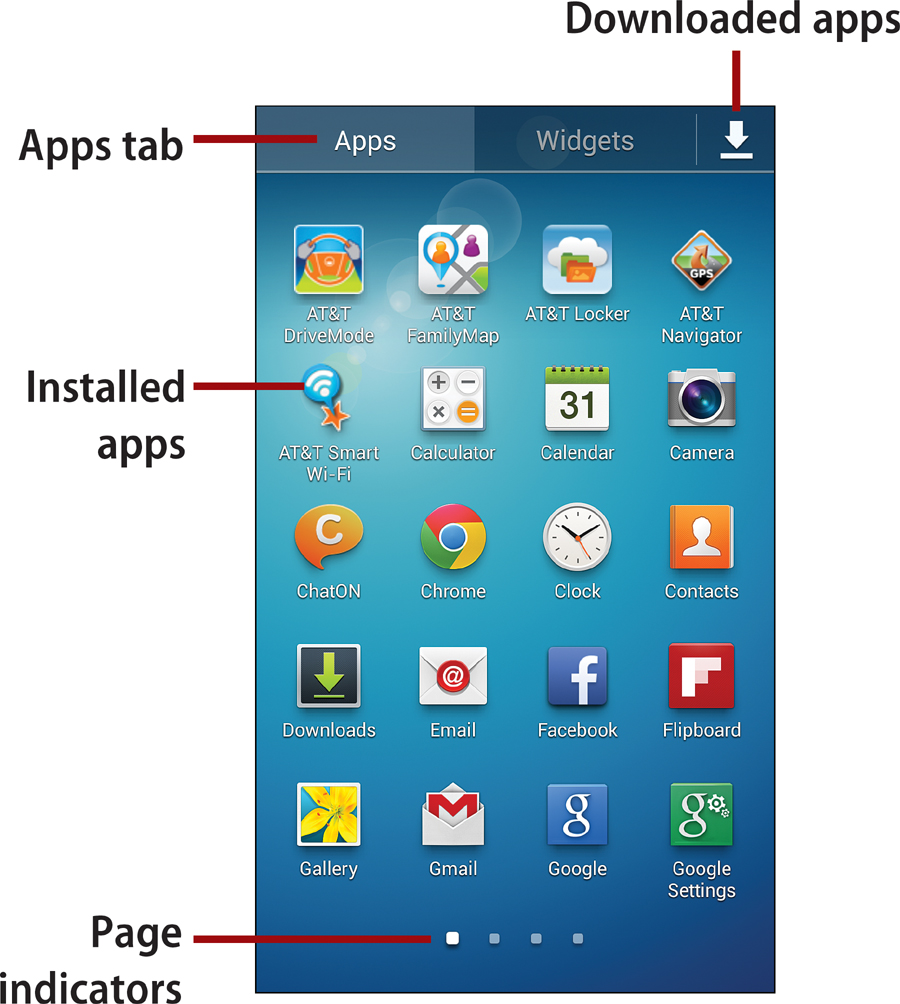
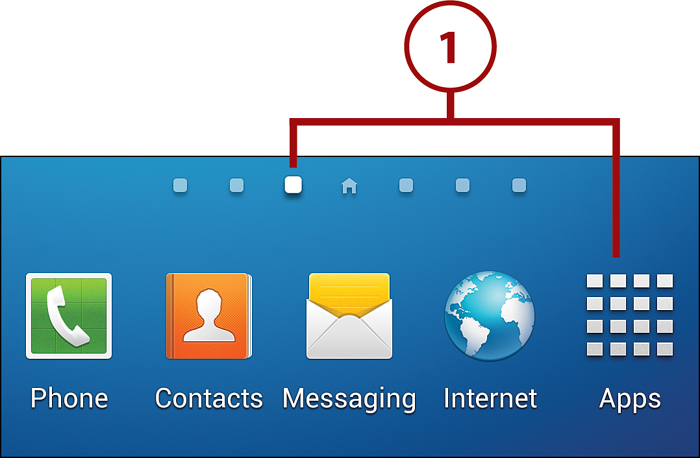
• Tap Apps at the bottom of any Home screen page. Ensure that the Apps tab is selected, and then tap the icon of the app that you want to run.
Navigation
Because you probably have several pages of apps, you can move from page to page by swiping the screen to the right or left or by tapping a navigation dot below the app icons.
To display only the apps that you’ve downloaded, tap the icon in the upper-right corner of the screen, or press the Menu key and tap Downloaded Applications.
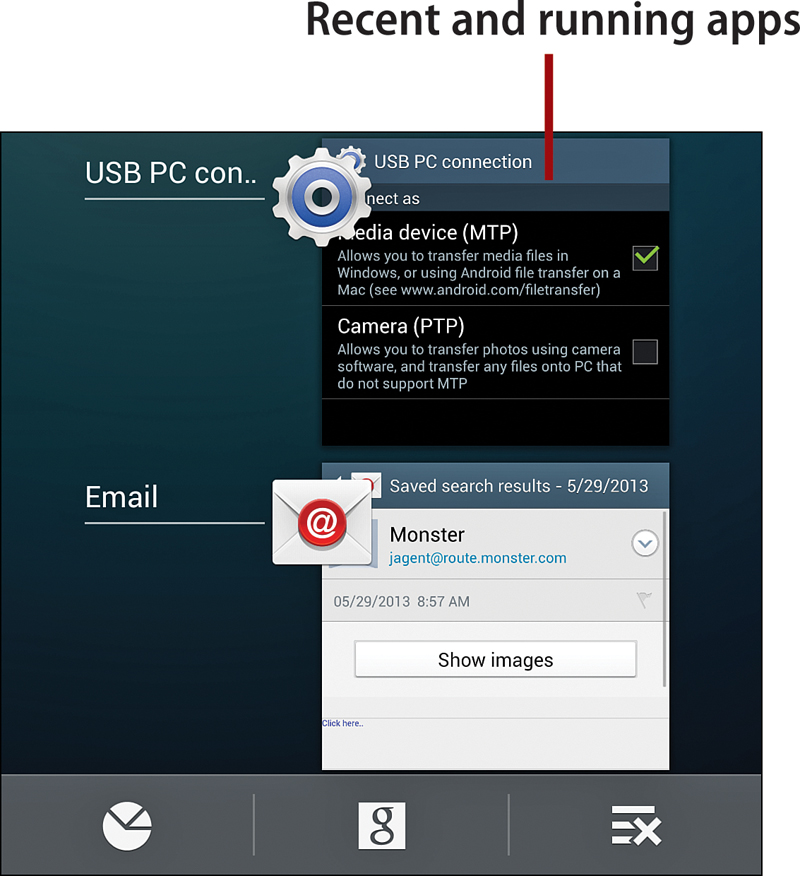
• On almost any screen, you can press and hold the Home key to display a list of recently run apps, as well as ones that are currently running. Scroll vertically until you see the app that you want to launch or to which you want to switch, and then tap its thumbnail.
Indirectly Launching an App
In addition to tapping an app’s icon, many actions that you perform on the phone can cause an app to launch. Consider these common examples:
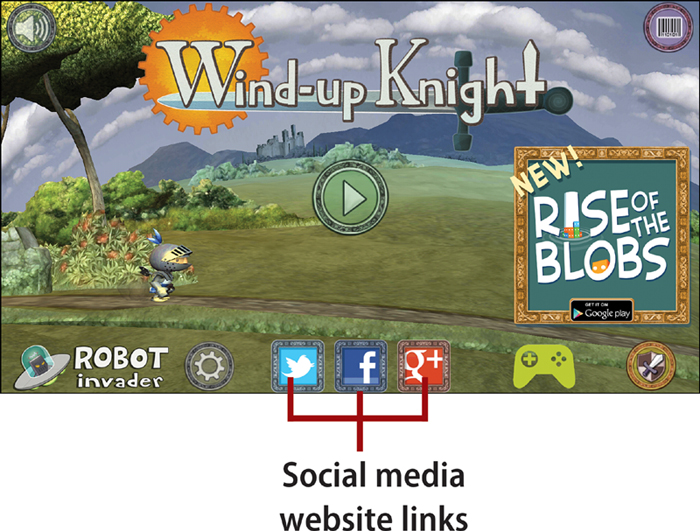
• In any program or widget, tapping a link to material stored on the web, to an HTML (web) file stored on the phone, or to a particular web page or site causes the Internet or Chrome app to launch to display the page. App help files are sometimes handled this way.
• Tapping a mailto: (email address) link on a web page or in an app causes Email to launch to create a new message to that address.

Not Just Links
In addition to tapping links, if you tap a phone number or email address on a web page, the number is entered into Phone in preparation for dialing or you can create a new Email/Gmail message to the address, respectively.
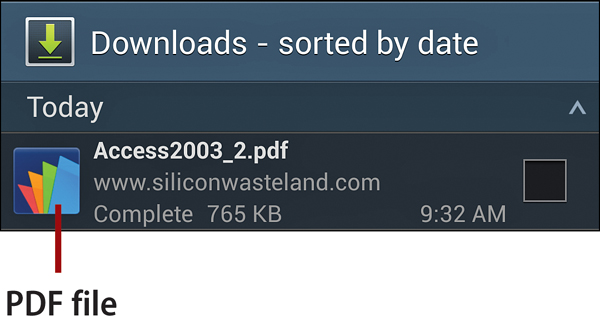
• Tapping a file icon (such as a music, video, or photo file) in My Files, in Downloads, on the Home screen, or in a folder you created causes an appropriate app to launch and present the file’s material. Tapping a document icon, such as a PDF or Microsoft Office document, may also cause an app to launch and display the file’s contents. Either case depends on having an app installed that is capable of reading and displaying the file, such as Polaris Office.
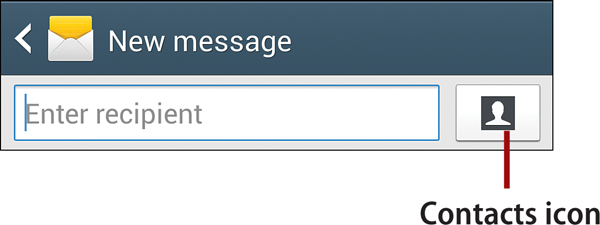
• Performing certain actions in an app can cause a related app to launch. For example, clicking the Contacts icon to select message recipients in Email or Messaging launches Contacts.
• Tapping certain entries in the Notification panel, such as a new email notification, causes the appropriate app to launch.
Using the Hardware Keys
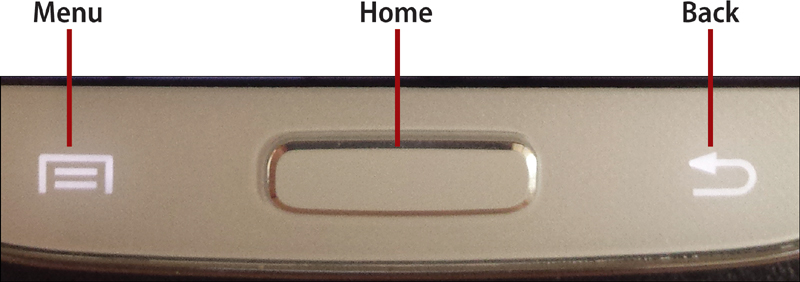
The three hardware keys at the bottom of the phone (Menu, Home, and Back) can be useful—and occasionally essential—when running apps.
Light ’em Up!
When the keys aren’t in use, only the Home key—a physical button—is visible. Until you tap one of the three keys or the touchscreen, the Menu and Back keys are hidden. Whether you can see the keys, however, is irrelevant. If you tap the currently hidden Menu or Back key, the key still performs its function.
Accessing Menus
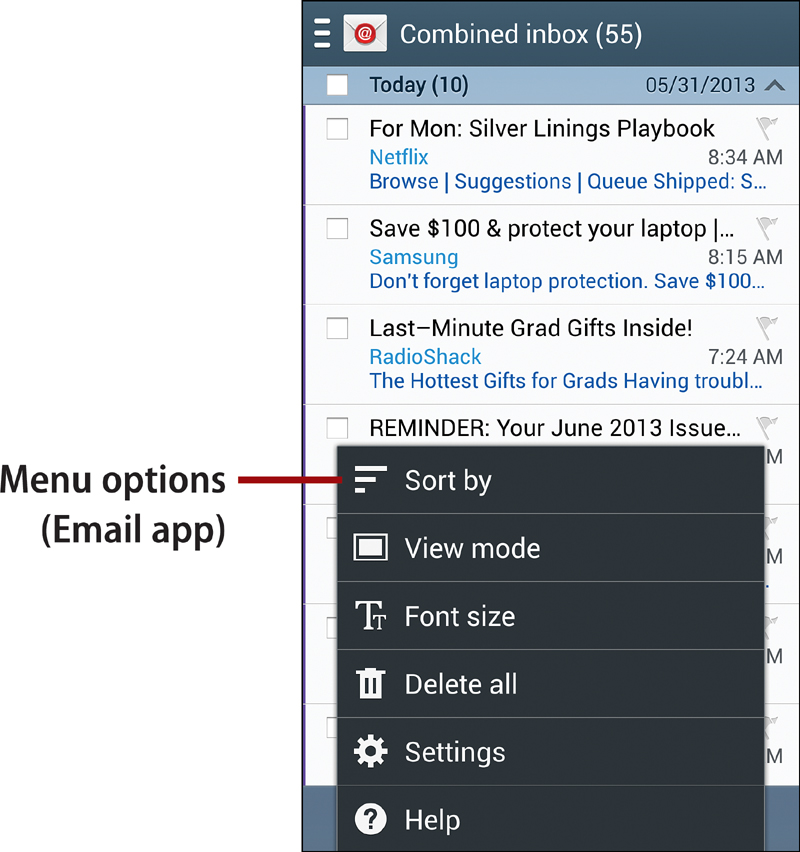
In apps that contain menus, you can press the Menu key on various screens to see the available options. Setting app-specific preferences is usually handled in this manner, for example. Note that menus are often context-sensitive—that is, they change depending on what you’re currently doing.
Other Menus
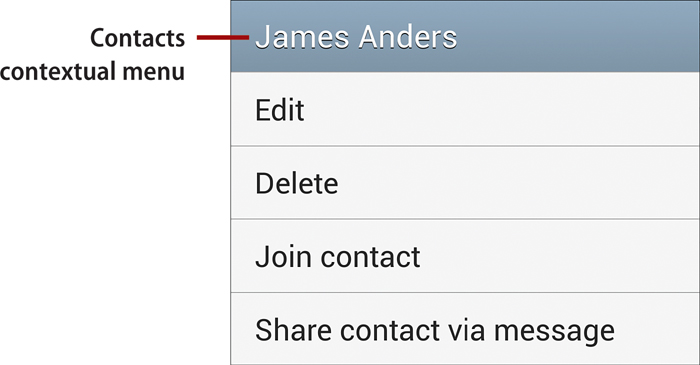
In addition to menus that are tied to the Menu key, apps may contain other menus. Some automatically appear onscreen (such as the Select menu in Gallery), whereas others are contextual menus that pop up when you press and hold an item (such as a contact record in Contacts).
Returning to the Home Screen
To immediately exit the current app, press the Home key. The most recently accessed page of the Home screen appears.
Navigating Within an App
Within most apps, forward navigation options are obvious. You tap entries, icons, thumbnails, or buttons to go to the next screen or to perform an action. However, the method of returning to the previous section or screen isn’t always as obvious. When it doesn’t happen automatically, you can usually press the Back key. (Some apps also have a Back icon in the upper-left corner of the screen that you can tap.)
In addition to moving you back through sections or screens (when using Internet or Chrome to view web pages or when modifying Call Settings in Phone, for example), you can also press the Back key to avoid making a selection in a dialog box or menu, leave the Notification panel, or dismiss the onscreen keyboard.
Switching Among Running Apps
Although many apps automatically quit when you leave them (see “Exiting an App”), you can use the Task Manager to switch among those that are running.
1. On almost any screen, press and hold the Home button until the list of recent and active applications appears.
2. Tap the Task Manager button.
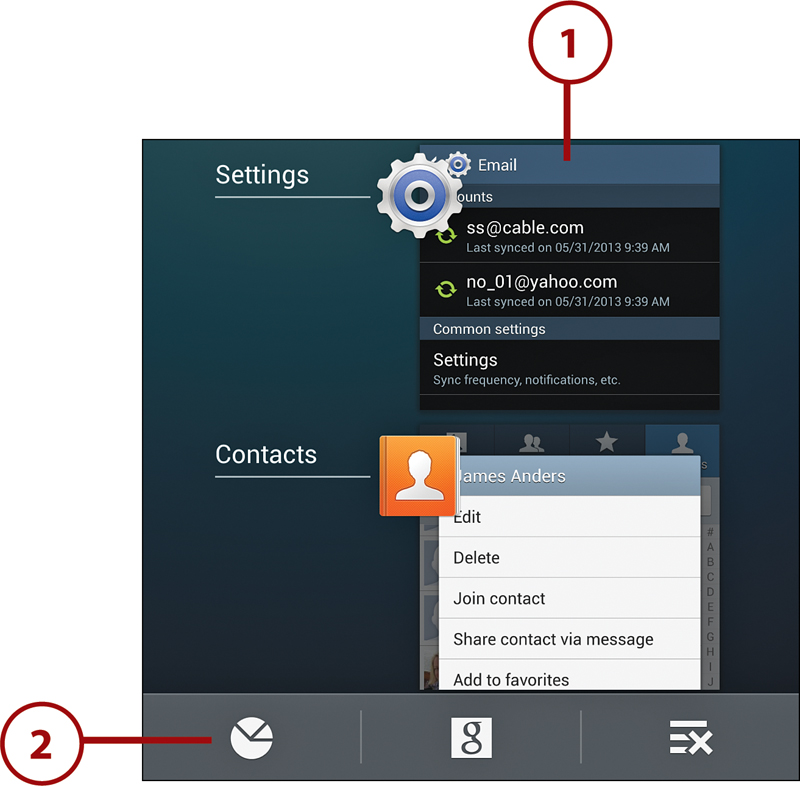
3. Ensure that the Active Applications tab is selected. To switch to any running app, tap its name.
Using Multi Window to Run Two Apps
With the new Multi Window feature enabled, you can split the screen to run two apps at the same time. Note that only certain apps can currently operate in Multi Window, such as Email, Gallery, Internet, and Messaging.
Enabling/Disabling Multi Window
1. On the Home screen, tap Apps, followed by Settings.

2. Select the My Device tab and tap Display.
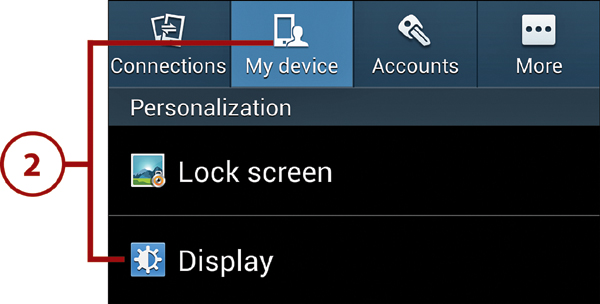
3. Tap Multi Window to toggle its state between enabled and disabled.

Enabled but Hidden
If you only occasionally use Multi Window or find its ever-present tab annoying, you don’t have to repeatedly open Settings to enable and disable it. Just press and hold the Back key to instantly hide or reveal the Multi Window tab.
Working with Multi Window
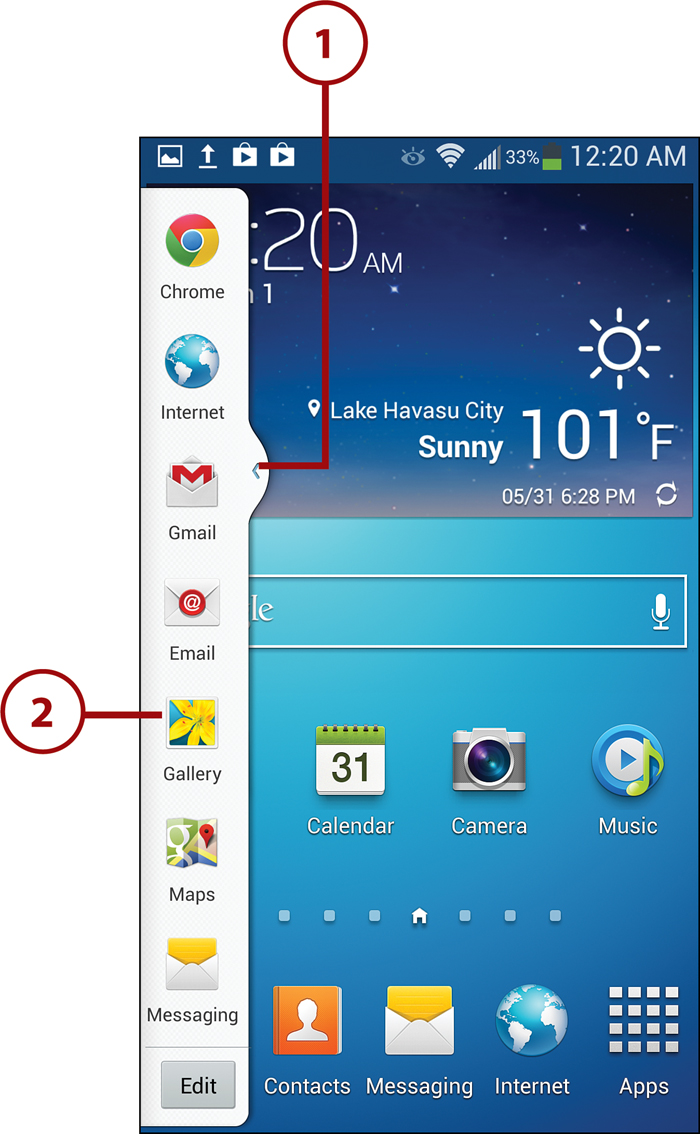
1. Open the vertically scrolling Multi Window bar by tapping its exposed tab.
2. To launch a Multi Window app, do any of the following:
• Tap an app’s icon on the bar to launch the app in full-screen mode.
• To launch a second app in split-screen mode, press and hold the app’s icon and drag it into the top or bottom half of the screen.
• To replace an app running in split-screen mode, press and hold an icon, and then drag it into the top or bottom half of the screen.
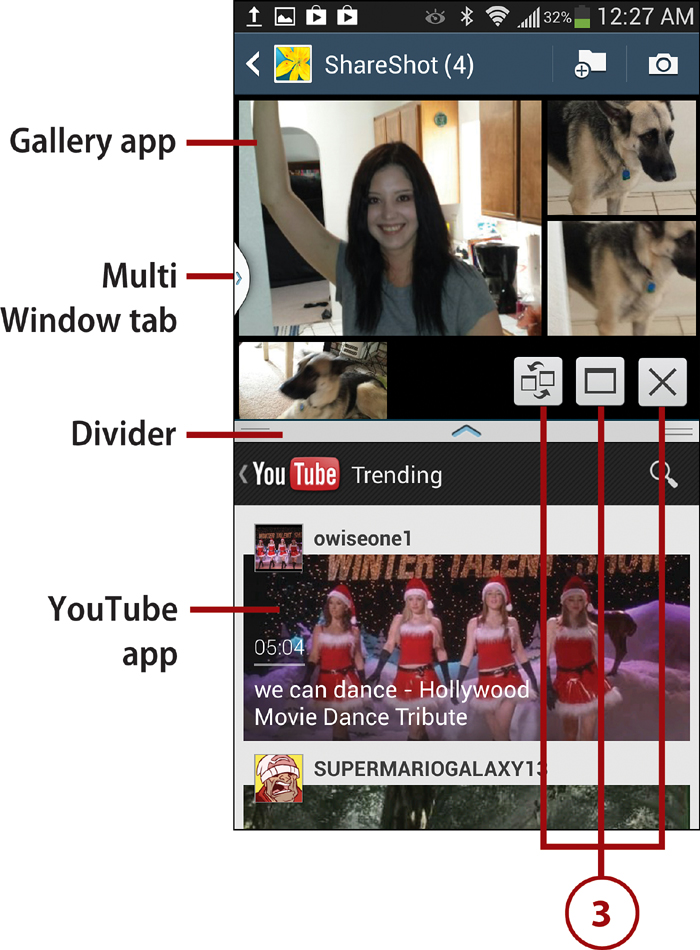
3. To modify the display when you’re in split-screen mode, you can do either of the following:
• Resize the two sections of the screen by dragging the bar that divides them.
• Tap the dividing bar to reveal a three-icon menu. In order, tap the first icon to swap the apps’ onscreen positions, tap the second icon to expand the app to full screen, or tap the third icon to close the app. (The latter commands affect the app that’s on their side of the divider. To select the app you want to change, tap the top or bottom half of the screen prior to tapping the expand or close icon.)
Multi Window Notes
Note the following when using Multi Window:
• If you launch an app that is incompatible with Multi Window, active Multi Window apps are cleared from the screen.
• If you launch a series of Multi Window apps (each one replacing another), you can frequently step backward through them by pressing the Back key.
• Opening Settings doesn’t interfere with Multi Window. When you’re done making changes in Settings, press the Back key to resume using the open Multi Window app(s).
Customizing the Multi Window Display
You can do any of the following to customize the Multi Window display:
• Change the tab position. With only the tab exposed, press and hold the tab, and then drag up or down to a new position on the Multi Window bar.
• Change the location of the Multi Window bar. The Multi Window bar can be on the left or right side of the screen (in both standard and landscape rotation). With Multi Window open, press and hold the tab until Multi Window undocks, and then drag it to the opposite side of the screen.
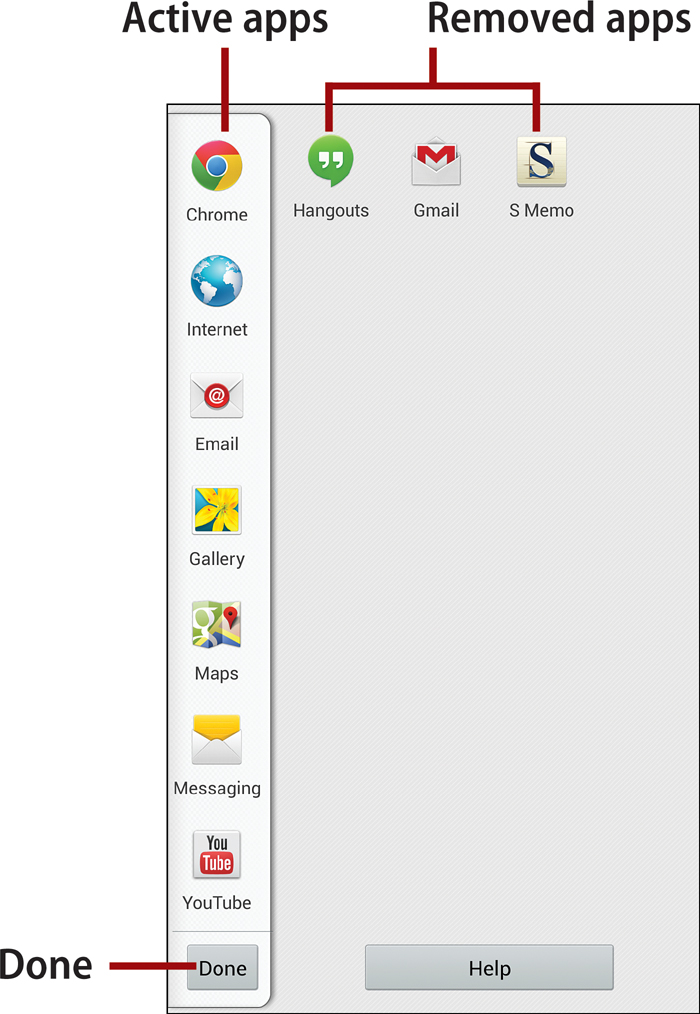
• Edit the Multi Window icons. With Multi Window open, tap the Edit button. You can drag icons off the bar (into the open window), drag them from the window onto the bar, or rearrange them. (Press and hold an icon, and then drag it to a new position on the bar.) When you finish editing the icons, tap Done.
Exiting an App
If you’re new to smartphones, you’ve probably noticed a major difference between phone apps and computer programs: Most apps have no Quit or Exit command. The few that do have such a command are typically those that, if left running, would run up data-related charges or rapidly drain the battery.
Whenever you perform an action that leaves the current app, such as powering off the phone, pressing the Back key, or pressing the Home key, the Android operating system decides whether to quit or suspend the app. Similarly, if app activities are causing the phone to run low on memory, Android performs these same functions as needed. However, if you want to quit an app manually to ensure that it’s no longer running, draining the battery, using memory, or running up data charges, you can use the Task Manager.
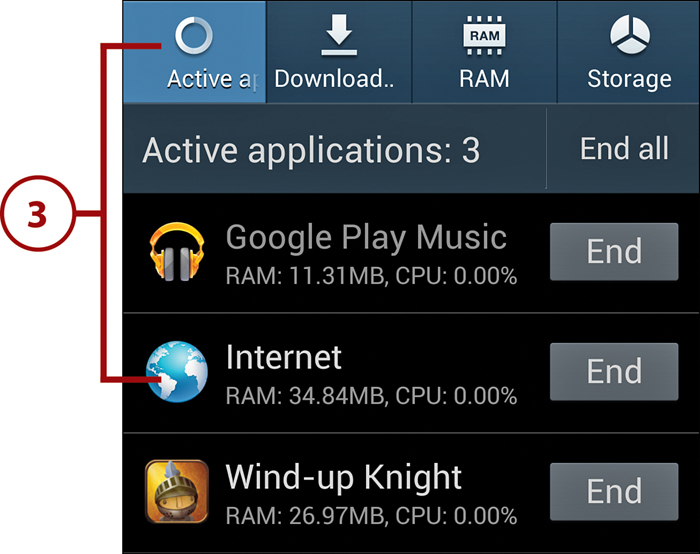
1. As described in “Switching Among Running Apps,” launch the Task Manager and tap the Active Applications tab (if it isn’t currently selected).
2. To quit a specific app, tap its End button. To simultaneously quit all listed apps, tap the End All button.
Downloading and Installing Apps from Google Play
Formerly known as Android Market, Google Play is the most common place for you to find Android apps for your phone. In addition to apps, you can download ebooks, movies, and music from Google Play.
1. Launch Google Play by tapping its Home screen icon (Play Store) or by tapping Apps and then Play Store.
2. Tap Apps, Music, or another link on the main screen to indicate the type of material that you’re seeking or want to browse.
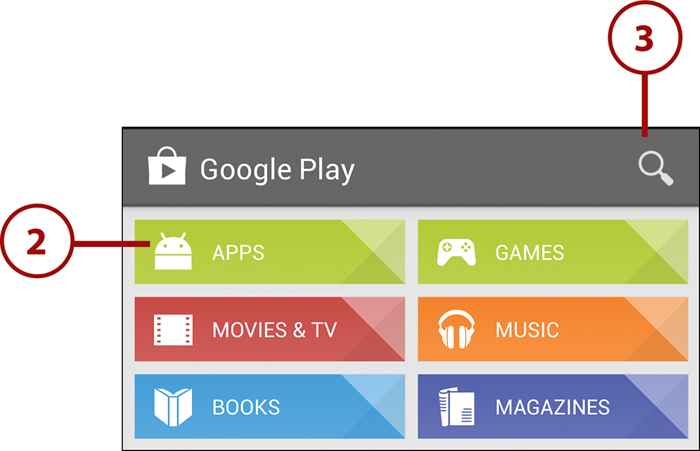
• To browse for apps, continue tapping links to focus your search.
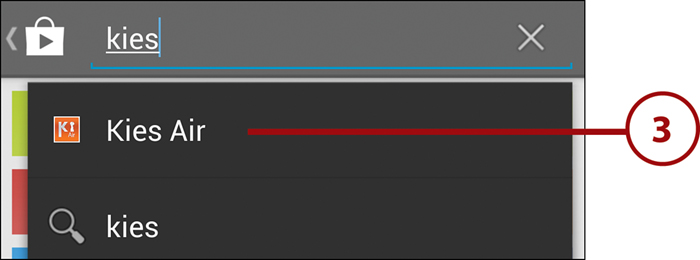
• If you know the name or type of app for which you’re searching, tap the search icon at the top of the screen and begin typing. A drop-down list of potential matches appears as you type. Tap one or continue typing to further narrow the search.
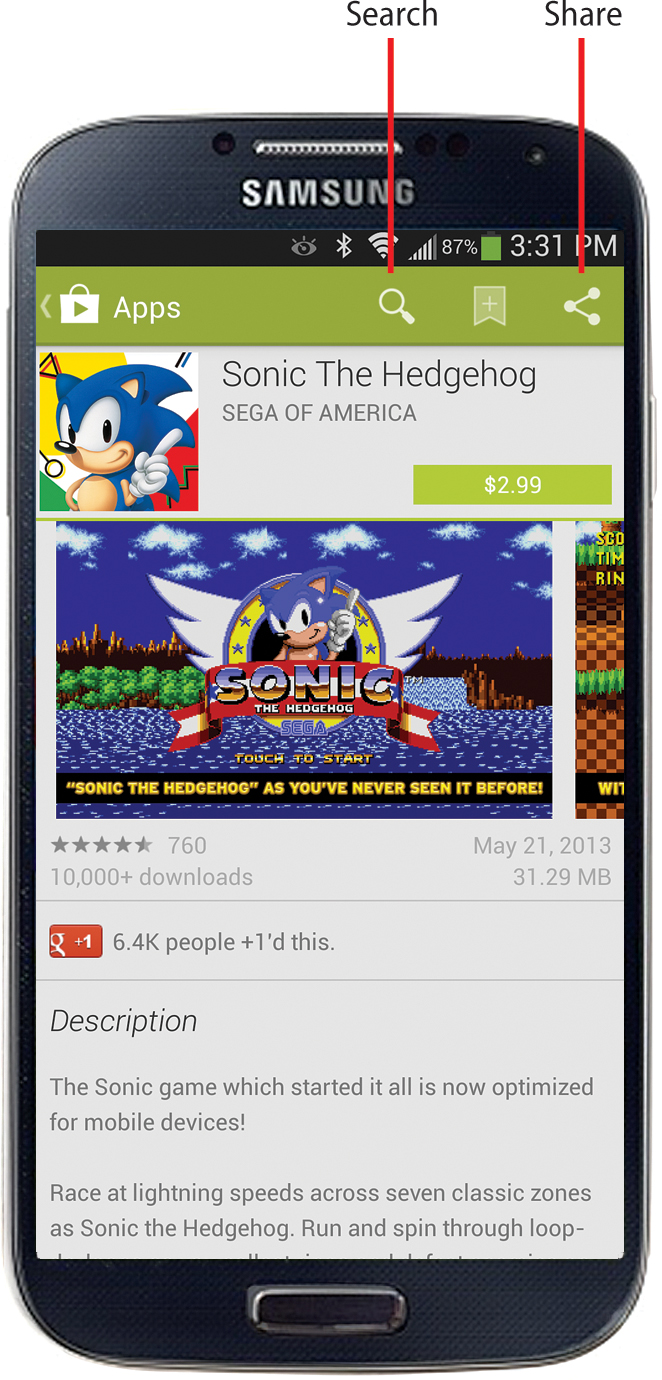
4. To view a listed app, tap its name.
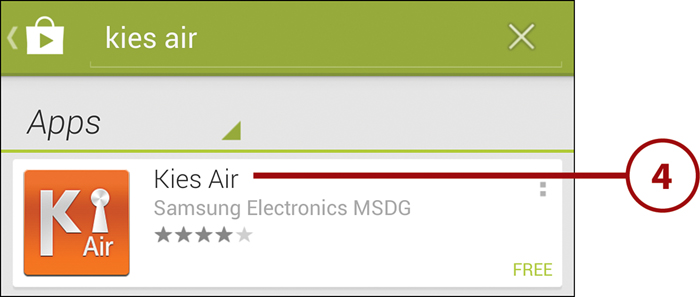
5. Review the description and user ratings for the app. You can also do the following:
• Tap the sample screen shots or videos. If multiple screen shots are available, you can view them by swiping left and right.
• To learn more about the app, read the What’s New and Description sections. You can also tap the link to the developer’s website (if provided).
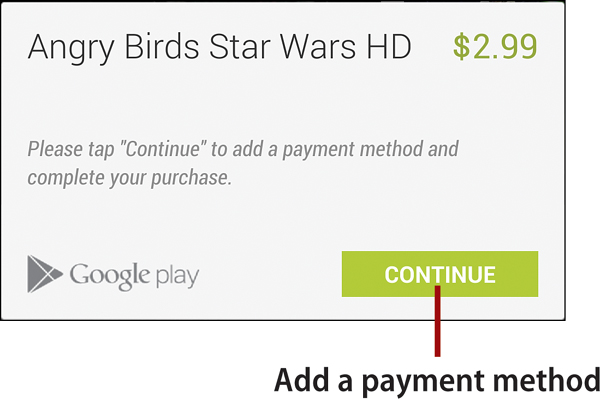
6. If you want the app, tap the green icon. If the app is free, the icon will read Install; otherwise, it will contain the price.

Charge It!
If the app isn’t free, you can charge it to a credit or debit card that you’ve registered with Google Play or—in some cases—add the charge to your monthly carrier bill. Specify a payment method or add a new one, and follow the instructions to complete the purchase.
Adding a credit or debit card creates a Google Wallet account for you. To learn about Google Wallet and where it’s accepted, visit www.google.com/wallet/.
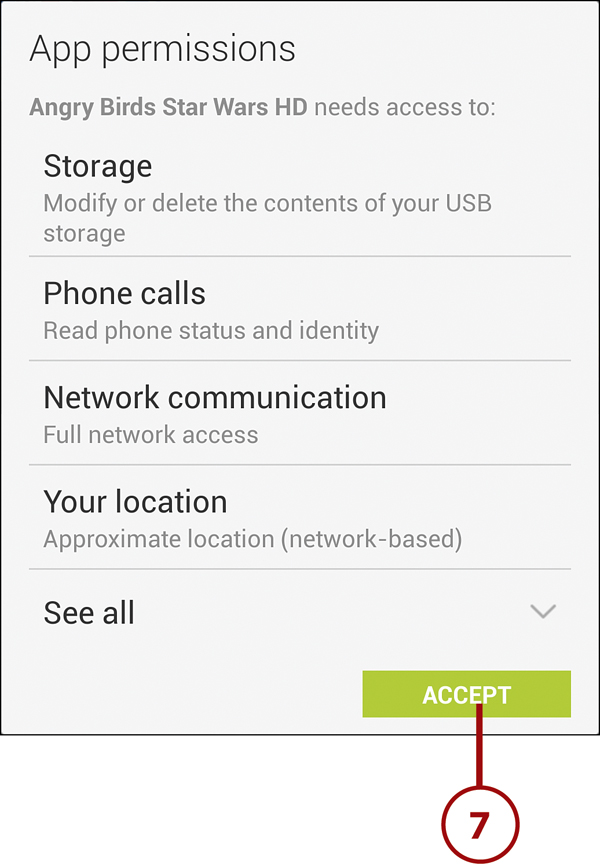
7. Before starting the download, the App Permissions screen appears, detailing how the app interacts with the operating system and uses your personal information. If the permissions are acceptable to you, tap the Accept button. The app is downloaded, installed on your phone, and its icon is added to the Apps pages.
Go Back
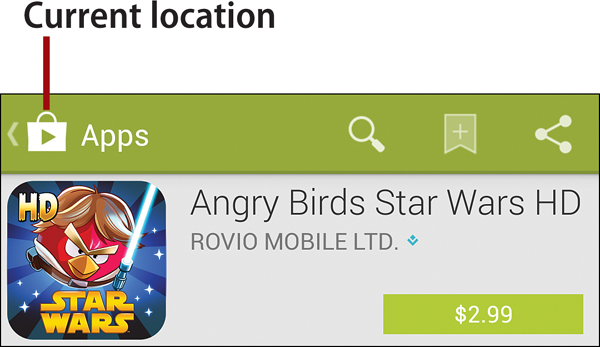
To step backward through Google Play to revisit previously viewed screens, press the Back key or tap the location information in the upper-left corner.
Customizing Google Play
Google Play has its own Settings screen that enables you to customize the way app updates are handled and provides an option to create a PIN that you can use to authenticate purchases.
1. In Google Play, press the Menu key and tap Settings.

2. The Settings screen appears. Following are the options you can change.
3. Notifications. When checked, an item appears in the Notification panel when updates are available for apps that you’ve downloaded from Google Play. You can download and install the updates by tapping the notification.
Check for Updates
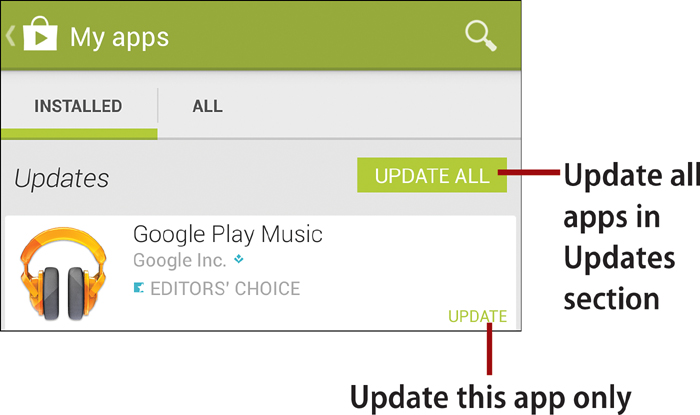
To manually check for updates, launch Google Play, press the Menu key, and tap My Apps to display the list of your downloaded apps. All apps for which updates are available are listed in the Updates section. Tap Update All to update all of the listed apps; tap the Update text for an app to update only that app.
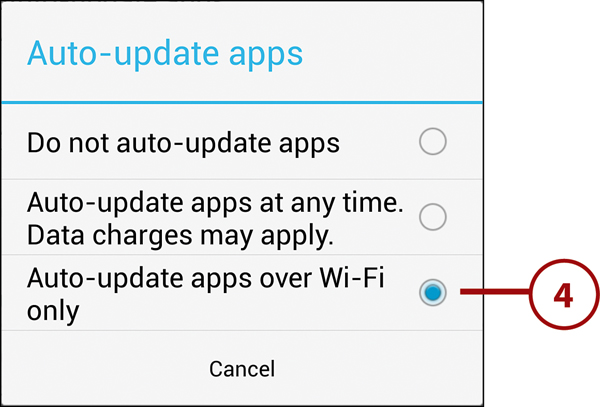
4. Auto-update Apps. This setting determines whether updates for apps are automatically downloaded and installed from Google Play as they become available. To specify how and when automatic updates occur, tap the Auto-update Apps text.
5. Auto-add Widgets. When this option is checked and you download a new app, a shortcut to the app is automatically added to your Home screen.
6. Clear Search History. Tap this option to delete all previous searches that you’ve performed in Google Play.

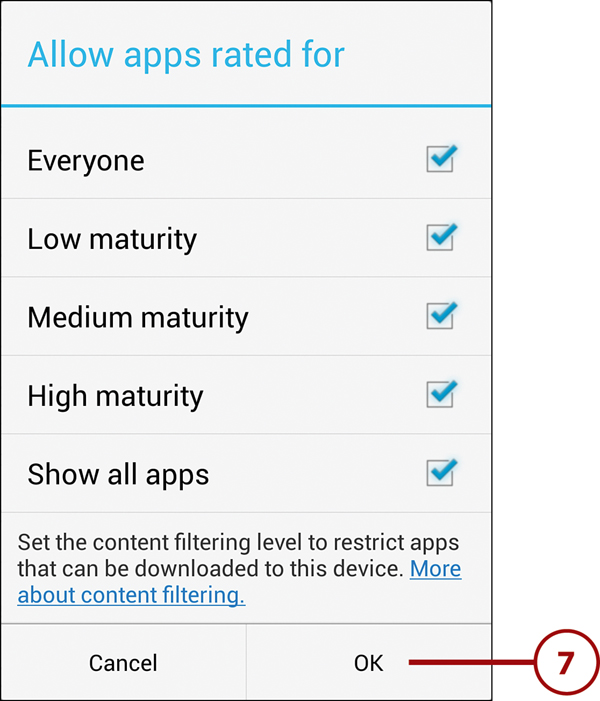
7. Content Filtering. To prevent certain types of apps from being downloaded, tap Content Filtering, enter or remove check marks on the Allow Apps Rated For screen, and tap OK.
8. Password. When checked, Google Play requests your Google/Gmail password whenever you purchase an app, movie, song, ebook, or other content.

Enabling App Downloads from Other Sources
Google Play is the official source of Android apps. However, if you’d like to download and install apps from unofficial sources, such as developer websites or the Amazon Appstore, you must change one of your phone’s settings.
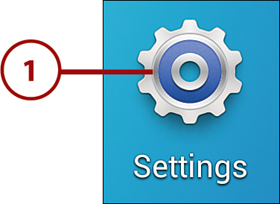
1. On the Home screen, tap Apps, followed by Settings.
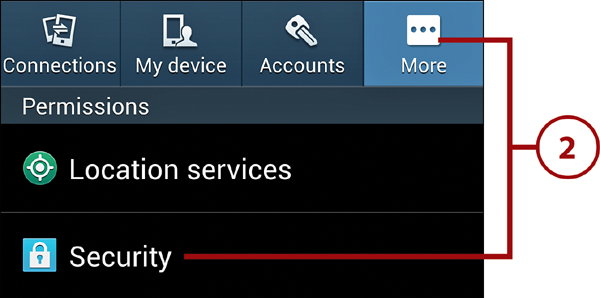
2. Select the More tab, and tap Security.
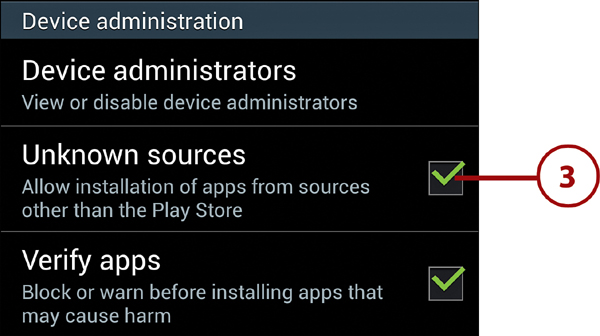
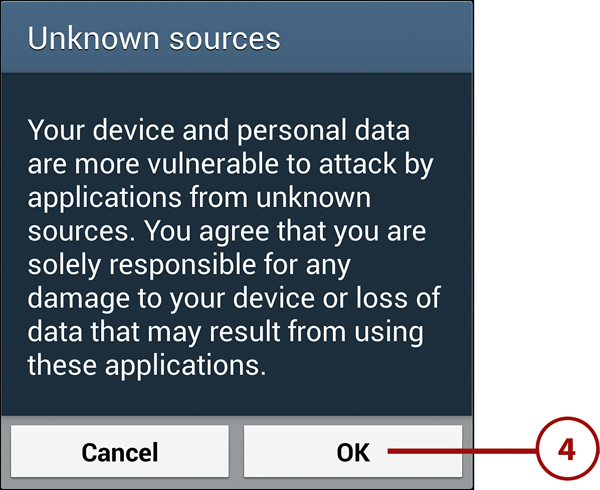
3. In the Device Administration section, enable Unknown Sources. When checked, you can download apps from any source that you choose.
4. Confirm by tapping OK in the dialog box that appears.
Using the Amazon Appstore for Android
The popular online retailer Amazon.com is another major source of free and paid Android apps. If you already have an Amazon account, you can use it to purchase apps for your phone, too. (If you haven’t already done so, you must allow downloading of apps from Unknown Sources, as explained in “Enabling App Downloads from Other Sources.”)
Installing the Amazon Appstore App
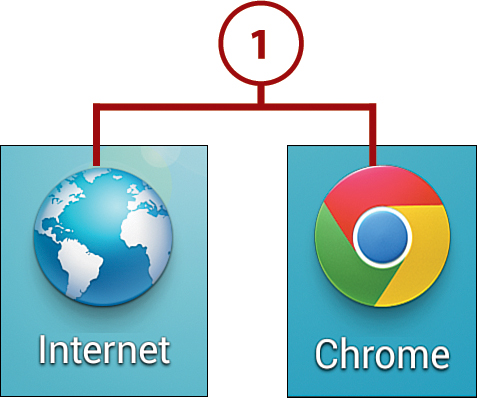
1. From the Home screen, tap Apps, followed by Internet or Chrome.
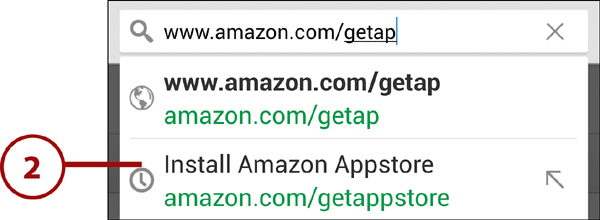
2. Enter http://www.amazon.com/getappstore in the address box or select it from the suggestion list as you type.
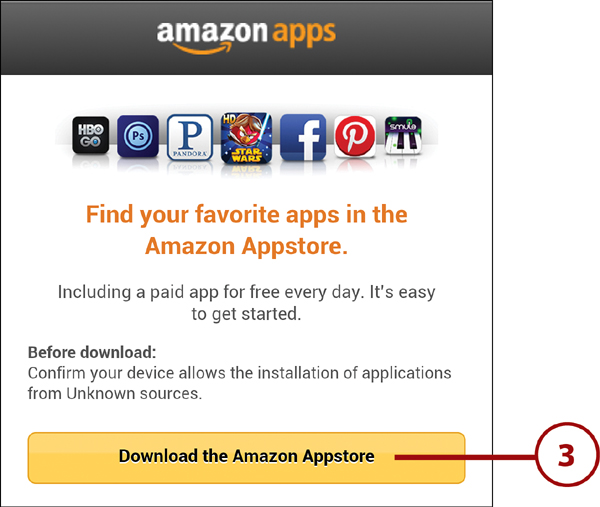
3. Tap the Download the Amazon Appstore button.
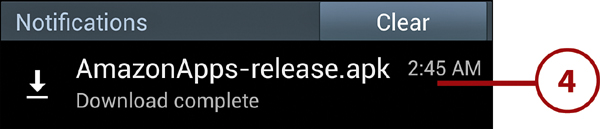
4. When the download completes, open the Notification panel and tap the AmazonApps-release.apk entry.
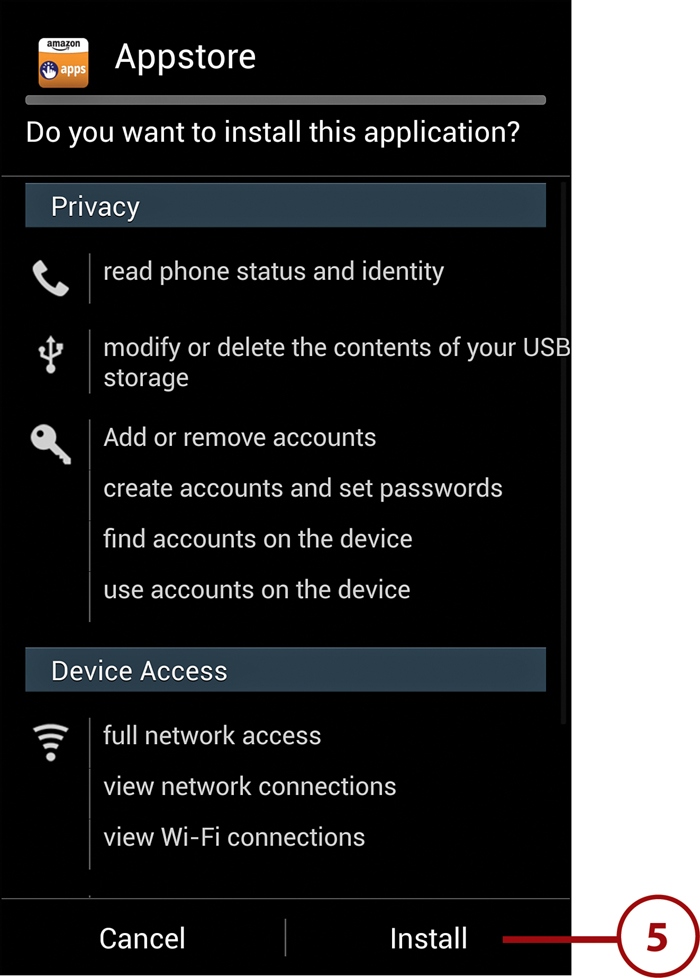
5. Review the Privacy and Device Access information for the app and tap Install. Tap Open on the following screen.
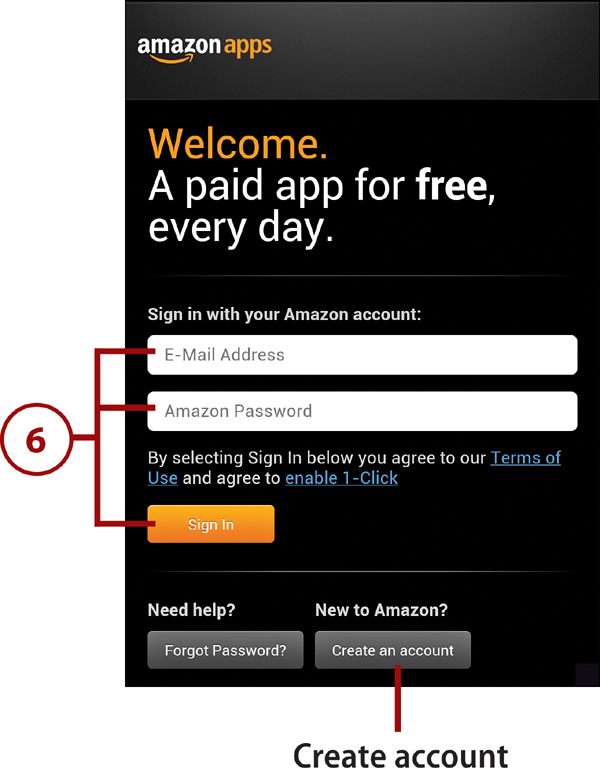
6. The Welcome screen appears. To associate this account with your Amazon.com account, enter your email address and Amazon password, and then tap Sign In. (If you don’t currently have an Amazon account, you can create one by tapping the Create an Account button.)
2. The Appstore opening screen appears.
3. Browsing. The main screen presents general categories you can use to begin your browsing. Apps within a category scroll left and right. You can tap app thumbnails or, if you don’t see something that catches your eye, tap See All to view all apps in that category. After doing so, you’ll note that you can further focus the browsing in the larger categories by selecting a subcategory from the Category icon and/or applying a sorting or filtering option from the Refine icon, such as Price or Avg. Customer Review.
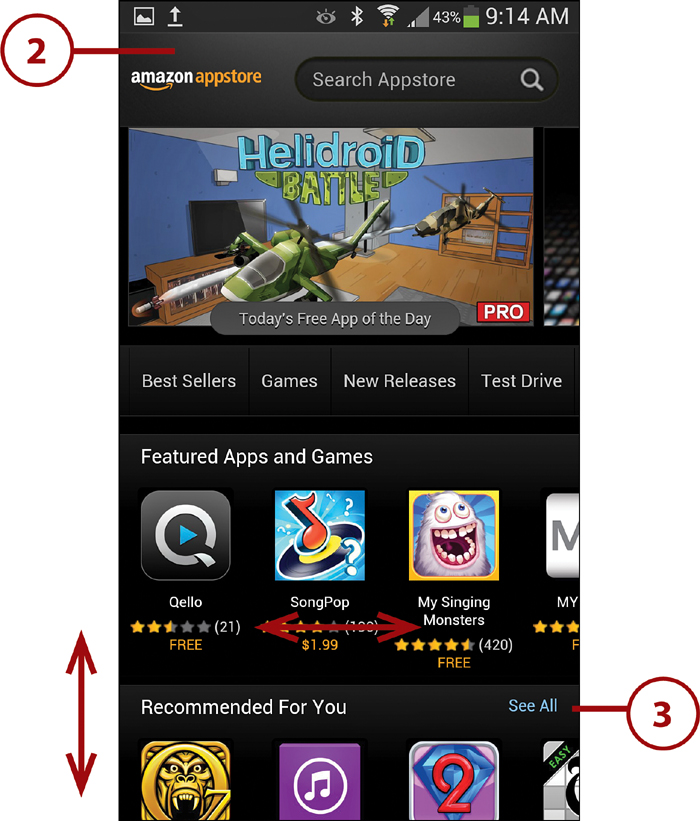
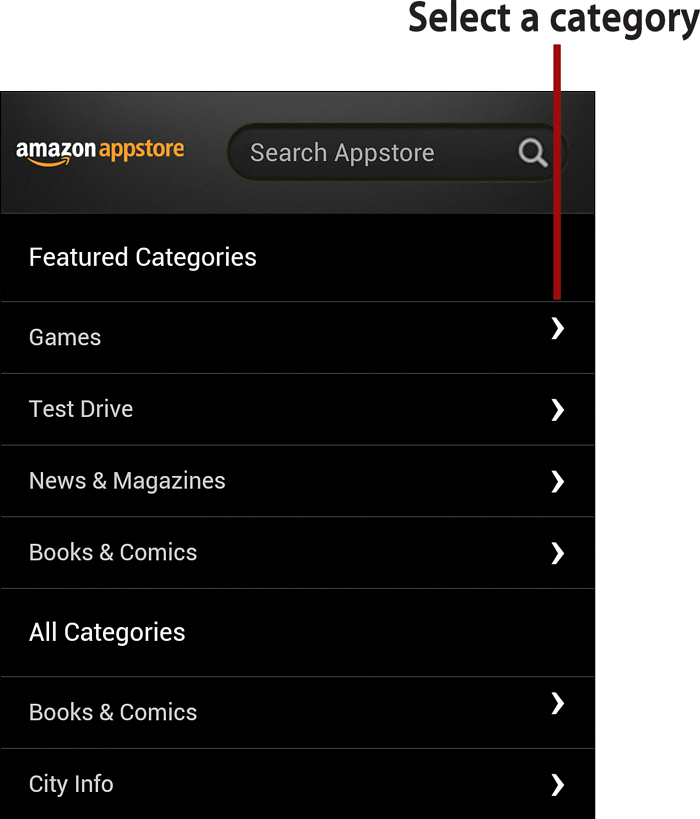
Paths to Better Browsing
You can quickly filter the apps by choosing a specific software category. Press the Menu key, tap the All Categories icon, and then tap the category in the scrolling menu. On the other hand, if you’re at a loss concerning where to start, return to the main screen and examine the Recommended for You list—apps that might interest you, based on your previous downloads.
4. Searching. If you know the name or type of app that you want, you can perform a search. Tap in the search box and enter the search text. When sufficient characters have been typed, a list of potential matches appears. Tap to select a suggestion or continue typing to further refine the suggestions.
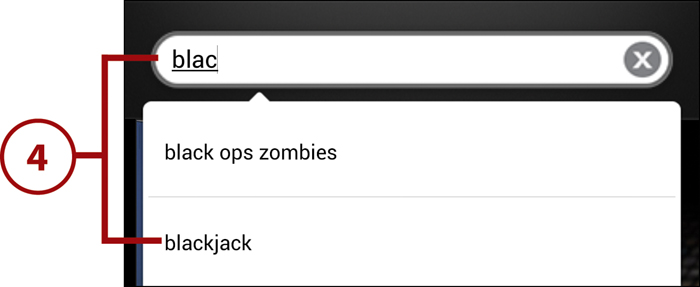
More Precise Searches
You can search all apps by performing the search on the main screen or search within a category or subcategory by navigating to that category before beginning the search (refer to step 3).
5. When you see an app that interests you, tap its entry and review the product description, screenshots, and reviews. Tap any screenshot to see it at full size.
6. If you decide to download the app, tap its Free or price button.
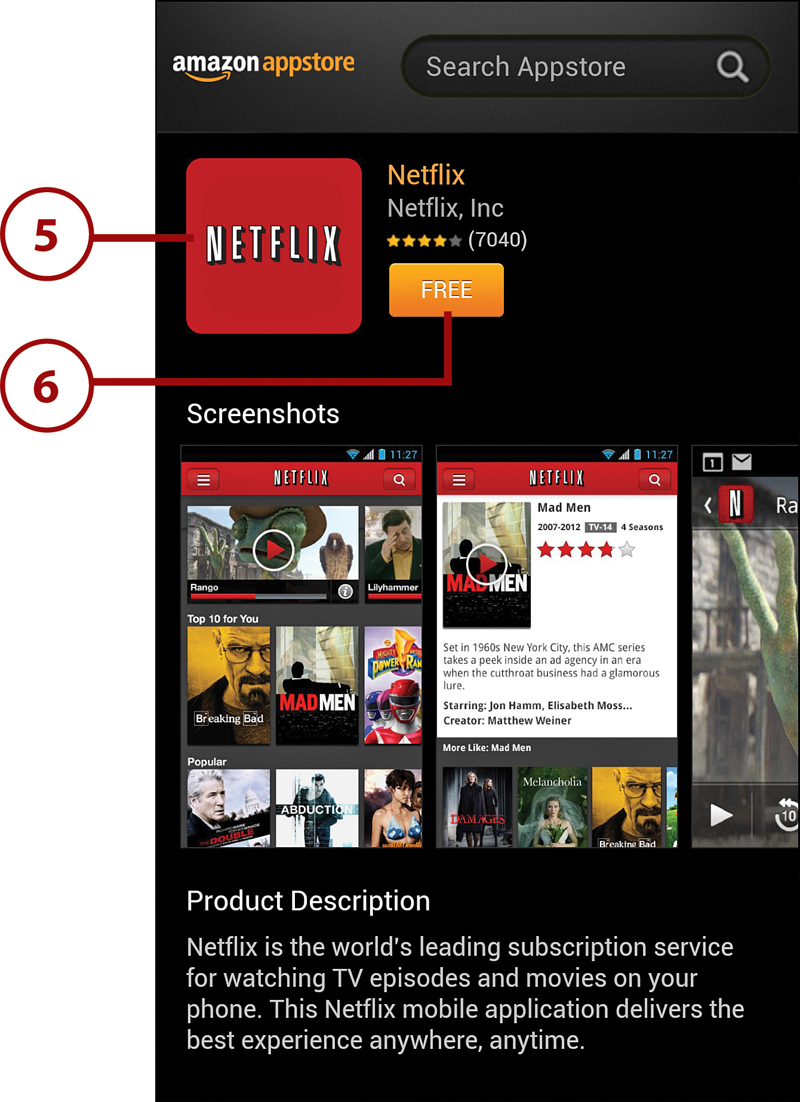
First Download Only
Until you enable Amazon’s 1-Click ordering and specify a preferred payment method, you can’t download apps. The first time you attempt to download an item, you’ll be stepped through the process of completing your Amazon account setup. To add a payment method to your account, use your computer’s browser to visit www.amazon.com, log into your account, and go to Add a Credit or Debit Card.
7. The button’s label changes to Get App (for a free app) or Buy App (for a paid app). Tap the button to initiate the download, charging it to your designated credit or debit card if it’s not free.
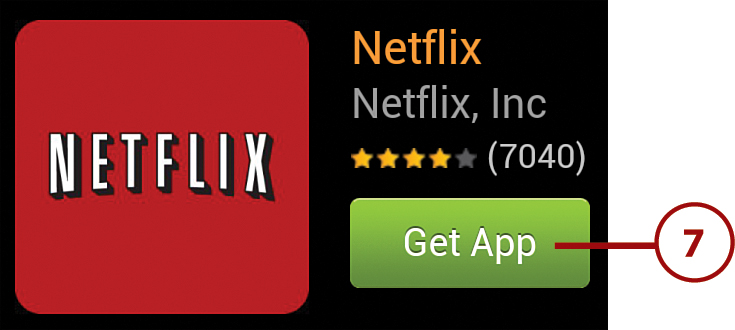
8. The permissions that the app requires are shown. Scroll through the permissions, and tap Install to install the app or Cancel if you’ve changed your mind.
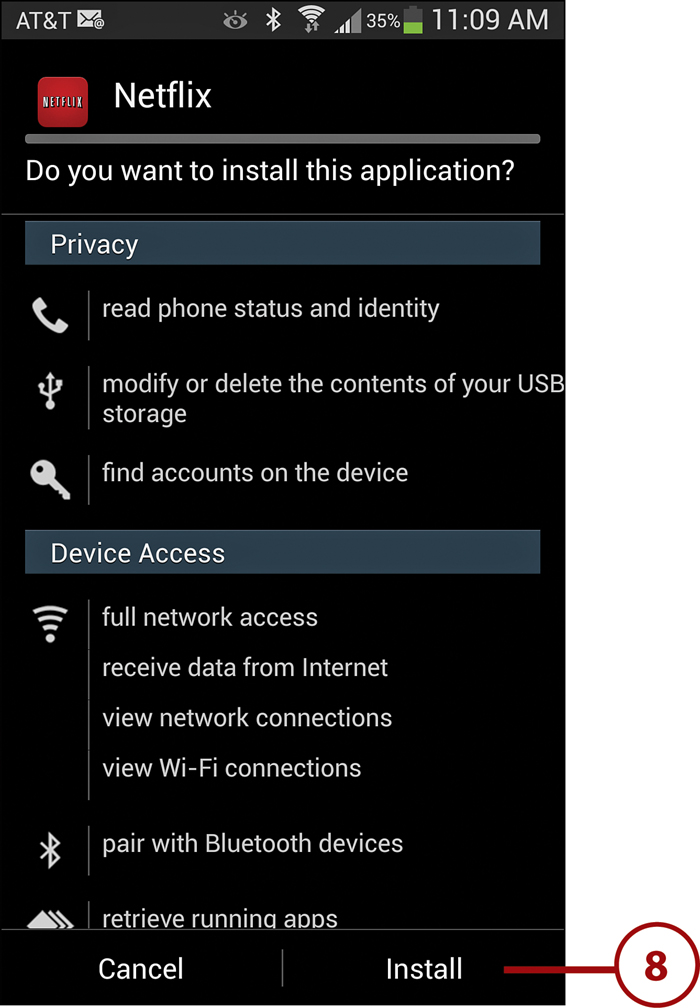
9. The app is installed on your phone and its icon is added to Apps. If you’d like to run it now, tap Open; otherwise, tap Done. Check your email for a receipt from Amazon.

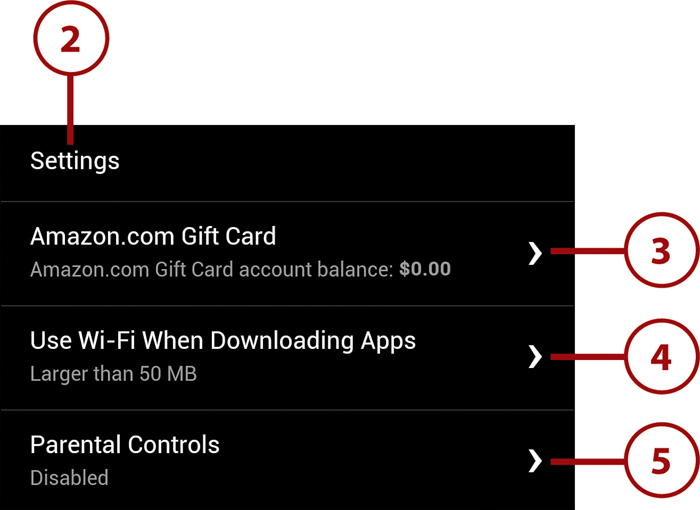
2. The Settings screen appears, enabling you to change important Appstore options. Altering most settings requires that you supply your Amazon.com user password.
3. Gift Cards. If you have an Amazon gift card or a promotional code, tap this option to add it to your account (enabling you to apply the amount to app purchases). Enter the gift card or claim code and then tap Redeem.
4. Use Wi-Fi When Downloading Apps. To avoid using your data connection to download large apps, tap this option to specify that apps larger than X MB should be downloaded only using Wi-Fi. (Apps smaller than the specified size can be downloaded using 3G/4G, if you don’t have Wi-Fi access at that moment.)
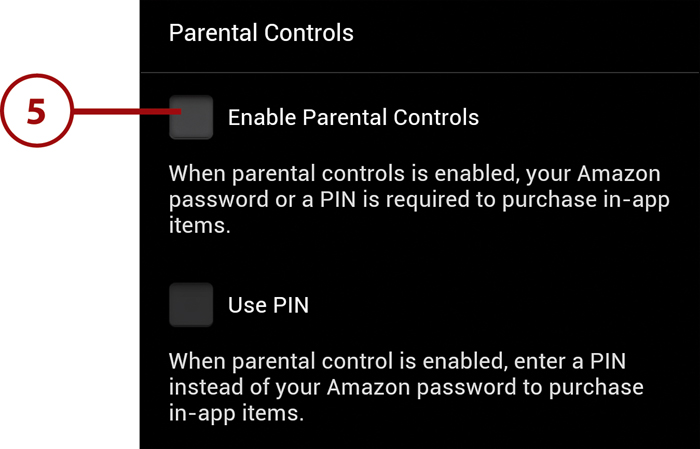
5. Parental Controls. When this option is enabled and anyone attempts to purchase in-app material such as subscriptions or game add-ons, your Amazon.com password or a PIN is requested. Tap Enable Parental Controls to enable the feature.
If Use PIN isn’t checked, your Amazon.com password is requested for in-app purchases. If Use PIN is checked, you must enter a numeric PIN instead of the password.

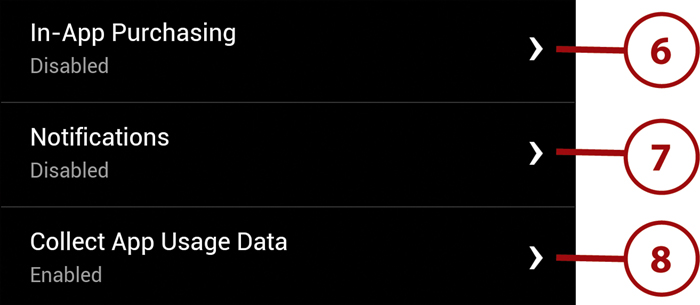
6. In-App Purchasing. When this option is enabled, you can buy app add-ons or subscriptions from within any app that offers them. (This option is enabled by default.)
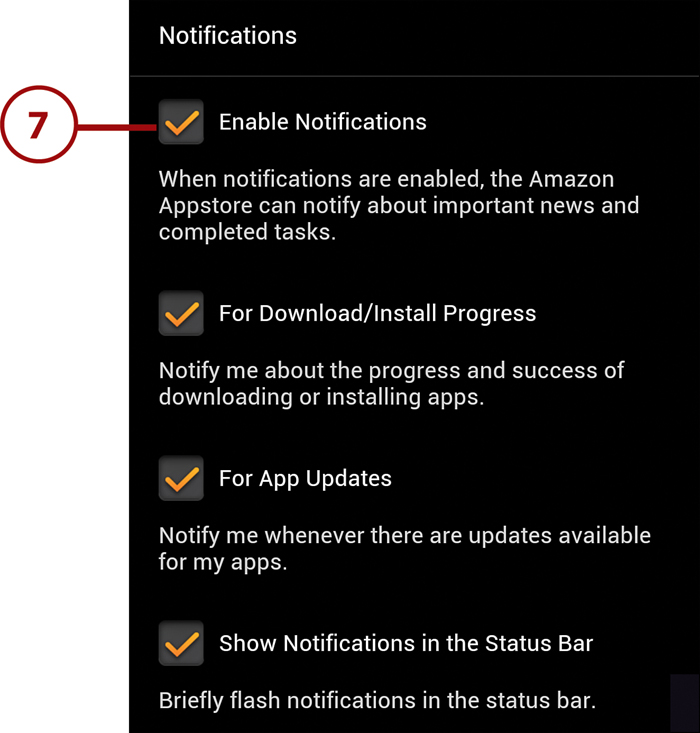
7. Notifications. Enable the various Notifications options to allow the Amazon Appstore to transmit notifications to the phone whenever something important occurs. (To enable any notification options, you must enable the first one.)
8. Collect App Usage Data. When enabled, Amazon collects usage data concerning the frequency and duration that you use the apps you’ve downloaded from the Appstore.
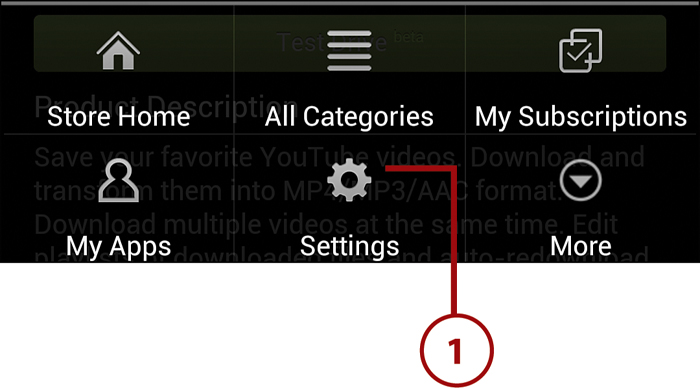
>>>Go Further: More Amazon Appstore Commands
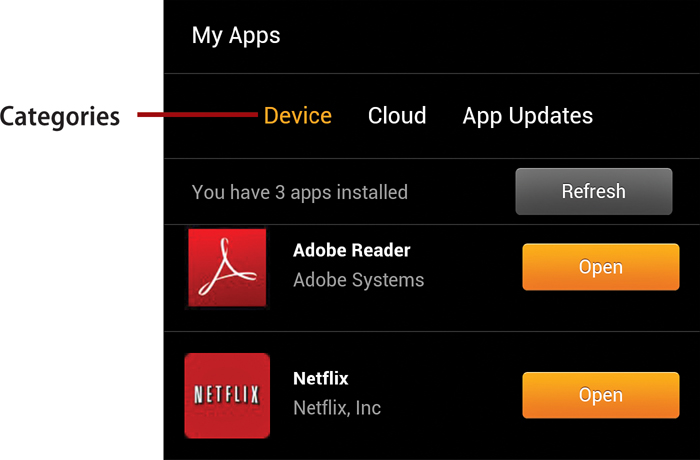
• Press the Menu key and tap My Apps to get the list of apps that you’ve downloaded from the Appstore. Tapping a category on the My Apps screen enables you to view installed apps on the current phone (Device), apps you’ve previous downloaded for this or another device (Cloud), or only those apps for which an update is available (App Updates). Tap a button to open, download, or update a listed app.
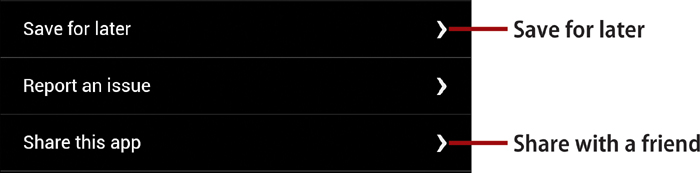
• When browsing for new apps, note that every app page has Save for Later and Share This App buttons at the bottom of the screen. When viewing an app of interest, tap Save for Later to add the app to a list that you can view by pressing Menu, tapping More, and Saved for Later. Tap the Share button to forward information about the app to a friend via email or text message.
• To return directly to the main screen, tap the Appstore logo at the top of the screen, or press the Menu key and tap Store Home.
Managing Apps
You can manage your installed apps by creating Home screen shortcuts to your favorite ones and uninstalling the apps you no longer want.
Creating Home Screen Shortcuts
To simplify the process of accessing your favorite apps, you can add Home screen shortcuts to them. You can accomplish this by using menus or by manually dragging them from Apps. (To learn more about moving and removing shortcuts, see “Customizing the Home Screen” in Chapter 3.)
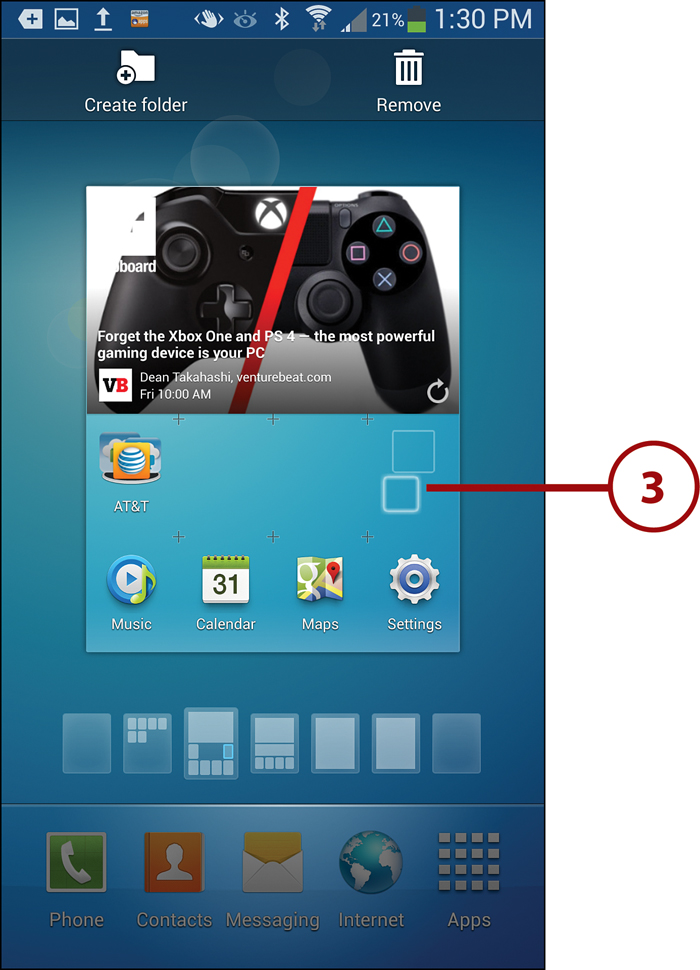
1. Navigate to the Home screen page where you want to add the app shortcut, and then tap the Apps icon.
2. Press and hold the icon of the app for which you want to create a shortcut.
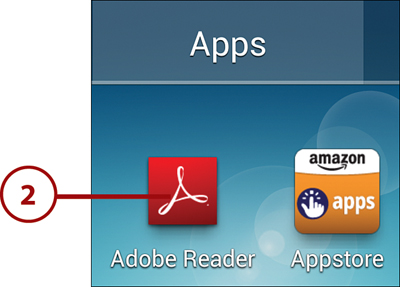
3. Drag it into position on the previously selected Home screen page (or to another page, if you like) and release the icon when it’s in the desired spot.
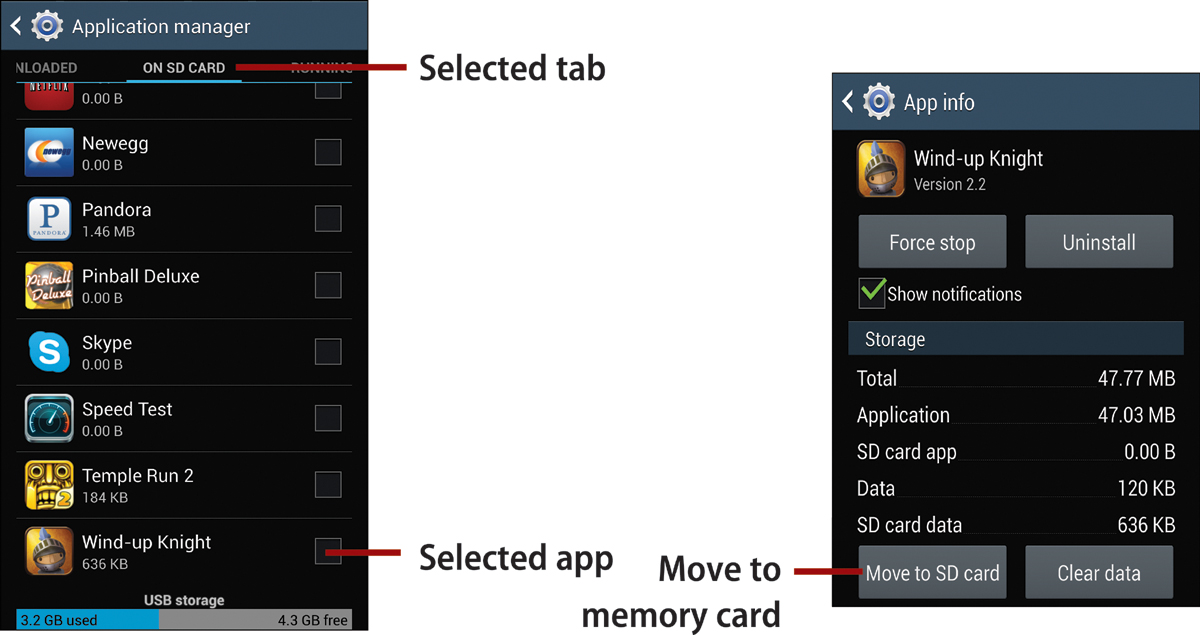
Uninstalling Apps
If you’re unhappy with an app or no longer need it, you can uninstall it, removing it from your phone and reclaiming the storage space it was using. Note, however, that only apps you’ve downloaded can be uninstalled; you can’t remove the built-in, core apps.
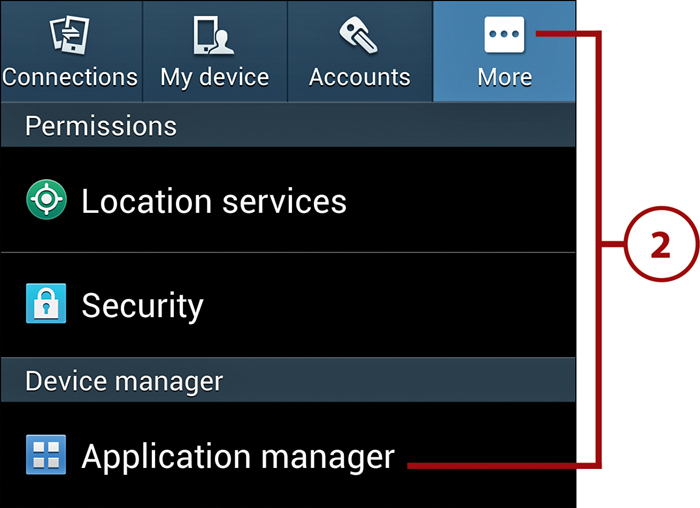
2. Select the More tab and tap Application Manager.
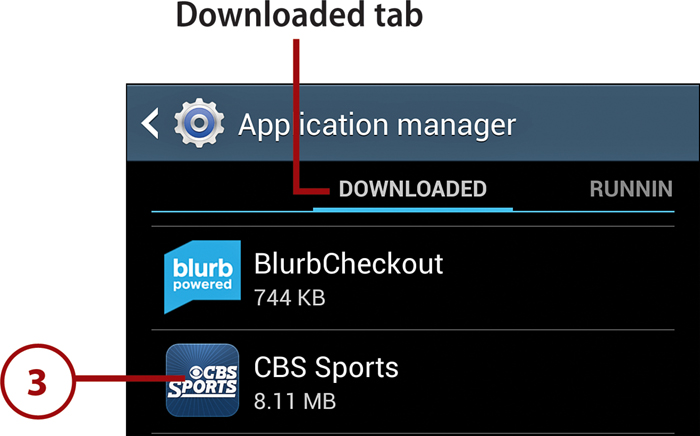
3. Select the Downloaded tab, scroll to find the app that you want to uninstall, and tap its entry.
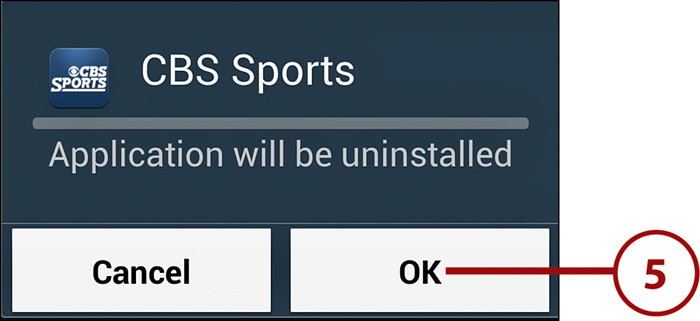
4. Tap the app’s Uninstall button. (Only apps that you are permitted to remove have an active Uninstall button.)
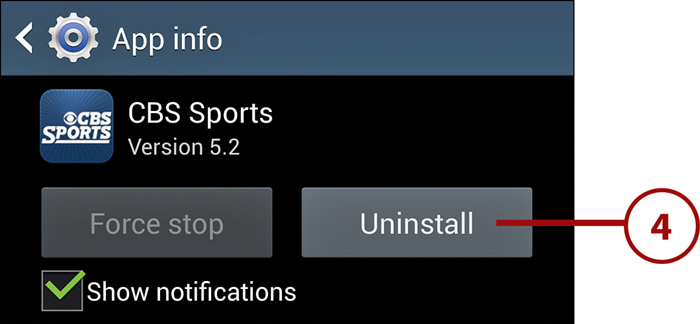
5. Tap the OK button on the confirmation screen that appears.
Uninstalling Using the Task Manager
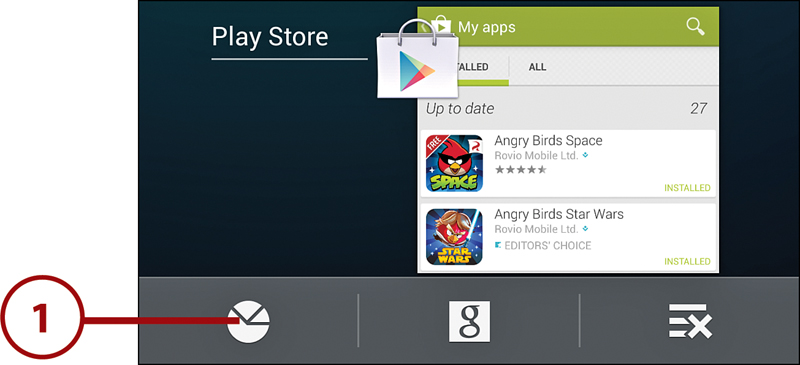
1. On almost any screen, press and hold the Home key until the list of recent and active applications appears. Tap the Task Manager button.
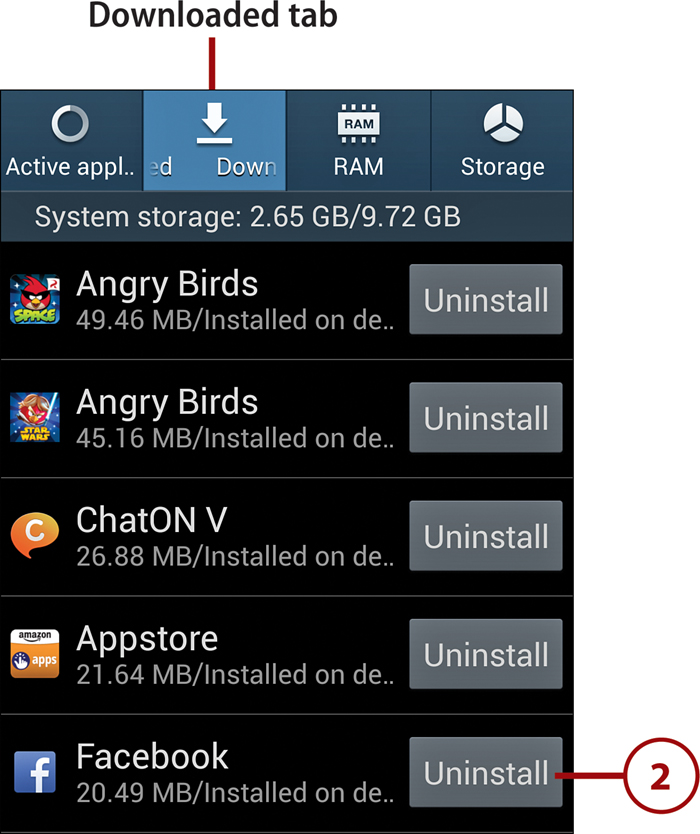
2. Tap the Downloaded tab, scroll to find the app that you want to remove, and tap its Uninstall button.
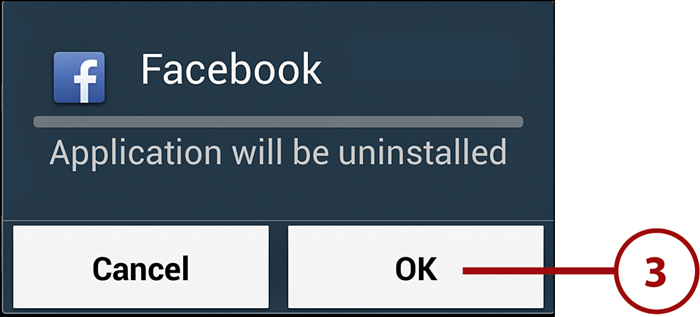
3. Tap the OK button on the confirmation screen that appears.
Uninstalling Using Google Play
1. From the Home screen, launch Google Play by tapping Apps and then tapping Play Store. (You may also have a Play Store shortcut on a Home screen page that you can tap.)
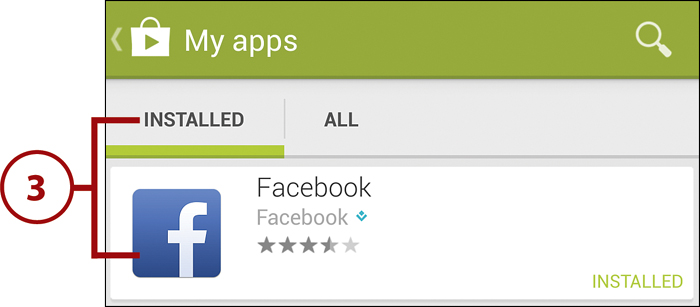
2. Press the Menu key and tap My Apps.

3. Select the Installed tab, and tap the app that you want to uninstall.
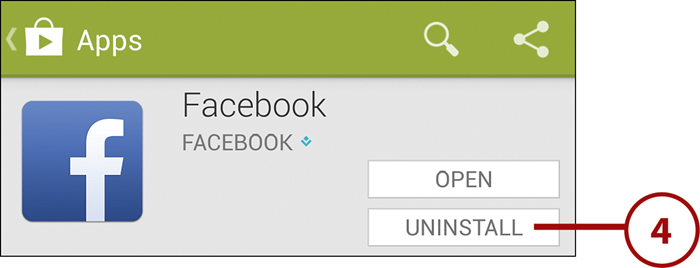
4. On the app’s Google Play page, tap the Uninstall button. (Although this button is available for most apps, it isn’t presented for system apps such as Group Play.)
5. In the dialog box that appears, confirm the app’s removal by tapping OK.
Updating Apps
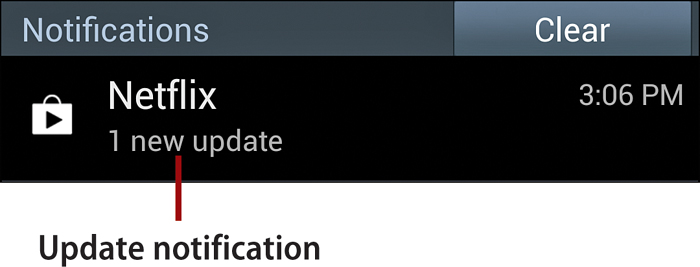
Developers occasionally release updates of their apps. When an update of an installed app becomes available at Google Play, a notification appears in the Notification panel. The core apps are often updated through GooglePlay, too.
1. Launch Google Play by performing steps 1 and 2 of “Uninstalling Using Google Play.” With the Installed tab selected, a list of the apps for which updates are available is displayed.
2. Do either of the following:
• To update an individual app, tap its Update text, and tap the Update button on the screen that appears.
• To simultaneously update all listed apps, tap Update All at the top of the list.

The selected updates download and install.
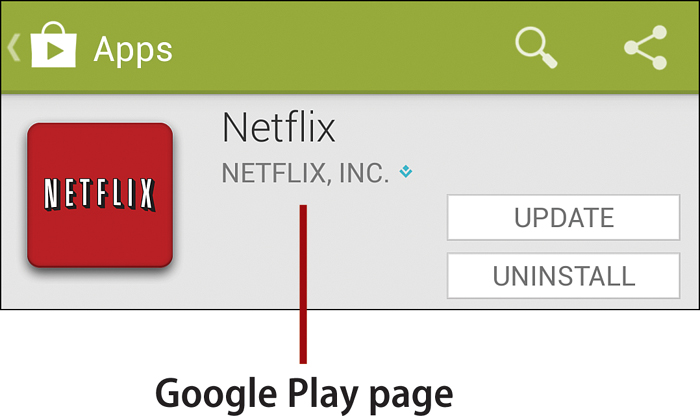
Another Update or Uninstall Option
You can also update or uninstall an app by going to its page in Google Play and tapping the appropriate button.