5. Managing Contacts
In this chapter, you find out how to use the Contacts app to create and manage your business and personal contacts. Topics include the following:
→ Understanding the Contacts interface
→ Creating, viewing, and editing contact records
→ Joining multiple contact records for the same person
→ Defining and working with contact groups
→ Backing up your contacts to the SIM card, built-in memory, or a memory card
→ Exporting Outlook (Windows) and Contacts/Address Book (Mac) contacts and importing them into Google Contacts
→ Setting display options for the Contacts record list
Contacts is the Galaxy S 4’s built-in address book app. It’s populated by contact records created on the phone, in your Google Contacts account on the web, and in other information sources that you sync to it, such as Facebook, LinkedIn, and Exchange Server accounts. The Contacts app links to Phone for dialing numbers, Email for selecting email recipients, and Messaging for selecting text and multimedia message recipients.
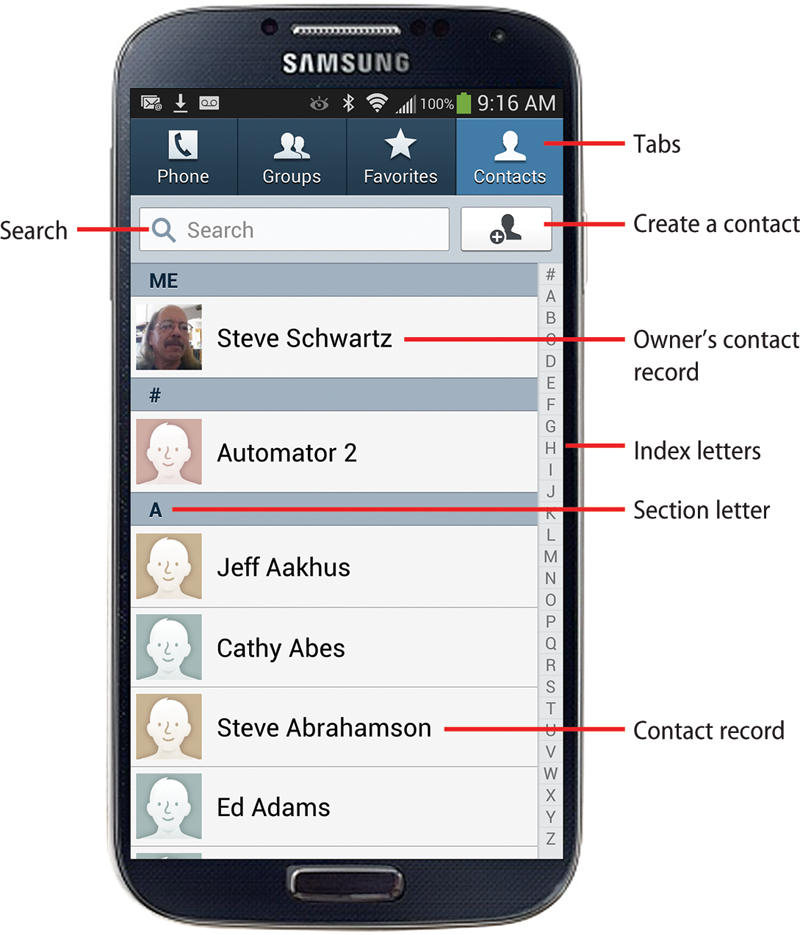
The Contacts Interface
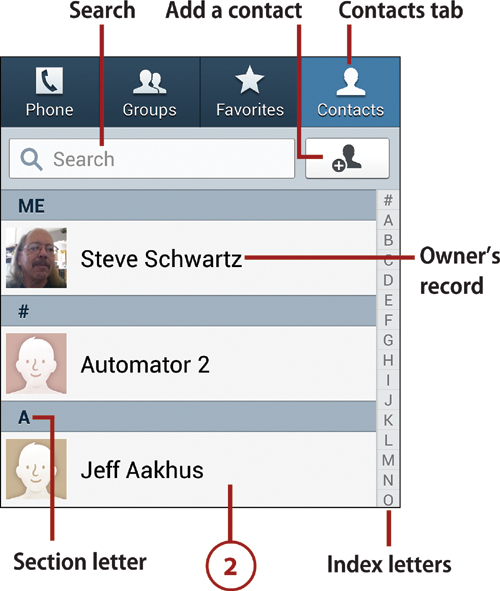
Contacts has four sections, each represented by a tab at the top of the screen. Here’s what you can do in each section:
• Phone. Tap the Phone tab to switch to the Phone app to make a call. (Phone and Contacts are linked; you can quickly switch between them by tapping the appropriate tab. Chapter 4 covers the Phone app.)
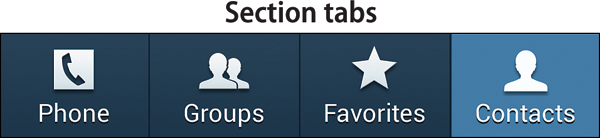
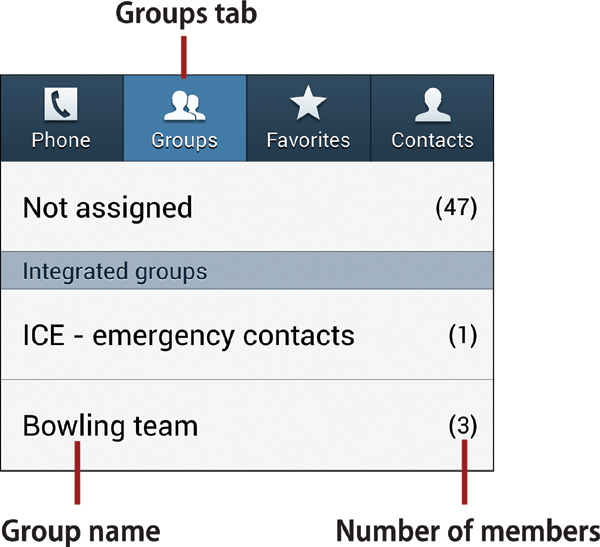
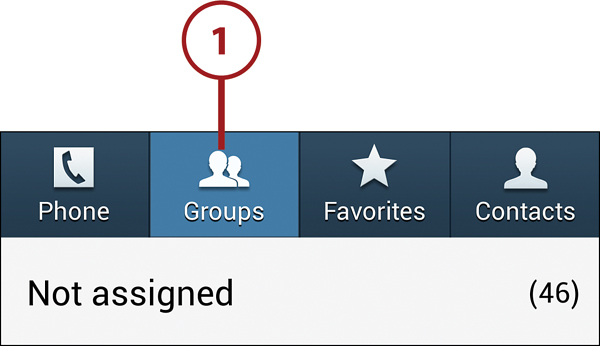
• Groups. Groups are contact record subsets whose members share some common element. Some groups, such as Family and Friends, are predefined or automatically created as you use the Galaxy S 4. You can also define your own groups, such as members of your bowling team or a committee on which you’re serving. To see the members of any group, tap the Groups tab and then tap the group name. To learn more about using and creating groups, see “Working with Contact Groups,” later in the chapter.
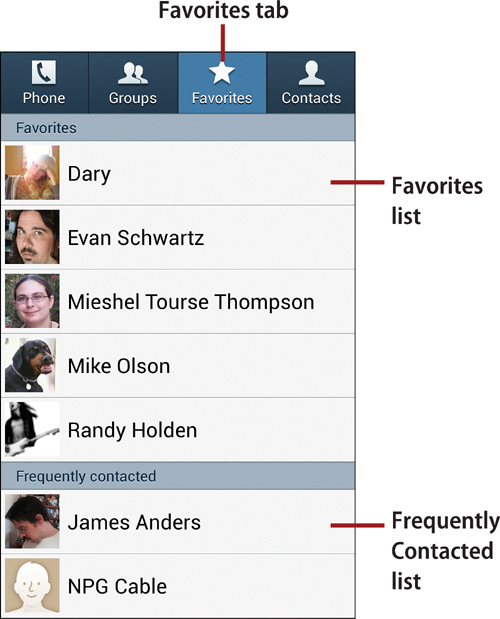
• Favorites. Tap this tab to view a list of only those contact records that you’ve marked as favorites. To add or remove someone as a favorite, open the person’s record for viewing in any list and tap the star icon to the right of the name. Beneath your favorites are other people and companies that you frequently call or message but have not marked as favorites. For more information about favorites, see “Marking Contacts as Favorites,” later in this chapter.
Grid Versus List View
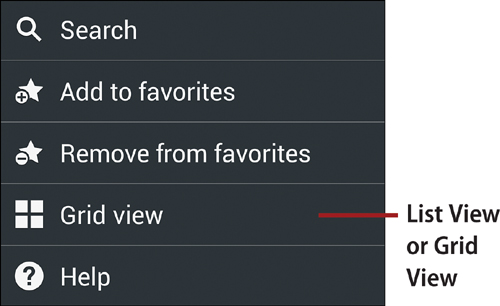
If you’ve added photos to your favorite contacts, press the Menu key and tap Grid View to display favorites as photo thumbnails. (To restore the Favorites scrolling list, tap List View.)
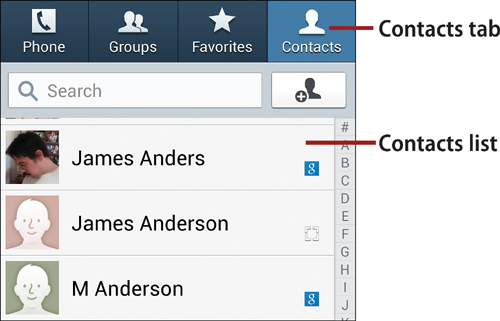
• Contacts. This is the default Contacts tab. It displays a scrolling list of your contact records. You can tap a person’s name to view her contact record. This section of Contacts can optionally be displayed by Phone, Email, and Messaging to enable you to select a call, email, or message recipient. The Contacts section is discussed throughout this chapter.
Creating a Contact Record
In addition to creating contacts in Google Contacts or another address book utility that you’re syncing with your phone, you can create new contact records directly on the phone.
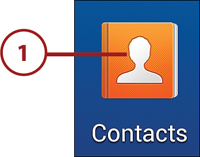
1. To launch Contacts, tap its Home screen icon or select it in Apps.
Other Contacts Launch Options
You can also launch Contacts by tapping the Contacts tab in the Phone app or the Contacts icon in Email or Messaging when selecting message recipients.
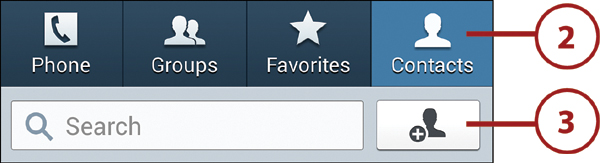
2. If it isn’t automatically selected, tap the Contacts tab.
3. To create a new contact record, tap the plus (+) button to the right of the search box.
4. The screen for creating a contact appears, ready for you to enter the person or company’s contact information.
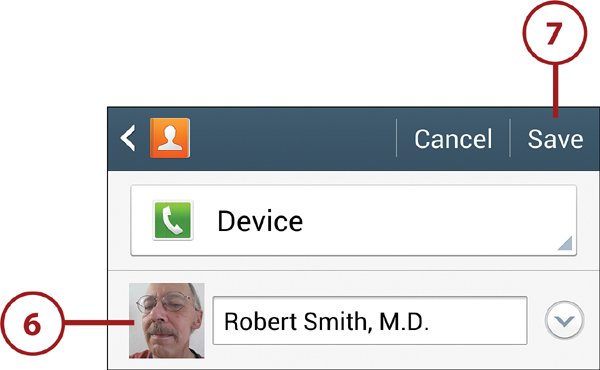
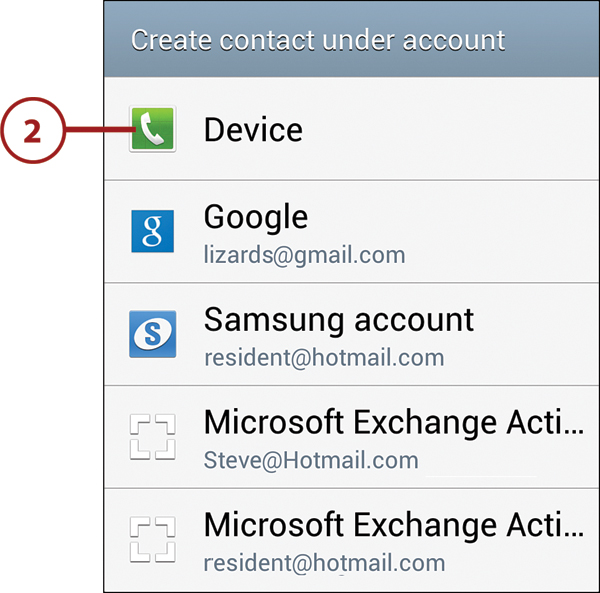
5. The top entry shows where the contact will be created and shared. To change this setting, tap its text. Select Device for a contact that will reside only on the phone. Select Google, Microsoft Exchange ActiveSync, or Samsung Account to share this record with the specified contact list. (These options appear only after you add accounts of these types.) Select SIM to store the contact on your SIM card; only the name, email address, and phone number are stored.
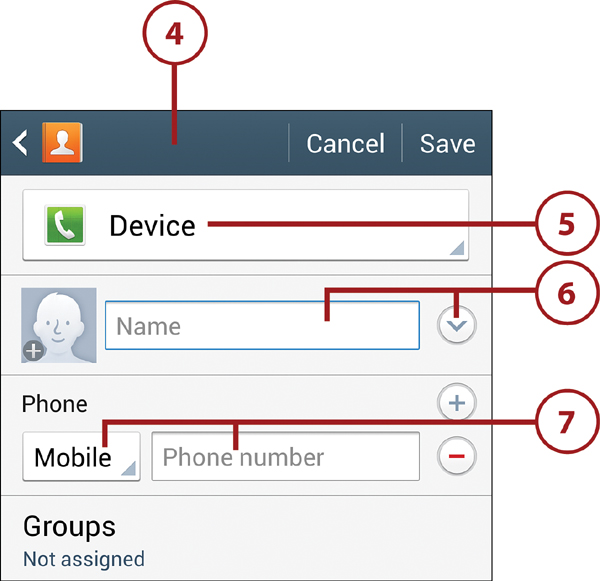
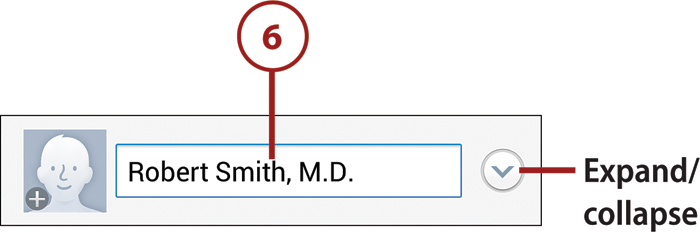
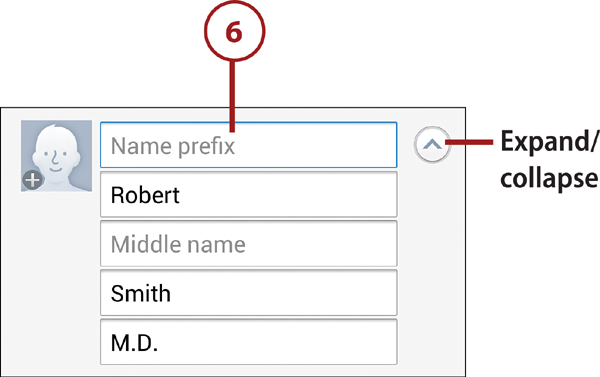
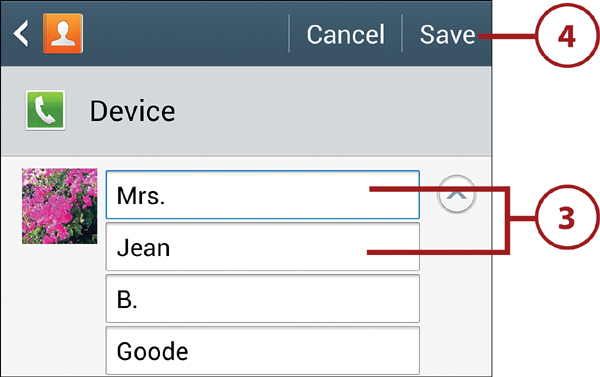
6. Enter the person’s name. You can type the full name in the Name field or—to enter more detailed name information, such as a prefix, suffix, or middle name—tap the expand/collapse icon beside the field. When you finish entering the name components, you can collapse the name by tapping the same icon.
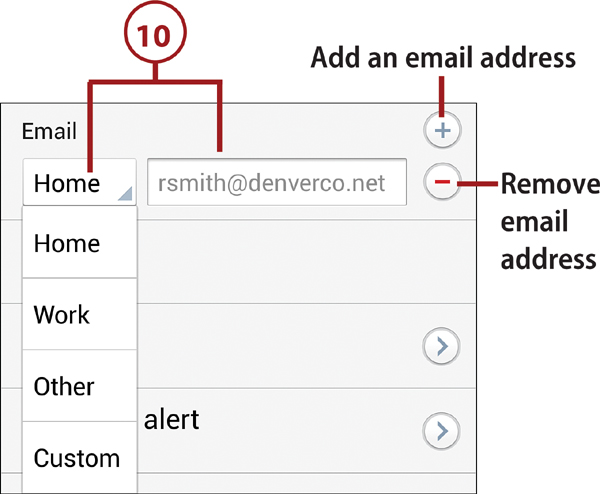
7. Enter a phone number for the person in the first Phone field. If the label (Mobile, for example) is incorrect, tap the label and select the correct one from the drop-down list. (Select Custom, at the bottom of the list, if you want to create your own label.)
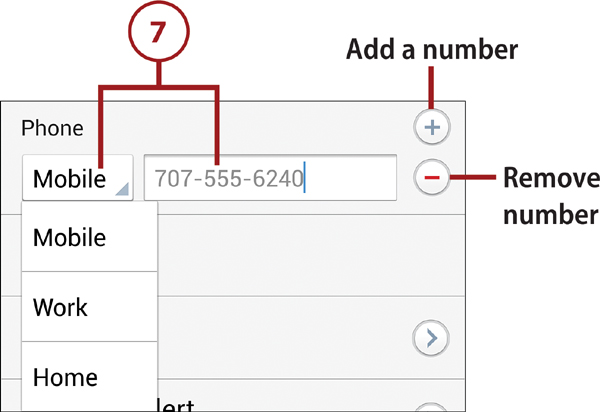
To add more numbers, tap the Phone field’s plus (+) icon. To remove an unwanted or blank number, tap its minus (–) icon.
Text Messaging
If you intend to send text or multimedia messages to this person, you must enter at least one number that’s designated as Mobile.
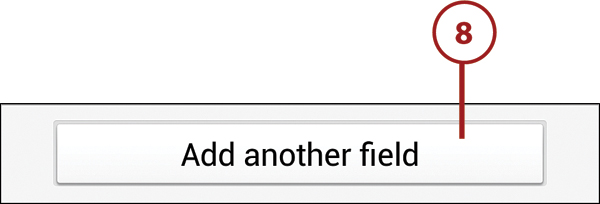
8. To add fields that aren’t currently shown, tap Add Another Field at the bottom of the screen. As an example, steps 9–11 explain how to add Email and Address fields to the record.
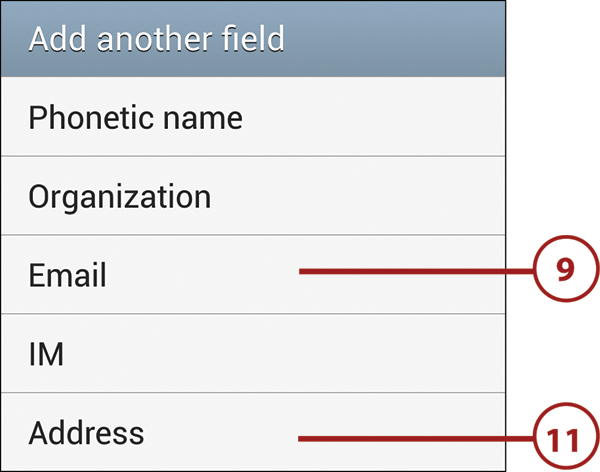
9. In the Add Another Field dialog box, tap Email.
10. Use the method described in step 7 to add one or more email addresses to the contact record. As with phone numbers, you can select a label for each email address from the drop-down list.
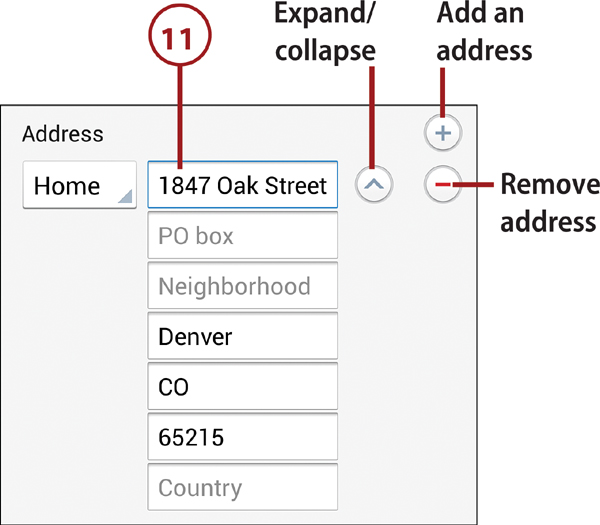
11. You can record one or more physical addresses for the person by tapping Add Another Field and then selecting Address in the Add Another Field dialog box. Use the same method that you used to enter Phone and Email information. Address is a composite field with separate entries for Street, City, State, and ZIP Code. To add other elements, such as P.O. Box or Country, tap the expand/collapse icon.
Adding Other Fields
To add other fields to the contact record, tap Add Another Field and select a field from the Add Another Field list. Only fields that you haven’t already added to the record are displayed.
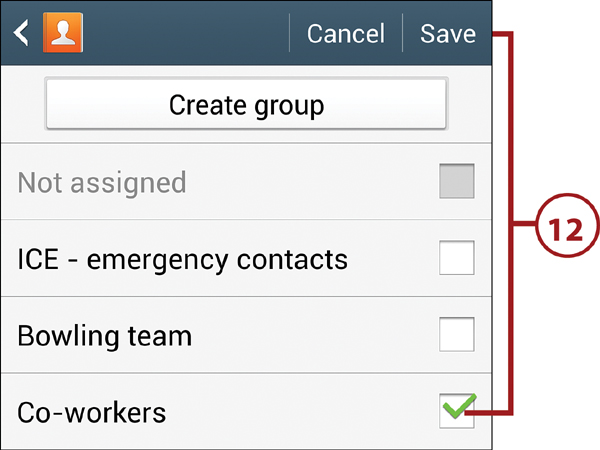
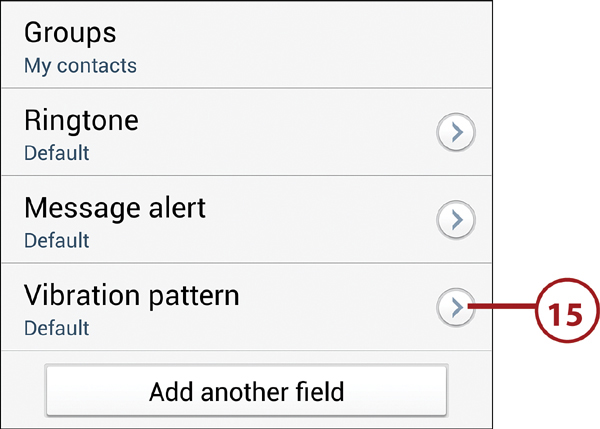
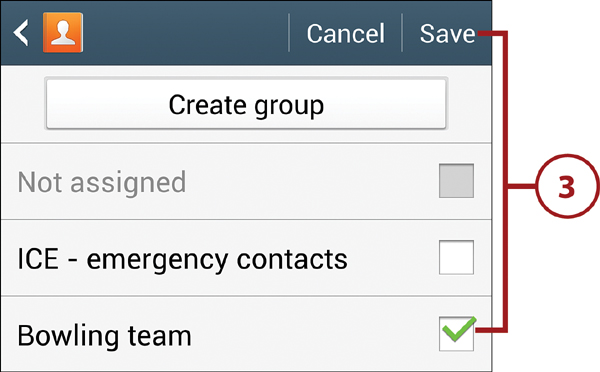
12. Optional: You can assign the person to one or more contact groups. The advantage of using groups is that you can text or email all members of the group by addressing a message to the group rather than to each member. To assign the person to groups, tap the Groups field, select the check box of each appropriate group, and tap Save. (To learn how to create and use groups, see “Working with Contact Groups,” later in this chapter.)
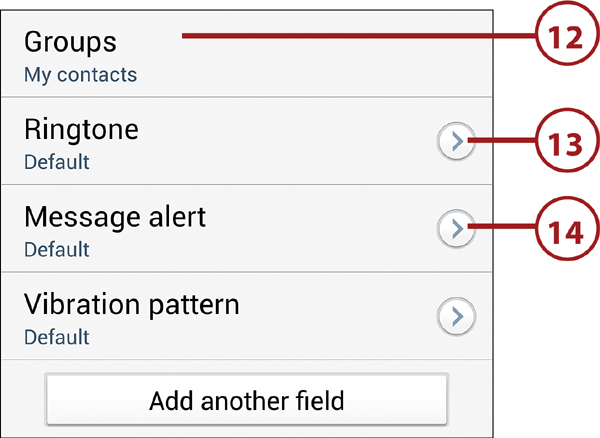
13. Optional: To specify a distinctive ringtone that will announce calls from this person, tap Ringtone, select an option in the Ringtones dialog box, and tap OK.
Specifying a Ringtone
You can select ringtones from those provided with the phone (Ringtones) or use any audio file—such as a downloaded ringtone or a complete song—that you’ve stored on the phone. To assign such a custom ringtone to the record, tap the Add button and locate the audio or music file. Ringtones are discussed in greater detail in “Setting Ringtones” in Chapter 3.
14. Optional: To choose a distinctive alert for messages from this contact, tap Message Alert, select an alert tone in the Message Alert dialog box, and tap OK.
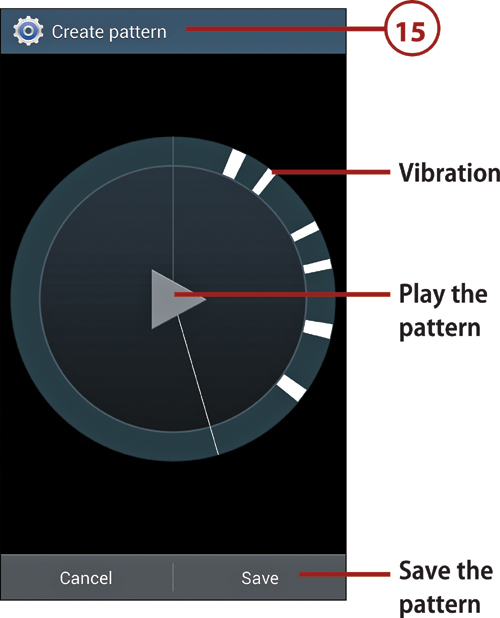
15. Optional: To assign an identifiable vibration pattern to the contact, tap Vibration Pattern, select a pattern in the Vibration Pattern dialog box, and tap OK. To create a custom vibration pattern, tap Create, and then drum the pattern on the Create Pattern screen.
16. When you finish entering the initial information for this contact, tap the Save button at the top of the screen or tap Cancel to discard the record.
Adding a Photo to a Contact Record
To help identify a contact, you can add a photo to the person’s record. You can use any photo that’s stored on the phone or use the phone’s camera to shoot the picture.
1. To associate a photo with the contact, tap the photo placeholder in the upper-left corner while creating or editing the contact record. (If the record already has a photo, you can tap it to replace it with a new photo.)

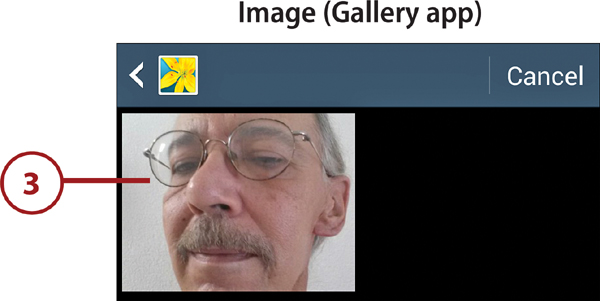
2. In the Contact Photo dialog box, select the appropriate option. Tap Image to use a photo stored on the phone. Tap Pictures by People to use a previously shared image. Tap Take Picture to use the phone’s camera to shoot the picture now. Tap S Memo to use an item you’ve stored in the S Memo app.

3. If you tapped Image or Pictures by People in step 2, Gallery launches. Tap the folder that contains the photo, tap the photo’s thumbnail, and go to step 6.
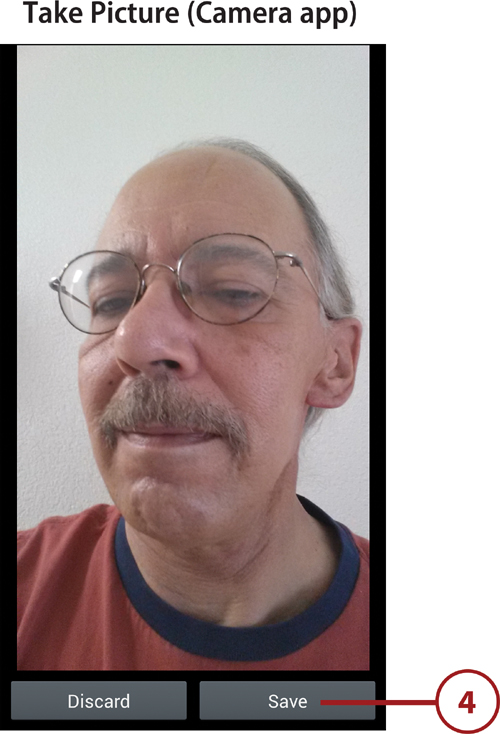
4. If you tapped Take Picture in step 2, Camera launches. Tap the Camera button to take the person’s picture. If you don’t care for the shot, tap Discard and try again; otherwise, tap Save and go to step 6.
5. If you tapped S Memo in step 2, S Memo launches. Select the memo that you want to use.
6. On the cropping screen, move and resize the blue cropping rectangle to select the area of the photo that you want to use, and then tap Done. The cropped photo is added to the contact record.
7. If you’re done creating or editing the record, tap the Save button at the top of the screen.
Viewing Contacts
The bulk of what you do in Contacts involves finding and viewing individual contacts so you can call, email, or text them.
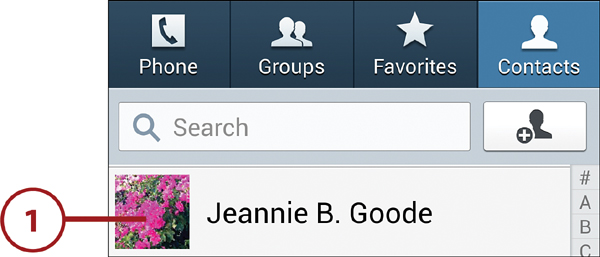
1. Launch Contacts by tapping its Home screen icon.
2. With the Contacts tab selected, contacts are displayed in an alphabetical scrolling list. By default, all contacts from all sources are listed. You can restrict contacts to a single source (LinkedIn, for example) and set other display options by following the instructions in “Setting Display Options” at the end of this chapter.
3. To find a particular contact, you can use any of the following techniques:
• Flick up or down to scroll the list.
• Tap an index letter on the right edge of the screen to go to that approximate spot in the alphabetical list.
• Press and drag in the index letter list. As you drag, a large version of each index letter appears. Remove your finger when the correct letter is shown. For example, to find a person whose last name is Jones, release your finger when J appears.
• To search for someone, tap the Search box and begin entering any element of the person’s record, such as first or last name, street name, or email address. As you type, a list of likely matching contacts appears. When you see the correct record, tap the person’s entry.
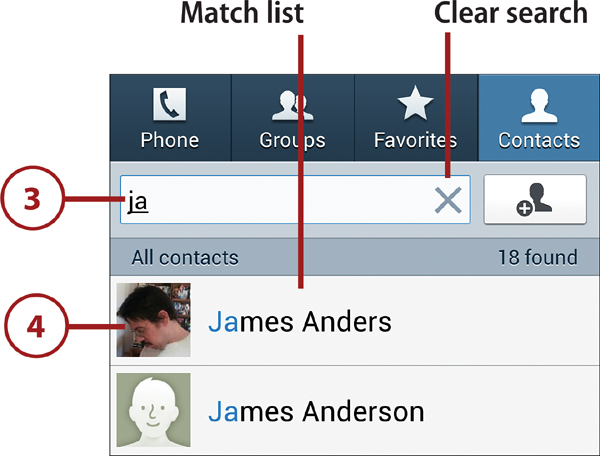
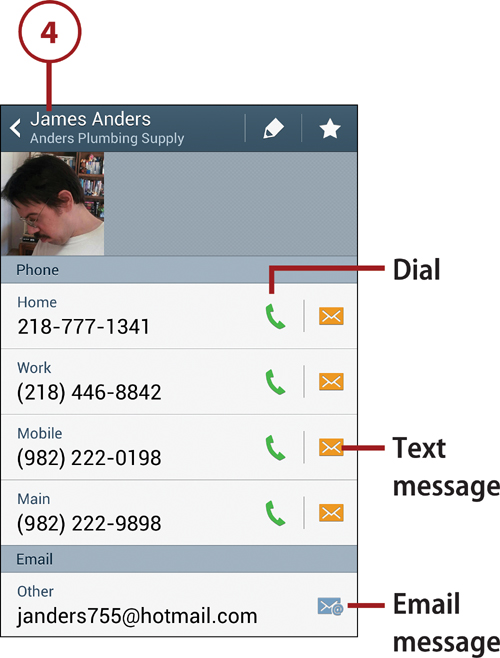
4. When you find the contact, tap it to view the person’s record. Depending on the information recorded for the contact, you can dial any listed number by tapping the green phone icon, send a text message to the person by tapping a mobile phone number’s envelope icon, or address a new email to the person by tapping an email address’ envelope icon.
Editing Contact Records
Contact records sometimes require editing. You might have to add or change an email address or phone number, or you may want to substitute a better picture. Editing a contact employs the same techniques that you use to create contact records. In this section, you discover several ways to edit records, as well as delete them.
Editing Contacts
When changes to a record are necessary to bring it up to date, here’s what you need to do:
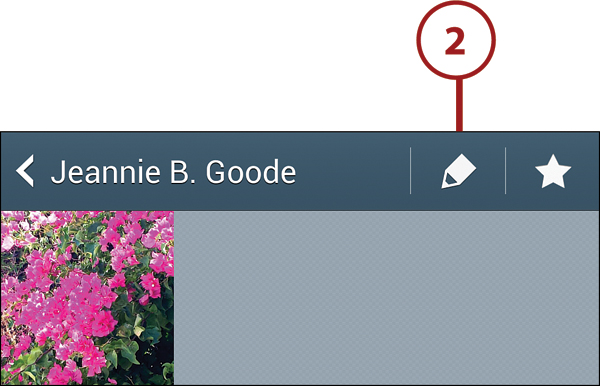
1. In Contacts, select the record that you want to edit.
2. The complete record displays. Tap the Edit icon, or press the Menu key and tap Edit.
3. Using the techniques described in “Creating a Contact Record,” make the necessary changes to the person’s information.
4. Tap Save to save your edits, or tap Cancel if you decide not to save the changes.
Setting Defaults for a Contact
Several contact fields can have multiple entries. For example, a record can have several phone numbers, email addresses, IM usernames, and mailing addresses. For some of these fields, you can optionally specify a default entry—that is, one that you want to treat as primary.
1. In any Contacts list, select the record for which you want to view, set, or change defaults.

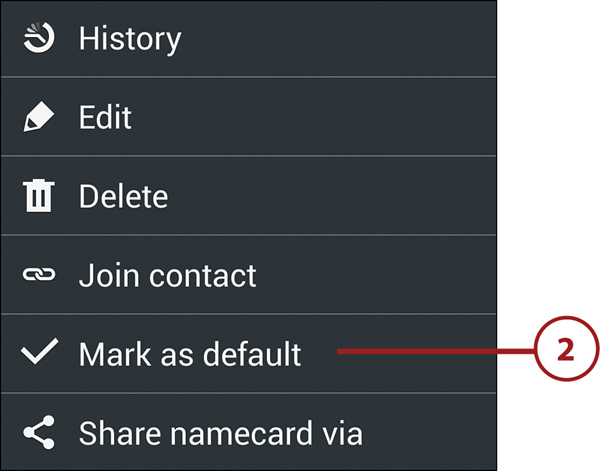
2. The complete record displays. Press the menu key and tap Mark as Default.
3. All items for which you can set a default are displayed. To set an entry as a default, tap its radio button. If necessary, scroll to see any additional items.
4. Tap Done to set the new defaults for the record.

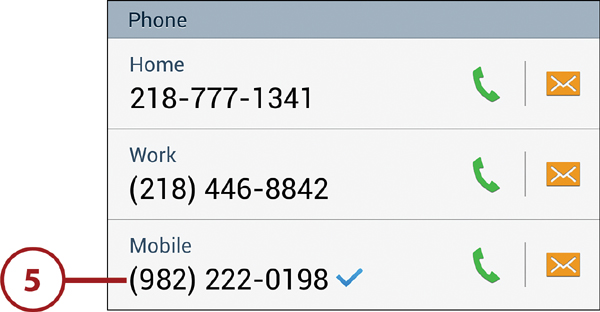
5. Whenever you view the record, default entries have a blue check mark.
Joining and Separating Contacts
Your contact records probably come from multiple sources. Some are created on the phone; others might originate in Google Contacts, LinkedIn, an Exchange Server account, or a social networking site. As a result, when you scroll through the entries in Contacts, you may find some duplicates. You can use the Join Contact command to merge the duplicates for a person into a single contact record.
1. In the Contacts list, locate a pair of records for the same person by browsing or searching. Tap one of the entries to open the record.
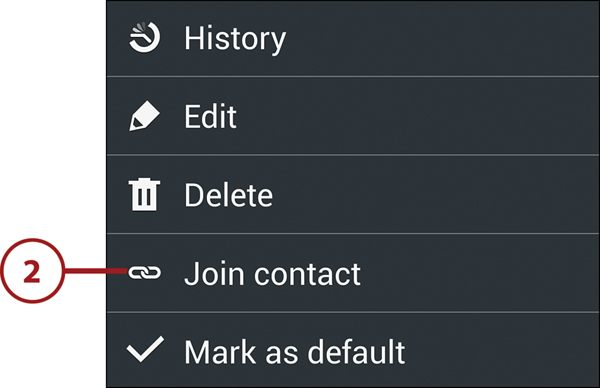
2. Press the Menu key and tap Join Contact. (You can also press and hold the person’s name in the Contacts list and choose Join Contact from the menu that appears.)
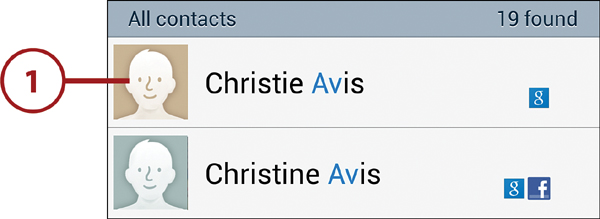
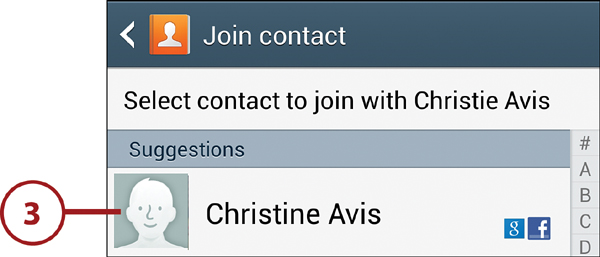
3. A Suggestions list appears. If it includes the person’s other record, tap to select it. Otherwise, scroll down to look for the record in the All Contacts section, and then tap to select it.
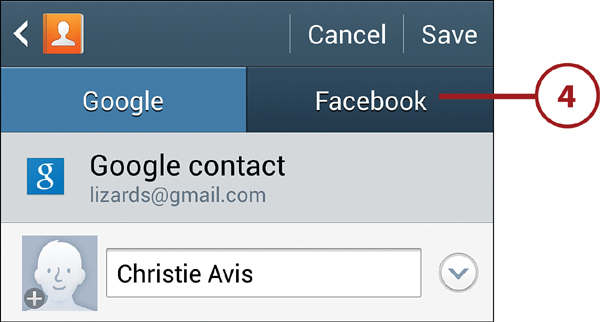
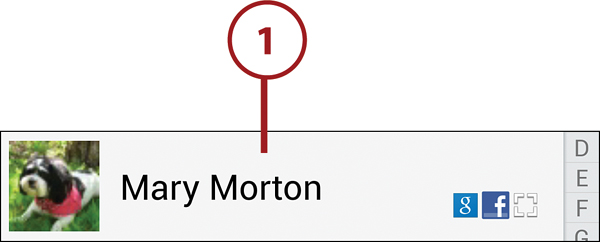
4. The two records are joined to create a single record. If you edit the record (display the record, and then either tap the Edit button or press the Menu key and tap Edit), you can see the sources of the joined records—in this example, Google and Facebook. If still more records exist for this person, you can join those as well by using the Join Contact command again.
Separating Joined Contacts
If necessary, you can separate joined records, re-creating the original, individual records. Open the joined record, press the Menu key, tap Separate Contact, and tap the minus (–) sign beside one of the listed records.
Marking Contacts as Favorites
To make it easy to quickly find people with whom you’re in regular contact, you can mark records as favorites. Doing so adds those people to the contacts in your Favorites list.
1. In a Contacts list, press and hold the contact’s name until the menu appears.
2. Tap Add to Favorites. If you subsequently need to remove the contact from Favorites, open the menu again and tap Remove from Favorites.

Marking and Removing Favorites in an Open Contact Record
With a contact record open, you can mark it as a favorite by tapping the star icon to the right of the person’s name, turning the star gold. To remove the person from your favorites, tap the gold star, removing the color.
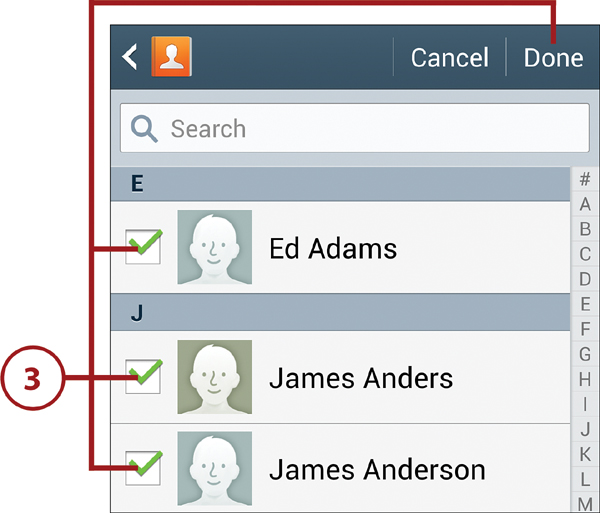
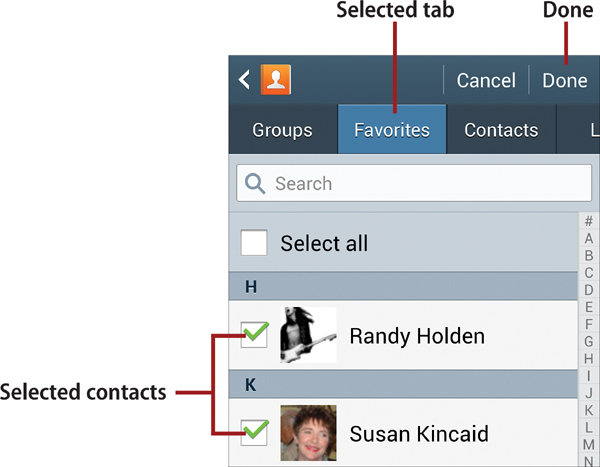
Simultaneously Adding or Removing Multiple Favorites
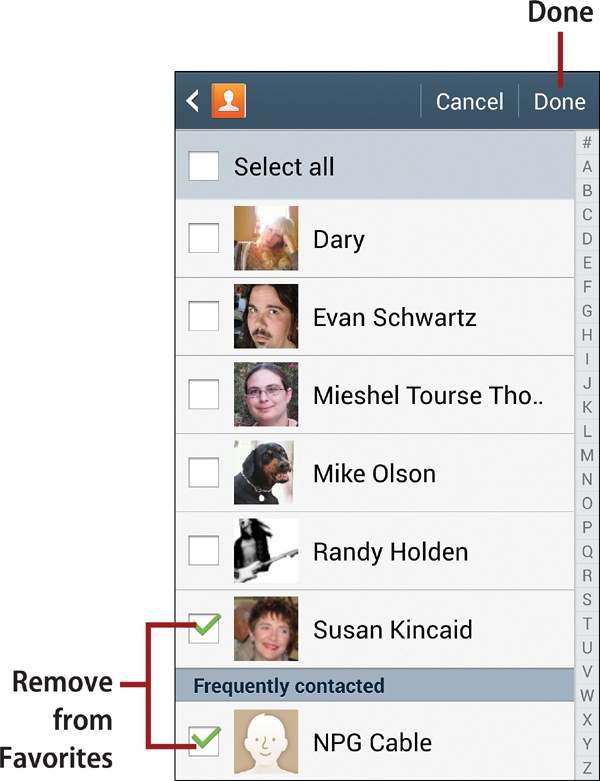
To add or remove multiple contacts from Favorites, select the Favorites tab, press the Menu key, and tap Add to Favorites or Remove from Favorites. Tap the check box of each person that you want to add or remove, and then tap Done. (When removing favorites, you can also remove people from the Frequently Contacted list by tapping their check boxes.)
Deleting Contacts
People leave your personal and business life for many reasons. When you’re certain that you no longer need their contact records, you can delete them.
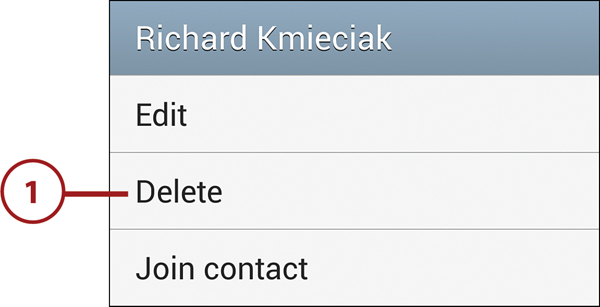
1. To delete a record while viewing any Contacts list, press and hold the record, tap Delete in the menu that appears, and tap OK in the Delete Contact confirmation dialog box.
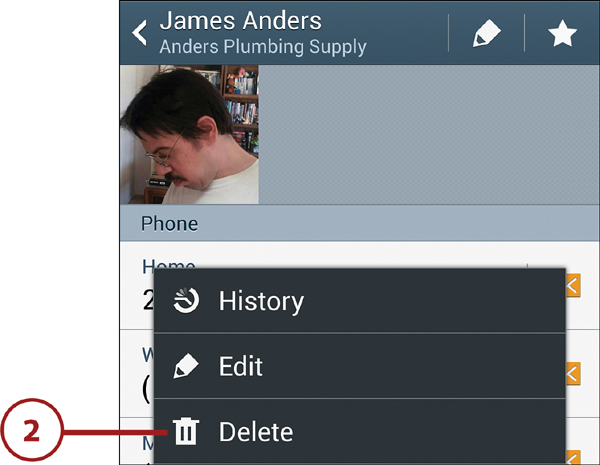
2. To delete a record while viewing it, press the Menu key, tap Delete, and tap OK in the Delete Contact confirmation dialog box.
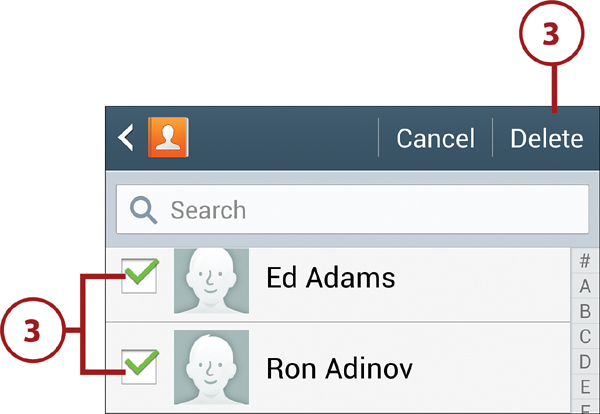
3. To simultaneously delete multiple records, display the Contacts list, press the Menu key, and tap Delete. Tap the check box beside each record that you want to delete, tap the Delete button, and tap OK in the Delete Contact confirmation dialog box.
Working with Contact Groups
A group is a collection of contacts that have something in common, such as membership in a parents’ organization, employees in a company department, or high school friends. Because each group is a subset of Contacts, you can use groups to quickly find every important person of a particular type. You can also use a group as the recipient for an email or text message, automatically sending it to all members. You can create groups and define their memberships from scratch, as well as use the built-in groups (Family and Friends, for example) and ones created for you by social media sites, such as LinkedIn and Facebook.
Creating a Group
1. In Contacts, select the Groups tab.
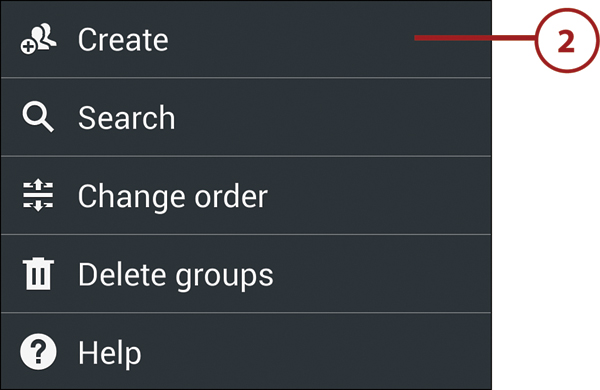
2. Press the Menu key and tap Create.
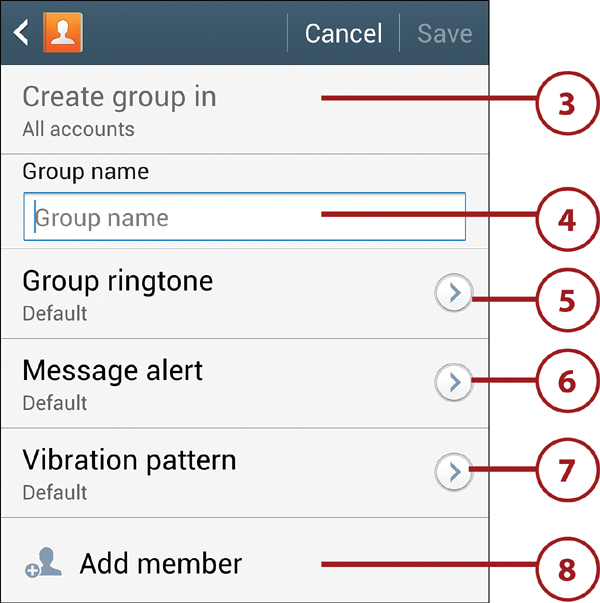
3. Optional: If you’ve registered more than one Google account, you can specify the account of which this group will be a subset by tapping the Create Group In entry.
4. Enter a name for the group.
5. Optional: Specify a ringtone that will announce calls from group members.
6. Optional: Specify an alert for text messages from group members.
7. Optional: Specify a vibration pattern that will announce calls or text messages from group members.
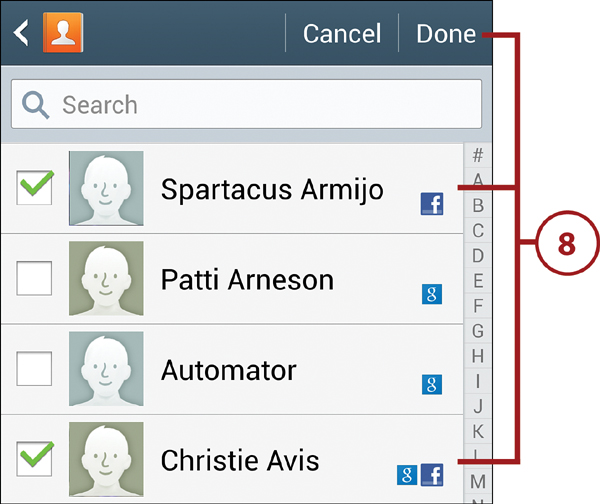
8. Optional: Tap Add Member to set the initial group membership. Select members by tapping their names and then tap Done. (Note that you can add members at any time.)
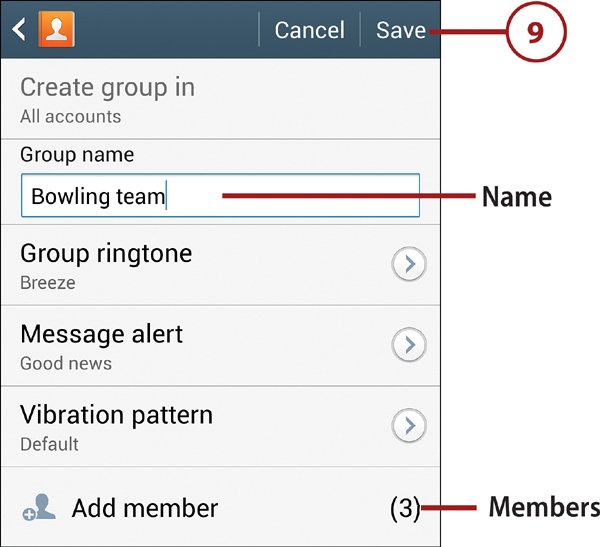
9. Tap the Save button to save the group name, membership, and settings. The group name is added to the Integrated Groups list. Whenever you want to view the group’s membership, select the Groups tab and tap the group’s name in the list.
Changing a Group’s Definition or Membership
You can quickly change a group’s settings or membership. Select the Groups tab, press and hold the group name, and select Edit Group in the menu that appears. When you finish making changes, tap Save.
Adding or Removing a Person from Group Membership
1. With the Contacts tab selected, tap a person’s name to open her record.
2. Tap the Groups entry.

3. Add or remove check marks to assign or remove the person from the listed groups. Tap Save to save the changes. (Note that a person can be a member of multiple groups.)
Quickly Removing Members from a Group
In addition to adding new members to a group, you can easily remove one or more members. On the Groups tab, tap the group name to display its membership. Then press the Menu key and tap Remove Member. Select the members that you want to remove from the group and tap Done.
Emailing or Texting a Group
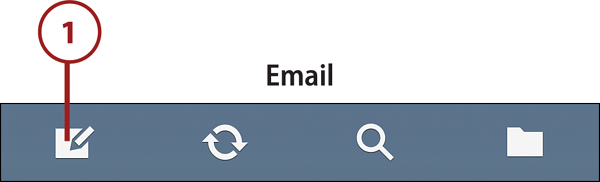
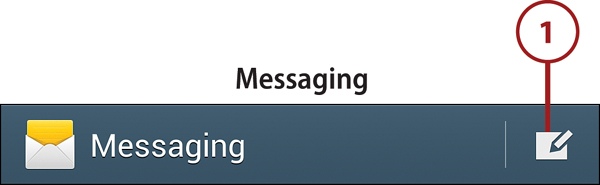
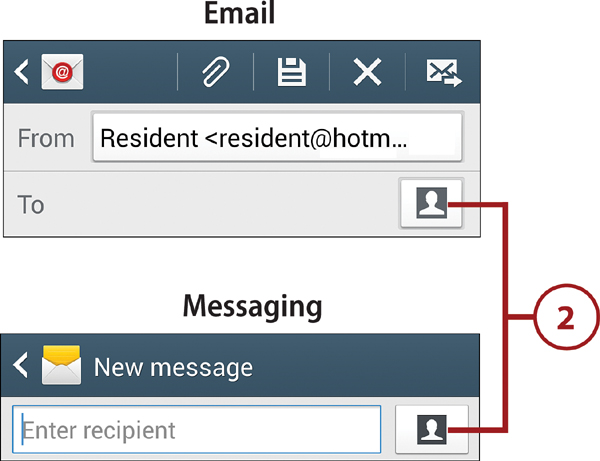
1. In Email or Messaging, tap the Compose icon.
2. Tap the Contacts icon to select email or message recipients.
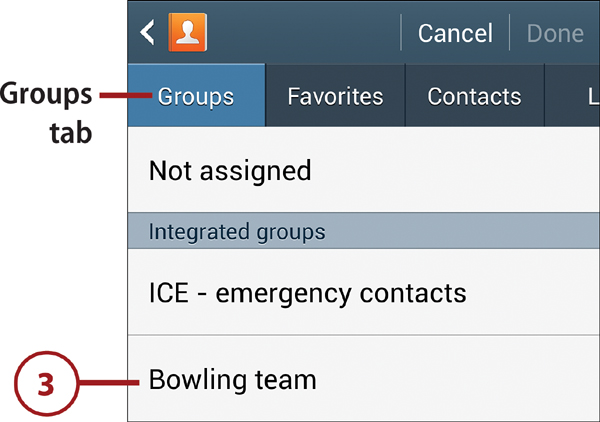
3. In Contacts, select the Groups tab and then tap the group that you want to email or message.
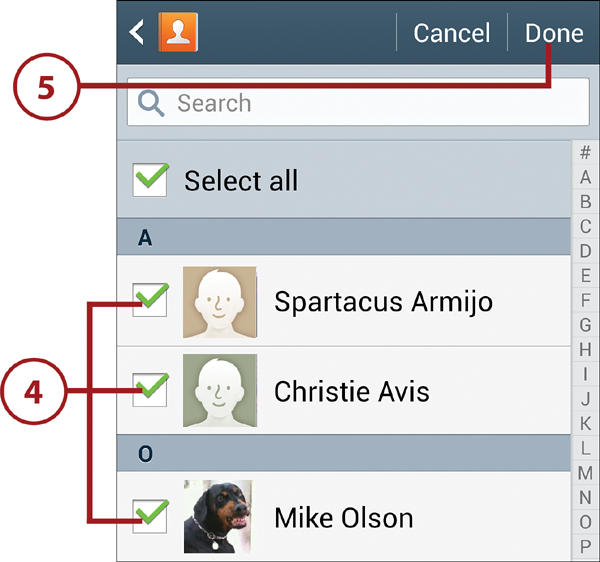
4. Tap the names of the group members that you want to email or message, or tap Select All to include the entire group as recipients.
Multiple Choice
If a selected individual has multiple email addresses or mobile phone numbers, a dialog box appears in which you must select the correct address or number.
5. Tap Done to transfer the selected members’ email addresses or mobile numbers to Email or Messaging, respectively. Complete your email or compose your message as you normally do.
Start an Email or Text Message from Contacts
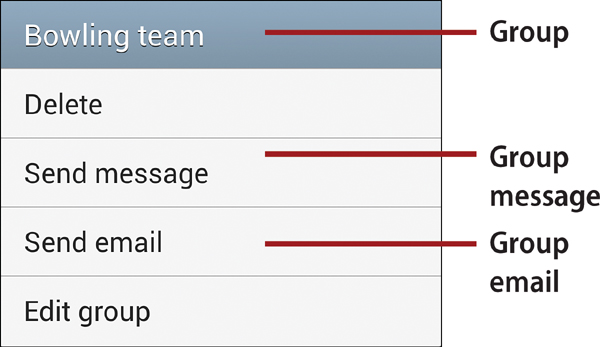
You can also initiate a group email or text message from within Contacts. Select the Groups tab, press and hold a group name, and tap either Send Email or Send Message. Select the members and tap Done. (You can also start this procedure when viewing a group’s membership. Press the Menu key and follow the same steps.)
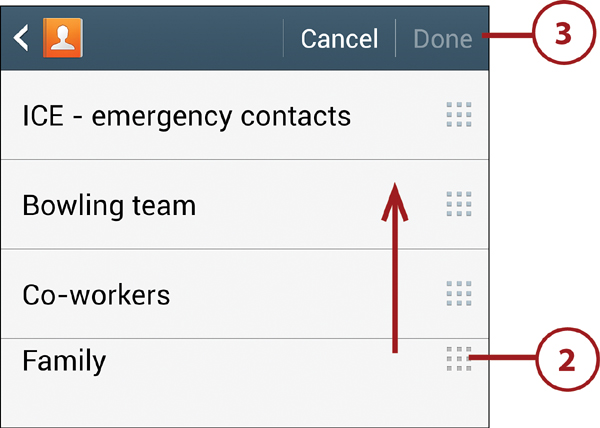
2. To change a group’s position, drag the group up or down by the dot pattern on its right edge. Release the group when it’s in the desired spot. Repeat for other groups whose positions you want to change.
3. Tap Done to save the new group list order.
Deleting a Group
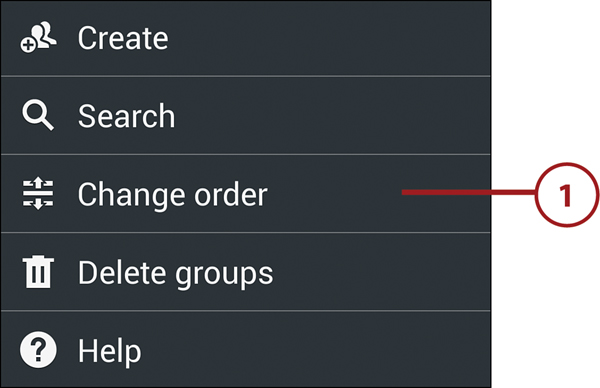
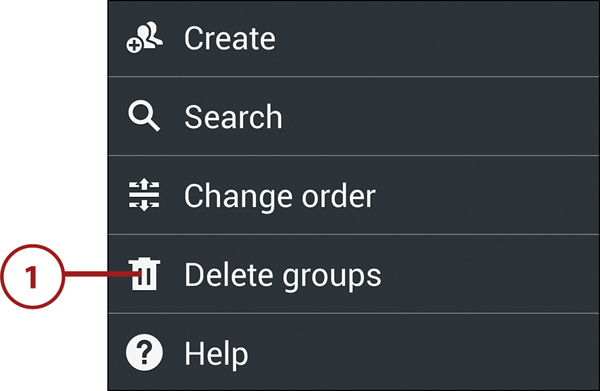
1. With the Groups tab selected, press the Menu key and tap Delete Groups.
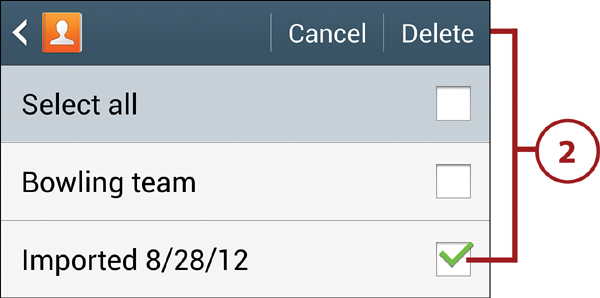
2. Select the groups you want to delete by tapping check boxes, and then tap the Delete button.
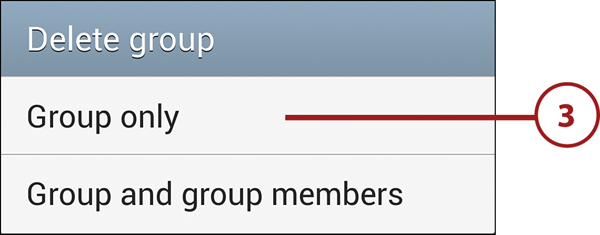
3. In the Delete Group dialog box, indicate whether you want to delete only the selected group(s)—leaving the associated contact records intact—or the group(s) and member contact records.
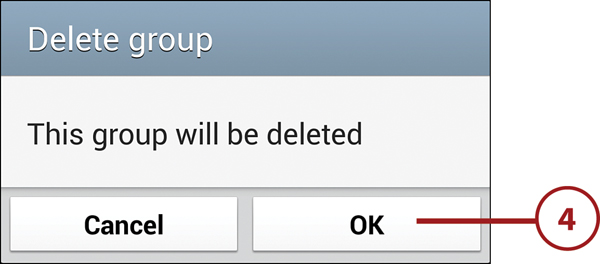
4. Confirm the deletion(s) by tapping OK or tap Cancel if you’ve changed your mind.
Deleting a User-Created Group
To quickly delete a group that you created, press and hold its entry in the groups list and tap Delete in the dialog box that appears.
Backing Up/Restoring and Exporting/Importing Contact Records
As security against phone-related disasters or in preparation for switching to a new phone, you can back up your Contacts data to a memory card, built-in memory, or SIM card, or you can merge the data with your Google or Samsung account.
You can also use export/import procedures to manually move copies of contact records from your computer-based email and address book utilities into Contacts. For information about and strategies for syncing your contact data with its various sources, see Chapter 16.
Carriers Differ
Each carrier decides the Contacts backup and restore procedures that it supports, as well as the steps each requires. However, regardless of which carrier you have, you should find several procedures in this section—occasionally with small variations—that are applicable to your phone.
Merging with Google Contacts or Your Samsung Account
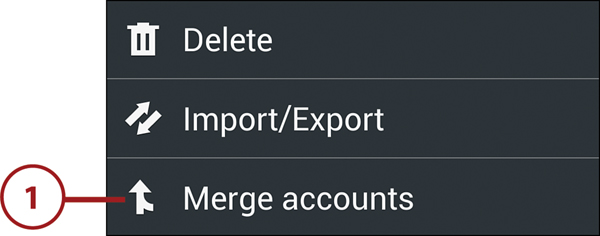
1. With the Contacts list displayed, press the Menu key and tap Merge Accounts.
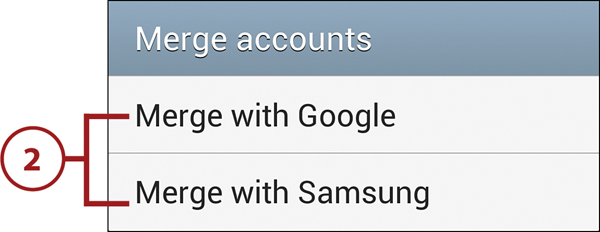
2. In the Merge Accounts dialog, tap Merge with Google or Merge with Samsung, as appropriate.
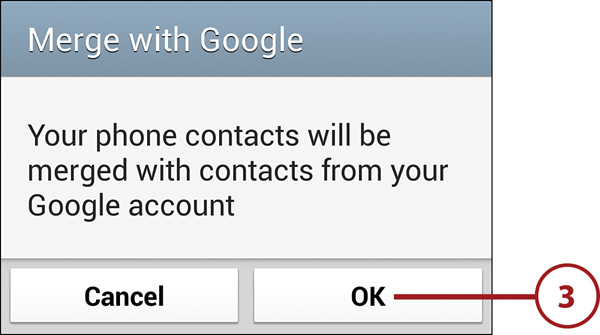
3. Tap OK in the confirmation dialog box.
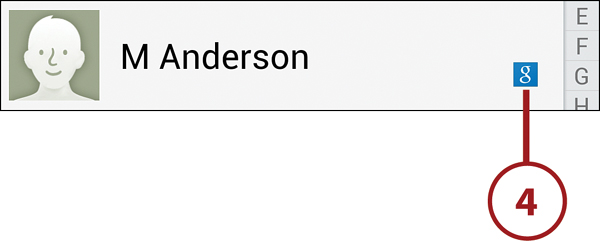
4. When you view the full contact list, you see that all records are now marked as Google contacts or as Samsung contacts.
Only the Device (Phone) Records Merge
If you merge your phone’s contacts with the Samsung account that you created during the phone’s setup, only those contacts created with Device as the source are merged; Google contacts are left unchanged.
To Merge or Not to Merge
Think carefully before performing a Merge with Google or—to a lesser degree—Merge with Samsung Account, especially if your contact records have many different sources and you want to keep those sources intact. Unlike the other backup and export procedures described in this section, the Merge commands modify the records by changing their creation source. Thus, use Merge with Google only if you’re committing to using Google/Gmail as the repository of all your contact data.
Copying Contacts to the SIM Card
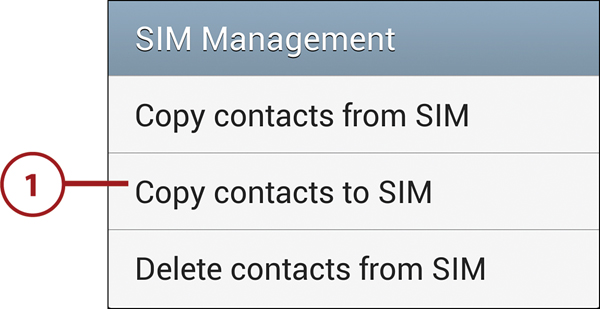
1. With the Contacts tab selected, press the Menu key. Depending upon your carrier, do one of the following:
• Tap Import/Export, followed by Export to SIM Card.
• Tap SIM Management, followed by Copy Contacts to SIM.
SIM Backup Limitations
Some carriers do not support backing up to or restoring from the SIM card. In addition, SIM card backups only include names, email addresses, and phone numbers—ignoring all other information entered in the records.
2. Select the contacts that you want to export and tap Done.
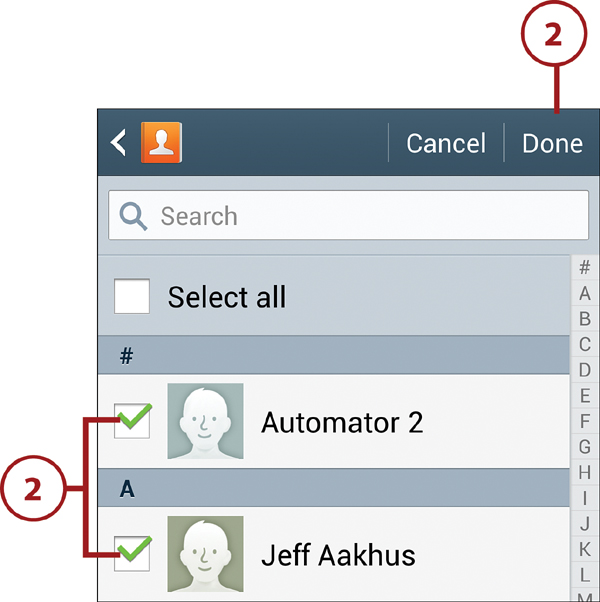
Selecting All or Most Contacts
If you want to copy most of your contacts but intend to leave a few out, scroll to the top of the list and tap Select All. Then tap the check boxes of only those records that you want to omit.
3. Tap OK in the confirmation dialog box. A dialog box informs you that the selected contacts were copied to the SIM card.

Backing Up to a Memory Card
1. With the Contacts tab selected, press the Menu key and tap Import/Export. (Note that you must have a memory card installed in the phone to export your Contacts data using this procedure.)

2. Tap Export to SD Card.
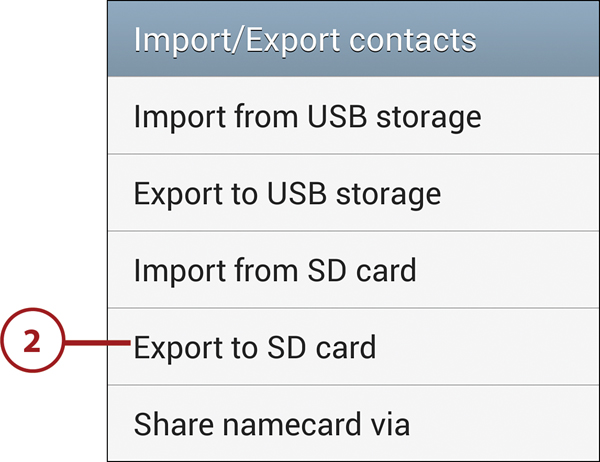
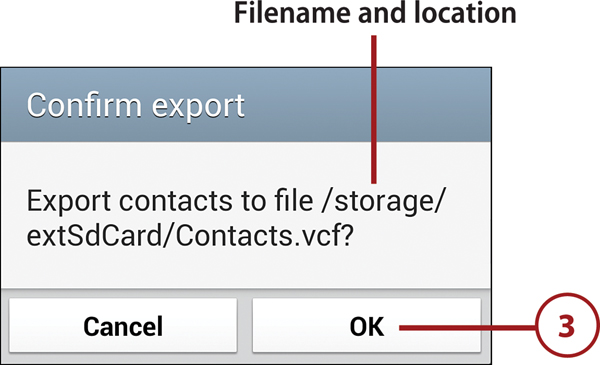
3. Tap OK in the Confirm Export dialog box. The data is exported to the displayed vCard filename and location. (The extSdCard in the file pathname indicates that your add-in memory card is the destination.)
Multiple Backups
As time passes, you can export multiple backups of the Contacts database to your memory card. Each new backup increments the filename by 1 over the highest-numbered backup on the card. For example, if there’s already a Contacts_002.vcf, the next backup will be Contacts_003.vcf.
Exporting to USB (Built-In Memory)
If you don’t have an add-in memory card, you can export your contacts to a vCard file in the phone’s built-in memory. From there, you can copy the file to your computer or store it in an online storage service.
In the Import/Export Contacts dialog box, tap Export to USB Storage, and then tap OK in the Confirm Export dialog box.
Restoring Contacts from Backups
If something happens to the Contacts database on your Galaxy S 4 or you switch to a new phone, you can restore the data from one or more backups.
Restoring Contacts from the SIM Card
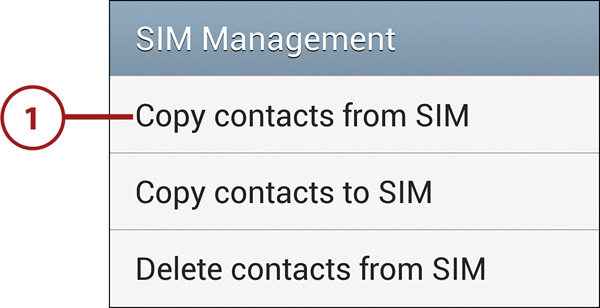
1. With the Contacts tab selected, press the Menu key. Depending upon your carrier, do one of the following:
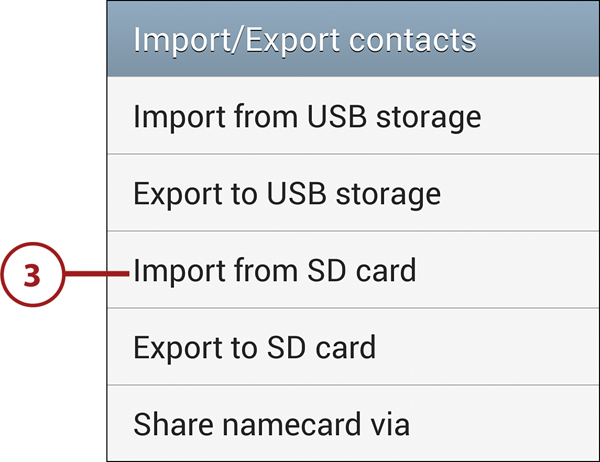
• Tap Import/Export, followed by Import from SIM Card.
• Tap SIM Management, followed by Copy Contacts from SIM.
2. When the contacts are imported from the SIM card, they must be associated with an account. Select an account from the dialog box.
3. Select the contact records that you want to restore—or tap Select All—and then tap Done.
Restoring Contacts from a Memory Card Backup
1. If this is a new phone, install the memory card in the phone to which you want to restore your Contacts database. (See “Adding a Memory Card” in Chapter 19 for instructions.) Launch the Contacts app.
2. With the Contacts tab selected, press the Menu key and tap Import/Export.

4. When the contacts are imported, you must associate them with an account. Select an account from the Save Contact To dialog box.

Beware of Duplicates
When restoring a backup from a memory card, the procedure doesn’t check for duplicate records. Thus, it’s safest to restore to a device that contains no contact records or only new, unique records that you’ve created on the phone. Remember, too, that if you have any contacts that you previously created or synced with Google Contacts, those contacts will automatically be restored on your first sync. In other words, restoring from the SD card might be unnecessary.
Restoring a USB (Built-In Memory) Backup
If you’ve stored your Contacts backup in the phone’s built-in memory, you can restore it by tapping Import from USB Storage in the Import/Export Contacts dialog box. In the Save Contact To dialog box, choose an account to associate with the restored contacts.
If you’ve only exported to USB once, your contacts are immediately imported. On the other hand, if you’ve created multiple USB backups, the Select vCard File dialog box appears. Select the file or files that you want to import, and then tap OK.
Importing Contact Data from Other Sources into Google Contacts
Although Google Contacts (Gmail’s address book) is the de facto source for Android contact data, it’s not the place in which many of us have chosen to store our contacts. You may already have years of contacts stored in email clients and address book utilities on your computer. You can also sync Outlook 2011 (Mac) and Address Book/Contacts (Mac) directly with Google Contacts, as explained in Chapter 16.
Exporting Your Computer’s Data
Here’s how to export your data from your existing contact-management application on your Mac or PC:
• Address Book or Contacts (Mac). Select the contacts to export and then choose File, Export, Export vCard (or Export Group vCard). Alternatively, drag the contacts out of the Address Book or Contacts window to your Desktop or a convenient Finder window.
• Outlook 2010 or 2013 (Windows). Click the File tab, click Options, and then click Advanced. Click the Export button to launch the Import and Export Wizard, click Export to a File, and click Next. Select the Comma Separated Values (Windows) option and click Next. Select the Contacts folder and click next. Click Browse, select the folder in which to place the exported file, and click Next. Finally, click Finish to export the data.
Importing the Exported Data into Google Contacts
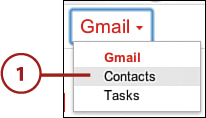
1. In your browser, go to mail.google.com or gmail.com and log into your account. Open the Gmail menu and click Contacts.
Just in Case...
As a safety measure, you might want to back up the Google Contacts data by choosing More, Export. If the import described in this task doesn’t go as planned, you can restore your original Google Contacts data by choosing the More, Import command or by choosing More, Restore Contacts. The former command restores from your backup file, whereas the latter restores from one of several Google-provided backups.
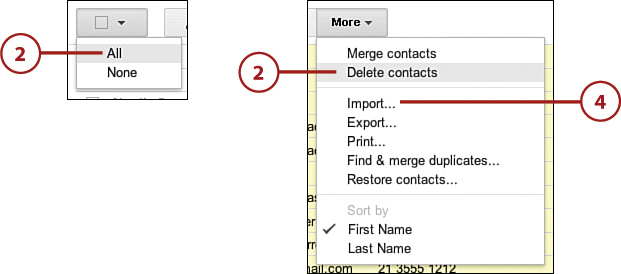
2. To replace all current data in Google Contacts with the new data, you must delete all the records. From the first Contacts menu, choose All to select all visible records. Then from the More menu, choose Delete Contacts.
Caution: Selective Deletions
If Google Contacts contains records that do not exist in the imported data, you may want to delete all records except those.
3. If still more records exist, repeat step 2. Continue until all records have been deleted.
4. Choose More, Import.
5. To select the data file to import, click the Choose File button in the Import Contacts dialog box.
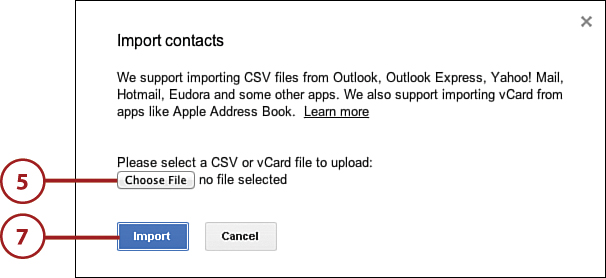
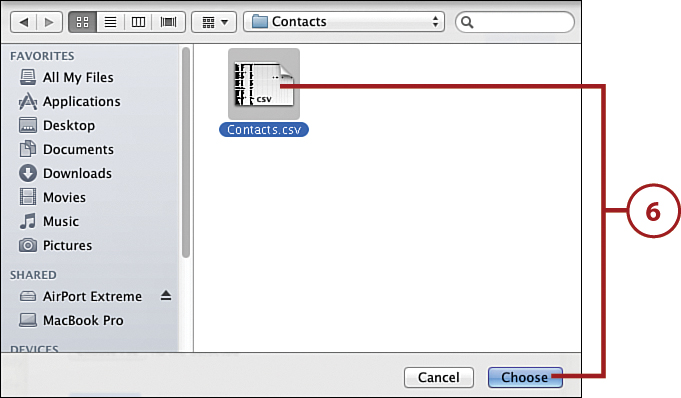
6. In the file dialog box that appears, select the exported data file and click the Choose button.
7. In the Import Contacts dialog box, click the Import button. The exported data appears in Google Contacts.
Odds and Ends
Contacts has a couple of other commands that you may occasionally find useful.
The Send Email and Send Message Commands
While viewing the Contacts list, you can select recipients for a new email or text message. Press the Menu key, tap Send Message/Email, and then tap Send Message or Send Email in the Send Message/Email dialog box. Select the Contacts, Groups, Favorites, or Logs tab; select recipients; and then tap Done to address the new email or text message.


Setting Display Options
With the Contacts tab selected, you can set a variety of useful options that determine which records are shown and the order in which they appear.
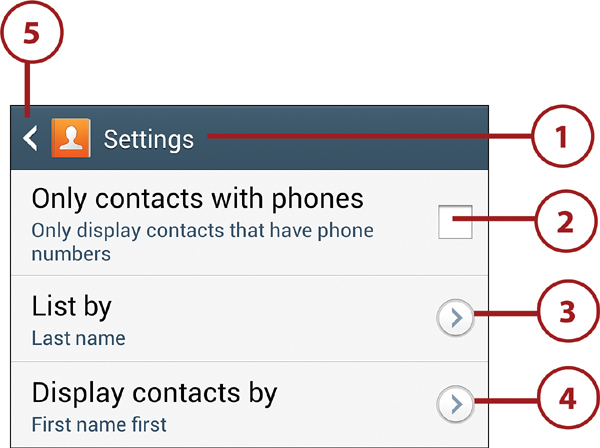
1. Press the Menu key and tap Settings. The Settings screen appears.
2. Tap the Only Contacts with Phones check box to hide contact records that don’t include a phone number. (To restore the full contacts list, tap it again to remove the check mark.)
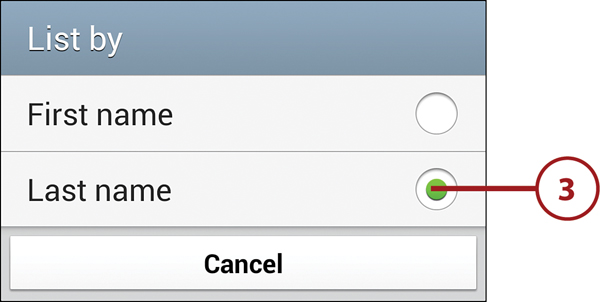
3. You can sort contacts alphabetically by first name or last name. To change the current sort order, tap List By and then select an option in the List By dialog box.
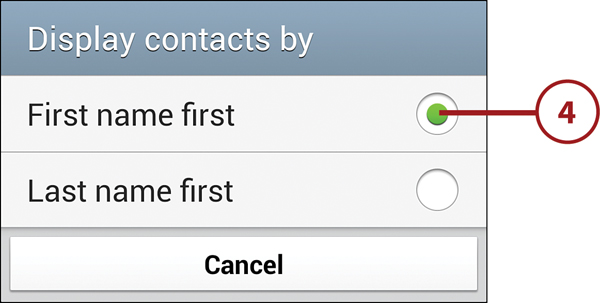
4. Regardless of the List By order specified in step 3, you can display each contact as first name first (Bob Smith) or last name first (Smith, Bob). Tap Display Contacts By, and then select an option in the Display Contacts By dialog box.
5. When you finish making changes, tap the Back icon or press the Back key.
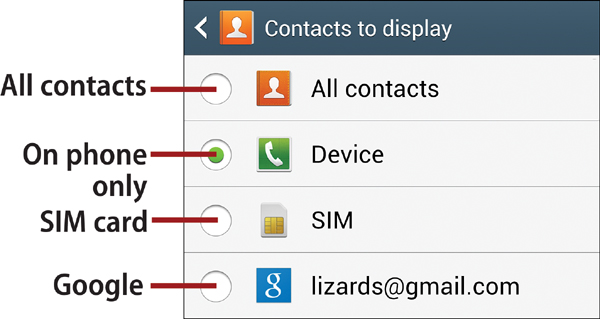
Specifying Contacts to Display
There’s also an option to view only those contacts associated with a particular account. For instance, you can view only your Facebook friends or LinkedIn colleagues. With the Contacts tab selected, press the Menu key, tap Contacts to Display, and select the account that you want to view. (To create a custom view that combines several accounts, tap the Settings icon to the right of the Customized List option.)