19. Crunching Numbers with Microsoft Excel Mobile
Microsoft Excel Mobile makes it easy to create and edit Excel workbooks anywhere you go right on your tablet. In this chapter, you learn about
→ Creating, Opening, and Saving Workbooks
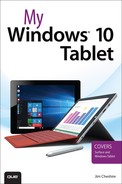
Microsoft Excel Mobile is designed to make working with numerical data quick and easy. Over the years, Excel has made complex numerical data analysis easier and easier, and the latest version makes that even easier by focusing on a touch interface. As you’ll see in this chapter, you can use Excel Mobile for everything—from planning your household budget to keeping track of gifts you’re buying for that special occasion.
Creating, Opening, and Saving Workbooks
Before we get started, it’s important for you to understand some Excel vernacular. A workbook is a file that opens in Excel. Each workbook contains one or more sheets that are represented by tabs within the workbook. You can use sheets to organize data within your workbook. Each sheet is made up of rows and columns of cells.
Now that you know these basics, let’s see how you can work with workbooks in Excel Mobile.
Creating a Workbook
Excel Mobile includes a large number of templates you can use to create workbooks. These templates vary from simple lists to complex sales trackers. You can also create a blank workbook so that you can start from scratch.
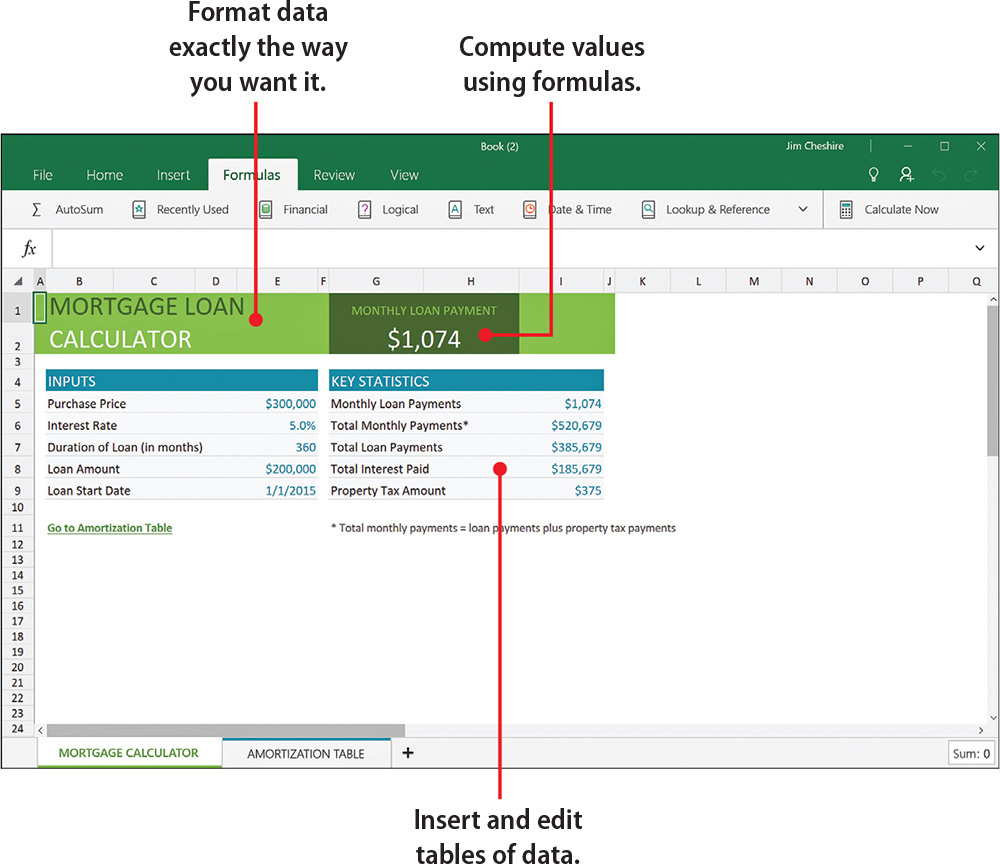
1. From the Start menu, tap or click Excel Mobile to launch the app.
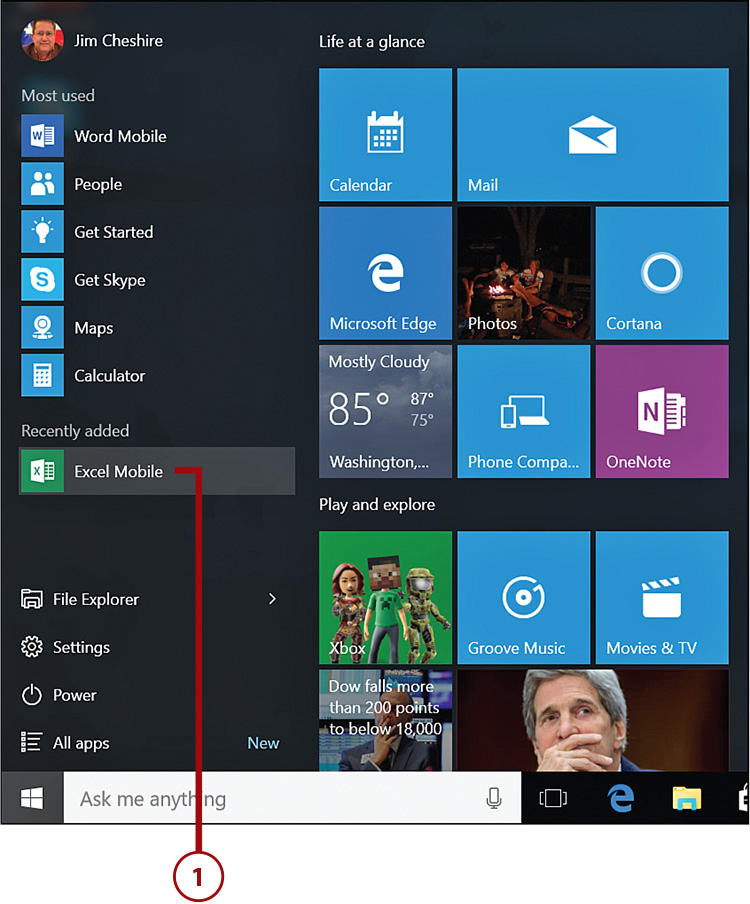
2. Tap or click the location drop-down and choose a new location for your workbook if you want to. (By default, Excel Mobile stores files in OneDrive.)
3. Swipe up or scroll down to see additional workbook templates.
4. Tap or click a template to create a new workbook based on that template.
OneDrive and Excel Mobile
It’s recommended that you store your Excel Mobile workbooks in OneDrive because you can then access them from any device. You’ll also be able to share workbooks with others if they are stored in OneDrive.
Opening Workbooks
If you want to work on a workbook that you’ve saved, you’ll need to open it first.
1. From within Excel Mobile, tap or click File.
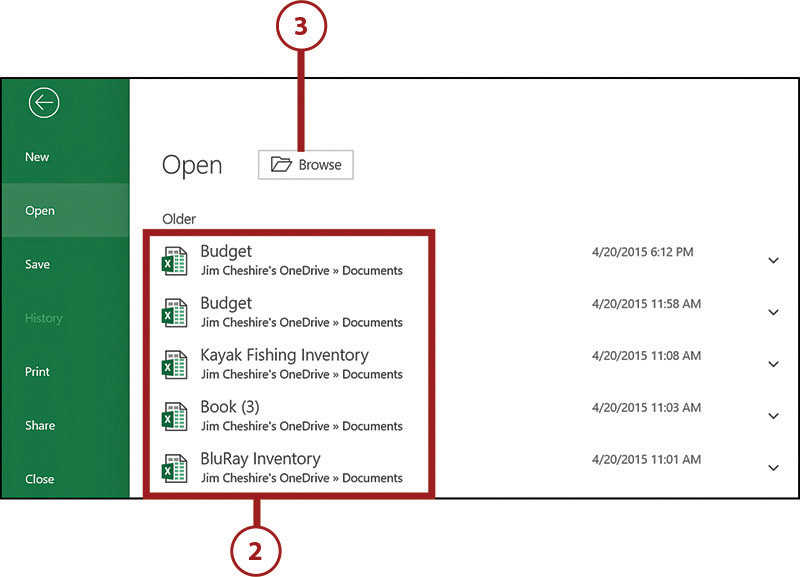
2. If your workbook is listed in the list of recent workbooks, tap or click it to open it.
3. If your workbook isn’t listed, tap or click Browse.
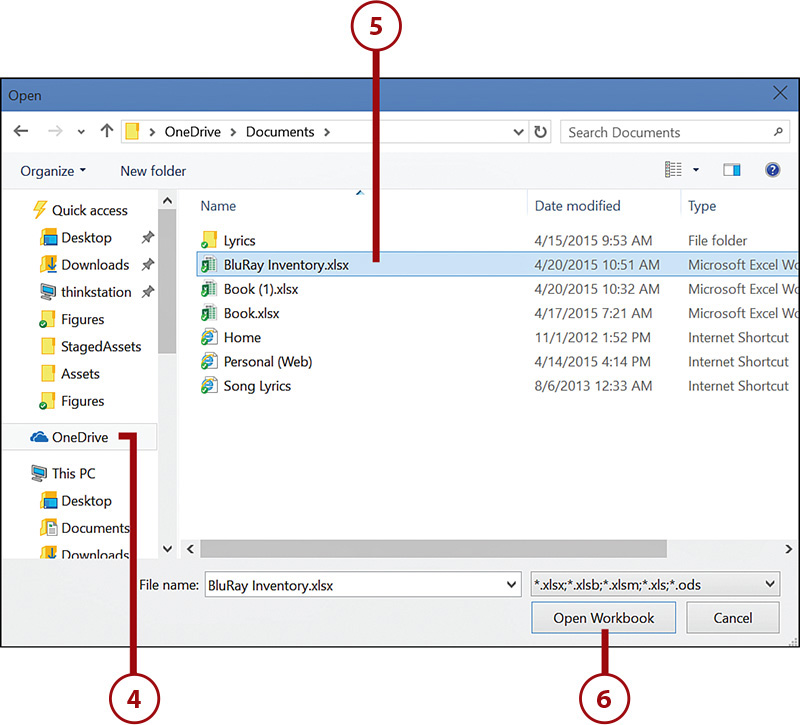
4. Browse to the location where your workbook is saved.
5. Tap or click your workbook to select it.
6. Tap or click Open Workbook.
Saving Workbooks
Excel Mobile saves your workbooks automatically as you work on them. However, if you want to, you can choose to save a copy of your workbook in a different location.
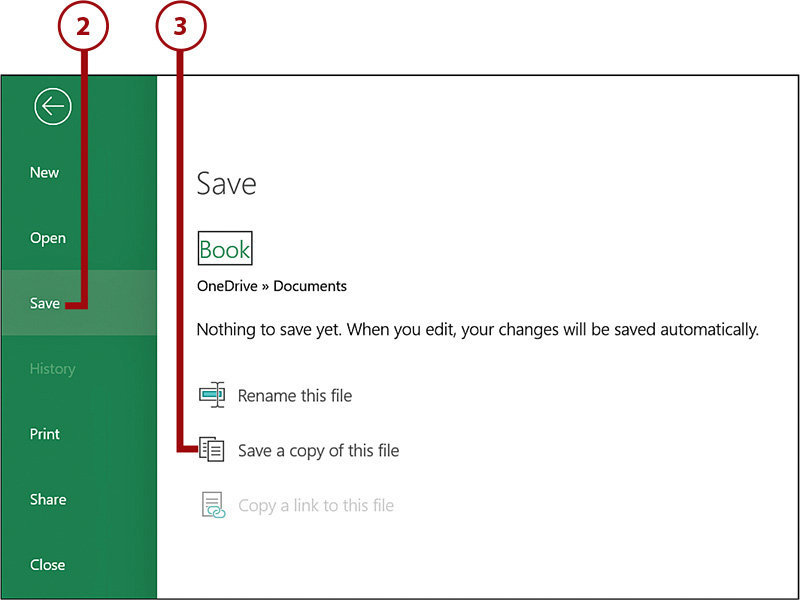
1. From within Excel Mobile, tap or click File.
2. Tap or click Save.
3. Tap or click Save a Copy of This File.
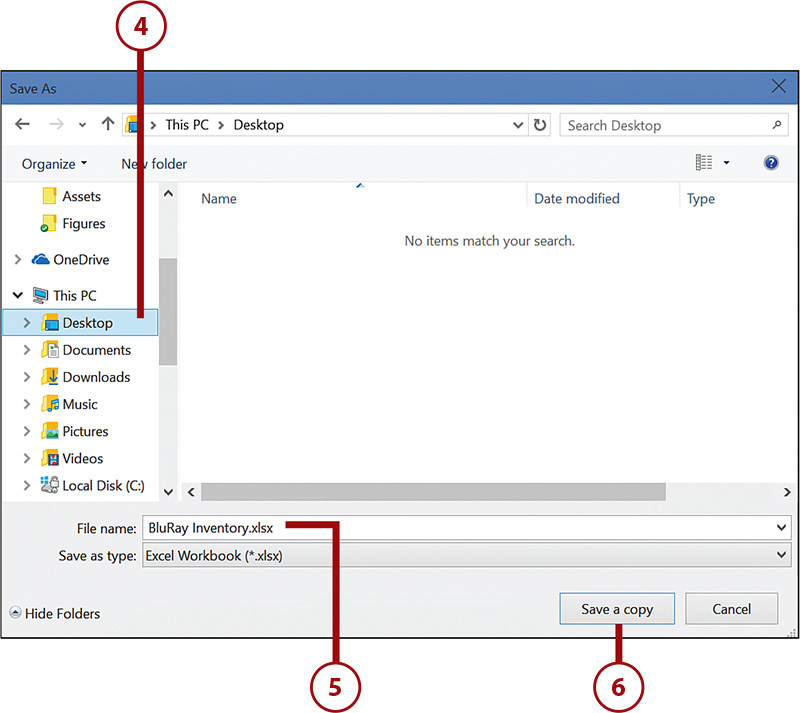
4. Browse to the location where you want to save the workbook.
5. Enter a new filename or accept the existing filename.
6. Tap or click Save a Copy.
Entering Data
You can add both text and numbers to your Excel Mobile workbook. You can adjust the width of columns to account for your data, and you can format your data using fonts, font sizes, styles, and colors. You can also have Excel Mobile format your data for you in a table with one easy step. You can organize your data by creating new sheets within your workbook.
Adding Data
You add data to your Excel Mobile workbook by clicking in a cell and typing to enter your data.
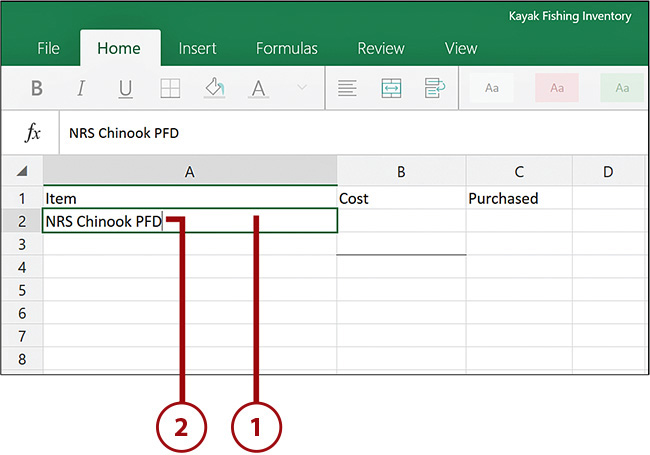
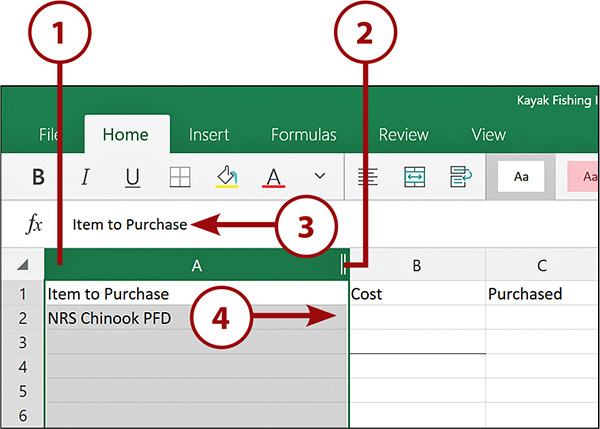
1. Tap or click within the cell where you want your data to be added.
2. Enter the text or numbers you want to add.
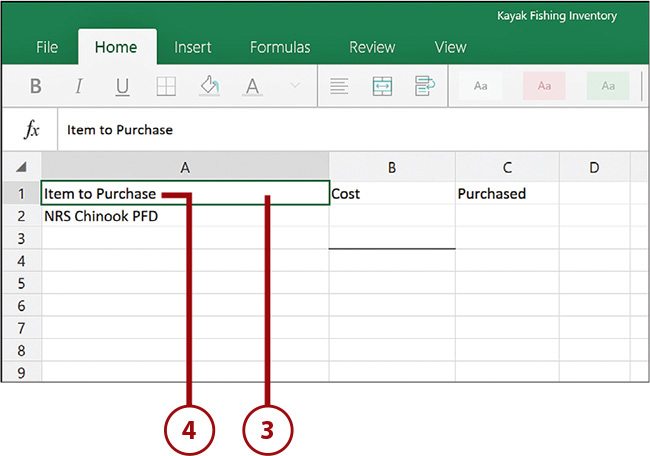
3. To modify data in a cell, tap and hold or double-click on the cell.
4. Modify the data in the cell and press Enter.
Excel Mobile Is Smart
Excel Mobile is pretty smart when it comes to understanding your data. For example, if you enter “$100” in a cell, Excel Mobile knows that you are entering data formatted as currency, and it will automatically recognize that cell as having a monetary value. The benefit of this will become obvious to you when you read the “Creating Formulas” section later in this chapter.
Resizing a Column
You might find that the data you enter in a cell is wider than the column that the cell is in. When that happens, you can adjust the width of the column. (You can also, naturally, make a column narrower if you want to.)
Resizing Using a Mouse
These steps walk you through resizing a column using touch. If you want to resize a column using a mouse, move your mouse pointer to the column header’s right edge until you see a mouse pointer with an arrow pointing left and right. You can then click and drag to resize the column.
1. Tap the header of the column you want to resize.
2. Tap and hold the sizing handle.
3. Drag the handle left to make the column more narrow.
4. Drag the handle to the right to make the column wider.
Changing Data Formatting
Just because you’re typically dealing with numbers in Excel Mobile doesn’t mean you can’t make your data look pretty. Excel Mobile has plenty of features to make formatting your data easy.
Formatting Is Applied to Cells
Formatting in Excel Mobile is applied to cells; therefore, you cannot format some parts of a cell differently than other parts. If, for example, you want to make text in a cell bold, all the text in the cell must be bolded. You cannot bold only some of the characters within the cell.
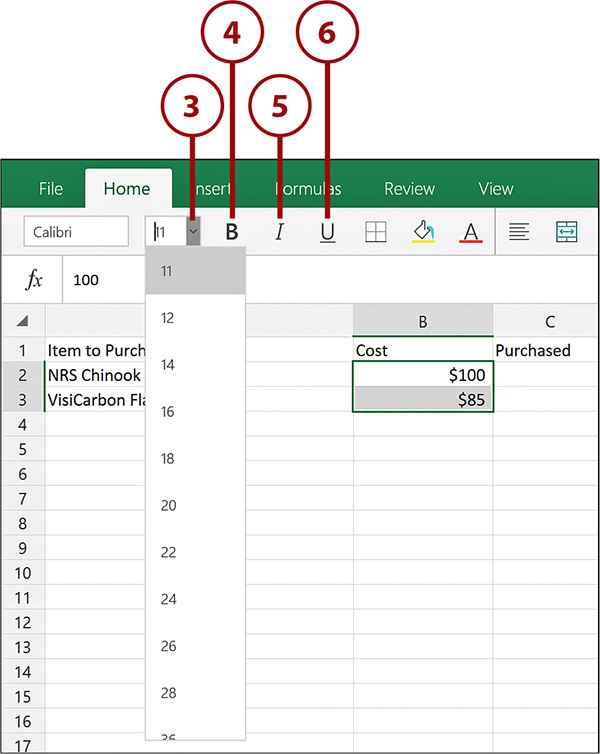
1. Tap or click the cell or cells you want to format. (Tap or click and drag to select multiple contiguous cells.)
2. Tap or click the Font drop-down, and then tap or click a font to change the font.

3. Tap or click the Font Size drop-down, and then select a new font size to change the size of text.
4. Tap or click Bold to make the text bold.
5. Tap or click Italic to make the text italic.
6. Tap or click Underline to underline the text.
7. Tap or click the Borders drop-down to add a border to the cells and to change the line style and line color of the border.

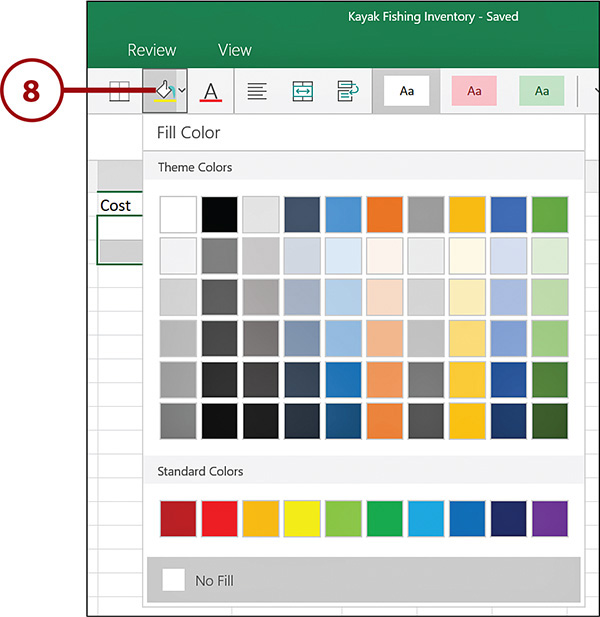
8. Tap or click the Fill Color drop-down, and then tap or click a color to add a fill color to the cells. (Tap or click No Fill to remove a fill color.)
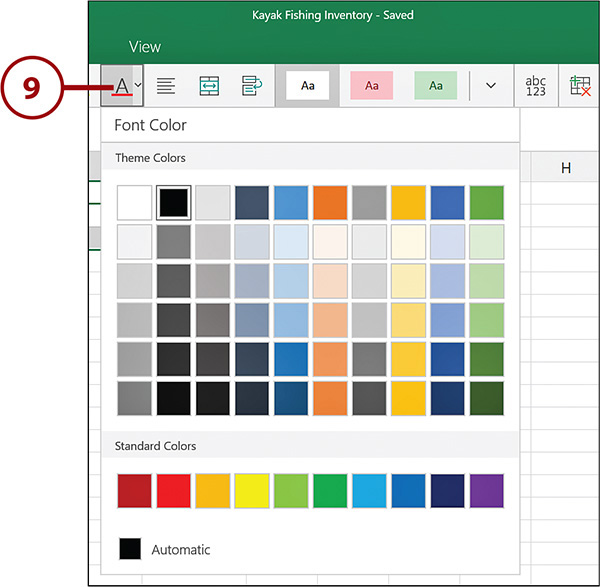
9. Tap or click the Font Color drop-down, and then tap or click a color to change the font color.
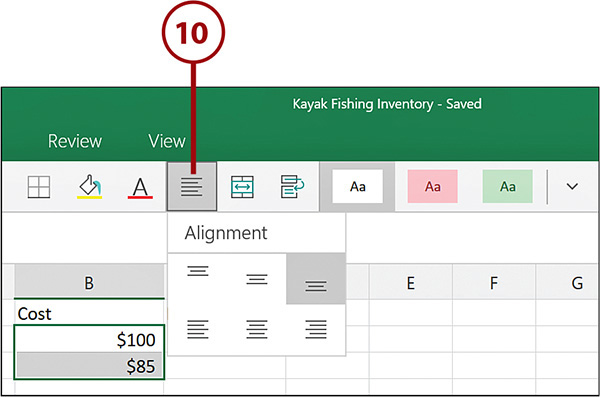
10. Tap or click Choose Text Alignment, and then tap or click an alignment option to align the text in the cell horizontally and vertically.
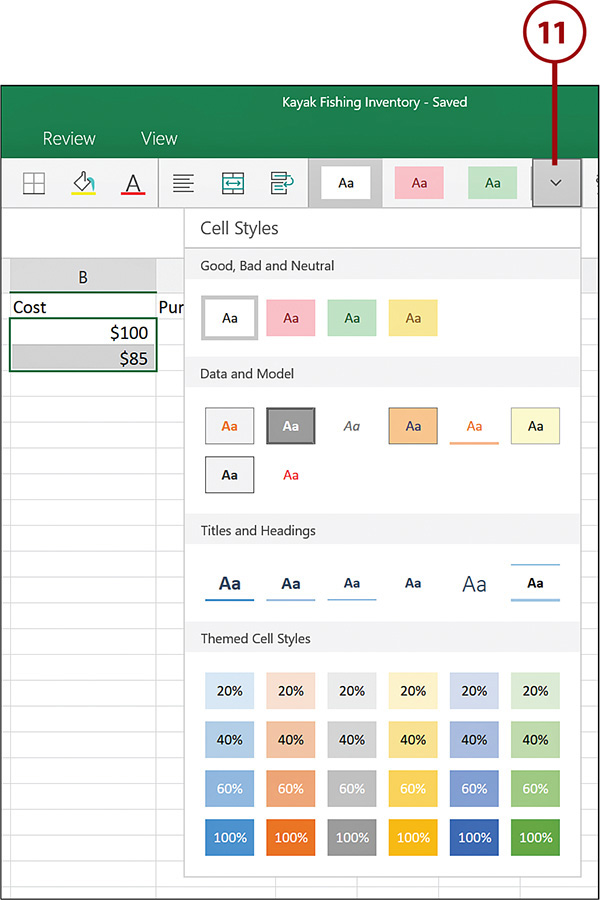
11. Tap or click the Cell Styles drop-down, and then tap or click a style to format cells using a preformatted style.
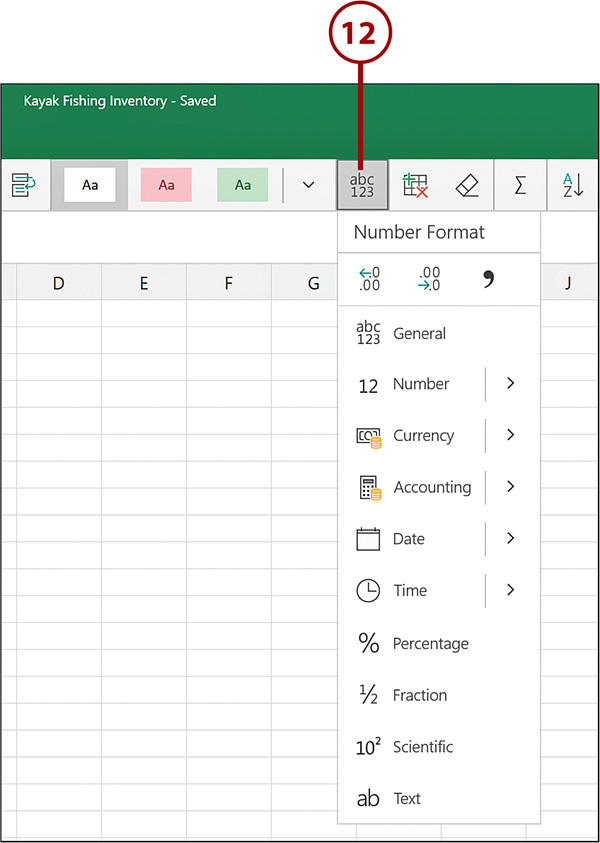
12. Tap or click Number Format to select a number format for the data in the selected cells.
Formatting Entire Rows or Columns
If you want to format an entire row or column, you can tap or click the row number or the column header to select the entire row or column in step 1. Any formatting that you apply will then format the entire row or column.
Why Choose a Number Format?
Step 12 shows you how to choose a number format for one or more cells. If you choose a number format for your cells, Excel Mobile will automatically format data you enter to match the chosen format.
Adding a Table
A lot of the data you will use in Excel Mobile is likely well-suited to a table. When you format tabular data as a table, Excel Mobile will format your table with a color scheme that makes it easier to visualize the data. You will also have the ability to filter and sort information based on columns.
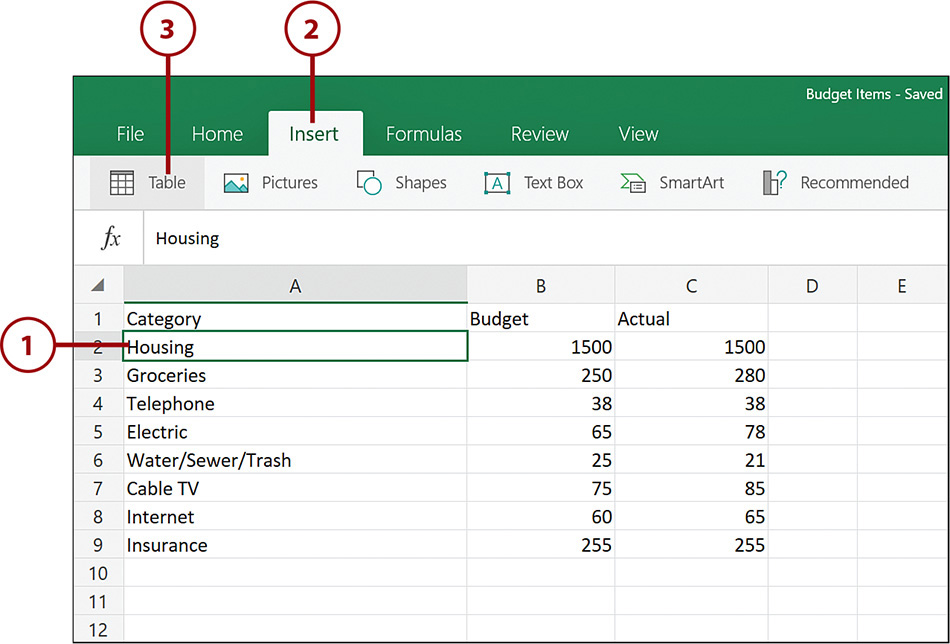
1. Tap or click any cell containing data.
2. Tap or click Insert.
3. Tap or click Table.
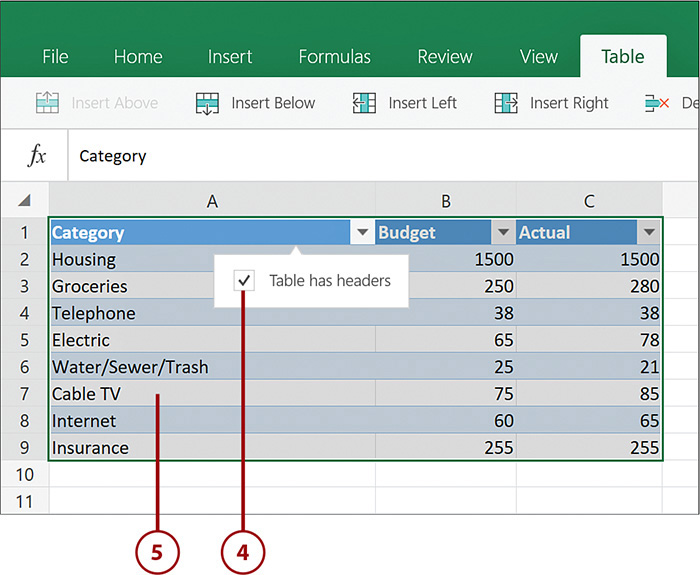
4. Excel Mobile will automatically detect whether your table uses headers. If Excel Mobile fails to recognize that your table does have headers in the first row, tap or click Table Has Headers to check the box.
5. Tap any cell to deselect the table.
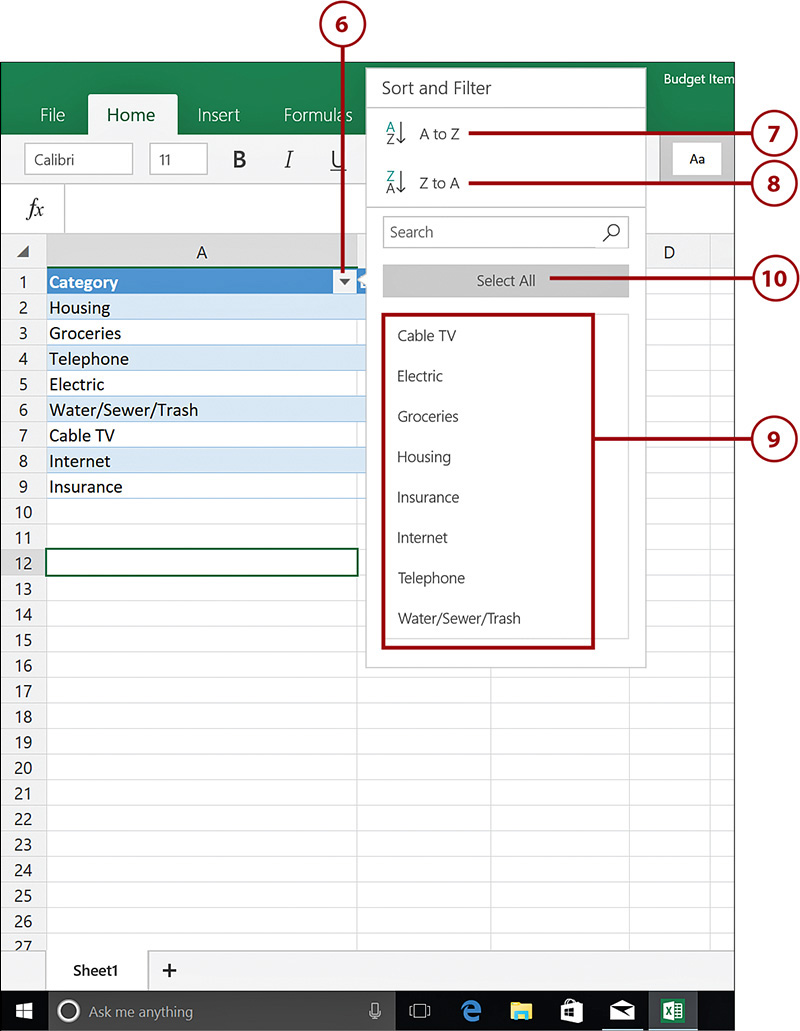
6. To sort or filter based on a column, tap or click the arrow at the right edge of the header cell.
7. Tap or click A to Z to sort the table in ascending order by the values in the column.
8. Tap or click Z to A to sort the table in descending order by the values in the column.
9. Tap or click one or more values to see only data for the values you select.
10. Tap Select All to see data for all values.
Alternating Colors
Notice that Excel Mobile added alternating colors to the rows in your table. If you add new data to your table, Excel Mobile will automatically add highlight colors to the rows of the table.
Working with Sheets
You might find it convenient to organize data in your workbook using sheets. Excel Mobile creates one sheet by default (called Sheet1), but you can create additional sheets as needed. You can also color-code your sheets, rename sheets, and organize sheet tabs.
Creating Sheets
You can create new sheets to better organize data that you’re entering into your Excel workbook. For example, if you’re creating a yearly budget, you might want to have one sheet for each month of expenses.
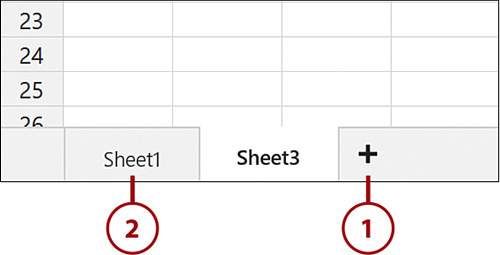
1. Tap or click the + sign at the bottom of the Excel window.
2. Tap or click a sheet’s tab to change to that sheet.
Renaming Sheets
Excel uses a generic name for new sheets, so you’ll likely want to rename your sheets to a more descriptive name.
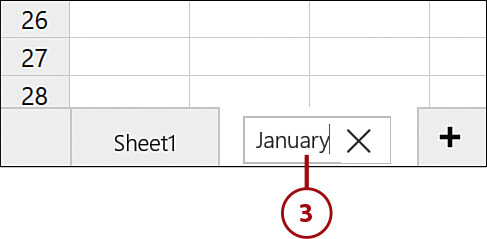
1. Tap and hold or right-click on a sheet name.
2. Tap or click Rename.
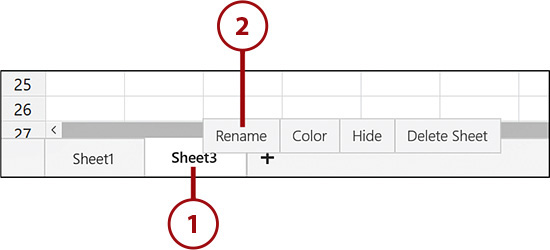
3. Enter a new name for the sheet and press Enter.
Faster Renaming
You can also double-tap or double-click a sheet to rename it.
Coloring Sheets
You can further categorize sheets by applying a color to the sheet’s tab. When a tab is not selected, the color you choose will appear in a border at the top of the tab. When you select the tab, the sheet’s name will appear in the color you selected and a colored border at the bottom of the sheet.
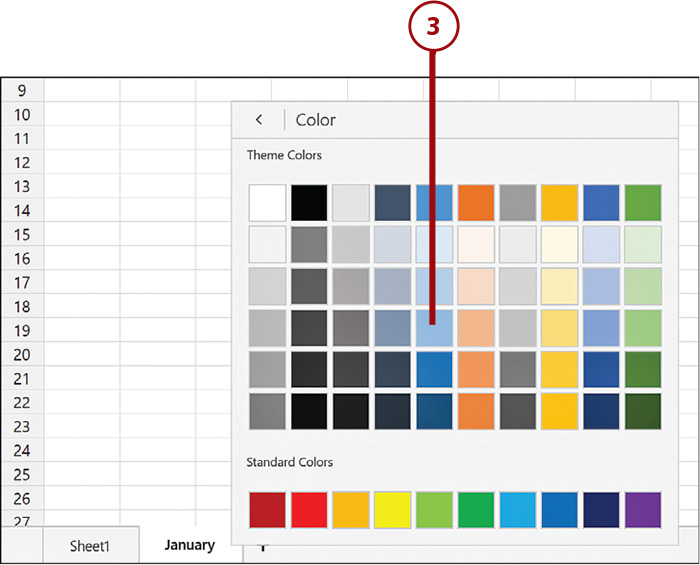
1. Tap and hold or right-click on a sheet’s tab.
2. Tap or click Color.

3. Tap a color for the sheet’s tab.
Organizing Sheets
You can change the order of sheet tabs so that your sheets are in the order you choose.
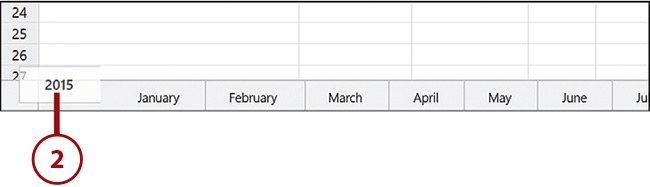
1. Tap and hold or click and hold on the sheet you want to move.
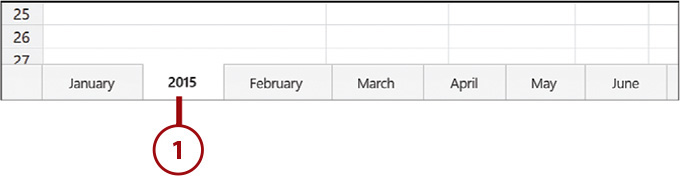
2. Drag the sheet to the desired position and release your finger or mouse button.
Deleting Sheets
If you no longer need a sheet, you can delete it. Deleting a sheet also deletes all the data on that sheet.
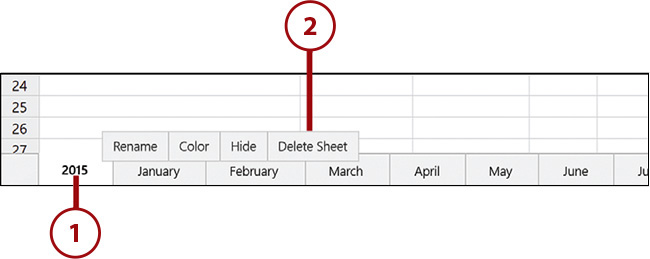
1. Tap and hold or right-click on the sheet you want to delete.
2. Tap or click Delete Sheet.
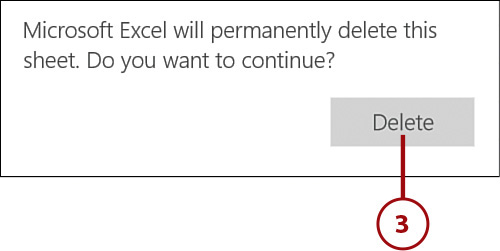
3. Tap or click Delete to confirm that you want to delete the sheet.
Canceling a Delete
If you change your mind and don’t want to delete the sheet, simply tap or click anywhere outside the confirmation dialog to cancel the delete.
Creating Formulas
The true power of Excel Mobile is realized when you start using formulas. Excel Mobile is kind of like a super calculator in that it has the capability to calculate and analyze numerical data just about any way you can imagine. It does that with formulas, and Excel Mobile makes it easy to use formulas, even when you’re not a math whiz.
You can enter formulas directly, or you can use the Formulas bar or Formulas ribbon for easier entry.
Directly Entering a Formula
You might want to enter a formula directly if you’re using a very simple formula to do something such as add some numbers together. In this step-by-step, you’ll see how to enter a formula that sums a group of cells.
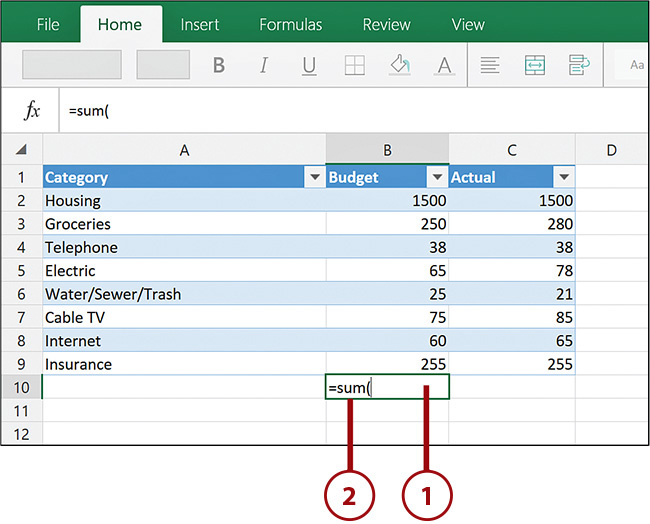
1. Tap or click the cell where you want the result of your formula to be entered.
2. Type =sum( in the cell.
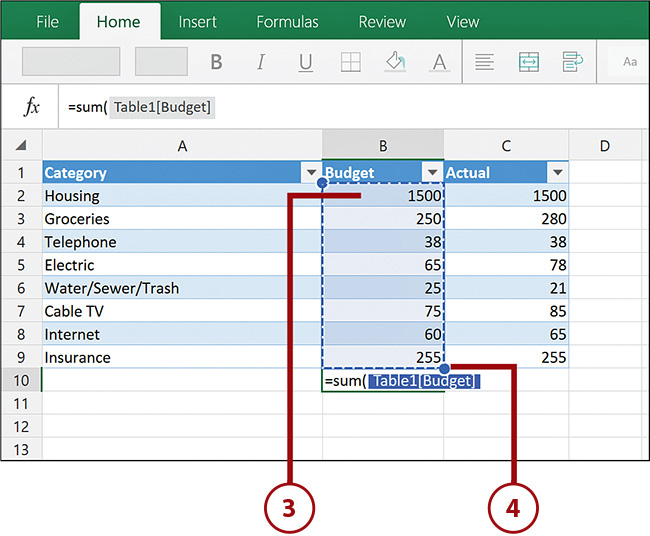
3. Tap or click in the first cell containing the numbers you want to add.
4. Tap or click the blue handle and drag it to enclose all the cells you want added.
5. Press Enter to add your formula and see the total of the numbers.
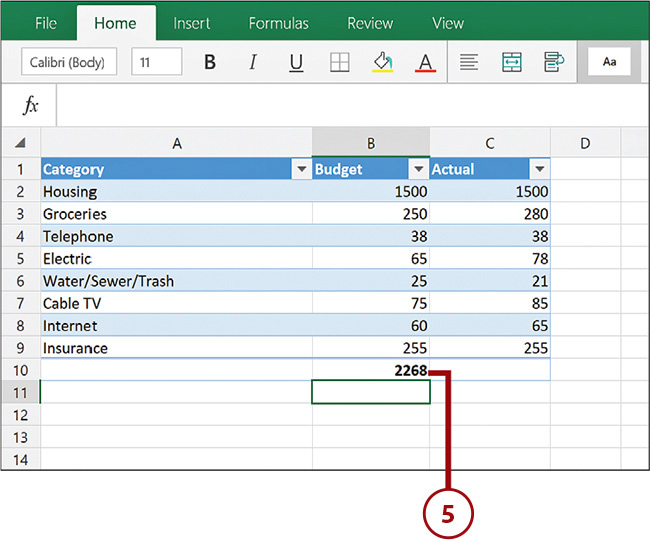
Formulas in Action
If you change one of the numbers used in your formula, Excel Mobile will automatically change the total that it computed. This is the power of Excel Mobile in action.
More Formulas
You might have noticed that Excel Mobile displayed a list of formulas after you entered the SUM formula in step 2. You can select any of these formulas to see information on how the formula works and how you can use it in your workbooks. This example was only a small example of the true power of Excel Mobile.
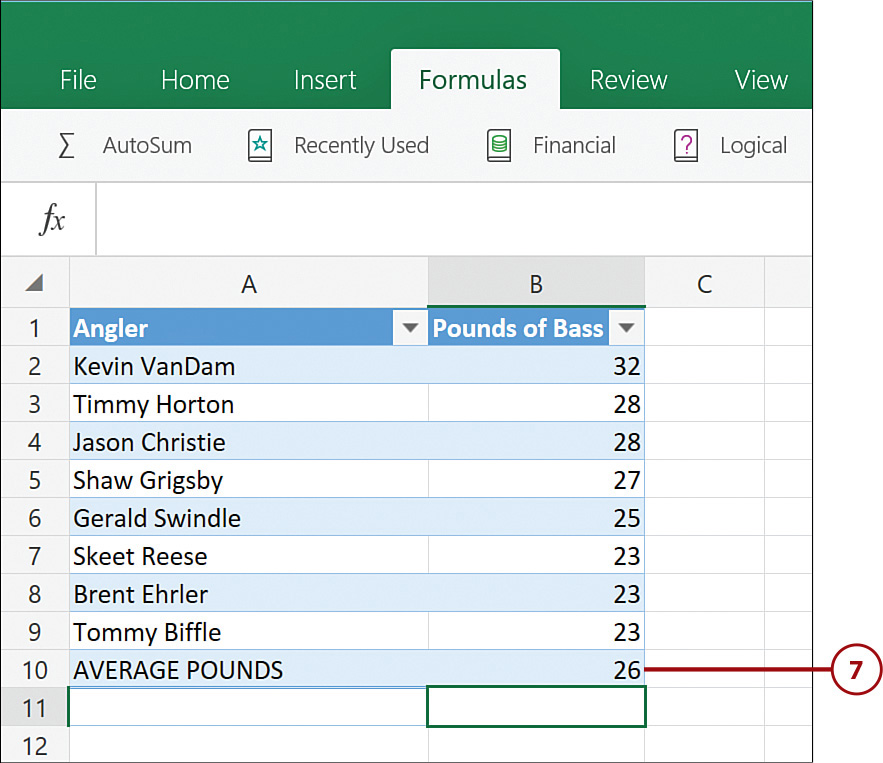
Using the Formulas Toolbar
In the example you just completed, you knew to use the SUM formula because I told you to do that. There might be times when you don’t know the name of a formula, and in those situations, the Formulas toolbar is a great solution.
The Formulas toolbar has buttons that represent categories of formulas so that you can find exactly the formula you need.
1. Tap or click the cell where you want the formula’s result to be entered.
2. Tap or click Formulas to activate the Formulas toolbar.
3. Tap or click a formula category, or tap or click the down arrow for more categories.
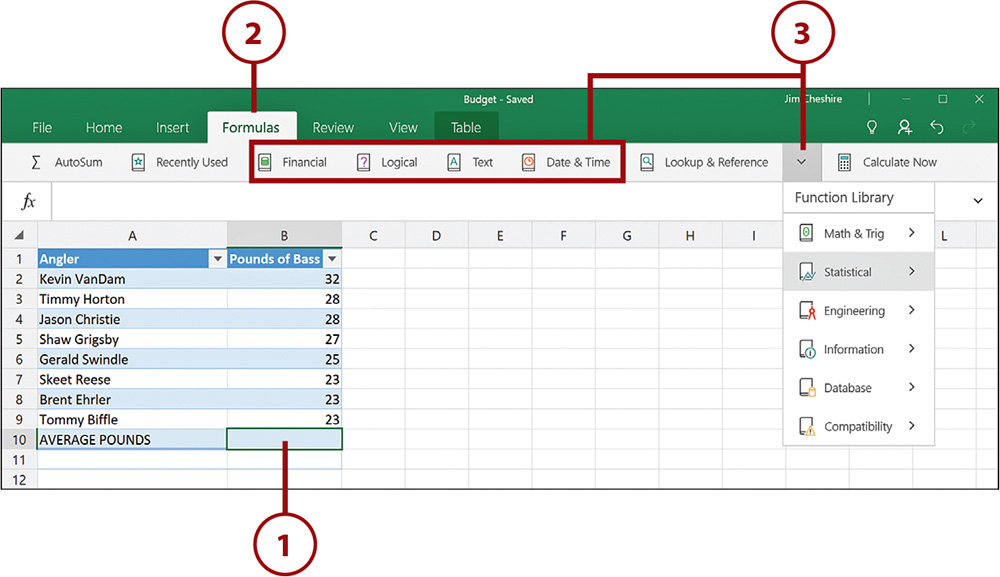
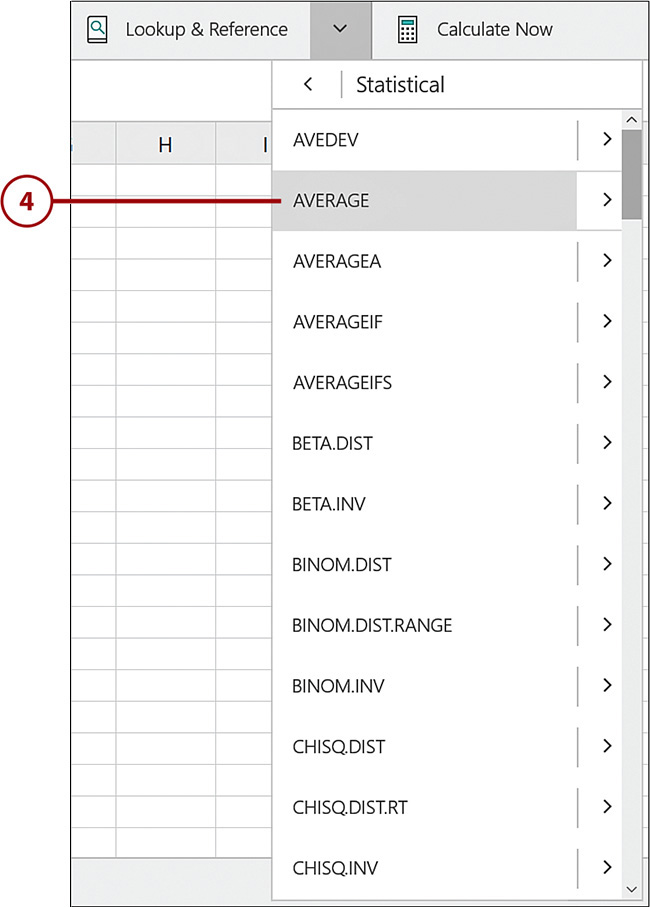
4. Tap or click the formula you want to use.
5. Tap or click the cell that contains the first number to be used in your formula.
6. If additional numbers are needed, tap or click the cell containing the additional number or select multiple cells using the handle.
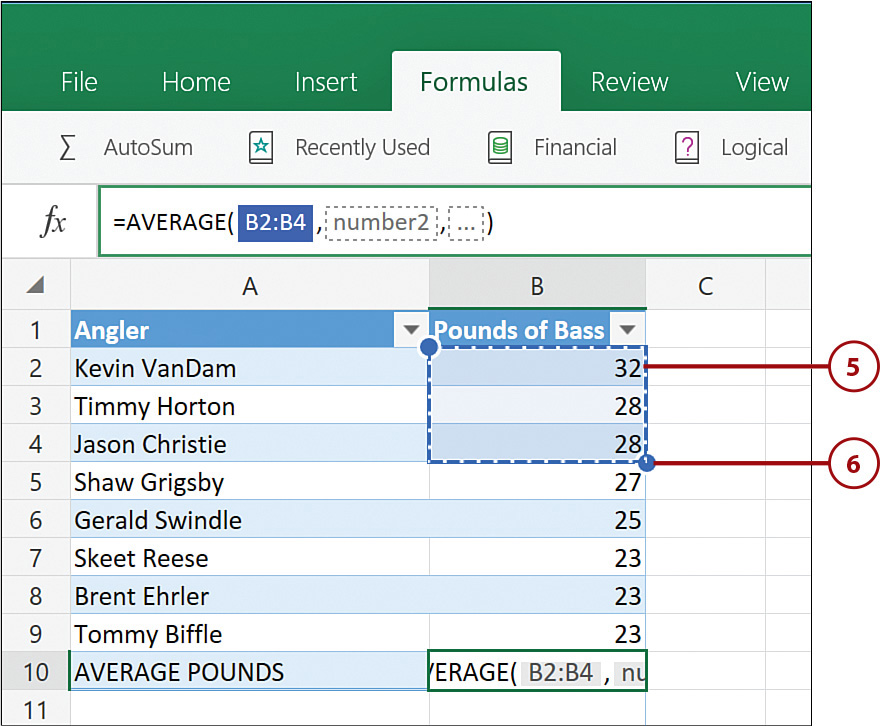
7. Press Enter to accept the formula and display the result.
Sharing Workbooks
Excel Mobile enables you to easily share workbooks with others. You can share a workbook with other people you are collaborating with on the workbook. You also can use sharing to send an email with the workbook attached to it in case you need to send the workbook to someone.
Sharing features in Excel Mobile are identical to the sharing features in the other Office apps. You can find out how to use these features by reading the section called “Sharing Documents” in Chapter 18, “Creating Documents with Microsoft Word Mobile.”