18. Creating Documents with Microsoft Word Mobile
If you need to create documents for any purpose, Microsoft Word is a great way to do it, and Microsoft Word Mobile is a great way to do it on your tablet. In this chapter, you learn about
→ Creating, Opening, and Saving Documents
→ Adding and Formatting Pictures
Microsoft Word is a word processor with a long history. Along with Windows 10, Microsoft introduced a new mobile version of Word that offers cloud integration and a universal experience across devices. It’s designed to work with documents that are stored in OneDrive (so that you can access those documents from any connected device). Even better, Word running on your Windows 10 tablet looks and works just like Word running on your Windows Phone or an iPhone, an Android phone, an iPad, and so forth.
In this chapter, my goal is to give you a taste of what you can do in Word Mobile. Obviously, I can’t cover the entire application, but if you are interested in learning all about Word, I encourage you to read My Office 2016, Que Publishing, Fall 2015.
Creating, Opening, and Saving Documents
Word Mobile offers a wide array of templates you can use to create documents of all types. As you’re creating your document, it gets saved to your OneDrive automatically so that it’s available on any other devices you use. However, if you choose to, you can save a copy to another location.
Installing Word Mobile
Before you go further in this chapter, you should install Microsoft Word Mobile from the Windows Store. It’s available as a free download.
Creating a New Blank Document
You can create a new blank document so that you can start from scratch without any included content.
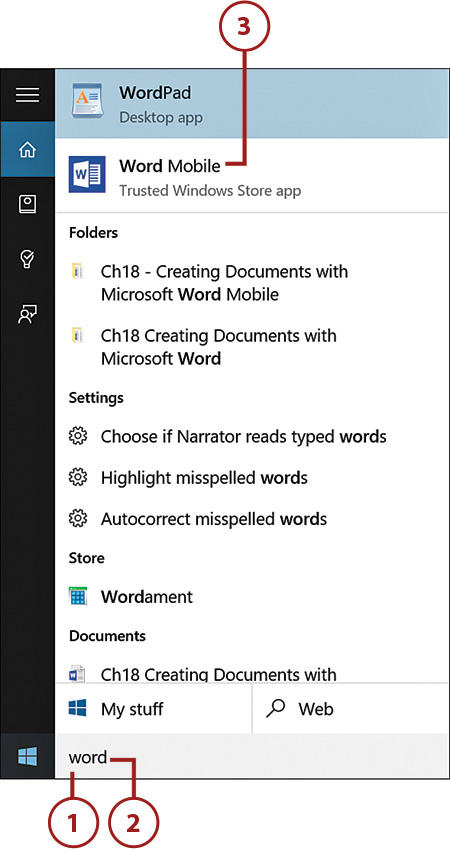
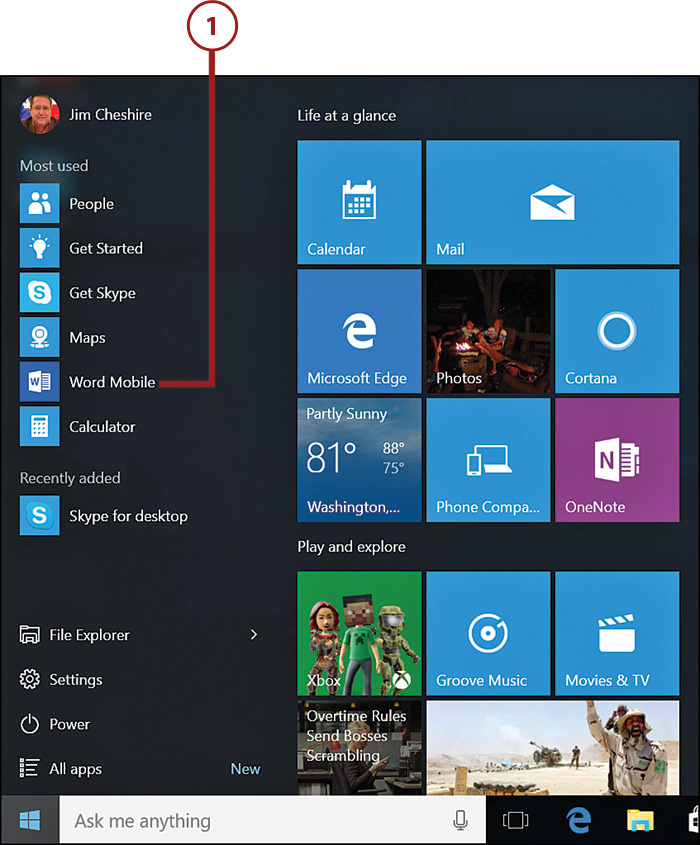
1. Tap or click the Search field.
2. Enter Word and press Enter.
3. Tap or click Word Mobile to open Word Mobile.
4. Tap or click In OneDrive if you want to change the location for your new document.
5. Tap or click This PC > Documents to save the new document in the Documents library on your tablet.
6. Tap or click Select a Different Location if you want to choose a different folder for your document.
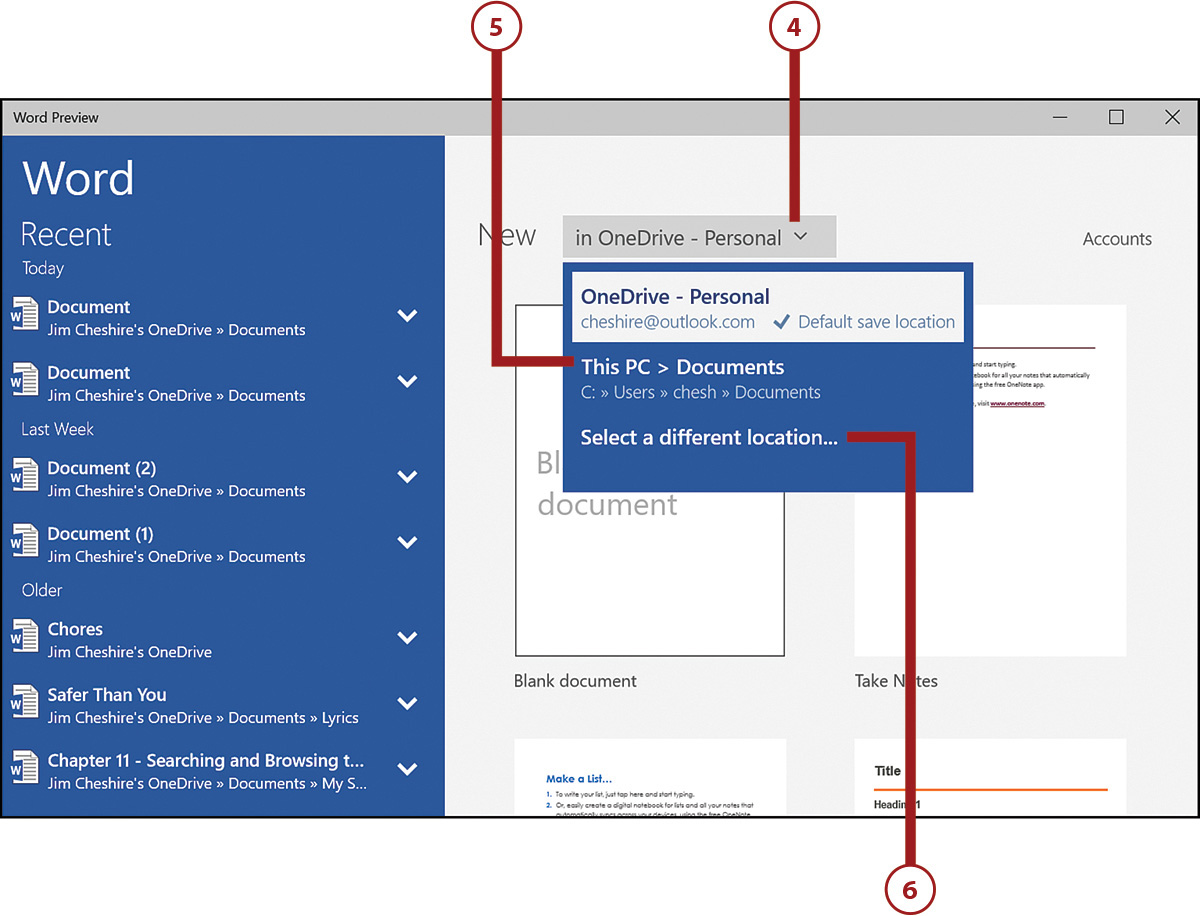
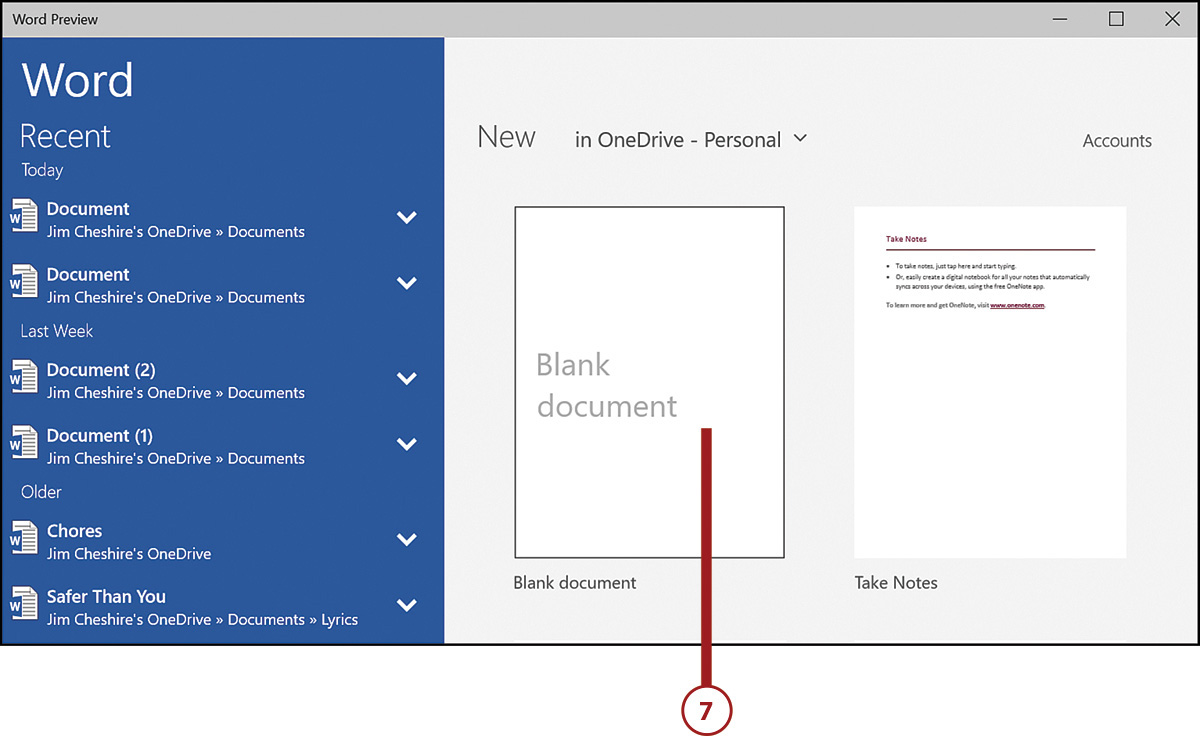
7. Tap or click Blank Document to create a new document.
8. Tap the document name to rename your document.
9. Enter a new name for your document and press Enter.

Using OneDrive
If you want to be able to access your document from other devices, you should create your document in OneDrive. Word Mobile will look for documents in OneDrive by default.
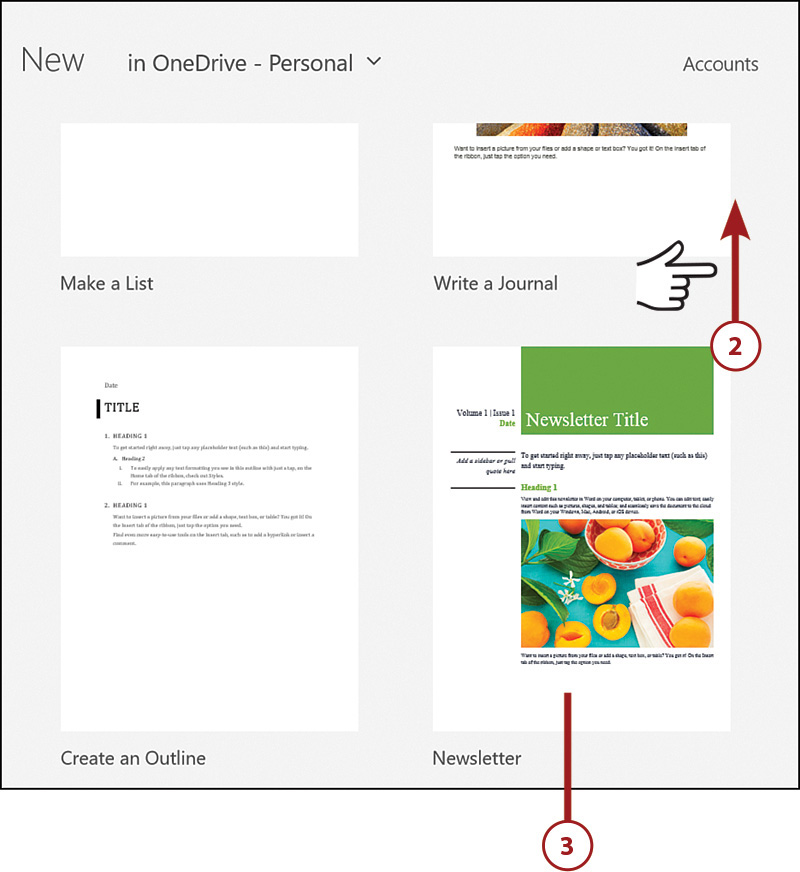
Creating a Document from a Template
Word Mobile comes with an assortment of templates to get you started on creating your document. Templates range from lists and journals to newsletters and resumes.
1. Launch Word Mobile from the Start menu.
2. Swipe up or scroll down to view additional templates.
3. Tap or click a template to create a new document based on that template.
Pinning Word Mobile
If you use Word Mobile a lot, you might want to consider pinning it to the Taskbar or the Start menu. For information on how to do that, see Chapter 3, “Using and Customizing the Start Menu and Taskbar.”
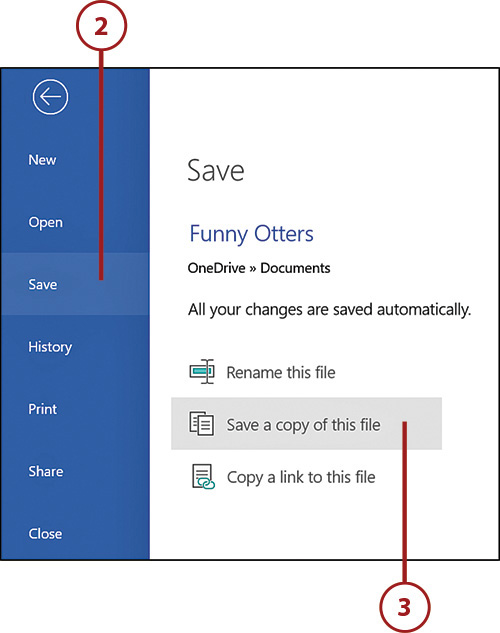
Saving Documents
By default, Word Mobile automatically saves your document to OneDrive as you are working on it, assuming you chose to create your document on your OneDrive. If you want to, you can also save the document elsewhere.
1. Tap or click File.

2. Tap or click Save.
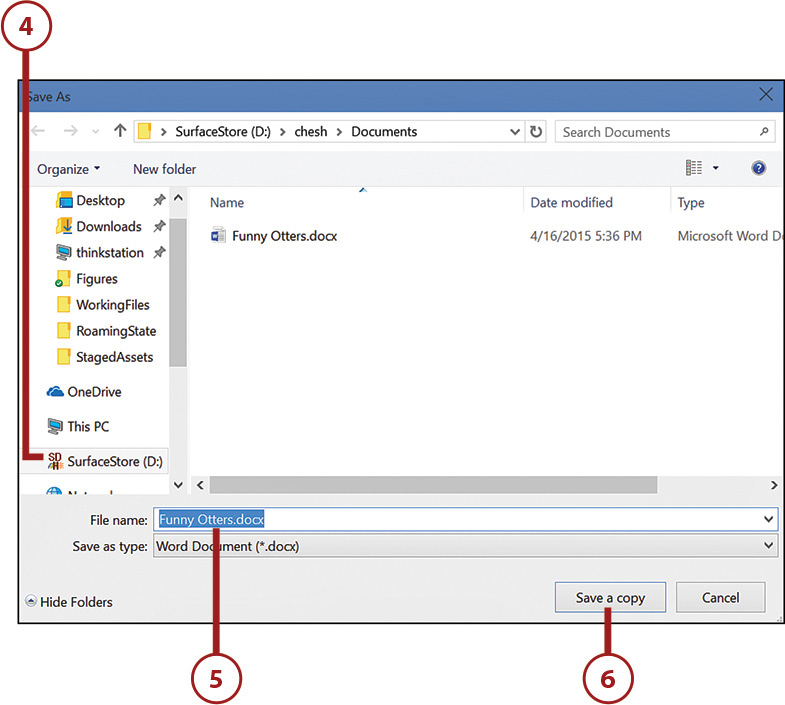
3. Tap or click Save a Copy of This File.
4. Navigate to the location where you want to save the file.
5. Enter a new name or accept the current document name.
6. Tap or click Save a Copy.
Opening Documents
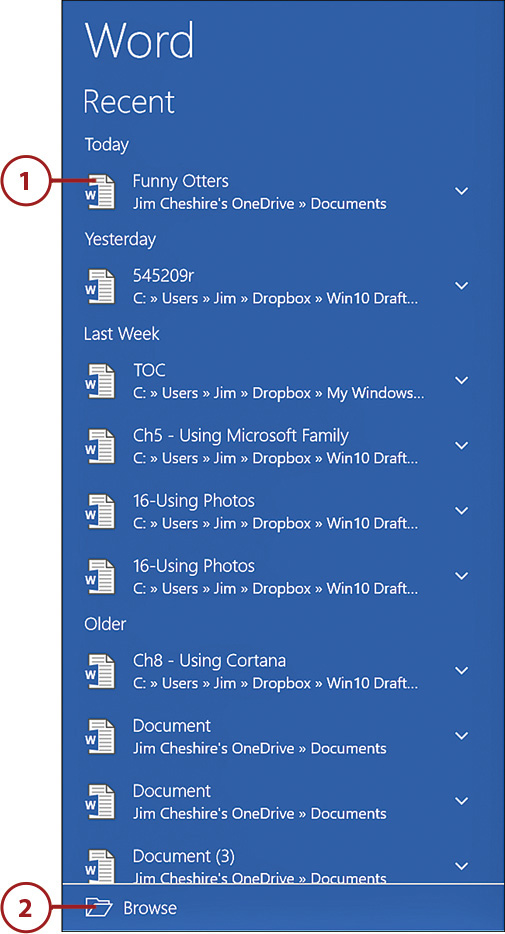
When you open Word Mobile, you are provided with a list of documents you’ve recently worked on. You can also open documents that are not on the list.
Opening Documents
If you’re currently working on a document and you want to open another document, you can tap or click File and then Open to open a document. After you do that, the steps to open the document are the same steps I’ve outlined here.
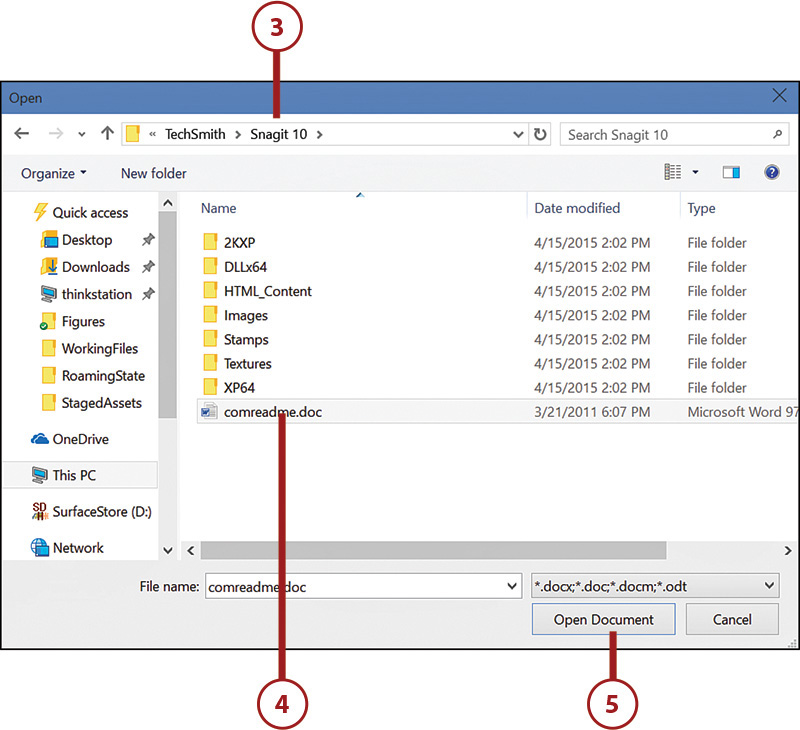
1. Tap or click a document in the Recent list to open that document.
2. Tap or click Browse to browse for a document that’s not listed.
3. Browse to the folder that contains the document you want to open.
4. Tap or click the document.
5. Tap or click Open Document.
Managing Recent Documents
As you saw earlier, Word Mobile keeps a list of documents you’ve worked on recently so that you can access them quickly. You can remove documents from this list. You can also pin a document to the list so that it doesn’t get moved off the list as you work on new documents.
Removing a document from the Recent list doesn’t delete the document; it simply removes it from the list. If you want to open the document later, you’ll need to browse to it.
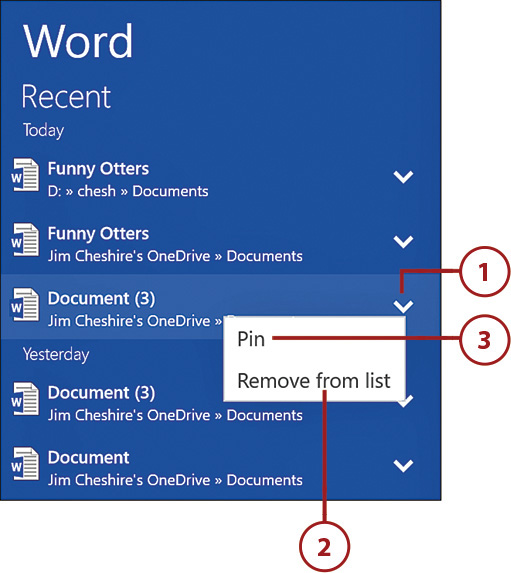
1. Tap or click the down arrow to the right of the document you want to remove.
2. Tap or click Remove from List to remove the document from the Recent list.
3. Tap or click Pin to pin the document to the Recent list so that it will not be automatically removed as you work on new documents.
Formatting Text
Word Mobile offers features that make it easy to format text the way you want. In addition to directly formatting text by making it bold, italicized, and so forth, you can also apply a style to text so that the text takes on predefined formatting that is based on the style you apply.
Formatting Text
You can change the font, the font size, the style and color of the text, and so forth.
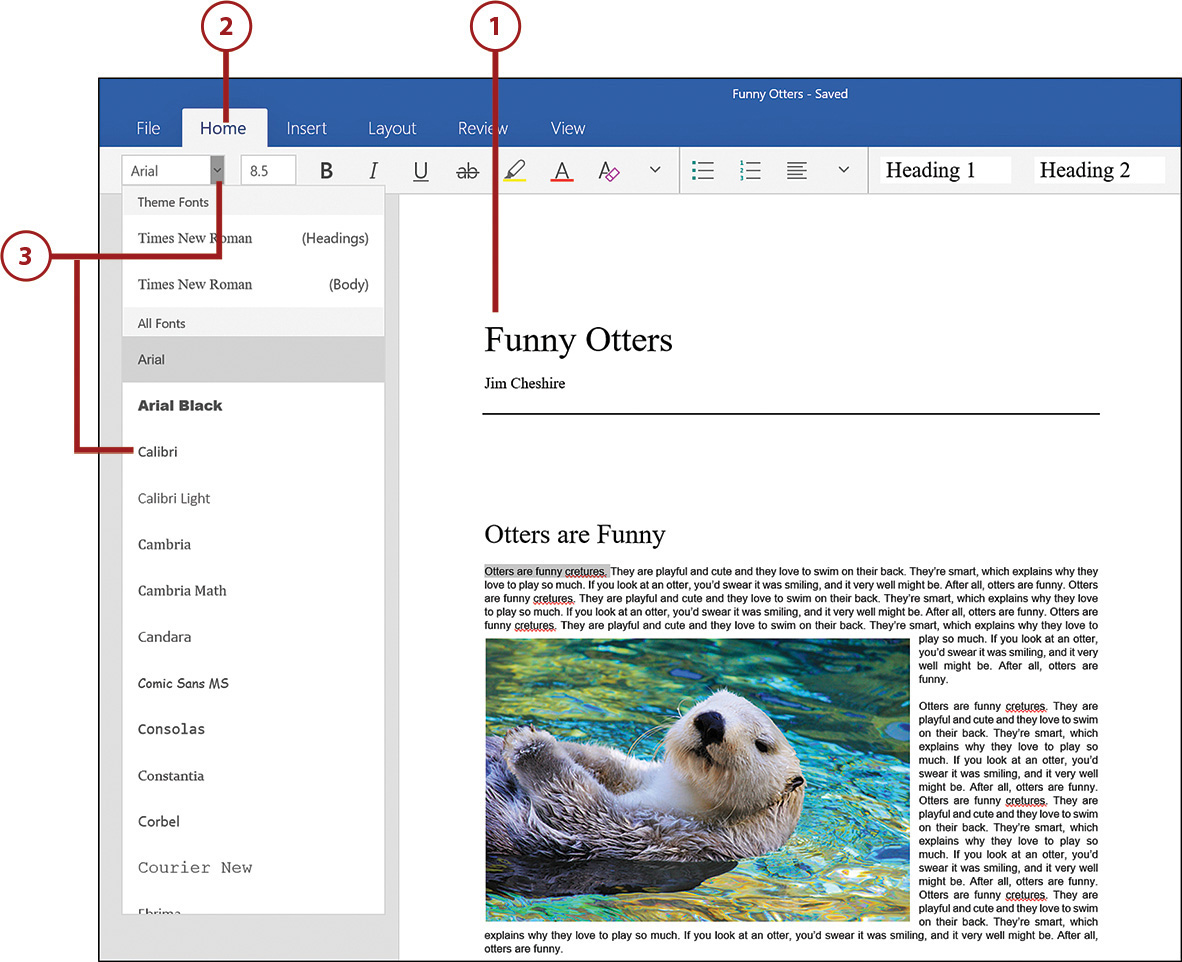
1. Select the text you want to format.
2. Tap or click Home.
3. Tap or click the Font drop-down, and then tap or click a font to change the font of the selected text.
4. Tap or click the Font Size drop-down, and tap or click a size to change the font size.
5. Tap or click Bold to make the selected text bold.
6. Tap or click Italic to make the selected text italic.
7. Tap or click Underline to underline the selected text.
8. Tap or click Strikethrough to strike through the selected text.
9. Tap or click Highlight to highlight the selected text in yellow.
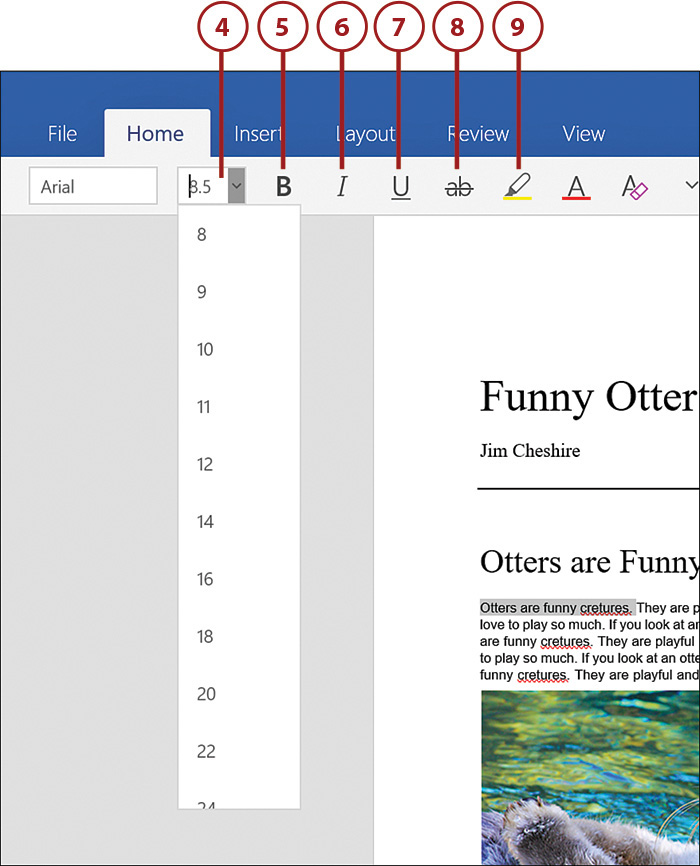
10. Tap or click Font Color, and then tap a new color for the selected text.
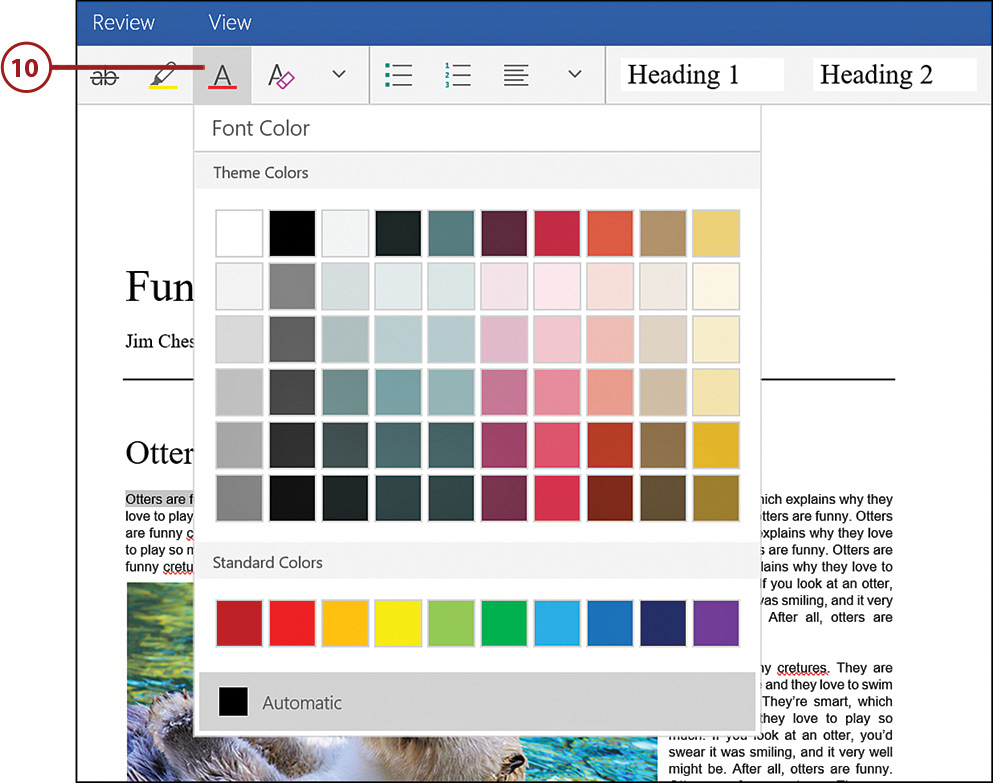
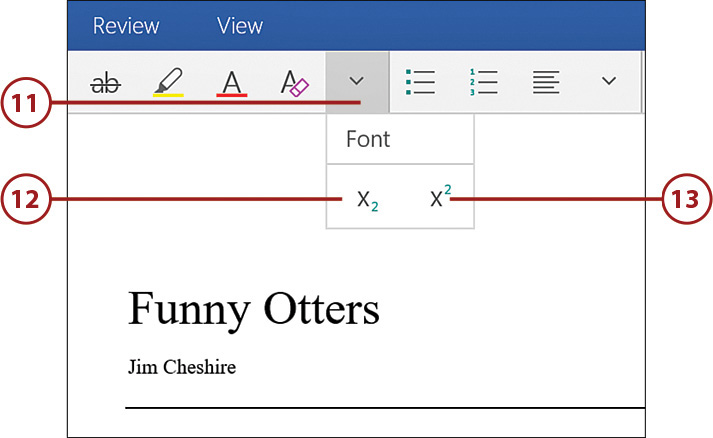
11. Open the Font menu.
12. Tap or click the down arrow, and then tap or click Subscript to make the selected text subscript.
13. Tap or click Superscript to make the selected text superscript.
If you want to format new text that you are about to add to a document, apply the formatting at the point where you are about to enter text and the new text you enter will have that formatting applied.
Formatting Text Using Styles
You can use a style to easily apply formatting to text. A style is a predefined set of formatting that you can apply to any text in one step. Styles are applied to an entire paragraph, so you don’t have to select text before you apply a style.
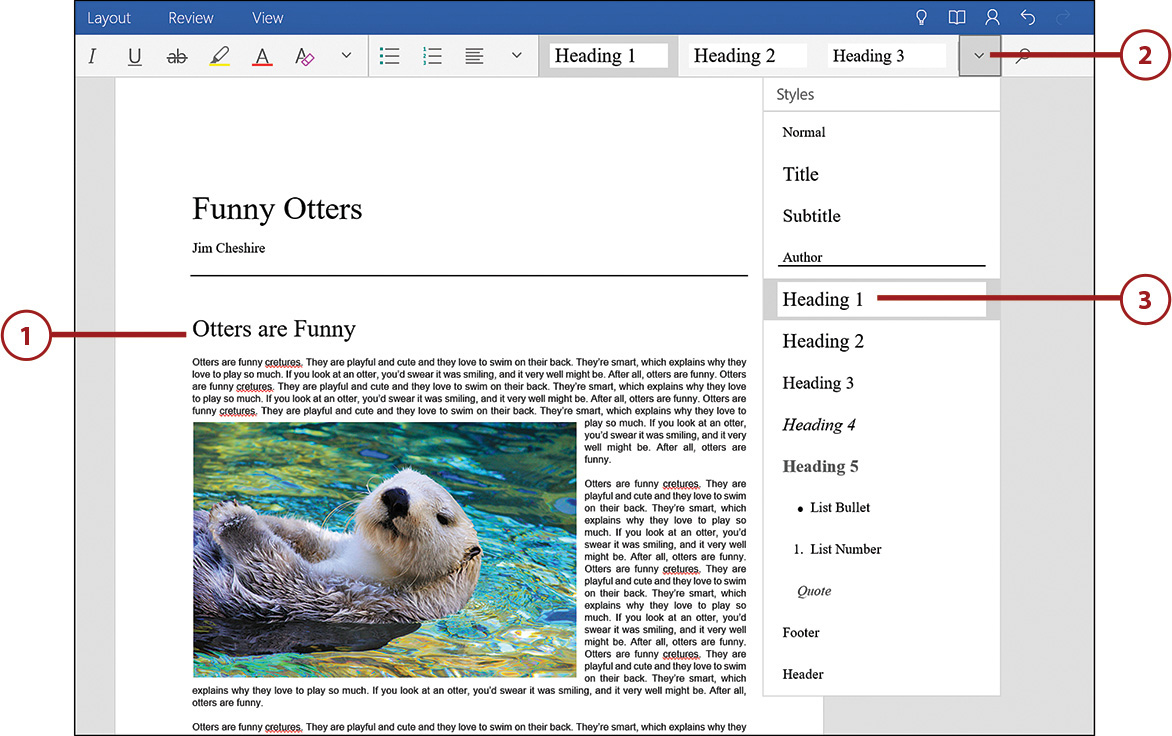
1. Tap or click to place your insertion point inside the paragraph that you want to format with a style.
2. Tap or click Styles.
3. Tap or click the style you want to apply.
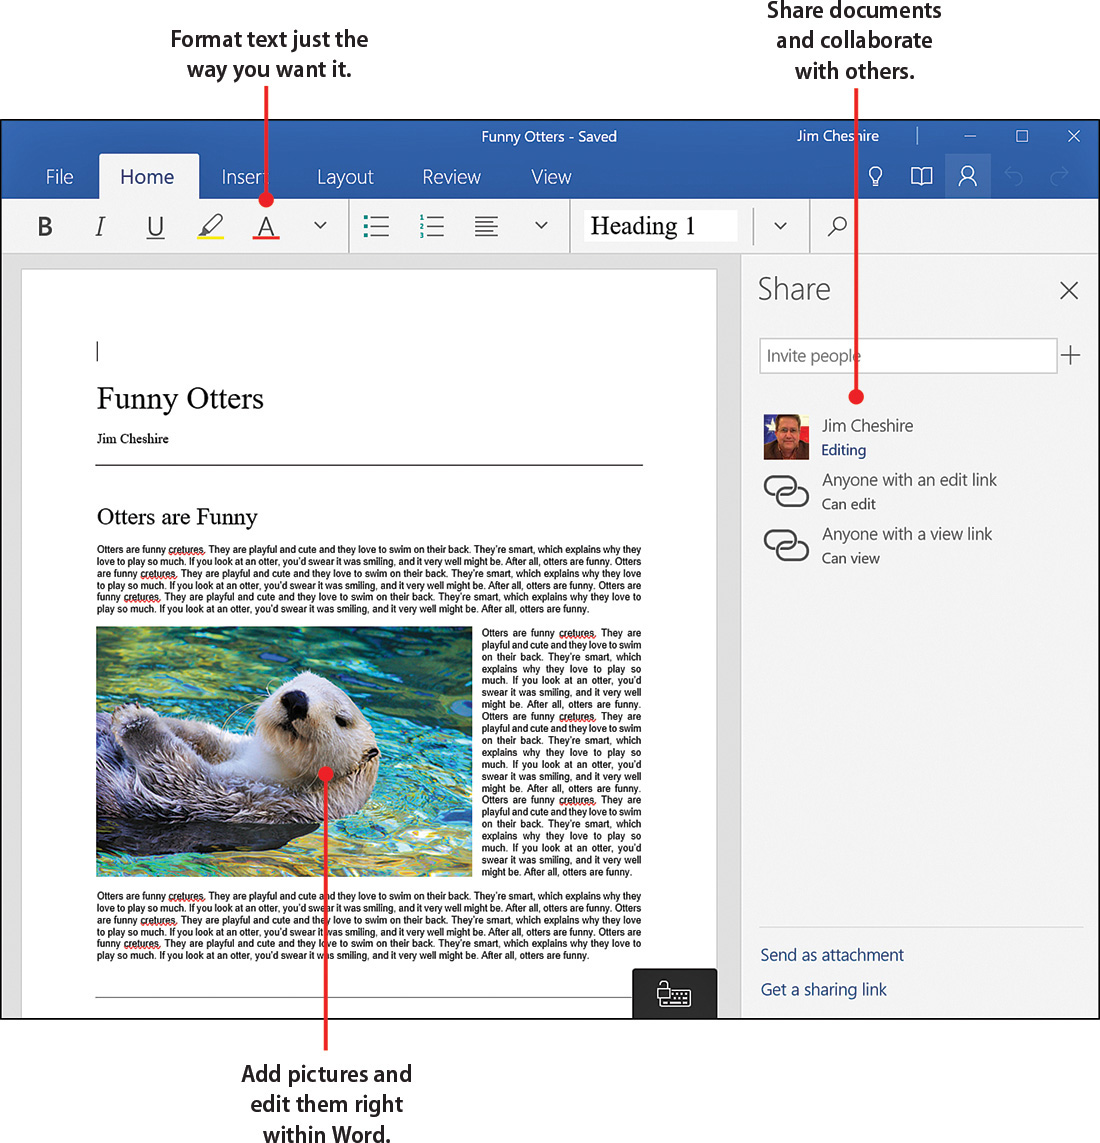
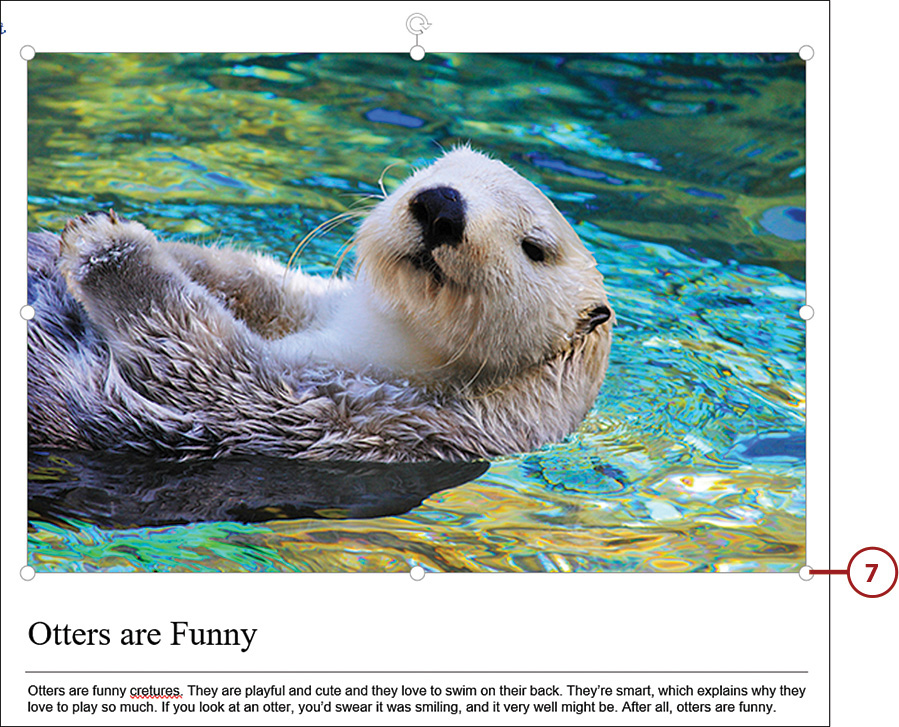
Adding and Formatting Pictures
Pictures can make a document more interesting. Word Mobile has plenty of tools to allow you to add and format pictures in a document.
Adding a Picture
You can add a picture from OneDrive or from your PC.
1. Place the insertion point where you want the picture to be.
2. Tap or click Insert.
3. Tap or click Pictures.
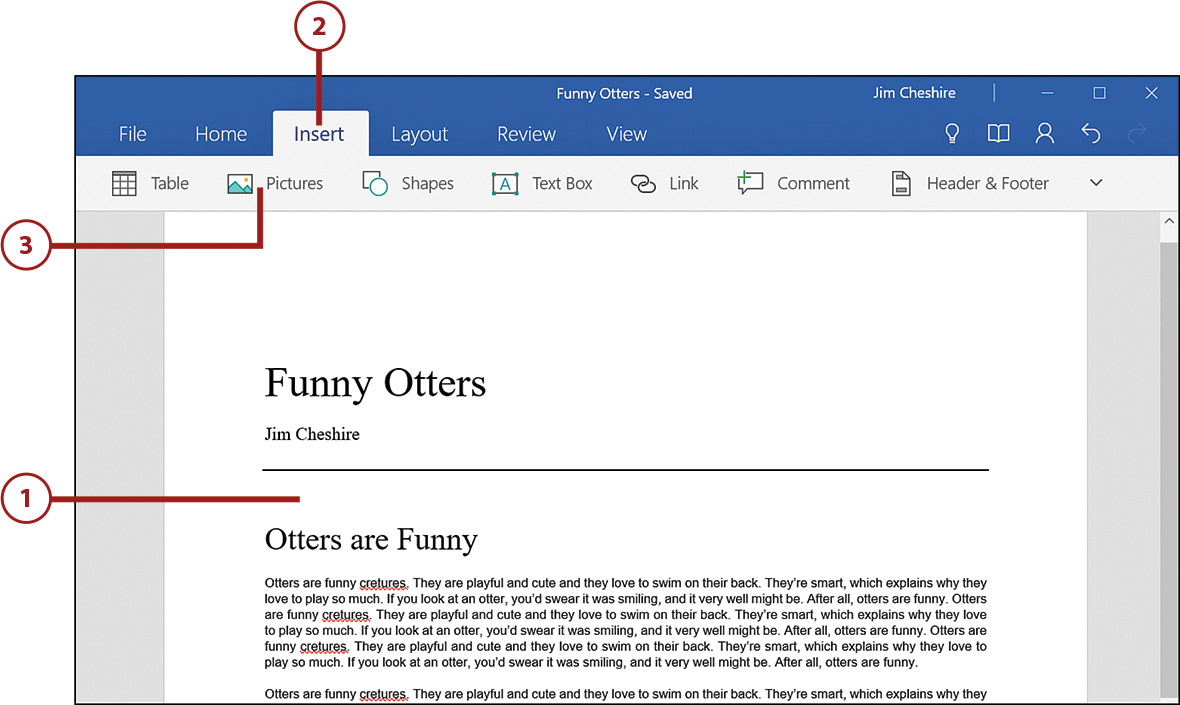
4. Navigate to the folder that contains the picture you want to add to the document.
5. Tap or click the picture to select it.
6. Tap or click Insert.
7. Tap or click and then drag one of the sizing handles to change the picture’s size.
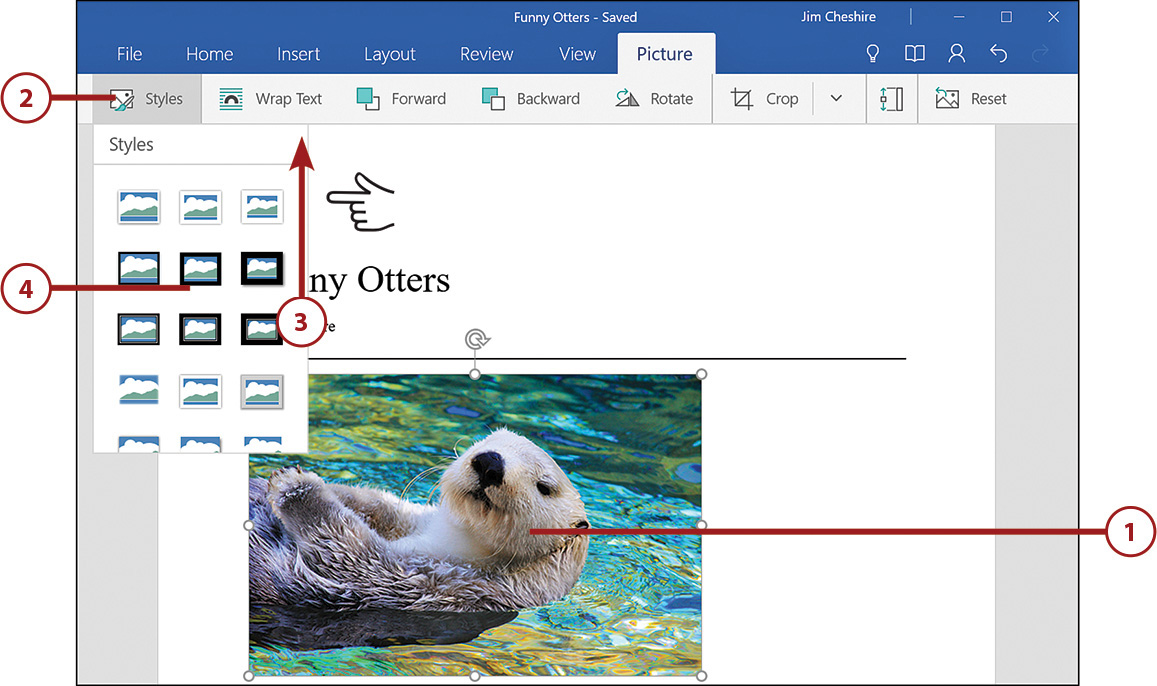
Applying a Picture Style
Much like the styles you can apply to text, picture styles enable you to apply formatting to a picture with a single tap or click.
1. Tap or click to select the picture to which you want to apply a style.
2. Tap or click Styles.
3. Swipe up or scroll down to see additional styles.
4. Tap or click the desired style.
Positioning a Picture
Word Mobile makes it easy to position a picture exactly where you want it. As you reposition a picture, the text in your document will automatically flow around it.
1. Tap or click your picture to select it.
2. Tap or click Wrap Text.
3. Tap or click a text-wrapping option for your picture using the icons as a guide.
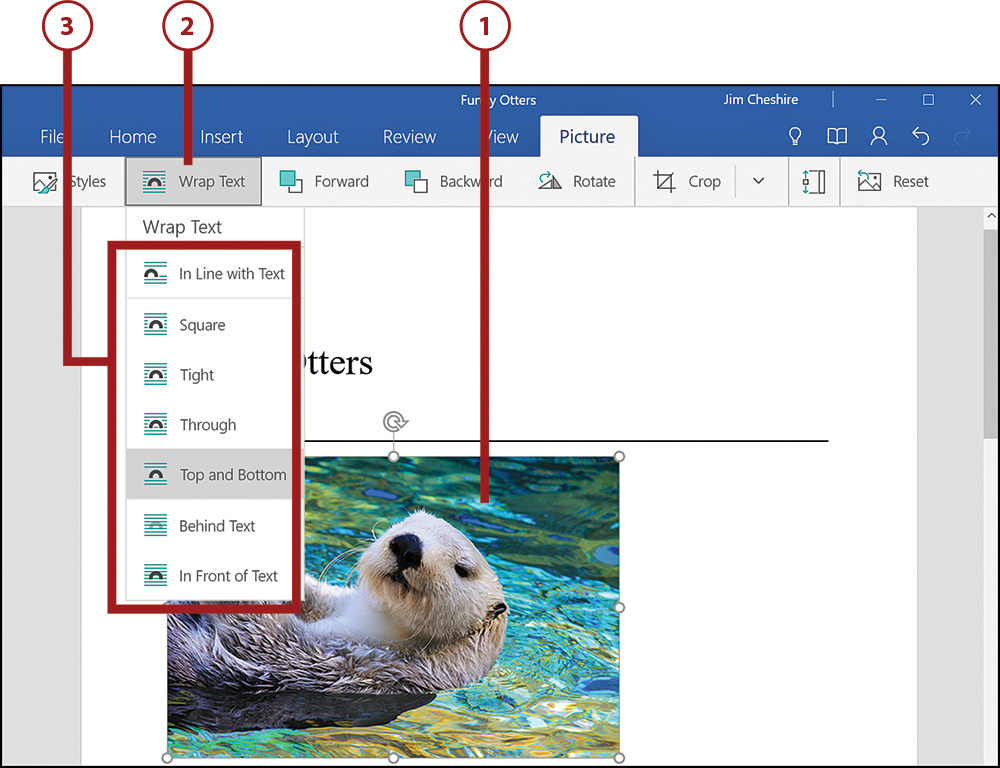
4. Tap or click and hold and then drag the picture to the desired location. Text will wrap around the picture automatically based on the setting you chose in step 3.
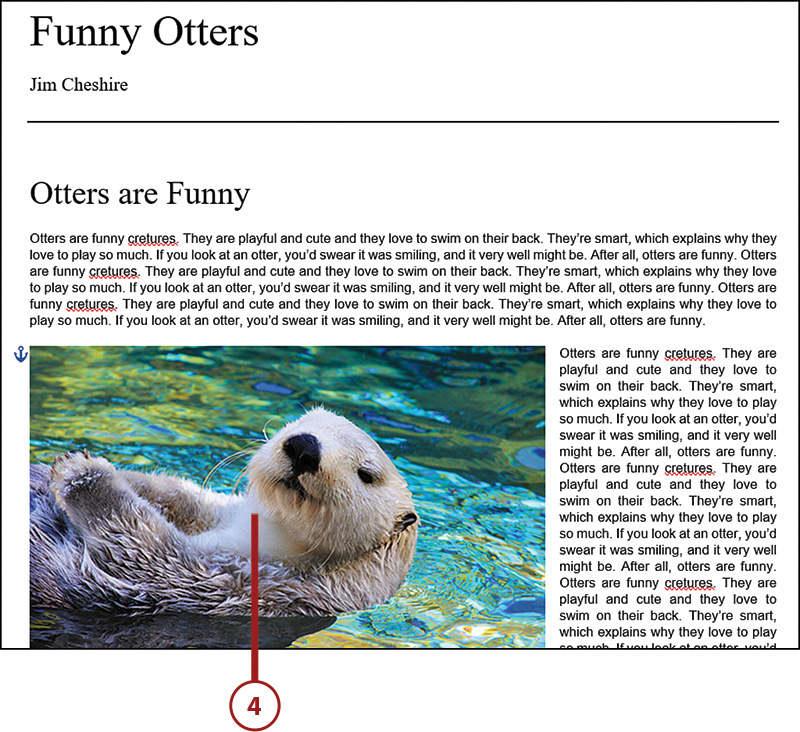
Wrapping Text
In the figure I’ve included, I am using the Square wrapping style. This style causes text to wrap around all sides of my picture.
Rotating a Picture
You might want to rotate a picture that you’ve inserted into your document. Word Mobile provides tools that make rotating pictures easy.
1. Tap or click the picture you want to rotate.
2. Tap or click Rotate.
3. Tap or click a rotation option to rotate the picture.
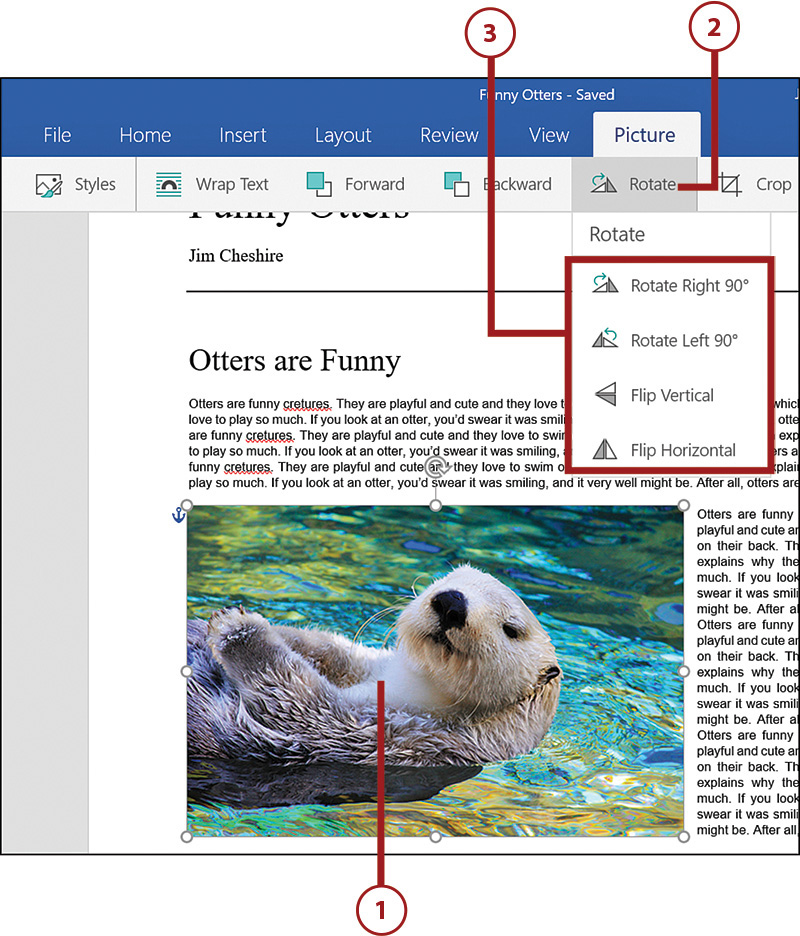
Fine Rotation Control
If you need to rotate a picture less than 90 degrees, you can tap or click the picture and drag the circular rotation control.
Cropping a Picture
You can crop a picture from within Word Mobile if you want to use only part of the picture in your document.
1. Tap or click the picture you want to crop.
2. Tap or click Crop.
3. Drag the handles to frame the portion of the picture that you want to keep.
4. Tap or click Crop again to complete the cropping.
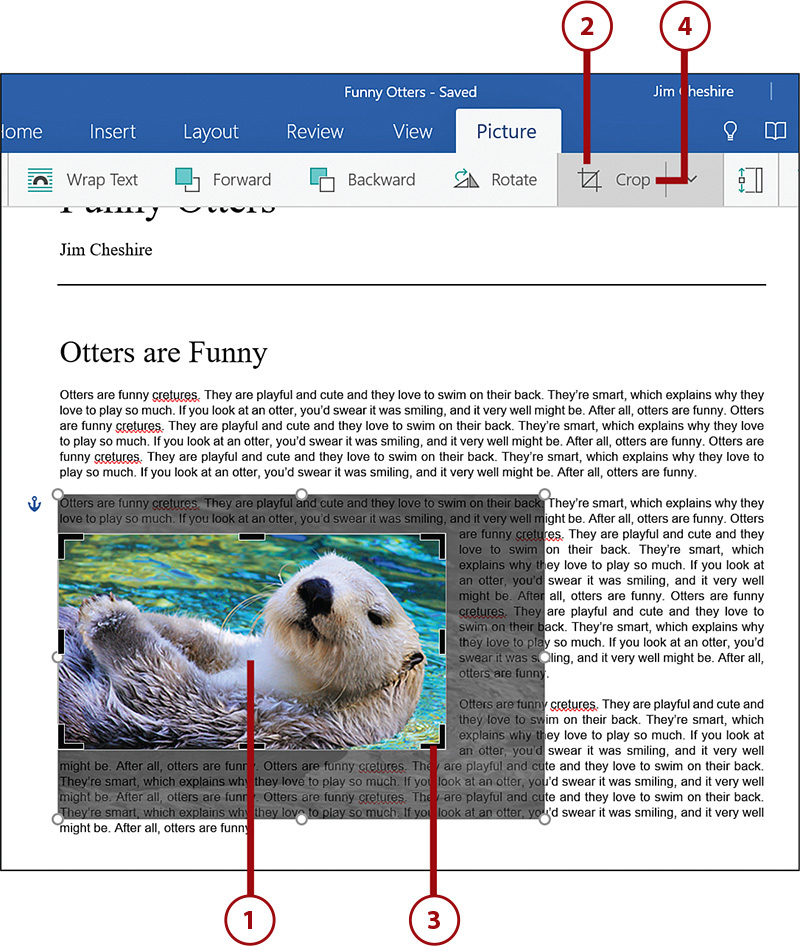
Undoing
If you want to undo a crop to a picture, tap or click Reset and then tap or click Reset Size.
Sharing Documents
As long as your document is saved in OneDrive, you can share it easily with others and allow them to either view or edit the document. You can also get a link that allows either editing or viewing that you can share with anyone. Finally, you can send your document as an attachment in an email message.
Inviting Others to a Document
When you send an invitation to a document, you are giving the recipient permission to either view or edit the document directly on your OneDrive.
1. With the document that you want to share open in Word Mobile, tap or click Share.
2. Enter the email address of the person you want to share the document with.
3. Tap or click Can Edit, and tap or click Can View if you don’t want to other person to be able to edit your document.
4. Enter a message.
5. Tap or click Share.
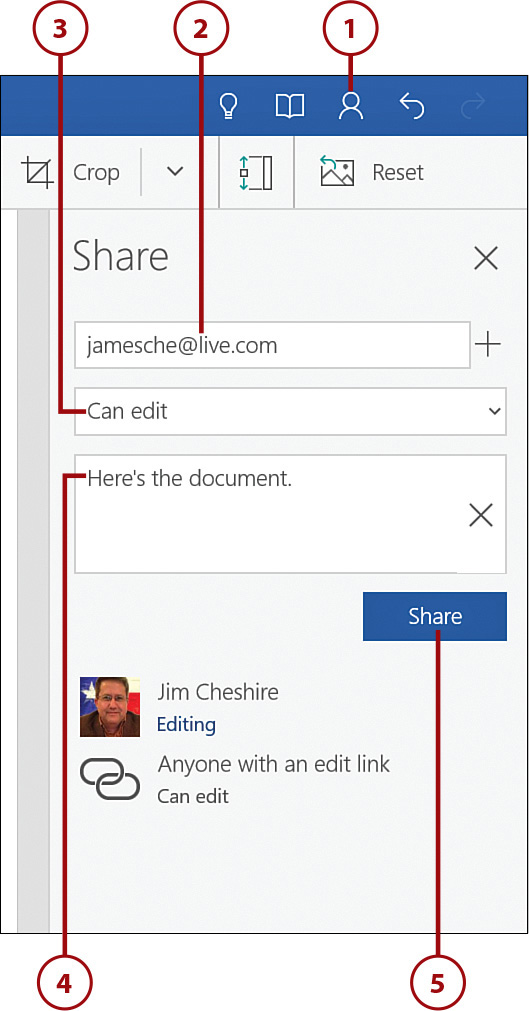
Microsoft Account Required
You can send an invitation to an email address that’s not a Microsoft account, but in order for the recipient to access your document, they must sign in with a Microsoft account.
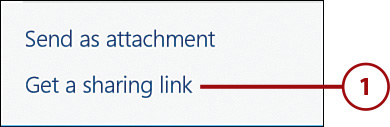
Getting Sharing Links to a Document
You might want to give someone a link that enables them to either edit or view your document using a method other than email. For example, you might be on a Skype call with someone and you want to send them a link that will allow them to edit your document. In that situation, you can get a sharing link that you can share with them.
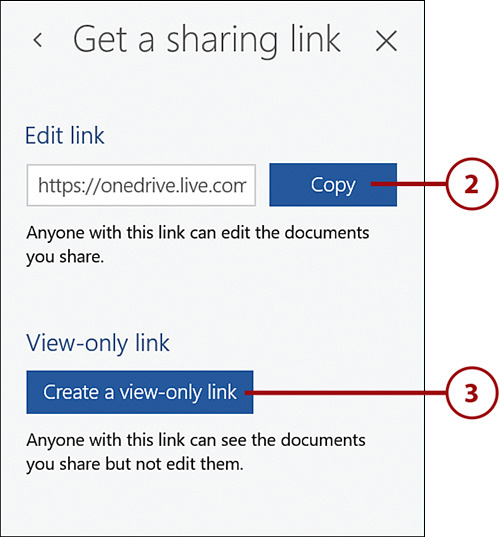
1. From the Share pane, tap or click Get a Sharing Link. (If prompted, click Create an Edit link as well.)
2. Tap or click Copy to copy a link to the clipboard that enables the user to edit the document.
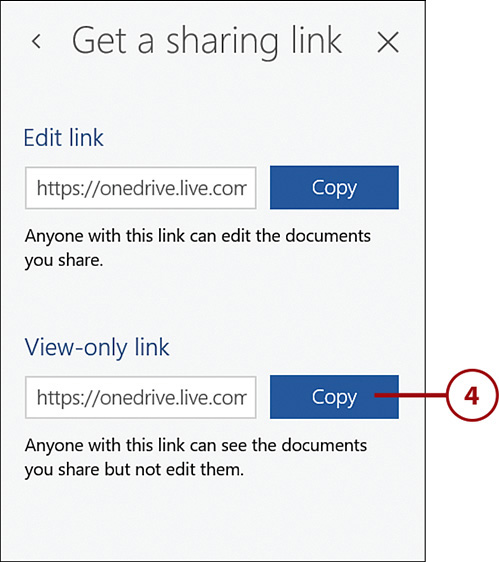
3. Tap or click Create a View-Only Link to get a link that enables the user to only view the document.
4. Tap or click Copy to copy the view-only link to your clipboard. You can then paste it wherever you need it.
Stop Sharing
The Share pane will show you with whom a document is shared. If you want to stop sharing with someone (including stopping sharing using a link), you can tap or click on the person in the Share pane and then tap or click Stop Sharing.
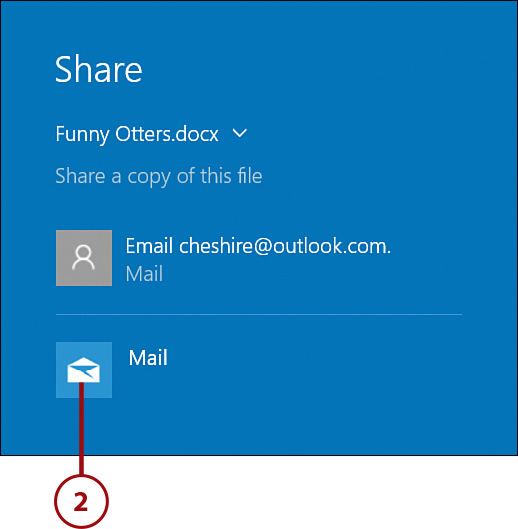
Sharing a Document Using Email
You can send a copy of your document to someone in email. When you use this method, the document is sent as an attachment. The user does not have access to the original document stored in OneDrive or elsewhere.
1. From the Share pane, tap or click Send as Attachment.

2. From the Windows 10 Share pane, tap or click Mail.
3. Enter an email address to which you want to send the document.
4. Enter a message.
5. Tap or click Send.

Reading in Word Mobile
Word Mobile offers a unique Read view that makes it easy to read Word documents on a tablet. You can easily swipe through a document to move from page to page. Read view also enables you to access the Insights feature in Word Mobile that makes it easy to get more information about topics in a document.
Using Read View
Once you switch to Read view, you’ll have the ability to navigate a document much more easily using touch.
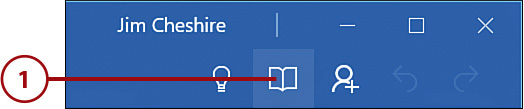
1. With your document open in Word Mobile, tap or click Read to switch to Read view.
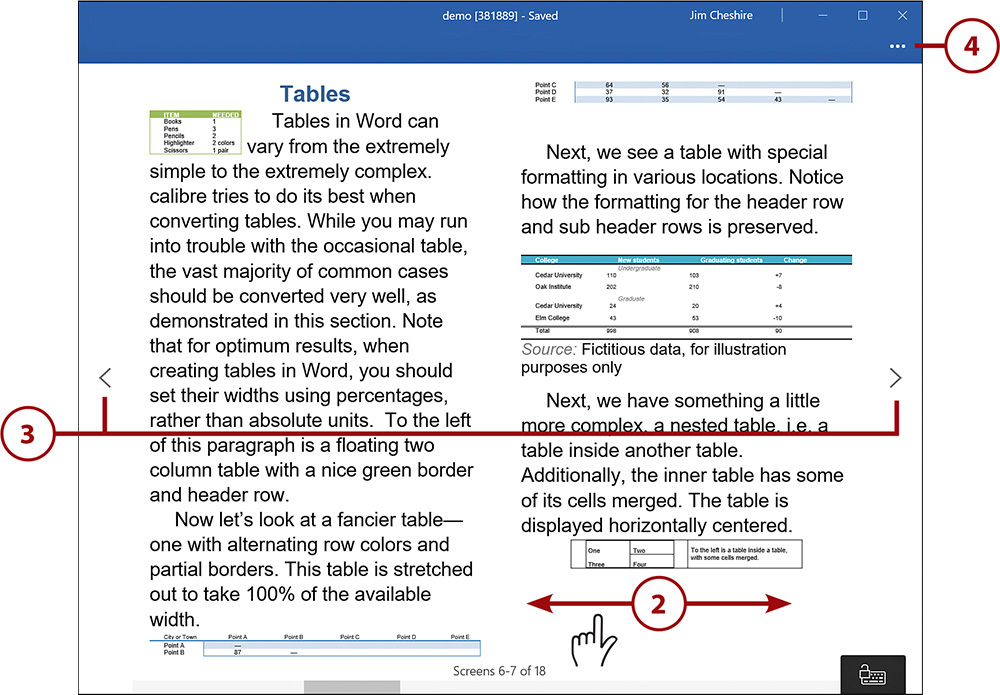
2. Swipe left and right to move from page to page.
3. If you use a mouse or trackpad, click the left and right arrows to move from page to page.
4. To exit Read mode, tap or click the ellipsis.
5. Tap or click Edit to switch back to Edit mode.

Customizing Read View
After you click the ellipsis in step 4, you’ll see options to change font size, background color, and more while in Read view. You can use these options to customize Read view to make it easier to read without modifying the original document.
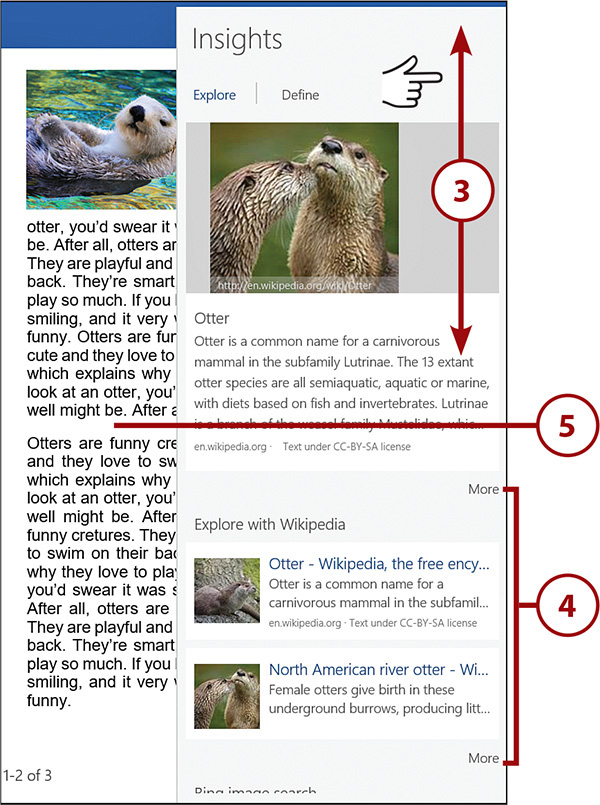
Using Insights
The Insights feature enables you to use the Internet to get more information about topics in a document.
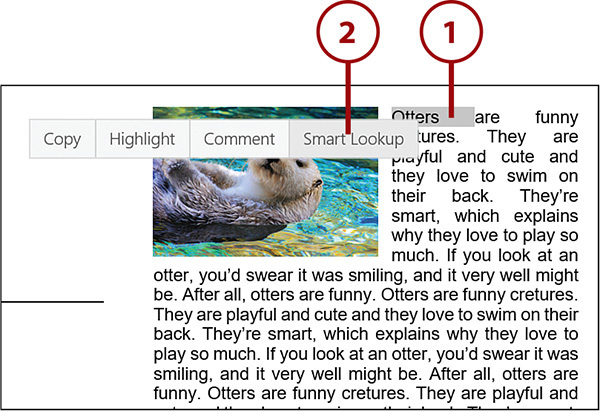
1. While in Read view, tap and hold or right-click on a word that you want more information on.
2. Tap or click Smart Lookup from the menu.
3. Swipe up and down to read more in the Insights pane.
4. Tap More to get additional information.
5. Tap outside the Insights pane to close it.