
In the previous chapters, we looked at all the essential components required to build IaaS. In this chapter, we will look at how to install and configure two optional OpenStack services, namely Heat and Ceilometer.
Although these services are optional, in a production environment, it is definitely recommended that we have at least Ceilometer installed to meter different components, which can then be used to integrate with a billing system of your choice (for example, Velvica).
Heat, on the other hand, can help the users to use a template in order to orchestrate the entire stack.
In this chapter, we will cover the following topics:
- Installing and configuring Heat
- Installing and configuring Ceilometer
- Testing the installation
- Billing and usage reporting
Heat is the orchestration engine of OpenStack. A Heat system can take care of provisioning an entire stack by requesting various services from other services of OpenStack (Nova, Cinder, and so on.) based on a text template. It can also be used to modify a currently running stack and delete it when we are done with it, so the entire life cycle of the stack can be managed using Heat.
Heat is functionally similar to AWS's CloudFormation and is compatible with AWS CF template, in addition to its own template format—Heat Orchestration Template (HOT).
The Heat system supports the REST API, which is native to other OpenStack services and supports an AWS CloudFormation-style Query API.
The Heat system does not have many subcomponents. The subcomponents and their functions are as follows:
- Heat: This is the command-line client, which is used to talk to the Heat API component to execute the API calls. This is mainly used by the administrators to execute a CloudFormation template.
- Heat API: This component accepts the API calls made to it and interfaces with the main subcomponent, the Heat engine. This accepts the REST-style API calls.
- Heat CF API: This component accepts the Query-style API that is native to the AWS CloudFormation. It performs the same functions as the Heat API.
- Heat engine: The Heat engine is the main subcomponent. It orchestrates the launch of the templates and passes the events back to the calling resource.
The following diagram demonstrates the architecture of the Heat system quite clearly:

While the format of the template is not yet set in stone, this format attempts to replace the CloudFormation (CFN) template that is currently in use. We shall briefly look at the template formats, just enough to understand how to read, modify, and create them.
Each HOT has the following fields:
- Heat template version tag: This is a mandatory field.
- Description: This is an optional field that is used to describe the template.
- Resources: This is a required field that describes the different resources that a stack will have, for example, a compute instance or a block storage for all the resources.
- Properties: These are the properties of the resource that need to be passed.
- Parameters: These are the properties that can be passed to the template during run time, allowing it to not be hard coded. These can have restrictions and constraints applied to them so that the user passes the same values to the template.
Input parameters: These are the parameters that have to be filled in while requesting a use of the template, as an example, the input parameter can be the machine size that you want for a stack or a key you want to pass in.
Output parameters: These are passed back to the user after the template is executed, as an example, the ID of a machine, its IP address, and so on.
A simple Heat Orchestration Template, which will request an instance with a predefined set of parameters, is shown in the following code. In this, we can see that the machine size needs to be passed during the runtime, and if it's not passed, it defaults to the m1.small size.
heat_template_version: 2013-05-23

description: Simple template to deploy a single compute instance

parameters:
  instance_type:
    type: string
    label: Instance Type
    description: Type of instance (flavor) to be used
    default: m1.small

resources:
  my_instance:
    type: OS::Nova::Server
    properties:
      key_name: my_key
      image: MyCustomTemplate
      flavor: { get_param: instance_type }
We can create multiple resources in a template and the Heat engine will orchestrate them in a sequence. We can even create nested templates in order to pass the variables between a child and a parent template allowing us to create an intricate orchestration process.
Writing HOT is beyond the purview of the book. However, after understanding the constructs of HOT, we should be able to now read and understand the different ones that are available freely on the Internet.
The installation of Heat services is straightforward and we will be installing them on the controller node. The installation follows the same principles and processes that we followed for the other services:
- Creating the database
- Keystone configurations (Creating users and endpoints)
- Installing packages
- Configuring packages
- Cleaning up
Let's start with the familiar checklists that we have been using so far, by filling in the details:
|
Name |
Info |
|---|---|
|
Access to the Internet |
Yes |
|
Proxy needed |
No |
|
Proxy IP and port |
Not Applicable |
|
Node name |
OSControllerNode |
|
Node IP address |
172.22.6.95 |
|
Node OS |
Ubuntu 14.04.1 LTS |
|
Heat DB password |
|
|
Heat Keystone password |
|
|
CloudFormation port |
8000 |
|
Heat orchestration port |
8004 |
|
Region |
dataCenterOne |
We create a blank database after logging in to the MySQL server:
mysql –u root –p
Enter the dbr00tpassword password. Once in the database, execute the following commands:
create database heat;
This will create an empty database called Heat. Let's now set up the heat database user credentials:
GRANT ALL PRIVILEGES ON heat.* TO 'heat'@'localhost' IDENTIFIED BY 'h3atpwd';
GRANT ALL PRIVILEGES ON heat.* TO 'heat'@'%' IDENTIFIED BY 'h3atpwd';
All this does is allows the username heat, using our password, to be able to access the database called heat.
The Heat components are installed using the aptitude package manager with the following command:
sudo apt-get install heat-api heat-api-cfn heat-engine python-heatclient
This installs the components. We do need to ensure that the command completes successfully and the components are installed.
Let's now look at configuring Heat, which includes similar steps followed for other OpenStack services, such as creating a Keystone user and Keystone services and endpoints. However, a small difference in comparison to the other services is that for Heat, we will need to create some additional roles as well.
We will create a user in Keystone, and by now, you are familiar with how to export credentials in order to use the different OpenStack command-line utilities:
keystone user-create --name heat --pass h3atkeypwd
We should see something like the following screenshot:

We then add the user to the admin by running the following command:
keystone user-role-add --user heat --tenant service --role admin
Up until now, we have been dealing with just two roles—admin and member, we will now create two new roles called heat_stack_owner and heat_stack_user.
The heat_stack_owner role needs to be assigned to the people who will manage the stacks themselves and the heat_stack_user role is for the people who use these stacks:
keystone role-create --name heat_stack_owner
keystone role-create --name heat_stack_user
We hope that you remember our users, Jane and John Doe, from our previous chapter. We will now assign the owner role to the user John (and to our admin user) in the tenant called TestingCloud that we created in our previous chapter, in the following way:
keystone user-role-add --user johnd --tenant TestingCloud --role heat_stack_owner
keystone user-role-add --user admin --tenant TestingCloud --role heat_stack_owner
This will give John and the admin users permissions to manage the stacks. This can also be done using the Horizon portal, the same way we assigned the member roles in the previous chapter.
There are two services that need to be created for the Heat system, one for the regular REST API and the second one for the Query API that will be used in case of a CloudFormation call, as follows:
keystone service-create --name heat-cfn --type cloudformation
--description "Orchestration"
keystone service-create --name heat --type orchestration
--description "Orchestration"
You should see something like the following screenshot:
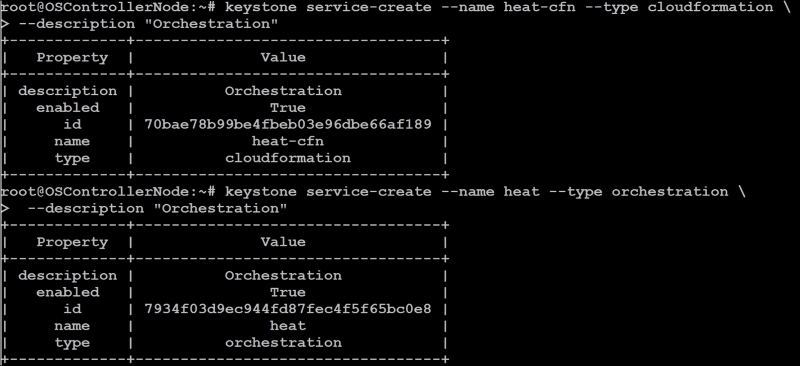
We will have to note the ID of both the services, which we will use in the next section.
In our case, the IDs are as follows:
- Heat:
7934f03d9ec944fd87fec4f5f65bc0e8 - Heat-CFN:
70bae78b99be4fbeb03e96dbe66af189
We will create two endpoints, one for the cloud formation and the other for Heat. Please ensure you replace the service-id with what you got in your previous step.
Creating the endpoint can be done as shown here:
keystone endpoint-create
  --service-id 7934f03d9ec944fd87fec4f5f65bc0e8
  --publicurl http://OSControllerNode:8004/v1/%(tenant_id)s
  --internalurl http://OSControllerNode:8004/v1/%(tenant_id)s
  --adminurl http://OSControllerNode:8004/v1/%(tenant_id)s
  --region dataCenterOne
The second endpoint is created with the port and the service-id of the CloudFormation service that was created earlier, as follows: (Substitute it with the heat-cfn endpoint ID.)
keystone endpoint-create
  --service-id 70bae78b99be4fbeb03e96dbe66af189
  --publicurl http://OSControllerNode:8000/v1
  --internalurl http://OSControllerNode:8000/v1
  --adminurl http://OSControllerNode:8000/v1
  --region dataCenterOne
This will create the Heat endpoints in Keystone.
We will now modify a single configuration file, /etc/heat/heat.conf. The following changes are done in the configuration file:
- In the
[database]section, the following are done:- We will set the database connection string as:
connection = mysql://heat:h3atpwd@OSControllerNode/heat
- We will set the database connection string as:
- In the
[default]section, this is done:- Configure the RabbitMQ access as follows:
rpc_backend = rabbit
rabbit_host = OSControllerNode
rabbit_password = rabb1tmqpass
- Set the Heat metadata server as:
heat_metadata_server_url = http://OSControllerNode:8000
heat_waitcondition_server_url = http://OSControllerNode:8000/v1/waitcondition
- Configure the RabbitMQ access as follows:
- In the
[keystone_authtoken]section, the following are done:- Set the Keystone configuration:
auth_uri = http://OSControllerNode:5000/v2.0
identity_uri = http://OSControllerNode:35357
admin_tenant_name = service
admin_user = heat
admin_password = h3atkeypwd
- Set the Keystone configuration:
- In the
[ec2authtoken]section, the following settings are made:- Set the authentication URL:
auth_uri = http://OSControllerNode:5000/v2.0
- Set the authentication URL:
Now that we have completed the hard work of setting up Heat, let's create a sample HOT and create a stack.
The template is very similar to what we saw in the previous section, and it simply requests a single server and takes the parameters as an image name, network ID, and machine size.
Create a file in directory /var and name it as test-stack.yml. The contents of the file are shown as follows. If we look carefully, we have set the default machine size to be m1.tiny, so if we do not override this, we will get an m1.tiny machine. The contents of the file are as shown:
heat_template_version: 2014-10-16
description: Testing stack with a single server
parameters:
  image_id:
    type: string
    description: Image use to boot a server
  net_id:
    type: string
    description: Network ID for the server
  instance_type:
    type: string
    label: Instance Type
    description: Type of instance (flavor) to be used
    default: m1.tiny
resources:
  server:
    type: OS::Nova::Server
    properties:
      image: { get_param: image_id }
      flavor: { get_param: instance_type }
      networks:
      - network: { get_param: net_id }
Once the template is created, we will export the credentials for the TestingCloud tenant. The only difference between the admin credentials that we have been exporting so far is the name of the tenant.
We have also added the admin user in the heat_stack_owner role, so this will work just fine. Alternatively, we can use John's credentials that we created. We will export the credentials as shown here:
export OS_TENANT_NAME=TestingCloud
export OS_USERNAME=admin
export OS_PASSWORD=h33l0world
export OS_AUTH_URL=http://OSControllerNode:5000/v2.0
We will need the following information to pass to the template:
- Network ID
- Image name
- Flavor name
We can then execute the following commands to view the available choices:
nova flavor-list
nova image-list
nova net-list
We have just one image that we have created, CirrosTest. We will use this. We can leave the flavor information to the default m1.tiny value, and we will need the ID for cloud-network so that our computer can be connected to this system:
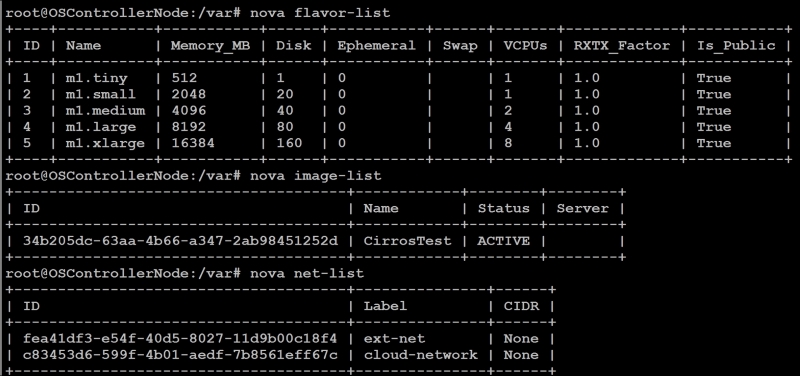
So, we can have values as follows:
Parameter: net_id= c83453d6-599f-4b01-aedf-7b8561eff67cParameter: image_id=CirrosTestParameter: instance_type=m1.tiny
We will now create the stack using the Heat client with the parameters as shown in the following. The stack will be called as mystack.
The format is as shown:
heat stack-create –f <filename of HOT template> -P <Parameters> "Stack Name"
Substituting our values, we get the following: (We could even use the names, and they will be translated.)
heat stack-create -f /var/test-stack.yml
  -P "image_id=CirrosTest;net_id=c83453d6-599f-4b01-aedf-7b8561eff67c;instance_type=m1.tiny" myStack
The output would look as shown here:

We can see that the stack creation is in progress. We will need to wait until the stack is deployed, you can test the status using the following command:
heat stack-list
We have successfully tested the orchestration module of OpenStack, and we can manage our stacks using HOT, if need be. This enhances the functionality of the cloud that enables complicated stacks to be defined and easily spun up by users. This can be used in the cases where the platform team defines the stacks that are allowed and the templates to be shared with users to spin up new stacks at their will.
It is worthwhile to note that this is merely another abstraction layer, and the restrictions that are set by the other layers still apply. As an example, the user can only use the network that is assigned to a project, and they can only spin up the maximum number of instances allowed by the quota, so on and so forth.
The next service that we will add to our cloud is Ceilometer, which is a telemetry module used to measure the different aspects of the cloud for the purposes of billing.